

Uploading and confirming a print (SLS)
Uploading and confirming a print (SLS)
After orienting your models, connect to your printer via USB, Ethernet, or Wi-Fi. Ensure your printer is connected to the same network as your computer, then send a print job to the printer.
While uploading a print job to the printer, PreForm and the touchscreen show that the FORM file upload is in progress. Once transferred, print jobs must be confirmed on the touchscreen to start the print.
Uploading a print job to a printer
To upload a print job from PreForm to a printer:
- Select the Printer and the Job Settings. Click Apply.
- Click the orange Upload to Queue button. The model is sent to the printer. A slider and percentage display allows you to monitor the upload progress.
Do not disconnect your printer while the upload is in progress.
Upload to Queue is unavailable in PreForm
If the orange Upload to Queue button is unavailable in PreForm:
- Verify that there are no other instances of PreForm open on your computer.
- Check that the printer is connected to the same network as the computer running PreForm.
- If the computer is not connected to the same network, save any files in progress and close PreForm.
- Connect the computer to the same network the printer is on, open PreForm, and connect to the printer.
If the orange Upload to Queue button remains unavailable, you may need to manually add the printer to PreForm.
Add to Running Job
With PreForm version 3.46.0 or later, use the Add to Running Job tool to add additional parts to the currently running print job.
If the current print job enters the cooling phase, Add to Running Job adds these parts to the Queue as a new print job. Parts in an active print job cannot be modified.
To use Add to Running Job:
- Update PreForm to version 3.46 or newer.
- Update printer firmware to version 1.22.0 or newer.
- Upload a print job to the printer. Start the print.
- Open PreForm.
- Select the printer with the running job. The running job must also have been uploaded with PreForm 3.46 or newer.
- Toggle Add to Running Job. The toggle turns blue when active.

- PreForm displays the available build volume above the current print with a blue inclusion box.
- Add, orient, and pack models in the available build volume. The additional models may not exceed the available build volume.
- Click Add to Job. PreForm adds the new models to the running print job.
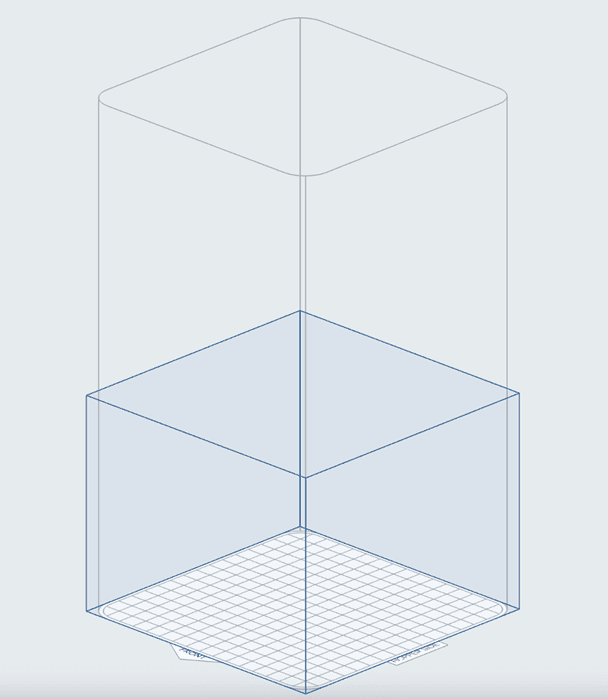
Known Issues with Add to Running Job:


Preparing the printer
Follow the instructions in the support article Preparing the Fuse 1 for a print.