Formlabs Logo
Cleaning the Fuse X1 lower laser window

Cleaning the Fuse X1 lower laser window

The lower laser window is one of the optical components between the laser source and the unsintered powder on the print bed. Contamination on the lower laser window can lead to print defects or failures.

Clean the lower laser window after every 240 hours of printing time (roughly every two weeks), or when indicated by the printer touchscreen.

Notice:

For best results, clean the lower laser window according to the normal schedule of maintenance. Cleaning too often or incorrectly can lead to residue buildup. This will affect print quality and strength. Only perform extra cleanings after running an optics check (available via the touchscreen by tapping Settings > Tools > Optics health check) and confirming a cleaning is needed. 
Checking the lower laser window

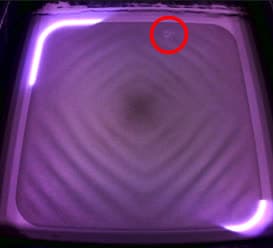
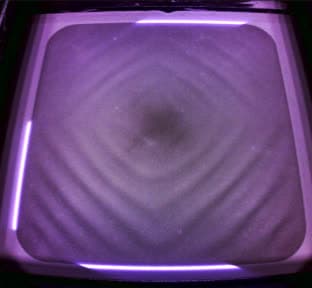
Before cleaning the lower laser window, run the optics health check print. Look for light spots or unsintered regions, which indicate that the lower laser window is contaminated in those spots.

Minor lower laser window contamination

For light contamination, perform the routine in-place cleaning detailed below. For heavier contamination, you may need to remove the lower laser window for a deeper cleaning.

Routine cleaning

The printer’s touchscreen reminds you to clean the lower laser window after every 240 hours of printing. Under normal circumstances, cleaning the underside of the window while it is still installed in the machine will suffice.

Required supplies:

  • Gloves
  • Polyester swabs (e.g., Texwipe TX714A)
  • Alconox
  • Distilled water
  • Ethanol
  • Recommended: headlamp and safety glasses

To clean the lower laser window:

  1. Open the print chamber door.

  2. Power off the printer.

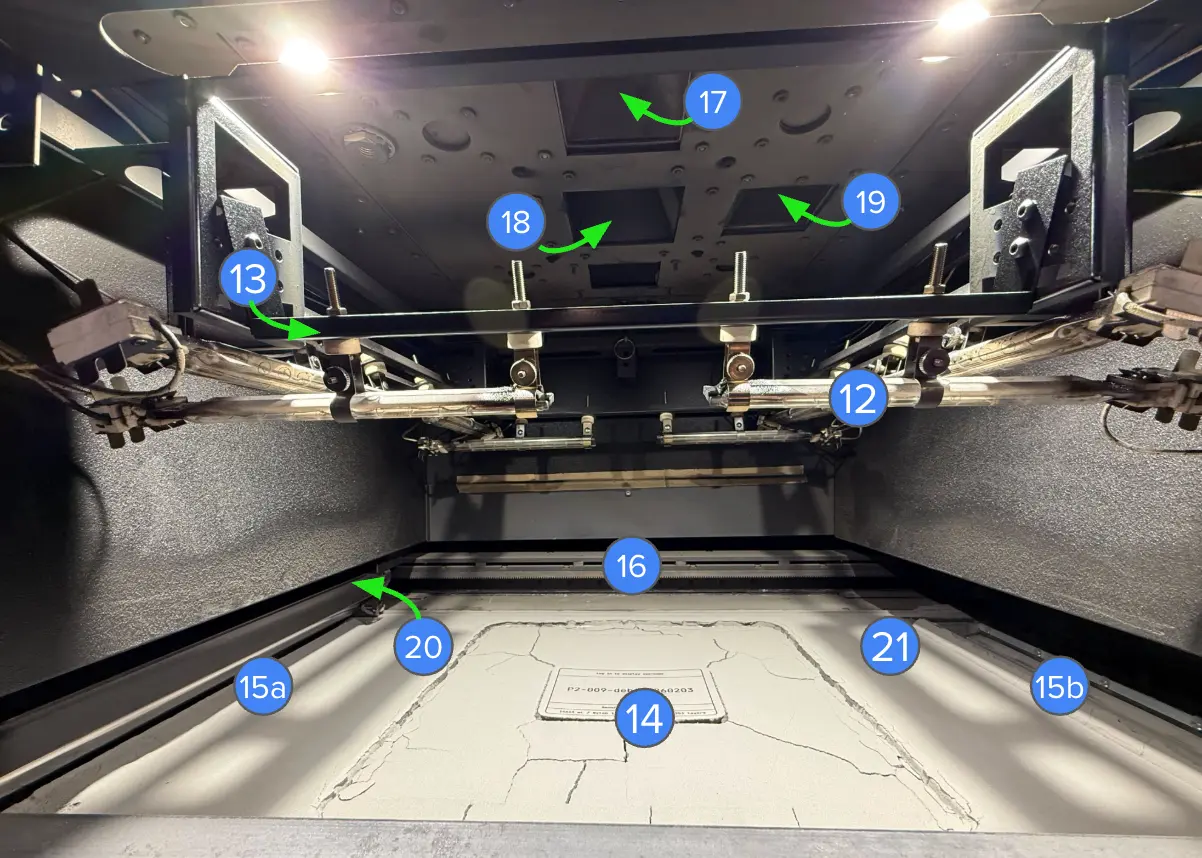
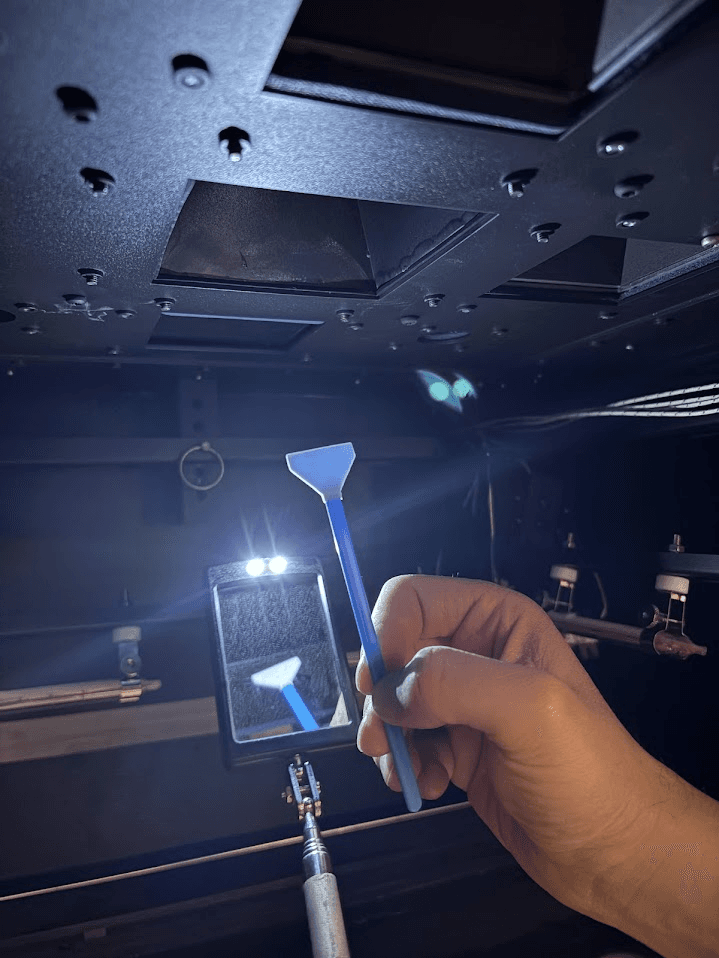
  3. Use a telescoping mirror wand to locate the lower laser window (item 18 in the figure below).

Fuse X1 product components - print chamber
Locating the Fuse X1 lower laser window
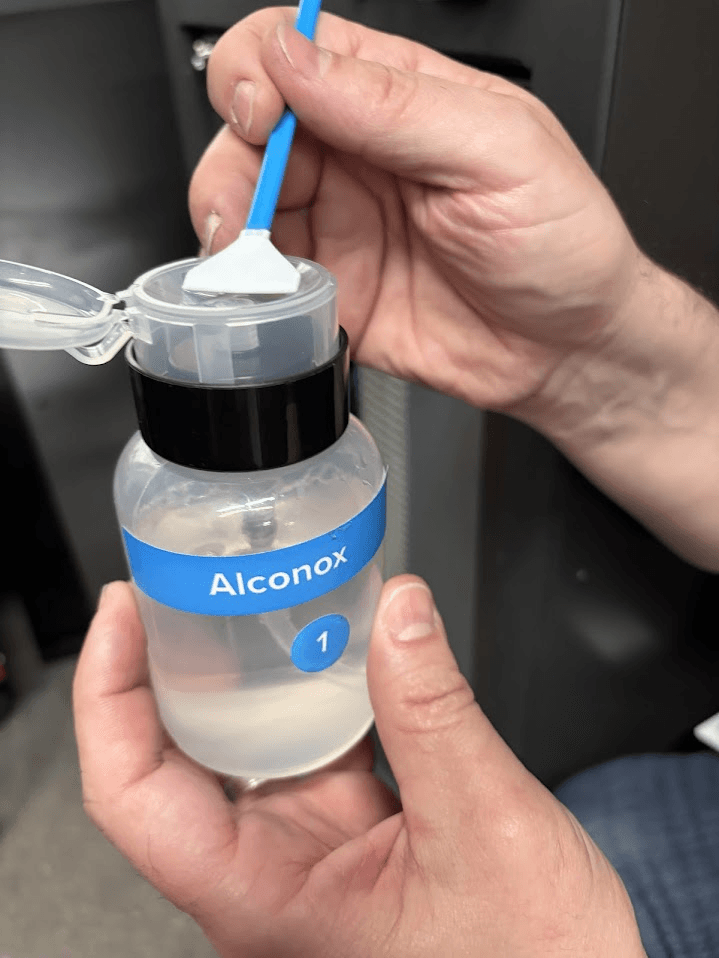
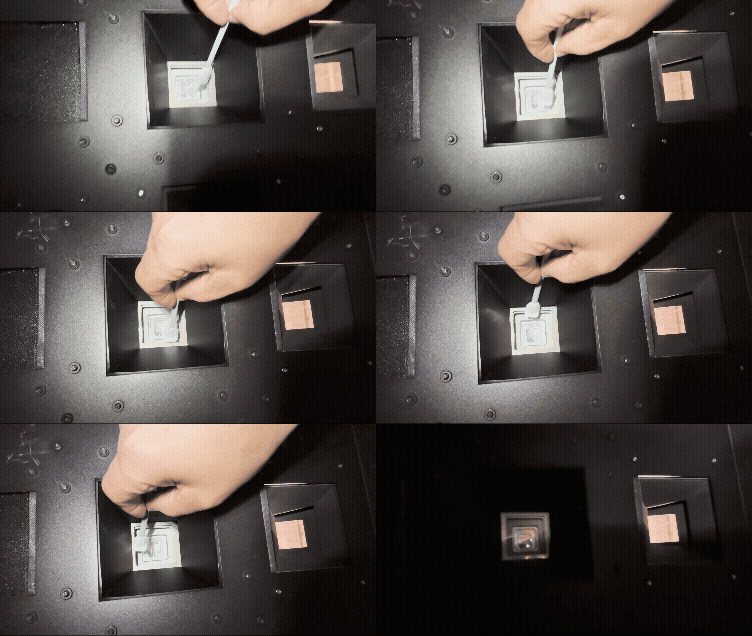
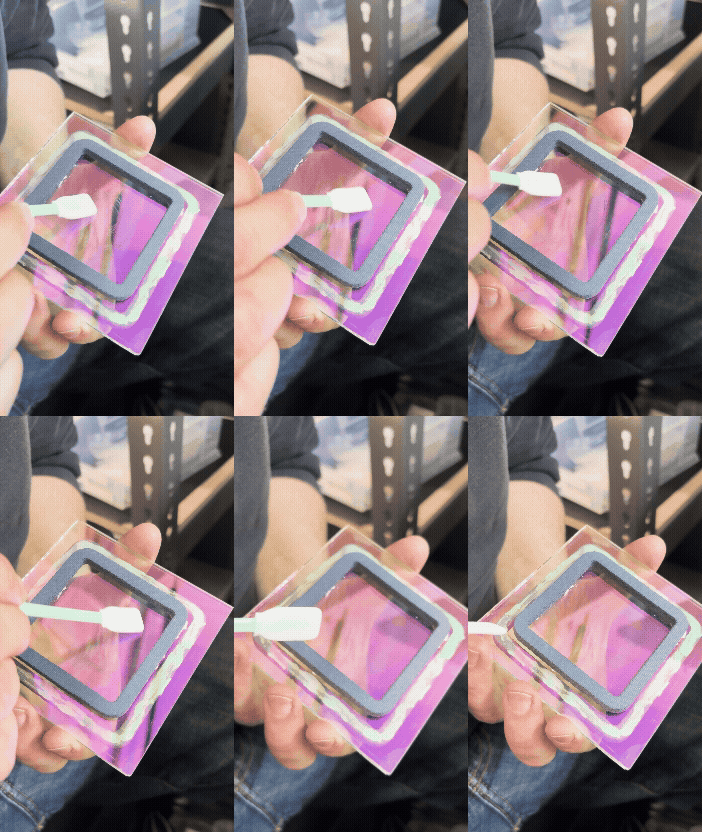
  1. Use a polyester swab wetted with Alconox to wipe the surface of the window. Start from the center and swirl in an expanding circle.
Wetting a swab
Cleaning the Fuse X1 lower laser window
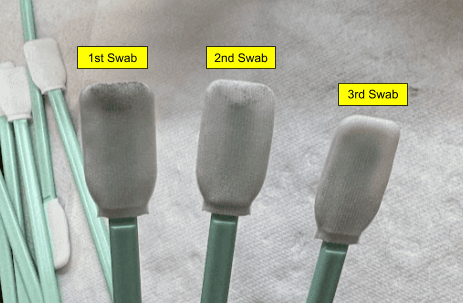
  1. Inspect the swab for contamination. Repeat the cleaning process with a new swab until it remains clean after swabbing.
Swab cleanliness after cleaning the Fuse X1 lower laser window
  1. Use a new polyester swab wetted with distilled water to wipe the surface of the window in the same swirling pattern and remove any Alconox residue.
  2. Use a new dry polyester swab to wipe the surface of the window in the same swirling pattern and remove any remaining water.
  3. Use a new polyester swab wetted with ethanol to wipe the surface of the window in the same swirling patter. Allow the ethanol to evaporate for at least 60 seconds.
  4. If needed, use a new polyester swab very lightly saturated with ethanol to remove any lingering streaks.
  5. Close the print chamber door and power the printer back on.
  6. Repeat the optics health check print to confirm that the lower laser window is fully clean.

Deep cleaning

For heavier contamination or contamination on the top side of the lower laser window, remove the window for a deeper cleaning.

Required supplies:

  • Gloves
  • Polyester swabs (e.g., Texwipe TX714A)
  • Alconox
  • Distilled water
  • Ethanol

To remove and clean the lower laser window:

  1. On the printer’s touchscreen, tap the wrench icon. The Maintenance screen appears.

  2. Tap Systems, then tap the Nitrogen valve toggle to disable the nitrogen flow. The nitrogen valve reopens after 15 minutes or when you toggle it back on manually, whichever comes first.

  3. Using an 8 mm hex driver, unlatch and open the maintenance access door, above the print chamber door.

  4. Locate the camera module, positioned at the front of the maintenance area. The camera module is secured in place with a latch at the back of the module. Open the latch and tilt the module forward so you can access the lower laser window cassette behind it. Do not fully remove the camera module from the printer, as it is still attached via a cable.

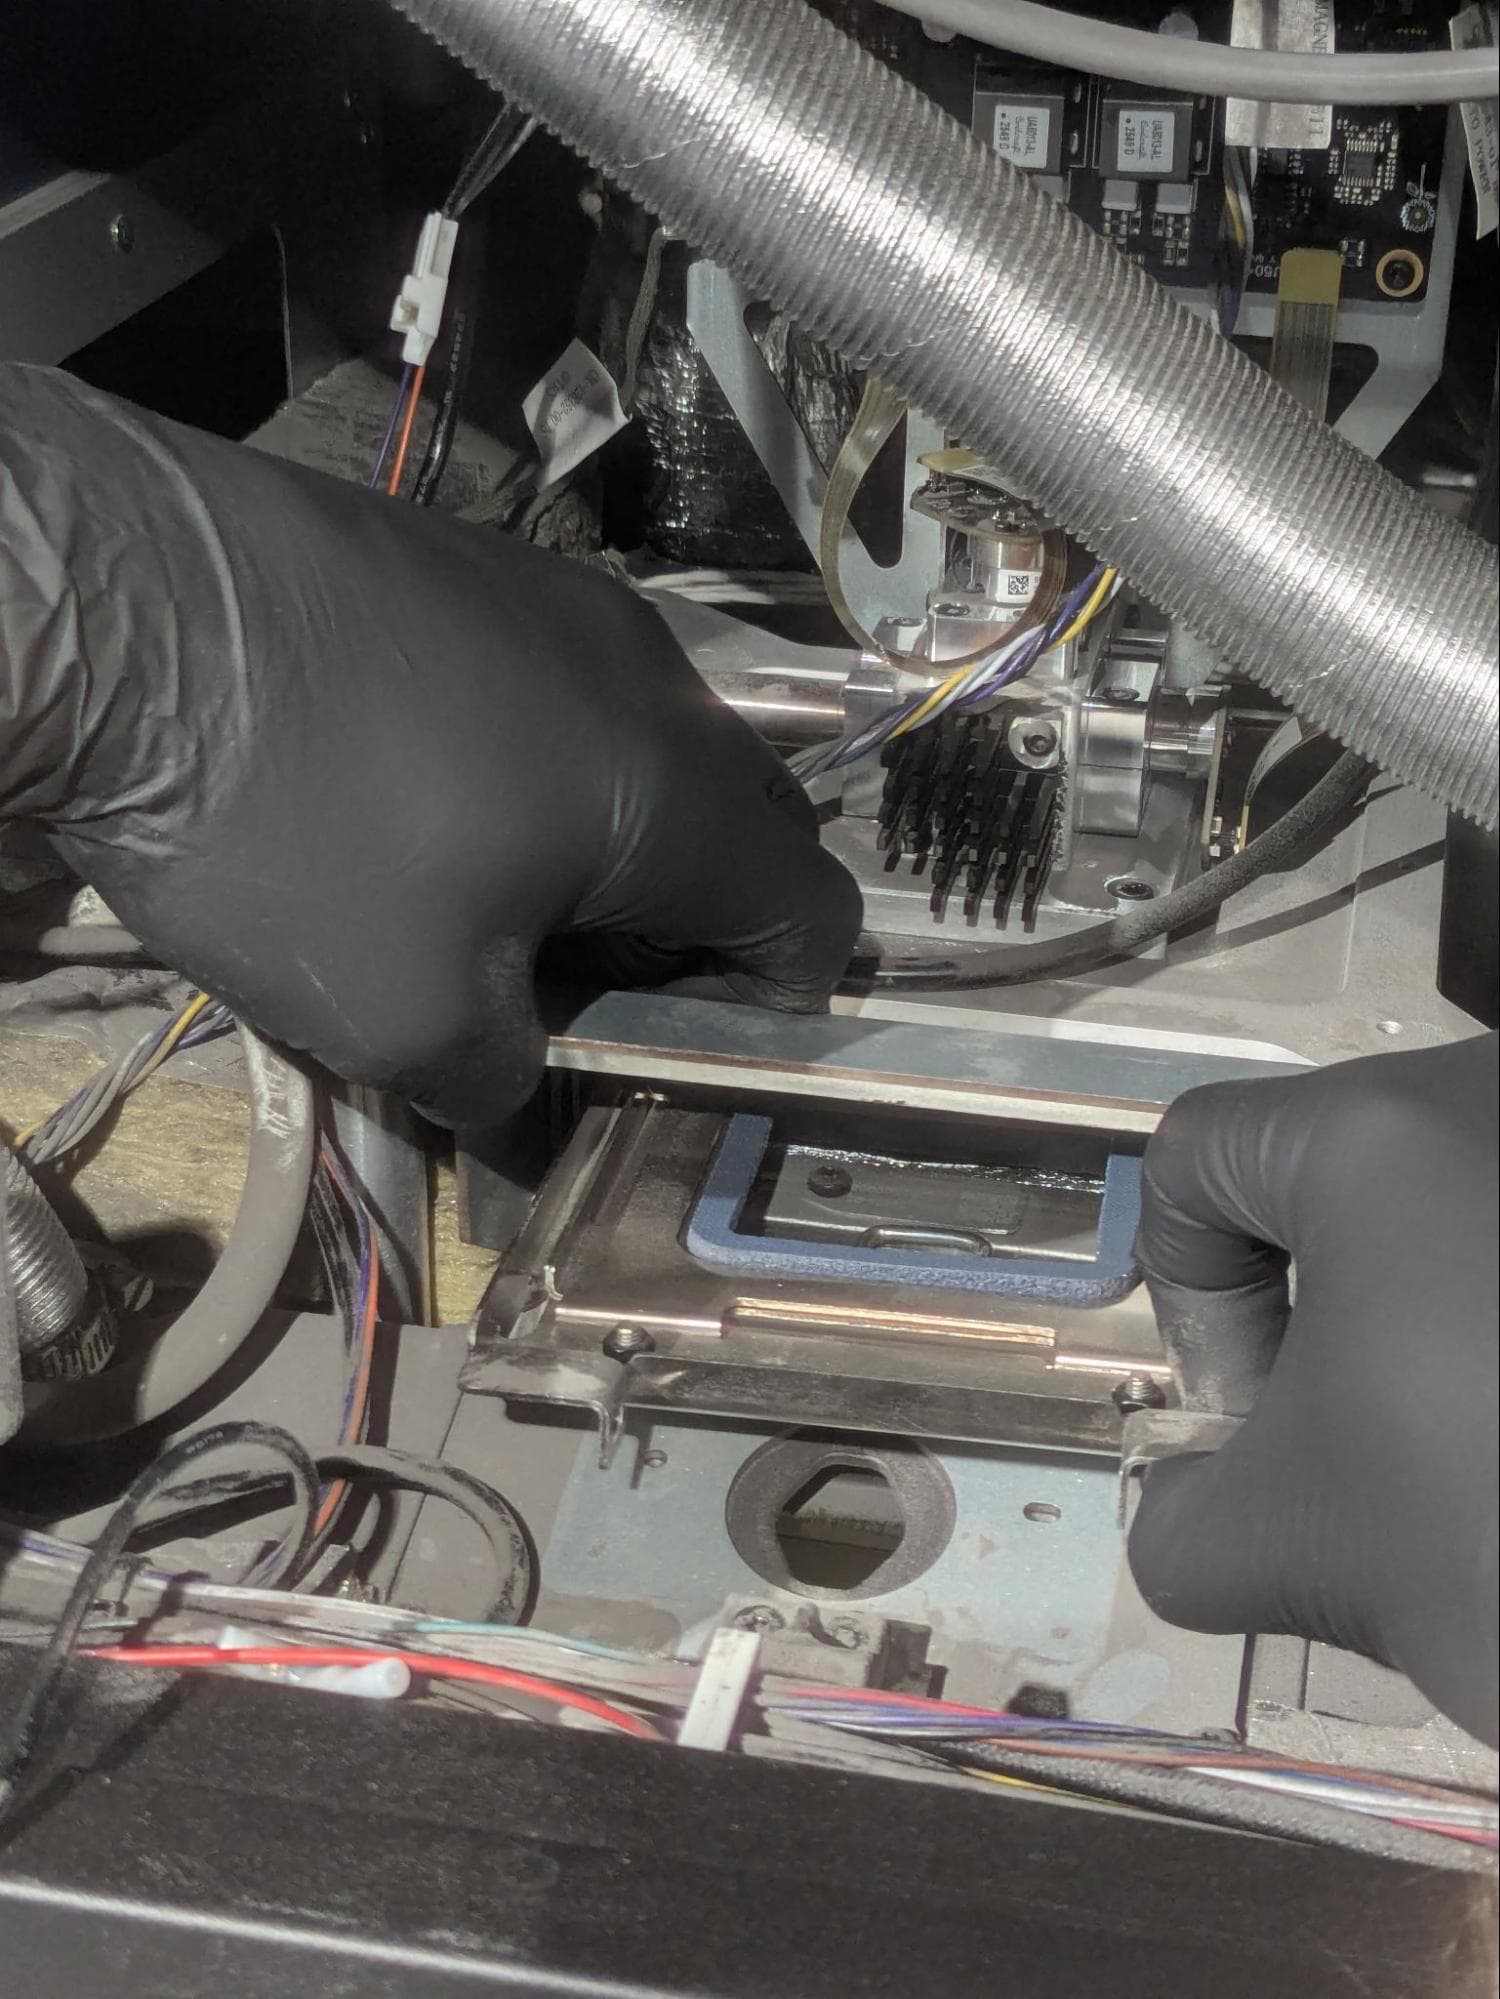
  5. With one hand, pull the lower laser window cassette tray handle towards you. The lower laser window cassette lowers. While holding the tray handle, slide the lower laser window cassette towards you and remove it from the printer.

Removing the Fuse X1 lower laser window cassette

Notice:

Do not leave the printer without a lower laser window for extended periods of time. Do not enable the nitrogen valve without a lower laser window installed. If you need to remove the lower laser window for an extended period of time, install a replacement.

  1. Use a polyester swab wetted with Alconox to wipe the surface of the window. Start from the center and swirl in an expanding circle.
Wetting a swab
Cleaning the Fuse X1 lower laser window
  1. Inspect the swab for contamination. Repeat the cleaning process with a new swab until it remains clean after swabbing.
Swab cleanliness after cleaning the Fuse X1 lower laser window
  1. Use a new polyester swab wetted with distilled water to wipe the surface of the window in the same swirling pattern and remove any Alconox residue.
  2. Use a new dry polyester swab to wipe the surface of the window in the same swirling pattern and remove any remaining water.
  3. Use a new polyester swab wetted with ethanol to wipe the surface of the window in the same swirling patter. Allow the ethanol to evaporate for at least 60 seconds.
  4. If needed, use a new polyester swab very lightly saturated with ethanol to remove any lingering streaks.
  5. Repeat steps 6–11 for the other side of the window.
  6. Orient the lower laser window cassette with the text THIS SIDE UP facing upright.
  7. With one hand, pull the lower laser window cassette tray handle towards you. The lower laser window cassette lowers. While holding the tray handle, slide the lower laser window cassette into the tray until it reaches a hard stop. Release the handle and confirm the cassette is secure and does not wiggle.
  8. Reinstall the camera module and latch it into place.
  9. Close the maintenance access door. Latch it shut using an 8 mm hex driver.
  10. Enable the nitrogen valve via the printer’s touchscreen.
  11. Repeat the optics health check print to confirm that the lower laser window is fully clean.

Replacing the lower laser window

To reduce downtime, or in cases where your printer’s lower laser window is damaged or cannot be sufficiently cleaned, you can replace the lower laser window.

Tip:

The Fuse X1 uptime kit comes with a spare lower laser window.

To replace the lower laser window:

  1. On the printer’s touchscreen, tap the wrench icon. The Maintenance screen appears.

  2. Tap Systems, then tap the Nitrogen valve toggle to disable the nitrogen flow. The nitrogen valve reopens after 15 minutes or when you toggle it back on manually, whichever comes first.

  3. Using an 8 mm hex driver, unlatch and open the maintenance access door, above the print chamber door.

  4. Locate the camera module, positioned at the front of the maintenance area. The camera module is secured in place with a latch at the back of the module. Open the latch and tilt the module forward so you can access the lower laser window cassette behind it. Do not fully remove the camera module from the printer, as it is still attached via a cable.

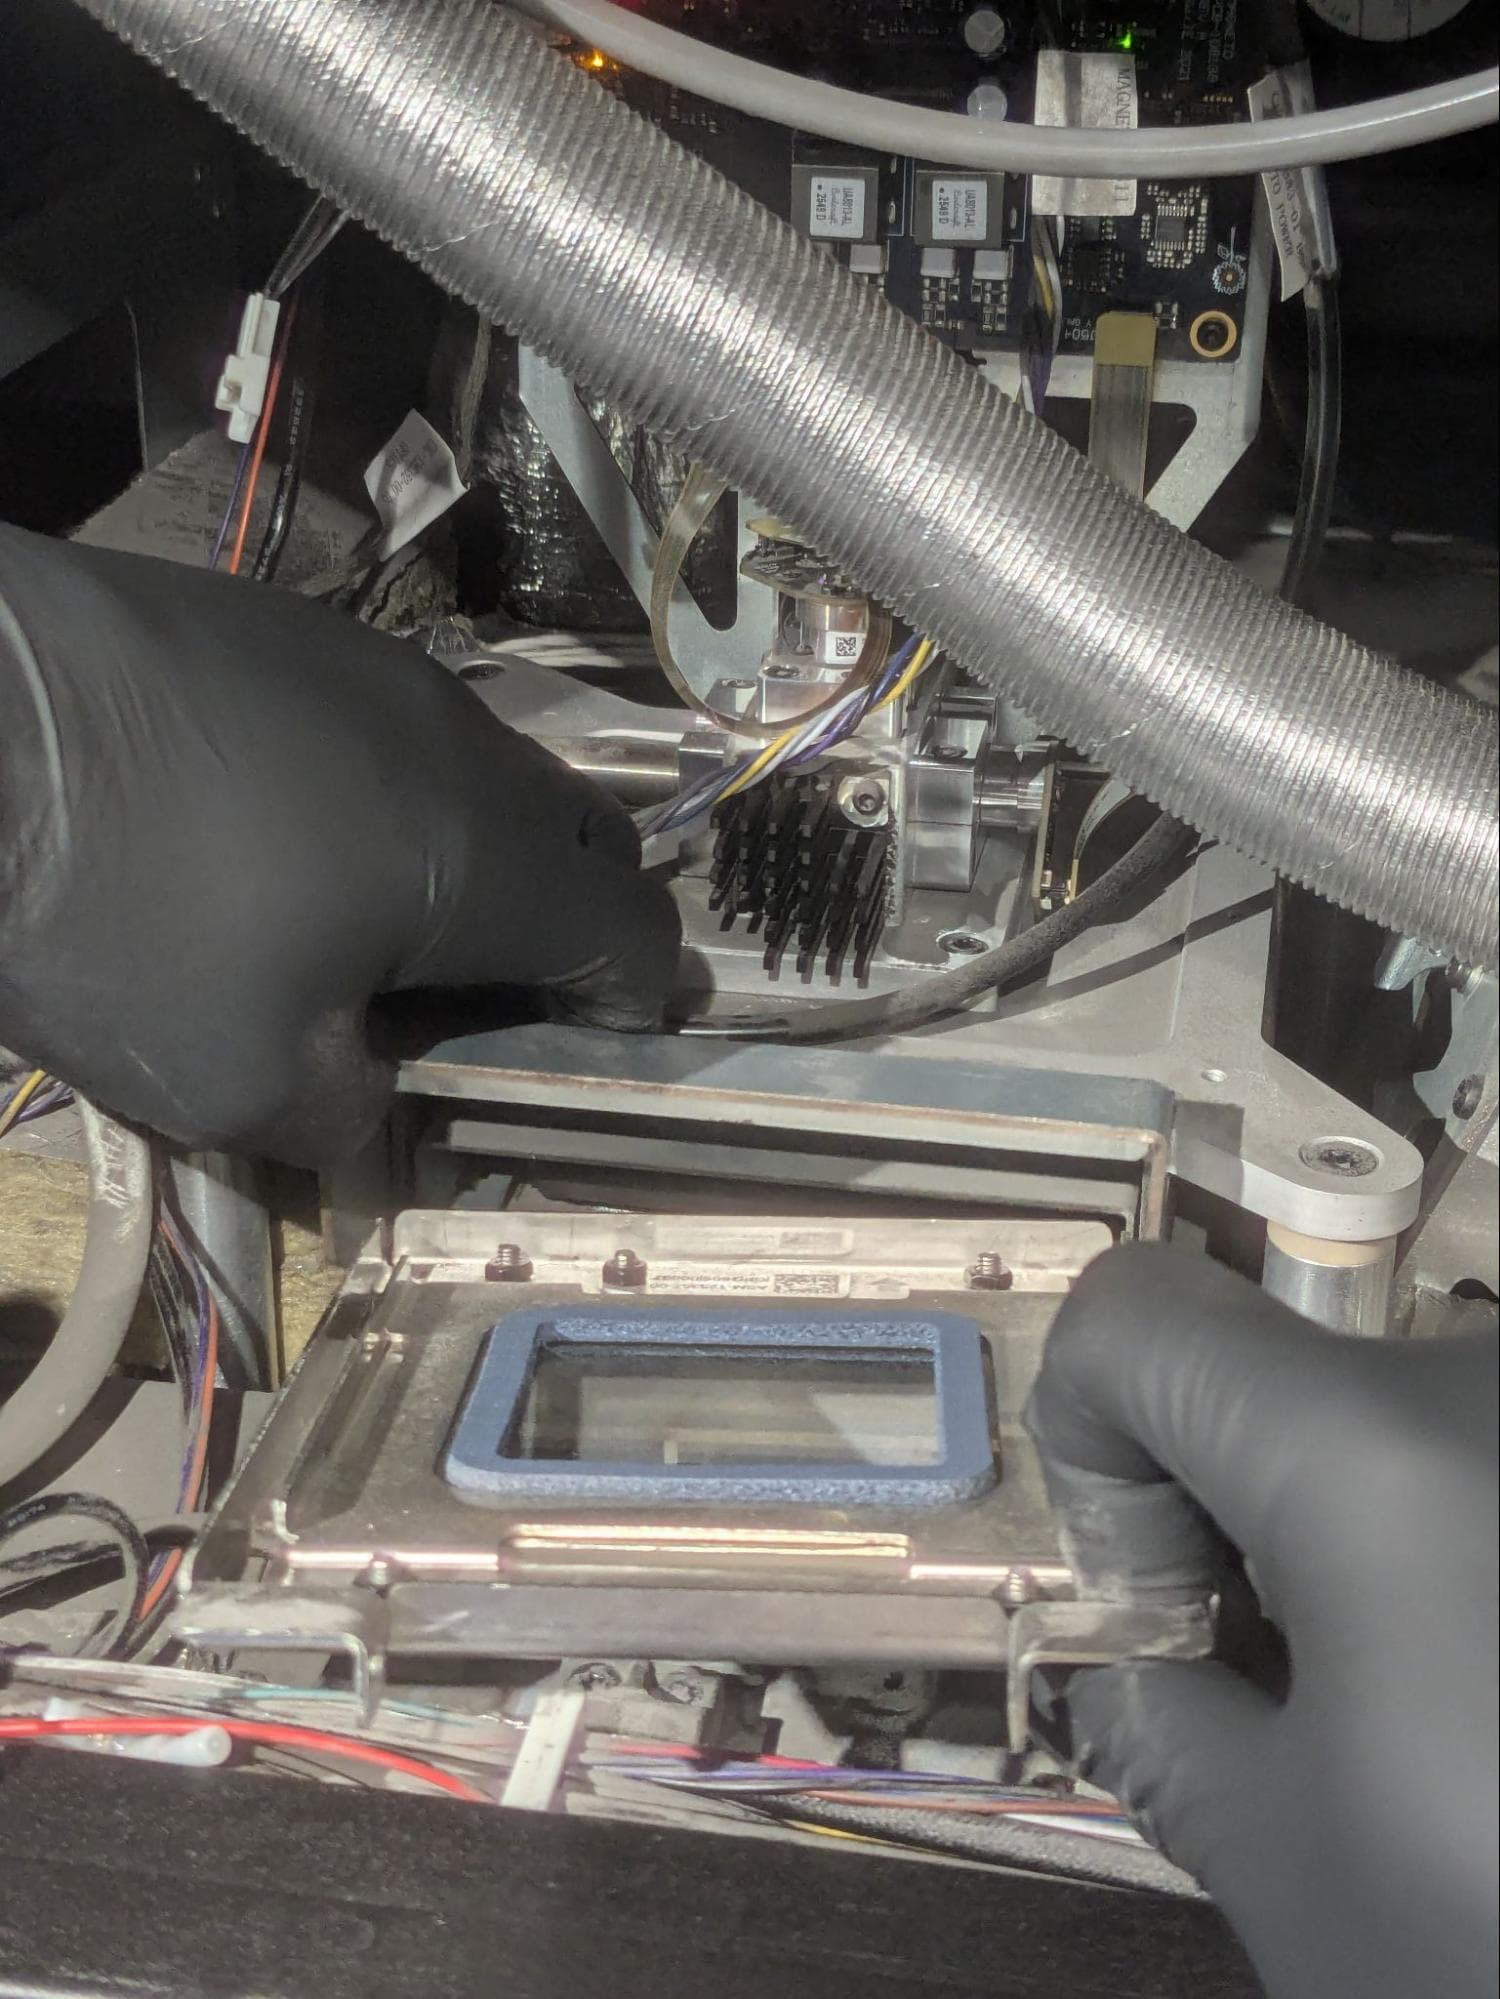
  5. With one hand, pull the lower laser window cassette tray handle towards you. The lower laser window cassette lowers. While holding the tray handle, slide the lower laser window cassette towards you and remove it from the printer.

Removing the Fuse X1 lower laser window cassette
  1. Orient the replacement lower laser window cassette with the text THIS SIDE UP facing upright.
  2. With one hand, pull the lower laser window cassette tray handle towards you. The lower laser window cassette lowers. While holding the tray handle, slide the lower laser window cassette into the tray until it reaches a hard stop. Release the handle and confirm the cassette is secure and does not wiggle.
  3. Reinstall the camera module and latch it into place.
  4. Close the maintenance access door. Latch it shut using an 8 mm hex driver.
  5. Enable the nitrogen valve via the printer’s touchscreen.
  6. Repeat the optics health check print to confirm that the replacement lower laser window is fully clean.