

Formlabs Logo

Working with projects in PreForm

Working with projects in PreForm

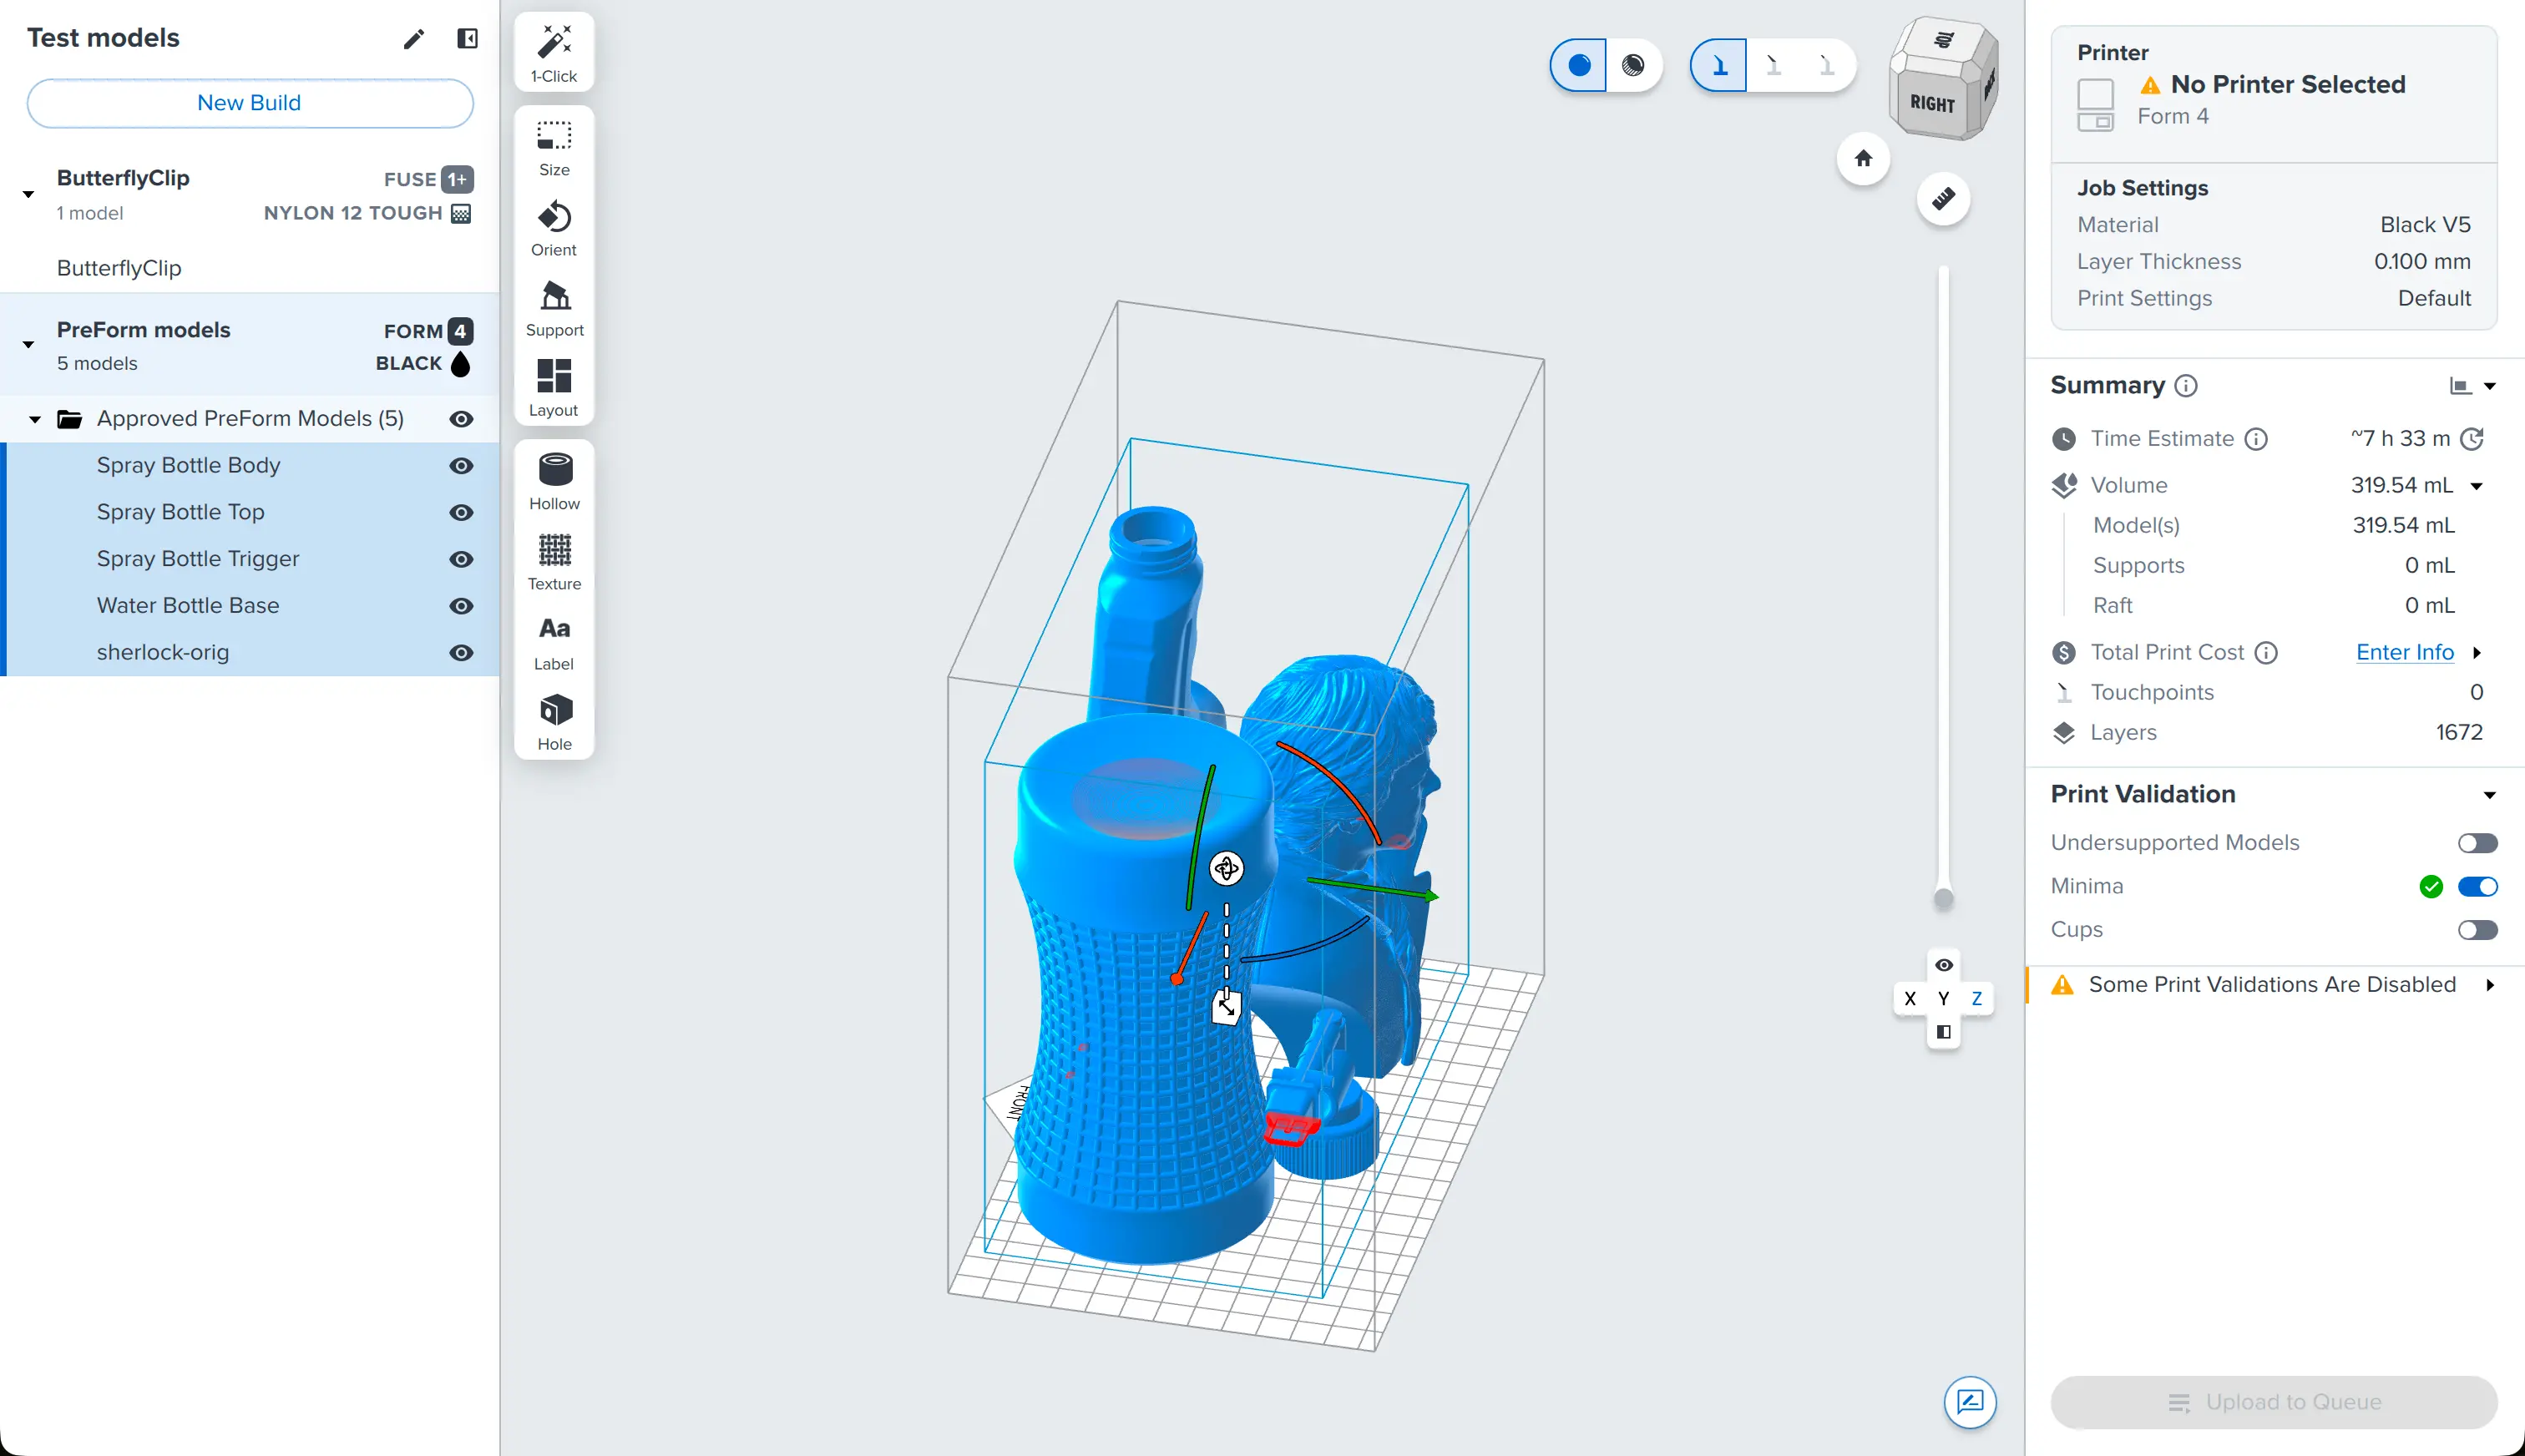
Starting with version 3.62.0, PreForm supports projects—you can set up builds across different printers and materials, switch between them from the new project panel, and move parts freely as your project plan evolves.

Example of projects in PreForm 3.62.0

Creating a new build in a project

Projects allow you to manage multiple builds within a single FORM file, with any combination of printer types and materials. There are multiple ways to create a new build within a project:

  • Click New Build at the top of the Project panel.
    • The new build appears at the bottom of the project list with the same printer and material settings as the selected build.
    • The new build is named Unnamed Build.
  • Right-click a build in the Project panel. A context menu appears. Click Duplicate.
    • The new build appears at the bottom of the project list with the same name, printer, material, and model list as the selected build.
  • Select one or more models in the 3D scene or the build list under a project in the Project panel. Right-click on the models. A context menu appears. Click Send to Build > Create New Build.
    • The new build appears at the bottom of the project list with the same printer and material settings as the build with the selected parts.
    • The new build is given the name of the model or models used to create it.

Editing printer and material settings for a build

Each build within a project can be set up with its own printer and material settings.

To change the job settings for a build:

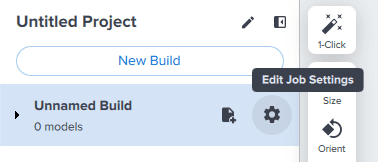
  1. Hover over a project in the Project panel. The Add Models and Edit Job Settings buttons appear.
  2. Click the gear icon labeled Edit Job Settings. The Job Setup screen appears.
  3. Select your printer, material, layer thickness, and print setting.
  4. Click Apply. Your selected job settings are saved for the active build.
Editing job settings from the Project panel

Naming a build or a project

Name your project or the individual builds within a project to help identify and organize them.

To name a project:

  1. Click the project name at the top of the Project panel, next to the pencil icon. The project name becomes an editable field.
    • The default name of a new project is Untitled Project.
    • If you open a FORM file that has a single build, such as one that predates PreForm 3.62.0 and projects, the project is given the same name as that FORM file.
  2. Enter your desired name for the project.
  3. Click away from the project name within PreForm or press Enter. The project name is updated.

To name an individual build within a project:

  1. Double-click the name of the build you want to edit within the Project panel. The build name becomes an editable field.
    • The default name of a new build is Unnamed Build.
    • If you add one or more models to a build, the build is given the same name as those models.
  2. Enter your desired name for the build.
  3. Press Enter. The build name is updated.

Adding models to a build in a project

Opening a model adds it to the currently-active build. You can also add models to a specific build within a project by hovering over the build in the Project panel and clicking the Add Models button that appears.

Moving models between builds

Projects allow you to move models between builds, such as if they do not fit on one build platform or if you are dividing prints between printers in a fleet.

To move a model to a different build:

  1. Select one or more models in the 3D scene or the model list under a project in the Project panel.
  2. Right-click on the models. A context menu appears.
  3. Hover over Send to Build. A panel appears with multiple options.
  4. Select the destination build for the models.
    • Click the name of a specific build to send the models to that build.
      • If you move a supported SLA model to a new build or to a build with the same printer and material settings, it retains its supports. If you move it to a build with different printer or material settings, the supports are deleted.
    • Click Create New Build to add a build to the project containing the selected models.
      • The new build appears at the bottom of the project list with the same printer and material settings as the currently-active build.
      • The new build is given the name of the model or models used to create it.

Deleting a build in a project

To delete a build within a project:

  1. Right-click a build in the Project panel. A context menu appears.
  2. Click Delete. A confirmation window appears.
  3. Click Yes, Delete Permanently to confirm. The build and its models are deleted from the project.

Note:

  • Clicking a build name in the Project panel and pressing Delete does not delete the build—it deletes the models within the build.
  • Deleting the last build in a project leaves an empty build named Unnamed Build with the same printer and material settings as the last deleted build in the project.