Required Supplies:
Formlabs:
- Replacement motherboard (RP-CU2L-MOBO-01)
- 2 mm hex driver (included in the Form 4L tool cap assembly)
Third-party:
- Phillips driver
- Nitrile gloves
- Anti-static grounding strap


The Form Cure L V2 motherboard is mounted to the back of the machine’s display assembly. If the motherboard is faulty or malfunctioning, the Form Cure L V2 may behave erratically or not function at all.
Use this guide to replace the motherboard on a Form Cure L V2.
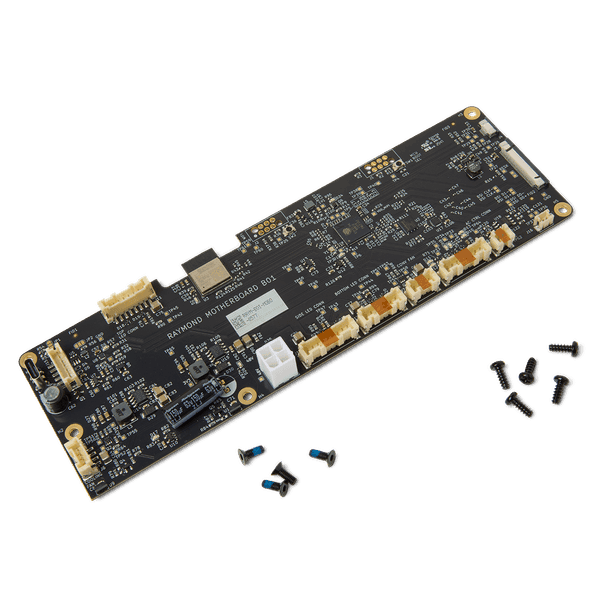
Required Supplies:
Formlabs:
Third-party:
Durée estimée : 15–20 minutes
Danger :
Lisez bien et respectez les instructions et avertissements de sécurité figurant dans le manuel. Le remplacement par des pièces inadéquates peut entraîner des brûlures, des chocs, un incendie ou une explosion. Les pièces usagées doivent être éliminées conformément aux réglementations locales.
Préparation de l’espace de travail
Overview: Prepare the Form Cure L V2 and workspace for replacing the motherboard.
Step 1: Prepare the workspace
Clear a workspace around your machine. Ensure that the workspace is well-ventilated and free of dust.
Step 2: Unplug the machine
Turn off the machine using the power switch on the back of the unit. Disconnect the power cable before continuing with maintenance. Do not perform maintenance on the machine while it is connected to power. Wait five minutes after disconnecting the machine from power before proceeding. If the machine was recently in use, the post-cure chamber will be warm. Wait at least 10 minutes for the chamber to cool.
Danger :
Effectuer la maintenance de la machine alors qu’elle est branchée augmente le risque de choc électrique. Ne jamais retirer les coques de la machine lorsqu'elle est branchée. Ne jamais rebrancher la machine sur le secteur pendant que les coques sont désinstallées.
Démontage de la carte mère
Overview: Disconnect and remove the original motherboard.
Étape 1 : ouvrir la porte
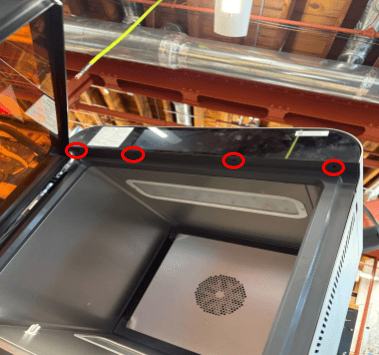
Ouvrez la porte de la chambre de polymérisation pour accéder aux vis qui fixent le panneau avant.
Étape 2 : Retirer les vis de la carte mère et de l’ensemble d’affichage
À l’aide d’une clé six pans de 2 mm, desserrez et retirez les quatre vis qui fixent la carte mère et l’ensemble d’affichage au châssis de la machine. Mettez les vis de côté.
Étape 3 : démonter la carte mère et l’ensemble d’affichage
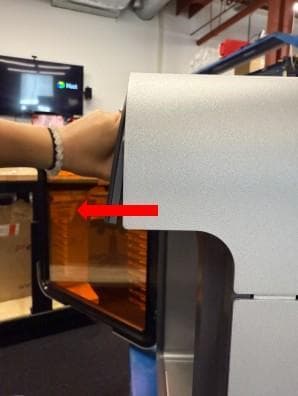
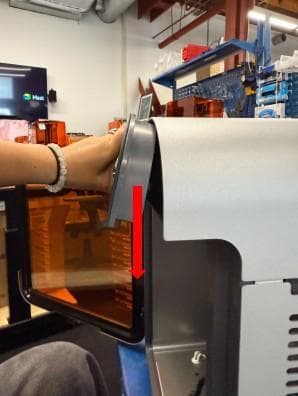
Inclinez doucement la carte mère et l’ensemble d’affichage vers le haut, puis tirez vers le bas. L’ensemble doit se détacher du châssis de la machine. Ne tirez pas brusquement sur la carte mère et l’ensemble d’affichage, car ils sont encore reliés à la Form Cure L V2 par un ensemble de câbles.
Étape 4 : Débrancher les câbles de la carte mère
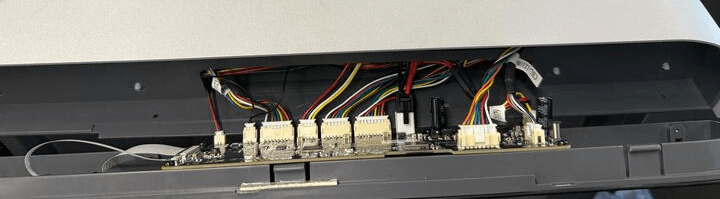
Disconnect all of the cables from the motherboard except for the two ribbon cables. For each, squeeze the tab and slide the cable out of the connector. Take care not to pull on the wires themselves.
Fully separate the motherboard and display assembly from the machine and set it display-side down on your work surface.
Step 5: Uninstall the motherboard
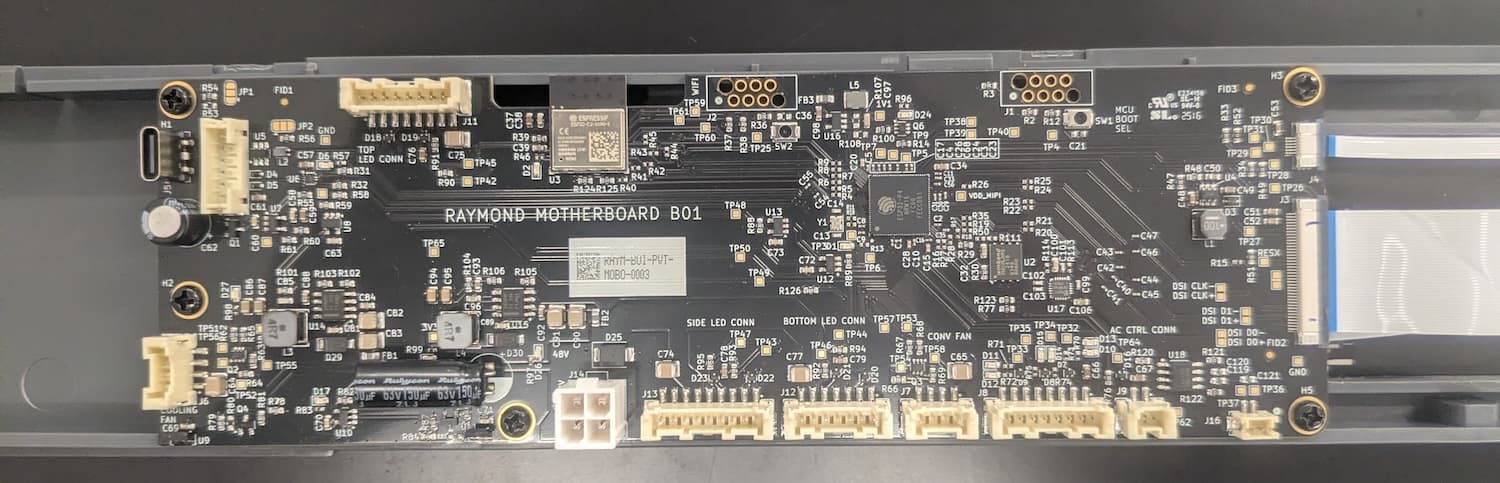
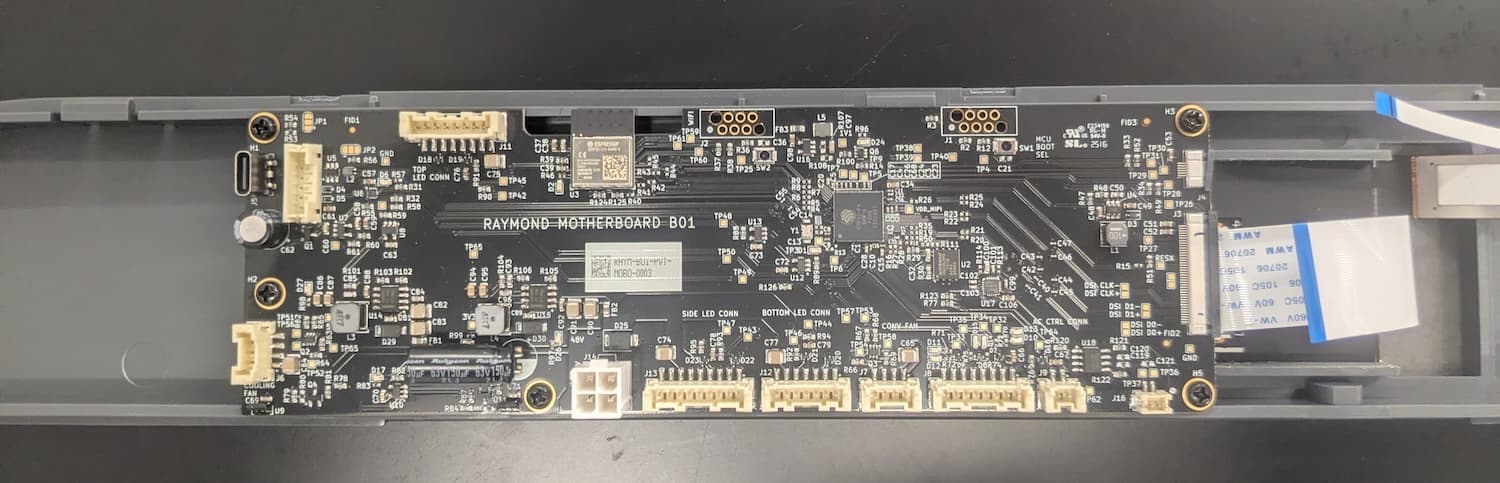
Disconnect the two ribbon cables from the side of the motherboard. For both, slide the black latch on the cable connector away from the white connector body. Once the latch is open, the ribbon cable should separate from the connector with minimal force. Take care not to fold or otherwise damage the ribbon cables.
Using a Phillips driver, loosen and remove the five screws securing the motherboard to the display assembly. Set the screws aside.
Fully separate the motherboard from the display assembly and set it aside for disposal with electronic waste.
Installation de la carte mère de remplacement
Overview: Connect, mount, and secure the new motherboard.
Step 1: Mount and secure the motherboard
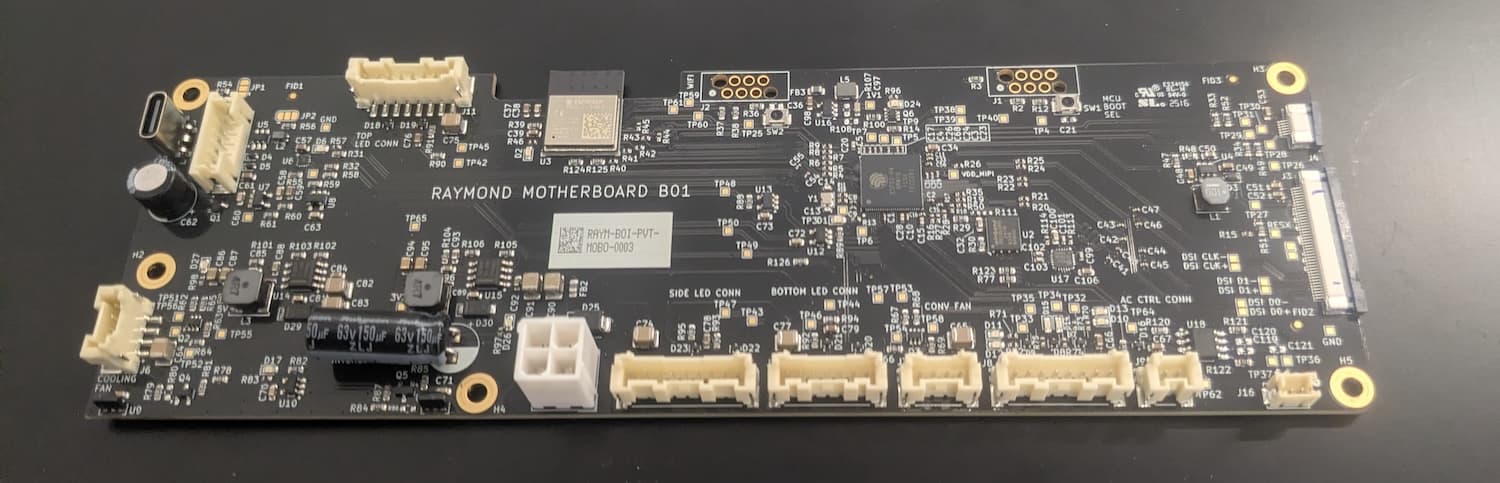
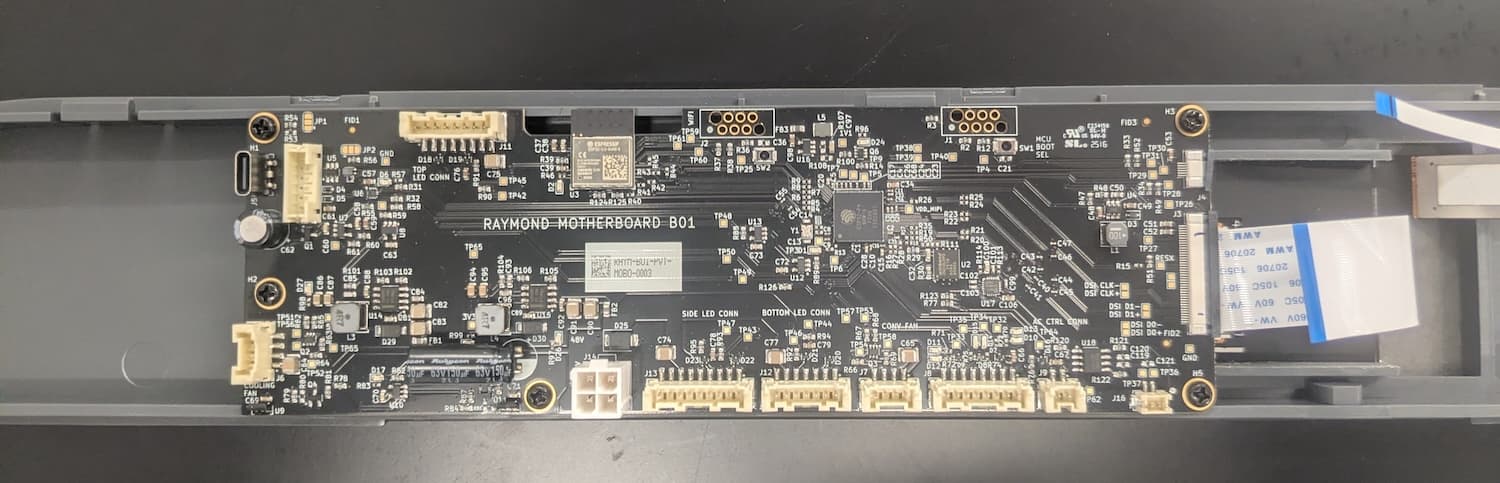
Remove the replacement motherboard from its packaging and place it on the back of the display assembly, aligning the five screw holes in the motherboard with the corresponding screw holes in the display. Thread one motherboard mounting screw into each of the five screw holes, then use a Phillips driver to tighten until snug.
Step 2: Connect the ribbon cables to the motherboard
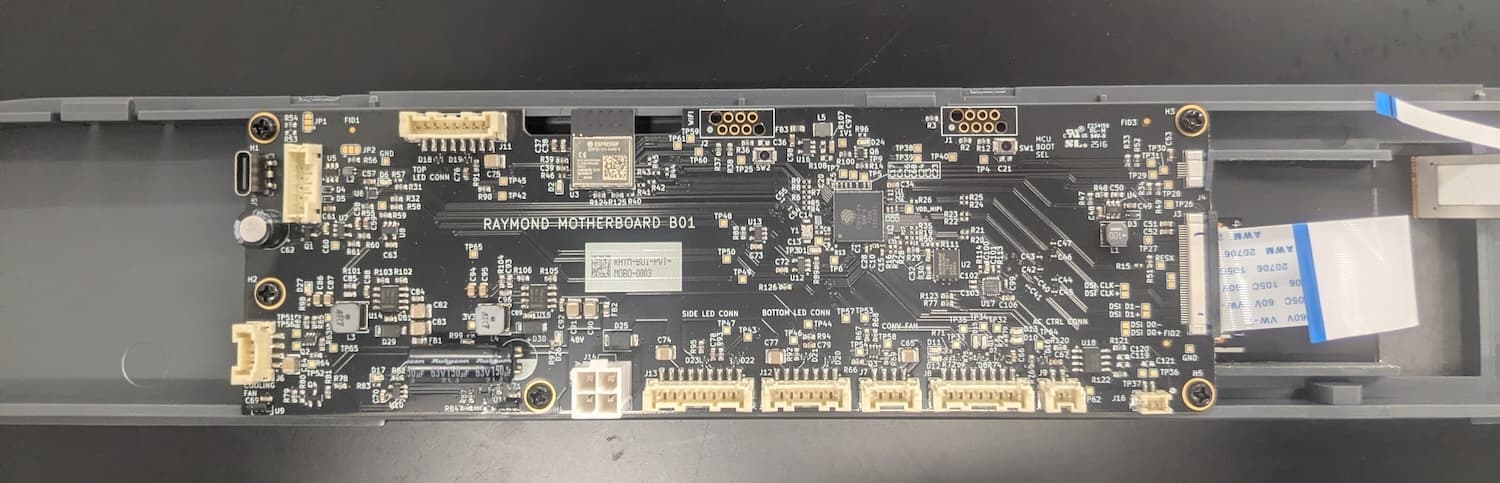
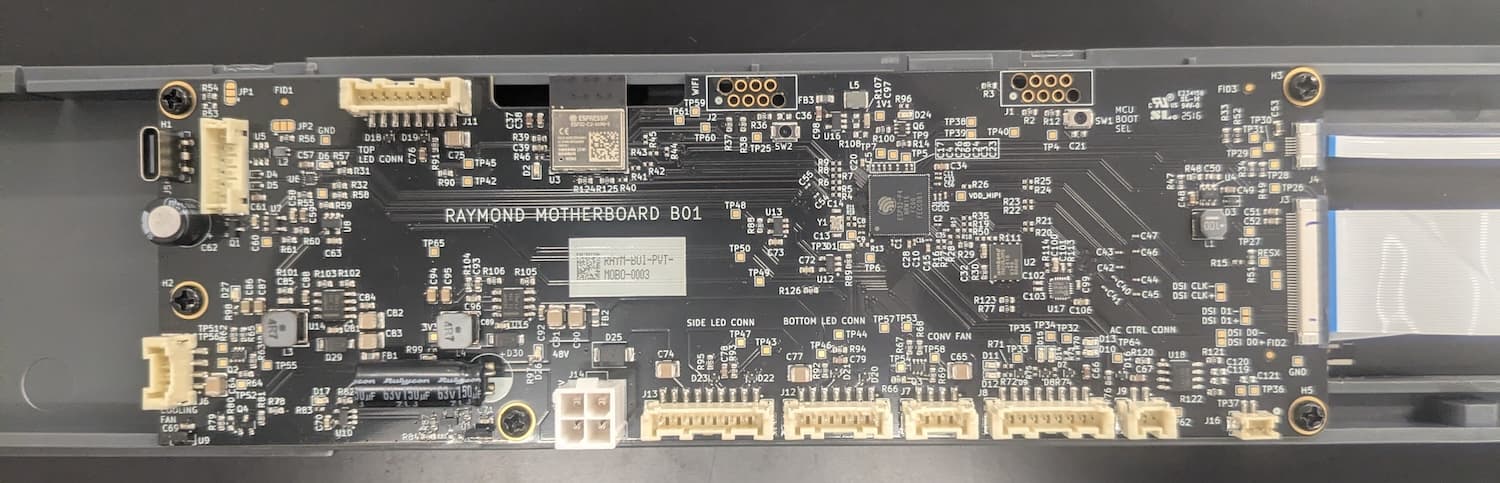
Carefully slide the two ribbon cables into their respective connectors on the motherboard. Push the black latches towards the white connector body. When the latch is flush with the connector body, the ribbon cable is secure.
Step 3: Connect the remaining motherboard cables
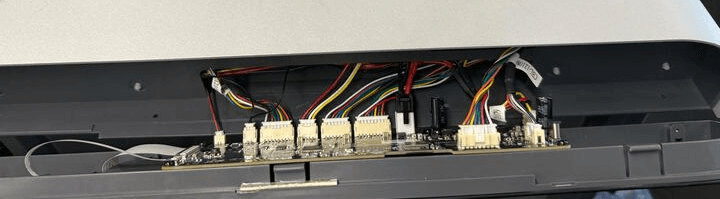
Hold the motherboard and display assembly in front of the machine, near its mounting point. Reconnect all cables to the motherboard, using the image here as a reference. Each cable only fits into its connector in the correct orientation. The locking tab clicks into place when the cable is fully connected.
Step 4: Mount the motherboard and display assembly
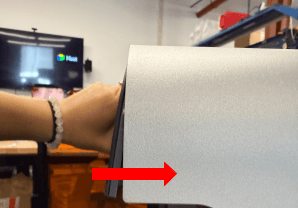
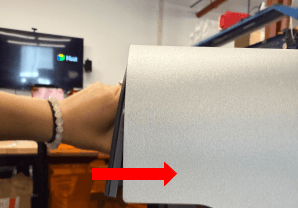
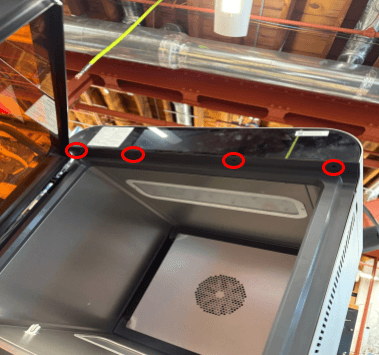
Inclinez légèrement la carte mère et l’ensemble d’affichage vers le haut. Insérez-la sous le bord avant de la coque supérieure, puis inclinez le bas de l’ensemble pour le mettre en place. Assurez-vous qu’elle est bien en place sur le corps de la machine et que les quatre trous de vis situés au bas de la carte mère et de l’ensemble d’affichage sont alignés sur les trous correspondants de la Form Cure L V2.
Thread one mounting screw into each of the four screw holes in the bottom of the motherboard and display assembly. Using a 2 mm hex driver, tighten the screws until snug.
Finalisation de la réparation
Overview: After installing the new motherboard, perform final checks.
Step 1: Power on the machine
Connect the power cable to the machine and its power supply. Turn on the switch at the back of the machine. Start a post-cure cycle and check that the machine operates normally.