Tip:
Keep the packaging for transportation or shipping.
The machine’s power cord is included on top of the foam inside the box. If you cannot locate the power cable, be sure to check all boxes in your shipment, as it may have been packed separately.

Plan an appropriate location for the Form Wash L V2. The Form Wash L is a floor-based unit. Purchase additional finishing supplies, including a suitable washing solvent to ensure you can start using the Form Wash L when it arrives.
The Form Wash L is ready for use once the Wi-Fi antenna is installed, the machine is connected to a power source, and the wash bucket is filled with solvent.
Additional supplies
Prior to receiving the Form Wash L, purchase at least 43 L of your preferred solvent.
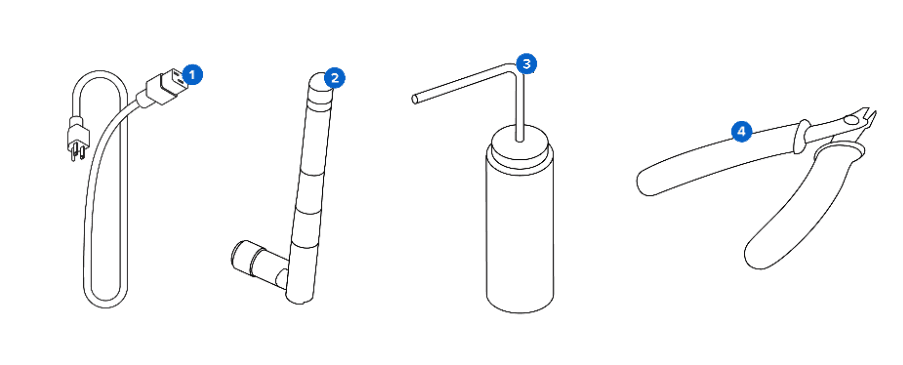
Purchase the following additional supplies to finish post-cured parts:
Arranging the workspace
Review the technical specifications to determine the best location for the Form Wash L.
The Form Wash L has the following dimensions: 78 × 46 × 67 cm (30.7 × 18.1 × 26.4 in). The Form Wash L unit weighs 56.7 kg (125 lbs) without solvent.
Reserve the following minimum dimensions for the most convenient access:
Operate the Form Wash L in a well-ventilated room with a temperature of 18–28 °C (64–82 °F). Follow safety considerations for the Form Wash L.
Unboxing the Form Wash L
The Form Wash L ships in a cardboard carton protected by foam inserts above and below the unit. The packaging contains the accessories, the power supply, and the Form Wash L Safety Booklet (English only). During unboxing, inspect the Form Wash L for any damage or missing items. In the case of damage or missing items, contact Formlabs Support or your authorized reseller.
Tip:
Keep the packaging for transportation or shipping.
The machine’s power cord is included on top of the foam inside the box. If you cannot locate the power cable, be sure to check all boxes in your shipment, as it may have been packed separately.
To unbox the Form Wash L:
Caution:
If you need to move the Form Wash L, use the carrying slings to move the machine. Do not pick up the Form Wash L without the carrying slings.
Notice:
Remove all packaging material before connecting the Form Wash L to a power source. Retain all packaging and inserts for warranty service. Refer to the manual for the repackaging instructions.
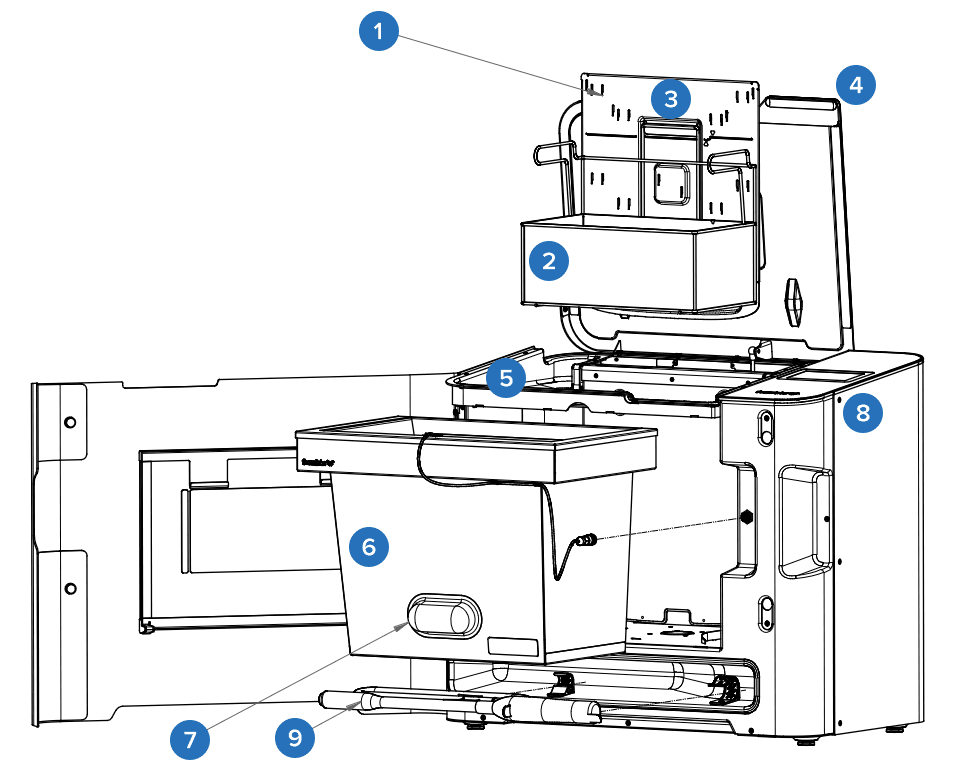
Form Wash L components
Form Wash L tools and storage
Installing the Form Wash L
Place the Form Wash L on a clean, level surface with a nearby power source. Plug the included power cable into the power port on the back of the unit and connect the power cable to a circuit. The Form Wash L is grounded via its power cable and does not require a separate grounding point. Flip the breaker switch on the back of the unit to the ON position to power on the machine.
The Form Wash L requires an internet connection in order to receive firmware updates.
To install the Wi-Fi antenna, screw the Wi-Fi antenna into the jack on the back of the unit.
For Ethernet, connect the machine to your LAN with an Ethernet cable. Refer to Connecting the Form Wash L and Form Cure L via USB, Ethernet, or Wi-Fi for more information.
As the Form Wash L initializes, the Formlabs logo with a progress bar appears on the touchscreen, followed by the onboarding screen. Follow the on-screen prompts to finish setting up the machine by removing any remaining packaging, filling the Form Wash L with solvent, and installing the solvent monitor. Be sure to set your solvent type, either during the onboarding process or by tapping the Solvent card on the home screen.
Installing the build platform mount arms
Choose a build platform mount arm configuration that suits your build platforms, part heights, and the amount of available solvent.
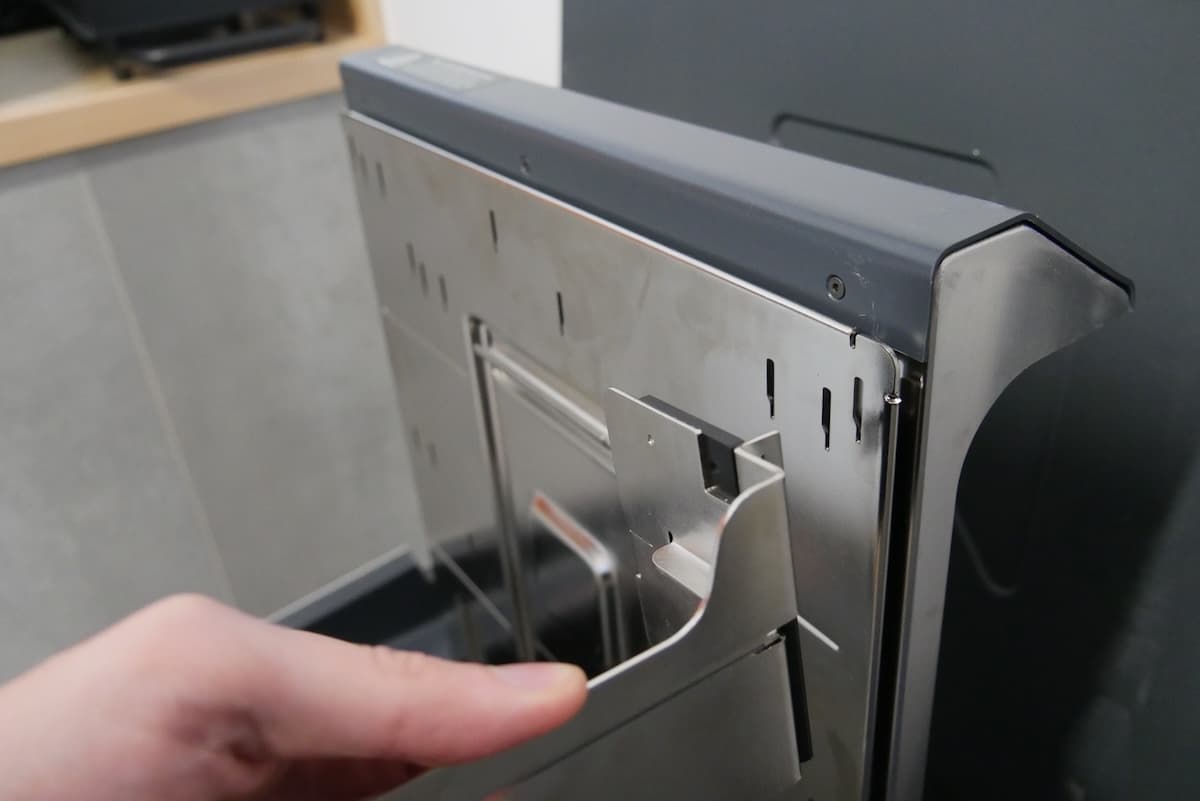
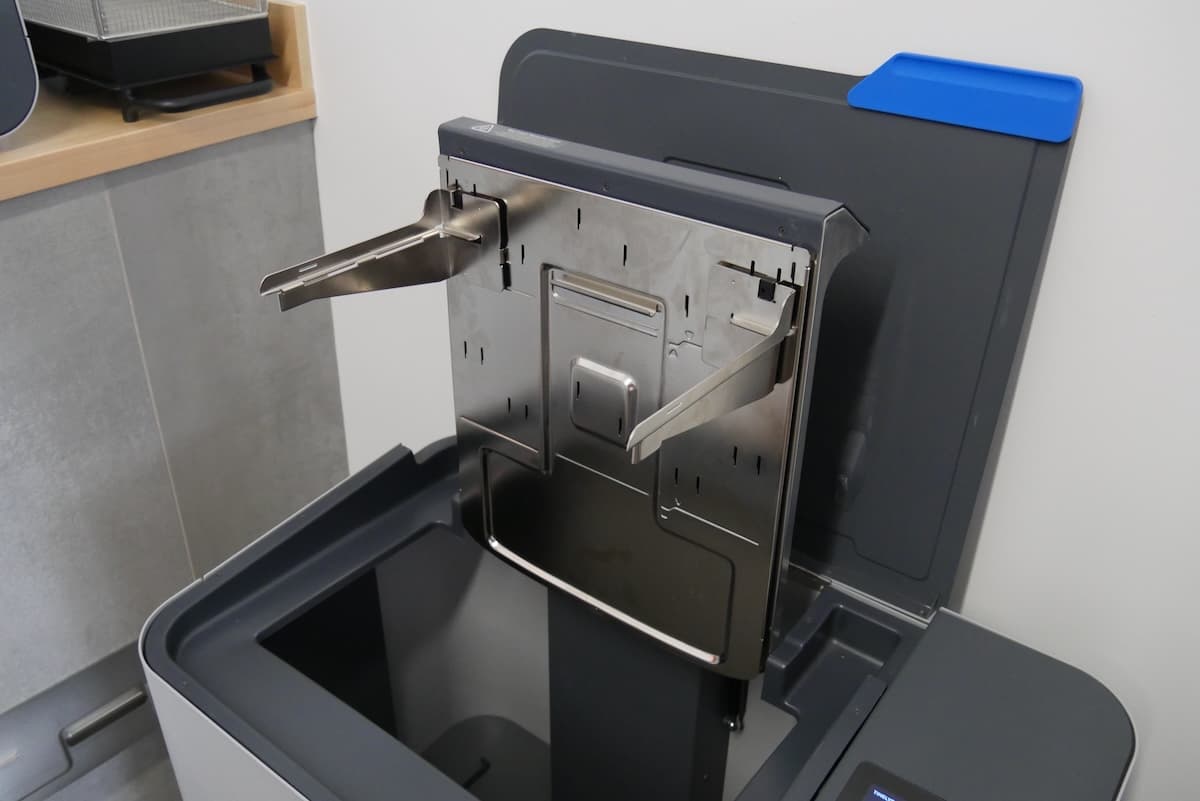
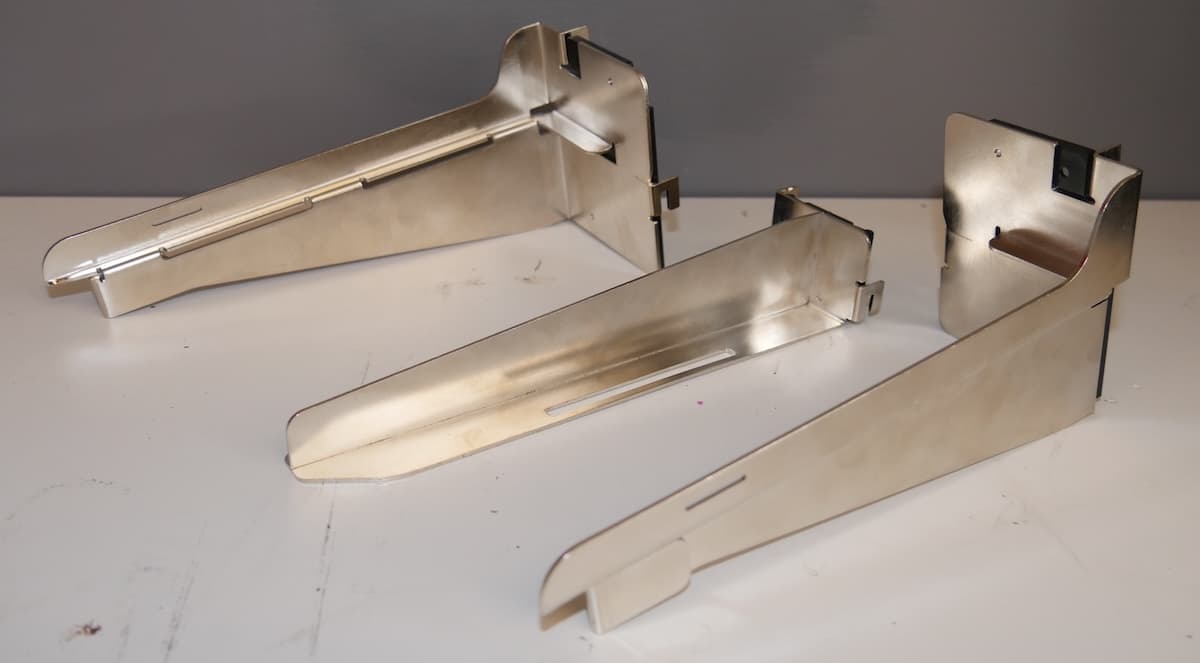
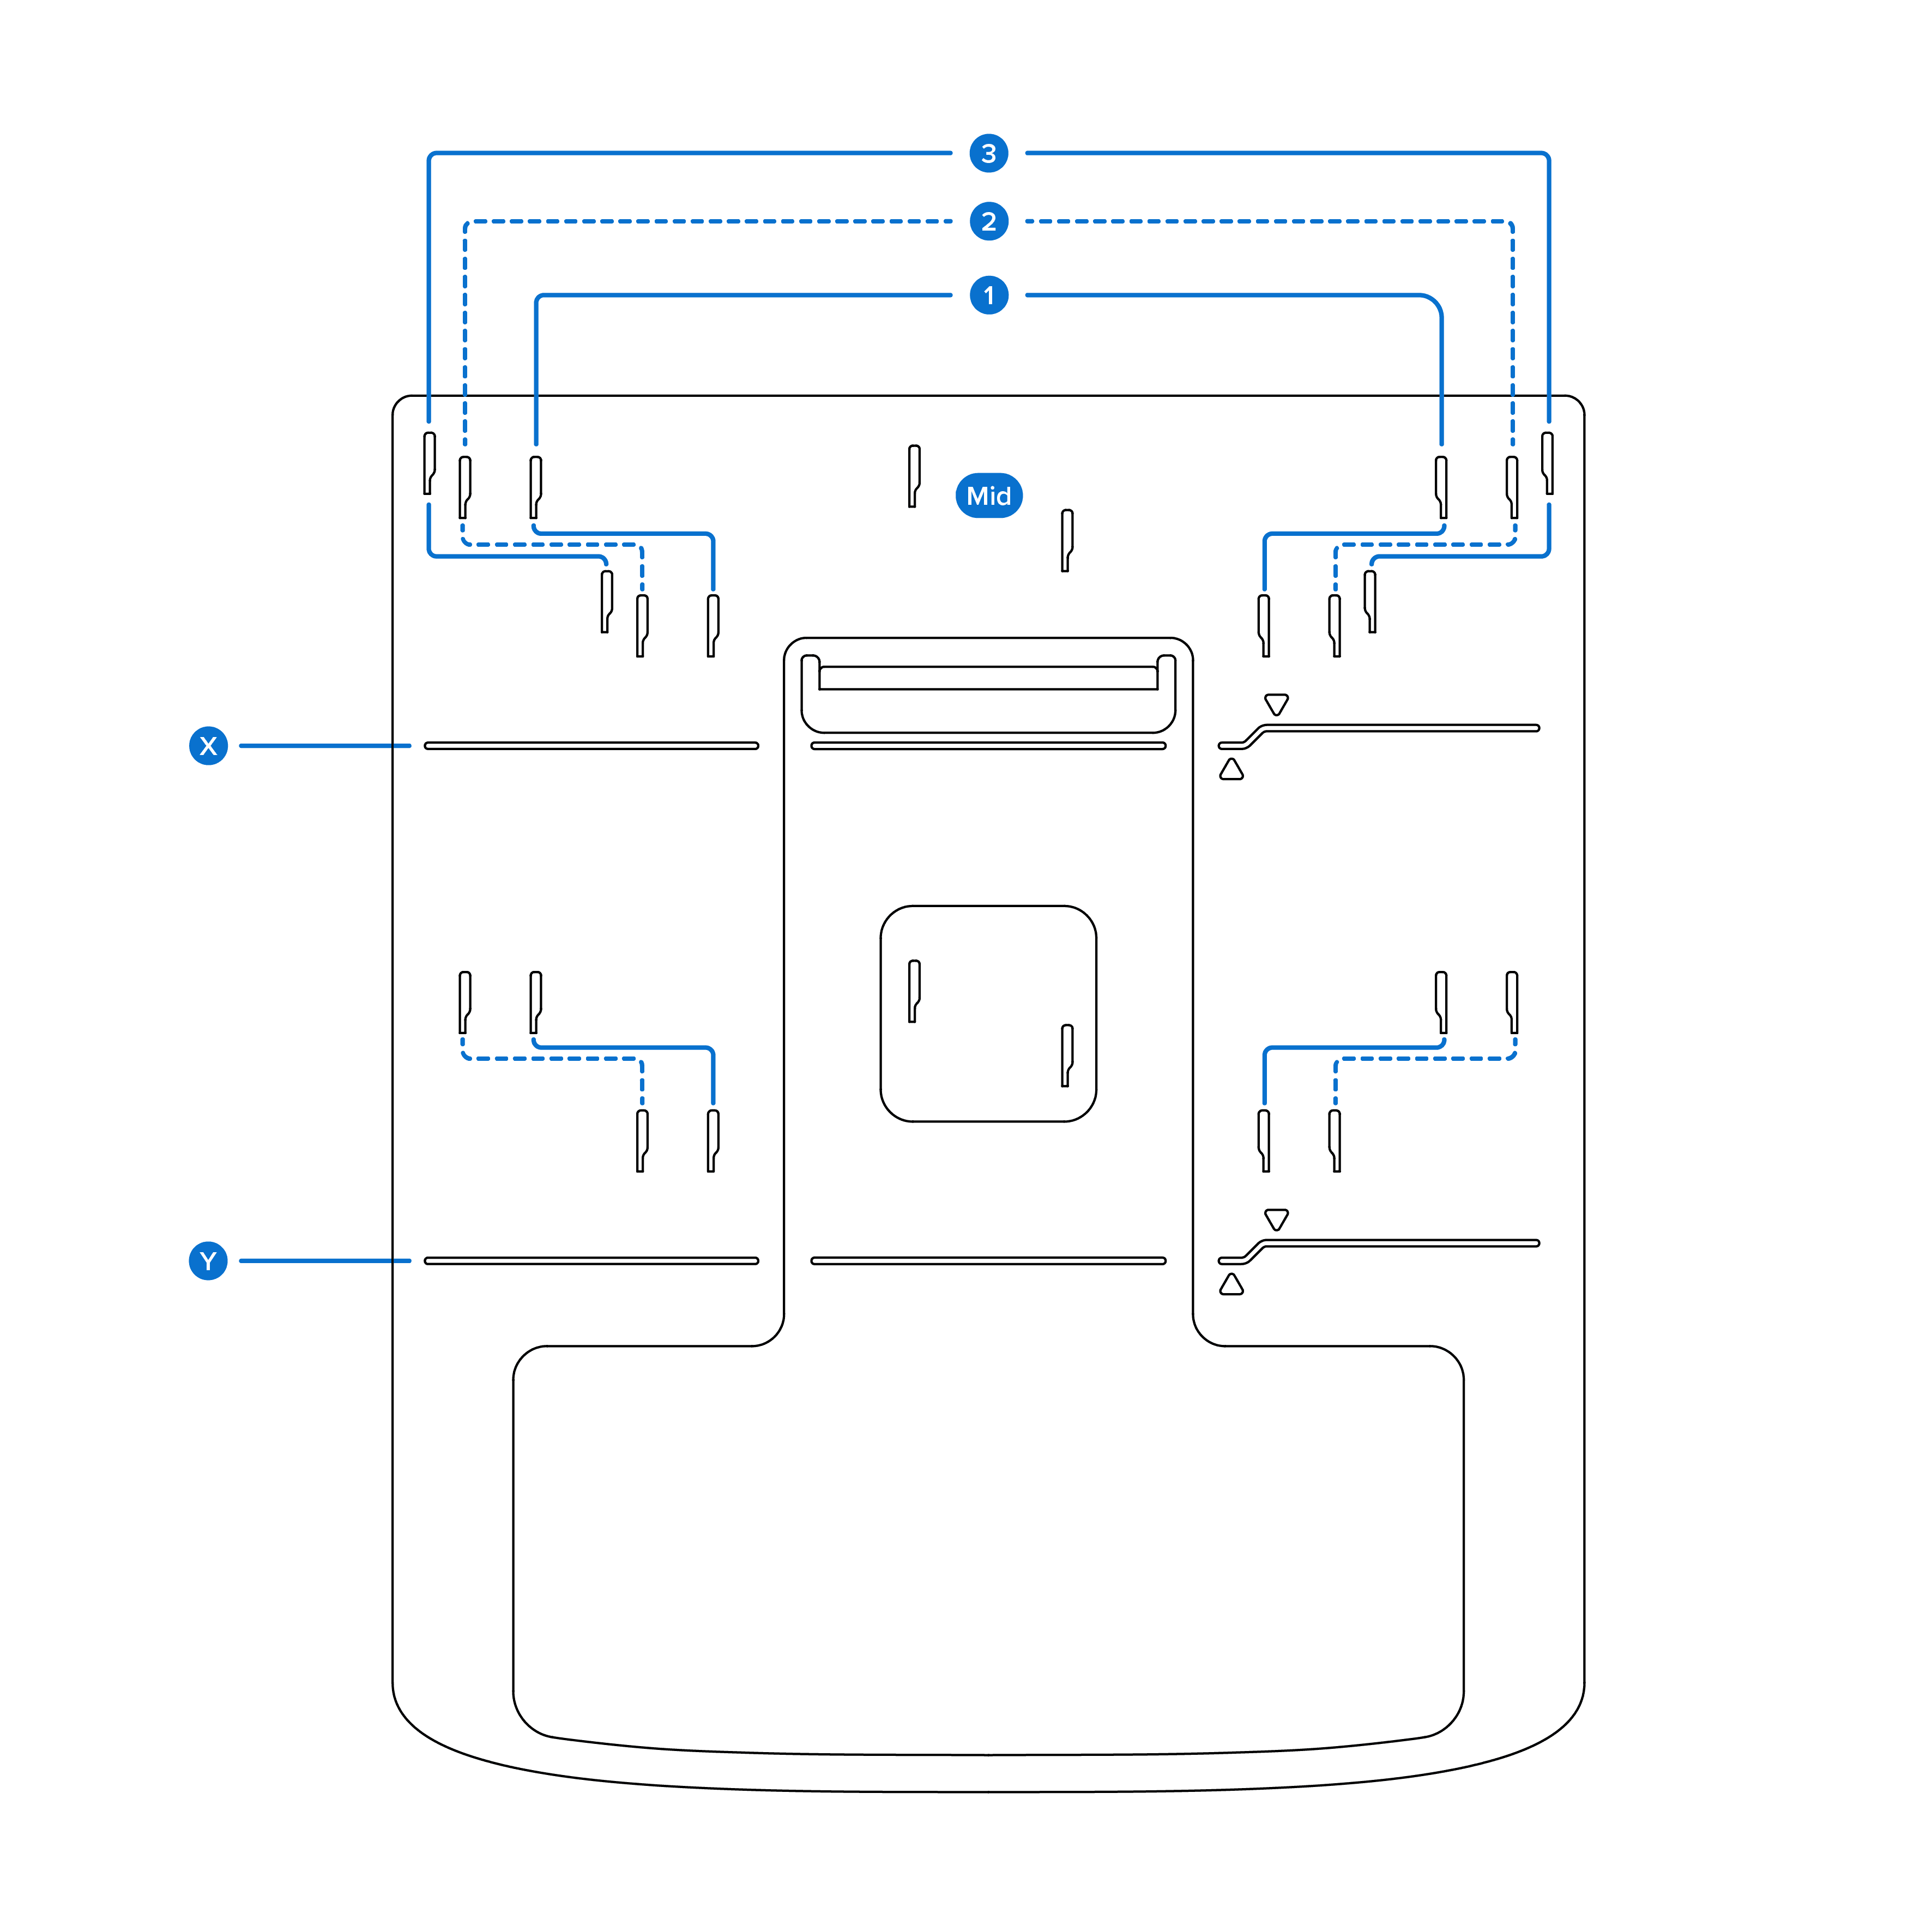
The Universal Build Platform Adapter has multiple slots for installing the build platform mount arms. It comes with three arms: left, right, and middle. The left and right arms fit into the outside positions, labeled 1, 2, and 3 in the figure below. Install the middle arm to be able to wash two Form 2, Form 3, or Form 4 build platforms at the same time.
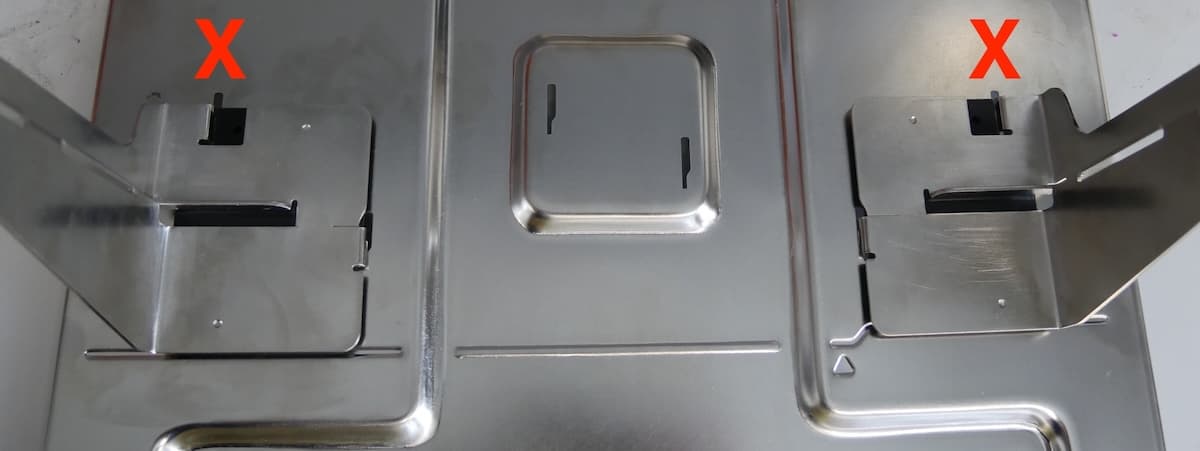
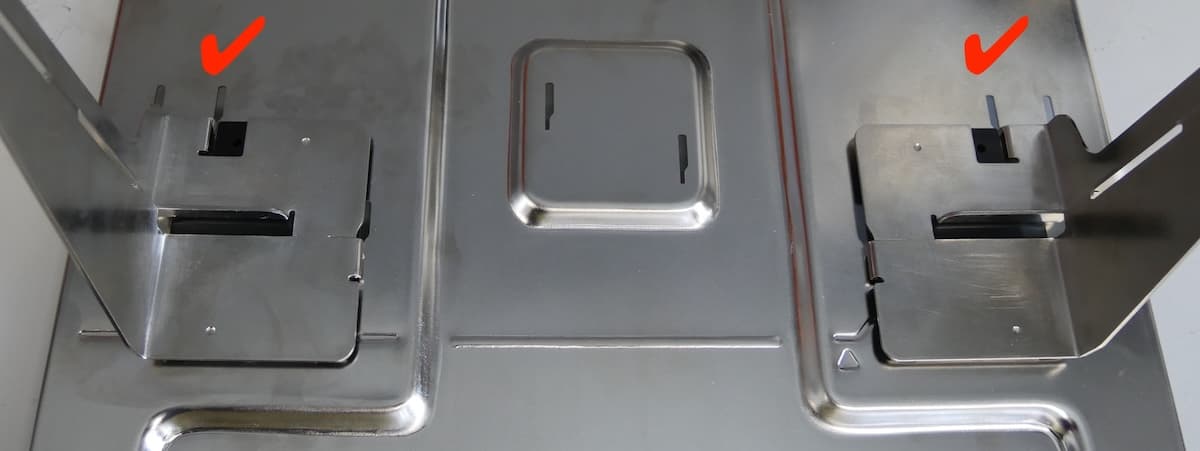
The upper set of arm positions, labeled X in the figure below, correspond to a full Form Wash L. The lower set, labeled Y in the figure below, corresponds to a half-full Form Wash L containing roughly 20 L of solvent.
| Printer | Build platforms | Left/right platform arm position | Middle arm installed |
|---|---|---|---|
| Form 2 Form 3 generation | Standard Build Platform Build Platform 2 Stainless Steel Build Platform | 2 | Yes |
| Form 3L generation | Form 3L Build Platform Form 3L Build Platform 2L | 2 | No |
| Form 4 generation | Form 4 Build Platform Form 4 Flex Build Platform | 1 | Yes |
| Form 4L generation | Form 4L Build Platform Form 4L Flex Build Platform | 3 | No |
Example configurations are shown below:
| Printer | Upper position | Lower position |
|---|---|---|
| Form 2 Form 3 generation | 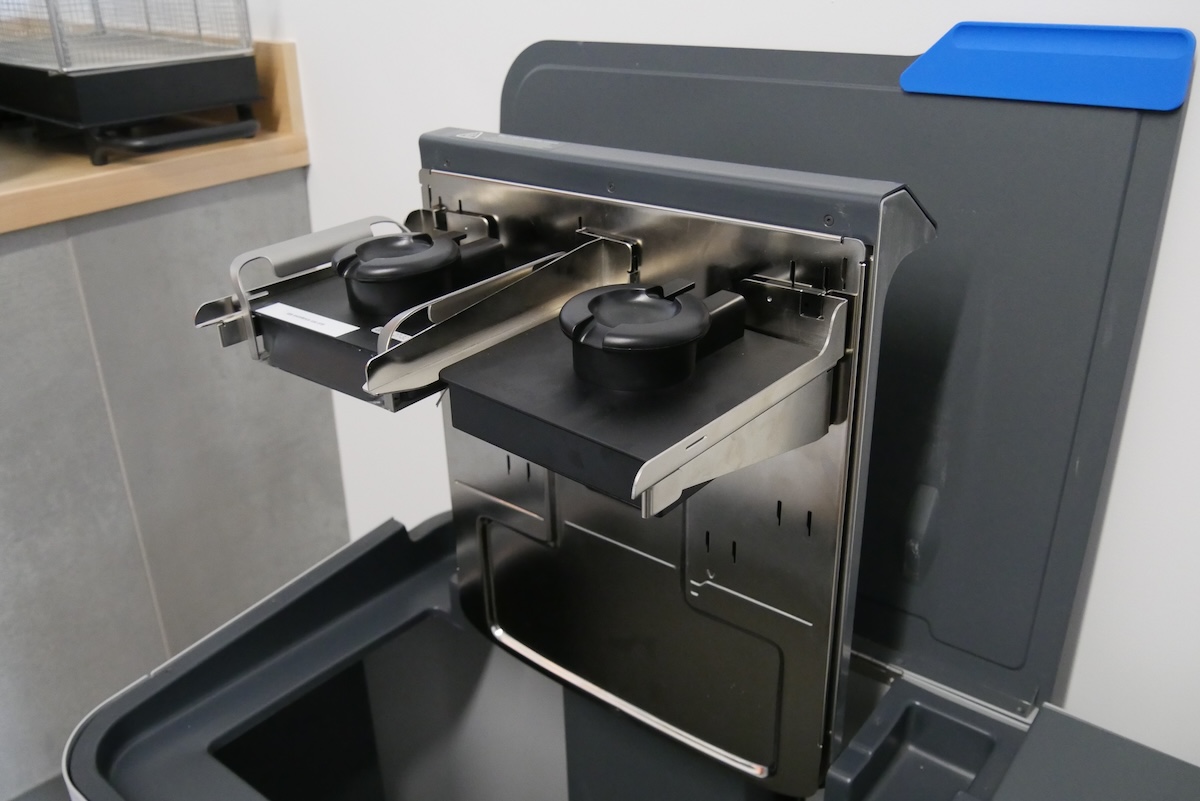 | 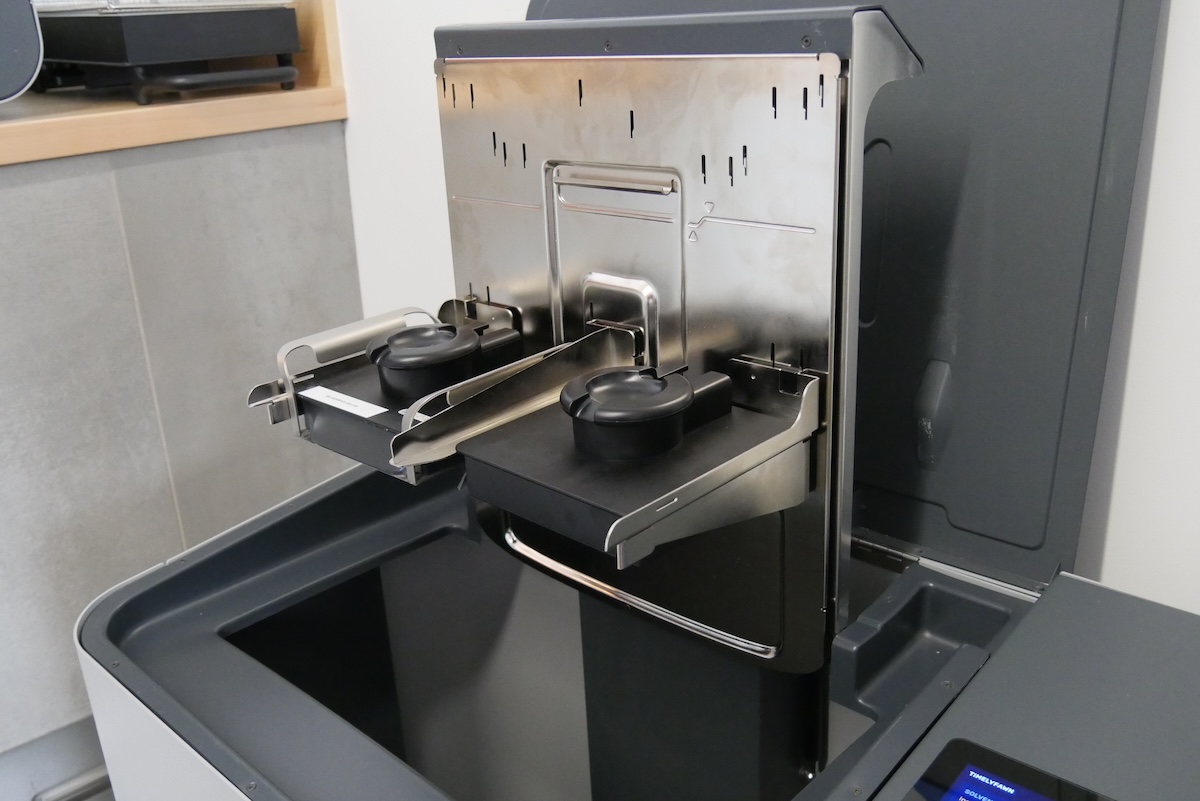 |
| Form 3L generation | 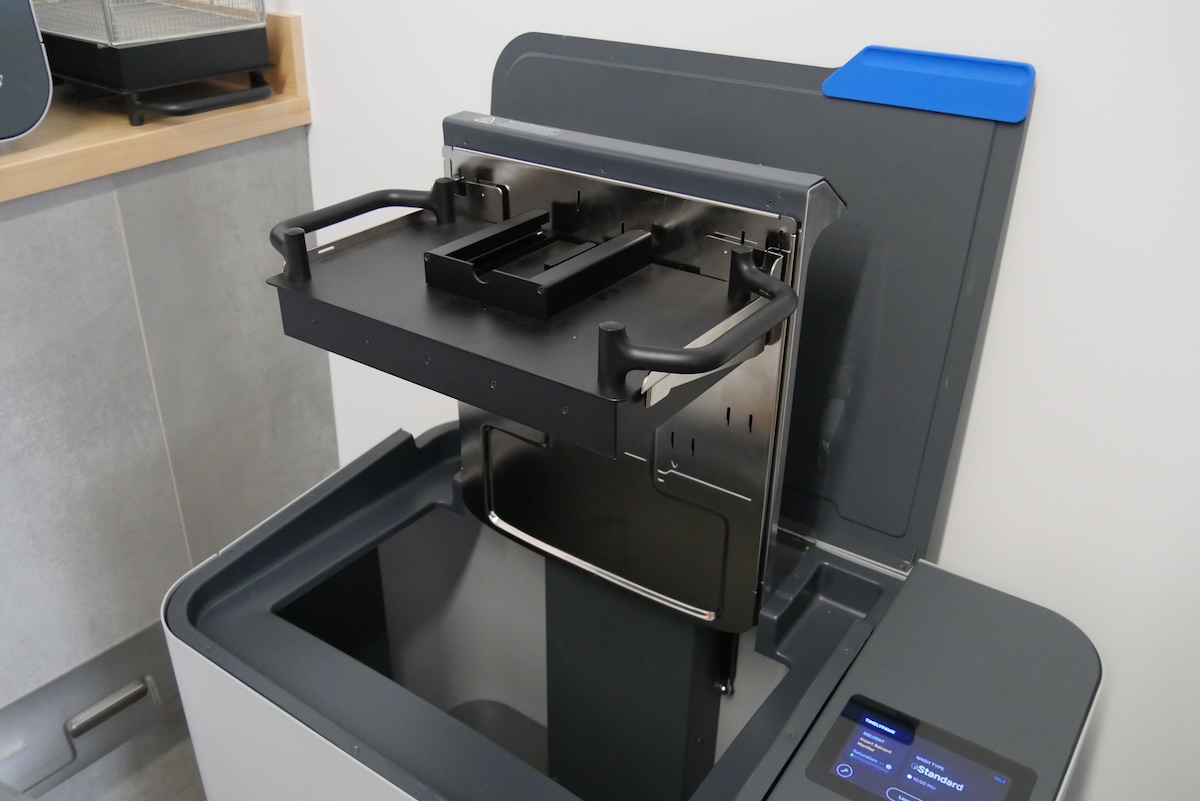 | 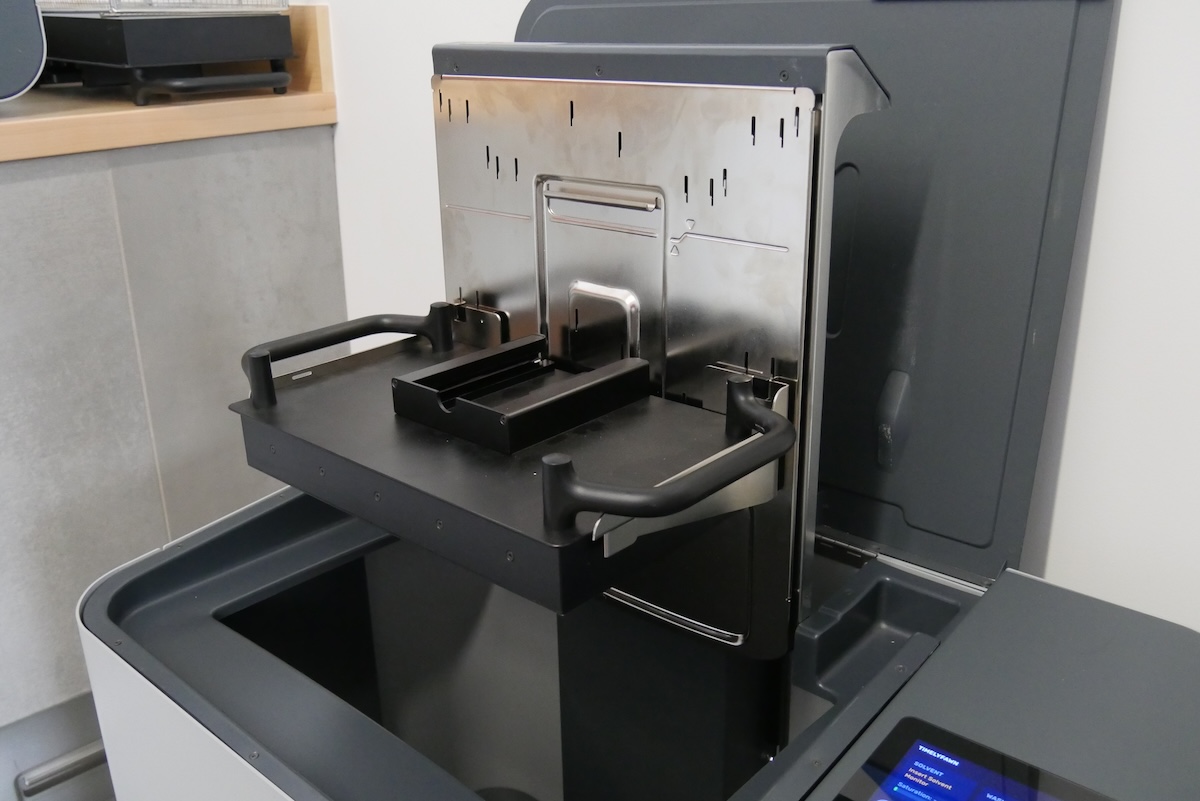 |
| Form 4 generation | 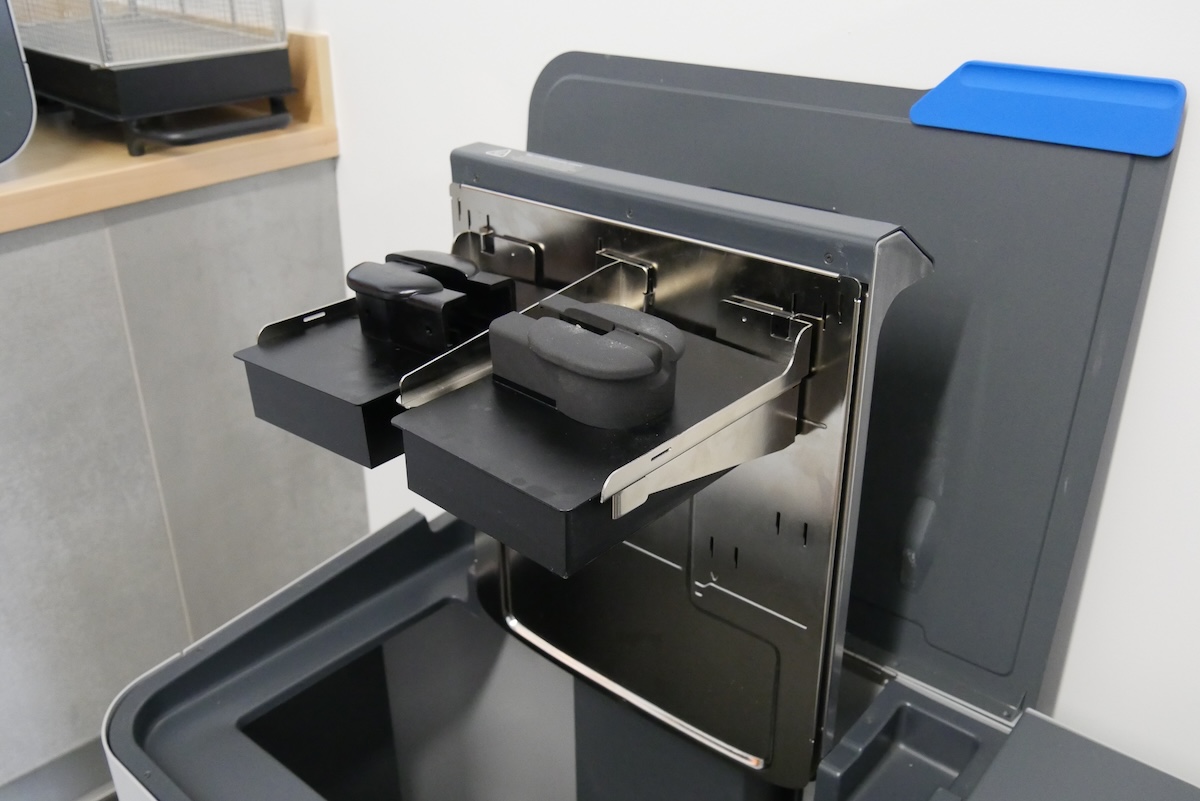 | 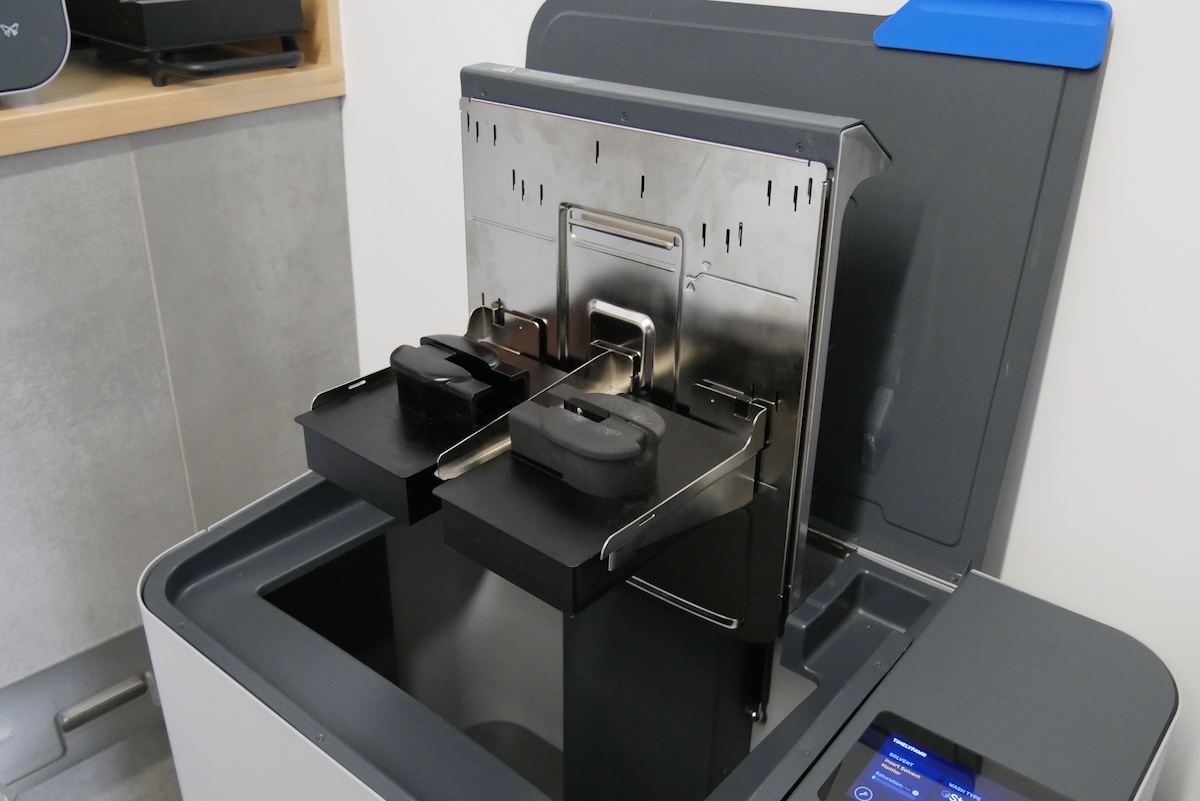 |
| Form 4L generation | 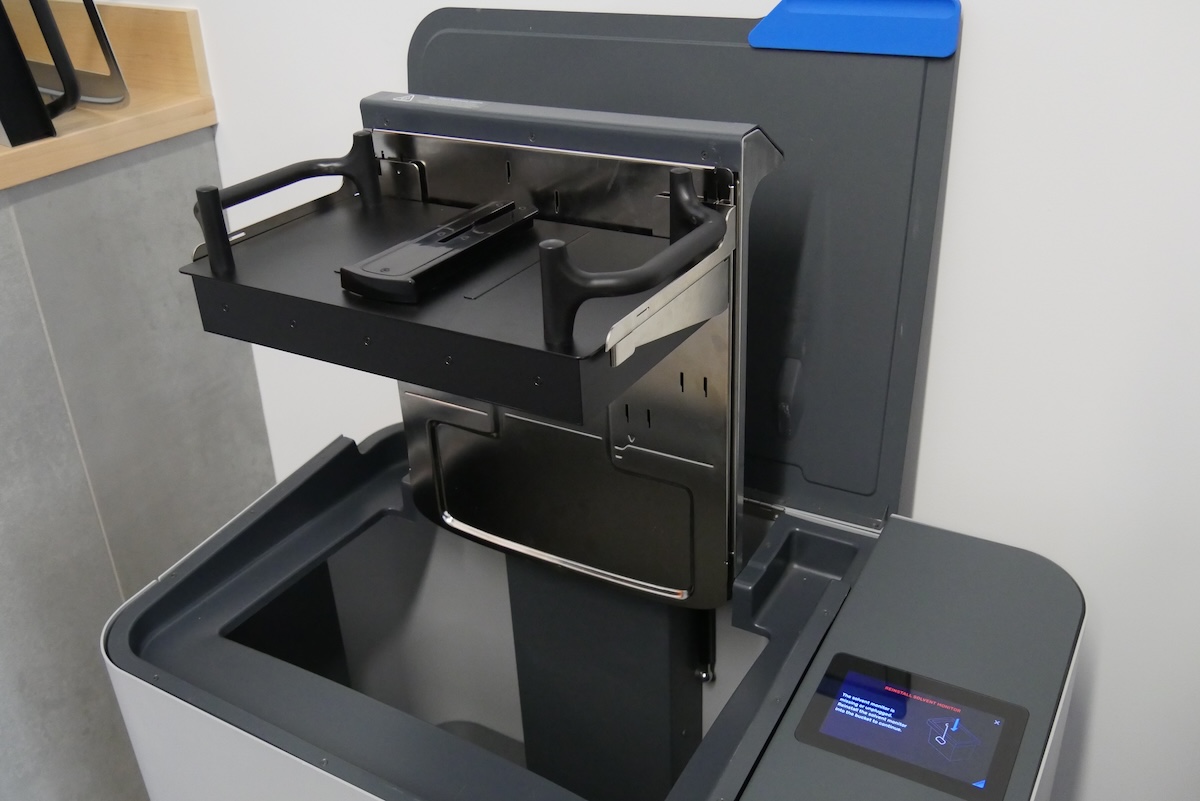 | N/A |
Note:
Remove the wash basket when washing a Form 4L build platform on a Form Wash L V1 unit with the Universal Build Platform Adapter. The wash basket interferes with the build platform, preventing it from sitting fully on the build platform mount arms.
To install the build platform mount arms: