
Injection molding is ubiquitous as a manufacturing process—in fact, the majority of plastic products in the world today are manufactured by injection molding. While it is an ideal technique for large-scale production needs, traditional CNC machined metal molds have prohibitive high costs and long lead times for low-volume production.
For prototyping and low-volume production (approximately 10-1000 parts), 3D printed injection molds provide a time- and cost-efficient solution. They also enable a more agile manufacturing approach, allowing engineers and designers to test mold designs, easily modify them, and then continue to iterate on their designs much faster, while being orders of magnitude cheaper than traditional CNC machining.
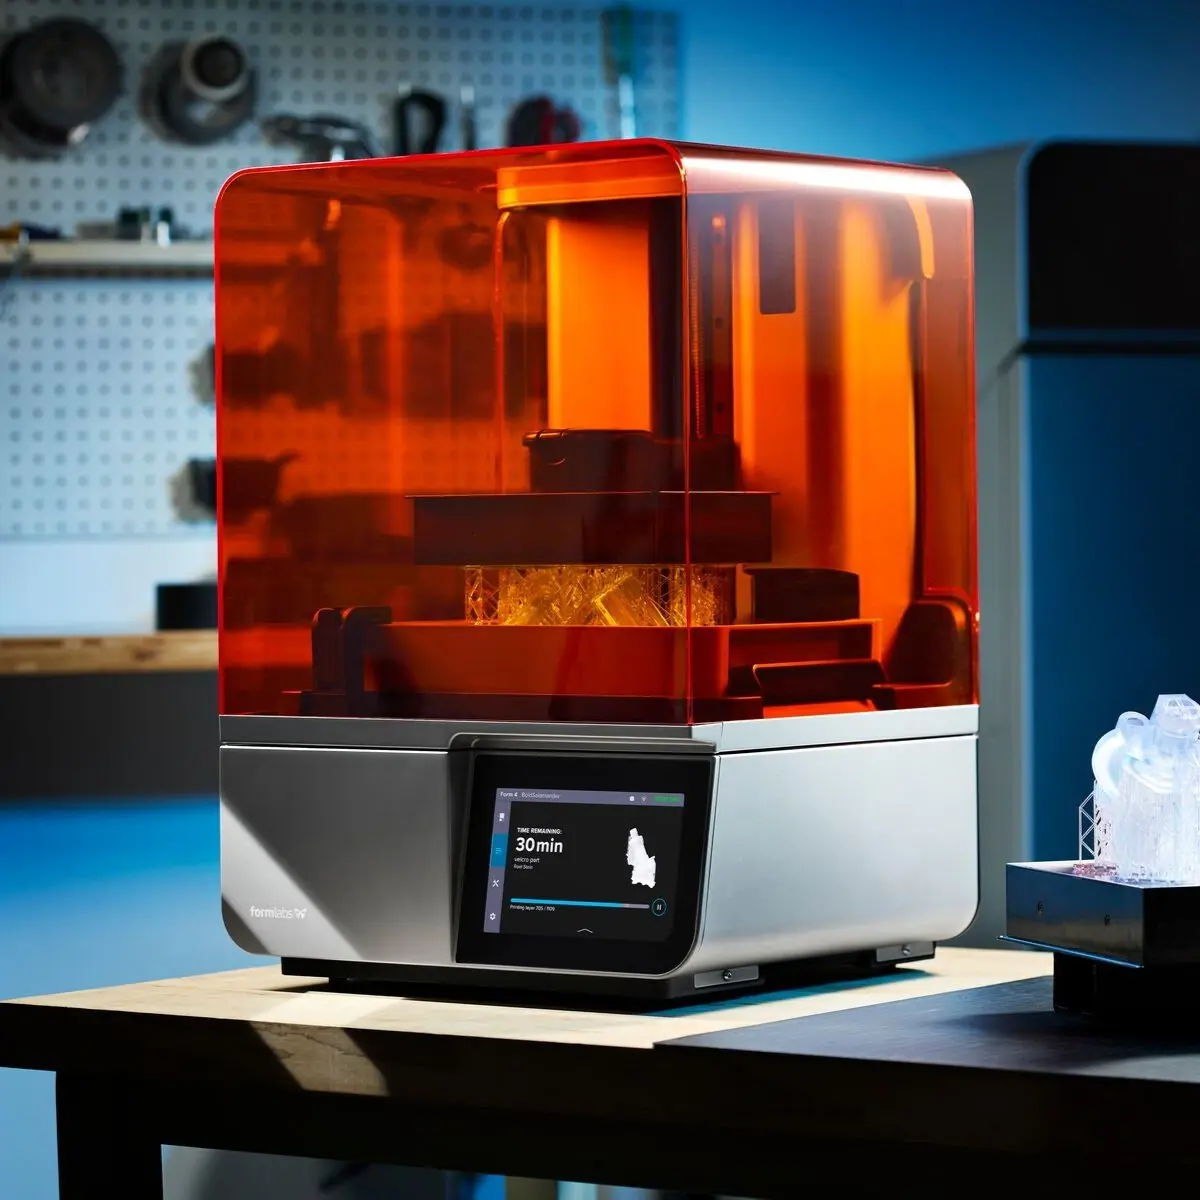
Creating custom molds using a stereolithography (SLA) 3D printer, like the Form 3+, is simple and convenient, allowing you to leverage the benefits of both 3D printing and traditional molding techniques.
In this guide, we’ll walk you through the process of DIY injection molding and share all the tools and tips necessary to utilize plastic injection molding in-house using 3D printed molds.
For detailed guidelines, design recommendations, and real-life case studies, download our white paper.
Book a Free Consultation
Get in touch with our 3D printing experts for a 1:1 consultation to find the right solution for your business, receive ROI analyses, test prints, and more.

Request a Free Sample Part
See and feel Formlabs quality firsthand. We’ll ship a free 3D printed sample part to your office.
What You Need for DIY Injection Molding
Building a setup for DIY plastic molding does require some investment. It takes both money and time to acquire the right equipment and to master using it. However, these costs are in many cases still lower than the cost of a single metal mold, so the eventual time and cost savings, once you’re up and running, will easily offset the initial effort.
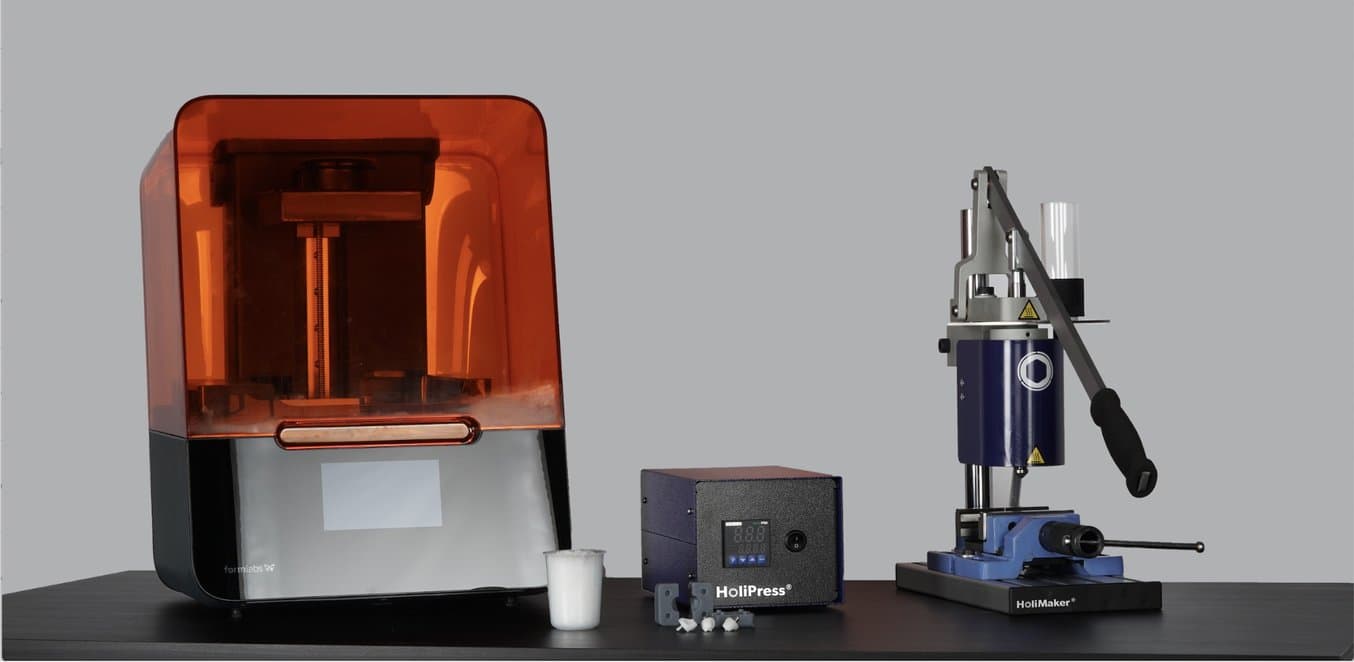
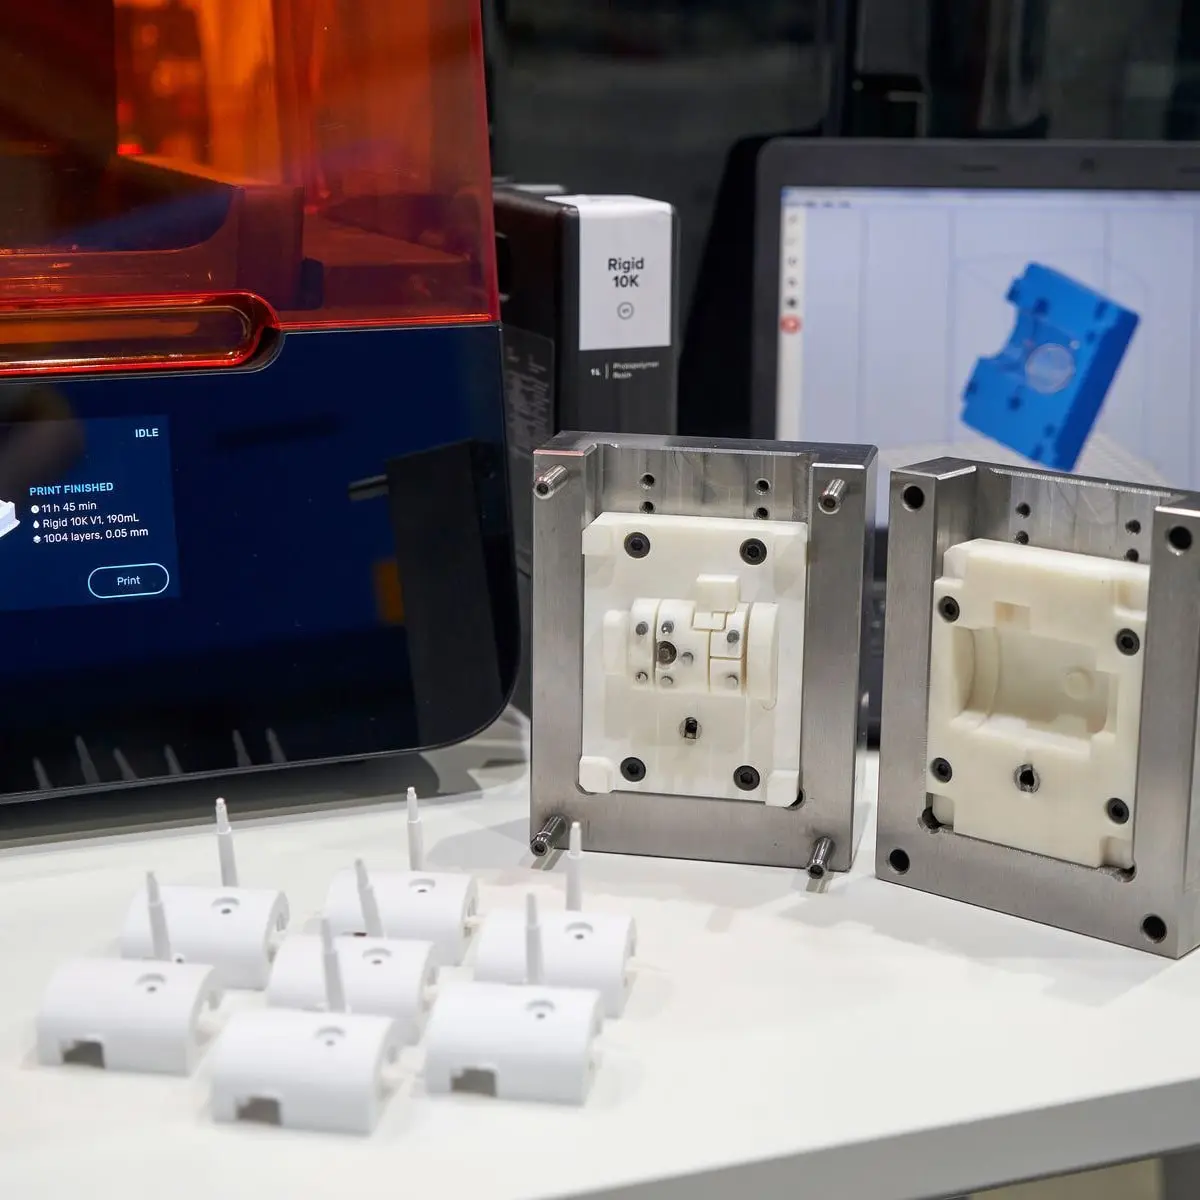
The Form 3 SLA 3D printer next to a Holipress desktop injection molder.
Here’s what you’ll need to get started:
-
A high-performance desktop SLA 3D resin printer, like the Formlabs’ Form 3+. The Form 3+ can produce accurate molds with crisp features, and a smooth surface finish that will yield high-quality final molded parts. Beyond DIY plastic molding, an SLA 3D printer is also a valuable asset for prototyping and other applications throughout product development.
-
A 3D printing material that can withstand the temperature and pressure on the mold during the injection molding process. We recommend the following materials for Formlabs SLA 3D printers:
-
Rigid 10K Resin is an industrial-grade, highly glass-filled material, which provides a solution that can cope with a wider variety of geometries and injection molding processes. It has an HDT of 218°C @ 0.45 MPa and a tensile modulus of 10,000 MPa, making it strong, extremely stiff, and thermally stable.
-
High Temp Resin offers a heat deflection temperature is 238 °C @ 0.45 MPa that is suitable for injection molding. This material is more brittle, but is recommended for materials with a high molding temperature and to reduce cooling time.
-
Grey Pro Resin has a lower thermal conductivity than High Temp Resin or Rigid Resin, which leads to a longer cooling time, but it is softer and can wear hundreds of cycles.
-
-
A benchtop injection-molding machine, such as the Galomb Model-B100 or the Holipress. There are a number of benchtop injection molders on the market that vary in cost. Many of the lower cost molders use a hand-driven plunger, while some of the more expensive units use a screw or pneumatic system. Some of our customers have recommended systems from Minijector, Morgan, APSX, or Micromolder as well. Desktop automated molders such as the product line from Babyplast are good alternatives for mass production of small parts.
-
Plastic pellets of your choice
-
A CAD software tool of your preference to design the mold insert, such as Blender, which you can download for free.
Before purchase, make sure to evaluate the injection molder carefully against your production requirements. For large parts, industrial processes will still be necessary. This DIY injection molding technique is best optimized for producing small parts at low volumes.
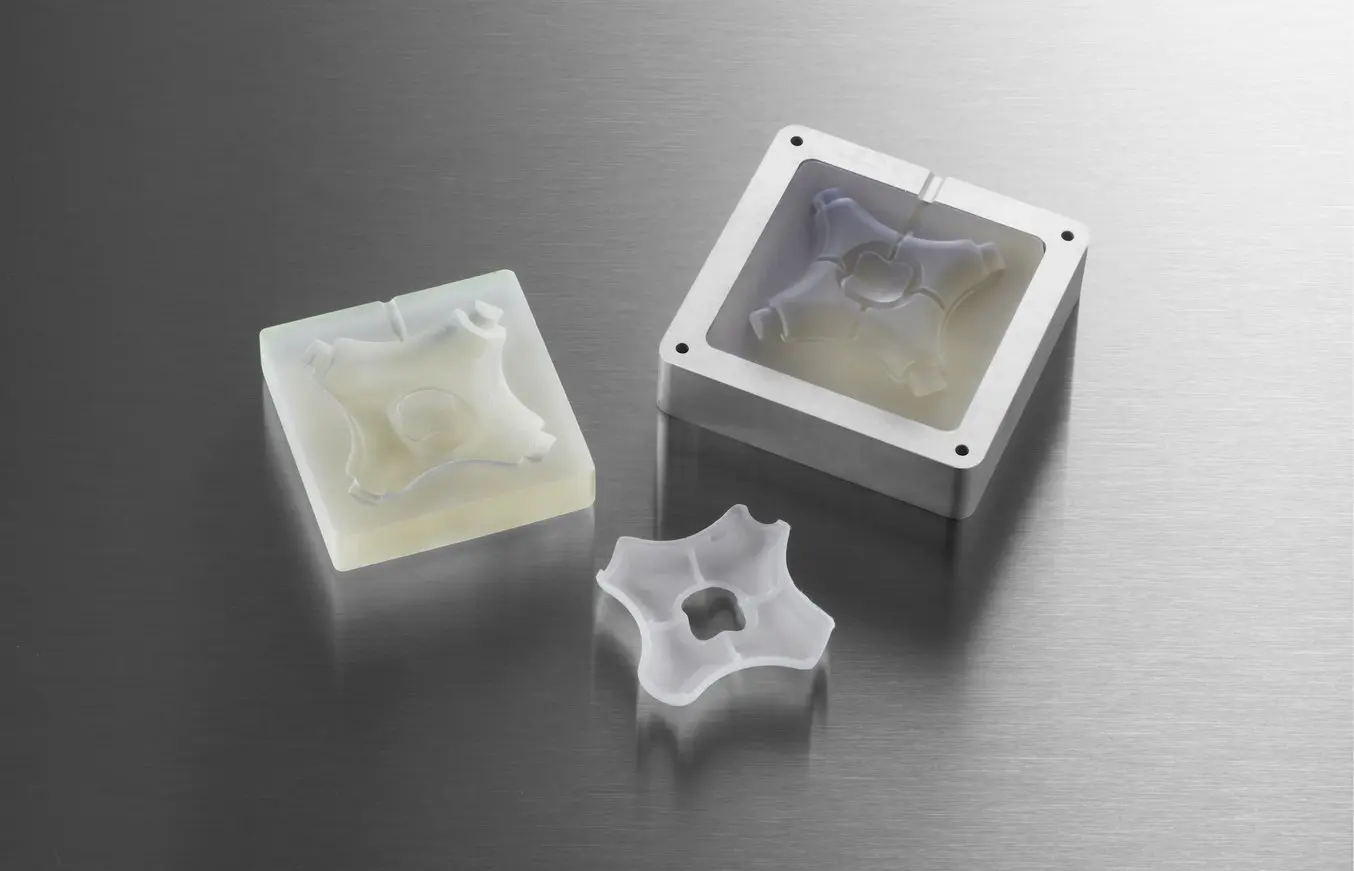
A Formlabs 3D-printed mold, and encapsulated component, made using this DIY injection molding process.

3D Printing for Injection Molding
Get in touch with our 3D printing experts for a 1:1 consultation to find the right solution for your business, receive ROI analyses, test prints, and more.
DIY Injection Molding Step by Step
1. Design the Mold in CAD
First, pick the CAD software tool of your preference to design the mold insert. We’ll use the open-source Blender, but the workflow should be fairly similar in any other CAD software.
Download the blank mold insert design files—you’ll use them to create your injection mold design. The designs can also be easily scaled to accommodate most injection molders and mold frames. Alternatively, you can also design your own mold insert for the using the cavity diagrams of the master mold frames.
Import both mold halves of the mold core and the 3D design you’d like to produce into your CAD tool.
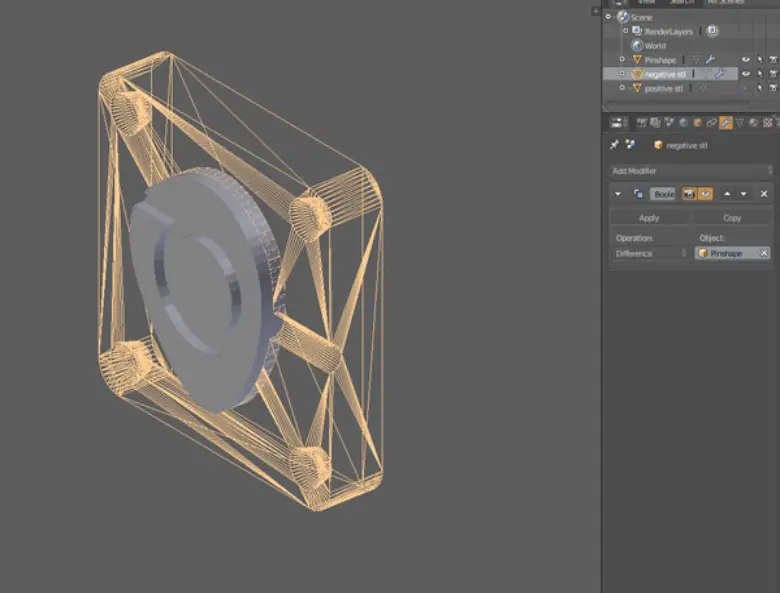
In Blender, use the eye icon in the scene explorer to toggle off one half of the mold. Once your workspace is set up to your liking, set both halves of the mold to the “wire” draw type under the Object menu, as in the image below.
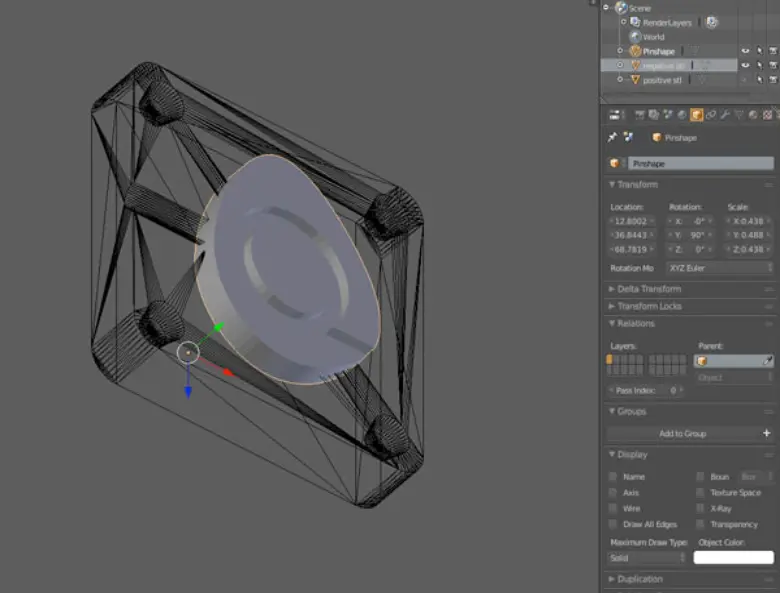
Now, you can position your mold. Ensure that the object fully intersects with the inlet for the molten plastic during the injection molding process. Use orthographic mode, engaged via “toggle perspective/ortho,” to make this more straightforward.
Turn the visibility of your current mold core off, and turn the other side on. Repeat the process to ensure that the object fully intersects with the inlet of the other half of the mold core. With your object lined up, you’re ready to subtract the area of two intersecting objects by using the “boolean difference” function in Blender.
Select the first half of your object, and choose the boolean option under the Modifiers Menu. Select the object you’re cutting, and make sure that the “difference” operation is selected. Apply the operator, and do the same for the other side. It should look something like the image below. If you get stuck here, this tutorial on adding interlocking components to a design may be helpful.
Your mold is now ready for printing. Export each half, making sure to check the “Selection Only” box in the Blender exporter.
2. 3D Print the Mold
To 3D print the mold, it’s essential to pick a material that can withstand the temperature and pressure on the mold during the injection molding process.
Based on internal testing and case studies with our customers, we suggest to choose the 3D printing resin based on the criteria from the table below. Three stars means the resin is highly effective, one star is less effective.
| Criteria | High Temp Resin | Grey Pro Resin | Rigid 10K Resin | |
|---|---|---|---|---|
| High molding temperature | ★★★ | ★ | ★★ | |
| Shorter cooling time | ★★★ | ★ | ★★ | |
| High pressure | ★ | ★★ | ★★★ | |
| Increase cycle number for complex geometries | ★ | ★★ | ★★★ |
Setting up the print only takes a few seconds in PreForm, the print preparation software for Formlabs professional 3D printers. If your mold design requires support structures for printing, make sure to orient the mold halves in PreForm so that the cavity faces up. This will simplify post-processing and ensure a high-quality surface for your molded parts.
Depending on the geometry and the size, multiple molds can be printed at once on a build platform to increase printing efficiency.
3. Injection Molding the Plastic Parts
Now that you’ve designed and 3D printed your mold, you can mold the parts on your benchtop plastic injection molding machine.
You have a wide variety of materials to choose from for injection molding. Formlabs and our customers have tested the following materials with 3D printed injection molds:
- LDPE
- PP
- PA
- PE
- TPE
- TPU
- PLA
- ABS
- ASA
- HDPE
- EVA
- PS
- POM
Consider the desired properties of your object and the capabilities of your injection molder before you make your choice. From there, simply follow the bespoke instructions on your injection molder to quickly and efficiently produce your parts.
Depending on the injected material, adhesion of the part to the mold can cause deterioration of the mold during extraction, in particular with flexible 3D printing materials such as TPUs or TPEs. Using a mold release agent is a good solution to help separate the part from the mold. Silicone mold release agents are compatible with Formlabs Grey Pro Resin, High Temp Resin, and Rigid 10K Resin.
If you have more questions about the workflow, make make sure to check our article FAQ: Injection Molding With 3D Printed Molds.
SLS 3D Printing vs. Injection Molding: When to Replace Molded Parts With 3D Printing?
This white paper showcases the cost-dynamics for real-life use cases, and presents guidelines for using SLS 3D printing, injection molding, or both.
Tips for Designers Trying DIY Injection Molding
When designing your mold, consider what will 3D print successfully, as well as what will mold successfully.
The exact approach to DIY injection molding will vary based on your desired design and volume, but these tips and tricks will help increase your success rate.
-
To reduce the visibility of print lines on the finished part, print the mold with a smaller layer height (50 or 25 microns per layer instead of the default 100). Note that this increases print time.
-
Adding two to five degrees of draft on surfaces perpendicular to the direction of pull will allow the part to be removed more easily and will minimize degradation of the mold.
-
You can polish split-plane surfaces with fine-grit sandpaper to reduce flash.
-
Consider using a water bath to more rapidly cool your part and reduce warping.
-
Embossed and engraved details should be offset from the surface by at least 1 mm.
-
If designing for an aluminum mold frame, add .125 mm of extra thickness to the back of the mold plates to account for compression forces and to ensure a complete seal.
For the complete process workflow and other best practices, download our white paper.
Low-Volume Rapid Injection Molding With 3D Printed Molds
Download our white paper for guidelines for using 3D printed molds in the injection molding process to lower costs and lead time and see real-life case studies with Braskem, Holimaker, and Novus Applications.
Breaking the Mold With 3D Printing
The conversation around 3D printing and injection molding is often oppositional, but it’s not always a question of one versus the other. By directly 3D printing parts or using 3D printed molds for injection molding for prototyping and low-volume production, you can leverage the benefits of both technologies. This will make your manufacturing process more time- and cost-efficient and allow you to bring products to the market faster.
Want to learn more about injection molding with 3D printed molds? Download our white paper for detailed guidelines for using 3D printed molds in the injection molding process and see real-life case studies with Braskem, Holimaker, and Novus Applications.
Not sure which 3D printing solution fits your business best? Book a 1:1 consultation to compare options, evaluate ROI, try out test prints, and more.