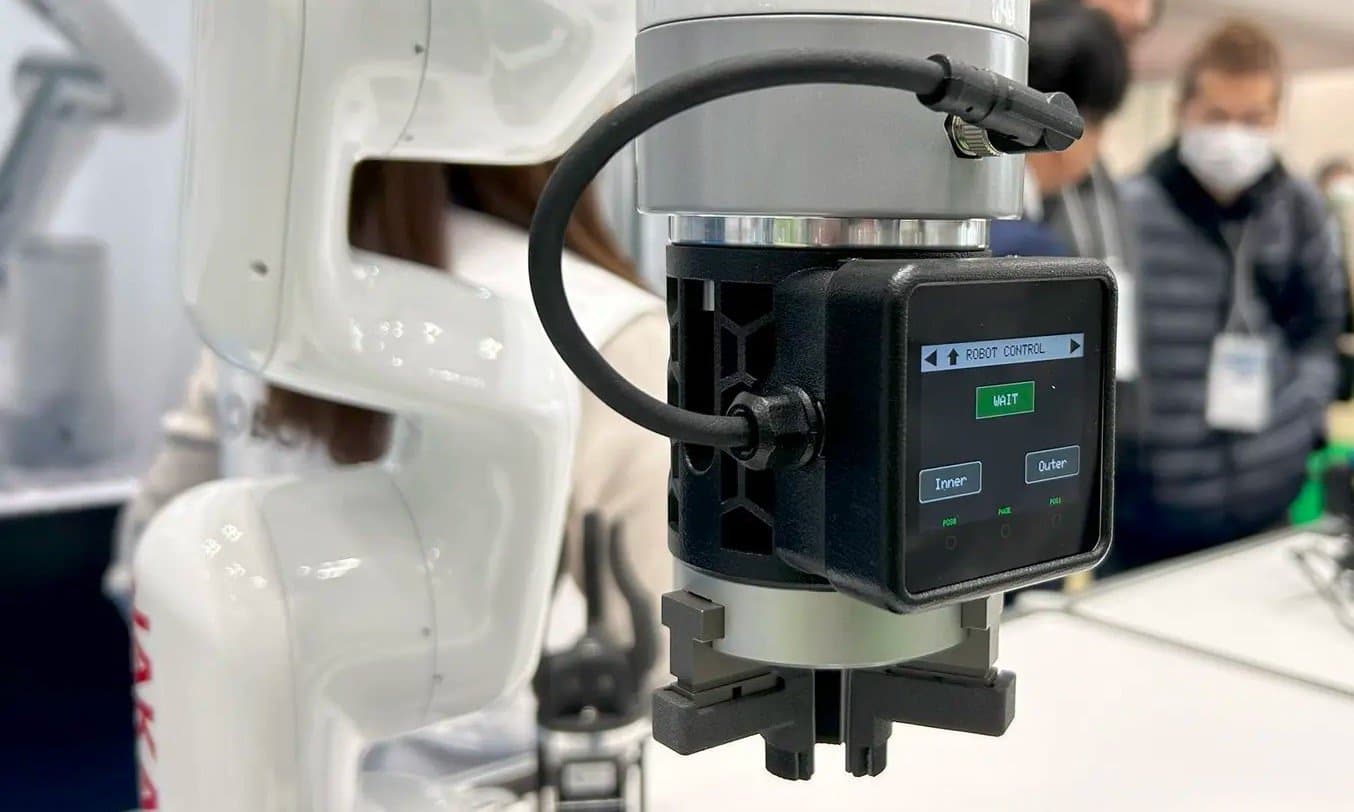
End-of-arm-tooling, or EOAT, refers to the component of a robotic system that interacts directly with the products the system is designed to move, alter, grab, or otherwise affect. EOAT is typically located at the end of a robotic arm, and typical functions include pick-and-place operations, welding, holding devices, and force sensors, among others.
As automation equipment has become nearly ubiquitous within large manufacturing operations, the need for high-quality, custom-designed EOAT has grown as well. EOAT often acts as the customized intermediary between a mass-produced robotic system and a manufacturer’s unique product or workflow.
This customization component makes 3D printing ideal for creating end-of-arm-tooling. Specifically, the material versatility of stereolithography (SLA) 3D printing and the durability and strength of selective laser sintering (SLS) 3D printing lend themselves well to creating end-use EOAT for use in industrial manufacturing scenarios.
Types and Applications of EOAT
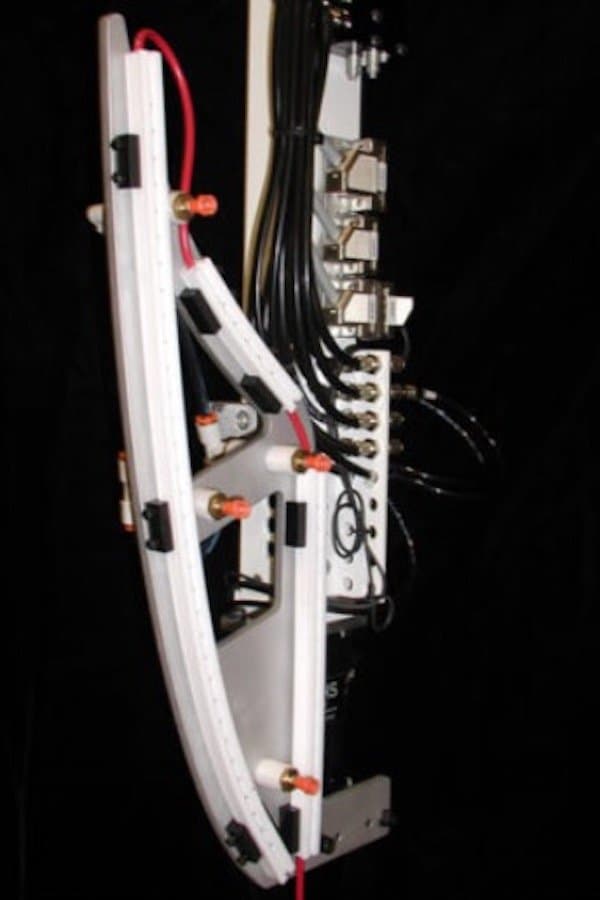
In-mold labeling (IML) decorating end-of-arm-tool (EOAT). Photo courtesy of Robotic Automation Solutions.
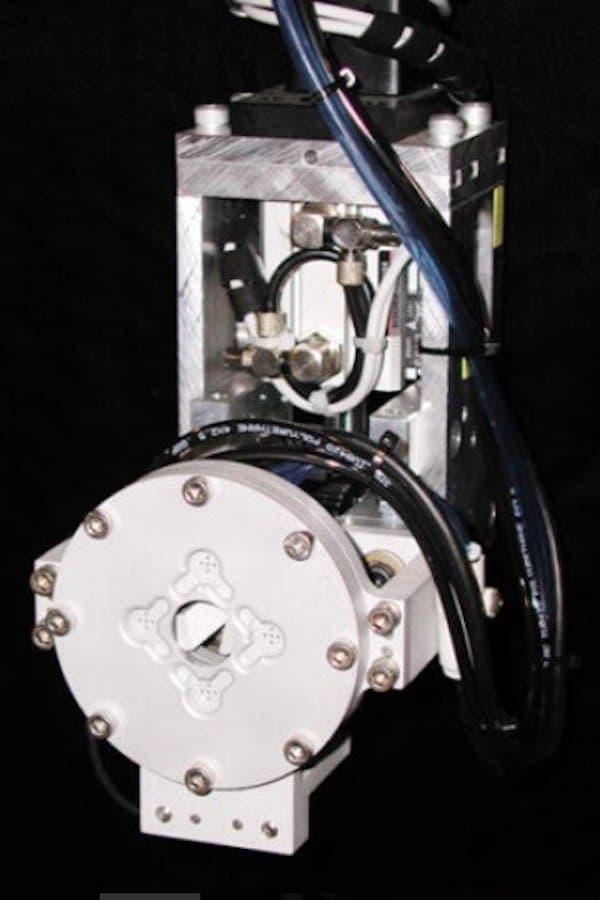
Vacuum placement end-of-arm-tool for picking up and moving small caps without the use of suction cups. Photo courtesy of Robotic Automation Solutions.
EOAT is often divided into three main categories: automation, process, and inspection or verification. Strong, durable EOAT in each of these categories can be a main driver of efficiency, productivity, and profitability for manufacturers.
| Automation EOAT | Process EOAT | Inspection and Verification EOAT |
|---|---|---|
| ‘Pick-and-place’ Grippers Magnets Vacuum/Suction | Welding (torch end) Cutting (blade end) Cleaning (pressurized air, etc) Painting or coating (nozzles and sprayers) | Vision Radiation Temperature Pressure |
The specific design and complexity of EOAT depends on the application it’s required to perform, the type of robot to which it’s attached, and the shape, weight, volume, and quantity of the items on which it’s performing the action.
For instance, a pick-and-place robot that moves a package from the end of a conveyor belt into a forklift bucket might use strong retractable ‘claw’ type EOAT if the package is heavy and rigid. For a small, lightweight package inside a padded envelope, the same pick-and-place robot might use end-of-arm-tooling with suction cups and pressurized air to lightly pick up the envelope and then drop it in the bucket.
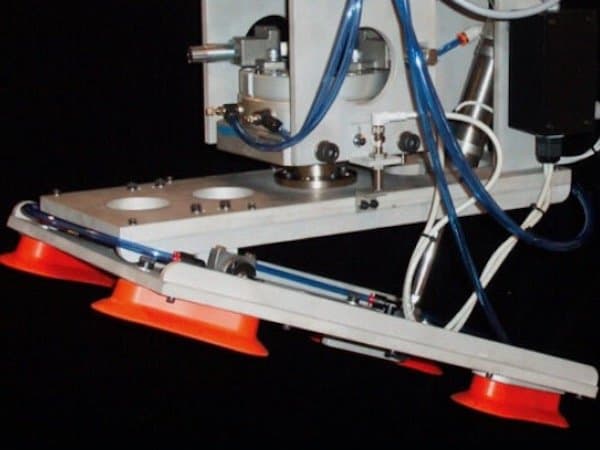
Vacuum cup systems end-of-arm-tooling made for picking up a 20-pound, 96-gallon waste container using four suction cups. Photo courtesy of Robotic Automation Solutions.
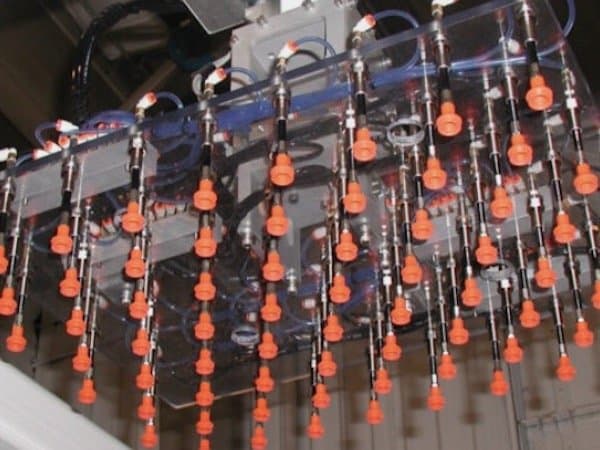
Vacuum cup systems end-of-arm-tooling made with 40 customized suction cups mounted to level compensators. Photo courtesy of Robotic Automation Solutions.
Though there are many different possible types of end-of-arm-tooling, the characteristics necessary for good performance are typically the same — highly accurate measurements that can hold tolerances and integrate successfully into the robotic system, light weight so that the robotic system does not have to allocate too much power and force to the tooling rather than the object, and strength, so that repeated actions does not wear on the tooling and cause breakage.
Robotic systems need power, and sometimes the EOAT needs its own power source, so that it can move independently of the larger robotic system. This can be done electrically or pneumatically, hydraulically, or through a combination of those methods. Electrically powered EOAT is typically used for lighter, more delicate operations, while hydraulic or pneumatic-powered EOAT is used in heavier industrial applications such as the automation industry.
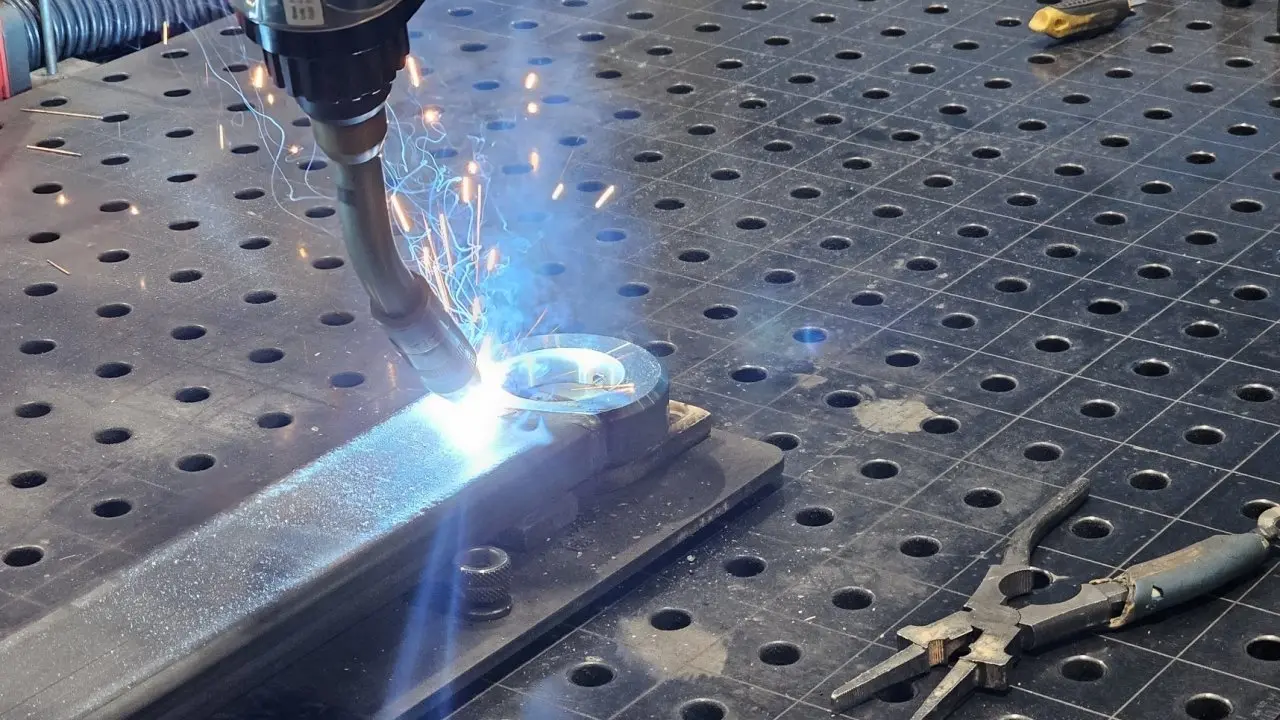
Quick Custom Welding Fixtures With 3D Printing
Discover how to streamline your tooling process to accelerate rapid prototyping and low-volume production of metal parts with quick and modulable welding fixtures. Our R&D machine shop coordinator shares methods and best practices for 3D printing welding fixtures, including design guidelines, tool temperature study, practical examples, and cost analysis.
Trends Driving EOAT Innovation
3D Printing
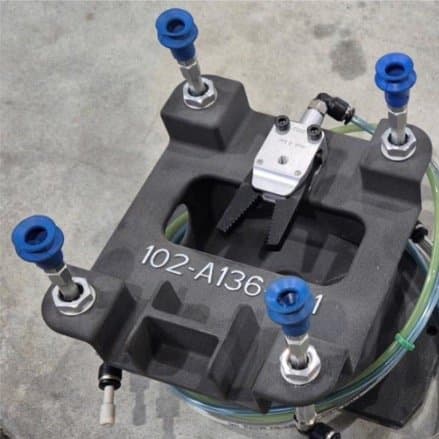
This end-of-arm-tooling plate designed and SLS 3D printed by Etienne Lacroix optimizes its geometry for lightweight strength.
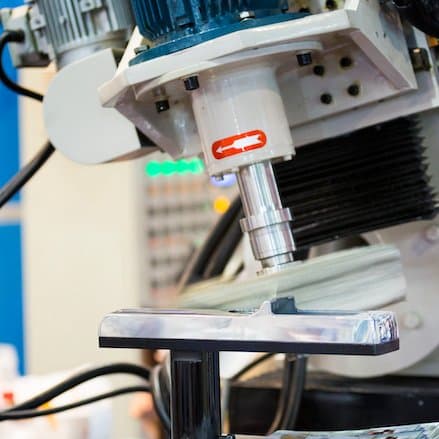
3D printing is an ideal technology for creating custom end-of-arm-tooling components for automotive robotic systems like this one, which is smoothing the surface of a part through a process called lapping.
The 3D printing industry has grown rapidly, apace with the automation and robotics industries. The two technologies complement and support each other, and 3D printing is being used increasingly as a fabrication method for strong, customized, lightweight EOAT. 3D printing is an ideal fit for creating EOAT because it excels in applications where on-demand replacement parts or customized enhancements are required.
3D printers themselves have become better suited to fulfilling these requirements as more durable technologies like SLS and MJF have become accessible, and as materials science has progressed, making materials like nylon, polypropylene, or TPU possible to 3D print into complex, custom shapes.
Perhaps the single largest pioneer in the application of robotic systems at an industrial scale, the automotive industry, has also championed 3D printing, and the two technologies have often been deployed together in automotive manufacturing and assembly applications. 3D printing helps manufacturers reconfigure their multi-million dollar robotic systems for each new make, model, or iteration of car, avoiding the need for costly metal tooling or CNC machining.
Main Reasons to 3D Print EOAT
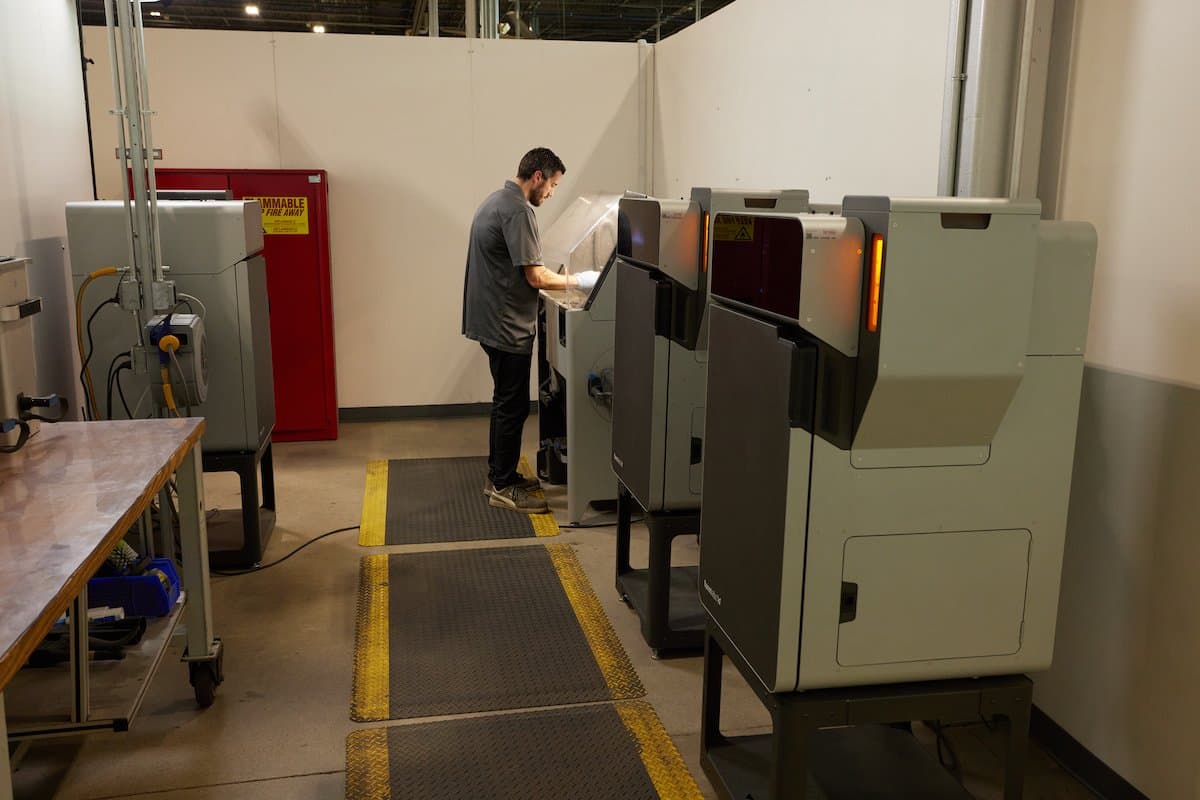
3D printers like Formlabs SLS Fuse Series can fit right into the shop floor workflow, delivering on-demand end-of-arm-tooling components within hours to minimize downtime. At Brose, the Fuse fleet responds to needs from the design department or the factory floor, creating end-of-arm-tooling components for many different departments and applications.
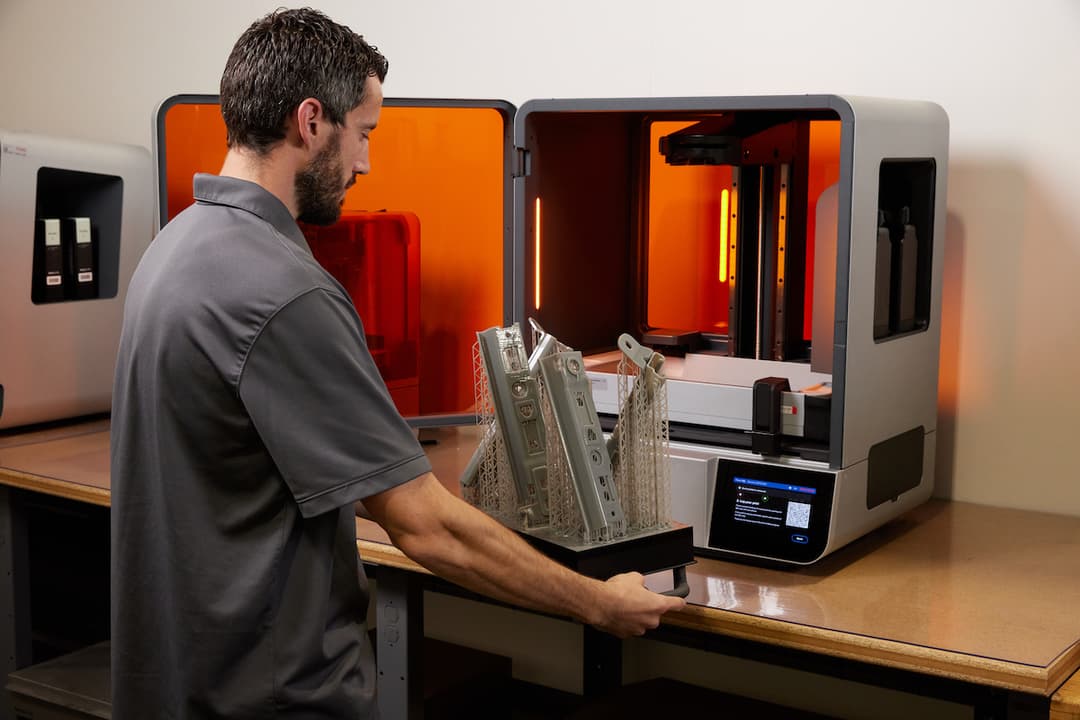
When a business needs an end-of-arm tool replaced, they need it right away, because in all likelihood, the lack of appropriate tooling is causing a stoppage in production and costing them money. 3D printing, especially accessible, in-house solutions like the Formlabs Form SLA Series or Fuse SLS Series, is the perfect fabrication method in these scenarios. The speed, material versatility, and range of build volumes and geometries make it easy for businesses to design a 1:1 replacement for their broken or worn down EOAT component, 3D print, and replace it within hours.
For enhancing end-of-arm-tooling and robotic systems through small tweaks and customized add-ons that improve function or productivity, 3D printing also excels. Soft 3D printed materials like Formlabs’ SLS TPU 90A Powder or SLA Silicone 40A Resin are useful when creating soft grippers or gripper coverings that reduce instances of damage to an object during pick-and-place or workholding operations. Other enhancements could be to protect the robot itself from damage and wear. Formlabs’ customer Stellantis prints small cages that protect the hoses on their painting robots from excessive friction. The small part requires high dimensional accuracy and strength, and was retrofitted onto the paint robot, making 3D printing an ideal solution for reducing shop floor costs and replacements.
Benefits of 3D Printing EOAT
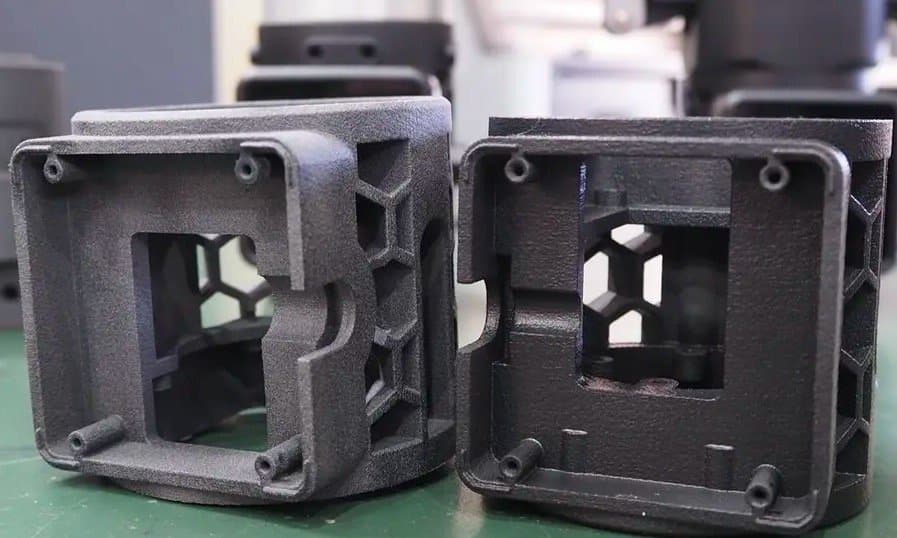
3D printed EOAT like this gripper by ARMA can optimize geometry for lightweight strength by removing material on the sides as part of this lattice pattern.
3D printing end-of-arm-tooling provides benefits similar to 3D printing for any manufacturing aid, rapid tooling, or end use part, but with the very important addition of the ability to fabricate lightweight designs.
- Lightweight design
- Agility and responsiveness
- Customization, design complexity
- Cost efficiency
3D printed EOAT can be strong and have complex geometries optimized for strength and stiffness in certain directions, without adding unnecessary weight or bulk to the tooling itself. Additionally, the ability to 3D print EOAT in-house greatly improves a manufacturer’s agility and responsiveness, and helps them avoid long lead times of outsourcing parts or getting replacements from their robotic systems’ OEMs. In terms of customization, certain EOAT has been designed to make it possible to cheaply mold or easily machine, rather than designing for optimum functionality and performance. 3D printing makes it possible to design each gripper, fixture, welder, arm, holder, etc., optimally for the job it needs to perform. The benefit of designing on-demand is that manufacturers can reduce their operating costs and avoid the expensive process of tooling or machining — instead, they can 3D print EOAT as needed, in their own workspaces.
Examples of 3D Printed End-of-Arm-Tooling
Heidelberg is the leading global manufacturer of offset printing presses — and though the idea of a printing press may sound historic, the methods Heidelberg uses to manufacture them are as modern as those found in any automotive or aerospace factory. They initially introduced 3D printing to optimize prototyping and product development by cutting costs and lead time, but today use 3D printed parts in serial production and as end-of-arm-tooling on their massive robotics systems.
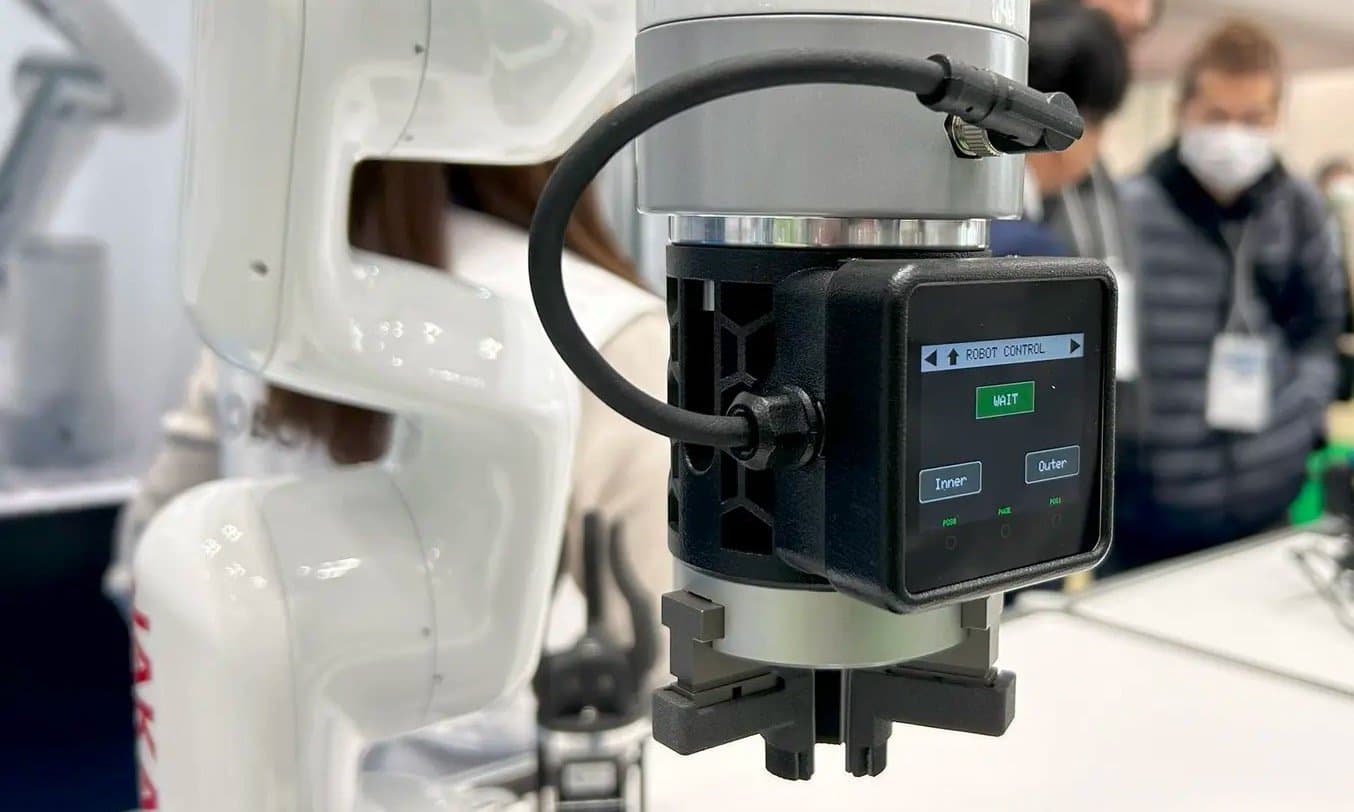
ARMA
At ARMA, the robotics branch of Japanese manufacturer FITCo., develops robotics systems for manufacturers in a range of industries. They leverage 3D printing to replace their traditional metal EOAT, mostly grippers, with 3D printed EOAT made from nylon and printed on the Fuse Series.
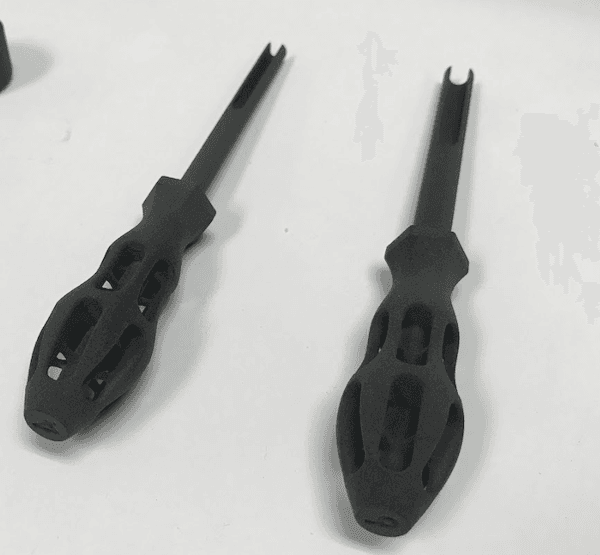
Tessy Plastics
A custom screwdriver fitting tool was created to remove rubber tubes from the pneumatic push-to-connect fittings. The strength of SLS parts allows custom tools to be created and in-use on the floor within a few days of conception. The fitting tool makes it easier to take the rubber tubes on and off, reducing damage to the fittings, which can cost $20–$30 each if they need to be replaced.
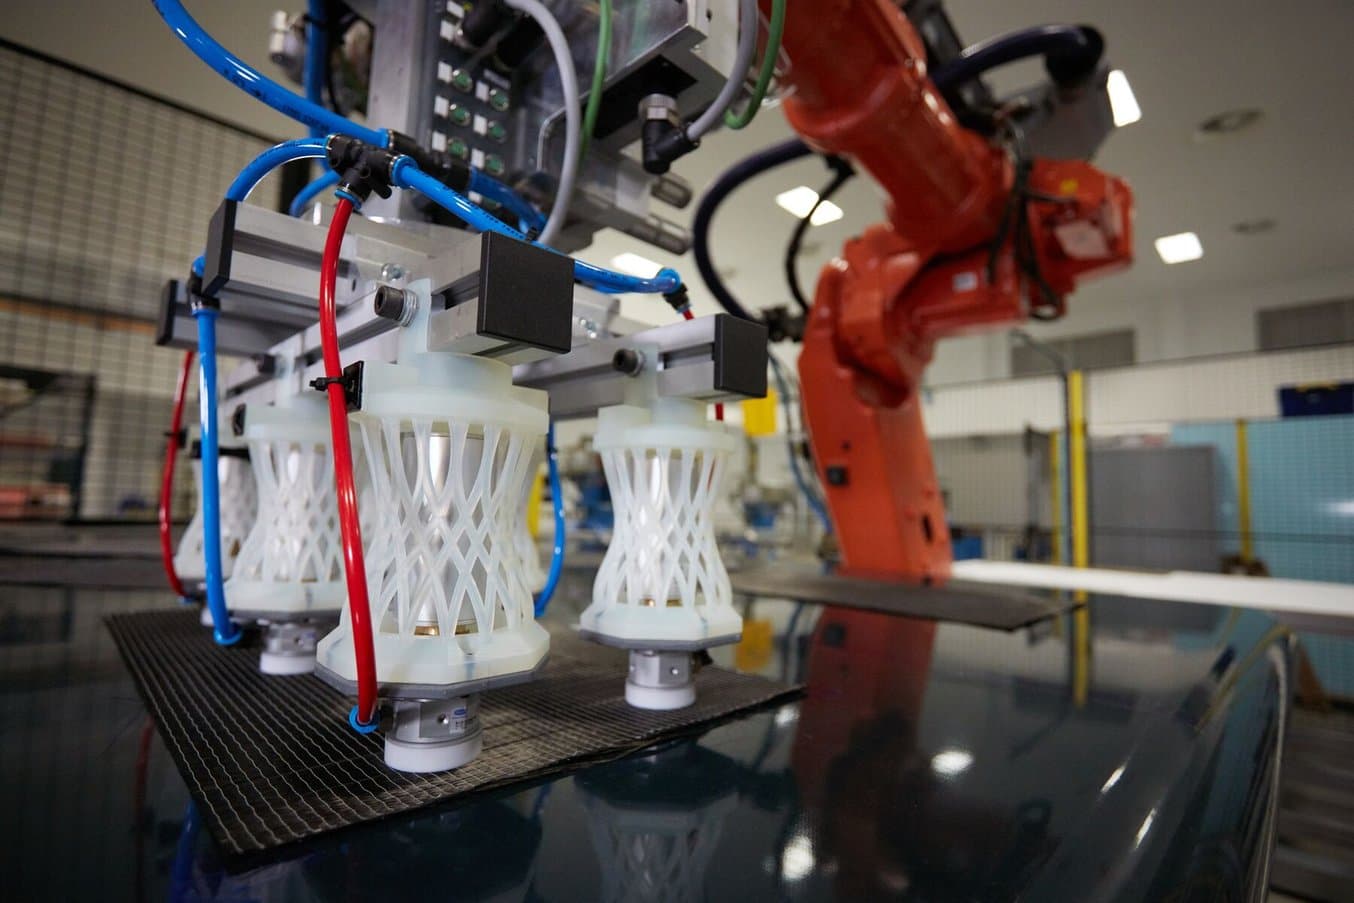
University of Sheffield Advanced Manufacturing Research Centre (AMRC)
Composites researchers at the University of Sheffield Advanced Manufacturing Research Centre (AMRC) developed and printed highly intricate brackets to replace the robot’s compressed air grippers that were worn. The latticed design and pliable SLA resin provide the right amount of springiness to accurately pick and place carbon fiber plies.
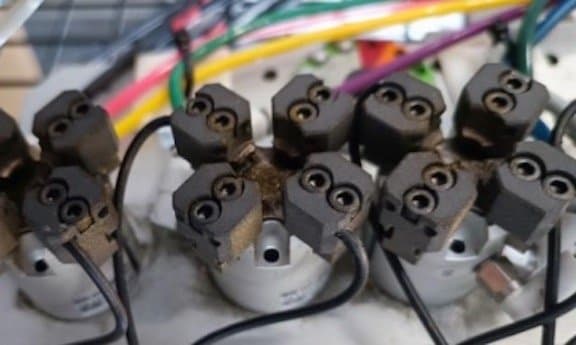
Etienne Lacroix
Etienne Lacroix’s plastics manufacturing arm, the MPM Company, uses the Formlabs Fuse Series SLS 3D printers to create custom, lightweight end-of-arm tooling (EOAT) that picks up heated metallic inserts. A robot with 32 jaws controls the parts by optical fiber. The grippers were 3D printed with the Fuse Series and Nylon 12 Powder.
Sensors Innovation and the Impact on EOAT
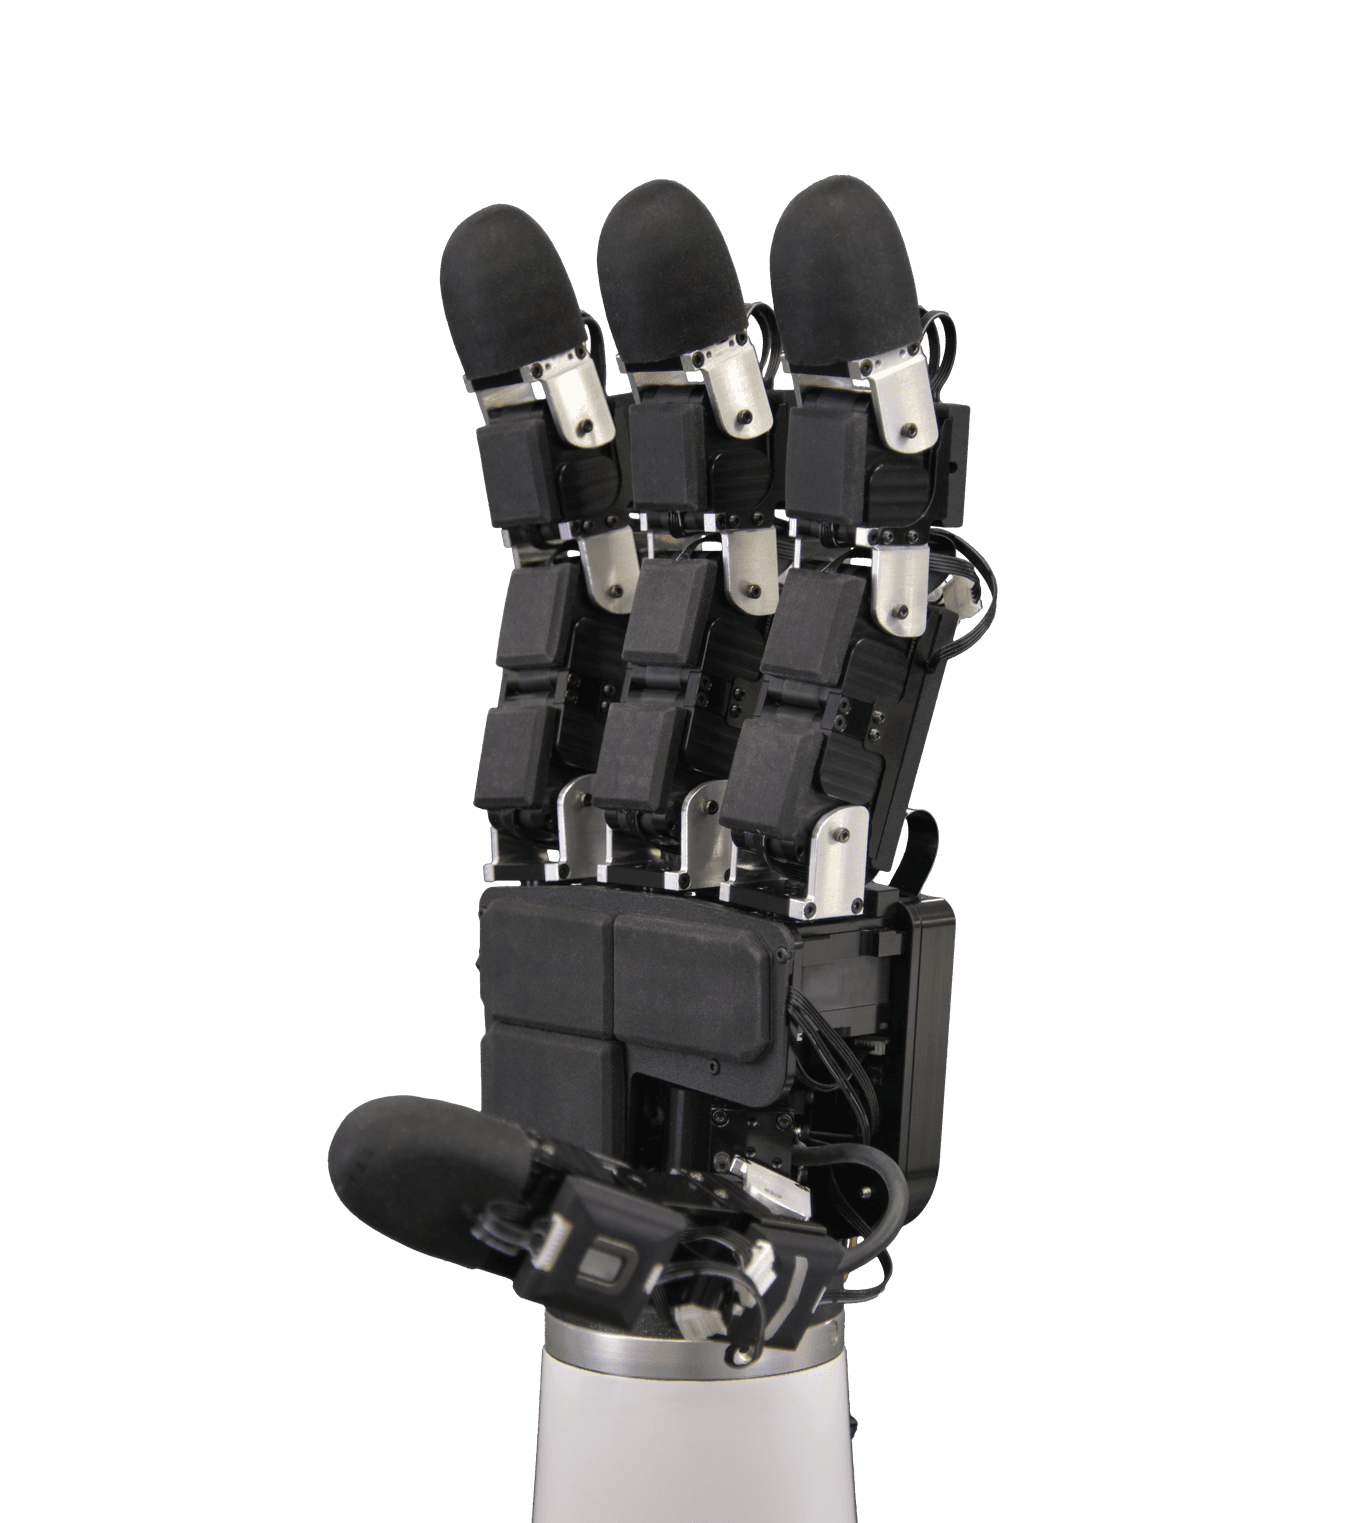
The advances made in sensor technology have made complex, humanoid robotics systems that can sense and react through contact, photoresistors, sound, and more, possible.
Another of the most crucial components of successfully integrated end-of-arm-tooling is the sensor system. After all, a robot cannot pick up, weld, grip, clean, or otherwise affect a part if it can’t ‘see’ it with a sensing system. But sensors aren’t just measuring and communicating visual data, sensor systems can gather all kinds of information, such as visible light, sound, temperature, contact and proximity, infrared red, and more.
Each type of sensor has benefited from technological advances that make them more powerful, precise, and consistent. Advances in the field of solar energy and the reliability of photovoltaic cells improve light sensors used in robotic solar systems. Contact sensors are extremely important for end-of-arm-tooling functions because they measure changes in velocity, position, acceleration, torque, or force between the object and the EOAT component. Magnetic field detection technology is used in proximity sensors. A robotic system may need to use all or most of these sensor types in order to perform a function correctly, and many times, much of the data it receives is collected or transmitted through the end-of-arm-tooling component. Sometimes, the sole function of the EOAT is to be a sensor itself, and transmit that information back to the main system.
Artificial Intelligence (AI) and End-of-Arm Tooling
Artificial intelligence (AI) makes automation and robotic systems more efficient and productive. End-of-arm-tooling both gathers data to feed into an artificially intelligent system and performs actions under commands from the system. The more precisely and reliably the EOAT integrates into the robot and interacts with the object, the higher the quality of data it feeds into the system.
As AI has become more sophisticated, it can create more complex and precise demands for robotic systems (and thus the EOAT that is part of those robotic systems) to perform. To manage that increased level of complexity, it’s necessary to dial in the dimensional accuracy of EOAT components as well as the smooth functioning of their actuators, their strength, reliability, resistance to creep, and optimal coefficient of friction.
EOAT Design: How to Design Faster with 3D Printing
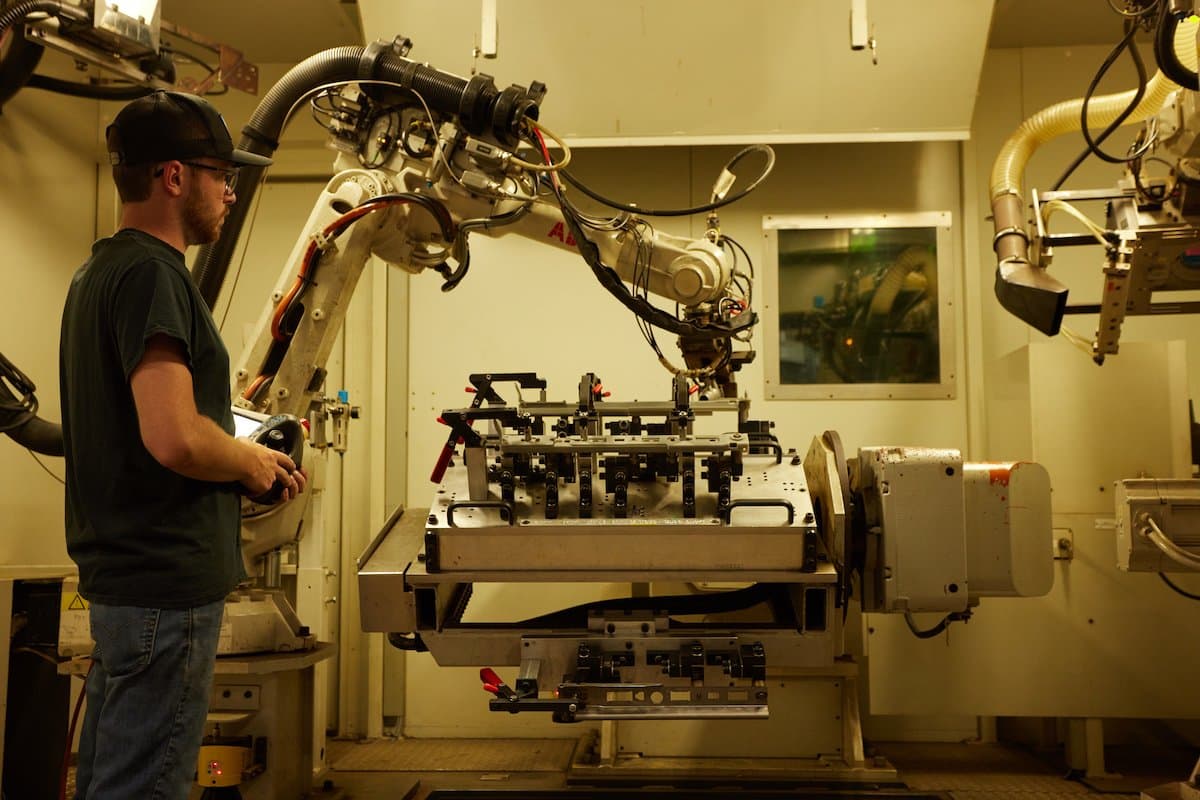
Choosing the right printer and material depends on application, environment, desired result, and many other factors. This welding robot used by Brose has a custom EOAT welding torch tip on it, made of metal, but surrounding jigs and fixtures are 3D printed in heat-resistant plastic.
3D printing makes designing and fabricating end-effectors easier and enables more complex, optimized solutions. 3D printed EOAT can increase efficiency and productivity — and can even speed up the design process.
The three main types of 3D printers are fused deposition modeling (FDM), stereolithography (SLA) and selective laser sintering (SLS). Each technology can be used for creating strong, customized, and effective end-of-arm-tooling, though each has unique strengths that lend themselves better to some applications.
FDM 3D printers excel at producing fast, inexpensive parts that are ideal for modeling and prototyping. For making mock-ups of end-of-arm-tooling to validate measurements or workflows, FDM is a great choice, and offers industry-familiar materials like ABS, so finite element analyses are possible. However, FDM 3D printers extrude filament layer by layer, creating minuscule air pockets in between layers in the Z direction — this can cause delamination when force is applied in that direction, and may make FDM EOAT components unsuitable in some contexts.
SLA 3D printers create parts by curing layers of liquid resin in the desired shape, layer by layer, with heat or light. The curing process creates isotropic parts, unlike FDM 3D printers, so SLA 3D printed EOAT can withstand multi-directional stressors equally. SLA 3D printers come in a range of build volumes and price points. Low-cost desktop resin printers are available for $200 to $1000, while professional options range from $2,500 to $10,000 and build volumes are more than suitable for the vast majority of end-of-arm-tooling components.
SLS 3D printers are being found more and more in manufacturing environments for 3D printed EOAT. The strength of SLS 3D printed parts and the material properties of nylon, the most common SLS material, streamlines SLS 3D printed EOAT’s integration into existing robotic systems. Additionally, elastomeric materials like Formlabs’ TPU 90A Powder are ideal for producing customized, geometrically complex soft grippers, one of the biggest applications for 3D printed EOAT.
| Fused Deposition Modeling (FDM) | Stereolithography (SLA) | Selective Laser Sintering (SLS) | |
|---|---|---|---|
| Resolution | ★★☆☆☆ | ★★★★★ | ★★★★☆ |
| Accuracy | ★★★★☆ | ★★★★★ | ★★★★★ |
| Surface Finish | ★★☆☆☆ | ★★★★★ | ★★★★☆ |
| Throughput | ★★★☆☆ | ★★★★☆ | ★★★★★ |
| Complex Designs | ★★★☆☆ | ★★★★☆ | ★★★★★ |
| Ease of Use | ★★★★★ | ★★★★★ | ★★★★☆ |
| Pros | Low-cost consumer machines and materials Fast and easy for simple, small parts | Great value High accuracy Smooth surface finish Fast printing speeds Range of functional applications | Strong functional parts Design freedom No need for support structures |
| Cons | Low accuracy Low details Limited design freedom | Some materials are sensitive to long exposure to UV light | Slightly rough surface finish Limited material options |
| Applications | Concept modeling Rapid prototyping Functional prototyping Manufacturing aids | Concept modeling Rapid prototyping Functional prototyping Rapid tooling Manufacturing aids Low volume, bridge, or custom manufacturing Dental models and appliances Medical models and medical devices Jewelry prototyping and casting Models and props | Rapid prototyping Functional prototyping Low volume, bridge, or custom manufacturing Long-lasting, durable manufacturing aids Medical devices, prosthetics, and orthotics |
| Print Volume | Up to 300 x 300 x 600 mm (desktop and benchtop 3D printers) | Up to 353 x 196 x 350 mm (desktop and benchtop 3D printers) | Up to 165 x 165 x 300 mm (benchtop industrial 3D printers) |
| Materials | Standard thermoplastics, such as ABS, PLA, and their various blends. | Varieties of resin (thermosetting plastics). Standard, engineering (ABS-like, PP-like, flexible, heat-resistant, rigid glass-filled), castable, and dental and medical (biocompatible). Pure silicone and ceramic. | Engineering thermoplastics. Nylon 12, nylon 11, glass or carbon-filled nylon composites, polypropylene, TPU (elastomer). |
| Training | Minor training on build setup, machine operation, and finishing; moderate training on maintenance. | Plug and play. Minor training on build setup, maintenance, machine operation, and finishing. | Moderate training on build setup, maintenance, machine operation, and finishing. |
| Facility Requirements | Air-conditioned environment or preferably custom ventilation for desktop machines. | Desktop and benchtop machines are suitable for an office environment. | Workshop environment with moderate space requirements for benchtop systems. |
| Ancillary Equipment | Support removal system for machines with soluble supports (optionally automated), finishing tools. | Washing station and post-curing station (both can be automated), finishing tools. | Post-processing stations for powder management and part cleaning. |
| Equipment Costs | Budget FDM printers and 3D printer kits start at around $200. Professional desktop FDM printers range from $2,000 to $8,000, and industrial systems are available from $15,000. | Low-cost resin 3D printers are available for $200 to $1000, professional SLA 3D printers are in the $2,500 to $10,000 range, and large-format resin 3D printers are in the $5,000 to $25,000 range. | Benchtop industrial SLS 3D printers start just under $30,000 for the printer and $60,000 for the entire ecosystem, including powder management and cleaning stations. Traditional industrial SLS printers start at around $200,000. |
| Material Costs | $50-$150/kg for most standard filaments, and $100-$200/kg for support materials or engineering filaments. | $100-$200/L for most standard and engineering resins, $200-$500/L for biocompatible materials. | $100/kg for nylon. SLS requires no support structures, and unfused powder can be reused, which lowers material costs. |
| Labor Needs | Manual support removal (can be mostly automated for industrial systems with soluble supports). Lengthy post-processing is required for a high-quality finish. | Washing and post-curing (both can be mostly automated). Simple post-processing to remove support marks. | Simple and semi-automated workflow for cleaning parts and recovering powder. |
Step-By-Step Guide to Designing and 3D Printing EOAT
- Identify an area for improvement: e.g., paint hoses or weld torches that could be angled differently, grippers that need more flexibility, heavy components that could be optimized for lightweight strength, etc.
-
Digitize existing tooling designs with reverse engineering to move to a digital inventory, or identify tooling needs and design new files.
-
Leverage design process to add or remove material/weight where possible
-
Take your existing file and remove weight where possible through generative design, hollowing, or creating lattice shapes.
-
While not thinner than metal, SLA and SLS 3D printers enable more complex shapes and smoother finishes without additional machining, which can improve performance and reduce costs.
-
-
Futureproof your parts by adding weight to surfaces that experience wear and tear or frequent friction.
-
-
Combine disparate assembly components for improve efficiency through living hinges, snap fit joints, and complex geometries.
-
Consider modularity and ergonomics for ease of installation and removal. Features like grips, contours, or screw threads can make installation and eventual replacement faster and easier.
-
Export your design into a 3D printing software like Formlabs’ Preform, and select a material.
-
Consider material demands like weight, stressors, impact-resistance, UV-resistance, chemical exposure, etc. Compare material properties and evaluate SLA resins and SLS powders for utility in your application.
-
-
Send your part to the printer, post-process, and install your EOAT component.
3D Printing End-of-Arm-Tooling
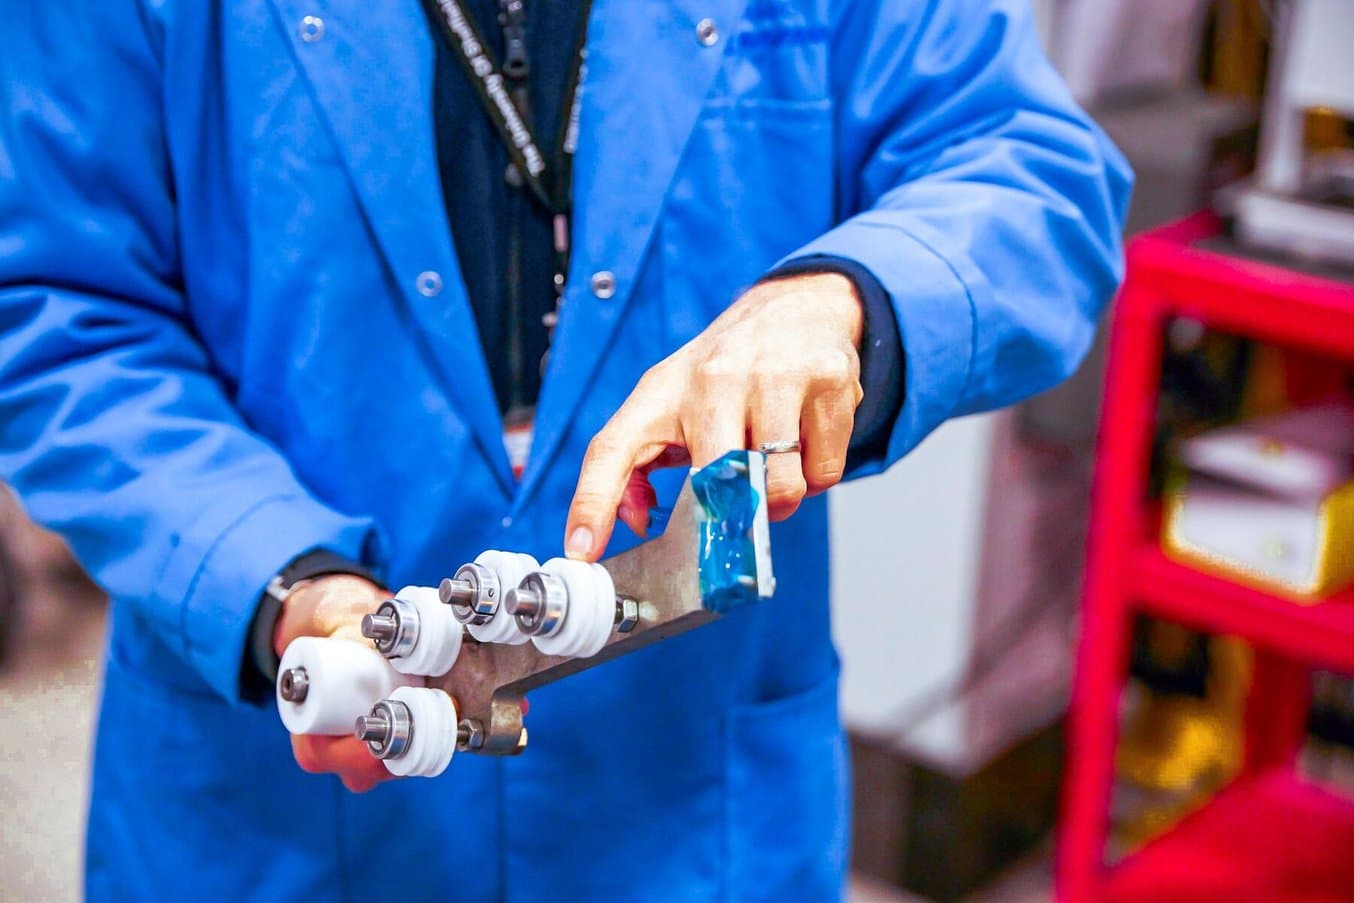
SLA 3D printed EOAT like these white rollers help AMRC optimize the efficiency of their customers’ heavy industrial systems.
EOAT is essential for manufacturing systems to operate their robotic workflows efficiently and safely. Combined with other advanced technologies like artificial intelligence and improvements made to vision and sensing technology, 3D printing is shaping the future of automation.
Robots are becoming more capable and complex and need customized, advanced tooling that can match their gains in efficiency. Traditional EOAT, made from metal or injection molded plastics, can be heavy, cumbersome, or simplistically designed, leading to inefficiencies and unnecessary weight on the robotics systems.
3D printing presents an alternative to traditional methods of fabricating end-of-arm-tooling. 3D printed EOAT can be optimized for strength without adding weight, it can be produced quickly on-demand which increases agility and reduces downtime, and it can be iterated for process improvements and upgrades without adding high tooling costs to a manufacturer’s bottom line.
To test the strength of our 3D printed resins or powder, request a free sample. To get one of your EOAT components printed as a custom sample, contact our sales team.
