Silikonkautschuk ist ein vielseitiges Material, das sich aufgrund von mechanischen Eigenschaften wie Hitzebeständigkeit und Biokompatibilität hervorragend für Anwendungen in der Medizin eignet. Von maßgefertigten Hörgeräten bis hin zu speziellen Griffen für medizinische Geräte, weichen anatomischen Modellen und Prothetik – Silikon ist ein wichtiges Material für die Gesundheitsbranche.
In diesem Leitfaden zeigen wir Ihnen, wie das Ecosystem von Formlabs eingesetzt werden kann, um echte Silikonteile für Anwendungen im Gesundheitswesen zu erstellen. Um den vollständigen Arbeitsablauf sowohl für den Druck mit Silicone 40A Resin als auch für den Silikonguss mithilfe von Formlabs' SLA-3D-Druckern (Stereolithografie) kennenzulernen, laden Sie unser Whitepaper herunter.

Expertenteam kontaktieren
Ob Sie patientenspezifische chirurgische Instrumente erstellen möchten oder Prototypen kardiologischer Medizinprodukte anfertigen: Wir stehen Ihnen zur Seite. Hinter Formlabs Medical steht ein engagiertes Spezialistenteam, das Sie und Ihr Unternehmen bei Bedarf mit professioneller Hilfe unterstützt.
Fertigung von Silikonteilen
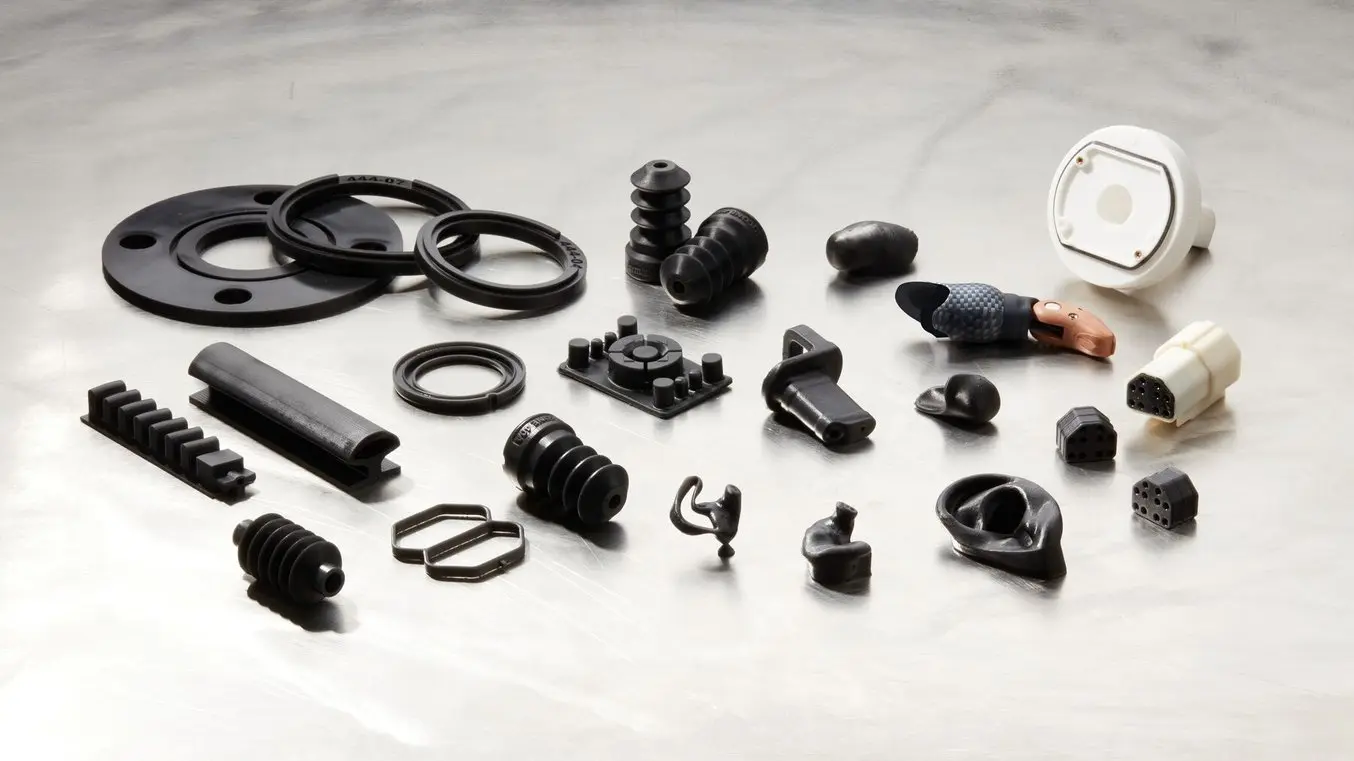
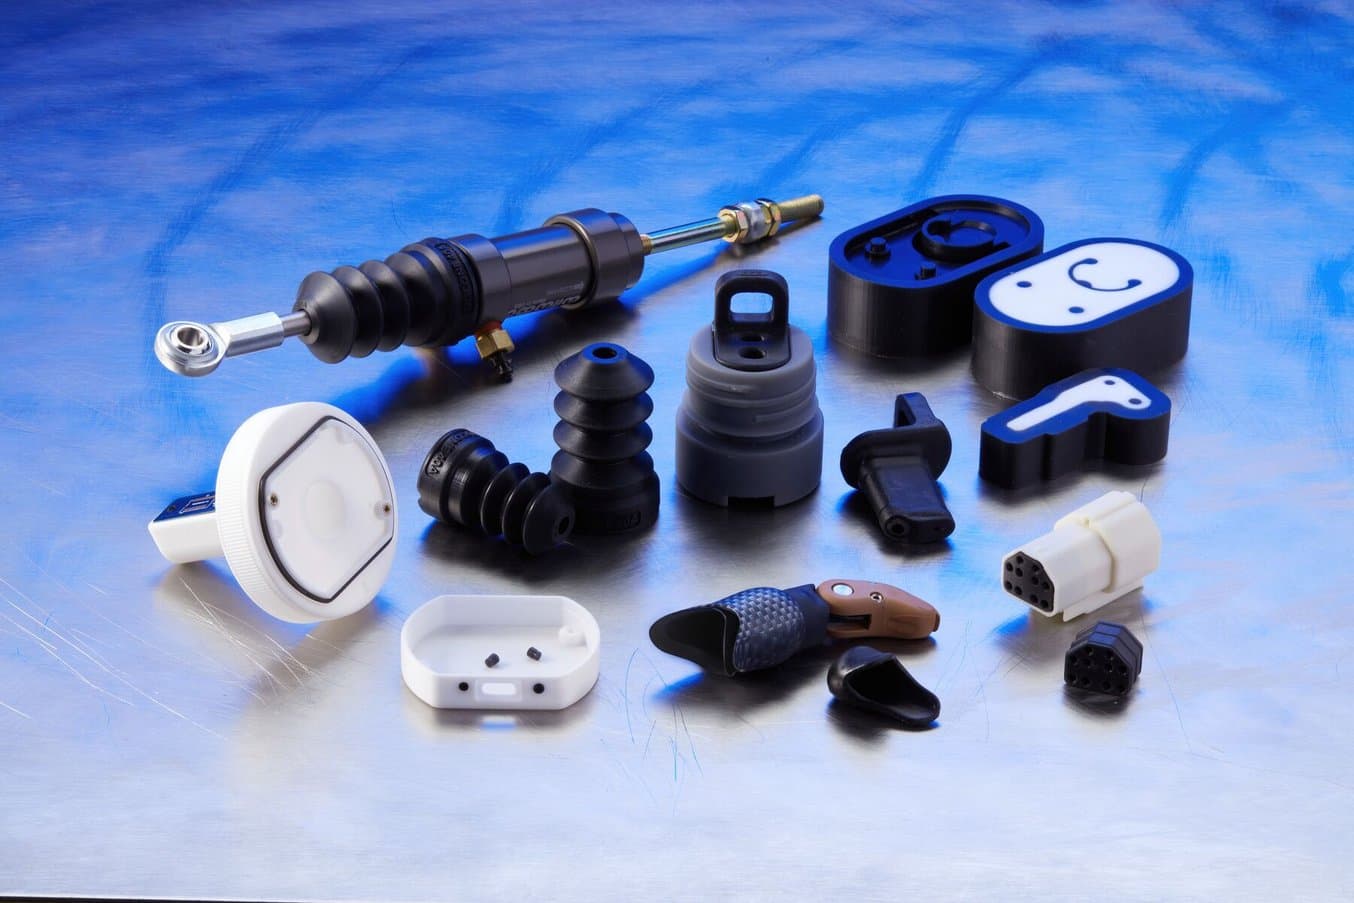
Weiche, gummiartige Teile kommen im gesamten Gesundheitswesen zum Einsatz, von weichen Anatomiemodellen bis hin zu Prothetik und anderen Wearables. Robuste, biegsame und dehnbare Teile aus echtem Silikon lassen sich mithilfe von zwei Methoden in das Fertigungsportfolio integrieren: durch direkten 3D-Druck mit Silicone 40A Resin oder Silikonguss mit SLA-3D-gedrucktem Werkzeug.
Silikon ist ein beliebtes Material zur Herstellung weicher Medizinprodukte für die Endverwendung. Es kann auch zur Herstellung von weichen Formwerkzeugen für den Guss harter Materialien verwendet werden, ein Verfahren, das als „Silikonformenbau“ bekannt ist. Dieser Leitfaden behandelt nur die Fertigung von Silikonteilen, bei der weiche, gummiartige Teile durch den direkten 3D-Druck mit SIlicone 40A Resin oder durch Gießen von Silikon in 3D-gedruckte Formwerkzeuge hergestellt werden. Weitere Informationen über die Fertigung harter Teile mittels Silikonformenbau finden Sie im entsprechenden Leitfaden.
Unser Whitepaper beinhaltet Beispiele für die Produktion von Silikonteilen mit einer Vielzahl von Methoden. Dazu gehören:
-
Direkter 3D-Druck von Silikon: Teile aus Silikon werden mit Silicone 40A Resin direkt auf den Kunstharz-3D-Druckern Form 3/B/+ hergestellt. Diese Methode eignet sich am besten für die Herstellung komplexer Geometrien, die durch Gussprozesse nicht erreicht werden können.
-
Formpressen von Silikonmasse: Schnell aushärtende Silikonmasse wird in zwei Hälften einer 3D-gedruckten Form gefüllt, welche mit einem Schraubstock zusammengepresst werden. Diese Methode wird häufig für die Prototypen von Dichtungen angewandt und kommt dem in der Massenproduktion eingesetzten Werkzeug sehr nahe.
-
Form zum Einspritzen flüssigen Silikons: Dies ist die gängigste Methode zum Formen eines durchgängigen Prototypteils aus Silikon mit einer zwei- oder mehrteiligen Form. In vielen Fällen wird der Prozess des Befüllens mit Silikon aufgrund des Formdesigns durch die Schwerkraft unterstützt. Das Silikon wird über einen Kanal am oberen Ende der Form eingefüllt und der Hohlraum der Form füllt sich von unten stetig auf. Am Ende tritt flüssiges Silikon durch Auslässe und Luftkanäle am oberen Ende der Form aus.
-
Umspritzen zur vollständigen oder partiellen Umhüllung von festen Einlegeteilen mit Silikon: Ein festes Teil wird in eine zwei- oder mehrteiligen Form eingesetzt. Anschließend wird flüssiges Silikon in den Hohlraum der Form eingespritzt, sodass es das Einlegeteil zum Teil oder vollständig umschließt.
-
Verlorene Formen für individuelle Teile aus Silikon: Die Form ist hierbei eine dünne, eierschalenartige Hülle (< 1 mm), die den Hohlraum für den Silikonguss lückenlos umschließt. Nachdem das Silikon ausgehärtet ist, wird die 3D-gedruckte, schalenartige Form zerbrochen und abgelöst, um das Silikonteil freizugeben. Da eine solche verlorene Form nicht wiederverwendet werden kann, wird diese Technik nur für einzelne, kundenspezifische Teile angewandt. Einen detaillierten Schritt-für-Schritt-Leitfaden zur Fertigung von verlorenen Eierschalenformen finden Sie hier, mit Fokus auf Otoplastiken aus Silikon.
Die verschiedenen Methoden für Design, Druck und Guss haben branchen- und anwendungsübergreifend einige grundlegende Schritte gemeinsam. In unserem Whitepaper stellen wir an einem ausführlichen Beispiel das Design einer Form zum Einspritzen von Silikon vor, wobei wir auch auf Tipps und bewährte Praktiken von unseren Kunden eingehen.
Arten von Silikon
Silikone sind eine Gruppe von Polymeren, deren Molekülketten die Elemente Silizium und Sauerstoff enthalten und die sich beim Aushärten von einem Gel oder einer Flüssigkeit in einen sehr biegsamen und dehnbaren Feststoff verwandeln. Sie sind vielseitige Materialien mit Hochleistungseigenschaften wie hervorragender elektrischer Isolierung, Hitzebeständigkeit, chemischer Beständigkeit, hoher Reißfestigkeit und Biokompatibilität, weshalb sie in anspruchsvollen Branchen wie dem Gesundheitswesen sehr beliebt sind.
Silikon-Elastomere sind auf dem Markt dominant und lassen sich in drei Kategorien einteilen:
-
Flüssigsilikone (Liquid Silicone Rubbers, LSR) sind hochleistungsstarke Silikone, die für gewöhnlich zur Herstellung starker technischer Komponenten mit engen Toleranzen genutzt werden, wie etwa Dichtungen oder elektrischer Anschlüsse. Sie werden unter hohen Temperaturen verarbeitet, oft mittels Spritzguss, und kommen in der Großserienproduktion zum Einsatz.
-
Hochtemperaturvernetzende Silikone (HTV) oder auch Heat Cured Rubber (HCR-Silikone) bieten eine erstklassige Beständigkeit gegenüber Temperaturen und Alterung und eignen sich daher ideal für Kabel oder Isolierungen in Medizinprodukten. Sie werden meist mittels eines Platinkatalysators ausgehärtet und erhalten ihre Form durch Extrusion oder Formpressen mit Vulkanisation unter Druck und Hitze. Entdecken Sie, wie der Silikon-Experte SIOCAST HTV-Silikonformen um 3D-gedruckte Urmodelle herum formt.
-
Raumtemperaturvernetzende Silikone (RTV) sind verhältnismäßig einfacher zu verarbeiten und bieten hervorragende mechanische und thermische Eigenschaften, die sich gut für Dichtungen und Medizinprodukte sowie die Ummantelung elektrischer Komponenten und den Formenbau eignen. Die Formgebung erfolgt bei Raumtemperatur, für gewöhnlich durch Spritzguss, Formpressen oder Guss.
In diesem Bericht behandeln wir Anwendungen mit RTV-Silikonen. Wir gehen auf Techniken ein, die in jeder Anlage für das Prototyping oder die Produktentwicklung betriebsintern durchgeführt werden können. Einige spezifische Arten von RTV-Silikonen sind folgende:
-
Silicone 40A Resin: Silicone 40A Resin ist ein RTV-Silikon aus einer Komponente und ergibt Teile aus 100 % Silikon mit erstklassiger Elastizität, Chemikalienbeständigkeit und thermischer Stabilität. Die Teile werden direkt auf dem Form 3/3B gedruckt und mit einem Gemisch aus Isopropylalkohol (IPA) und Essigsäure-n-butylester sowie anschließend mit Wasser, Hitze und UV-Licht nachbearbeitet.
-
Flüssige RTV-Silikone: Flüssige Silikone bestehen in der Regel aus zwei Komponenten oder einer Komponente mit einem Zusatz geringer Mengen eines Katalysators. Es gibt zwei gemeinhin verfügbare Kategorien. Platinkatalysierte Silikone kosten mehr, bieten aber eine bessere langfristige Formbeständigkeit bei sehr geringfügiger Schrumpfung nach der vollständigen Aushärtung. Zinnkatalysierte Silikone sind kostengünstiger, aber langfristig weniger beständig, und neigen zu stärkerer Schrumpfung. Die Aushärtezeit liegt zwischen zehn Minuten und mehreren Stunden.
-
Polydimethylsiloxan (PDMS): PDMS ist ein flüssiges RTV-Silikon mit spezifischer chemischer Struktur, das in der Polymerkette aus Silizium und Sauerstoff auch Methylgruppen enthält. Dieses flüssige Polymer wird weitläufig als Schmiermittel oder als viskoser Zusatzstoff in Konsum- oder Industriegütern verwendet. In ausgehärteter Form kommt PDMS in einer Reihe von Forschungsanwendungen zum Einsatz. Seine hohe optische Transparenz und die Fähigkeit, auch kleinste Oberflächenstrukturen und Kanäle abzubilden, machen PDMS perfekt für die Mikrofluidik und weiche Lithografie. Viele Formulierungen von PDMS härten bei Raumtemperatur innerhalb von 48 Stunden aus oder können bei erhöhter Temperatur in weniger als einer Stunde ausgehärtet werden.
-
Silikonmasse: Hierbei handelt es sich um Zwei-Komponenten-Kitt, dessen Komponenten von Hand zu gleichen Anteilen vermischt werden. Der in diesem Bericht behandelte Silikonkitt besitzt eine Shore-Härte von 40A (siehe untenstehende Skala), was etwa der Härte eines Radiergummis entspricht. Diese Art von Silikon kann im Schmuckfachhandel erworben werden und wird häufig zur Herstellung von Wachsmodellen für den Metallguss verwendet. Das Silikon selbst dient jedoch gut zur Nachbildung formgepresster Dichtungen.
Haut- und Schleimhautverträglichkeit und Lebensmittelechtheit
Manche Anwendungen erfordern mehr Vorsicht als andere, wenn es um Kontakt mit dem menschlichen Körper oder mit Nahrungsmitteln geht. Überprüfen Sie stets das Materialsicherheitsdatenblatt des Silikonherstellers, um zu gewährleisten, dass der Einsatz für Ihre Anwendung ungefährlich ist. Beachten Sie, dass flüssige Zwei-Komponenten-Silikone, die als hautverträglich ausgewiesen sind, für gewöhnlich einen Platinkatalysator nutzen.
Silicone 40A Resin wird derzeit gemäß ISO 10993-1 für die folgenden Biokompatibilitätsendpunkte als Produkt mit Hautkontakt bewertet: ISO 10993-5:2009, 10993-23-2021:2021, ISO 10993-10:2021.
Shore-Härteskala
Gummiartige Materialien wie Silikonkautschuke können für verschiedene Härtegrade formuliert werden, die von sehr weich bis sehr hart reichen. Dies wird durch den jeweiligen Wert auf der Shore-Härteskala angezeigt. Weichere Materialien werden auf der Shore-Härteskala A gemessen, härtere auf der Shore-Härteskala D. Die untenstehende Tabelle liefert einen hilfreichen Vergleich mit gängigen Haushaltsgegenständen.

Entscheidung zwischen Druck und Guss
Ob der direkte 3D-Druck oder sonstige Formverfahren für Silikon für Sie optimal sind, hängt von den spezifischen Anforderungen Ihrer Anwendung oder Ihres Arbeitsablaufes ab. Folgende Charakteristika der einzelnen Methoden sollten berücksichtigt werden:
-
Komplexe Geometrien: Nicht alle Geometrien sind durch Gussverfahren realisierbar. Bei Anwendungen, die komplexe Geometrien erfordern, ist der direkte 3D-Druck vorzuziehen.
-
Farbe: Silicone 40A Resin ist schwarz. Für Anwendungen, die transparente oder farbige Teile erfordern, kann der Silikonguss eine bessere Wahl sein.
-
Dauer: Das Entwerfen von Teilen für den direkten 3D-Druck geht schneller als das Formdesign. Weiterhin beansprucht der Druck eines einzelnen Silikonteils deutlich weniger Zeit als der Druck einer Form und deren Ausgießen mit Silikon. Wenn die Zeit begrenzt ist, bietet sich in der Regel der direkte 3D-Druck an.
-
Geruch: Bei Druckabschluss weist Silicone 40A Resin einen Geruch auf, der erst nach einer gewissen Zeit verzieht. Dies lässt sich durch die Nachhärtung des Teils in einer Mischung aus Wasser und dem Raumerfrischer Febreze HD beschleunigen. Dennoch sollte der Silikonguss womöglich vorgezogen werden, wenn der Geruch des Materials für die Anwendung unmittelbar von Bedeutung ist.
-
Biokompatibilität: Verschiedene Arten von Silikon weisen unterschiedliche Grade von Biokompatibilität auf. Silicone 40A Resin wird derzeit gemäß ISO 10993-1 auf seine Hautverträglichkeit geprüft. Für Anwendungen, die einen höheren Grad an Biokompatibilität erfordern, bietet sich der Silikonguss womöglich eher an.
-
UV-Einstrahlung: Die mechanischen Eigenschaften von Silicone 40A Resin verschlechtern sich bei wiederholter Einwirkung von UV-Licht. Für Anwendungen, bei denen die Teile häufig direktem Sonnenlicht ausgesetzt werden, stellt der Silikonguss vermutlich die bessere Alternative dar.
Für medizinische Anwendungen, in denen gummiartige Teile benötigt werden, Silikon sich aber nicht gut eignet, können alternative Formlabs-Elastomere in Betracht gezogen werden: etwa BioMed Elastic 50A Resin für SLA oder TPU 90A Powder für den SLS-3D-Druck.
| Material | Drucker | Maximale Zugfestigkeit | Spannung bei 100 % Dehnung | Bruchdehnung |
|---|---|---|---|---|
| Formlabs Silicone 40A Resin | Form 4/B Form 3/B/+ | 7,2 MPa | 4,5 MPa | 135 % |
| BioMed Elastic 50A Resin | Form 4/B Form 3/B/+ | 2,3 MPa | 1,3 MPa | 150 % |
| BioMed Flex 80A Resin | Form 4/B Form 3/B/+ | 7,2 MPa | 4,5 MPa | 135 % |
| TPU 90A Powder | Fuse 1+ 30W | 8,7 MPa (X/Y) 7,2 MPa (Z) | 7,2 MPa (X/Y) 7,0 MPa (Z) | 310 % (X/Y) 110 % (Z) |
Überblick über den Druck mit Silicone 40A Resin
Silicone 40A Resin basiert auf der Pure Silicone Technology™, einem neuen, zum Patent angemeldeten Verfahren, das auf dem Stereolithografie-Ecosystem (SLA) von Formlabs beruht und die Produktion von Teilen aus 100 % Silikon ermöglicht, und zwar betriebsintern und innerhalb von Stunden. Es ist ideal für Anwendungen, die Biegsamkeit, Haltbarkeit und Widerstandsfähigkeit gegen wiederholtes Dehnen, Biegen oder Kompression erfordern.
| Materialeigenschaft | Silicone 40A Resin |
|---|---|
| Shore-Härte | 40A |
| Bruchdehnung | 230 % |
| Reißfestigkeit | 12 kN/m |
| Rückprallelastizität | 34 % |
| Temperaturbereich | -25 °C bis 125 °C |
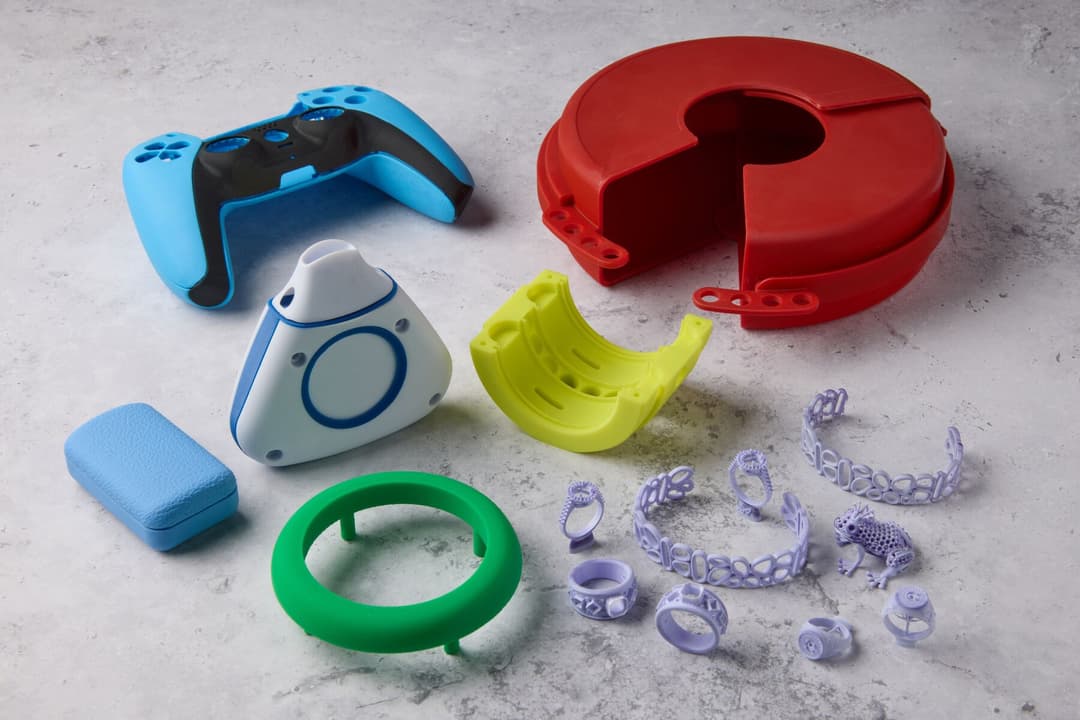
Die Anwendungen für Silicone 40A Resin sind vielfältig und reichen von Rapid Prototyping, Beta-Tests und Validierungsphasen in der Produktentwicklung bis hin zur kosteneffizienten Fertigung von Endverbrauchsteilen in kleinen Stückzahlen oder kundenindividueller Fertigung. Das Material eignet sich auch für die Fertigung von Medizinprodukten, patientenindividueller Prothetik, audiologischen Komponenten und für die Herstellung von Teilen mit komplexen Geometrien, die mit herkömmlichen Methoden nur schwer zu fertigen sind.
Der direkte Silikon-3D-Druck mit Silicone 40A Resin ist die ideale Lösung für eine Vielzahl von Anwendungen, vom Rapid Prototyping bis hin zu Fertigungshilfen, Werkzeug und Kleinserienfertigung oder Einzelanfertigungen.
Die Markteinführung von Silicone 40A Resin liefert eine Lösung für langzeitige Herausforderungen konventioneller Methoden zum Silikon-3D-Druck, wie etwa hohe Kosten und technische Einschränkungen. Durch die Option zum Druck mit einem Klick sparen Kunden mit Silicone 40A Resin Zeit, da keine Gussform entworfen und hergestellt oder Silikon ausgegossen werden muss. Des Weiteren eröffnen sich neue Designmöglichkeiten, da auch komplexe Geometrien umgesetzt werden können, die mit konventionellen Methoden schwer zu erzielen sind. Diese erschwingliche und unkomplizierte Lösung macht es möglich, hochwertige Teile für die Endverwendung zu produzieren, ohne Kompromisse in Sachen Preis, Qualität oder Geschwindigkeit einzugehen.
Überblick über den 3D-Druck von Werkzeug für Silikonguss
Formen zur Herstellung von Silikonteilen werden konventionellerweise durch CNC-Bearbeitung aus Aluminium- oder Stahlblöcken gefertigt. Dies gilt sowohl für zwei- oder mehrteilige Spritzgussformen für Flüssigsilikone (LSR) als auch für Formpresswerkzeuge mit einem einzigen Hohlraum zur Anwendung mit einer erhitzten HCR-Silikonplatte, die unter Druck und hohen Temperaturen ausgehärtet wird. Solche Metallformen werden für gewöhnlich in der Massenproduktion eingesetzt. Kommen Sie beim Prototyping zum Einsatz, fallen wochenlange Durchlaufzeiten und Werkzeugkosten im drei- oder vierstelligen Bereich an, wodurch kleine Designänderungen und deren Tests nur eingeschränkt möglich sind.
Der Desktop-3D-Druck stellt eine leistungsstarke Lösung zur schnellen und kostengünstigen Herstellung von Formwerkzeugen dar. Er erfordert wenig Ausrüstung und erlaubt es geschultem Personal somit, seine Aufmerksamkeit anderen, höherwertigen Aufgaben zuzuwenden. Durch betriebsinternen 3D-Druck integrieren Hersteller und Produktdesigner das Rapid Tooling in den Prozess der Produktentwicklung, sodass das Design und die Materialauswahl noch vor dem Übergang zur Massenproduktion validiert werden können. Auf diese Weise iterieren sie schneller, beschleunigen die Produktentwicklung und bringen bessere Produkte auf den Markt. Werkzeug, das aus SLA-Kunstharzen von Formlabs 3D-gedruckt wird, bietet für die Prototypenfertigung, kleine Produktionschargen und die kundenspezifische Fertigung zahlreiche Vorteile hinsichtlich des Produktdesigns. RTV-Silikone mit zwei Komponenten können in eine zwei- oder mehrteilige Form aus dem 3D-Drucker eingespritzt und RTV-Silikonmasse in die Hälften eines 3D-gedruckten Formpresswerkzeugs gefüllt werden. Werkzeug aus dem 3D-Drucker eröffnet dem Produktdesign eine breite Palette an Silikonen mit Zinn- oder Platinkatalysator sowie eine große Bandbreite an Härtegraden, Farben und Transparenzgraden oder auch spezielle Funktionen wie Hautverträglichkeit.
Herstellung von Silikonteilen mit 3D-gedruckten Werkzeugen
Dieser Bericht bietet eine schrittweise Anleitung zu 3D-gedruckten Formwerkzeugen für die Produktion von Silikonteilen, einschließlich bewährter Praktiken und Fallstudien von Kunden.
Der Stereolithografie-3D-Druck (SLA) ist die ideale Wahl zur Formenherstellung für den Silikonguss, da SLA-Teile eine glatte Oberflächenbeschaffenheit und eine hohe Präzision aufweisen. RTV-Silikone bilden feine Oberflächendetails aber auch -mängel genau ab, sodass die Oberflächenqualität des Formwerkzeugs direkt auf die Oberfläche des fertigen Teils übertragen wird. Eine Form aus einem Schmelzschichtungsdrucker (FDM) würde beispielsweise sichtbare Abdrücke von Schichtlinien auf dem Silikonteil hinterlassen.
Der SLA-3D-Druck mit BioMed Clear Resin oder Clear Resin von Formlabs macht es hingegen möglich, das Einspritzen des Silikons zu beobachten, sodass die Entstehung von Luftblasen oder Leerräumen kontrolliert werden kann und erkennbar ist, wo abgerundete Ecken oder zusätzliche Lüftungsöffnungen notwendig sind. Der SLA-3D-Druck lässt außerdem eine höhere Designkomplexität zu. In eine 3D-gedruckte Form können Hinterschneidungen oder sonstige komplexe Geometrien eingefügt werden, die mit CNC-Bearbeitung unmöglich oder unerschwinglich wären.
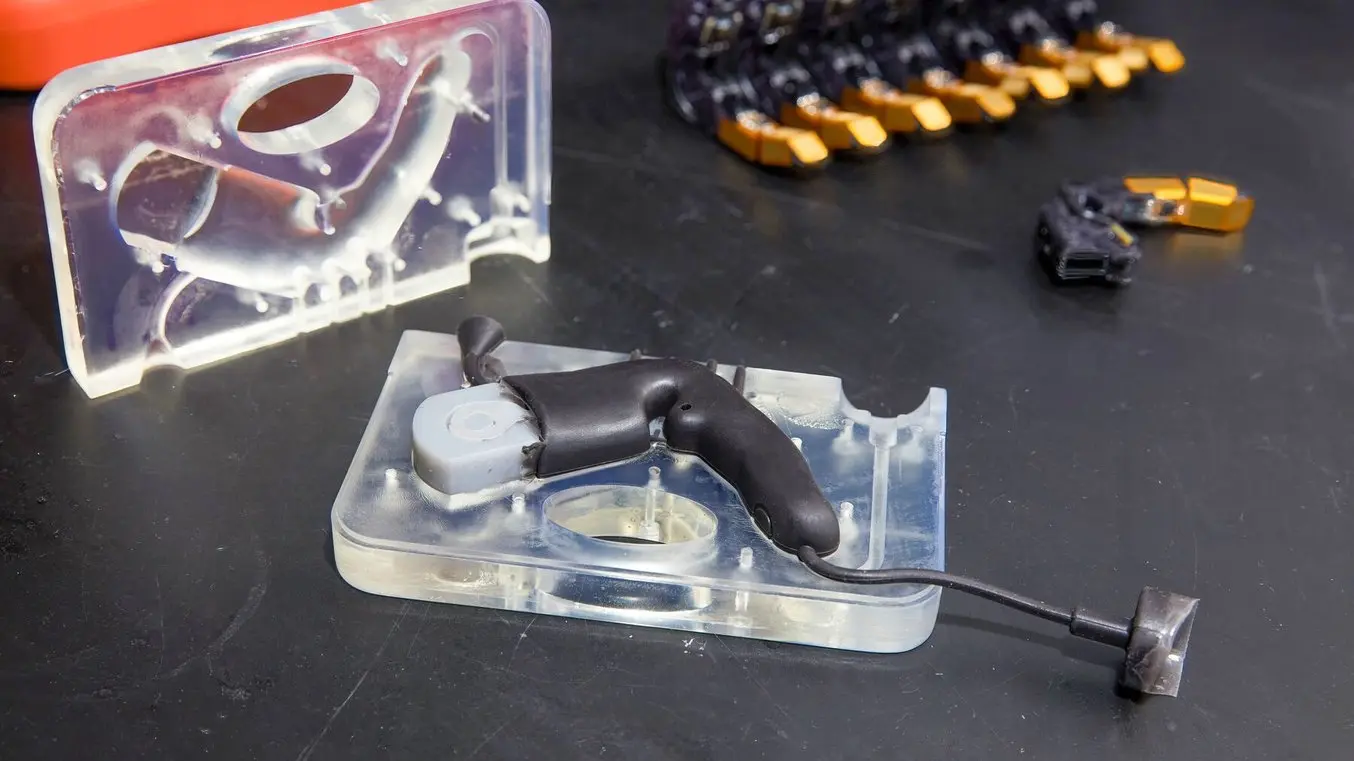
PSYONIC ummantelt die Finger der Ability Hand durch Silikonumspritzung. Einige Formen beinhalten einen Einsatz aus Tough 2000 Resin, der den von Silikon einzuschließenden „Knochen“ in der Form verankert.
Auch in ihrer mechanischen Leistung sind Formlabs' BioMed Clear Resin und Clear Resin vielseitig. Das gleiche Material kann sowohl für extrem dünne, eierschalenartige Gussformen verwendet werden, die sich zur Freigabe eines Silikonteils leicht abbrechen lassen, als auch für robuste Formpresswerkzeuge, die zahlreiche Male zur Dichtungsringproduktion genutzt werden. Und schließlich verringern preiswerte Fertigungslösungen für den Benchtop die Durchlaufzeiten; Designteams können eine Form 3D-drucken und schon am nächsten Tag mit dem Silikonguss beginnen.
Bei der Verwendung in 3D-gedruckten Formen bildet RTV-Silikonkautschuk filigrane Oberflächendetails wie geprägten Text genau ab. Darüber hinaus sind die meisten gussfähigen Silikone nicht chemisch adhäsiv und lassen sich nach der Aushärtung einfach von 3D-gedruckten Formen abziehen. Eine mechanische Verbindung ist möglich, wenn das Silikon auf eine sehr poröse Oberfläche wie gewebten Stoff gegossen wird. In manchen Fällen kann eine chemische Verbindung mit besonderen Bindemitteln gefördert werden.
Da zur Verarbeitung von RTV-Silikonen weder hohe Temperaturen noch hoher Druck erforderlich sind, lässt es sich auch bei der Prototypenentwicklung mit eingeschränkter Ausrüstung leicht formen. Dadurch sinken die Einstiegskosten, die zur Einführung weicher Bauteile im Designportfolio eines Unternehmens notwendig sind. Leitfäden zur schnellen und kostengünstigen Fertigung kleiner Serien von Silikonteilen im eigenen Betrieb finden Sie in unserem vollständigen Whitepaper.
Compatibility of 3D Printing Resins and Silicones
Anytime a castable material such as silicone comes into contact with a printed mold, we must consider the chemical interaction between the two materials. When casting platinum-catalyzed silicones in SLA molds, one particular challenge arises: the resin monomer can inhibit the silicone curing process, leaving an uncured gummy surface. However, high-quality platinum-catalyzed silicone parts can be produced by making sure SLA molds are fully cleaned and cured, and by applying protective coatings and mold releases.
There are many possible combinations of silicone, resin, protective coating, and mold release that you can try. We asked customers from a variety of industries to report on their successful workflows, and their responses are summarized below. We considered many of these insights when developing our own step-by-step process.
| Branche | Anwendung | Art der Form | Silikon | Kunstharz | Best Practices |
|---|---|---|---|---|---|
| Product Design | Beta prototypes Skin contact | Umspritzform | Unspecified (Pt cure) | Clear Resin | Paint on Vaseline as mold release |
| Product Design | End-use | Eggshell mold | Smooth-On Mold Max (Tin cure) | Clear Resin | No mold release used; mold is sacrificial / one-time use |
| Product Design | Prototypes | Compression mold | Castaldo Quick-sil (putty) | Clear Resin | General purpose mold release from Smooth-On |
| Product Design | Prototypes skin contact | Injection filled mold | Unspecified (Pt cure) | LT Clear Resin Clear Resin Grey Resin | Any general purpose mold release |
| Product Design | Prototypes Skin contact | Injection filled mold Overmold | Smooth-On Dragon Skin 20 (Pt cure) | Clear Resin | Krylon Crystal Clear Acrylic spray + Ease Release 200 |
| Manufacturing / Healthcare | End-use | Injection filled mold Overmold | Smooth-On Dragon Skin 20 (Pt cure) | Clear Resin | No mold release needed |
| Manufacturing / Healthcare | End-use Mucous membrane contact | Eggshell mold | Unspecified (Pt cure) | Biomed Amber Resin | No mold release used; mold is sacrificial / one time use |
| Audiology / Healthcare | End-use Skin contact | Eggshell mold | BioPor AB 40 by Dreve | Clear Resin Biomed Clear Resin | No mold release used; mold is sacrificial / one time use |
| Unterhaltungsindustrie | Models and props Skin contact | Injection filled mold Open mold | Smooth-On FX Pro (Pt cure) | Black Resin >br>Grey Resin | Mold release not always needed |
| Unterhaltungsindustrie | Models and props Part reproduction | Open mold Silicone mold | Variety of Pt and Tin cure by Smooth-On | Crear Resin Grey Resin | XTC-3D High Performance 3D Print Coating |
| Unterhaltungsindustrie | Models and props Part reproduction | Silicone mold | Unspecified (Pt cure) | Cler Resin | SEM Flexible Primer Surfacer spray coating |
| Unterhaltungsindustrie | Models and props Skin contact | Injection filled mold | Platsil Gel-25 by Polytek (Pt cure) | Rigid 10K Resin | Smooth-On Super Seal coating and Ease Release 200 |
| Hobby | art reproduction | Open mold Silicone mold | Smooth-on OOMOO 30 (Tin cure) | Grey Resin | General purpose mold release from Smooth-On |
While the combination of materials clearly varies, our customers aligned on the following:
- Make sure your parts are fully washed and cured. The 3D printed mold must be washed thoroughly in clean IPA, such that surfaces are not tacky after the mold dries. The mold should also be cured completely to reduce the amount of unreacted monomer on the SLA parts. For this process, the Form Cure is a great option. Clear Resin parts will develop a yellow tint, which is a good indicator that your mold is fully cured.
- Try a protective coating. There are many acrylic or epoxy coatings available that are applied as an aerosol spray in a single step (e.g. Krylon Crystal Clear acrylic coating), or as a two-part brush- on material (e.g. XTC-3D from Smooth-On). Using very little material, both types of coatings will leave a glossy, glass-like finish on the internal surfaces of the mold. Multiple applications may be needed. Check the manufacturer’s instructions for drying or curing times.
- Use a mold release anytime silicone contacts another material. This will ease the de-moldingstep, and eliminate silicone residue inside the mold, making it easier to reuse it for multiple castings. In many cases a generic or “general purpose” mold release from your silicone brand is sufficient (e.g. Stoner Dry film e408). A light mist of mold release is enough. Once again, check the manufacturer's instructions for recommended drying times.

Der neue Form 4B: Schnellere Fertigung, höhere Präzision, behördliche Konformität
Entdecken Sie, wie der Form 4L und Form 4BL neue Maßstäbe der Produktivität und Innovation setzen, dank beispielloser Schnelligkeit, Genauigkeit und Zuverlässigkeit.
Additional Best Practices
Some silicone formulas, such as PDMS, are more susceptible to cure inhibition than others when they come into contact with SLA 3D printed tooling. We have listed further troubleshooting steps provided by Formlabs users, which build off of our general guidelines for RTV liquid silicones.
- Rinse with acetone. Spraying the 3D printed mold with an acetone squeeze bottle can help to remove residual solvent and any debris after the standard IPA washing step.
- Over-cure the mold. For tooling printed in Clear Resin, increase the curing time from 15-20 minutes to 60-120 minutes at 60 °C.
- Wait 24-48 hours after post-processing. Allow the mold to sit in ambient temperature and light before applying coatings and casting the silicone. It is helpful to expose the mold surfaces to open airflow during this step.
- Use an epoxy coating. A two-part epoxy sealant can act as an effective barrier between the silicone and the 3D printed mold.
- Use a higher concentration of catalyst. When using two-part silicones, we suggest adding a bit of extra catalyst component. If a small proportion of the catalyst is inhibited by the mold surface, the extra catalyst can help compensate for this and prevent formation of a tacky silicone surface.
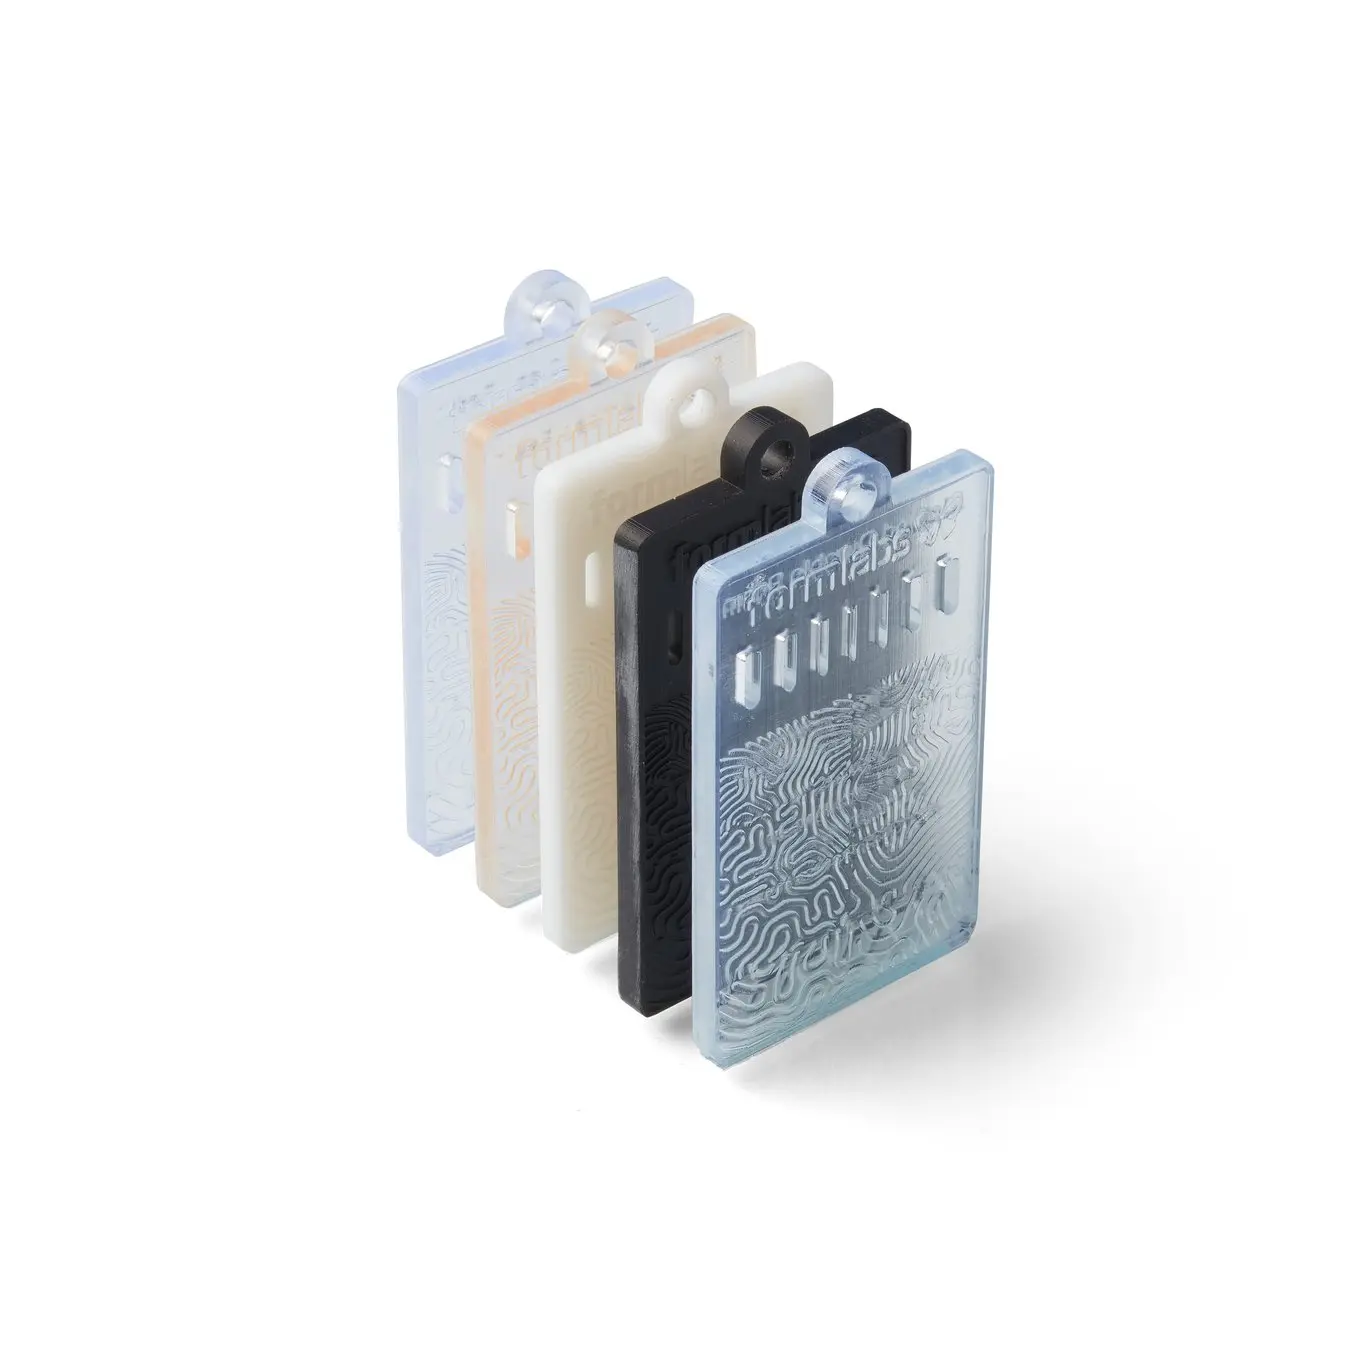
Proben der BioMed-Kunstharze
Jedes Probestück umfasst geprägte und hervorgehobene Merkmale, Ausschnittstärken von 0,5–2 mm sowie behördliche Regulierungen des jeweiligen Kunstharzes.
Selecting a Mold Type
Auch wenn die Ergebnisse der unterschiedlichen Formgebungsverfahren ähnlich aussehen, gibt es einige Kriterien, die bei der Auswahl der Art der Form beachtet werden sollten. Dazu zählen die Geometrie des endgültigen Teils, die Möglichkeit von Hinterschneidungen und Löchern im Design, das Produktionsvolumen und die für den Guss vorgesehenen Materialien. In der untenstehenden Tabelle haben wir einige Richtlinien aufgeführt.
| Art der Form | Teilgeometrie | Materialien | Produktionsvolumen |
|---|---|---|---|
| Formpresswerkzeug | Keine Hinterschneidungen | Silikonkitt mit hohem Härtegrad | Dutzende von Durchgängen |
| Form zum Einspritzen | Kleine Hinterschneidungen | Two-part liquid silicones | Dutzende von Durchgängen |
| Umspritzform | Encapsulate internal hardware, minor undercuts | Two-part liquid silicones | Dutzende von Durchgängen |
| Verlorene Form | Can accommodate large | Two-part liquid silicones | Einmalige Verwendung |
Silicone Molding Step-By-Step
The Formlabs team has developed a step-by-step process for creating a silicone product prototype by combining different aspects of our customers’ successful workflows. One project presented below is a molded silicone keychain with an embedded Apple AirTag device. The other is a gasket designed by OXO. The design guidelines cover all critical steps from importing a reference geometry to adding alignment features for encapsulated hardware. We also used the novel silicone filling method employing an epoxy gun with a 1:1 volume mixing nozzle recommended by Dame Products.
Many of the steps and best practices shared are common across mold types. Each step of the tutorial indicates its relevance to injection filled molds, overmolds, or compression molds.
For information about eggshell molds, the Formlabs audiology white paper 3D Printing Custom Silicone Ear Molds provides a step-by-step guide.
WHAT IS REQUIRED?
From Formlabs:
- Formlabs BioMed Clear Resin or Clear Resin
- Compatible Formlabs SLA printer with up-to-date firmware
- PreForm software (most recent version)
- Compatible Build Platform
- Compatible Resin Tank
- Form Wash, Form Wash L, or Finish Kit
- Form Cure or Form Cure L
| Item | Supplier | Anmerkungen |
|---|---|---|
| High-gloss acrylic spray | Krylon | Protective coating |
| Ease Release 200 | Mann Release Technologies | Mold Release |
| Apple AirTag | Encapsulated hardware | |
| Dragon Skin 20 | Smooth-On | Two-part RTV Silicone, Platinum Cure |
| Silc Pig | Smooth-On | Colored pigment |
| Stirring sticks | ||
| Epoxy cartridge | McMaster-Carr | 1:1 ratio |
| Epoxy dispensing gun | McMaster-Carr | |
| Mixing nozzle | McMaster-Carr | |
| C-clamp or spring clamps | ||
| Duct tape | ||
| Vacuum chamber and pump (optional) | Amazon | |
| Pressure pot (optional) | Amazon |
Molding Process: Compression Mold
| Item | Supplier | Anmerkungen |
|---|---|---|
| Ease Release 200 | Mann Release Technologies | Mold release |
| Castaldo QuickSil | Castaldo | |
| Tabletop vice |
WHAT IS REQUIRED?
Overmold
- Import the Reference If you are planning to overmold or encapsulate another object with silicone, import your reference object or substrate in the CAD software of your choice. In this example, we imported a digital replica of an Apple AirTag.
Injection Filled Mold, Overmold, or Compression Mold
- Design the Silicone Part Together, the silicone and any encapsulated items form the base volume. For overmolded parts, aim for a minimum silicone shell thickness of 2 mm. In our compression mold example, the object has a complete through-hole. We recommend defining a core as a separate object. The silicone part plus core can be thought of as your base volume.
- Design the Mold Stock Create a block around your base volume that extends at least 1 cm beyond the outer shell of your part.
- Split the Mold For a basic two-part mold, you will be splitting your base volume into two parts along a defined surface based on a parting line. Start by using draft analysis to define the parting line. Consider how the two halves of your mold will come apart, to ensure that the silicone part can be easily released from the mold. To avoid undercuts, the parting line might be a contour instead of a straight line. Next, extrude the parting line into a surface and use this surface to split your mold. For complex molds that require more than two parts, this process can be repeated multiple times to generate the number of mold parts required.
- Remove Base Volume From the Mold Stock Use boolean subtract in your CAD software to carve out the mold cavity from the solid block. In the case of our compression mold, the individual core component is added back with a boolean addition to one side of the mold, in effect creating two parting lines.
- Check Draft Angles It is a good idea to pause here and consider how your mold bodies will come apart after you inject the silicone. Our customers recommend using at least a 2° draft angle for silicone product prototypes. However, this aspect of silicone mold design is quite forgiving. Because the silicone rubber can generously deform during de-molding, many angles can be handled including 90° angles or slight undercuts. We recommend using the Draft Analysis tool in your CAD program at this step to analyze and edit any areas shown in red beyond the threshold draft angle.
Injection Filled Mold, Overmold
- Design the Gate If you are relying on gravity to fill the recesses of the mold cavity, place the entrance of your gate high on the mold block and then, using a U-shape with a generous bend radius, connect the gate to the mold cavity at the lowest possible point. Filling at this location prevents air bubbles from forming. Boolean subtract the gate from the mold stock. Typically, the central axis of the fill gate is located on the parting line. Another configuration would be a short fill gate that directly connects to a point on your mold cavity; the main air vent will be located on the opposite side.
- Define Air Vents Air is displaced when filling silicone into an enclosed space, so it is natural to place an air vent at the point of the mold that is last to fill. In our example, this is placed at the top of the mold stock. To place additional air vents, it is helpful to think about areas where air is likely to be trapped, and connect vents specifically to points such as sharp turns, corners, or areas where two liquid flow fronts connect. Typically air vents will be cylinders (~0.5-2 mm in diameter) that connect areas of your cavity to the top of the mold. Like the fill gate, it is helpful to align the axis of any air vent on the parting line. Once placed, boolean subtract these features from the mold stock.
Injection Filled Mold, Overmold, or Compression Mold
- Add Mating Features These features align and constrain separate parts of the mold stock to each other. Leave a ~ 0.1 mm offset gap between complementary mating features.
Overmold
- Add Alignment Pins for Encapsulated Devices If you are overmolding or encapsulating a part in silicone, the part must be fully constrained in the mold so it does not shift during silicone casting. Use as few alignment pins as necessary to constrain the part and aim for a pin diameter of ~1.25 mm. Pins should be pointing in the direction of draw, or perpendicular to the parting line of the mold. Note that alignment pins do leave small holes in the surface of the silicone part. If needed, these can be patched after de-molding using a small dab of liquid silicone which is then allowed to cure.
Injection Filled Mold, Overmold
- Add More Mold Features One additional mold feature is a fill trough. A trough is used for overflow of the silicone at both the fill gate and vent locations, and can be designed as a single continuous well that covers all gate and vent features. The trough also contains a reservoir of liquid silicone that can enter the mold during the curing process by freely seeping into the mold cavity to displace bubbles and voids, or to compensate for silicone that enters the interface between mold parts during cure. In this particular example, our trough is 10 mm deep.
-
Add a Syringe Inlet We also recommend adding a syringe inlet feature that matches the geometry of your syringe. We made ours slightly oversized, with a 6° angle to fit a variety of syringe and mixing nozzle types.
-
Add Pry Points Pry points can be added to assist with disassembly of the mold after curing. These are small rectangular cutouts along the parting line that allow a flathead screwdriver or another tool to be used to separate the mold parts. Our example cutouts extend 5 mm into the mold edge.
-
Add Fillets or Chamfers Add fillets or chamfers to angled mold features This is usually the final step after the mold geometry is locked. Adding fillets to soften the edges of the mold can also aid the 3D printing process. When printing a mold stock directly on the build platform, beveling any external corners eases part removal after printing and reduces the amount of resin flash that can accumulate around sharp corners.
Printing the Mold
Injection Filled Mold, Overmold, or Compression Mold
- Select the Resin Many resins work, however Clear Resin or Biomed Clear Resin are great options for visualizing the flow of silicone while casting your part.
- Print the Mold We recommend printing with a 50 microns layer height for a good balance between smooth surface texture and fast printing time. Since silicone picks up fine details on the surface, including layer lines, 25 microns layer height might be needed for some aesthetic applications. Orient your parts on the build plate so that critical interior surfaces are free of support marks. Placing the mold stock flat on the build platform can work in some cases.
- Wash and Post-Cure the Mold It is critical to thoroughly wash excess resin off of the mold stock with clean IPA because uncured resin can inhibit curing of silicone. The mold should also be cured completely to reduce the amount of unreacted monomer on the SLA parts. For Clear Resin, the recommended settings are 15 minutes at 60 °C. For BioMed Clear Resin, the recommended settings are 60 minutes at 60 °C. The preset time and temperature settings on Form Cure work well. The outer surface can be polished to a highly transparent finish. Adding mineral oil to the exterior surfaces is one option to help fill in surface scratches and provide an extremely clear window into the silicone filling process.
Printing the Mold
Injection Filled Mold, Overmold
- Apply Coatings and Mold Release Apply coatings and mold release. Consider using mold release anytime two different materials come into contact with each other. This includes embedded hardware that you plan to insert and remove from an overmolded silicone sheath. Consult our customer workflow table for recommendations. Follow the guidelines on your material packaging, and wait for the coatings to fully cure or dry before moving on to the next step.
- Insert Internal Parts/Hardware Alignment pins help to orient the part that will be encapsulated.
- Close and Clamp the Mold Carefully clamp the mold starting in the direction of the draw, making sure that the mold stock and any encapsulated objects remain in alignment. In our example, we used a 3D printed replica of an Apple AirTag, fabricated in Rigid 10K Resin.
Printing the Mold
Injection Filled Mold, Overmold
If you are incorporating a pigment, mix the pigment into Part B before moving on to the steps below.
A frequent concern when casting silicone is trapping small air bubbles in the mold. This results in voids in the final casted part. A couple of supplemental methods are recommended to manage air bubbles, including degassing liquid silicone in a vacuum chamber prior to mold filling. As a general guideline, check the viscosity of your liquid RTV silicone formula. If it is over 18,000 cps (centipoise) degassing is recommended. If it is below this threshold, a degassing step may not be necessary. Another recommended technique is placing the filled mold in a pressure chamber during silicone curing in order to collapse and shrink any entrained bubbles. A great prototype can be produced without degassing the silicone or curing under pressure, but you can achieve a nearly perfect part using these supplemental methods.
Vat Method
- Degas parts A and B separately under vacuum, if needed.
- Mix parts A and B together vigorously. Typically the two silicone components are mixed in equal volumes. Allow the mixture to degas under vacuum again, or to gently degas in air.
Mixing Nozzle Method
- Degas parts A and B separately under vacuum, if needed.
- Fill each side of an epoxy cartridge system with one part (A or B), using separate syringes to transfer the liquids. Pouring the silicone high above the cartridge in a thin stream will help to avoid remixing air into the silicone.
- Degas parts A and B. Stand upright and allow the silicone to gently degas in air. Because silicone parts A and B remain separate, the filled cartridge can remain for days before you use it.
Formpresswerkzeug
- Mix Parts A and B Thoroughly Mix together equal volumes of parts A and B of the silicone putty and knead by hand. The silicone rubber begins to cure after 90 seconds, so the parts should be kneaded for the minimum time necessary to generate a uniform color.
Formpresswerkzeug
Injection FIlled Mold, Overmold
Vat Method
- Draw the degassed silicone mixture into a syringe. Next, invert the syringe so the nozzle faces up. Allow any air pockets to rise to the top. Depress the plunger to expel the air and extrude a small amount of your silicone to ensure no air bubbles remain in the syringe. Insert into the fill gate and slowly fill the mold until silicone exits from the air vents. If your model has an overflow trough feature, continue filling this area of the mold.
Mixing Nozzle Method
- Assemble the epoxy gun. Insert the cartridges into the gun and screw on the mixing nozzle. It’s helpful to squeeze a little bit of liquid out of the nozzle tip at this stage to make sure the epoxy is properly mixed.
- Fill the mold. Insert the epoxy gun nozzle into the fill gate and slowly fill the mold until silicone exits from the air vents. Again, fill up the trough feature if your mold includes one.
Use a Pressure Pot (optional)
- As an optional step, place the mold in the pressure pot and add your silicone manufacturer’s recommended air pressure to the pot (e.g. ~ 30 psi). This shrinks any bubbles trapped in the mold and forces the material in the trough down into the mold. Let the silicone cure under pressure according to the manufacturer's instructions.
Compression Mold
- Stuff Silicone Into the Mold The silicone should be compacted into both sides of the mold, being sure to catch all details and crevices. Any excess material will simply spill outside the edges of the mold.
- Squeeze Mold Together The mold should be squeezed perpendicular to the parting line. In compression molds, the mating surfaces don’t completely touch until pressure is applied. Close the clamp gently until it does not close further. The recommended Castaldo Quick-Sil silicone rubber cures completely in 20 minutes.
Formpresswerkzeug
Injection Filled Mold, Overmold, Compression Mold
The cure time can range from 10 minutes to several hours depending on the silicone chemistry.
- Define Mold Orientation With a gravity-filled configuration, like our example, the mold can remain oriented upright without an extra sealing step as the silicone cures. With an end-to-end filling configuration, we would experience a backflow of silicone if the filled mold was set on our workbench. After filling, we recommend sealing the gate with duct tape. The compression mold should remain clamped in a tabletop vise while curing.
- De-Mold and Trim the Silicone Part It is normal to develop some flash within and around the parting line. Remove excess silicone from the exterior of the mold first. Pry open the mold by inserting a flat head screwdriver or another flat tool into the pry point and gently twisting to break the seal. Remove the silicone part, being mindful that some silicone may need to be gently trimmed away from any air vents. After removing the silicone part from the mold, use a sharp razor or flush cutters to trim the vent and gate features from the part. Residual bumps can be removed gently with wet fine grit sandpaper. Finally, you can wash the part with soap and water to remove sandpaper and mold release residues.
- Prepare for the Next Casting Molds can be reused multiple times. You may need to clean out vents with a sharp tool and/or reapply mold release before filling with silicone again. It is common to accumulate incompletely cured silicone in the narrow surface between mold blocks. This can be wiped away with a clean cloth.
- Iterate Design It is normal to go through a couple of mold design iterations after trying the full end-to-end workflow. A few design changes you might need to consider include increasing the offset distance between mating features, moving alignment pins to ensure that encapsulated objects are fully constrained, or adding air vents in areas that tend to trap air bubbles during filling.

Dame Products use 3D printed molds for overmolding.
Formpresswerkzeug
Mold material: Production molds are typically made from machined aluminum or steel.
Alignment pins for overmolding: The alignment pins for overmolding are oriented within the plane of the mold’s main parting line, rather than perpendicular to it. These are also designed to retract in and out of the mold, resulting in a silicone layer that does not have dimples and holes created by alignment pins.
Draft angle: Our customers recommend using at least two degrees draft angle for silicone products. While the prototype or short-run production molds presented in this report can handle deep undercuts, these types of silicone geometries must be carefully pried from the mold, and would be difficult to replicate by an automated injection system.
Injection molding configuration: Gravity-fill molds are highly reliable mold configurations for benchtop prototyping. For rapid mass production methods, inlet and outlet geometries are on opposite sides of the mold.
Silicone materials: While silicone chemistry used in production is quite similar to the RTV materials presented in this white paper, both liquid silicone rubbers (LSR) for injection moldingnand heat cured rubbers (HCR) for compression molding typically enter the mold at low temperature, and are then cured at elevated temperature.
Silicone Printing Step-By-Step
WHAT IS REQUIRED?
From Formlabs
- Formlabs Silicone 40A Resin
- Compatible Formlabs SLA printer with up-to-date firmware
- PreForm software (most recent version)
- Compatible Build Platform
- Compatible Resin Tank
- Form Wash, Form Wash L, or Finish Kit
- Form Cure or Form Cure L
From Third-Parties
- IPA (99% or higher): To make wash solvent blend for washing Silicone 40A parts
- N-Butyl Acetate (purchase in the US; purchase in EU): To make wash solvent blend for washing Silicone 40A parts
- Glass Beaker (at least 500 mL in size): To submerge Silicone 40A parts inbwater during the post-cure steps
- Febreze HD (optional): For masking of odor of printed Silicone 40A parts
- 1.5 Gallon Glass Jar (optional): For storing wash solvent and washing printed Silicone 40A parts if not using a Form Wash
- Ultrasonic Cutting Knife (optional): For removing support nubs on Silicone 40A parts
1. Design
1.1. Design your parts with the Silicone 40A Design Guidelines in mind.
2. Druck
2.1. Import File
Check that your version of PreForm is up to date by going to Help, then Check For Updates in the upper left-hand corner. Import or open your part file by dragging them into PreForm, or by going to File and then Open in the upper right hand corner.
2.2. Select Material
Select Silicone 40A by clicking the Printer Type box in the Job Info menu on the right-hand side. Select “Silicone” from the materials grid.
2.3. Orient
PreForm can auto-orient based on Formlabs best practices. To auto-orient, select your part and click Orientation on the left side of the screen. Then, click Auto-Orient Selected.
For best results, you may orient manually using the red, green, and blue actuators surrounding your part. Consider orientating so that areas where a smooth surface texture is most important are facing away from the build platform.
Print directly on the build platform whenever possible. Try to keep the bulk of the part’s weight as close to the build platform as possible and orient long parts parallel to the front edge of the build platform.
2.4. Add Supports
To auto-generate supports based on material properties, select your part and go to Supports on the left side of the screen and select Auto-Generate All.
For optimal results, we recommend manually editing auto-generated supports, or manually placing supports until the part is sufficiently supported (indicated by a green thumbs-up beside Supports in the Job Setup menu). PreForm will indicate in red what areas might require additional support.
If surface texture or post-processing time is a major concern, you may want to consider designing custom supports using CAD software. Guidelines for adding tearaway supports can be found here.
2.5. Layout
Set your part’s location on the build platform by clicking and dragging, using the red green and blue actuators surrounding your part, or by clicking Layout, then Layout All on the right side of the screen. It’s best to place parts in the center of the build platform. When printing multiple parts, space on the build platform can be optimized and material can be saved by overlapping rafts.
2.6. Send to the Printer
Send your job to the printer by clicking the orange Upload Print button on the bottom right. When the Print dialogue box opens, select the printer that you would like to use.
2.7. Set Up the Printer
Shake the Silicone 40A cartridge and then insert it. When using a new cartridge, double check that the silicone bite valve is opening successfully by squeezing it with a gloved finger. Insert a build platform and a compatible resin tank into the printer.
Begin printing by selecting your print job from the printer’s touch screen. Follow any prompts or dialogues shown.
Attention: For full compliance and biocompatibility, Silicone 40A requires a dedicated resin tank and build platform. Only use the Form Wash with other Formlabs biocompatible resins.
3. Nachbearbeitung
3.1. Remove the Part
Remove the part from the build platform by wedging the part removal tool or a scraping tool under the part raft and rotating the tool. Parts can also be washed directly on the build platform in the Form Wash.
3.2. Wash
Place the part in the Form Wash filled with an 80/20 mixture of 99% isopropyl alcohol (IPA) and n-butyl acetate. Do not wash with IPA or n-butyl acetate alone. Wash using the recommended setting for Silicone 40A (20 minutes).
If the model is hollow or has internal channels, ensure liquid resin is thoroughly flushed out from these features. This can be done using a syringe filled with the mixture from the Silicone 40A wash. Allow parts to fully dry before post-curing.
3.3. Remove Supports
For rest results, remove supports after washing but before post-curing.
To remove supports, pull gently at the support structure. On thicker parts, just pulling may be sufficient. On thinner parts, consider using flush cutters, or sliding a sharp hobby knife along the part’s surface, being careful not to damage the part itself. An ultrasonic cutter can also be used here for greater precision.
3.4. Post-Cure
Post-cure your part to achieve optimal mechanical properties. Fully submerge the part in a beaker (or other UV-transparent container) of water, and place the beaker of water containing your part into the Form Cure. Use the recommended settings for Silicone 40A (45 min at 60 °C).
Mask the odor of Silicone 40A by adding Febreze HD to the water in the glass beaker before post-curing. For every 500 mL of water, use 12.5 g of Febreze HD. If not treated, this odor will dissipate over time.
3.5. Additional Post-Processing
A miniature, mounted Scotch Brite wheel can be used with a rotary tool to grind down support marks on parts either before or after curing.
Before applying any adhesives, ensure that the part has been thoroughly washed, is dry, and the surface is not tacky or dusty. Formlabs recommends using a primer such as DOWSIL 1200 series or a medical primer. After a primer has been applied, use a silicone adhesive such as DOWSIL 734. Do not use cyanoacrylate glues as they are brittle and leave a crust on the silicone.
Medical Customer Case Studies
Direct Printing with Silicone 40A Resin
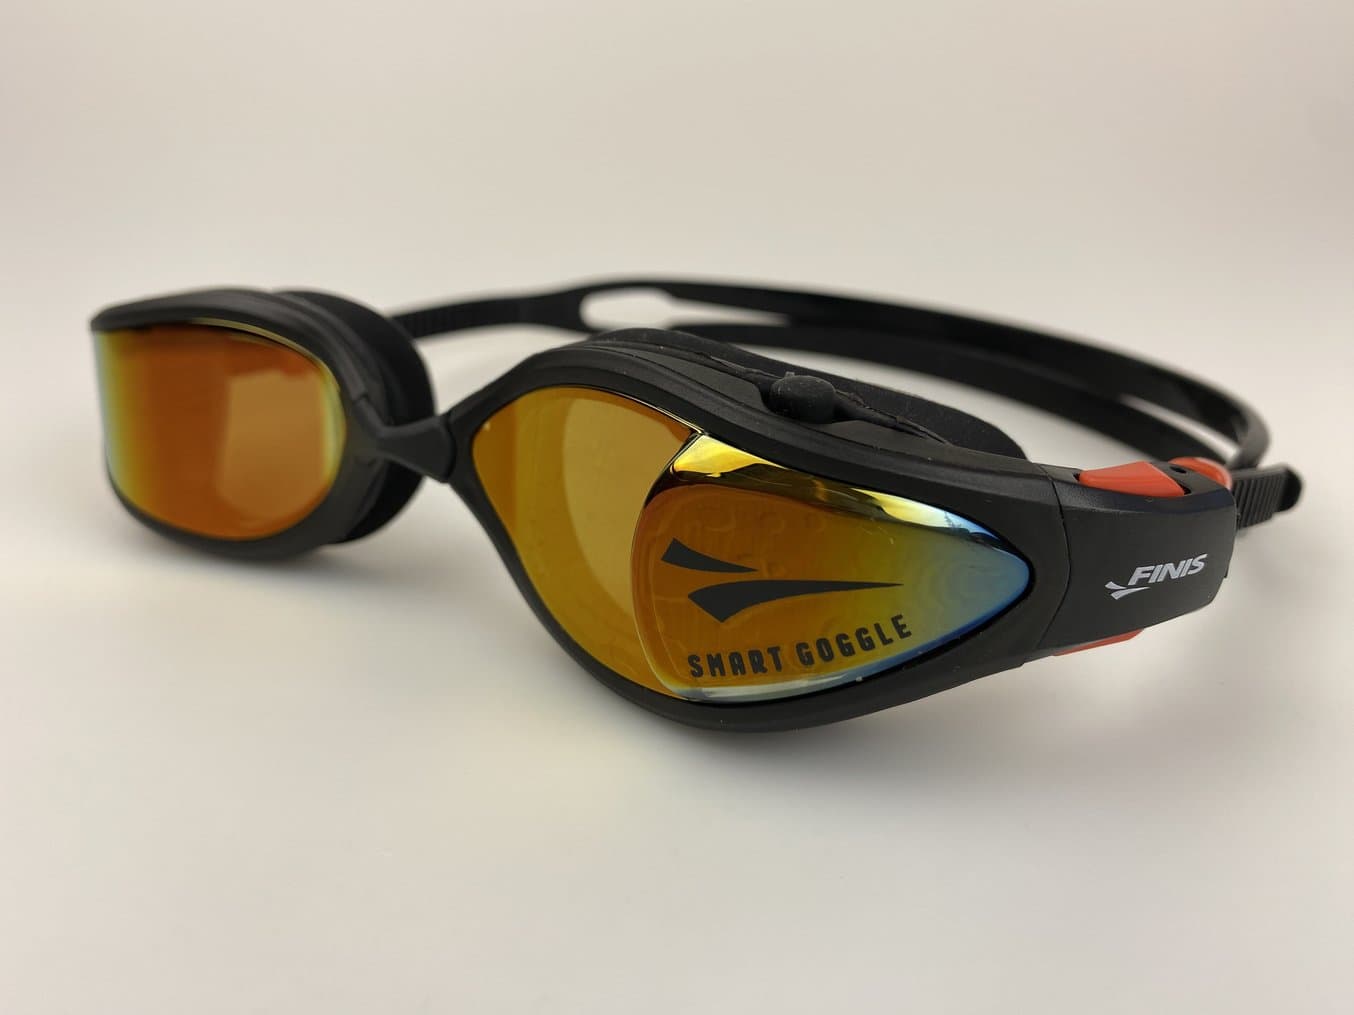
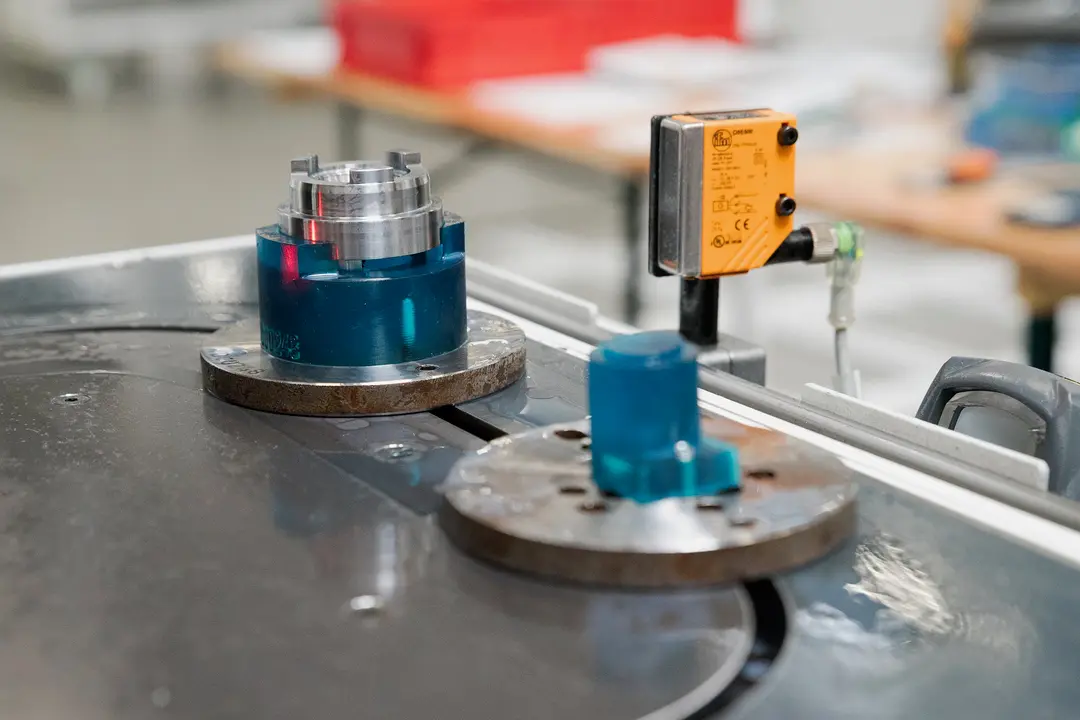
FINIS, Inc. ist auf die Entwicklung von Schwimm- und Wassersportausrüstung spezialisiert, einschließlich hochmoderner Hilfsmittel wie der intelligenten Schwimmbrille Smart Goggle Max.
FINIS, Inc., a California-based company renowned for its innovative swim-related products, prioritizes quality and performance to meet the evolving needs of swimmers of all skill levels. Led by senior designer David Beittel, the product development team initially used filament 3D printing for rapid prototyping but sought more detailed and isotropic parts. That’s when they transitioned to Formlabs Form 3+ Stereolithography (SLA) 3D printers and Silicone 40A Resin. This resin proved invaluable for swift adjustments, overnight functional prototype printing, and achieving characteristics close to final production materials.
Historically, FINIS relied on labor-intensive silicone casting in traditional molds, leading to long production lead times. With the introduction of the Form 3+ 3D printers and Silicone 40A Resin, the team overcame challenges associated with mass-producing silicone parts. They were able to produce production-quality parts in a mere eight hours for just $10 a piece. This is a significant undercut to outsourced urethane casting, which has the usual expenditure of over $1,000 and a three-week timeline. The 3D printed silicone gaskets successfully underwent rigorous water tightness assessments within a swimming pool environment and demonstrated elasticity closely mirroring final production characteristics. Silicone 40A has become an essential tool for refining designs and ensuring optimal performance throughout FINIS, Inc.’s development process.
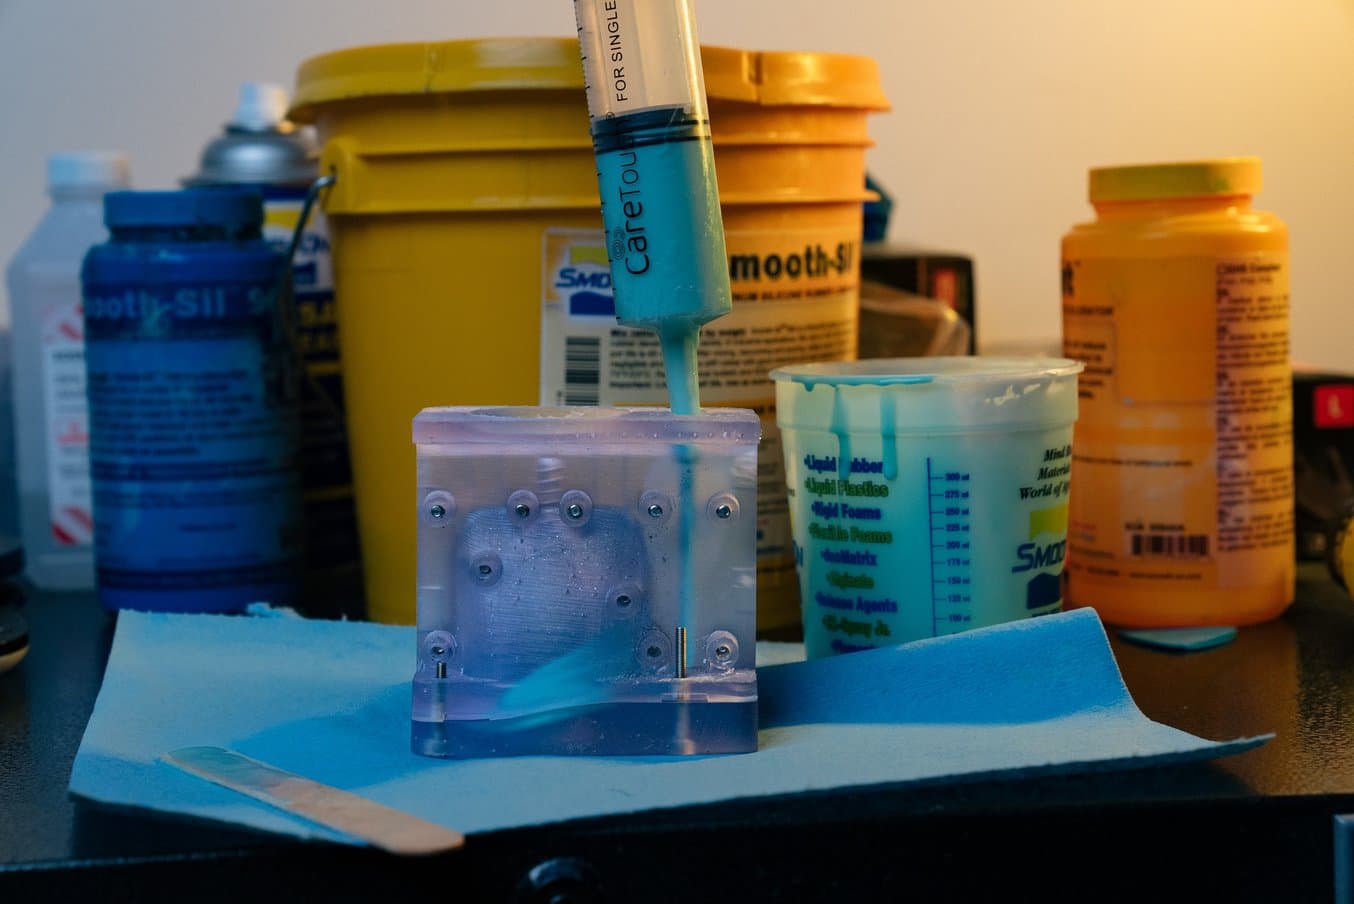
Injection Filled Molds for Product Prototyping With Glassboard
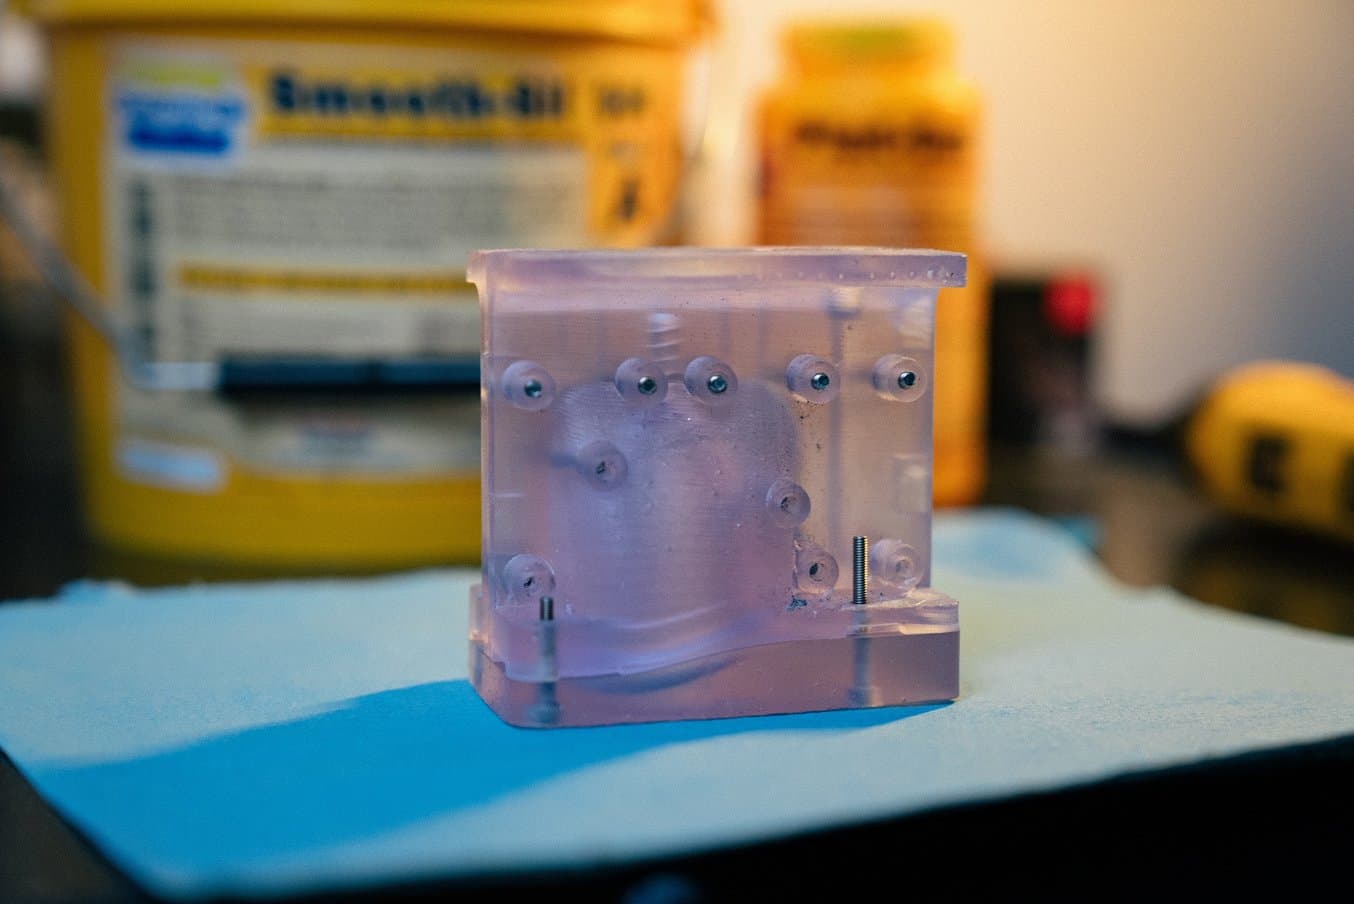
BioMed Clear Resin is used to create transparent molds which can be inspected for air bubbles or other imperfections.
Glassboard is a product design consulting firm in Indianapolis, IN. Their design team uses silicone in molds for a very wide variety of prototyping applications from silicone menstrual cups, to custom fittings and overmolds, to seals, gaskets, and o-rings. Glassboard typically uses molds that are made of multiple parts that can be disassembled to remove the casted silicone and then reused for multiple castings.
A typical mold design at Glassboard, such as the one used for the Sunny Menstrual Cup, is an injection filled mold aided by a gravity-fill configuration. Liquid silicone is injected through a port at the top of the mold, runs down a channel to enter the bottom of the mold cavity, gradually fills to the top of the cavity, and exits via narrow air vents at the top of the mold.
An innovative feature of Glassboard mold design is a trough reservoir at the top of the mold. Troughs are used to contain the overflow of the silicone at both the gate and vent locations. Another purpose of the trough is to allow excess silicone to enter into the mold after filling to displace voids created by collapsing air bubbles or by silicone seeping into the narrow surface between mold blocks.
Silicone Overmolding of Customer Beta Prototypes With Dame Products

Dame Products employs an overmolding method to produce customer beta prototypes with embedded hardware. Their mold is printed in Clear Resin.
Dame Products is a Brooklyn-based startup that designs products for the health and wellness industry. Their product line incorporates complex ergonomically shaped hardware that is fully encapsulated in a layer of skin-safe silicone in vibrant colors. The team employs silicone overmolding with 3D printed molds to produce customer beta prototypes.
Each 3D printed mold stock is a two or three part injection filled mold that has anchoring features for small internal hardware. Parts A and B of a platinum-catalyzed liquid silicone are loaded into two sides of a 50:50 ratio epoxy cartridge, and attached to an epoxy gun with a mixing nozzle. This innovative method simultaneously mixes the silicone components while gradually forcing the liquid silicone into the mold.
Dame engineers can prototype dozens of overmolded devices in one day by rotating through three or four SLA printed molds. While the silicone rubber from one prototype is curing, the next can be de-molded and prepared for the next fill. Trimming and cleaning of prototypes happens in parallel. When prototype hardware is returned to the company, the beta device is bleached, the thin silicone layer removed, and the internal hardware is reused in a new prototype.
End-Use Overmolded Grippers With PSYONIC
PSYONIC encapsulates the Ability Hand fingers using a silicone overmold configuration. Some molds include a Tough 2000 Resin mold insert to anchor the encapsulated “bone” feature in the mold.
California-based PSYONIC is reinventing limb prosthetics with the world’s first touch-sensing bionic hand. The team uses 3D printing as a critical step in manufacturing almost every component of their device. This includes mechanical fingers that are encapsulated with silicone using an SLA 3D printed mold.
The molds are produced by taking the inverse of the finger or thumb shape, subtracting it from the mold stock, and adding inlets and air vents for injection of two-part platinum cure silicone. The mold also accommodates the structural “bone” component of the finger, which is fabricated using an FDM 3D printer.
Designers at PSYONIC are able to use each mold dozens of times before it wears out, and when this happens they can simply print a new mold and start injecting silicone again the next day. The team also directly contrasts Formlabs Clear Resin to their previously used fused deposition modeling (FDM) thermoplastic molds, namely referring to the upgrade in surface quality. Silicone picks up any texture or defect in the mold cavity, including 3D printing layer lines, so the smooth surface quality of Formlabs resins has been beneficial.
Silicone Injection Molding of Custom Makeup Effects With Dreamsmith
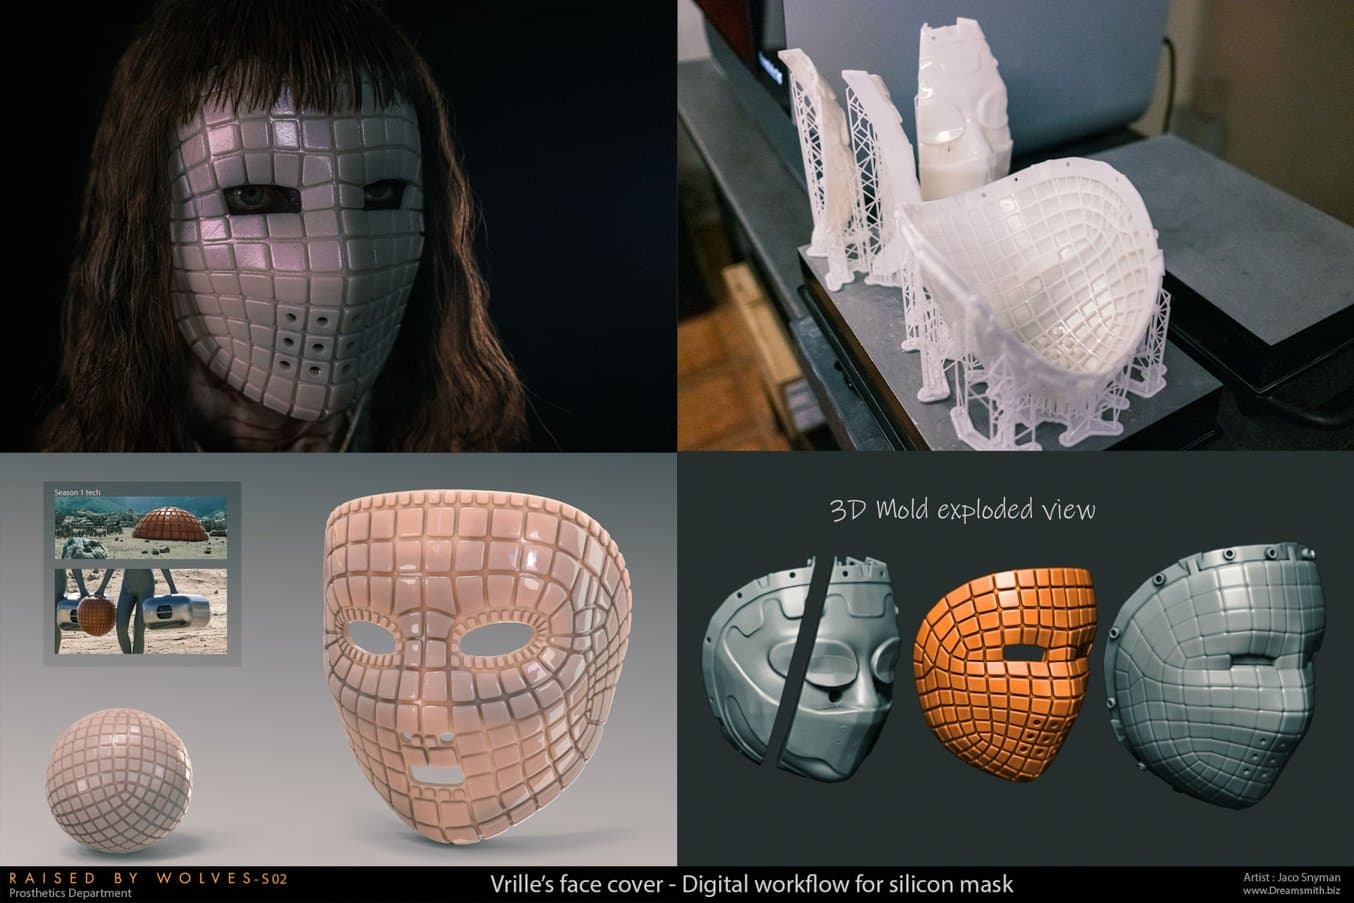
Designing and printing a complex shape and highly-detailed silicone mask with 3D printing.
Dreamsmith is an entertainment props and makeup effects firm based in South Africa. Their team has worked on designs for popular shows like Raised By Wolves, in which one particular effect needed was a silicone face mask incorporating a highly geometric exterior and an interior that conformed to the face of their actor.
Using the Form 3L, their team printed a mold that utilized optical scan data from the actor’s face for one interior surface, and a sharp geometric tile pattern for the other. While their design looks quite different from some of the product design examples in this report, the Dreamsmith team had many of the same material concerns, including ensuring compatibility of their mold material with skin-safe platinum cure silicone. They ultimately selected Formlabs Rigid 10K Resin for its high precision.
Eggshell Mold for Custom Medical Devices With Cosm
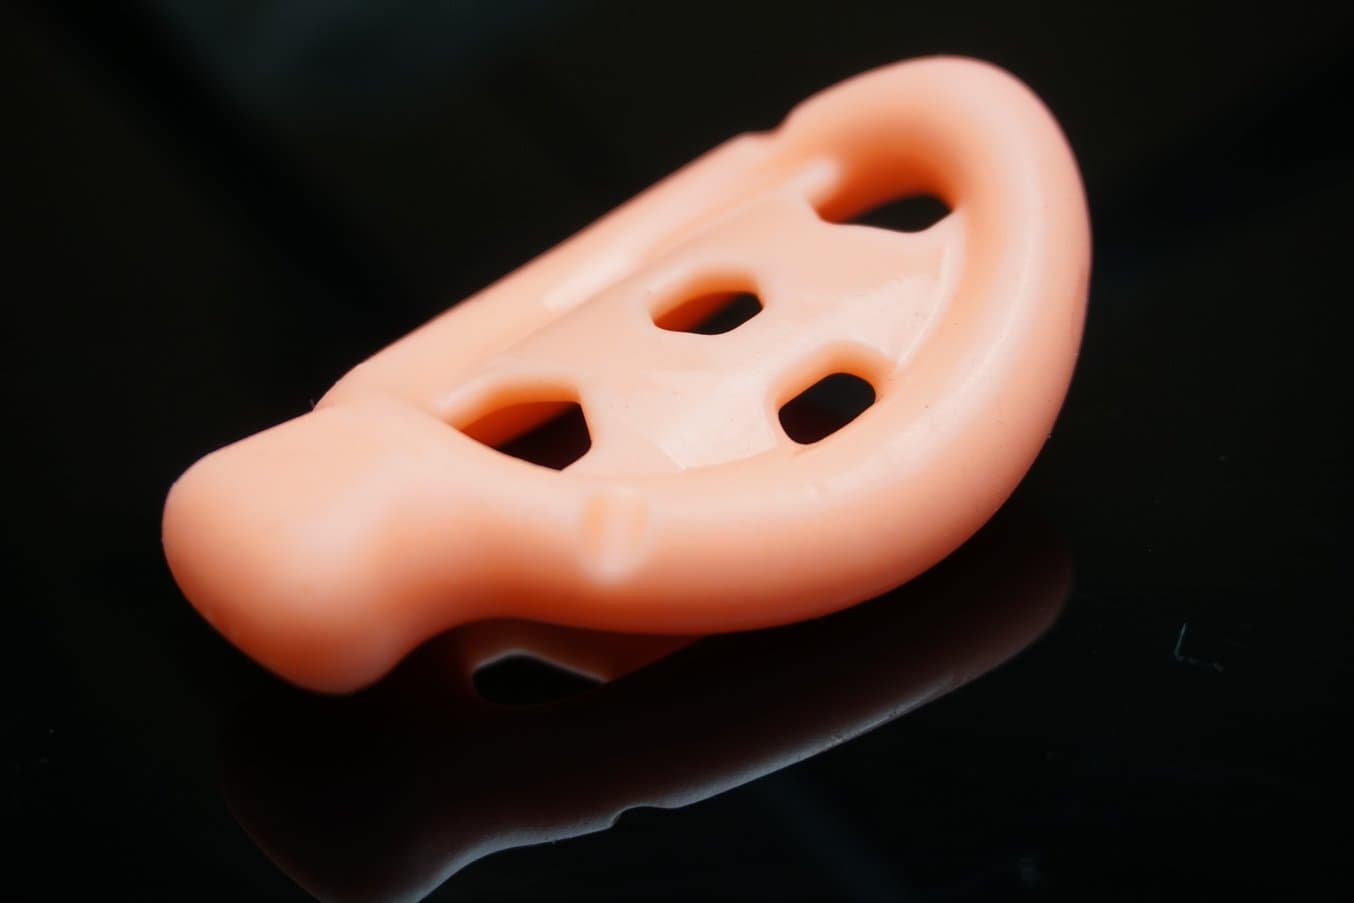
Cosm employs eggshell molds to produce custom silicone medical devices. Their thin-walled mold is printed with Biomed Amber Resin.
Cosm is a medical device company revolutionizing treatment for uterine prolapse, a common but often overlooked medical condition, with patient-specific silicone pessaries. The pessary is a non-surgical treatment approach in which a small support device is inserted below the uterus by a doctor. However standardized designs require fit by trial and error, and patients often give up on treatment before finding the proper fit.
The Cosm team’s approach utilizes data from a novel ultrasound technique to design a custom device tailored to a patient’s own anatomy. The Cosm team turned to Formlabs SLA printers for their silicone tooling, developing an eggshell-style conformal mold that is filled with medical-grade silicone and then cracked away to reveal the patient-specific silicone implant. The moldsare made from Biomed Amber Resin printed on the Form 3B.
Jetzt einsteigen in die Herstellung von Medizinprodukten aus Silikon
Die Anwendungen für Silikon sind vielfältig und reichen von Rapid Prototyping, Beta-Tests und Validierungsphasen in der Produktentwicklung bis hin zur kosteneffizienten Fertigung von Endverbrauchsteilen in kleinen Stückzahlen oder kundenindividueller Fertigung. Mit dem Formlabs-Ecosystem drucken Sie Teile aus Silicone 40A Resin für die Fertigung von Medizinprodukten, patientenindividueller Prothetik, audiologischen Komponenten und für die Umsetzung von komplexen Geometrien, die mit herkömmlichen Methoden nur schwer zu fertigen sind.
Laden Sie für vollständige Leitfäden zum 3D-Druck von Silikongussformen sowie von endgültigen Teilen aus Silikon unser Whitepaper herunter.