Matériel nécessaire :
Formlabs :
- Ensemble d’affichage de remplacement
Tiers :
- Clé six pans de 2 mm
- Gants en nitrile


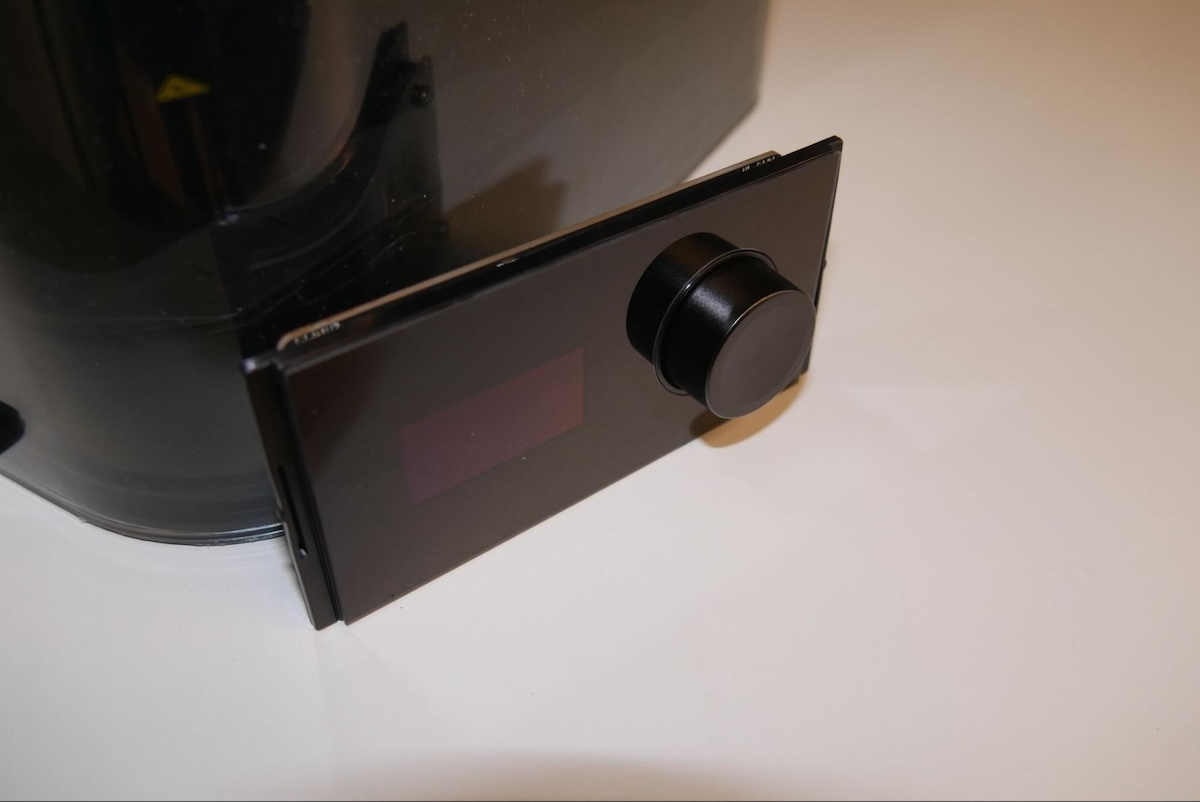
L’ensemble d’affichage de la Form Wash (2e génération) se compose de l’écran et du bouton de commande de la machine. Un écran endommagé ou défectueux peut vous empêcher de sélectionner et de démarrer un cycle de lavage.
Utilisez ce guide pour remplacer l’ensemble d’affichage de la Form Wash (2e génération).
Matériel nécessaire :
Formlabs :
Tiers :
Durée estimée : 15 à 30 minutes
Préparation de l’espace de travail
Aperçu : préparez la Form Wash et un espace de travail plat pour remplacer l’ensemble d’affichage.
AVERTISSEMENT :
La résine peut provoquer une irritation ou une réaction allergique cutanée. Portez des gants pour manipuler de la résine liquide ou des surfaces recouvertes de résine. Se laver abondamment les mains à l’eau et au savon.
Débranchez la Form Wash de sa source d’alimentation.
Soulevez la Form Wash en saisissant sa base, et non la cuve de lavage. Déplacez l’appareil dans un endroit bien ventilé. Placez l’unité sur une surface plane pour un accès facile.
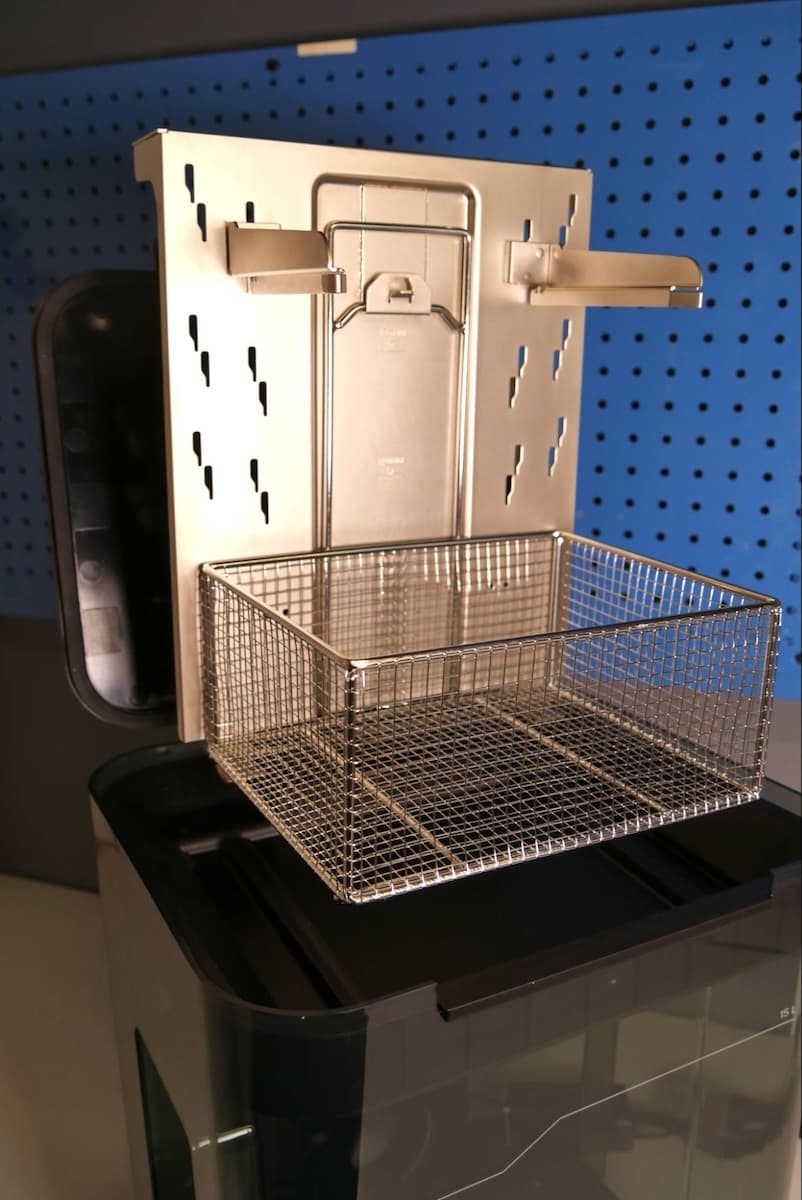
Soulevez le couvercle externe. Saisissez la partie supérieure de l’élévateur et tirez vers le haut jusqu’à ce qu’il atteigne la fin de sa course. Il est normal qu’il y ait des frottements ou des secousses lorsque vous soulevez le support, et cela ne devrait pas affecter l’appareil. Notez que l’élévateur peut ne pas rester en position haute de lui-même.
Étape 4 : Retirer la cuve de lavage
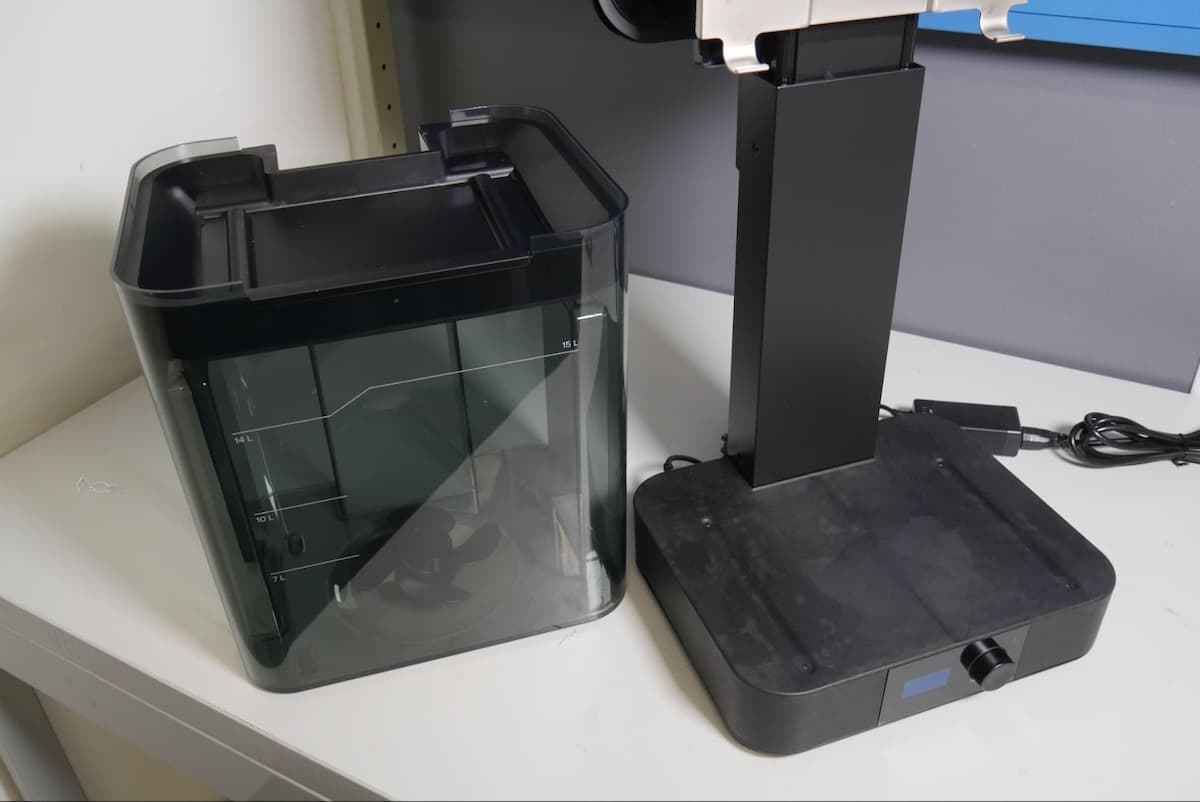
Retirez la cuve de lavage de la base et mettez-la de côté sur une surface stable et plane. Pour réduire le risque de déversement, retirez le solvant de la cuve de lavage à l’aide d’une pompe siphon.
DANGER :
L’alcool isopropylique est inflammable. Fermez les récipients et maintenez-les hors de portée des enfants.
Démontage de la plaque inférieure
Aperçu : retirez la plaque inférieure pour accéder à l’ensemble d’affichage.
Étape 1 : faire pivoter l’unité
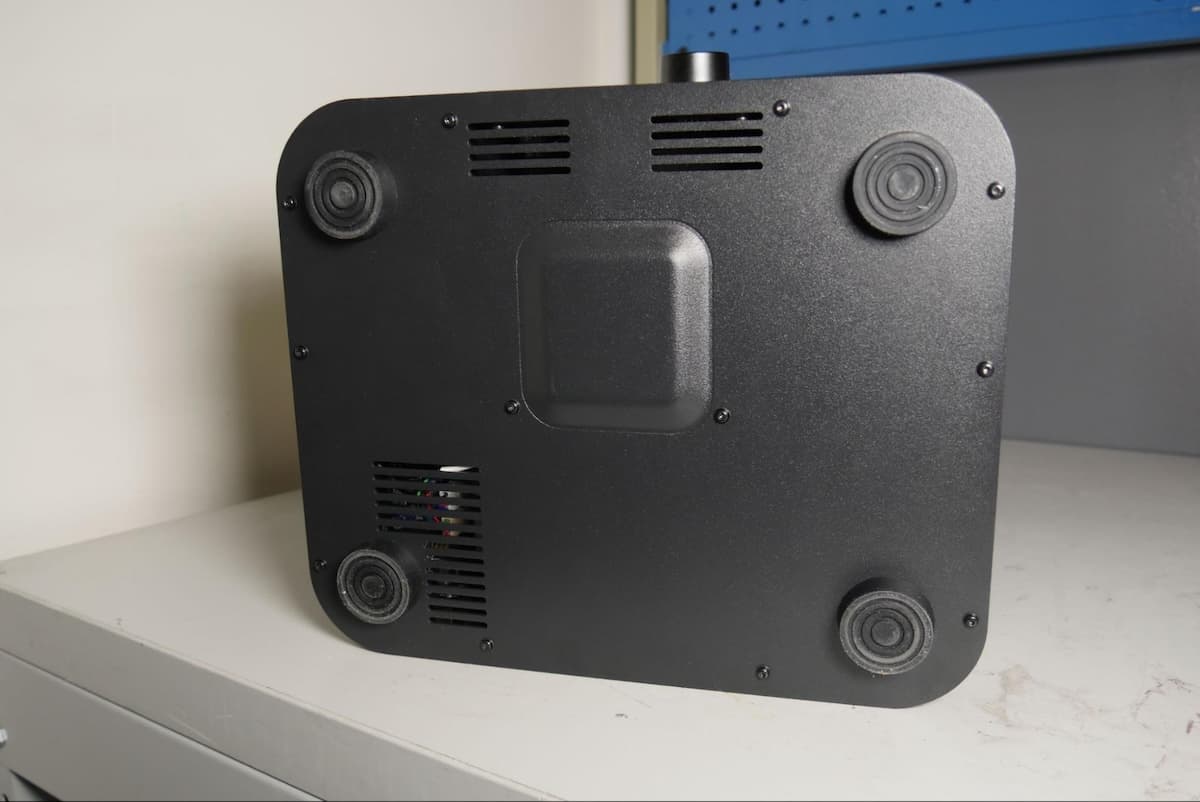
Fermez le couvercle et faites pivoter la Form Wash sur le dos, la plaque inférieure tournée vers vous.
Étape 2 : désinstaller la plaque inférieure
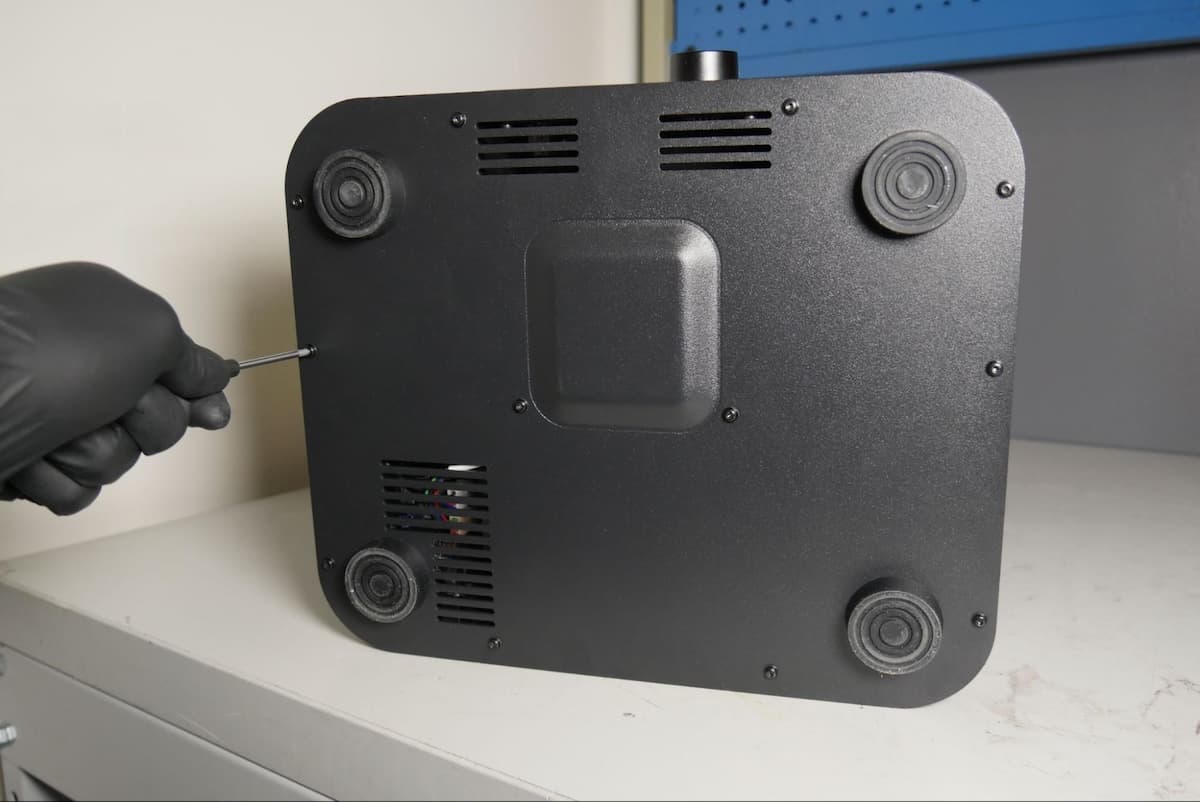
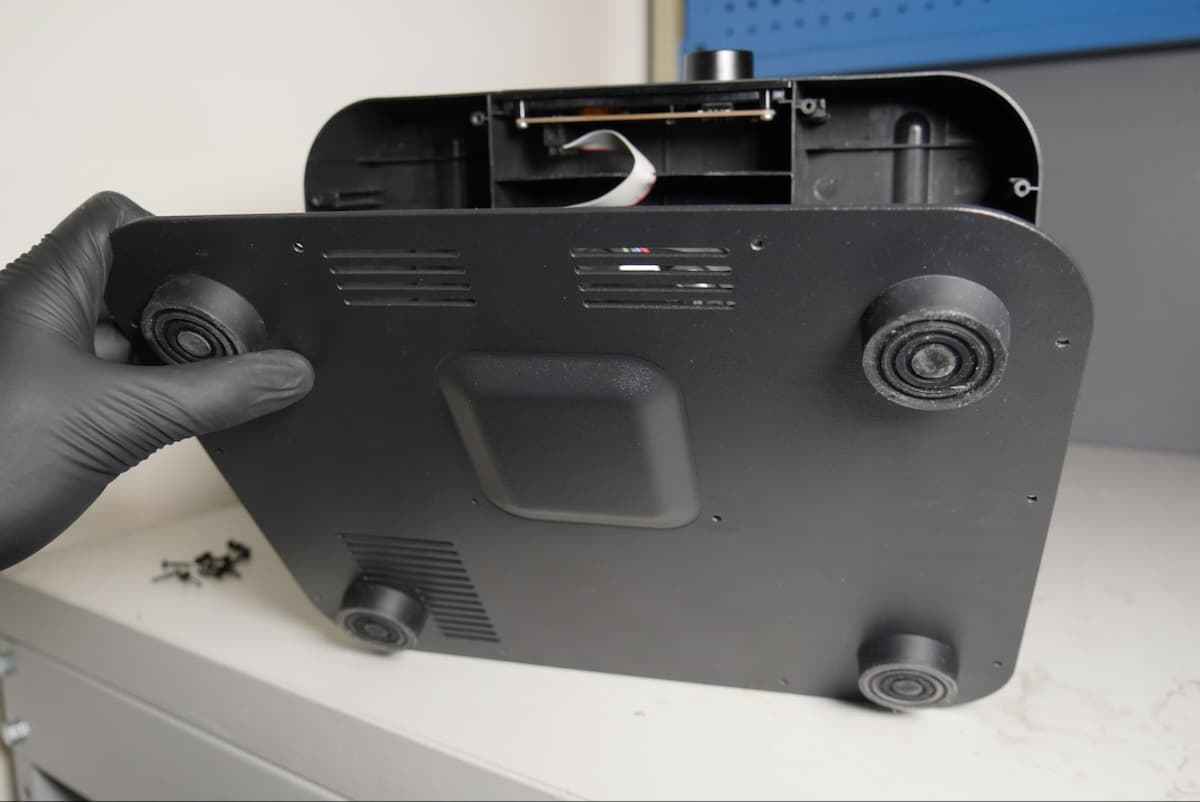
Utilisez une clé six pans de 2 mm pour desserrer et retirer les 12 vis qui fixent la plaque inférieure à la Form Wash. Séparez la plaque inférieure de l’appareil. Mettez la plaque inférieure et les vis de côté.
Retrait de l’ensemble d’affichage
Aperçu : débranchez et désinstallez l’ensemble d’affichage.
Étape 1 : Retirer l’ensemble d’affichage
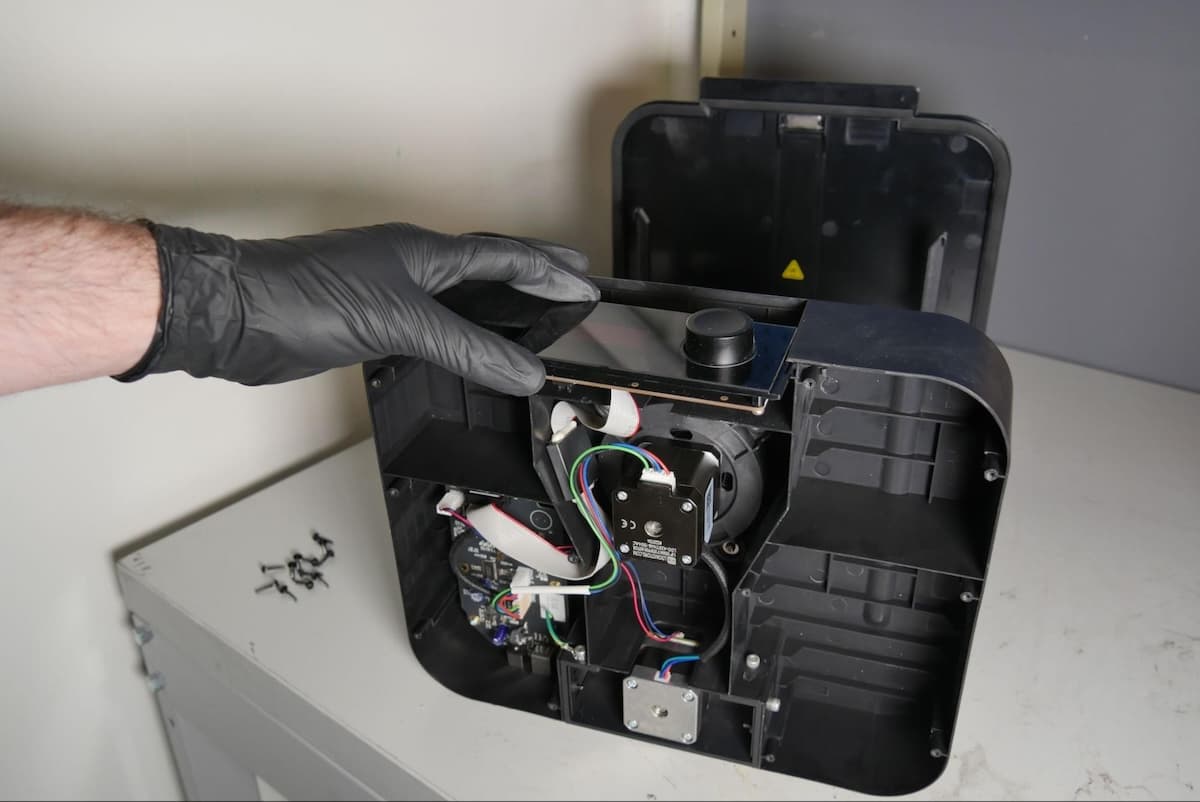
Tirez doucement sur l’ensemble d’affichage pour le sortir de la Form Wash. L’ensemble d’affichage est toujours connecté à la Form Wash par un câble à ce moment-là.
Étape 2 : Débrancher le câble d’affichage
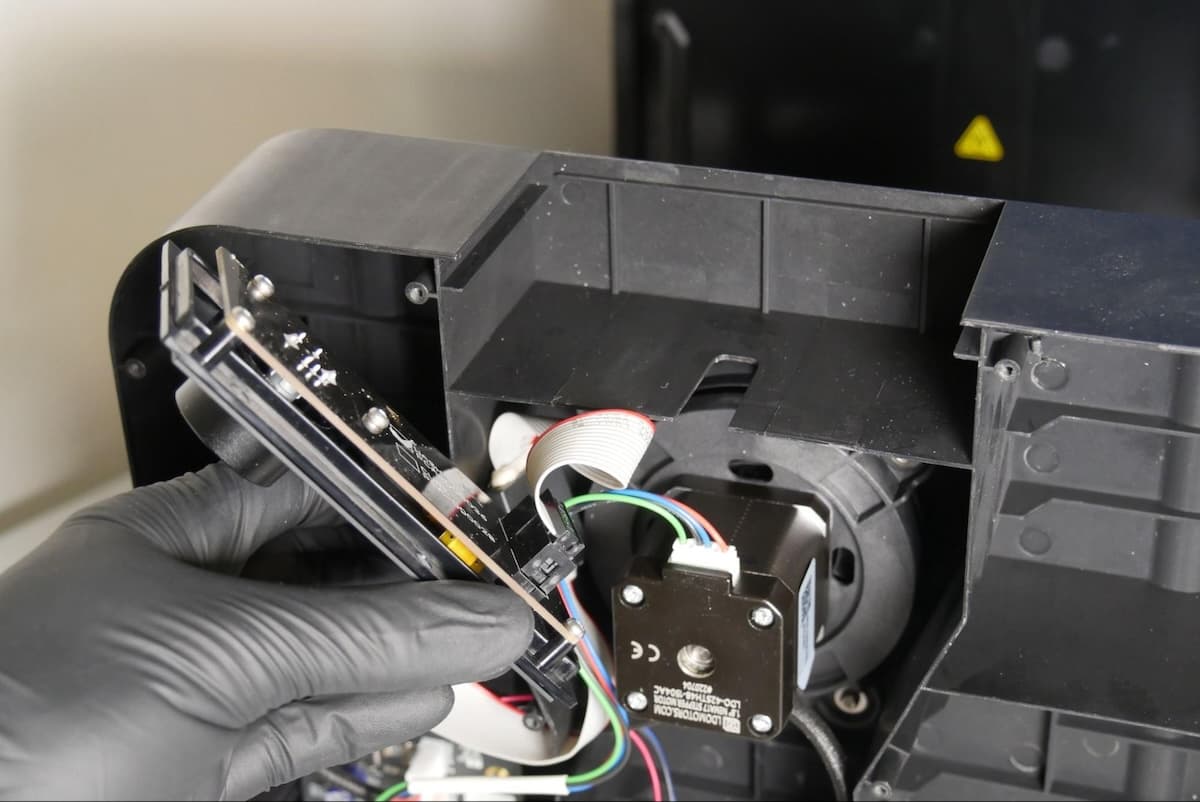
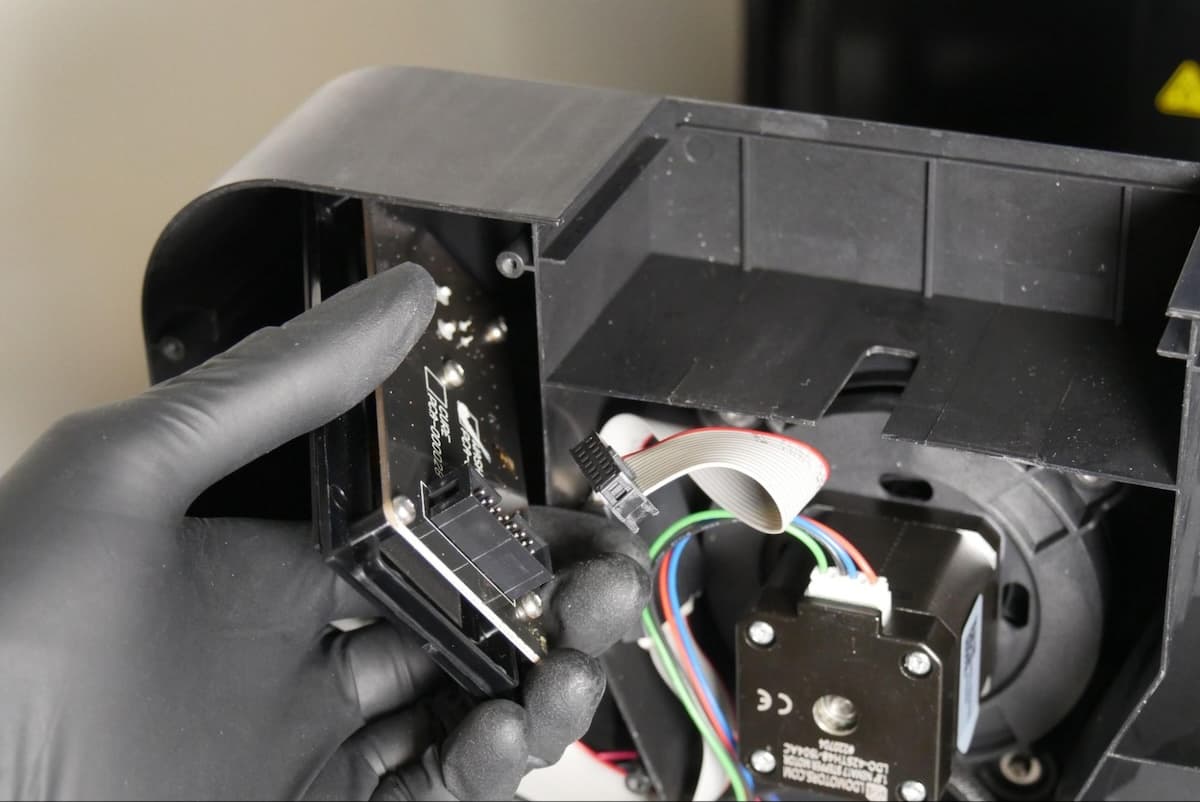
Saisissez le câble d’affichage par son boîtier et débranchez-le de l’ensemble d’affichage. Veillez à ne pas tirer sur le câble.
Installation de l’ensemble d’affichage
Aperçu : Après avoir retiré l’ensemble d’affichage d’origine, installez l’ensemble d’affichage de remplacement.
Étape 1 : Connecter le câble d’affichage au nouvel ensemble d’affichage
Poussez le connecteur du câble d’affichage dans l’arrière du nouvel ensemble d’affichage. Assurez-vous que le connecteur du câble est bien en place.
Étape 2 : Monter l’ensemble d’affichage de remplacement
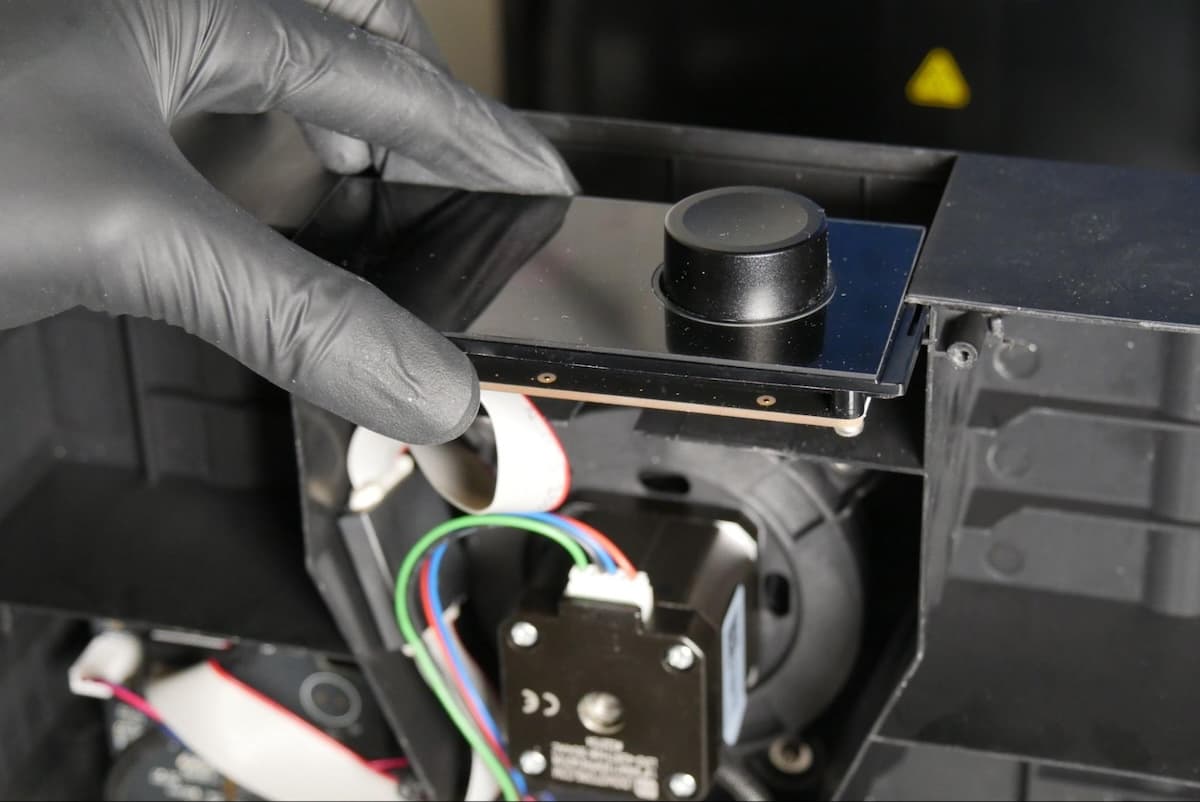
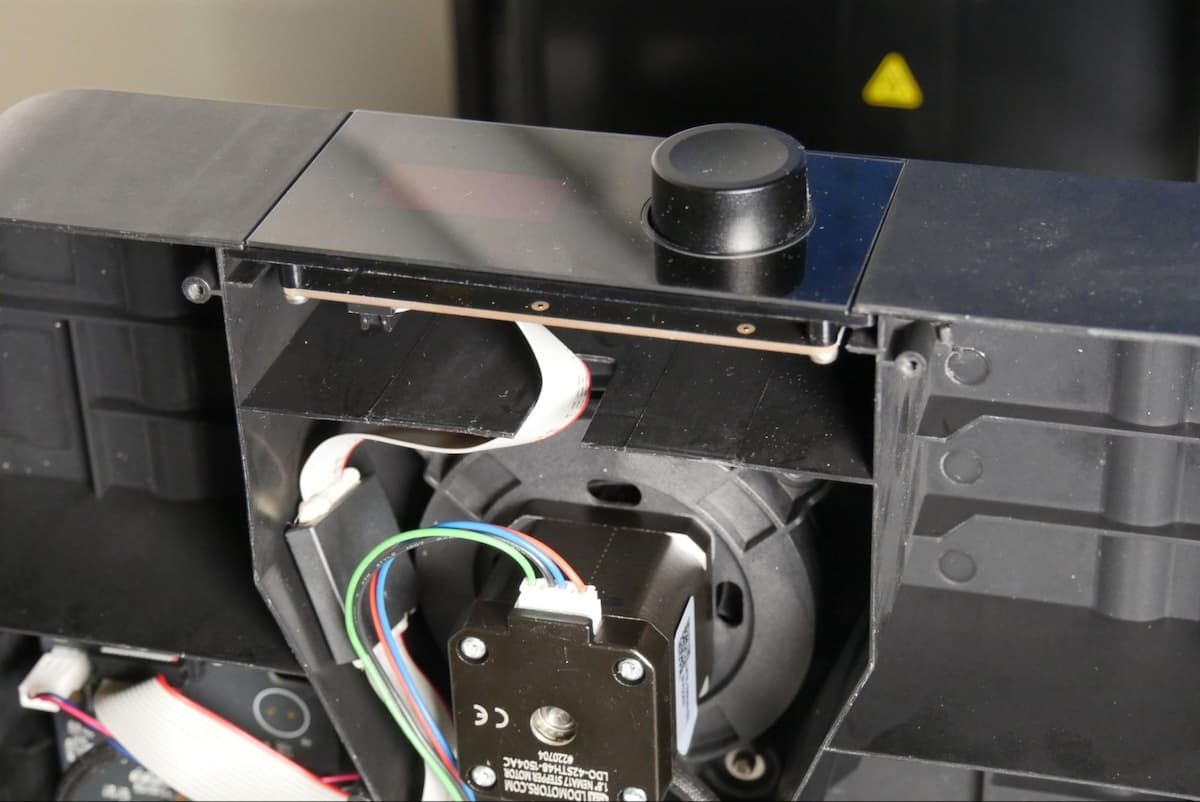
Orientez l’ensemble d’affichage avec le bouton à droite. Exercez une pression uniforme pour insérer le nouvel ensemble d’affichage dans la base. Veillez à ce que le bas de l’ensemble d’affichage affleure le fond de la Form Wash et à ce que le câble de l’écran ne soit pas pincé ou plié.
Réinstallation de la plaque inférieure
Aperçu : montez et fixez la plaque inférieure.
Étape 1 : Monter la plaque inférieure
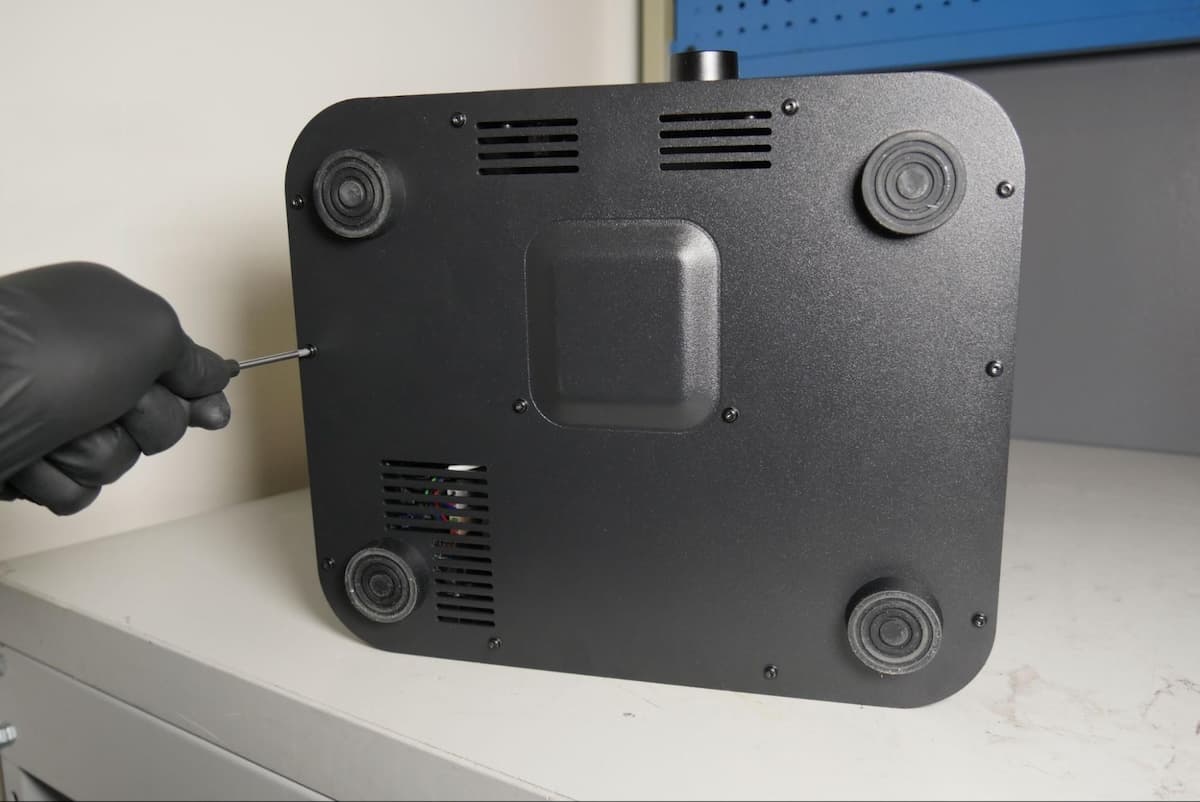
Maintenez la plaque inférieure contre la Form Wash. Veillez à ce qu’elle soit bien à plat contre la Form Wash et que les trous de vis de la plaque inférieure soient alignés sur ceux du fond de l’appareil.
Étape 2 : Fixer la plaque inférieure
Visser une vis dans chacun des 12 trous de vis de la plaque inférieure. Utilisez une clé six pans de 2 mm pour serrer jusqu’à ce qu’elles soient bien ajustées.
Finalisation de la réparation
Aperçu : après avoir installé le nouvel ensemble d'affichage, mettez la machine sous tension et effectuez les vérifications finales.
Étape 1 : Mettre l’unité en position verticale
Remettez l’appareil en position verticale.
Étape 2 : réinstaller la cuve de lavage
Réinstallez la cuve de lavage dans la Form Wash. Si vous avez précédemment vidé le solvant, remplissez la cuve de lavage.
Étape 3 : Mettre l’appareil sous tension
Connectez la Form Wash à l’alimentation électrique. La machine s’allume et s’initialise.
Étape 4 : tester la réparation
Vérifiez que le menu de la Form Wash est visible sur l’écran. Essayez de tourner le bouton et de sélectionner plusieurs options différentes sur l’écran. Contactez l’assistance Formlabs ou votre revendeur agréé pour partager les résultats de la procédure.