
WHITE PAPER
Camera malfunctions (Form 4 and Form 4L generation)
Camera malfunctions (Form 4 and Form 4L generation)
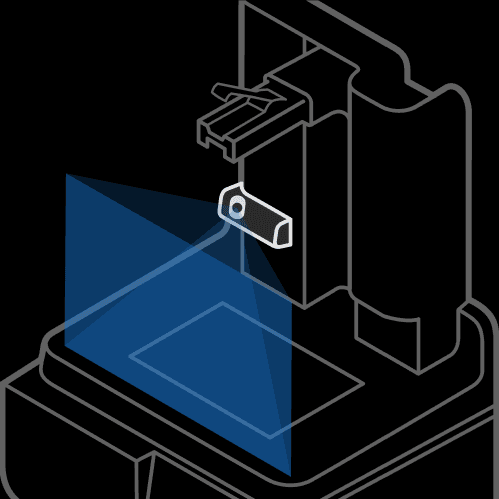
Form 4 and Form 4L generation printers contain an integrated camera. If the camera is enabled, it automatically saves a photo of each print when it completes. The camera is located to the left of the Z-axis tower and points at the build platform and resin tank.
If the camera is damaged, disconnected, or disabled, it may not be able to take pictures or the pictures may be too dark or otherwise discolored.
Symptoms
- No post-print photo or timelapse (if enabled)
- PreForm or Dashboard cannot show a live snapshot
- Photos or timelapses are dark or discolored
Causes
- Camera is disabled on the printer
- Timelapse was not enabled for a print job
- Network connectivity issue
- Firmware bug
- Damaged or disconnected camera cable
- Damaged camera module
Troubleshooting steps
- The camera is disabled before setup. You are prompted during onboarding to enable it, but can disable it at any time. Check the following:
- The printer’s camera is on
- Camera analytics are enabled
- The printer is registered to Dashboard
- The printer is connected to the internet
- If you expected but cannot see a timelapse of your most recent print, make sure that the Timelapse recording option is enabled for your next print.
- Open PreForm.
- Click the name of a Printer. The Job Setup window opens.
- Scroll to the Choose Printer section. Click to select a Form 4 or Form 4L generation printer.
- Scroll down to the Choose Print Settings section and toggle Timelapse recording to ON. The toggle turns blue.
- Click Apply. The timelapse recording settings are applied.
- Ensure that your printer's firmware is up to date.
- Reseat the camera cable. Follow the instructions in the guide for replacing your printer’s camera to unplug the camera cable and reconnect it to the camera module.
- Replace the camera module. Replacement camera modules are available for purchase on the Formlabs Store.
- Form 4 generation
- Form 4L generation
- If the issue persists, contact Formlabs Support or your authorized reseller