

Injection molding
Injection molding
Injection molding is a cost-effective process for mass-producing identical parts with tight tolerances. Traditionally, injection molding uses tools made out of metal with CNC machining or electric discharge machining, requiring specialized equipment, high-end software, and skilled labor.
3D printing allows users to fabricate injection molds for prototyping and low-volume production, significantly reducing cost and time compared to metal molds while still producing high-quality and repeatable parts. SLA printed parts have a smooth surface finish, high precision, and are chemically bonded to be dense and isotropic.
3D printed molds support a broad range of thermoplastics such as acrylonitrile butadiene styrene (ABS), acrylonitrile styrene acrylate (ASA), polyamide (PA), polycarbonate (PC), polyethylene (PE), polyoxymethylene (POM), polypropylene (PP), thermoplastic elastomer (TPE), and thermoplastic polyurethane (TPU). A low viscosity material helps reduce the pressure and extend the lifetime of the mold.
- Polypropylene, polyethylene, and thermoplastic elastomer are easy to process at hundreds of cycles.
- More technical plastics like polyamide or polycarbonate support a lower number of runs.
- Thermoplastic polyurethane may adhere to the printed mold. Use a release agent to help to separate the part from the mold.
Formlabs recommended materials
Rigid 10K Resin is an industrial-grade, highly glass-filled material that serves as an ideal molding material for a wide variety of geometries and injection molding process conditions.
With a heat deflection temperature (HDT) of 218 °C @ 0.45 MPa and a tensile modulus of 10,000 MPa, Rigid 10K Resin is a strong, extremely stiff, and thermally stable molding material that maintains its shape under pressure and temperature to produce accurate parts.
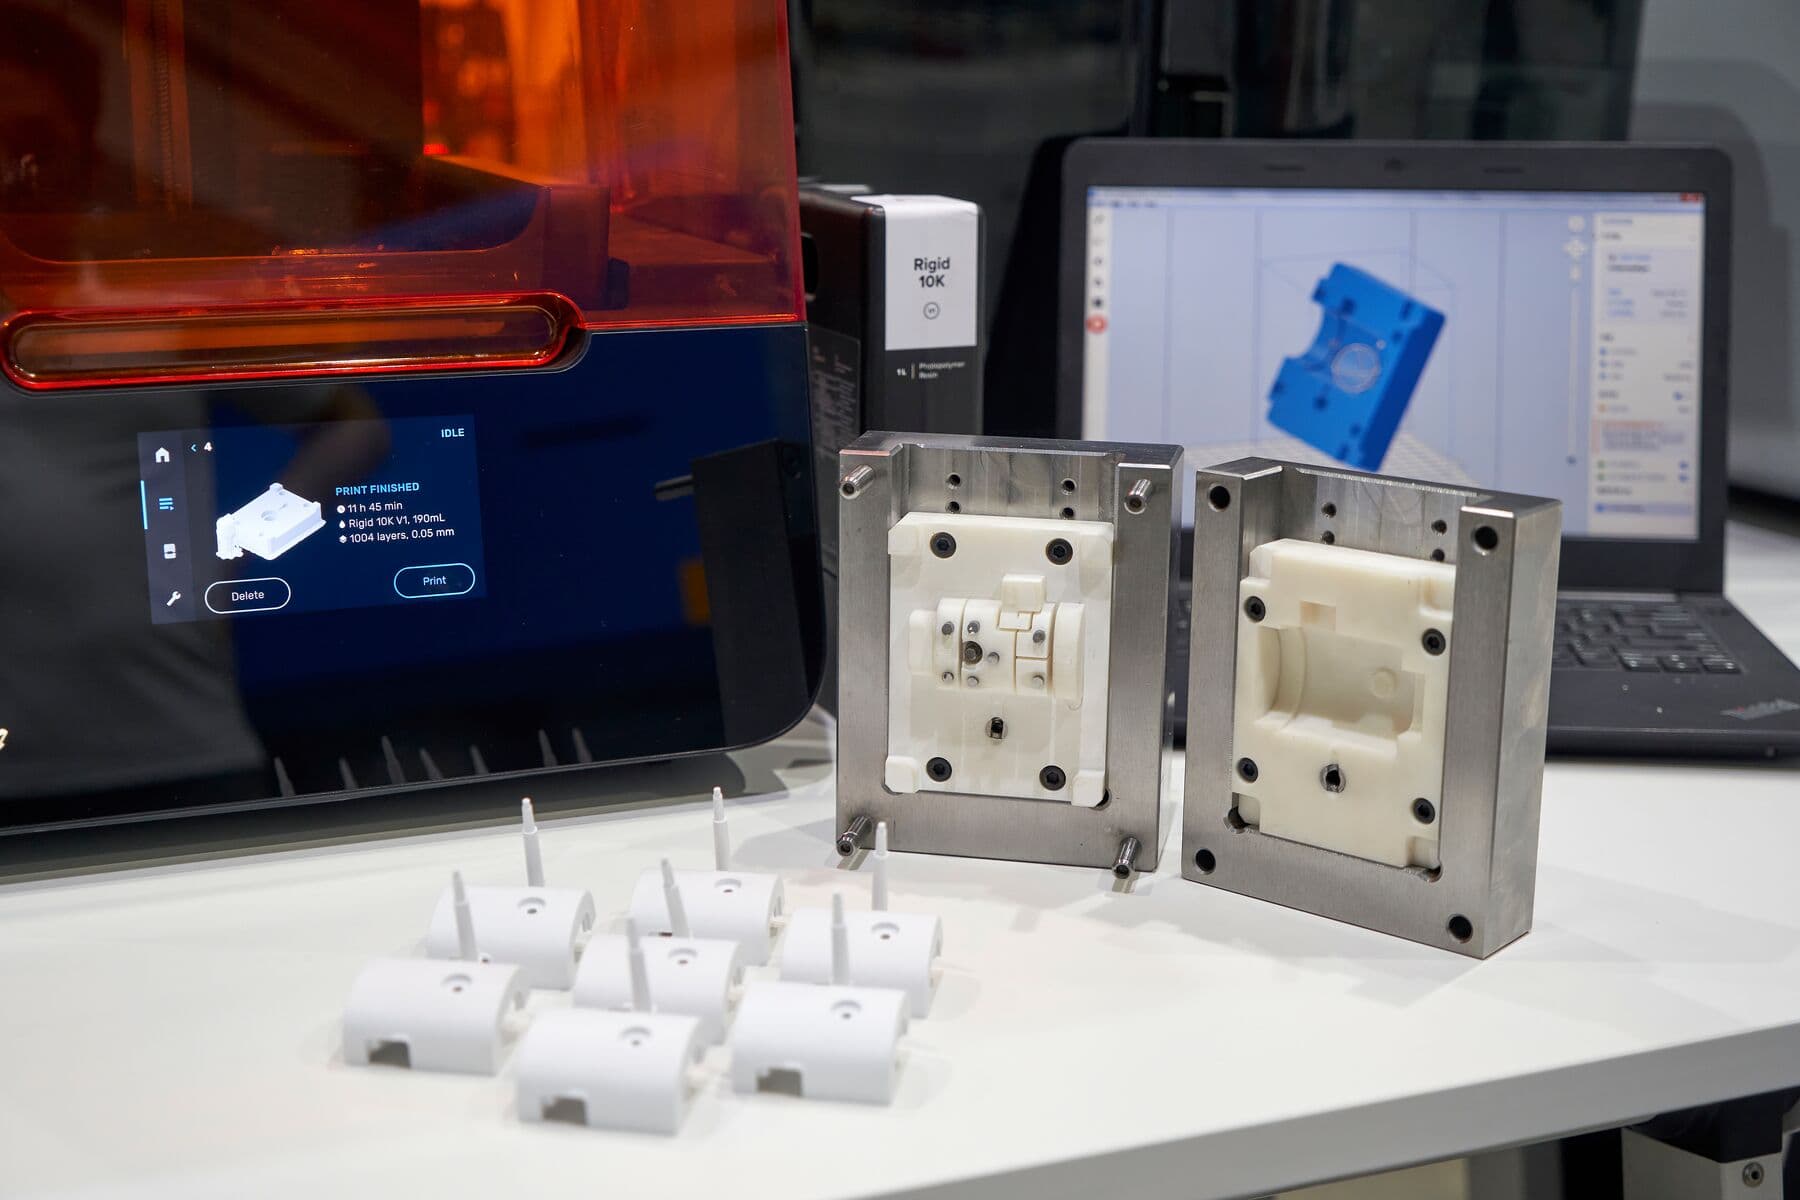
Alternatively, High Temp Resin is also suitable for injection molds. High Temp Resin’s HDT of 238 °C @ 0.45 MPa is the highest of Formlabs resins, allowing it to withstand higher molding temperatures with better performance on thin walls and fine details. However, molds printed in High Temp Resin are more brittle than from Rigid 10K Resin and break much earlier under pressure.
Grey Pro Resin is a third option, only suitable for small and a low number of parts. It should be used when pressures and temperatures are low and the dimensional accuracy of your molded part is less critical. Molds made from Grey Pro Resin bend before breaking, worsening accuracy over time as the mold is used.
This is summarized in the table below where more stars indicate better performance under that condition.
| Criteria | Rigid 10K Resin | High Temp Resin | Grey Pro Resin |
|---|---|---|---|
| High molding temperature and pressure | * * * | * * * | * |
| High number of cycles | * * * | * | * |
| Thin walls | * * | * * * | * |
| Reduce resin costs | * | * * | * * * |
Design considerations
When designing a printed part for injection molding, follow Formlabs’ best practices for additive manufacturing as well as the general rules for injection mold design.
General guidelines:
- Design parts with 3° to 5° of draft angles
- Maintain a uniform wall thickness across the part
- Round up edges
- Plan stock allowance (min 0.5 mm) on the mold and post-process to adjust the sizes.
Formlabs recommends printing one set of the mold prior to production to understand dimensional deviations. Edit the CAD model to account for these deviations in the mold design.
To extend the lifetime of the mold:
- Open up the gate to reduce the pressure inside the cavity.
- Design one side of the stack flat while the other side carries the design. This reduces the chance of misalignment during mold clamping and reduces the risk of flashing.
- Include large air vents (0.05 mm depth) from the edge of the cavity to the edge of the mold for a better flow into the mold, minimized pressure, and alleviated flashing in the gate area to decrease cycle time.
- Avoid thin cross-sections: surface thickness less than 1–2 mm may deform with heat.
- Incorporate cooling channels to monitor the tool temperature.
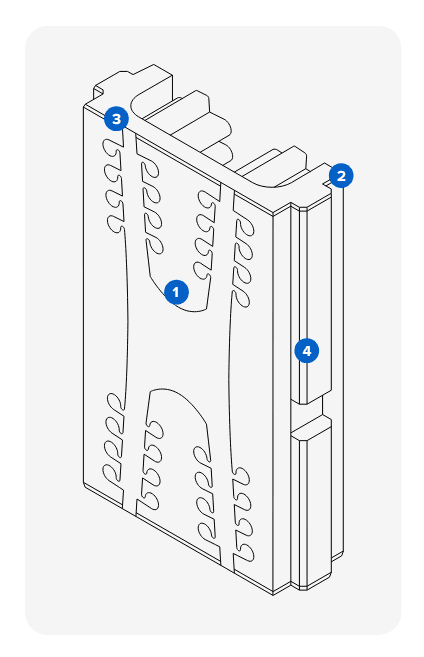
To optimize the print:
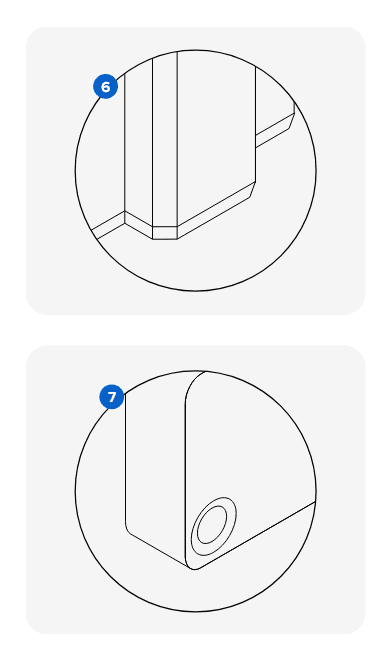
- Add chamfer to help to remove the piece from the build platform.
- Build assembly features or centering pins at the corners.
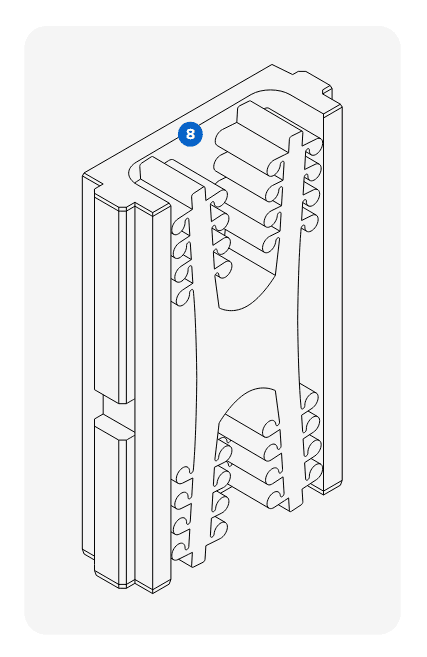
- Reduce the cross-section in areas that are not supporting the cavity to save material costs and reduce risks of print failure or warpage.
Printing considerations
Follow Formlabs best practices for model orientation and avoid printing supports on molding surfaces. If the geometry allows it, print the mold flat on the edge directly on the build platform, in order to reduce warpage. Printing without supports also saves printing time, labor, and resin. Select a base surface that will minimize overhangs.
- Print both halves of the molds aligned in reference to the build direction. Potential size variations will be more consistent, improving the quality of the parting line.
- Support all free-hanging cores, in particular small diameter cores.
- Print at 25–50 µm layer height for dimensional accuracy and smooth ejection of the plastic part from the mold.
- Print multiple cores in case of breakage. Employ interchangeable stacks to run new cycles while the other sets cool in order to decrease the cooling time and compensate for the low thermal conductivity of a plastic mold.
Post-processing considerations
Follow Formlabs best practices for washing and post-curing prints. Refer to the individual material articles for specific wash and cure instructions.
- Finish the printed mold to meet critical dimensions such as diameters and outer surfaces.
- Desktop milling, drilling, or hand-sanding will help to fit both halves of the mold together and avoid flashing.
- For thin, over hanging parts, use 3D printed cores with metallic inserts to prevent breakage.
To extend the life of the 3D printed mold, Formlabs recommends:
- Reduce the clamping force.
- Keep the injection pressure and speed low, in particular at the beginning. Gradually increase the injection parameters.
- Maintain the tool temperature below 60 °C. To accelerate cooling:
- Allow ambient air to cool the mold.
- Apply compressed air to cool the mold.
- Incorporate cooling channels in the design.
- Apply a release agent for some technical thermoplastics. Mold release is widely available and silicone mold releases are compatible with Grey Pro Resin, High Temp Resin, and Rigid 10K Resin.
End-use recommendations and limitations
3D printing is a powerful solution to fabricate injection molds rapidly and at a low cost. It is particularly recommended for:
- Later-stage functional prototyping with end-use materials
- Product validation
- Low-volume production
Even though 3D printed molds can offer advantages when used appropriately, there are still limitations. 3D printed polymer molds do not have the same performance abilities as machined metallic molds. Some limitations include:
- Dimensional accuracy
- Longer cooling times
- Printed molds are more fragile under heat and pressure
- Adhesion of the part to the mold can cause deterioration of the mold during extraction
Additional resources