WHITE PAPER
Formlabs Logo

Installing the Polishing System (Fuse Blast)

Installing the Polishing System (Fuse Blast)

The Fuse Blast Polishing System is a module you can install on your Fuse Blast to provide additional polishing for SLS printed parts.

Installing the Polishing Module

  1. Flip the breaker switch on the back of the unit to the OFF position to turn off the machine and unplug the power cable from the back of the unit. Wait five minutes before proceeding.
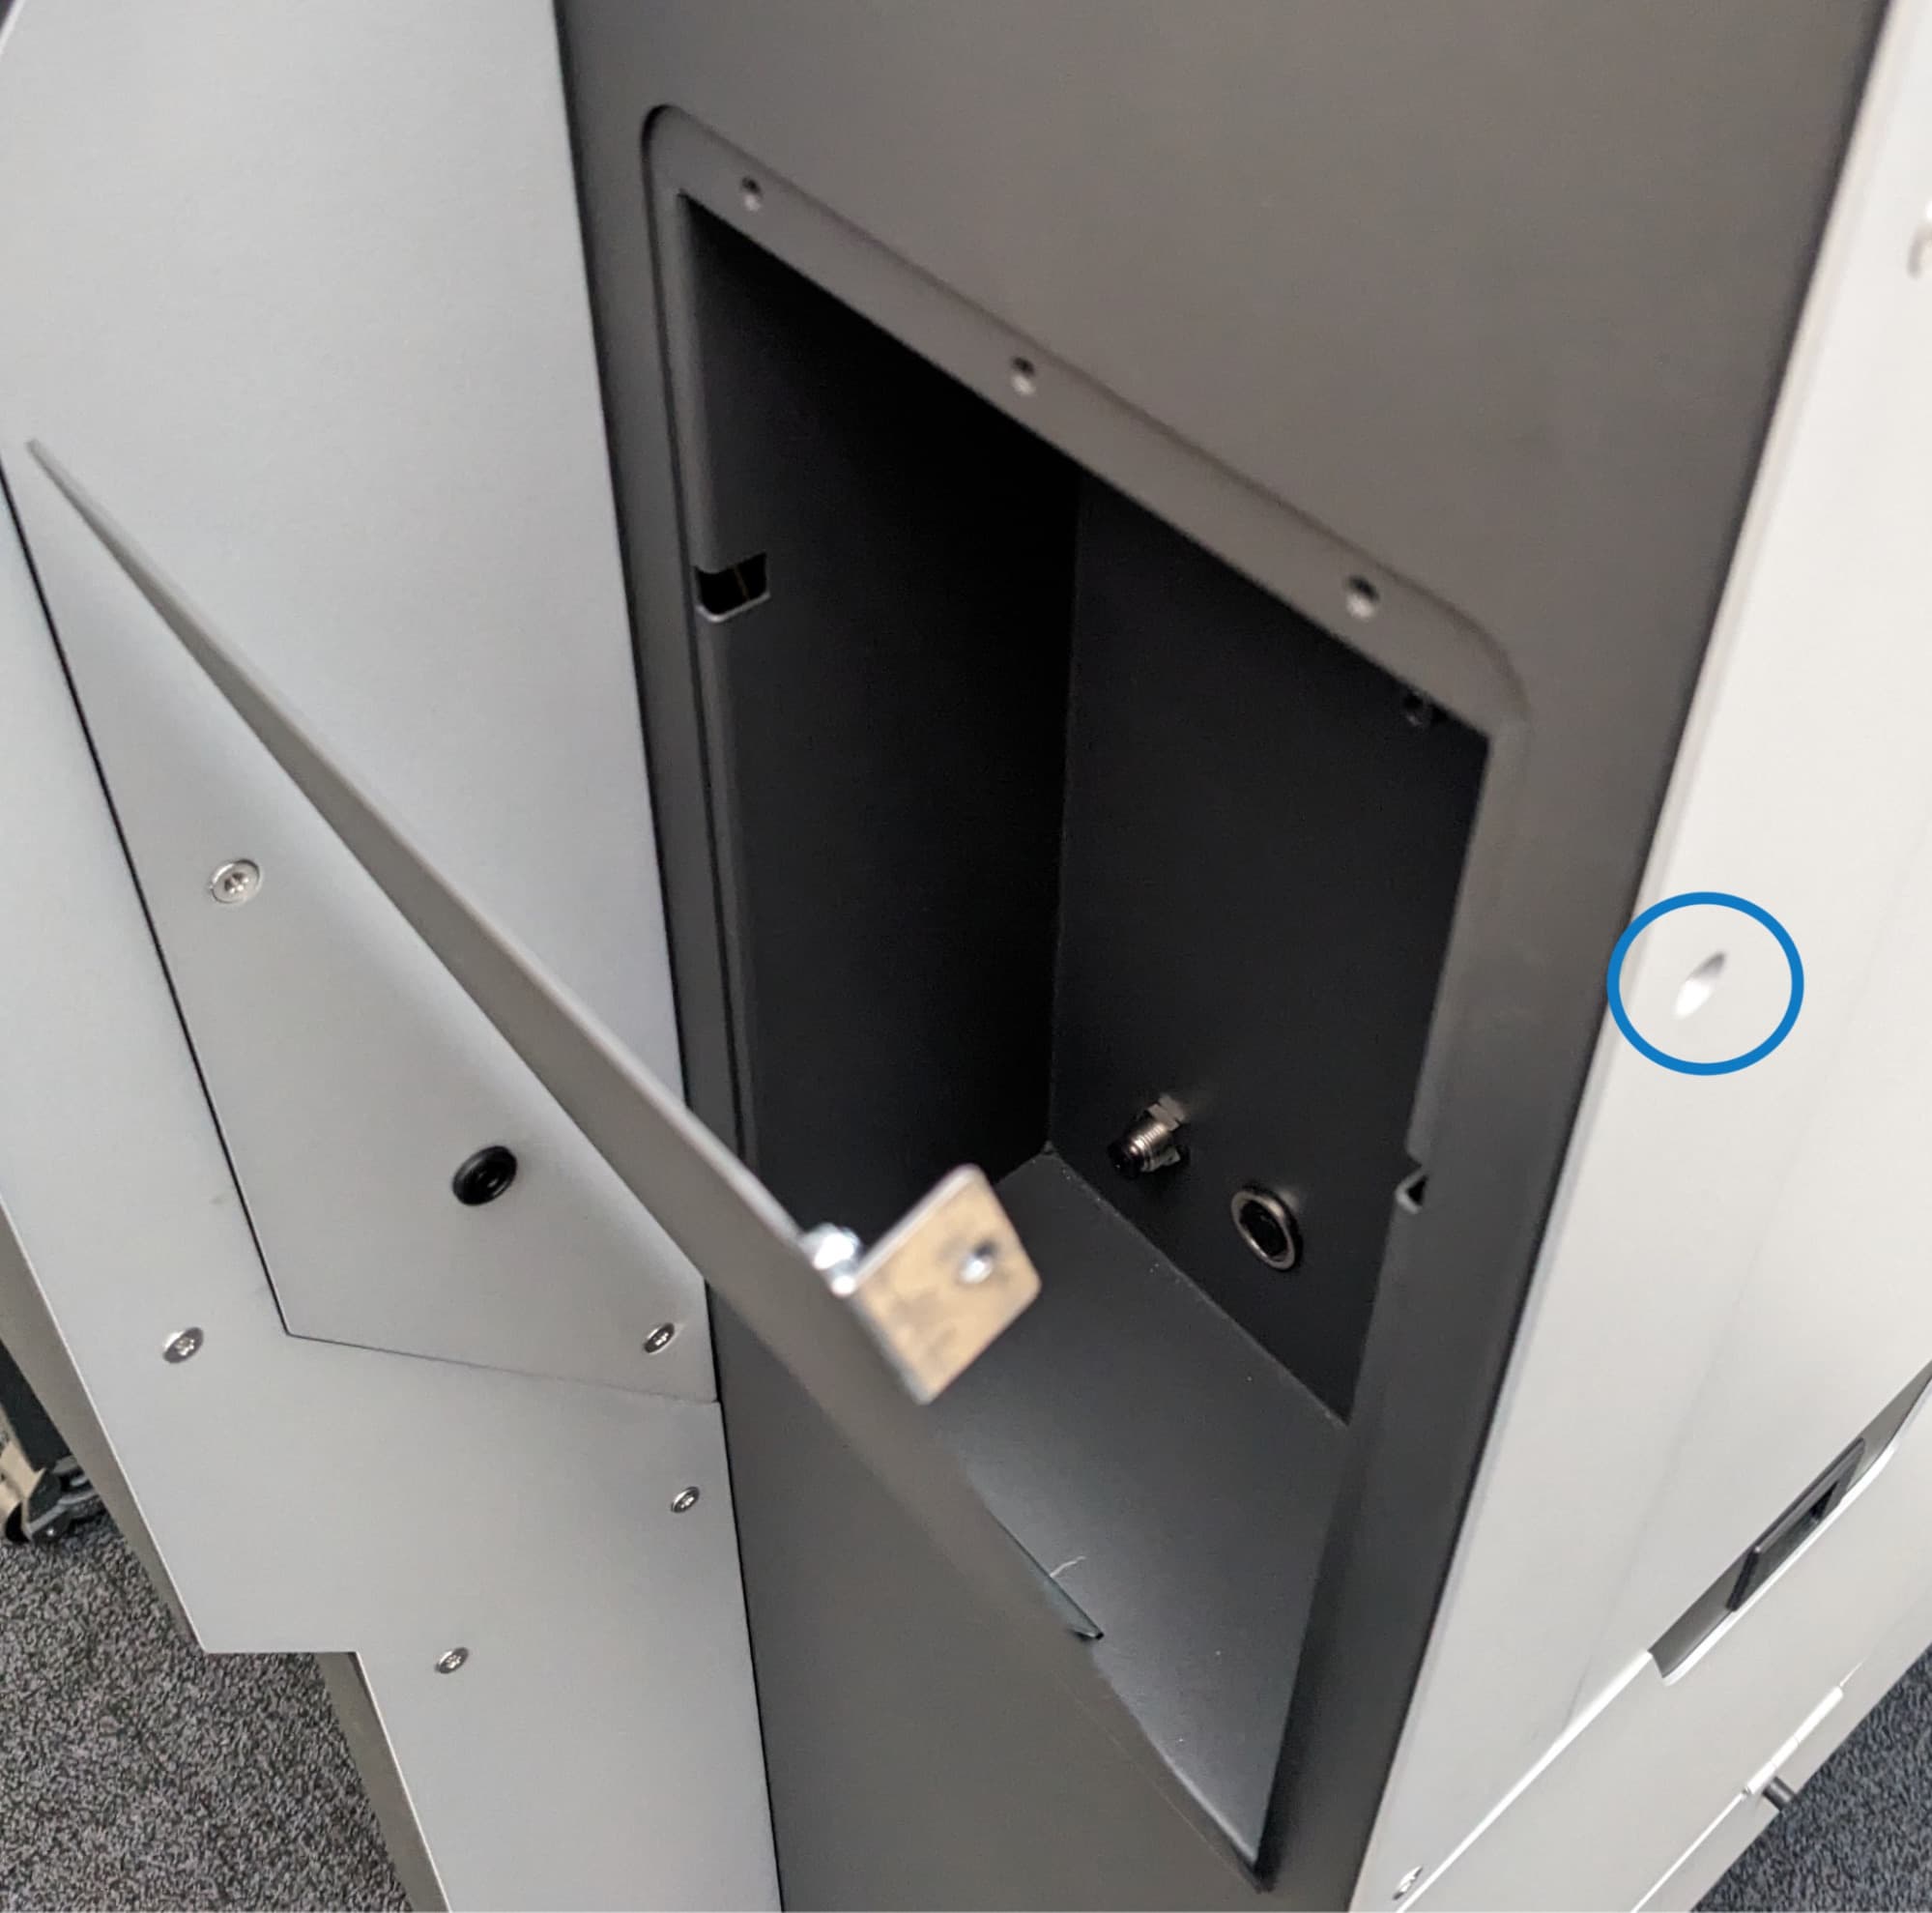
  2. Remove the T15 Torx screw from the side of the unit and the front panel from the polishing cavity.
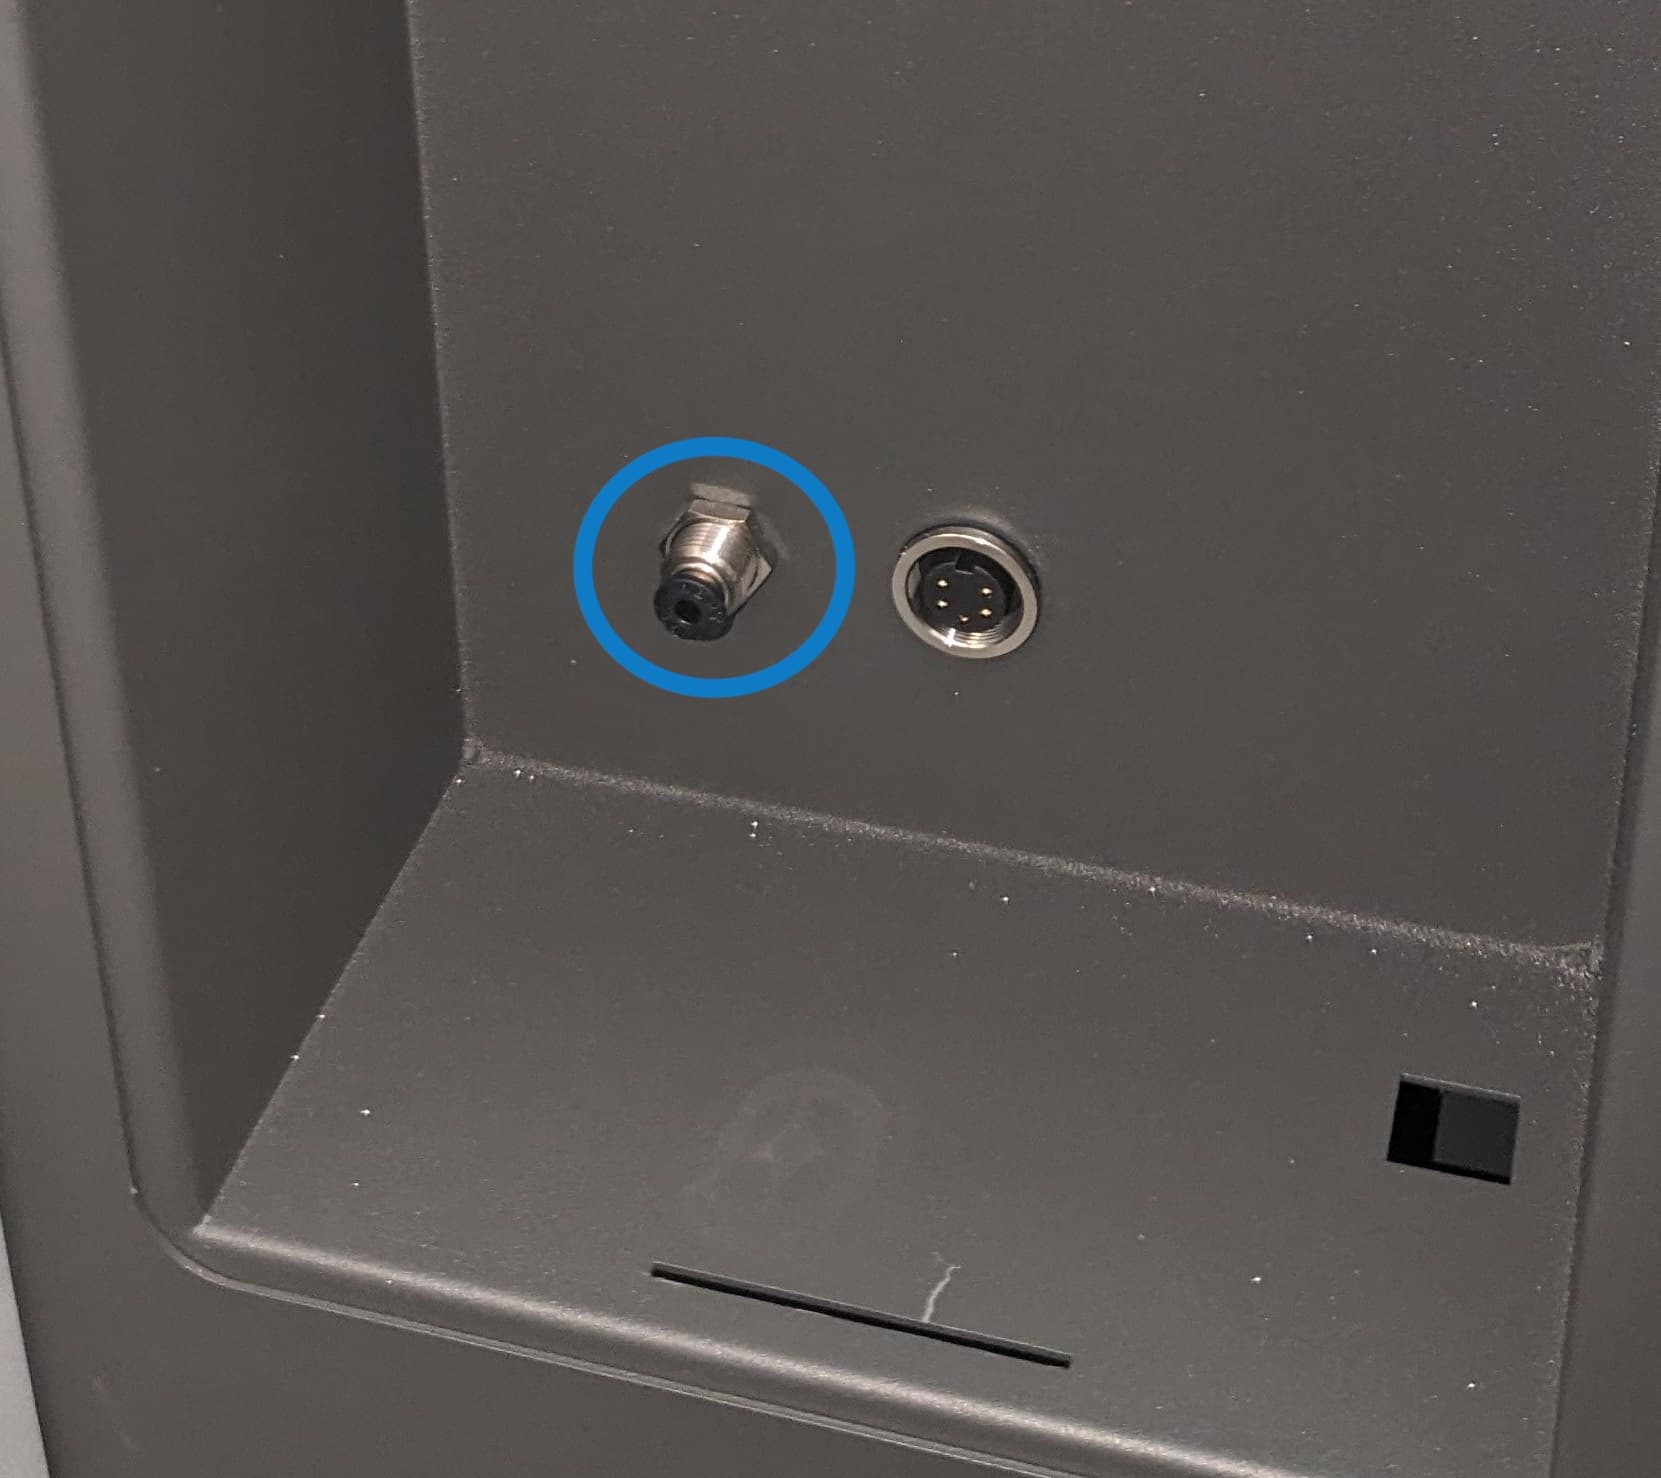
  1. The Polishing Module has a water tube and an electrical cable that must be connected to the Fuse Blast. Insert the plug for the water tube into its fitting.
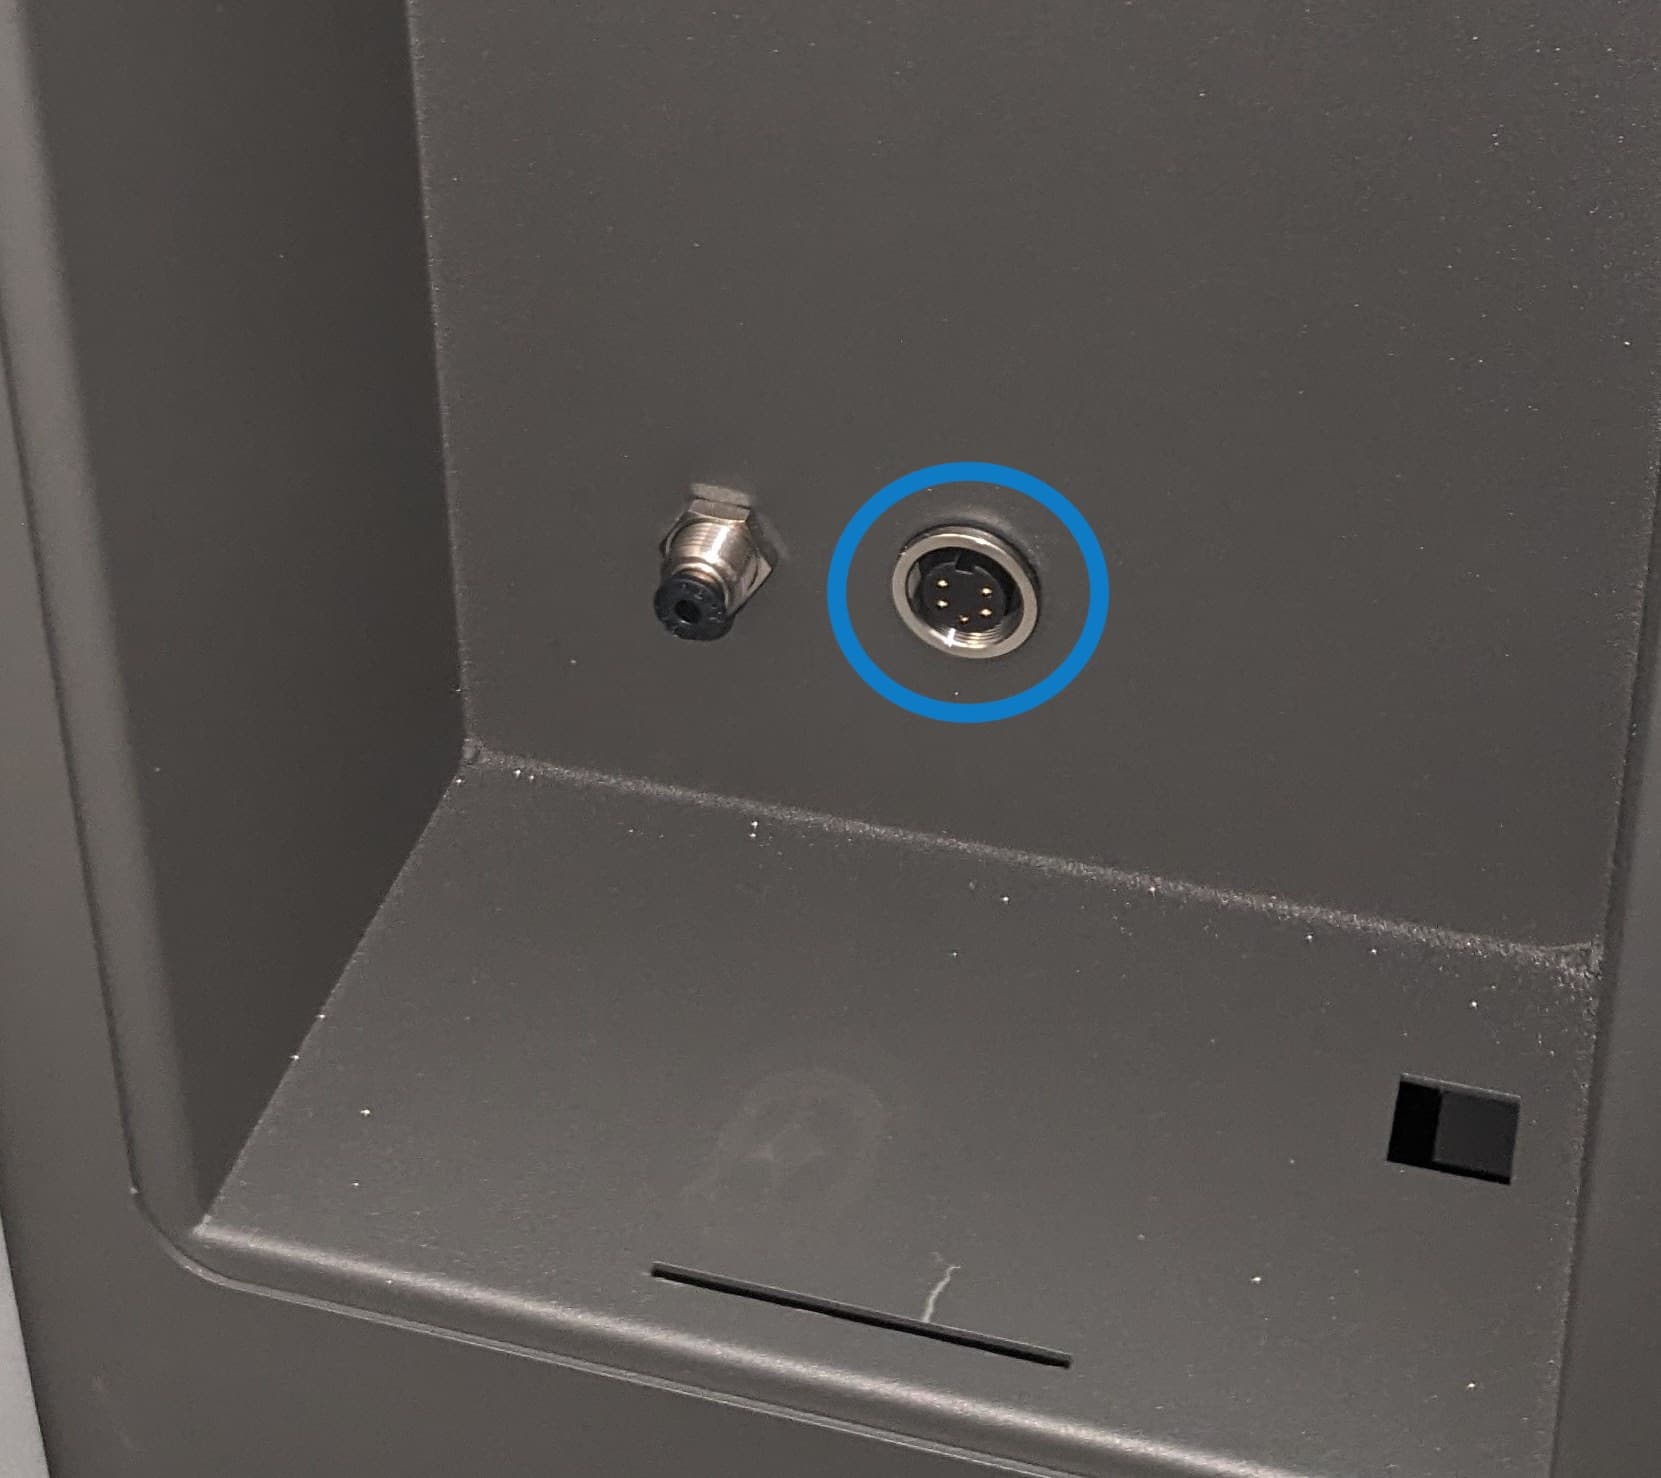
  1. Plug the Polishing Module cable into the Polishing System module and into the socket at the back of the cavity. Turn the ring on the plug to secure it.
Fuse Blast polishing cavity with power port annotated
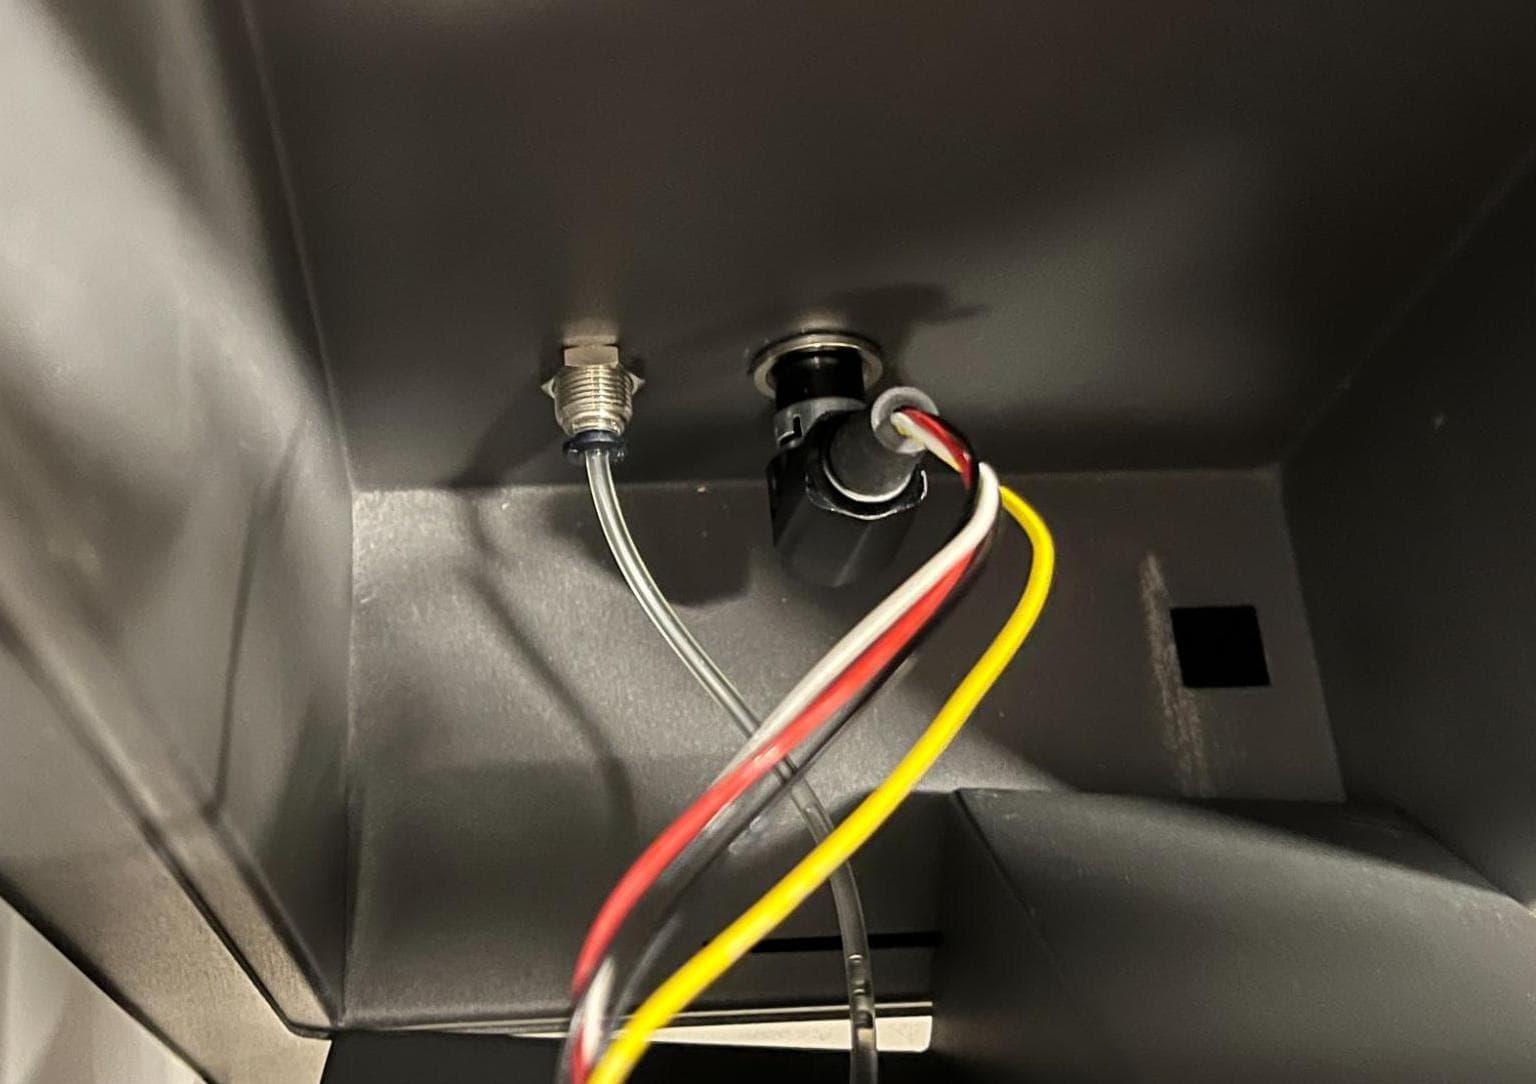
Fuse Blast polishing cavity with power cable and water tube installed
  1. Slide the Polishing Module into the cavity.
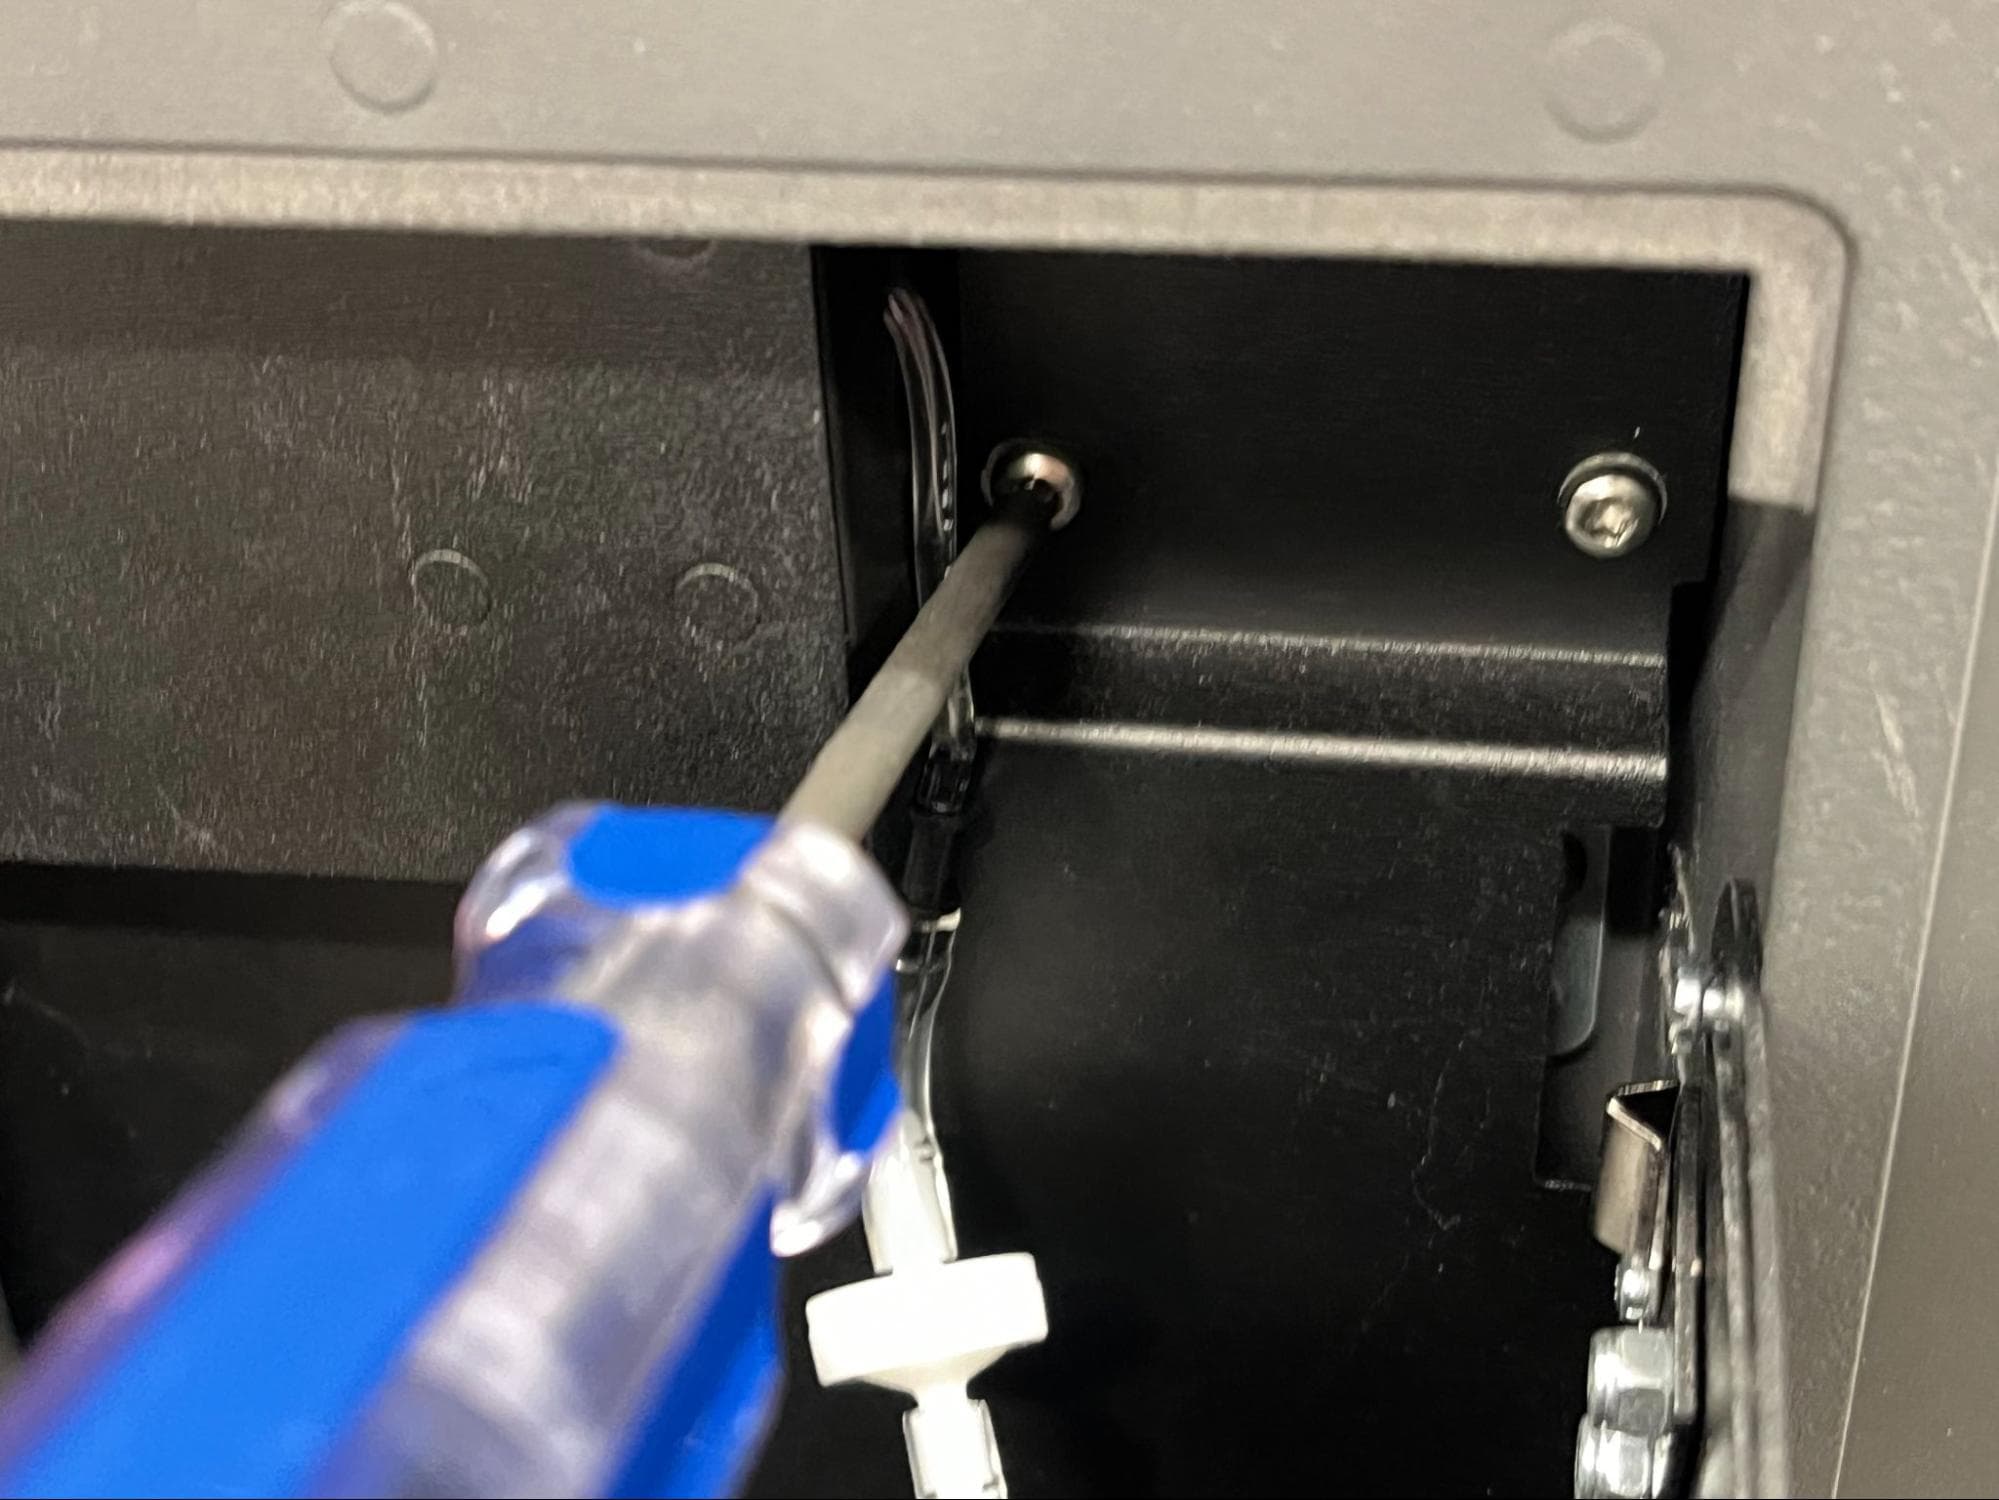
  2. Using a Philips screwdriver, tighten the captive grounding screw until snug.
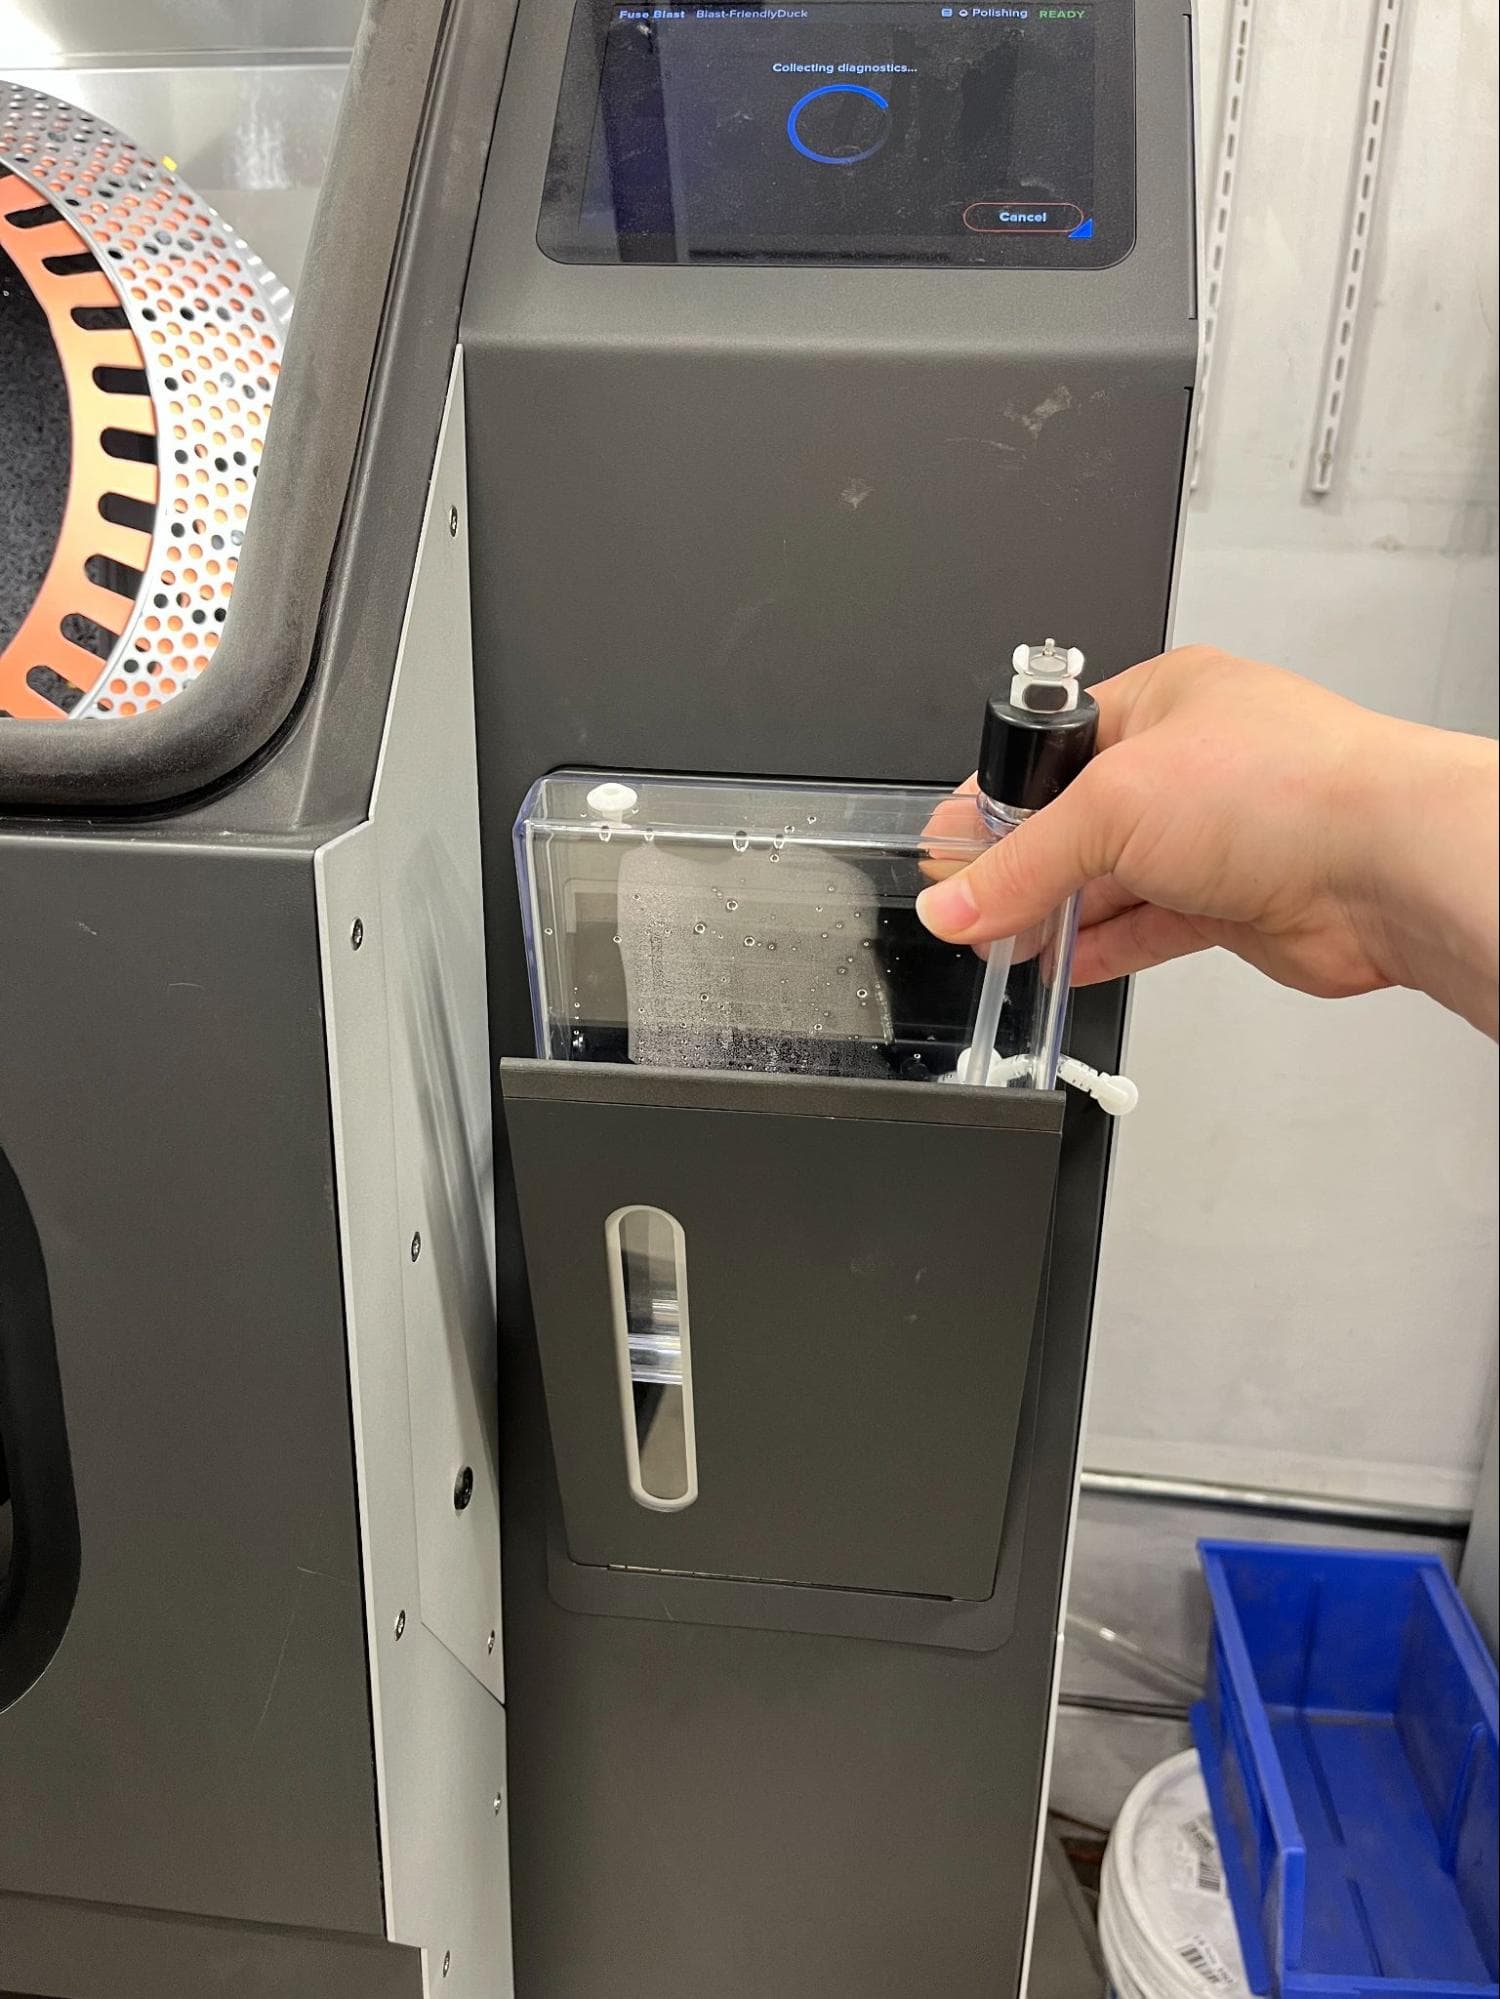
  1. Fill the included water tank with tap water until 80% full. Do not use deionized water.
  2. Add 7 mL of Formlabs Polishing Agent. Close the tank and gently agitate to mix.
  3. Insert the bottle into the Polishing System.
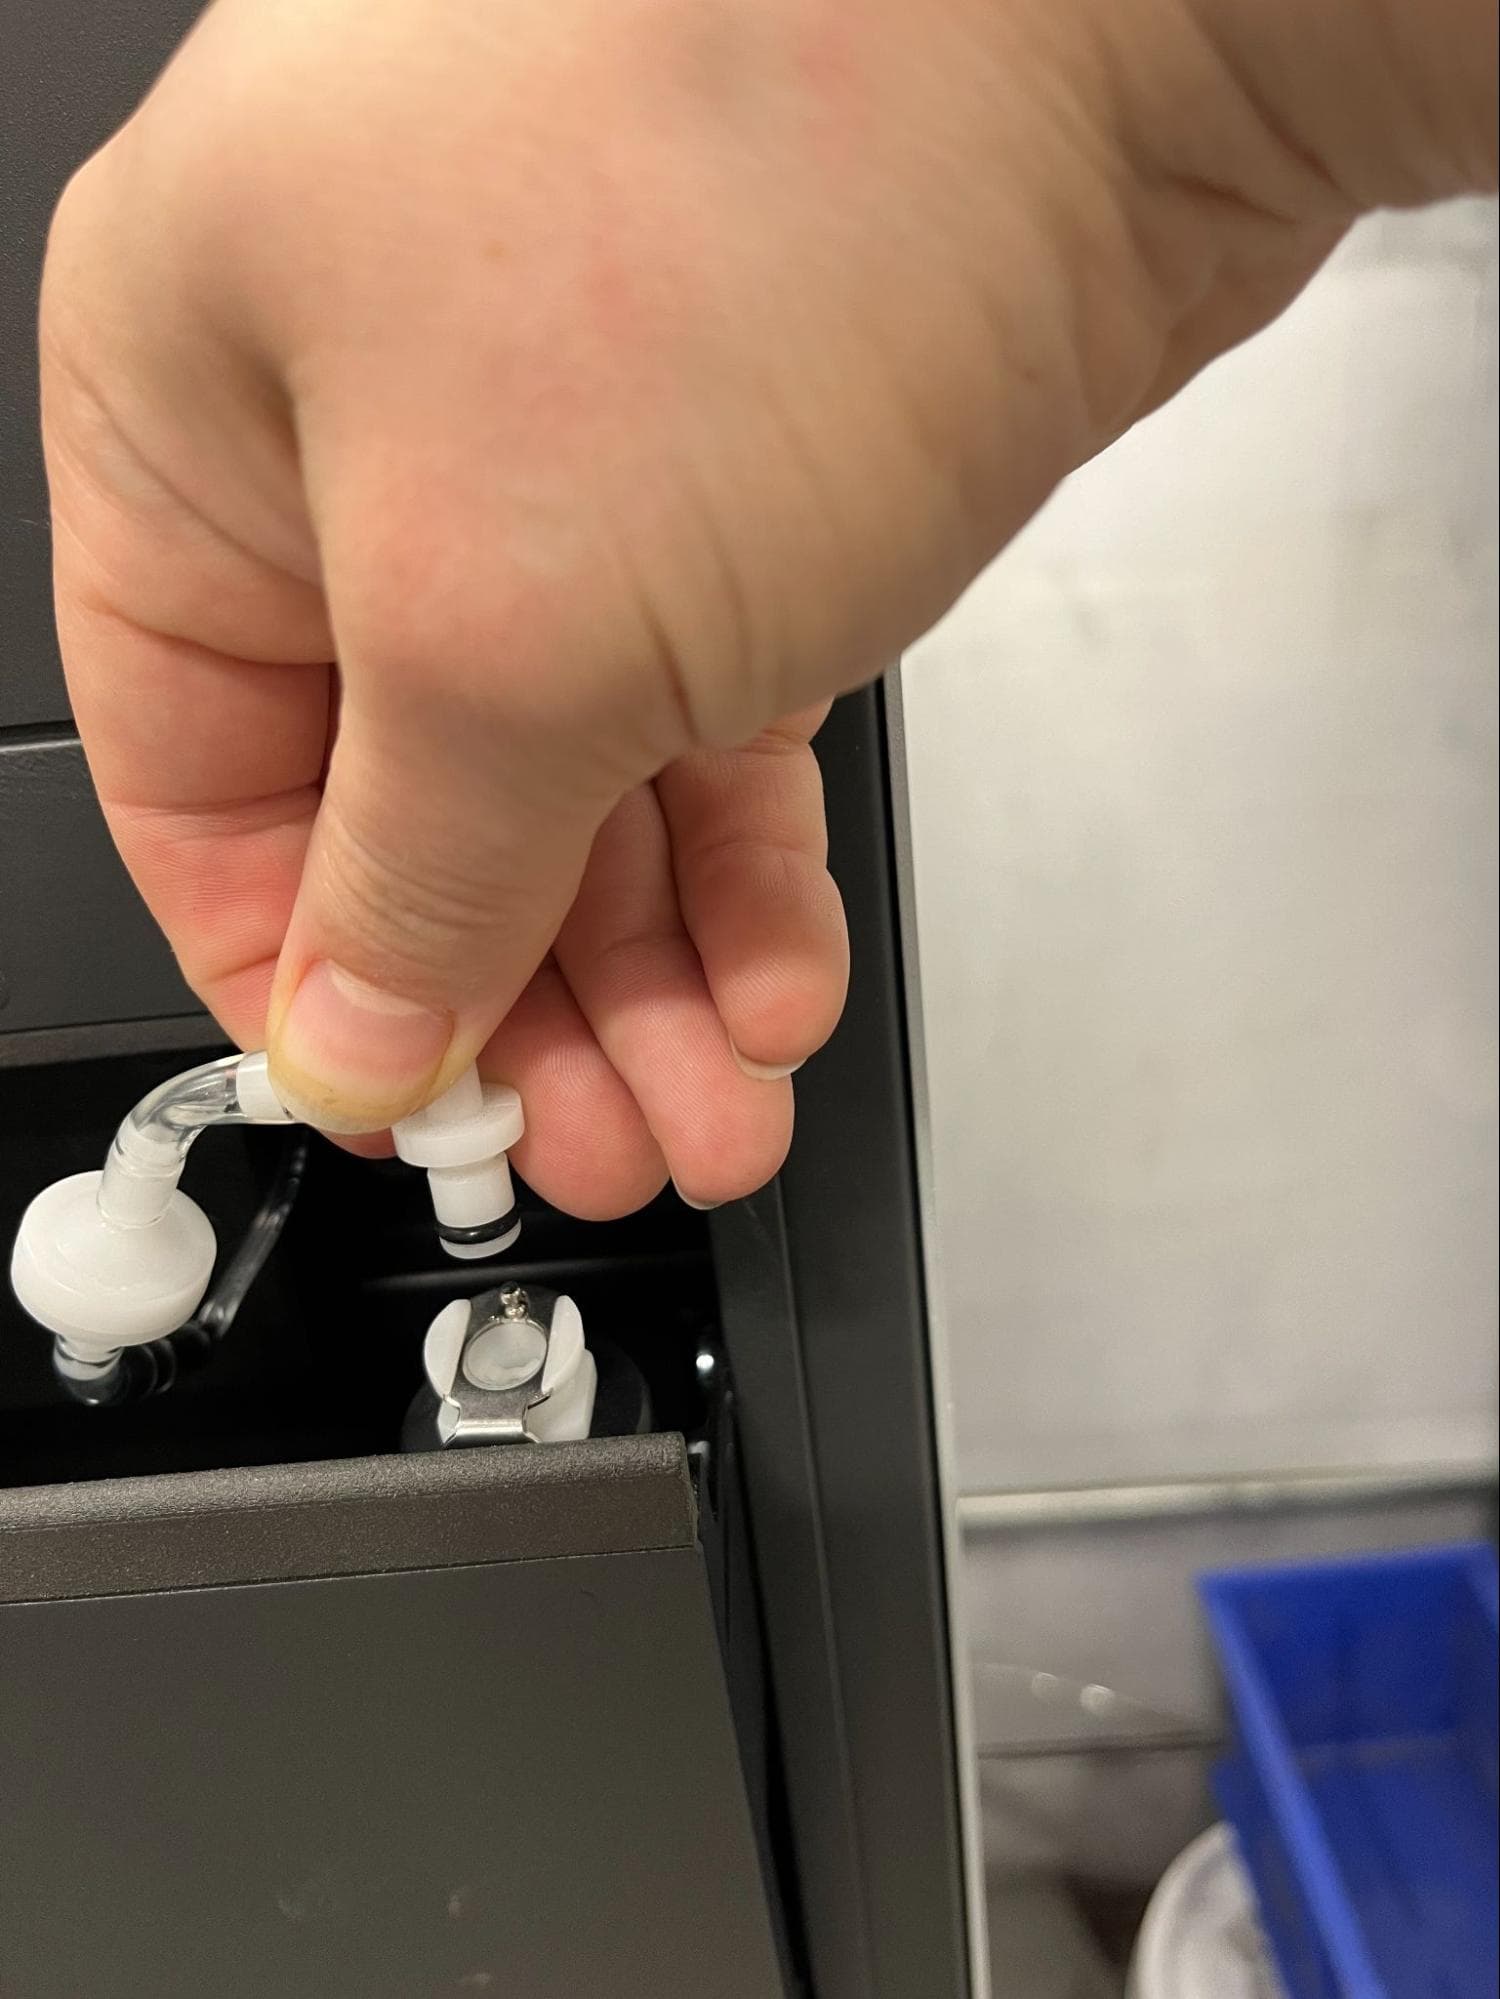
  1. Insert the quick-connect plug for the water feed line into the socket at the top of the water tank.

Installing the injection nozzle

Note:

If you have the 4 mm nozzle orifice installed on the Fuse Blast, follow the instructions in the support article Replacing the Fuse Blast blast orifice to install the 3 mm one.

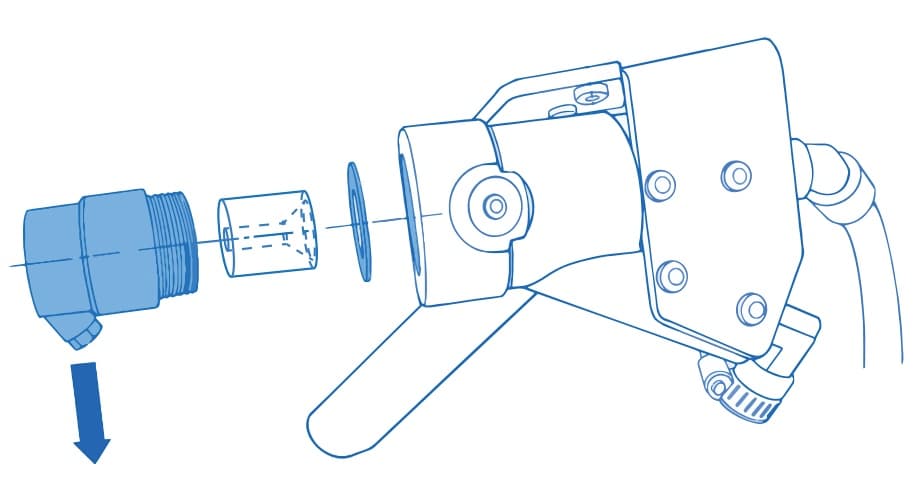
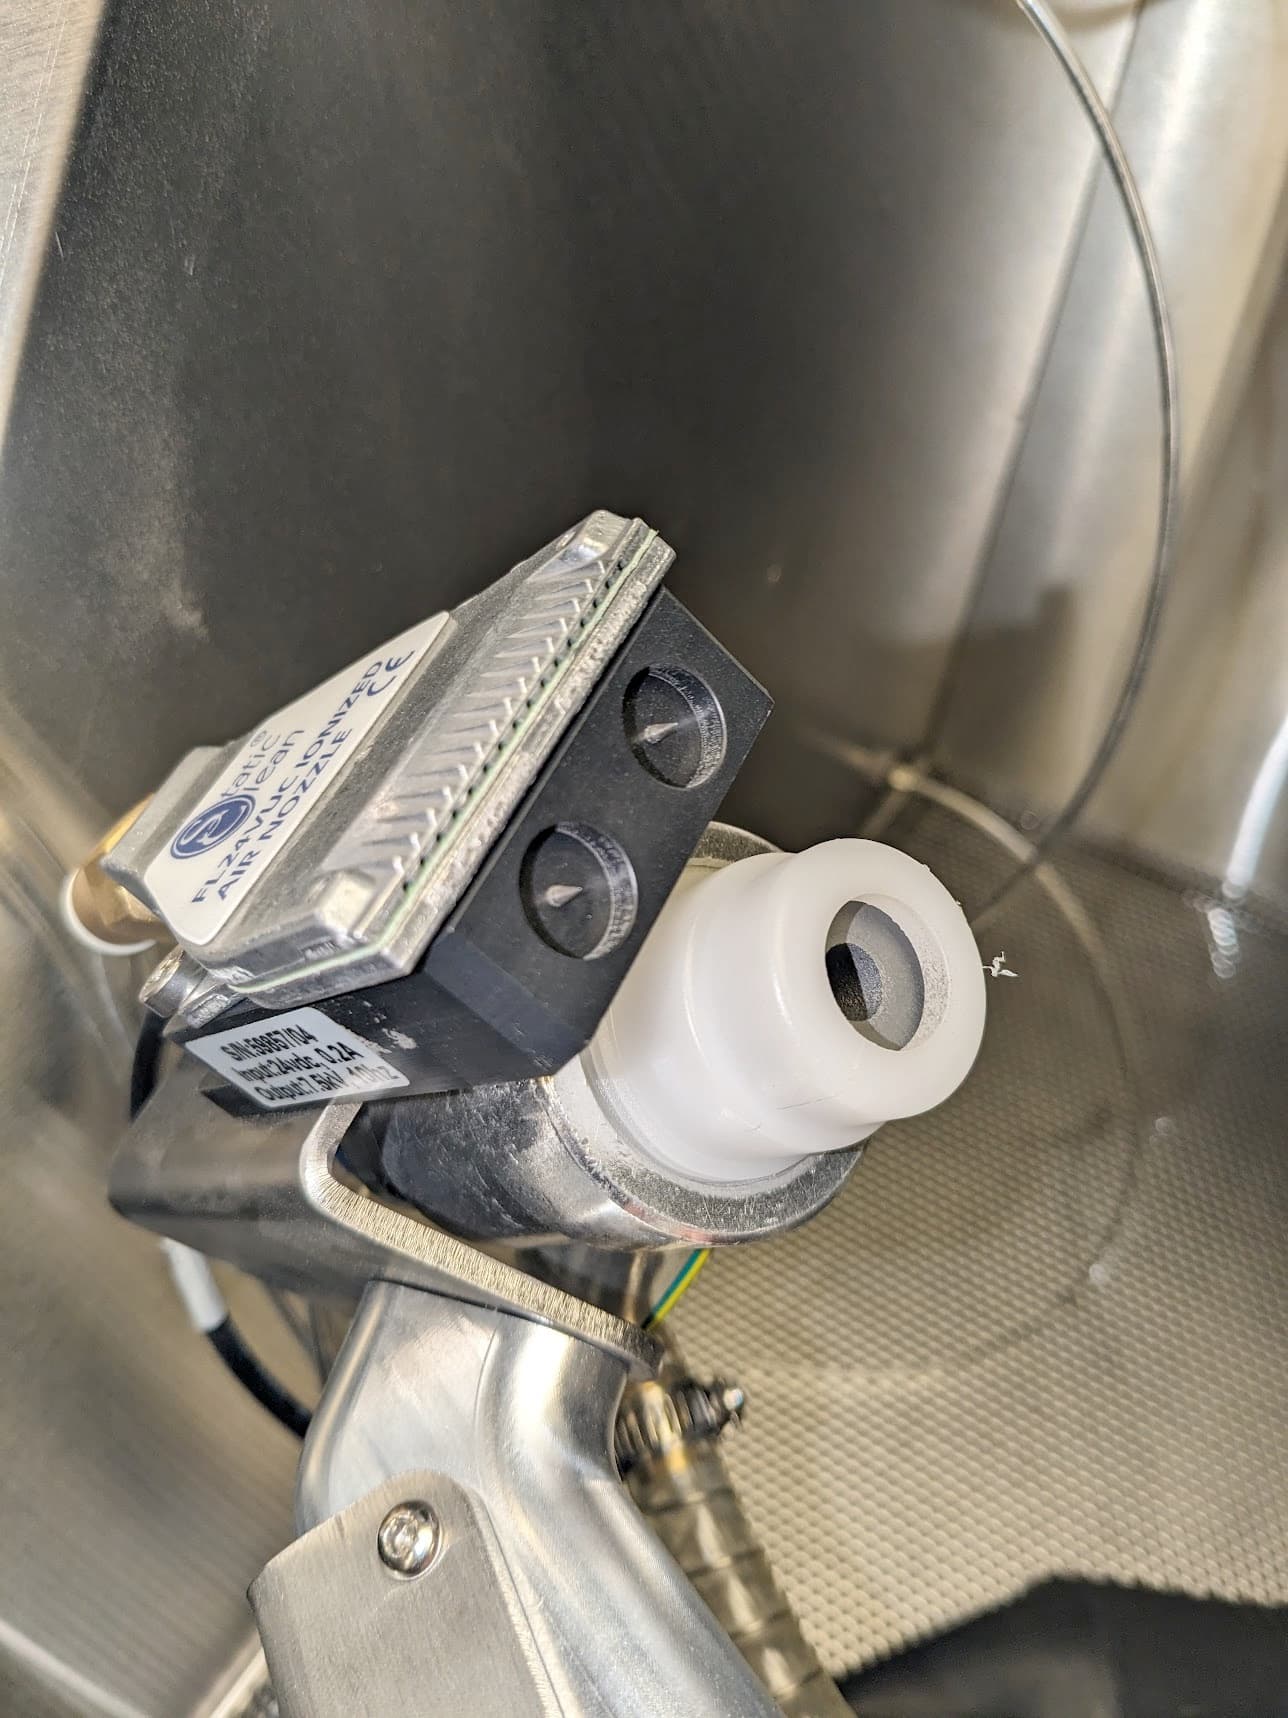
  1. Unscrew the white nozzle holder from the front of the blast gun and set it aside.
     
  1. Remove the two T25 Torx screws securing the ionizer to the blast gun and set them aside.
  2. Remove the ionizer from the top of the blast gun and set it aside, taking care to avoid damaging the ionizer tips.
  3. If a metal washer is not already present, place the included nozzle washer into the front of the blast gun.
  4. Insert the nozzle into the included nozzle holder with the wide opening of the nozzle facing the threaded end of the nozzle holder.
  5. Screw the replacement nozzle holder into the blast gun. Tighten until the nozzle holder is secure and the hose coupling faces the bottom of the blast gun.
  1. Screw the included injector hose into the hose coupling on the nozzle holder. Use an 8 mm wrench to tighten until snug.
  2. Reinstall and secure the ionizer to the top of the blast gun.
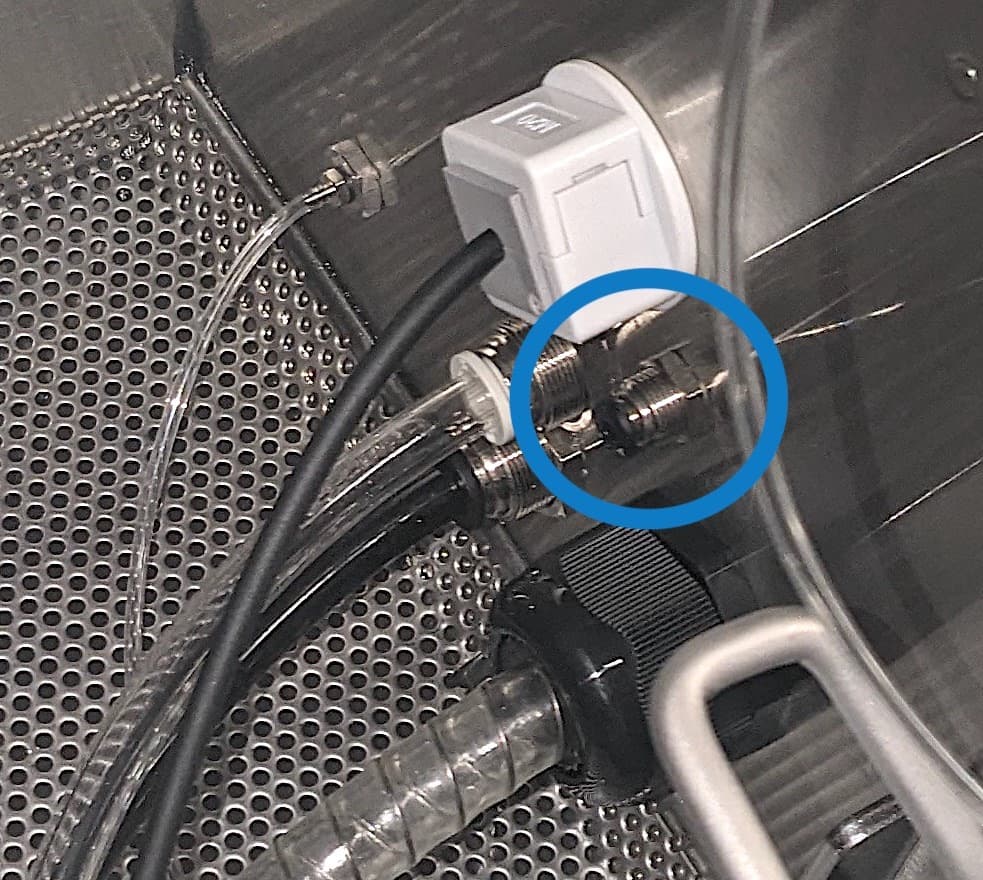
  3. Locate the port for the injection nozzle on the right wall of the blasting chamber. The Fuse Blast ships with a silver stud inserted into it. Remove the stud.
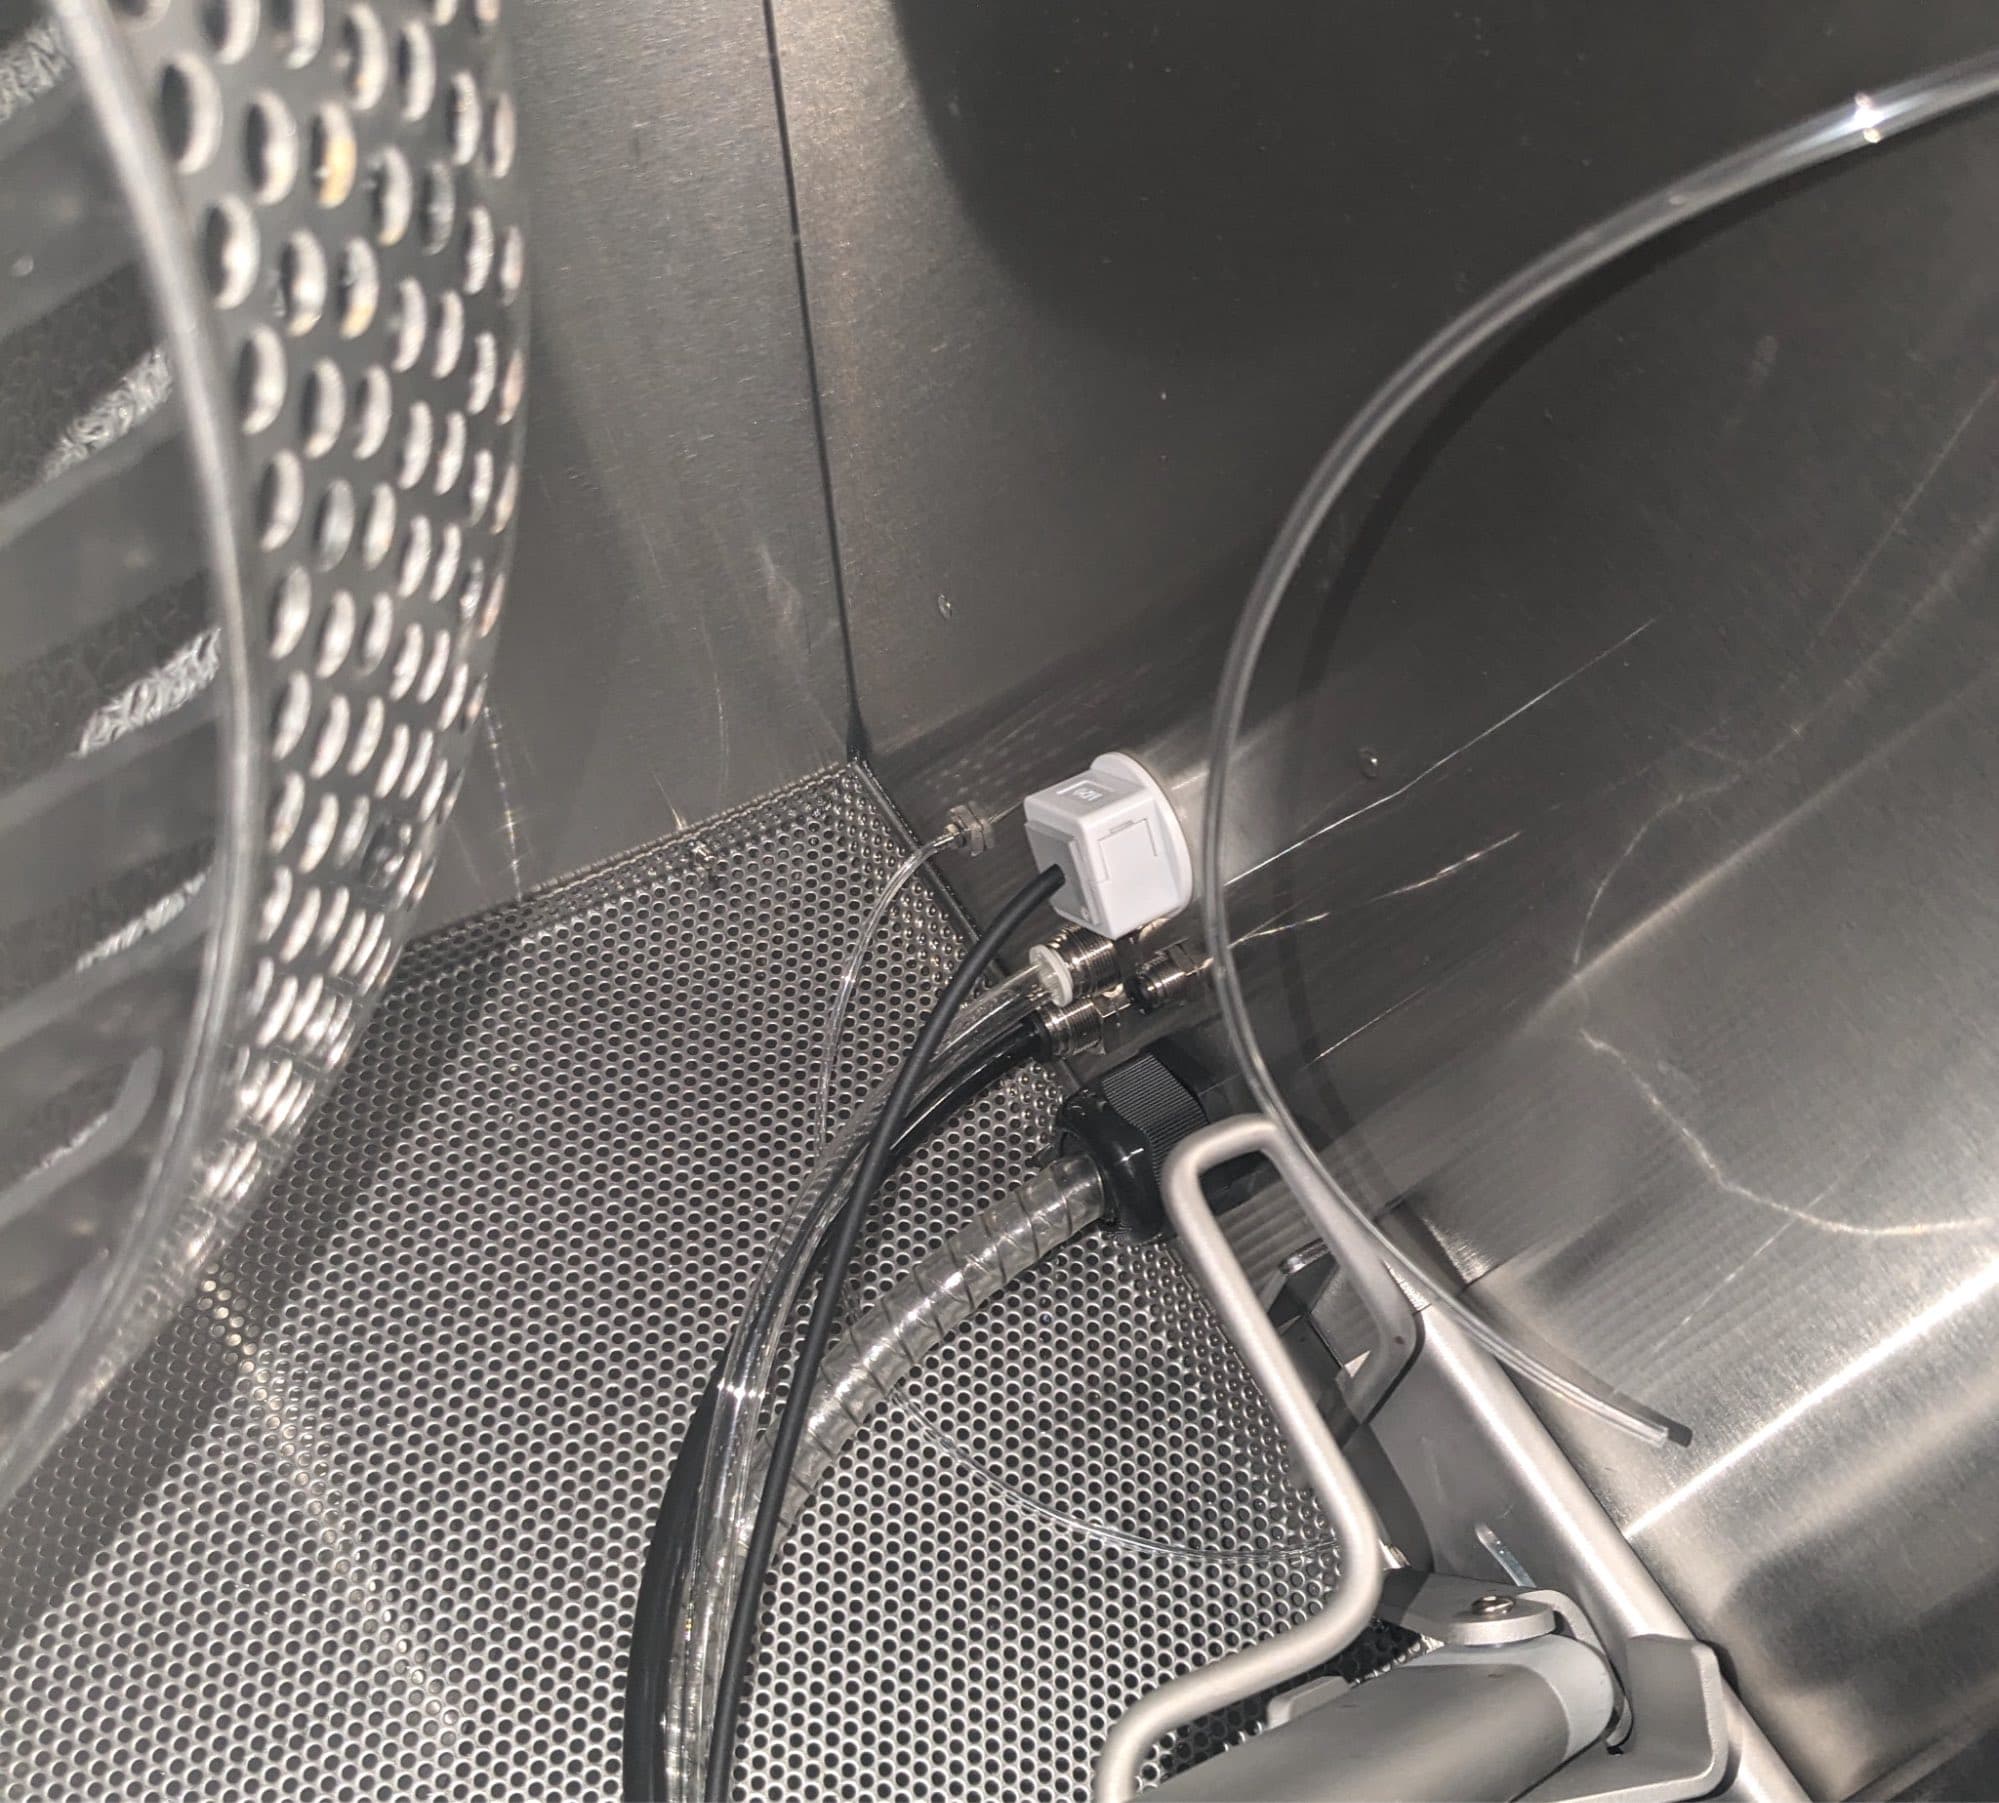
Fuse Blast blasting chamber with tubes and their ports
Closeup of port with silver stud
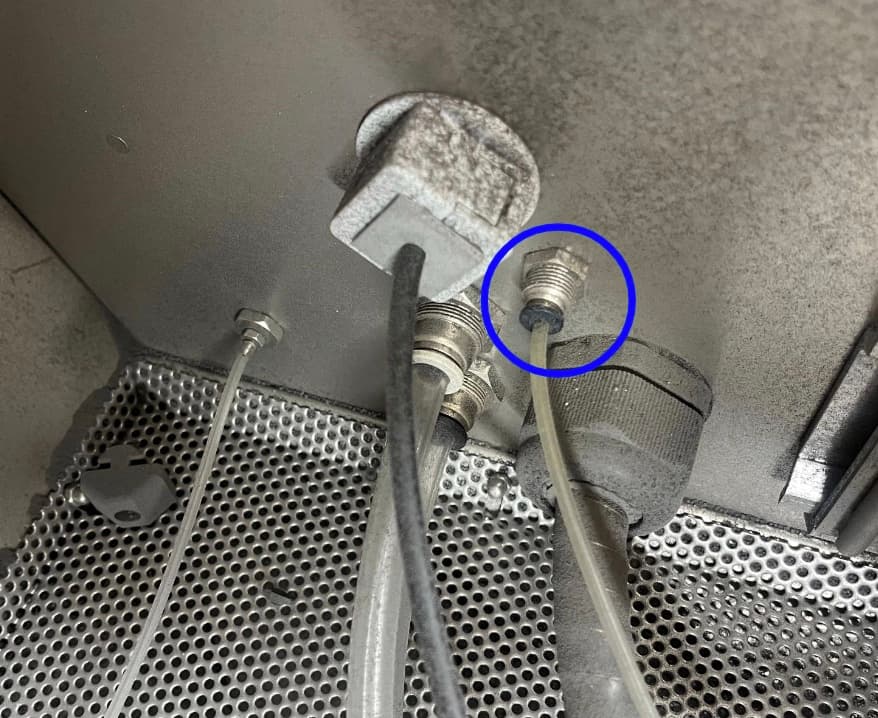
  1. Insert the tube connected to the injection nozzle in the port in the wall of the Fuse Blast.
  1. Bundle the injection nozzle tube to the other nearby tubes inside the Fuse Blast using the included zip ties.

Installing the Fuse Blast Polishing Mesh

Before filling the machine with Formlabs Polishing Media, install the Fuse Blast Polishing Mesh.

  1. Remove the Fuse Blast Hopper Mesh following the steps in the support article for Cleaning the Fuse Blast's media filter mesh.
  2. Insert the Fuse Blast Polishing Mesh that arrived with your Fuse Blast Polishing System.

Preparing the Fuse Blast and polishing media

If the Fuse Blast has been used previously with non-polishing media, you must empty the media hopper before adding Fuse Blast Polishing Media. Likewise, if you would like to put glass media in the Fuse Blast, follow the instructions in the support article Switching blasting media types.

Updating the Fuse Blast firmware

The Fuse Blast Polishing System needs to be enabled on the Fuse Blast touchscreen. Update your machine’s firmware to ensure it is compatible with the Polishing System.

  1. Open PreForm (version 3.34.0 or later).
  2. Connect the Fuse Blast to the computer via USB or connect the device to an Ethernet network or Wi-Fi.
  3. Click File > Accessories. The Accessory List window opens.
  4. Click the Fuse Blast’s serial name. The Device Details window opens.
    • If using Ethernet, the device might not appear. Use the Add button to connect to it by its IP address.
  5. Click Update in the upper-right corner of the Device Details window. The Firmware Update window opens.
  6. Follow the onscreen instructions to download the latest firmware and then upload the file to the Fuse Blast.
  7. The Fuse Blast automatically recognizes when you send a firmware update and starts the update process.
  8. When it finishes, the device will restart. Do not disconnect power while it is updating and restarting.

Enabling the Polishing System and preparing it for use

Before you polish your printed parts, enable the Polishing System and prime the water line:

  1. On the Fuse Blast touchscreen, tap Settings > Maintenance > Polishing. The Polishing screen appears.
  2. Toggle Polishing to ON. The toggle turns blue.
  3. Tap the water drop icon next to Prime Pump. The Polishing System pumps water through the water lines and to the water injection nozzle.
  4. Use the Fuse Blast with the Polishing System to clean your printed parts.