WHITE PAPER
Formlabs Logo

Preparing dental scans for printing with PreForm Dental Workspace

Preparing dental scans for printing with PreForm Dental Workspace

Intraoral scanning equipment captures digital impressions of the mouth to form a high-detail 3D scan, but they often create incomplete meshes or uneven bases. These become problems in SLA printing because:

  • Non-manifold meshes do not form a complete, watertight object and generally have missing pieces.
  • A level surface is needed as a base in order to adhere to the build platform and reduce post-processing work.

PreForm Dental Workspace automates the setup of common dental applications with industry’s best practices in mind. Use PreForm Dental Workspace in your dental workflow to print dental models seamlessly and efficiently.

Note:

PreForm Dental Workspace is only available on Preform 3.29 version or later and on printers that have been optimized for biocompatible materials, such as the Form 2, Form 3B, Form 3BL, Form 4B, and Form 4BL.

Creating a dental model with PreForm Dental Workspace

To prepare a dental scan for printing with PreForm Dental Workspace:

  1. Open Dental Workspace
  2. Select a template
  3. Import the scan(s) into the Dental Workspace
  4. Send the model to the printer

Step 1: Open Dental Workspace

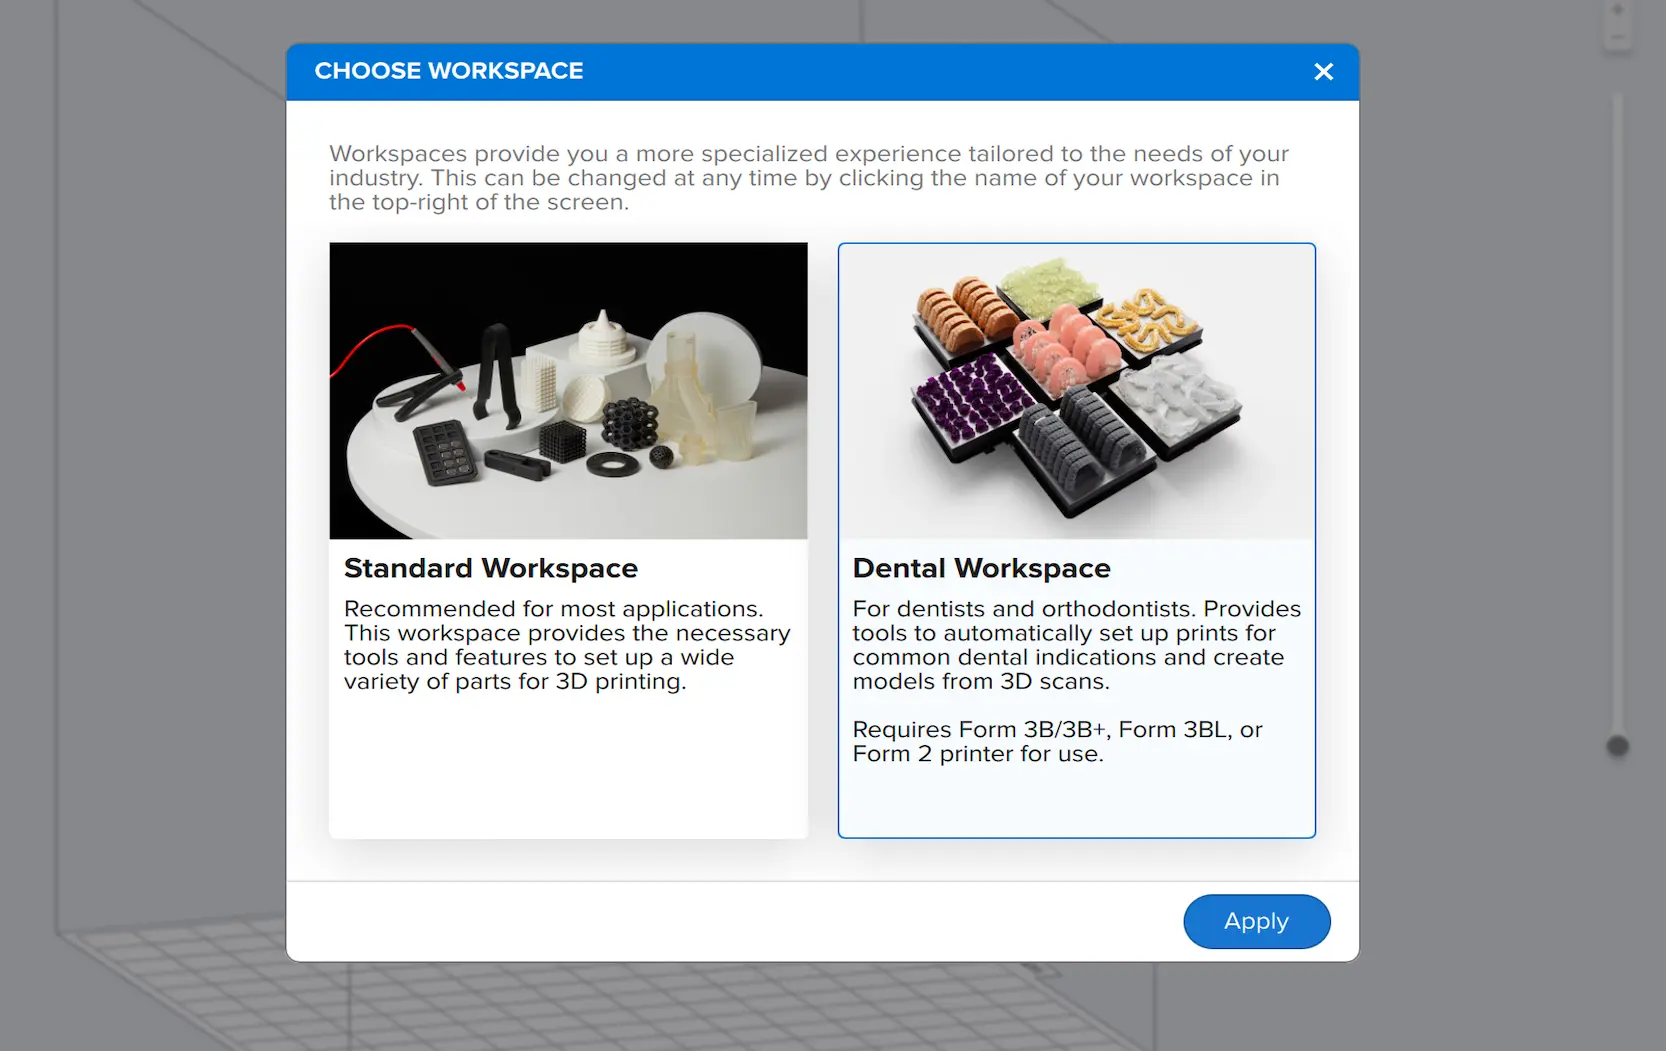
When opening PreForm version 3.29 or later for the first time, a pop-up box labeled Choose Workspace appears. Select Dental Workspace to open the Dental Workspace homepage. PreForm remembers your selection and automatically reopens the Dental Workspace homepage in the future.

alttext
alttext

To return to the Dental Workspace homepage from the Standard Workspace:

  1. Click View > Choose Workspace. The Choose Workspace pop up box appears.
  2. Select Dental Workspace and click Apply. The 3D scene in the Dental Workspace appears.
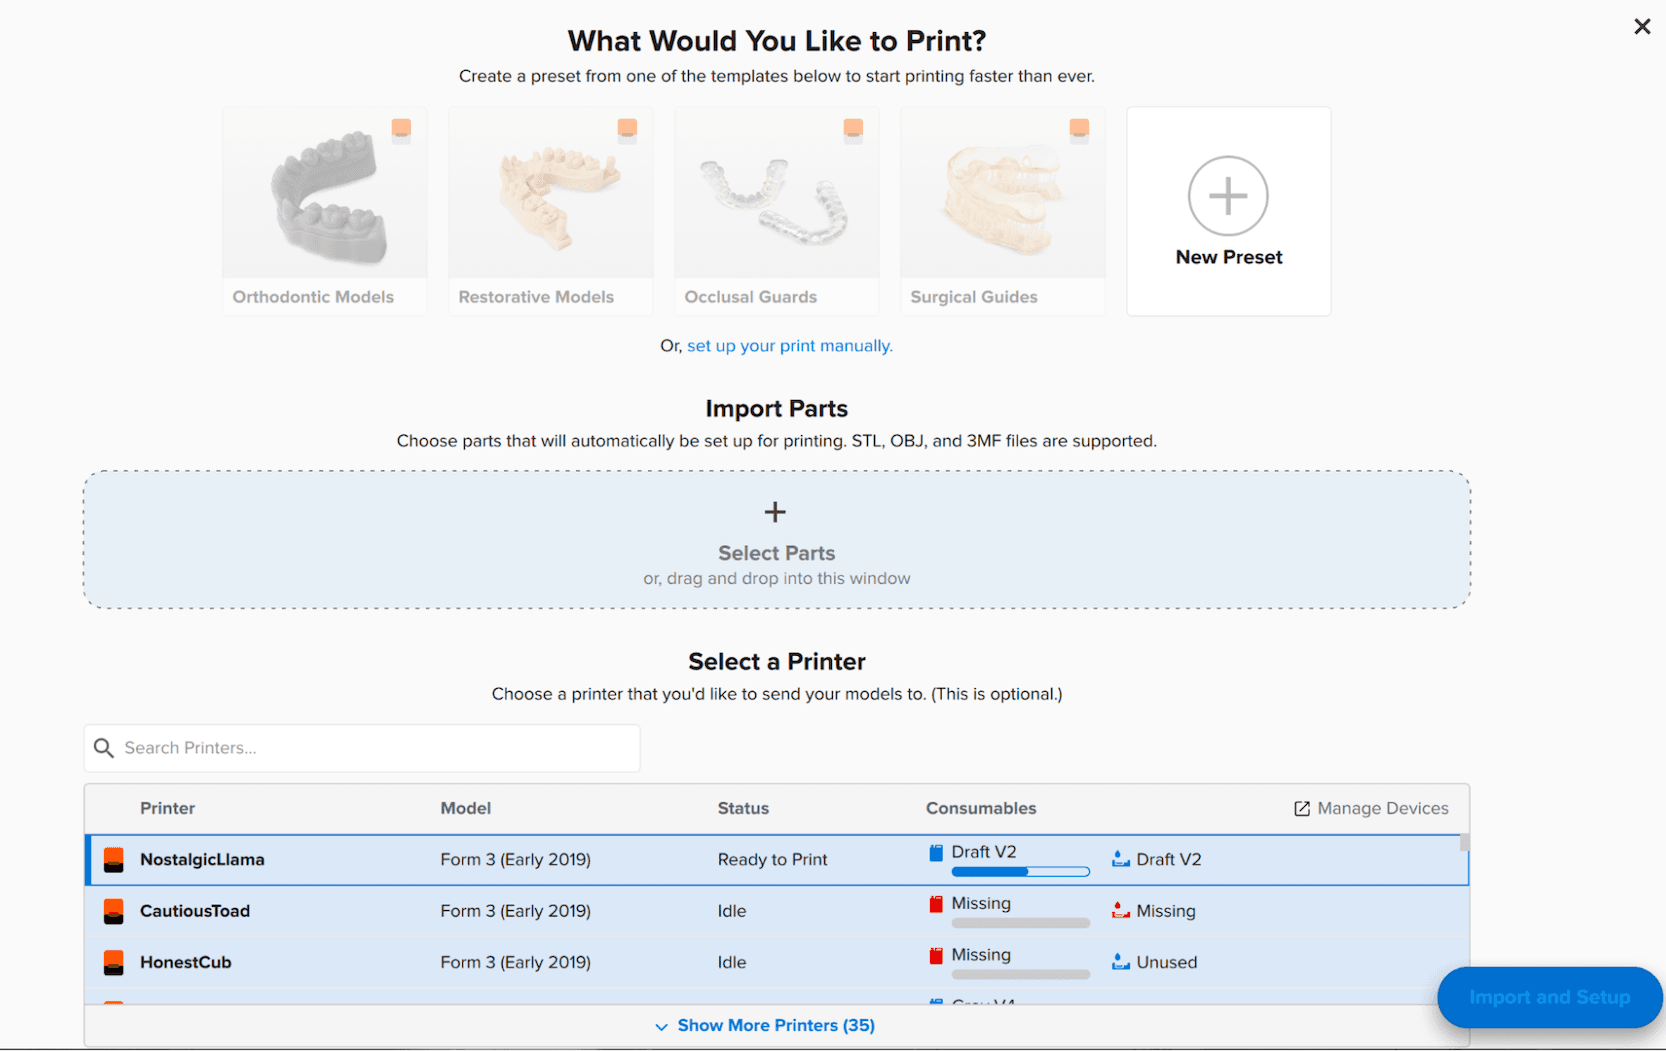
  3. In the top-left corner click the Select Preset button +. The Dental Workspace homepage appears.


Step 2: Select a template

PreForm Dental Workspace features presets to speed up the print job setups for dental applications. The presets include suggestions based on industry best practices for common dental applications. You may also customize a preset to best suit your current workflow.

To create a preset in the Dental Workspace:

  1. Open the Dental Workspace.
  2. Under What You Would Like to Print?, select the type of print for your application to create a new preset. The New Preset page appears.
  3. Under Choose a template, select a printer type.
  4. Select a template for your dental application. A blue box appears around your selection. The Material Settings and Model Settings below are updated to reflect recommendations for printing the selected dental application.
  5. Enter or update the Preset Name under Job Setup.
  6. Click Save & Apply to create your preset. The Dental Workspace homepage reappears with your preset listed under What Would You Like to Print?.

Note:

If selecting or creating a preset from the 3D scene, Dental Workspace automatically applies your selected preset to any imported files.

Step 3: Import the scan(s) into the Dental Workspace

PreForm is compatible with STL, OBJ, and 3MF file types. PreForm Dental Workspace allows you to import multiple files into the workspace.

Import the scan(s) into the Dental Workspace:

  1. Open the Dental Workspace.
  2. Drag or drop an STL, OBJ, or 3MF file into the box labeled Import Parts. The file name in a rectangular box appears to confirm a successful upload.
  3. Select a printer (compatible with Formlabs resins for biocompatible applications only) from the Select a Printer list. A blue box appears around your selection.
  4. Click Import and Setup to import the model into the 3D scene.

Step 4: Send the model to the printer

Once the model is imported and set up based on your selected preset, it is ready for printing. Send the print job to the printer to print your dental model.


Customizing a preset

PreForm Dental Workspace allows you to customize presets to best suit your unique workflow.

To customize a preset:

  1. Open Dental Workspace.
  2. Under What You Would Like to Print?, select the type of dental model for your application to create a new preset. The New Preset page appears.
  3. Under Choose a template, select a printer type.
  4. Select a template for your dental application. A blue box appears around your selection with updated Material Settings and Model Settings for the default template.
  5. To customize the preset, click Material Settings. The box expands to display Choose Material, Choose Layer Thickness, and Choose Print Settings.
  6. Select the material, layer thickness, and print setting of your choice.
  7. Click Model Settings. The box expands to display Choose Orientation and Supports.
  8. Select the orientation and support settings of your choice.
  9. Enter or update the Preset Name under Job Setup.
  10. Click Save & Apply to create your preset. The Dental Workspace homepage reappears with your preset listed under What Would You Like to Print?.
alttext

Tip:

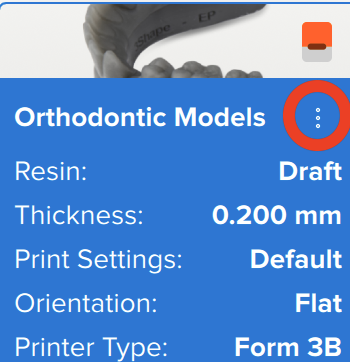
To edit or delete a preset, hover your cursor over the preset and click the three dots in the right-hand corner.