WHITE PAPER
Formlabs Logo

Receiving and unboxing your Form Auto

Receiving and unboxing your Form Auto

Know what to expect when your Form Auto comes in the mail. Unboxing and initial setup steps are detailed here.

Before receiving your Form Auto

Prepare a space to receive your Form Auto and house the necessary accessories and consumables. Refer to the support article Preparing your workspace for the Form Auto for more info.

Product components

Form Auto

Form Auto components
  1. Cover actuator: The cover actuator opens the printer’s cover during part removal.
  2. Base: The printer attaches to the turntable on the base via an adapter plate attached to the printer’s adjustable feet.
  3. UV shield: Removable UV-safe cover. This component shields the part removal mechanism and prevents uncured resin from curing in the machine.
  4. Part release gantry: Houses the part removal mechanism, camera, and other part release features.
  5. Part release bin: A UV-resistant container where parts are stored after being released by Form Auto. The included part wash basket is compatible with the Form Wash L.
  6. Wash basket: A stainless steel basket that interfaces with the Form Wash L, allowing parts to be transferred directly into the Form Wash L for washing.
Form Auto components
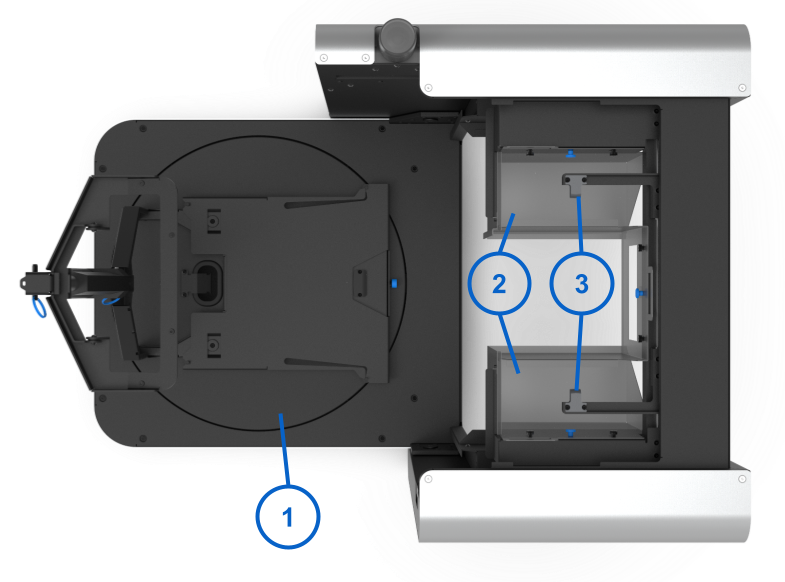
  1. Turntable: The printer attaches to the turntable on the base via an adapter plate attached to the bottom of the printer. The turntable allows the printer to rotate into three positions at 90 degree increments.
    • Printing position: printer facing the part removal enclosure and part release bin
    • Touchscreen position: printer facing the side of the Form Auto or facing away from the part removal enclosure, allowing access to the touchscreen
  2. Part removal enclosure: Parts are removed from the build platform into the removal enclosure, which catches the parts and transports them out of the printer. Parts are then deposited into the part release bin.
  3. Part removal mechanism: This mechanism carries the part removal enclosure and squeezes the handles on Build Platform 2 to remove the parts from the build platform.

Accessories

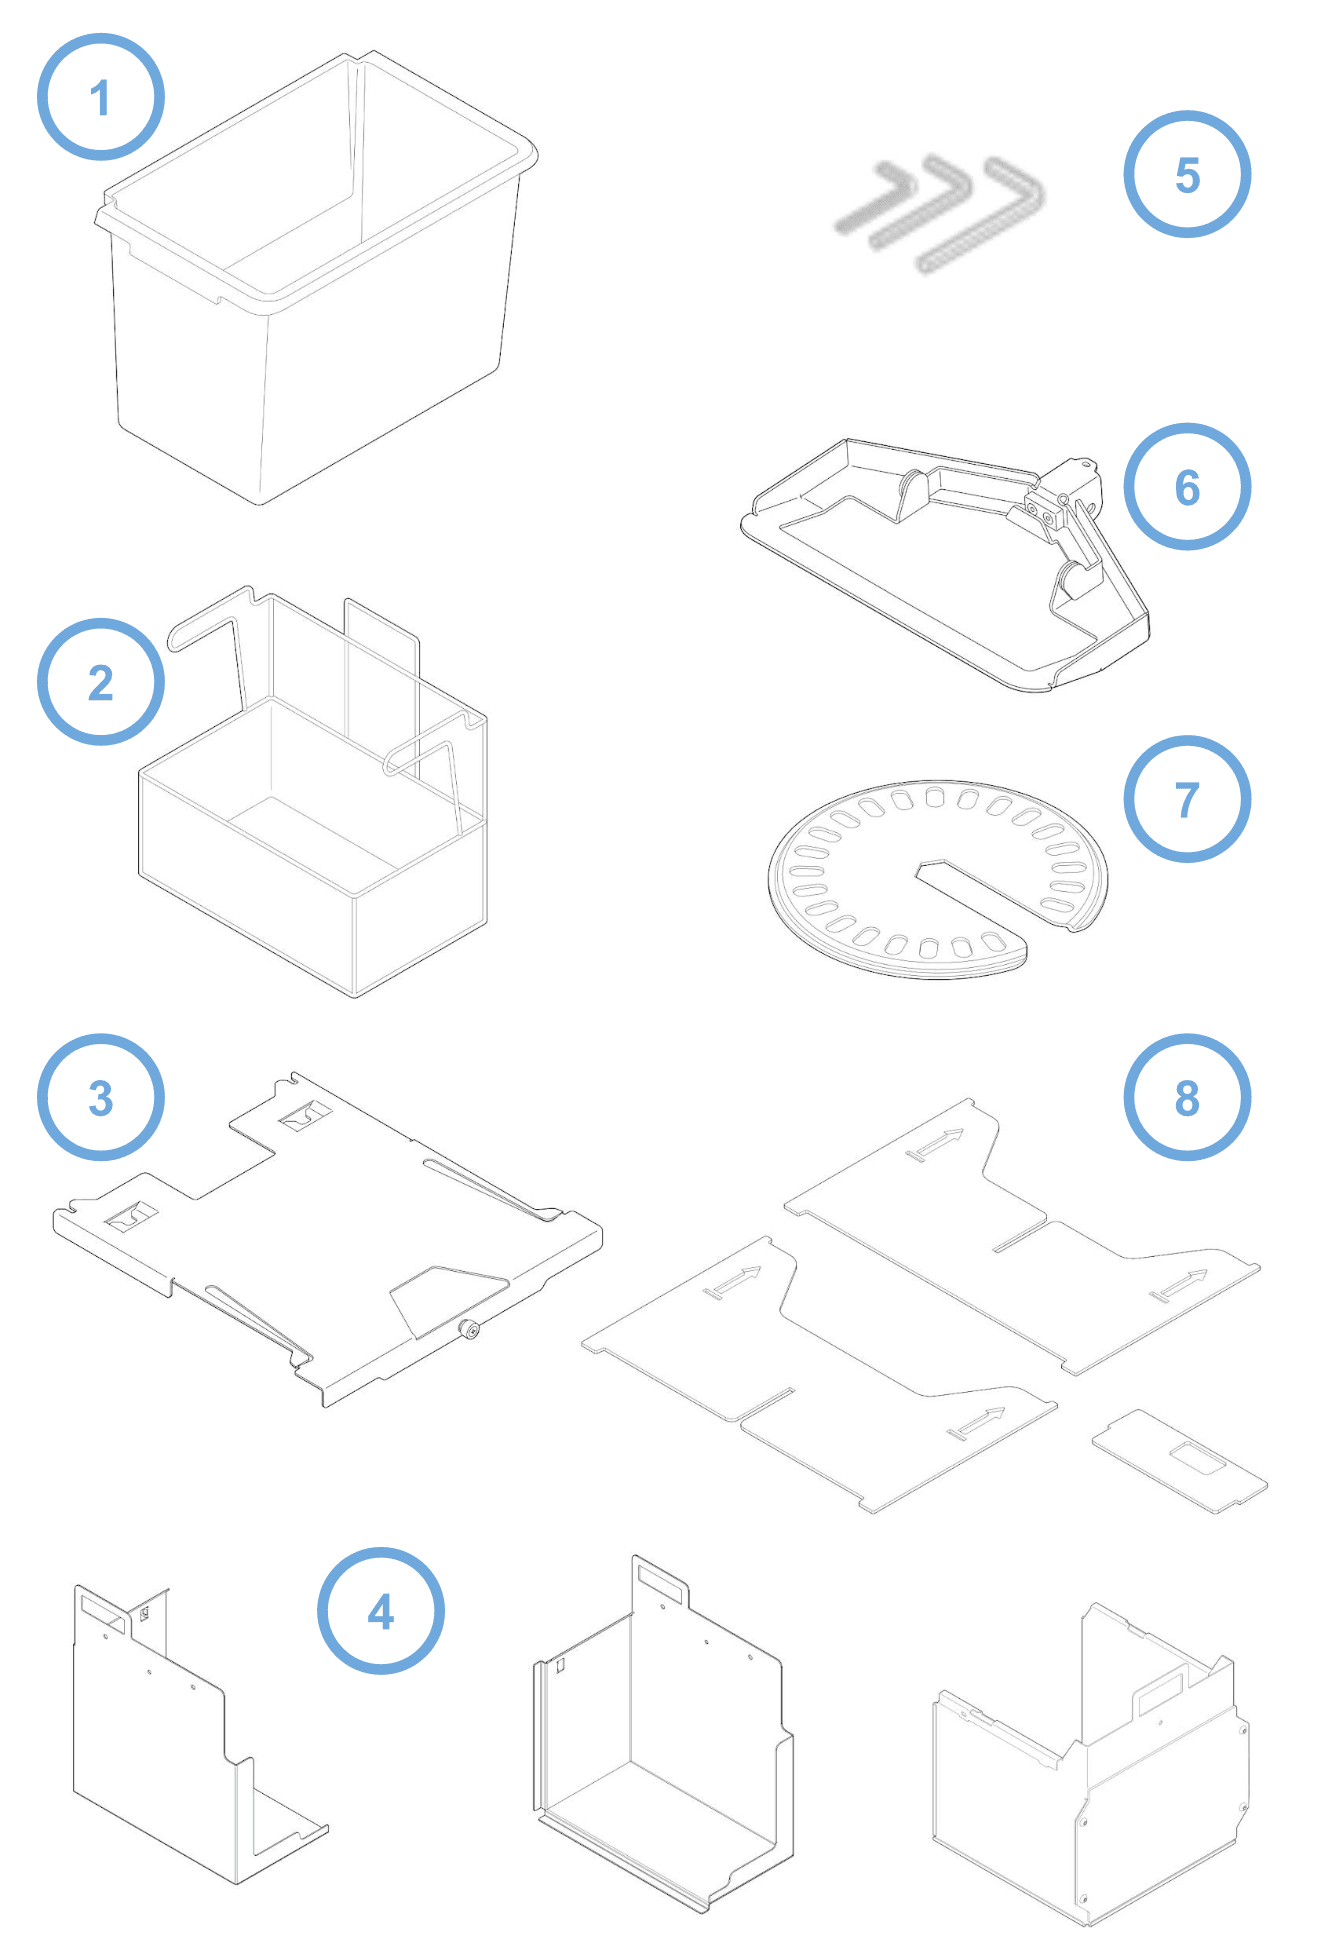
Also included in the Form Auto package are:

  1. Form Auto part release bin
  2. Form Auto wash basket (compatible with the Form Wash L)
  3. Printer base adapter plate
  4. Form Auto part removal enclosure (3 pieces)
  5. Fasteners and tools box
    • Gantry screws (4x, M8 x 1.25, 12 mm)
    • Gantry screw washers (4x)
    • Part removal enclosure thumb screws (5x)
    • Cover bracket screws (4x, M3 x 0.5, 18 mm)
    • 2.5 mm hex driver
    • 3 mm hex driver
    • 5 mm hex driver
  6. Form Auto printer cover bracket
  7. Form Auto leveling disc (compatible with the Form 3L/Form 3BL)
  8. Printer cover brace (cardboard, 2 pieces) and cartridge slot cover (cardboard)
Form Auto accessories

Note:

When printing with a Formlabs resin for biocompatible applications, the Form Auto’s part removal enclosure, part release bin, and wash basket are considered part of the printing process. Maintain separate part removal enclosures, part release bins, and wash baskets for resins for biocompatible applications.
Unboxing and setting up the Form Auto

To unbox and set up the Form Auto:

  1. Cut and remove the straps securing the Form Auto box to its shipping pallet.
  2. Lift the outer box off of the Form Auto.
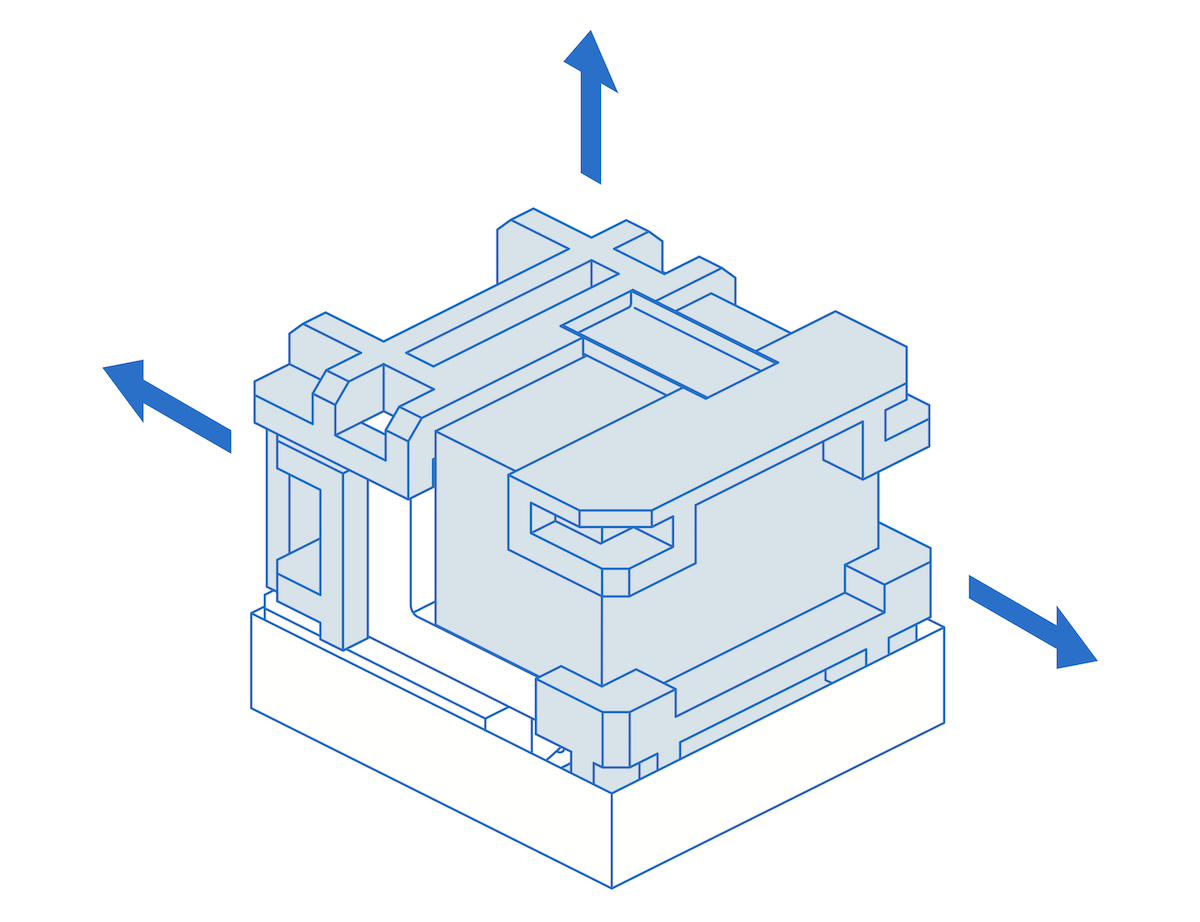
  1. Remove the accessories box, the four corner braces, and the foam cells protecting the sides of the unit. Leave the Form Auto resting on the lower foam. Do not lift the Form Auto off the lower foam until you have unfolded and secured the part removal gantry in step 6.

Note:

Be sure to remove the foam underneath the front corner of the part release gantry. Failing to remove this foam will prevent you from properly unfolding and securing the part removal gantry.

Removing foam from around the Form Auto
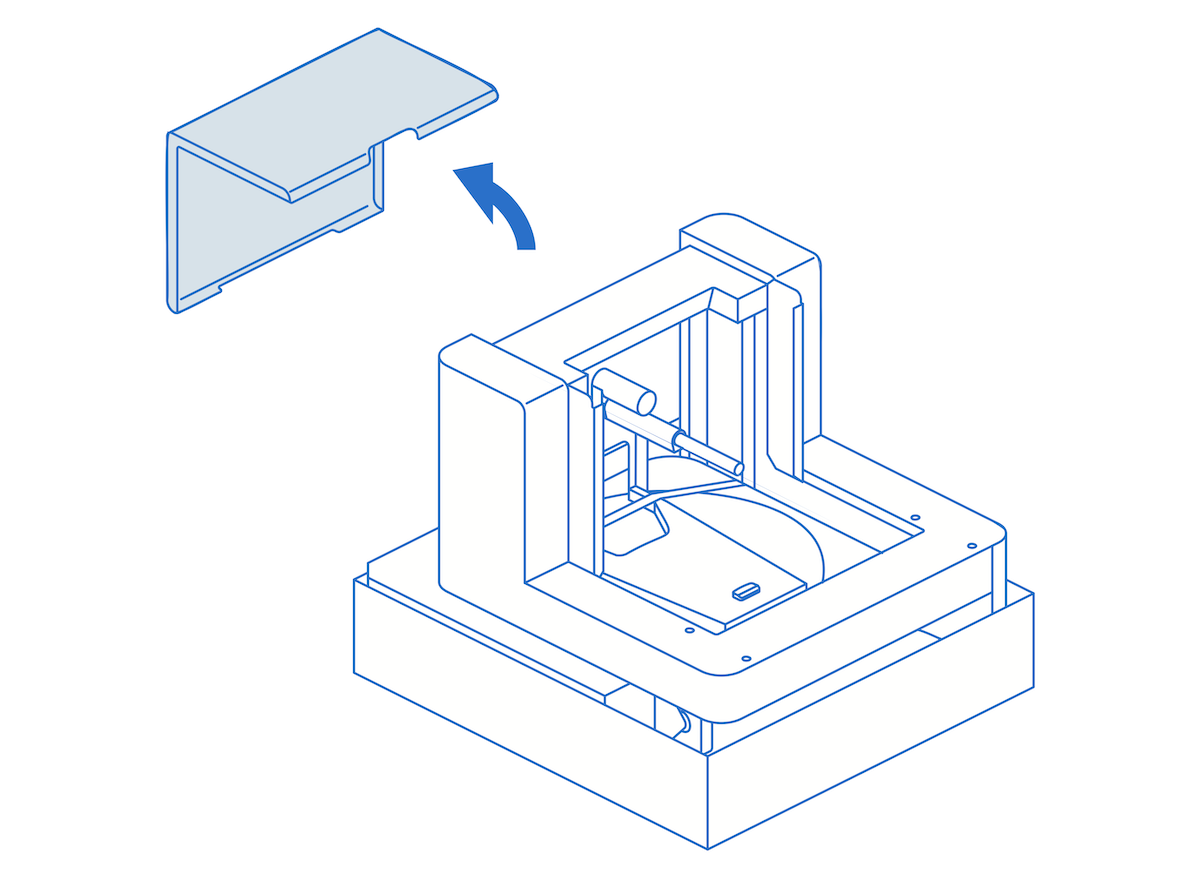
  1. Lift the orange cover off of the Form Auto and set it aside.
Removing the cover from a Form Auto
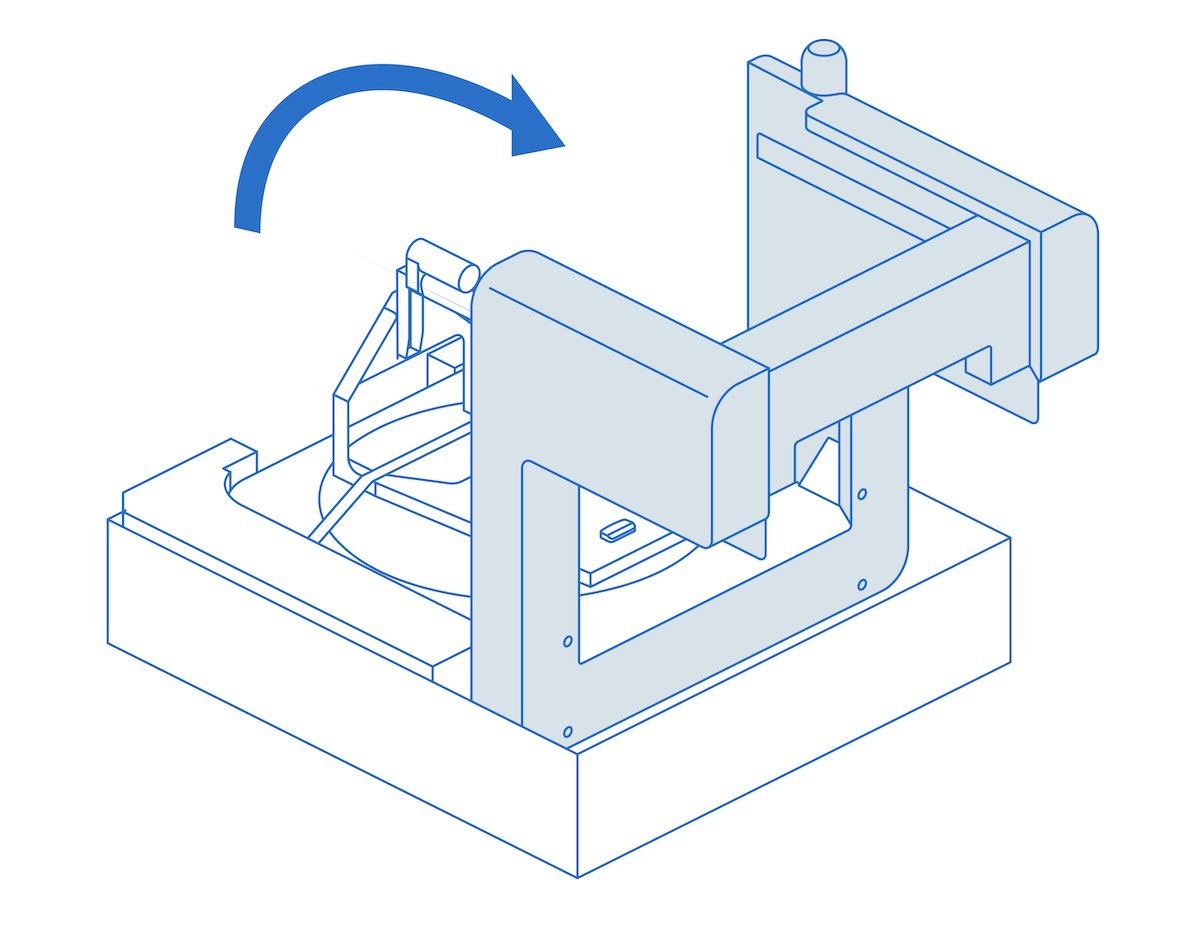
  1. Tilt the part removal gantry forward into an upright position. If the bottom foam interferes with the gantry, pull the Form Auto forward slightly. When properly positioned, the part removal gantry sits flush against the front of the Form Auto base. The Form Auto is secured to the packaging with a strap. Leave this intact until the gantry is secured.

Caution:

Pinch hazard. Keep fingers clear of the hinge while unfolding the part removal enclosure.

Unfolding the Form Auto part removal gantry
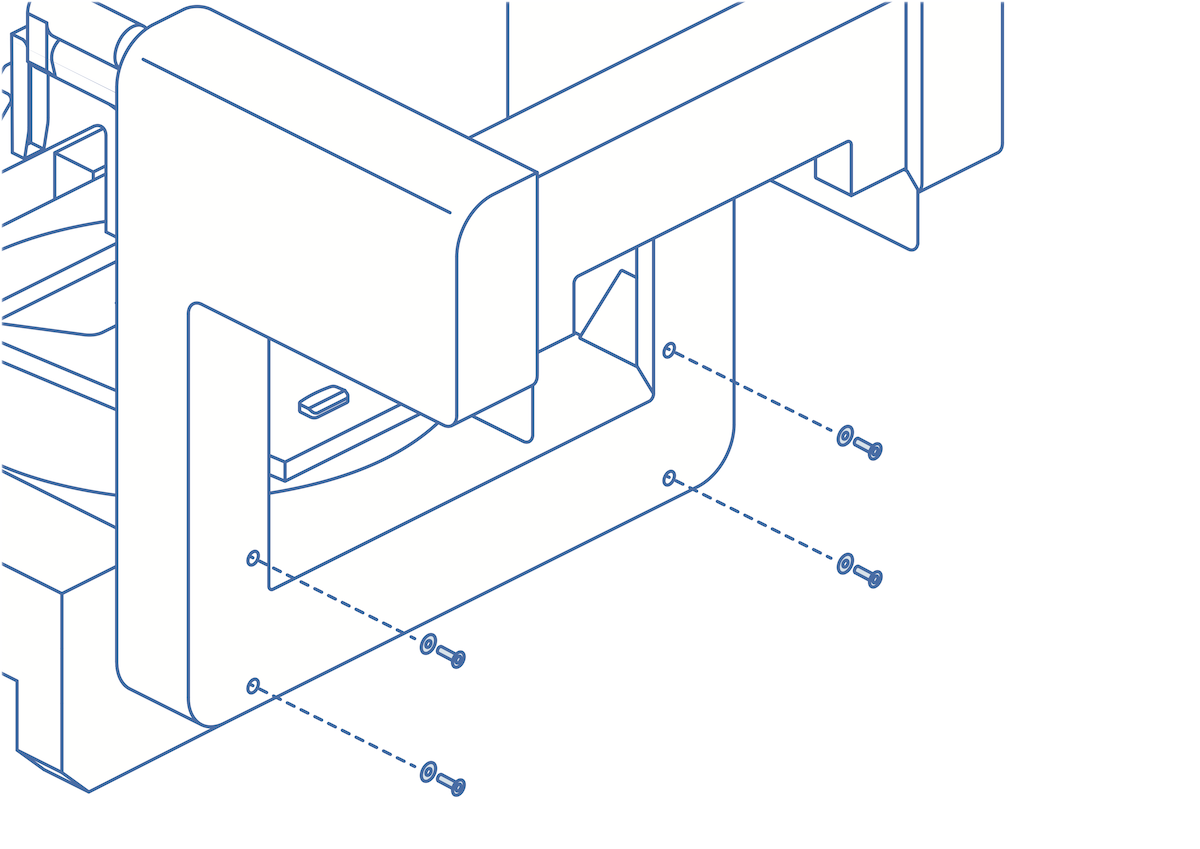
  1. Open the accessories box and locate and remove the screws, washers, and tools. Place one washer onto each of the four gantry screws (M8 x 1.25, 12 mm long). Thread one gantry screw into each of the four screw holes as the base of the gantry. Tighten with a 5 mm hex driver until snug.
Securing the Form Auto part removal gantry
  1. Cut and remove the strap securing the Form Auto to its packaging. Support the Form Auto while cutting the strap to prevent it from tipping forward.

Caution:

The Form Auto is a heavy object. A two person lift is required to prevent injury and avoid damage to the machine.

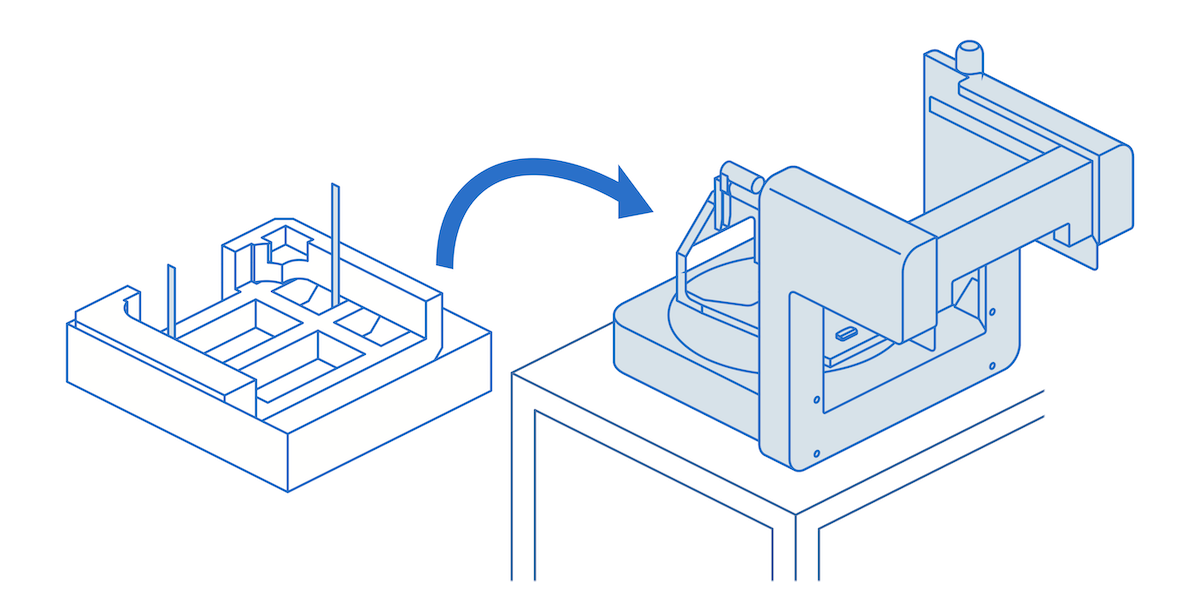
  1. Lift the Form Auto off of the lower foam and place it in its intended final location. When the printer is installed on the Form Auto, the unit is heavy and difficult to move.
Removing the Form Auto from its packaging
  1. Remove any remaining packaging from the Form Auto.
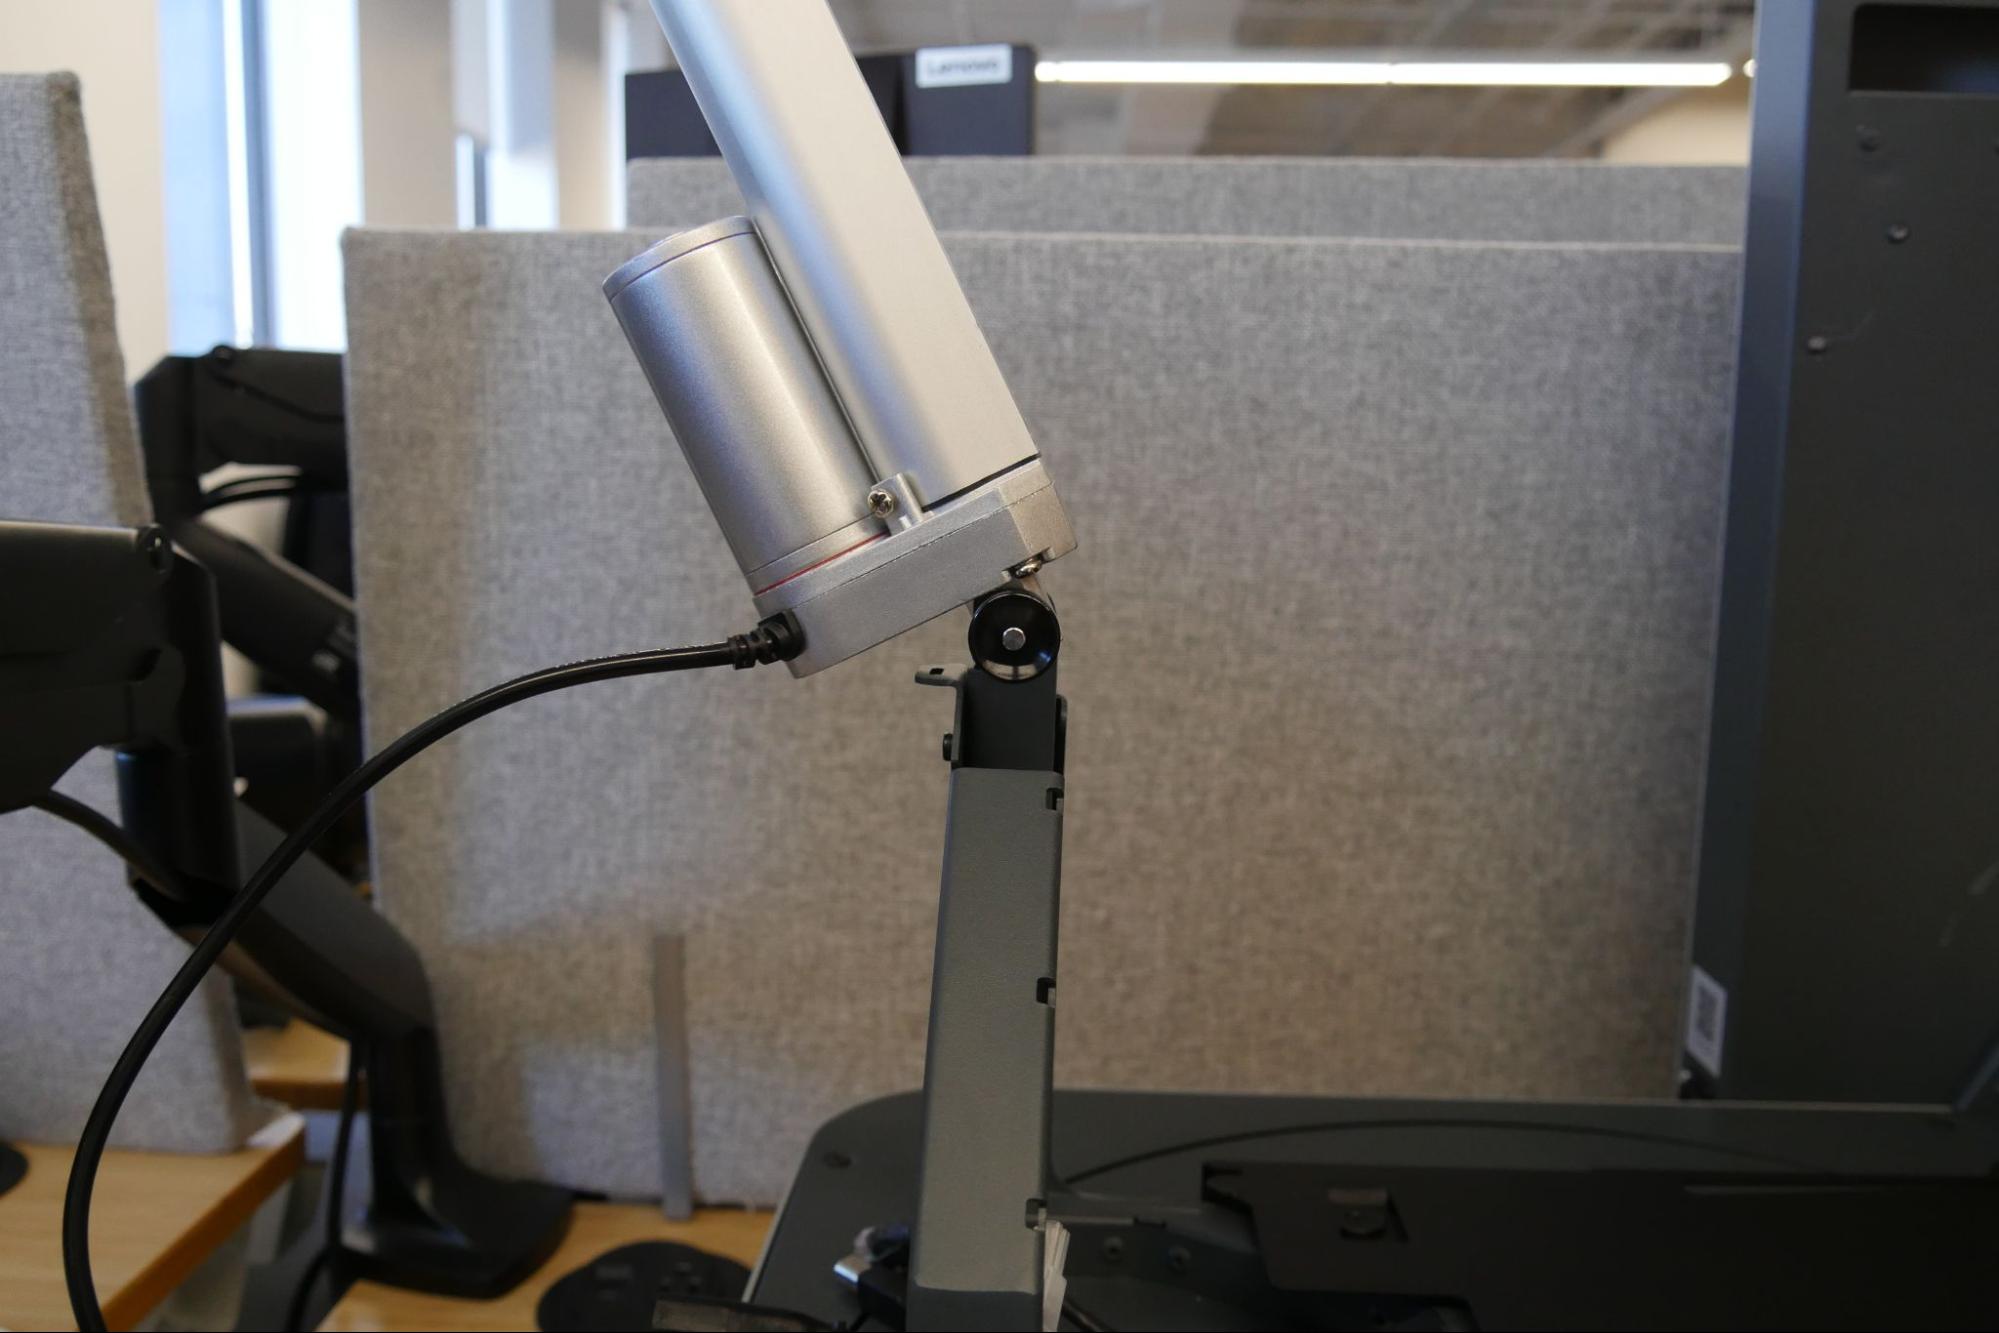
  2. Tilt the cover actuator upright.
Unfolding the Form Auto cover actuator

Note:

Save the Form Auto’s packaging including any inserts for transporting the machine. Original packaging is required for warranty service and designed to be kept and reused for transportation or shipping.

The machine’s power cord is included on top of the foam inside the box. If you cannot locate the power cable, be sure to check all boxes in your shipment, as it may have been packed separately.

Next steps

After unboxing the Form Auto and placing it in its intended location, finish setting it up and calibrate the unit.