

Schedule of maintenance (Fuse Blast)
Schedule of maintenance (Fuse Blast)
The Fuse Blast allows users to efficiently clean SLS printed parts that have been extracted using a Fuse Sift. An air handling system helps reduce plumes from free-floating powder, while an integrated blasting media reclamation system minimizes waste. In order to preserve the reliability of the Fuse Blast, it is important to regularly check and clean several components and assemblies.
To access the list of maintenance tasks:
- On the machine’s touchscreen, tap the gear icon. The Settings screen appears.
- Tap Maintenance. The Maintenance screen appears.
- Tap Maintenance Tracking. A list of maintenance tasks appears.
- Tap the down arrow next to a maintenance task to learn more about the procedure. Tap the checkbox next to a maintenance task to confirm that you have completed it.

After every use
After each blasting cycle:
- Inspect the Fuse Blast gloves
- Visually inspect the gloves and ensure there are no holes. Replace the gloves if necessary.
- Inspect the blast gun mount
- Verify that the blast gun mount has its full range of motion and is usable in all cleaning positions.
- Clean accumulated media
- Between cycles, use the gloves and blast gun in rinse mode to sweep media through the work surface. To minimize accumulation, pull the gloves inside out and off the work surface during automatic blasting.
- Refill the water tank if needed (Fuse Blast Polishing System only)
- Check the water level window on the front of the Polishing Module.
- Verify that the water level is sufficient for the polishing process.
- If needed, open the Polishing Module, separate the water feed line from the water tank, and refill the tank with tap water. Fill the water tank until 80% full. Do not use deionized water.
- Add 7 mL of Formlabs Polishing Agent.
- Close the tank and gently agitate to mix.
- Reattach the water feed line, insert the tank into the Polishing Module, and close the door.
- Check the water hose (Fuse Blast Polishing System only)
- Ensure the water hose is appropriately connected and there are no leaks.
After every 10 hours of media blasting
After every 10 hours of active use:
- Inspect and clean the media filter mesh
- The media filter mesh must be cleaned for optimal filtering. Open the media filter door and slowly slide the filter out while vacuuming the top surface.
- If you notice waste powder in the media hopper, clean the media filter mesh more frequently.
- Empty the waste hopper
- The waste hopper must be emptied regularly. Inspect the waste hopper through the orange window. If the waste level is above the maximum fill line, place a container under the waste hopper valve, then pull the knife gate to empty the hopper. Close the valve when the hopper is empty.
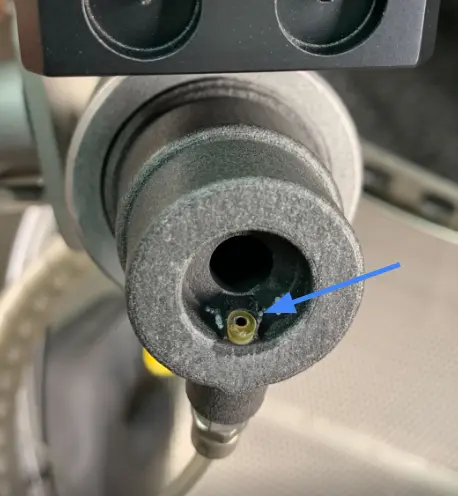
- Inspect the water injection needle (Fuse Blast Polishing System only)
- The water injection needle may occasionally clog with media or powder. To inspect the needle, shine a light at it and ensure that the tip of the needle is tangential to the nozzle outlet. Check for any obstructions inside the needle and replace if present.
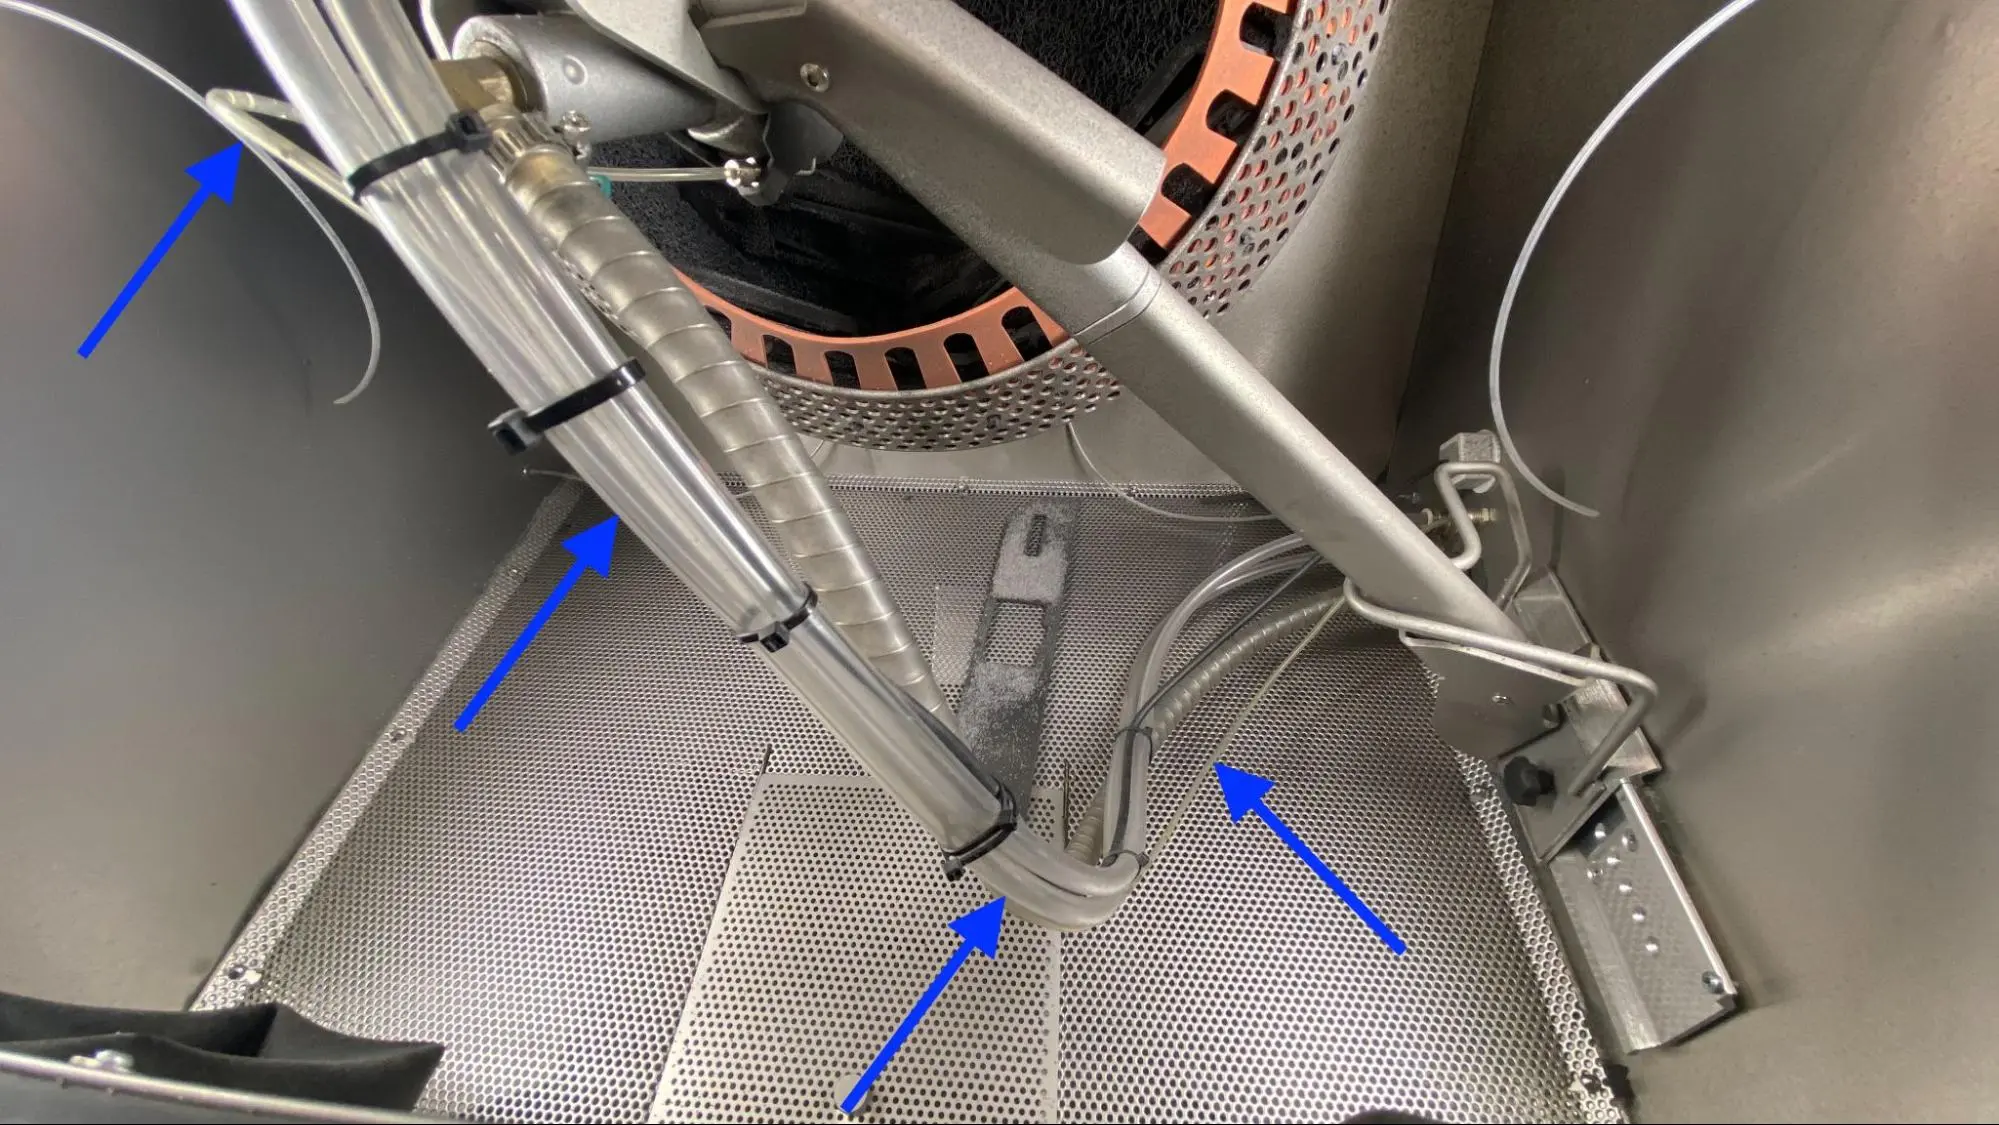
- Inspect the water hose (Fuse Blast Polishing System only)
- While unlikely, the water hose may occasionally clog with media or powder. Open the blasting chamber door and shine a light along the length of the water hose. Check for and fix any obstructions or leaks. If the obstruction cannot be cleared, replace the water hose.
After every 20 hours of media blasting
After every 20 hours of active use:
- Clean the parts catcher
- Large debris can cause clogs or impede air flow. Unlatch and open the blast door to access the work area, lift the access hatch in the work surface grate and inspect the part catcher mesh at the bottom for any large debris.
After every 30 hours of media blasting
After every 30 hours of active use:
- Clean the HEPA air filter
- The HEPA filter must be cleaned regularly for optimal air flow. Open the filter door and use a vacuum cleaner to clean the filter.
- Replace/refill the blasting media
- Sufficient media is required for blasting. Inspect the media hopper window and top up if necessary by pouring media into the blast chamber.
After every 50 hours of media blasting
After every 50 hours of active use:
- Inspect and clean the ionizer
- The ionizer tips must be free from debris to produce clean parts. Inspect the ionizer tips and clean as needed with a cotton swab.
As needed
If you notice any issues during use:
Unclog the blast gun nozzle
- Open the blast gun and verify that there are no clogs or buildup.
- Clean out the blast gun if needed. Inspect the nozzle for wear and replace it if the inner diameter has widened.
- Reassemble the blast gun before resuming operation of the machine.
Inspect the tumbler basket liner
- Remove the tumbler basket and visually inspect the liner. Replace if worn or broken.
Inspect the blast media line
- Visually inspect the blast media line for excessive wear. Replace if needed.
Inspect the interface between the tumbler basket and shaft
- Remove the tumbler basket and visually inspect the shaft interface and surrounding components for wear.
Inspect the blasting chamber air rinse hoses
- Visually inspect the air rinse hoses on the sides of the blasting chamber. Replace them if they are worn or have shortened.
Inspect the foot pedals
- Test the operation of the pedals and inspect the cable for wear. Replace the pedals if needed.
Inspect the door window
- Clean the door window with glass cleaner to remove any scuffs from the chamber rinse air whips. It is normal for the whips to rub the inside of the window and leave some residue behind.
- If the window is too scratched or fogged to see through comfortably, replace the door window.
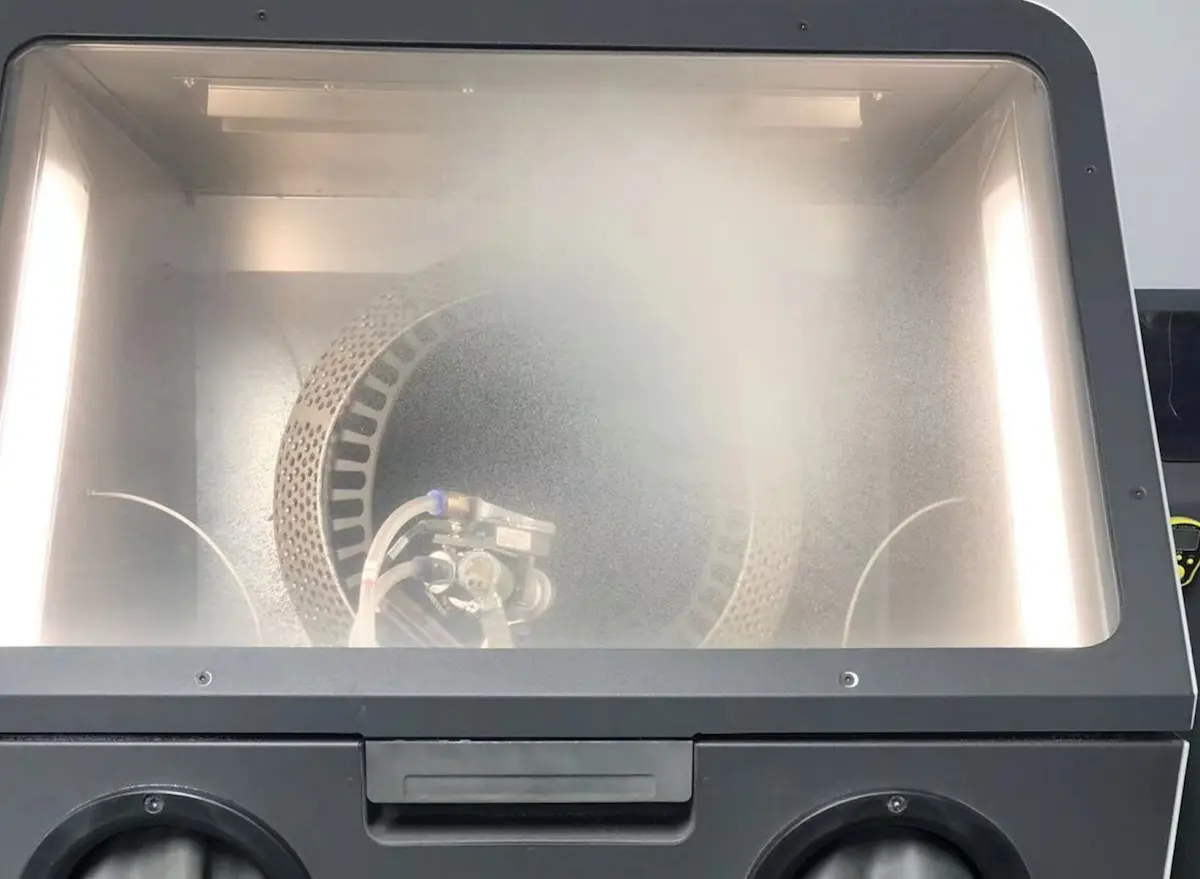
Example of window fogging from 150 hours of blasting with glass media
Unclog the Fuse Blast gun
- Fuse Blast Polishing System only: Open the blasting chamber and remove the nozzle holder with the water injection needle from the blast gun.
- With the blasting chamber door closed, place your hands into the blast gloves.
- With the blast gun nozzle pointed into the workspace, step on the right foot pedal to initiate a manual blast.
- While stepping on the manual blast foot pedal, place one gloved palm on the nozzle of the blast gun to block airflow, then remove for a pulse of air to release from the blast gun. Repeat several times until the blast gun functions normally. Reinstall the water needle into the blast gun.
- If the issue persists, you may need to manually unclog the blast gun. With the media blasting turned off, open the blasting chamber door.
- Remove the blast gun from the blast gun mount.
- Unscrew the blast nozzle from the blast gun.
- Inspect the interior and clean any clogs with a cotton swab or other fine, blunt tool.
- Screw the blast nozzle onto the blast gun until finger tight, and replace the blast gun on the blast gun mount.
- Fuse Blast Polishing System only: Reinstall the nozzle holder with the water injection needle into the blast gun.
Replace the water injection needle (Fuse Blast Polishing System only)
- Replace the water needle if obstructions are present during routine inspection or if the needle is damaged.
Replace the water hose (Fuse Blast Polishing System only)
- Replace the water hose as needed if obstructions or leaks are present during routine inspection.