
Notice:
To avoid damage to equipment, check the resin tank compatibility table in Choosing the right material to confirm you are using a resin tank that is compatible with this material.

Notice:
To avoid damage to equipment, check the resin tank compatibility table in Choosing the right material to confirm you are using a resin tank that is compatible with this material.
Premium Teeth Resin is a nano-ceramic filled Class II material with enhanced aesthetics, mechanical properties, and validated longevity to guarantee optimal clinical performance. 3D print denture teeth and temporary full-arch implant-supported restorations (All-on-X appliances) without compromising on intraoral mechanics, life-like aesthetics, and simplified post-processing and finishing steps.
Note:
To learn more about the performance or specific material properties of Premium Teeth Resin, refer to the Safety Data Sheet (SDS) and Technical Data Sheet (TDS). Always consult the SDS as the primary source of information to understand safety and handling of Formlabs materials.
Premium Teeth Resin prints at 50 microns and 100 microns.
Required resources:
Printing with Premium Teeth Resin
Notice:
To avoid damage to equipment, check the resin tank compatibility table in Choosing the right material to confirm you are using a resin tank that is compatible with this material.
Install or update PreForm, then set up the next print job.
To prepare a model for printing in PreForm, follow the instructions in the manufacturing guide. When printing digital dentures, follow the steps in our application guide 3D Printing Full Dentures with Formlabs 3D Printers [EN] [DE] [ES] [FR] [IT].
To prepare a model for printing in PreForm:
Note:
Premium Teeth Resin may be bonded to 3D printed denture bases after curing using bonding systems designed for PMMA-based denture materials such as Ivoclar Ivotion Bond Kit. Refer to the instructions provided by the bonding system manufacturer.
Washing
Follow the part washing recommendations in the manufacturing guide for the clearest and best possible results. Improper washing can lead to suboptimal mechanical and biocompatibility properties.
Post-curing requirements
Follow the post-curing recommendations in the manufacturing guide for the clearest and best possible results. Improper post-curing can lead to suboptimal mechanical and biocompatibility properties.
Understanding Premium Teeth Resin color perception
Premium Teeth Resin is a photopolymer and therefore it will go through darkening and relaxation before the color stabilizes. Color variation is expected in different stages of the post-processing workflow. Similar to all semi-opaque materials, color differences can also be seen from different lighting environments as well as model thicknesses.
Premium Teeth Resin shades are designed to match Vita shade tabs under the following conditions:
To preserve color accuracy after post-curing, finished parts should be stored in a dark place until ready for patient use. Every lot of Premium Teeth Resin is quality checked for color accuracy, always maintaining a Delta E2000 (ΔE) value less than 1.5 from the target (the generally accepted threshold for human color difference perception).
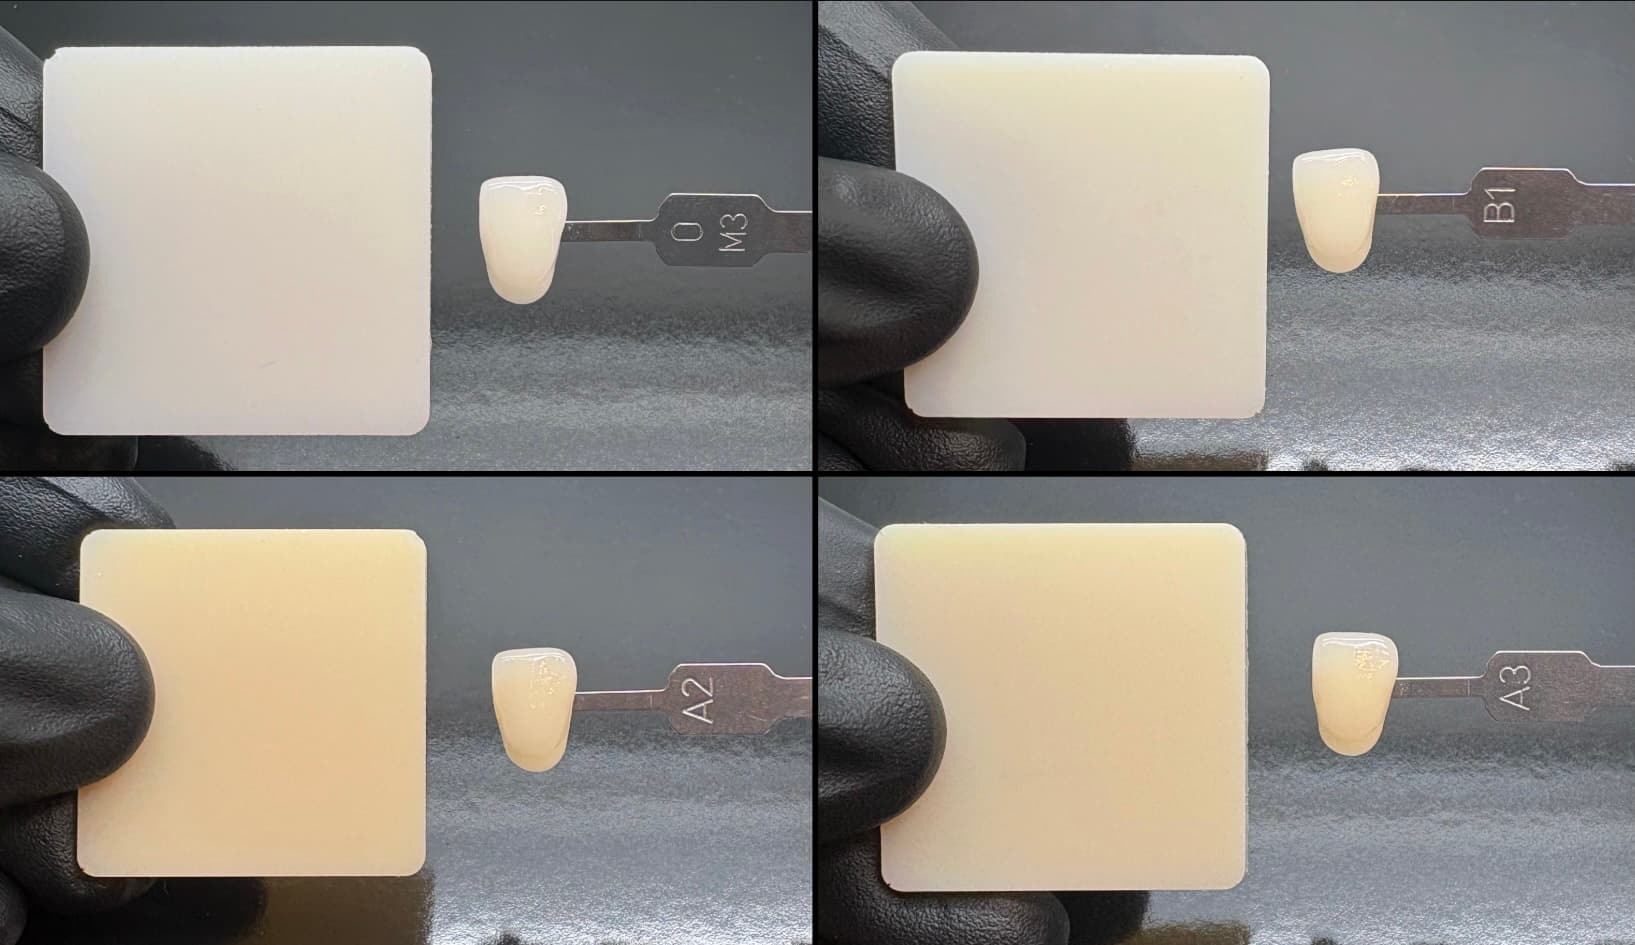
Premium Teeth Resin shade match (2 mm thick, D65 illuminant, Form Cure V2 post-cure)
Top Left: Bleach, Top Right: B1, Bottom Left: A2, Bottom Right: A3
Impact of viewing conditions
Premium Teeth Resin was color matched to Vita shade tabs under a D65 standard illuminant and over a black background. This was chosen since it approximates a natural sunlight illuminant and the dark background conditions of the mouth. Evaluating the color match over a different color background or with light transmitting through the sample will result in the shade appearing darker.
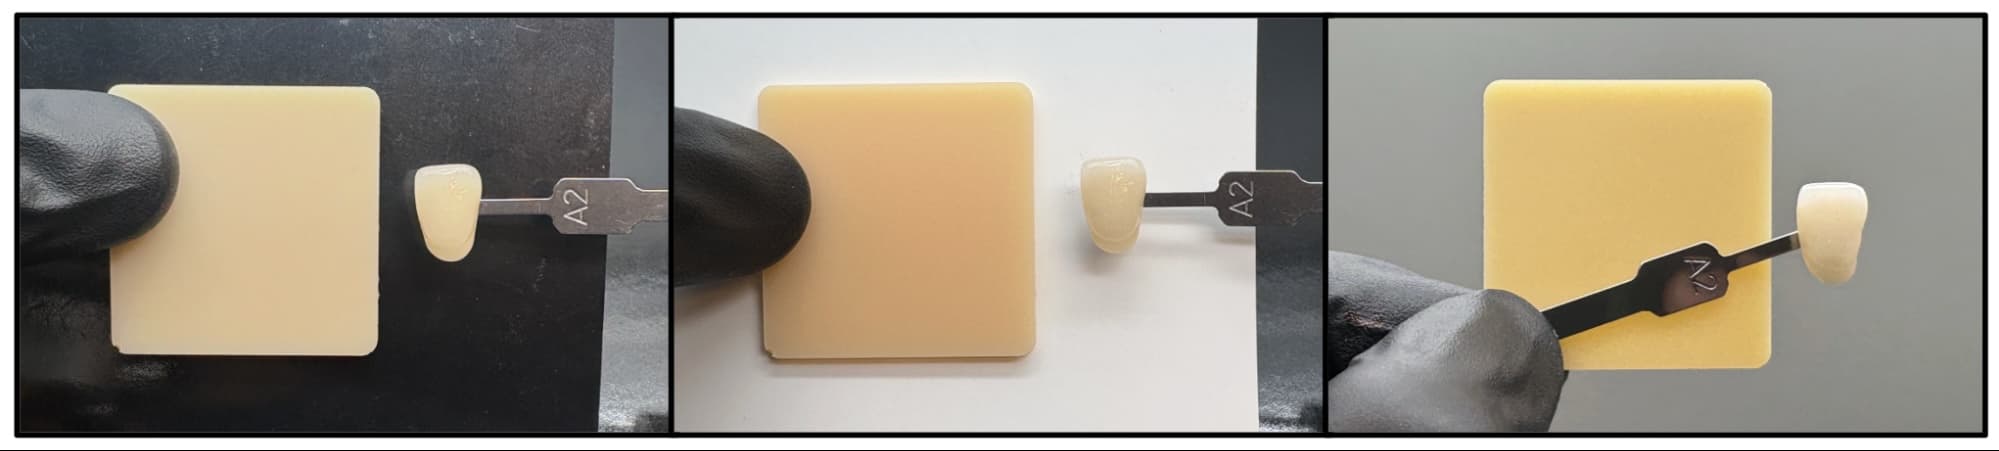
Impact of background on color (2 mm thick, D65 illuminant, Form Cure V2 post-cure)
Left: over black background (color match target condition), Middle: over white background (not representative of the mouth), Right: light transmission (not representative of the mouth)
Evaluating the color match under different lighting conditions (especially ones with varying amounts of ultraviolet light) can also result in slight color match differences due to color metamerisms.
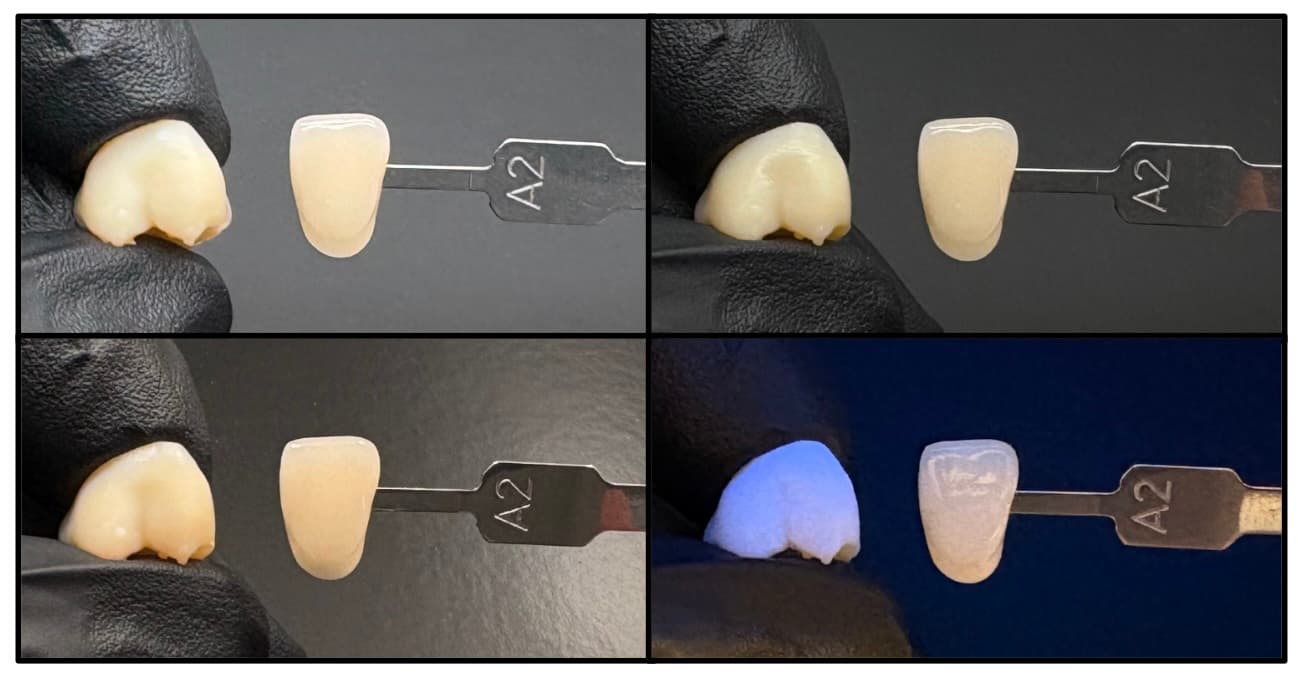
Metamerisms and illuminant impact on color (1–3 mm thick crown model, Form Cure V2 post-cure)
Top Left: D65 illuminant, Top Right: TL84 illuminant, Bottom Left: tungsten filament illuminant,
Bottom Right: ultraviolet illuminant (shows fluorescence)
Impact of model thickness
Premium Teeth Resin is a translucent resin, which means the perceived color is highly dependent on the thickness of the sample. Thicker geometries are perceived as darker and more orange/red. Premium Teeth Resin is recommended for use in geometries greater than 1 mm in thickness. Color match to the Vita shade tabs was prioritized for thicknesses between 2–3 mm.
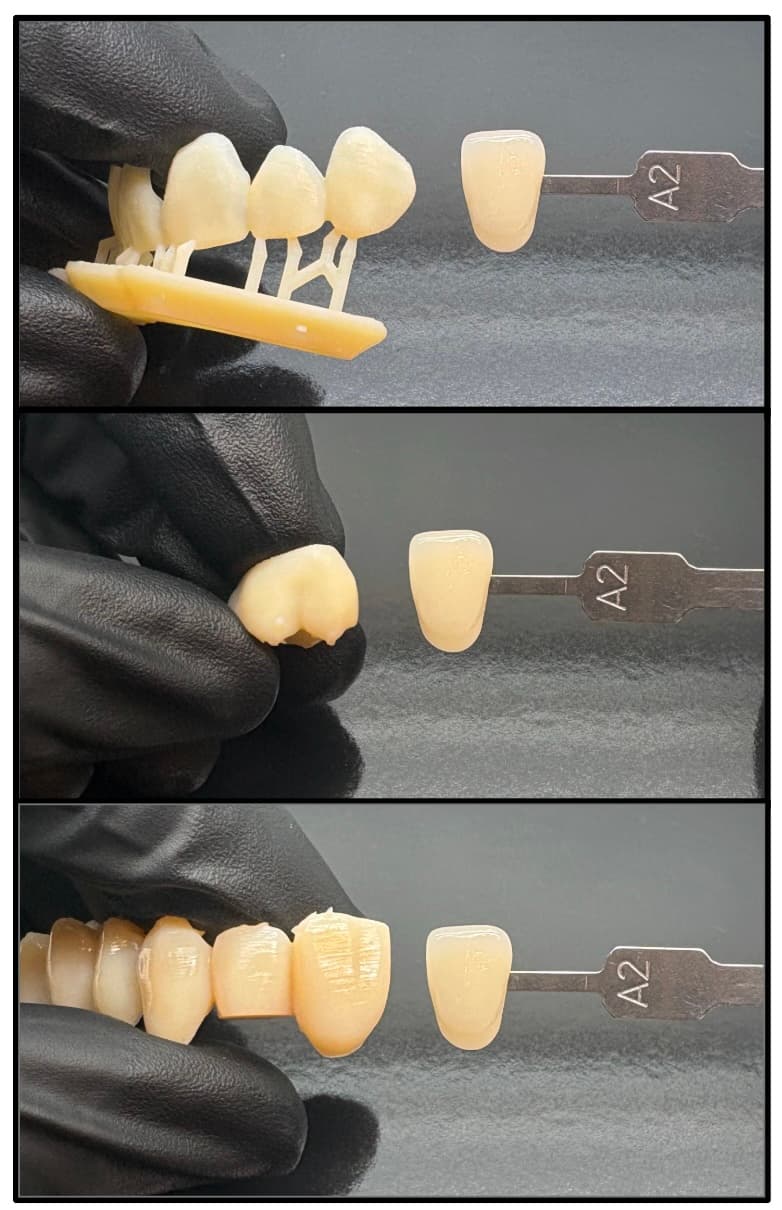
Impact of thickness on color (D65 illuminant, Form Cure V2 post-cure)
Top: 1 mm thick veneer model, Middle: 1–3 mm thick crown model, Bottom: 3–10 mm thick bridge model (darkness due to model thickness)
Impact of post-curing and aging
Conditions in the mouth are shielded from most UV exposure, but all printed parts exposed to ambient light are susceptible to some color change. Exposure to UV light (beyond expected dental conditions) can begin to darken the color of parts printed in Premium Teeth Resin over time. This is a fundamental property of UV-curable resins and can occur in the UV post-cure or under strong environmental light. The color of Premium Teeth Resin was optimized for post-curing with the Form Cure V2; slight color variations may exist when curing with the Form Cure V1 or other cure units. UV post-curing can also initiate the formation of colored species which degrade over the course of a couple of hours or days.
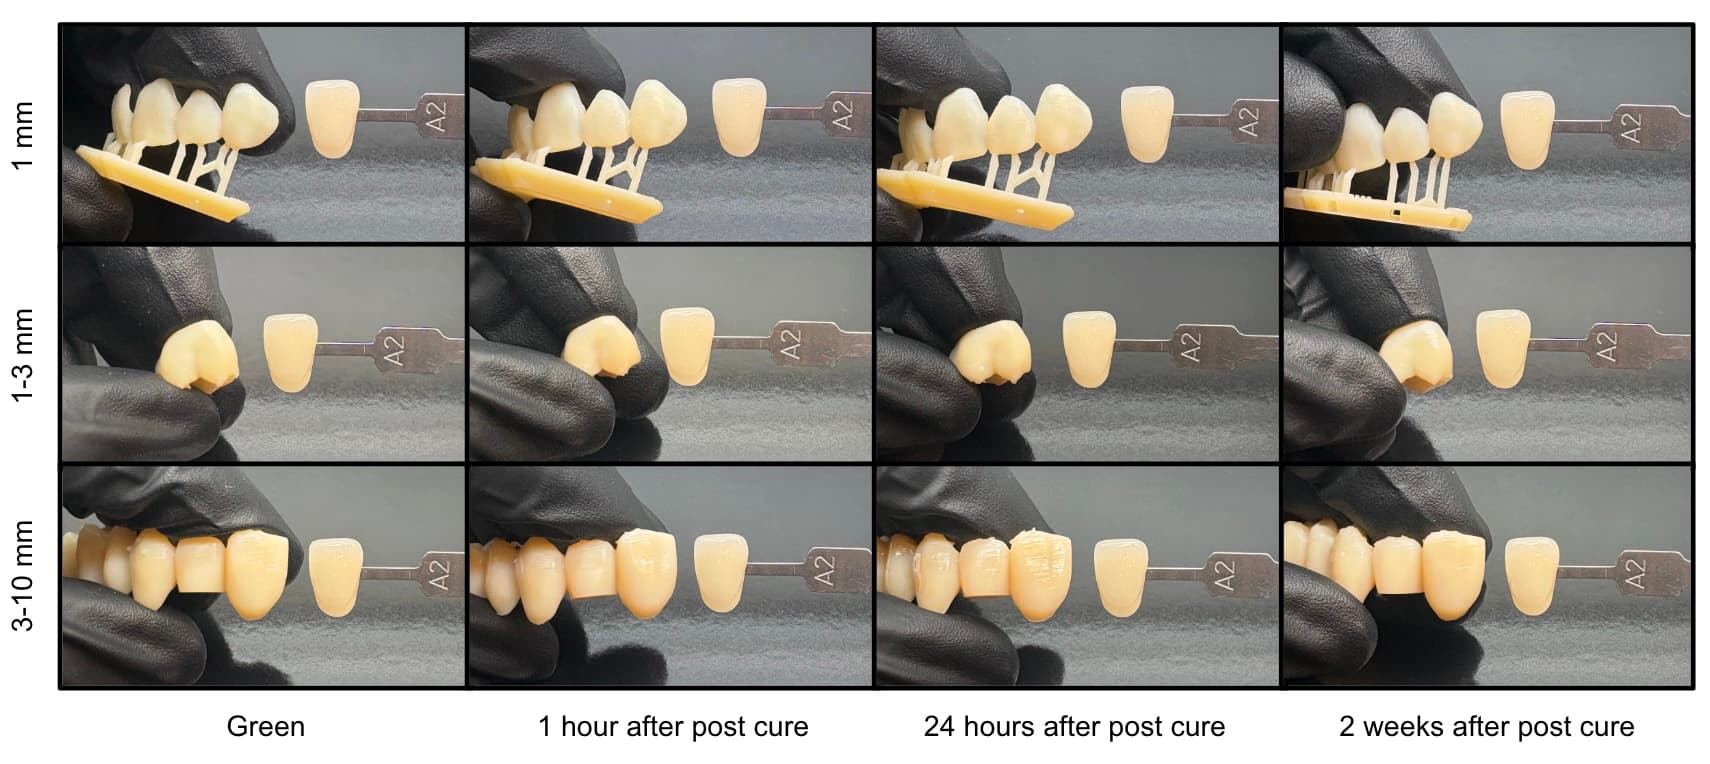
Impact of time after post-cure (D65 illuminant, Form Cure V2 post-cure)
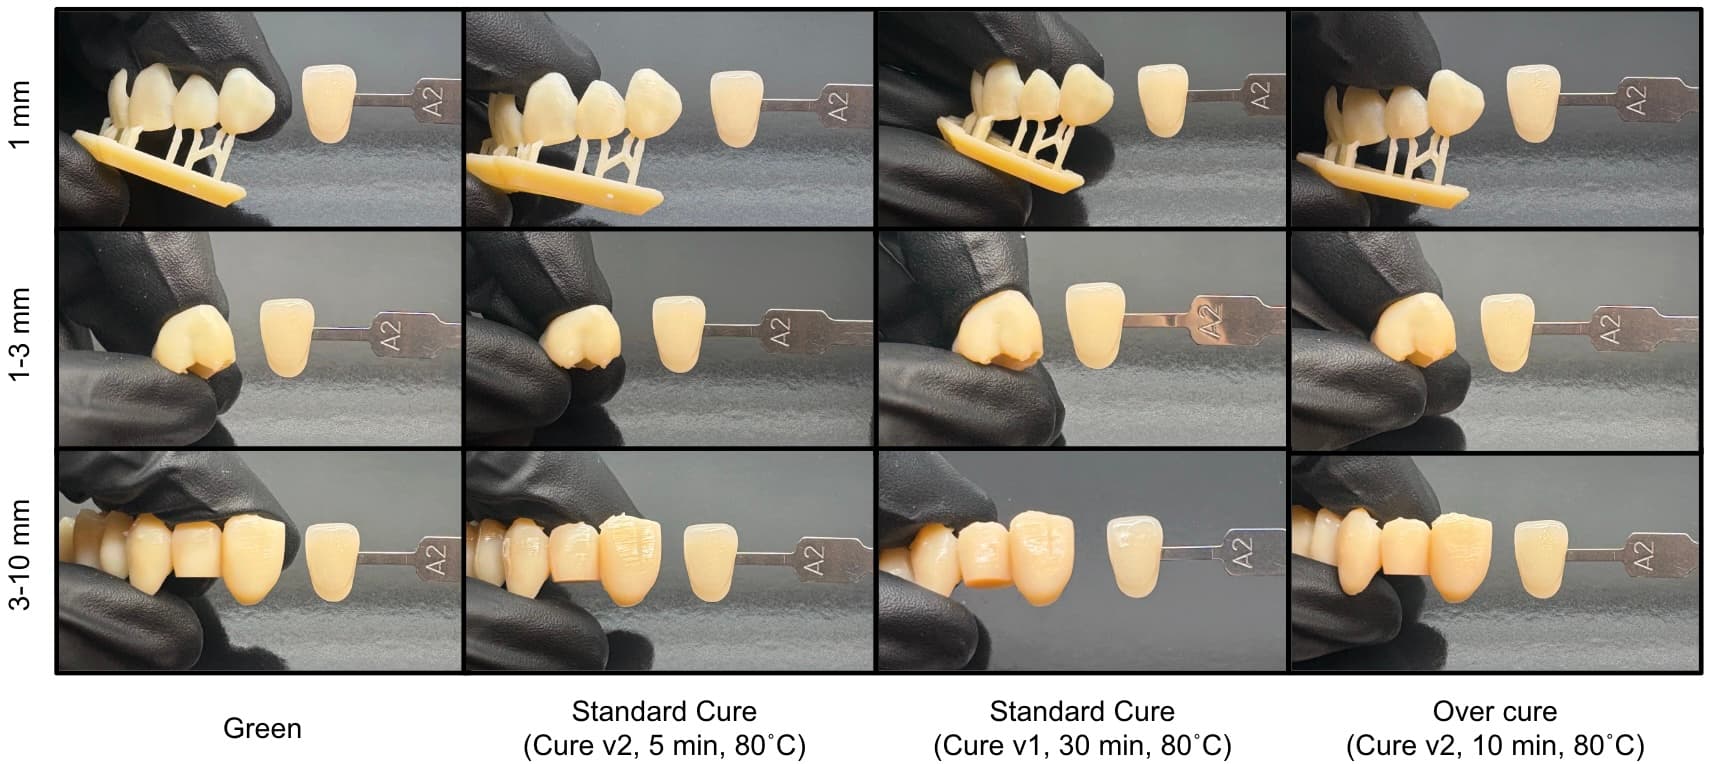
Impact of post-cure cycle and additional UV exposure (D65 illuminant, 24 hours after post-cure (except for green))
Additional resources