WHITE PAPER
Formlabs Logo

X/Y Scaling (Fuse 1 generation printers)

X/Y Scaling (Fuse 1 generation printers)

Every Formlabs SLS printer goes through rigorous factory calibration. For applications that require high accuracy, Fuse 1 generation printers have a setting to optimize dimensional fit.

X/Y Scaling is an advanced calibration tool for Fuse 1 generation printers. Formlabs recommends adjusting the X/Y Scaling settings to improve dimensional accuracy and replicability for printed parts within a ±150 μm tolerance window.

Complete the following steps to tune your printer for fitment:

  1. Print the test file.
  2. Post-process the printed parts.
  3. Measure the test print.
  4. Applying the new settings.

Printing the test file

Prepare your printer

Before printing the test file, ensure the printer is using the latest firmware and has a clean build chamber inserted.

  1. Download the latest firmware to the printer you wish to test.
  2. On the printer’s touchscreen, tap the gear icon. The Settings screen appears.
  3. Tap System > Firmware Update.
  4. After the firmware update installs, confirm the system restart on the touchscreen or wait 30 seconds for an automatic restart.
  5. Insert a build chamber into the printer.

Always reset the X/Y scaling settings to factory defaults before making any new adjustments. Failure to do so may result in inaccurate calibrations.

  1. On the printer’s touchscreen, tap the gear icon. The Settings screen appears.
  2. Tap Calibration > X/Y Scaling. The X/Y Scaling screen opens.
  3. Tap Next. The X/Y Scaling input screen appears.
  4. Tap Skip.
  5. Drag both the X Scaling and Y Scaling sliders to 0.00%. Tap Done.

Prepare the model in PreForm

  1. Download the latest version of PreForm onto your computer.
  2. Download the test file. The X/Y Scaling test print consists of one double-sided printed part.
  3. Open PreForm.
  4. Open the test print file in PreForm. Do not move, rescale, or reorient the model. X/Y Scaling test print in PreForm
  5. Select the printer you wish to print the X/Y Scaling test print.
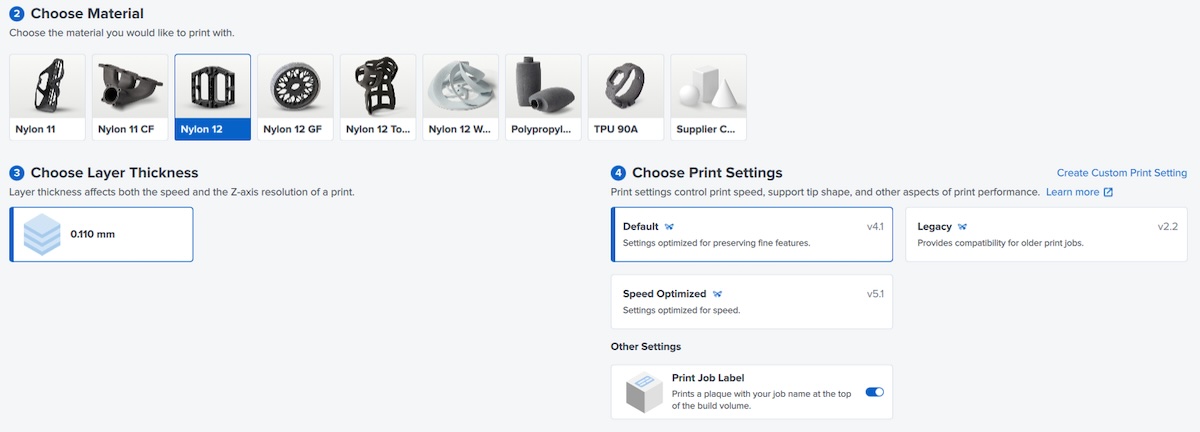
  6. Select a material.
Changing material or print setting on a Fuse 1 generation printer

Note:

If you change your print setting or switch the powder type associated with your printer, reprint the test print and redo the X/Y Scaling calibration.

  1. Click the orange Print button to send the job.
  2. Start the print job on your printer.

Post-processing the test print

Cooling the build chamber

SLS printed parts are sensitive to sudden and drastic temperature changes. After printing, the print job needs to cool in the build chamber to alleviate thermal stresses in the printed parts. Parts that are not allowed to properly cool may warp and are not suitable for X/Y Scaling calibration.

Formlabs recommends waiting at least 5 hours and 30 minutes before post-processing the build chamber with the X/Y Scaling test print.

  1. Check that the print enclosure is 35 ºC (95 °F) or cooler before handling prints.
  2. Once the build chamber has fully cooled, remove it from the printer.

Post-processing the printed parts

  1. Insert the build chamber into the Fuse Sift.
  2. Unpack the powder cake and extract the X/Y Scaling test print.

Note:

The X/Y Scaling test file also prints a small Formlabs butterfly above the test print. The Formlabs butterfly is not necessary for the calibration test and can be discarded.
  1. Thoroughly remove powder from the test print in the Fuse Sift.
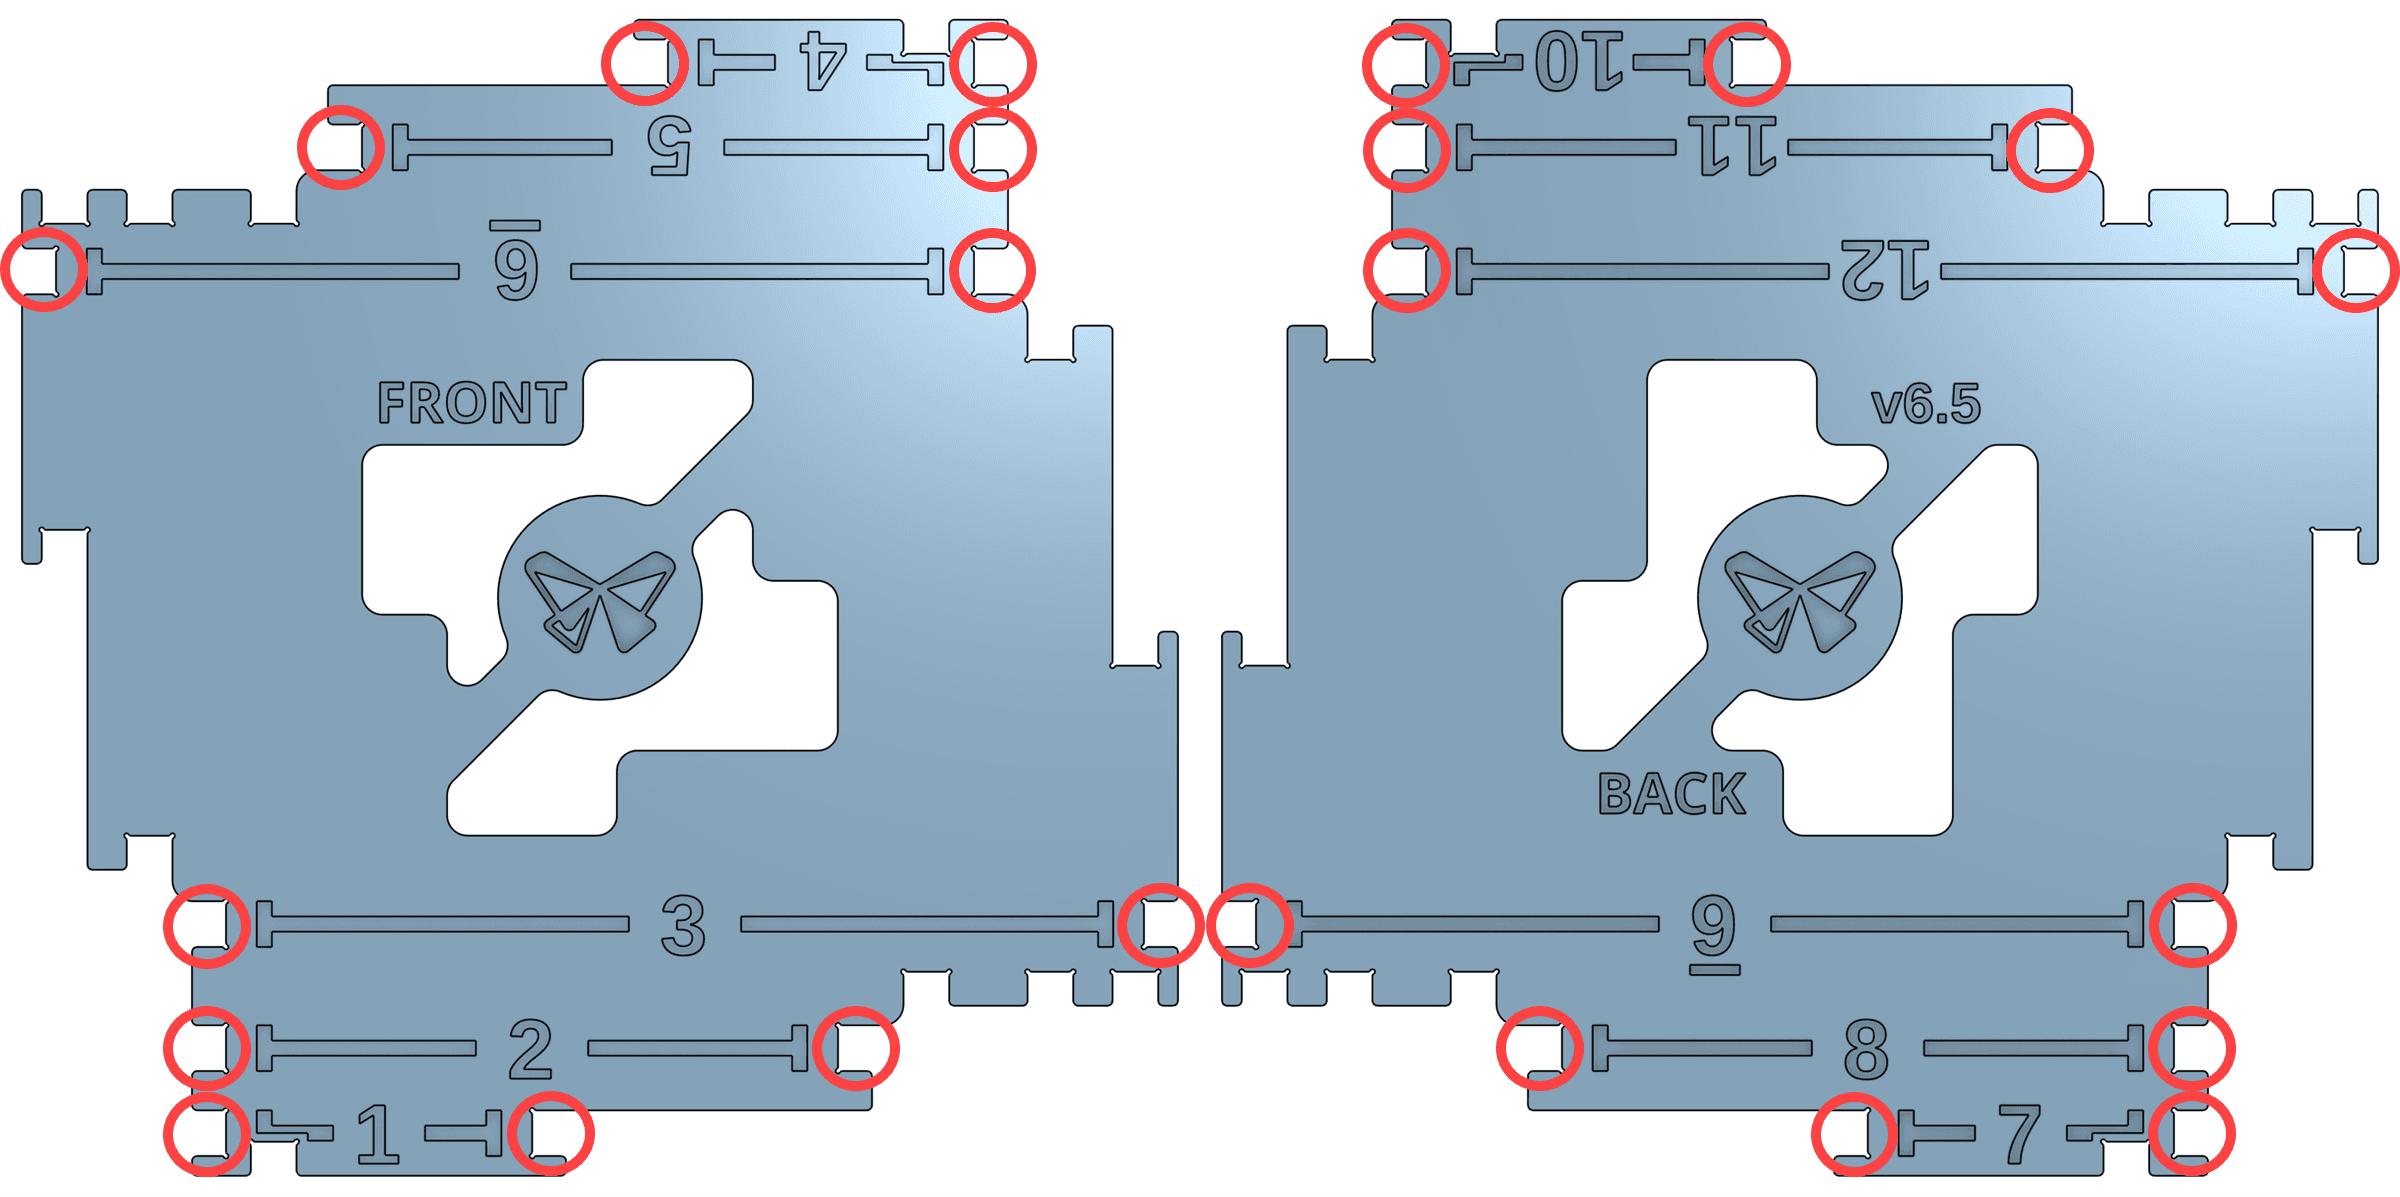
  2. Media blast the test print to fully remove any remaining powder and the Surface Armor on the part. Pay specific attention in removing powder from the 24 measurement points for accurate calibration.
X/Y Scaling test print annotated

Measure the X/Y Scaling test print

Measure the test print after it has been printed, cooled, and media-blasted. Use a set of calipers to determine the distance between each pair of measurement slots and input the values to the printer UI to accurately calibrate your Fuse 1 generation printer.

Measuring the test print

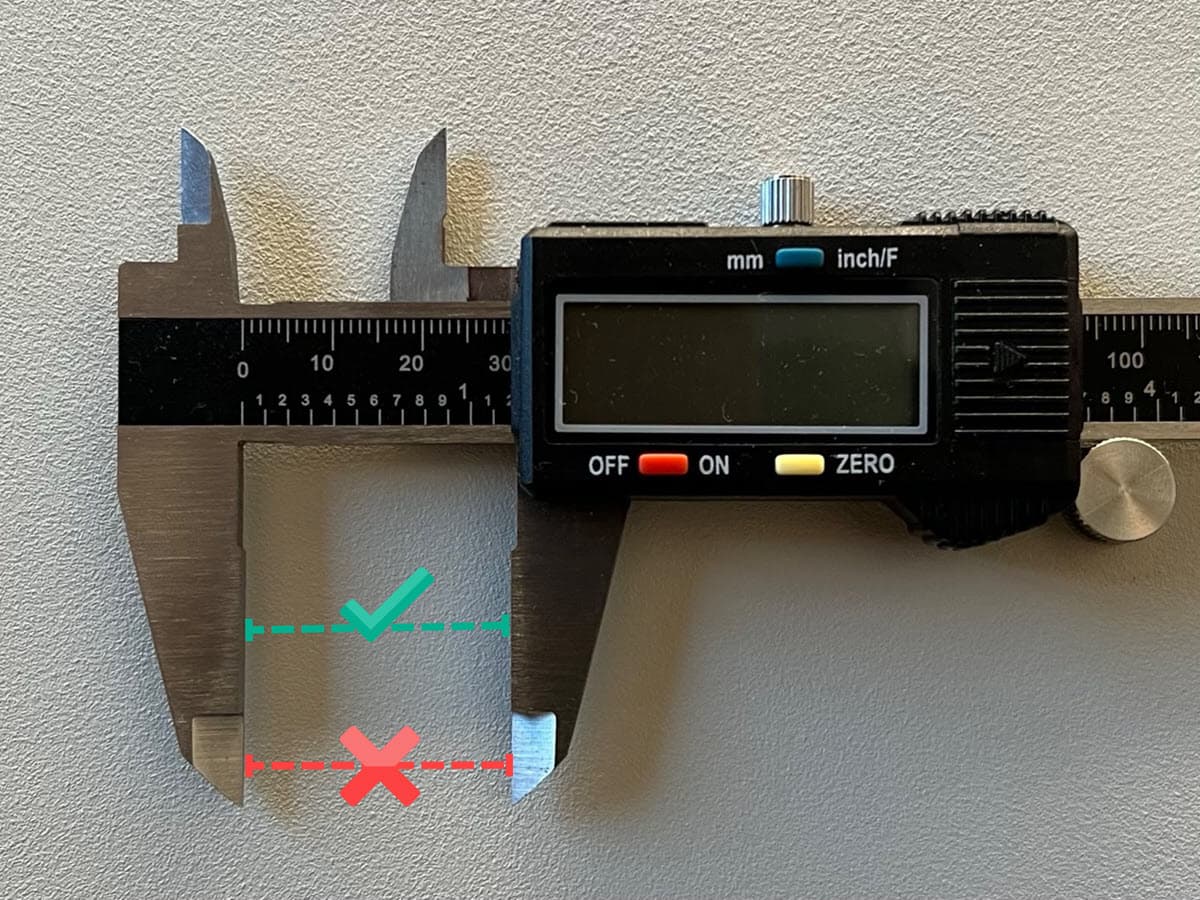
  1. Fully close your caliper’s jaws. Zero the calipers before measuring the X/Y Scaling print. Check the zero point throughout your measurements to ensure no measurement error is being added into the calibration.
  2. Measure the test print at the first pair of measurement slots on the front of the printed part. Write down the value.

To ensure accurate readings:

  • Measure the test print at the flat part of the caliper’s lower jaw
Measure the test print at the flat part of the caliper's lower jaw
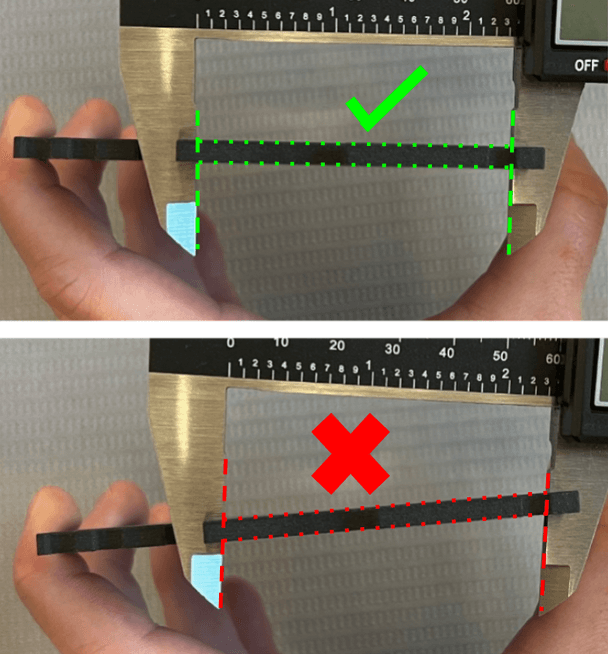
  • Ensure the calipers are perpendicular to the printed part
Ensure the calipers are perpendicular to the printed part
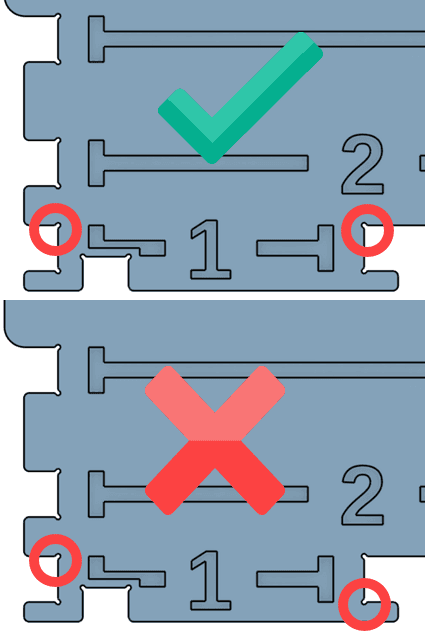
  • Ensure the calipers are aligned to the same edge face while measuring each measurement slot
Ensure the calipers are aligned to the same edge face while measuring each measurement slot
  1. Measure the next 11 measurement slots and write down the values for each.

Applying the new settings

Input the results from measuring the test print to the X/Y Scaling calibration tool on the printer’s touchscreen.

Note:

There is variation between different units, therefore it is necessary to print an X/Y Scaling test print for each printer and powder combination whose dimensional accuracy you want to adjust. Only apply the changed settings to the printer that was used to print the offset tool.

Calibrate the printer
  1. On the printer’s touchscreen, tap the gear icon. The Settings screen appears.
  2. Tap Calibration > X/Y Scaling. The X/Y Scaling screen opens.
  3. Tap Next. The X/Y Scaling input screen appears.
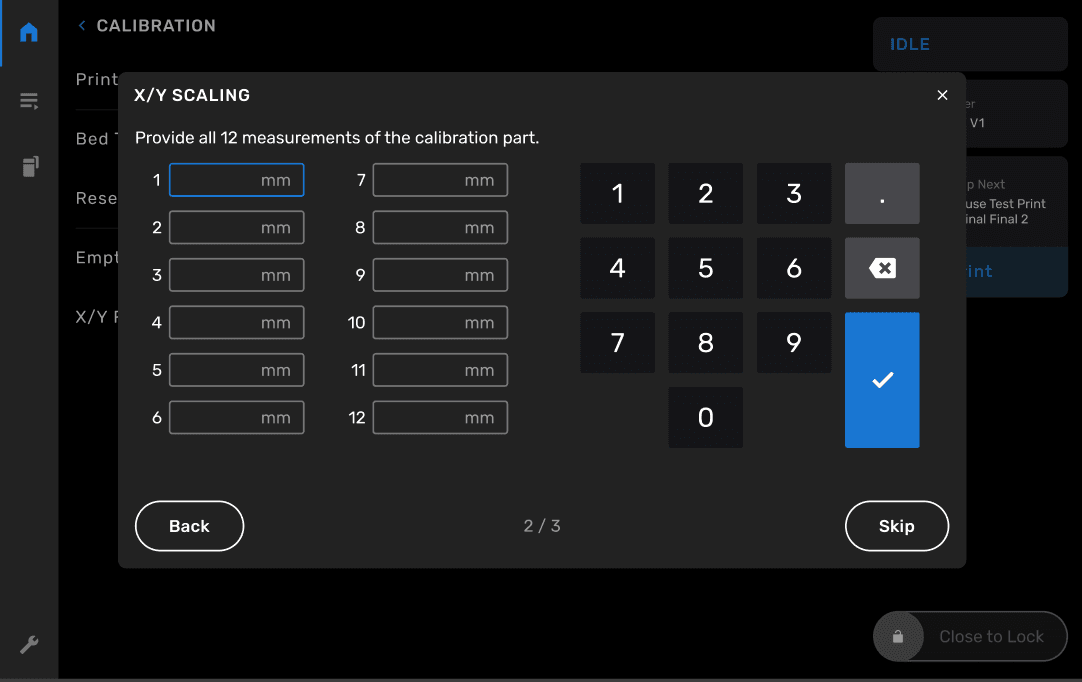
  1. Enter the 12 measurements from the printed test file. The Calculate button appears when all values have been entered and are within an expected range. Tap Calculate. Skip calculations by pressing Skip before entering any values.
X/Y Scaling printer calibration screen

Note:

The printer checks that values are within 1.5 mm of the nominal dimension in the model (30, 60, or 90 mm). The touchscreen displays a warning for any values that are out of range or missing. If any measurements are out of range:

  1. Media blast the part if you have not done so already.
  2. Check that the part was not printed with custom print settings.
  3. Remeasure the part, making sure you are following the guidance above.
  1. Tap Finish. The X/Y Scaling values are applied to all future prints using the tested material.

Troubleshooting

If an error occurs while using X/Y Scaling, Formlabs recommends re-measuring the test print and inputting the new values into the printer touchscreen. If the error persists, please contact Formlabs Support or your authorized reseller.