WHITE PAPER
Formlabs Logo

Troubleshooting issues with parts printed in Alumina 4N Resin

Troubleshooting issues with parts printed in Alumina 4N Resin

Alumina 4N Resin is a high-density and high-purity technical ceramic with exceptional performance in extreme environments: thermally resistant, hard, abrasion resistant, mechanically strong, and chemically inert. Conventionally it is manufactured by pressing or ceramic injection molding, both of which require expensive tooling in order to produce parts.

Sometimes prints don't come out as expected. Compare symptoms of common issues with parts printed in Alumina 4N Resin to narrow in on the underlying source of the problem and find a solution.

Issues during printing

Particulate settling in the resin tank or cartridge

Alumina 4N Resin has alumina particles suspended in the liquid resin. As with other Formlabs resins with suspended particulates, the alumina can settle over time if your resin tank or resin cartridge is left unused for a prolonged period of time.

To prevent particulate from settling in the resin tank or resin cartridge:

  • Shake the resin cartridge for two minutes before printing. Press the bite valve open with a gloved hand to ensure that the resin can flow freely.
  • Stir the resin in the resin tank with a non-marring tool such as the Form 3 tank tool to redisperse the alumina particles.
  • Refrigerate or freeze the resin cartridge and resin tank when not in use to prevent settling during storage.

Parts not adhering to the build platform

“Non-adherence” describes a print defect in which prints are either partially or completely detached from the build platform. This occurs when the initial layers of a print fail to adhere to the build platform. In cases of complete non-adherence, the print is missing from the build platform and there is a flat area of cured resin on the bottom of the resin tank.

To resolve non-adherence issues when printing with Alumina 4N Resin:

  1. Calibrate your printer’s Z-axis.
  2. Fine tune your printer’s Z-axis if necessary.
  3. Print a single 50 micron (0.050 mm) layer with any available resin. Formlabs recommends using a Standard Resin for this test.
  4. Clean any liquid resin off of the printed layer and build platform.
  5. Measure the thickness of the printed layer with a micrometer or other similar tool. Take note of the minimum measured thickness.
  6. Calculate the needed Z-axis adjustment by subtracting 100 microns from the minimum measured thickness of the printed layer.
    • On the printer’s touchscreen, tap Settings > Maintenance > Calibration > Z Axis Fine Tuning. The Z Axis Fine Tuning screen appears.
    • Tap the - button above Z Offset to lower the default position of the build platform by the amount calculated above.

Note:

It is normal for the first printed layer on Formlabs LFS printers to be markedly thicker than the nominal 50 microns.

If non-adherence issues persist, sand your build platform surface with a medium or fine grit sandpaper before printing. A rougher surface helps parts printed in Alumina 4N Resin stick to the build platform.

Prints failing after initial layers (Form 3 only)

Sometimes, parts may adhere to the build platform but fail after the first few layers are printed. This is most often due to a miscalibrated Z-axis or a problem with the resin tank mixer.

To prevent parts from failing after the initial layers have printed, calibrate your printer’s Z-axis.

If the mixer is not fully parked in the mixer case at the side of the resin tank when the print failure occurs, remove the mixer from the tank. Bend the mixer arms slightly outwards. Orient the mixer with the arms facing upward and toward the mixer case on the left side of the tank. The magnets in the mixer should be facing down. Slide the mixer to the left, into the mixer case, until the flexure arms on each end click into place.

Parts falling off of supports
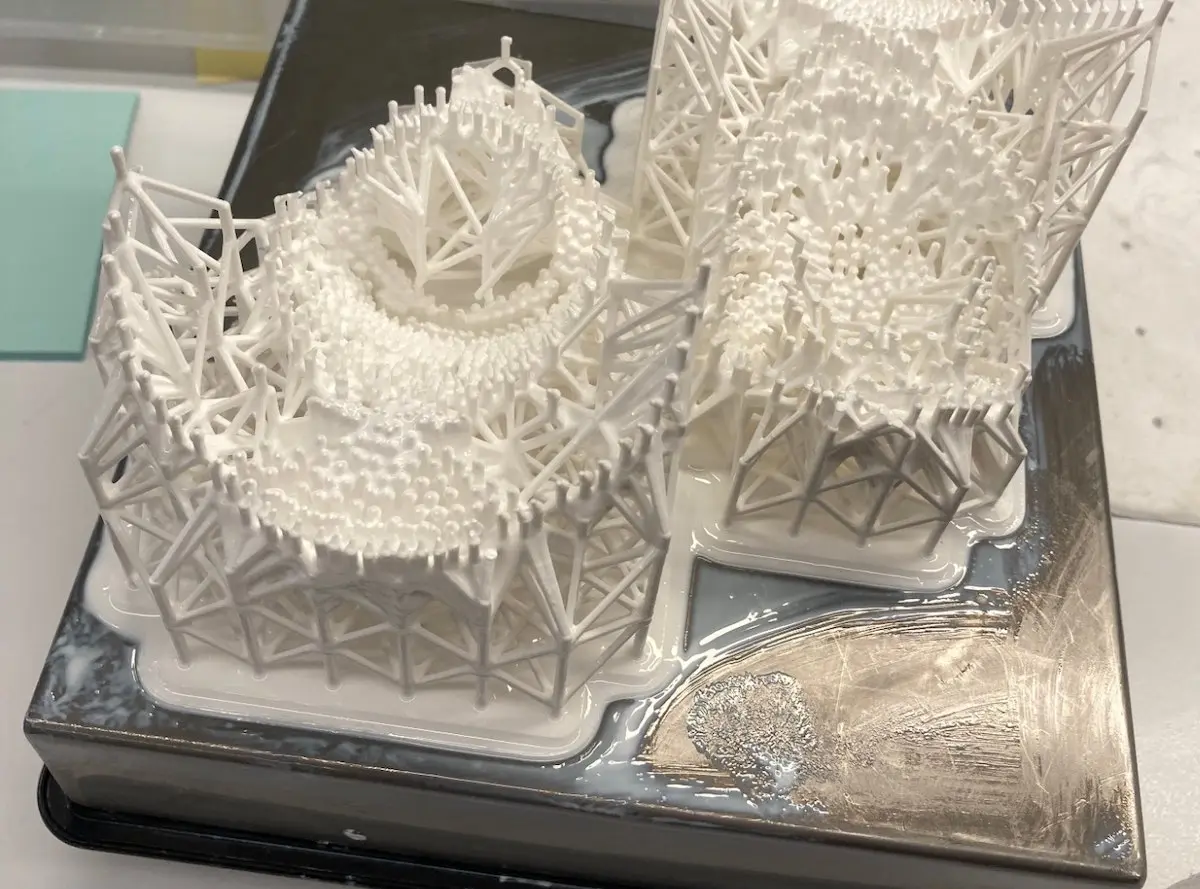
Parts that adhere to the build platform properly can also fail by falling off their supports later during the print. This can be due to insufficient supports, part geometry, or the age of the resin.
Part printed in Alumina 4N Resin that has fallen off its supports

To prevent parts from falling off their supports during the print:

  • Manually add supports in PreForm if necessary.
  • Ensure that support tips are the proper size. Formlabs recommends a touchpoint size of 0.4–0.8 mm. 0.5 mm touchpoints are preferred. Larger touchpoints generally hold the part better but leave larger marks or nubs during post-processing.
  • Orient parts so that the print does not start with a sharp edge. When printing with Alumina 4N, it is generally recommended to orient your parts parallel to the build platform, unlike with most Formlabs resins. If your part must be printed at an angle, fillet the bottom edge to create more surface area for support touchpoints.
  • Orient your parts to avoid cups. Check the Alumina 4N design guide for further recommendations.
  • As Alumina 4N Resin ages, its performance with respect to fine details, including smaller touchpoints, degrades. If your resin is older than three months, consider using larger touchpoints for your prints. Refrigerate the resin cartridge and resin tank between uses to extend its life.

Part breaking during the print

Parts can also break during the print, even if they do not detach from their supports. This can be due to insufficient supports, part geometry, or collisions between the mixer and the part.

To prevent parts from breaking during the print:

  • Manually add supports in PreForm if necessary.
  • Orient your parts to avoid cups. Check the Alumina 4N design guide for further recommendations.
  • Orient your parts to avoid sudden changes in mass or cross-sectional area between layers.
  • Check for mixer decoupling during prints.

Part geometry not resolving

Particularly small features in your parts may not print properly, especially as the resin ages.

If fine features are not resolving:

  • Ensure that the part complies with the design guide recommendations. Features that are too small may not print, even with fresh resin.
  • As Alumina 4N Resin ages, its performance with respect to fine details degrades. Refrigerate the resin cartridge and resin tank between uses to extend its life by up to 12 months.

Mixer decoupling (Form 3 generation)

At various points before and during a print, Formlabs LFS printers move the mixer across the resin tank and build platform to check for obstructions and mix the resin. Magnets in the LPU housing couple to corresponding magnets in the mixer, which is pulled along as the LPU moves. The mixer is intended to decouple from the LPU housing if it encounters a previous failed print or other blockage. This is often accompanied by a Mixer Check Failure error message.
alttext

To resolve mixer decoupling issues:

  • Remove any cured resin from the resin tank and filter the resin in the tank.
  • If the mixer is failing to park in the mixer case, the arms at the ends of the mixer may be too wide. Remove the mixer from the tank. Bend the mixer arms slightly inwards. Orient the mixer with the arms facing upward and toward the mixer case on the left side of the tank. The magnets in the mixer should be facing down. Slide the mixer to the left, into the mixer case, until the flexure arms on each end click into place. Adjust the arms as needed so that the arms click into place with very light force.
  • If the mixer parks in the mixer case but does not stay in place, the arms at the ends of the mixer may be too narrow. Remove the mixer from the tank. Bend the mixer arms slightly outwards. Orient the mixer with the arms facing upward and toward the mixer case on the left side of the tank. The magnets in the mixer should be facing down. Slide the mixer to the left, into the mixer case, until the flexure arms on each end click into place. Adjust the arms as needed so that the arms click into place with very light force.
  • If the mixer continues to decouple during prints, contact Formlabs Support or your authorized reseller. The mixer may need to be replaced.

Mixer detected debris during preprint (Form 4 generation)

During the preprint routine, the mixer scrapes along the build platform to check for debris left from prior prints. Alumina 4N Resin’s viscosity can lead to false positives during this stage.

As Alumina 4N Resin ages, its viscosity increases. Refrigerate the resin cartridge and resin tank between uses to extend its shelf life up to 12 months.

If you see Mixer detected debris errors during preprint:

  • Check that your build platform is completely clean and free of debris.
  • Check your resin’s lot number and expiration date. If your resin is expired or has been stored outside of a refrigerator for more than three months, you may need to replace your resin.
  • Sediment in the tank can cause the mixer to skip and trigger false positives. Thoroughly stir your resin using a plastic scraper or by detaching the mixer and manually moving it from side to side before each print.

If you continue to experience preprint debris detection issues, contact Formlabs Support or your authorized reseller for more assistance.

White particles deposited on the build platform
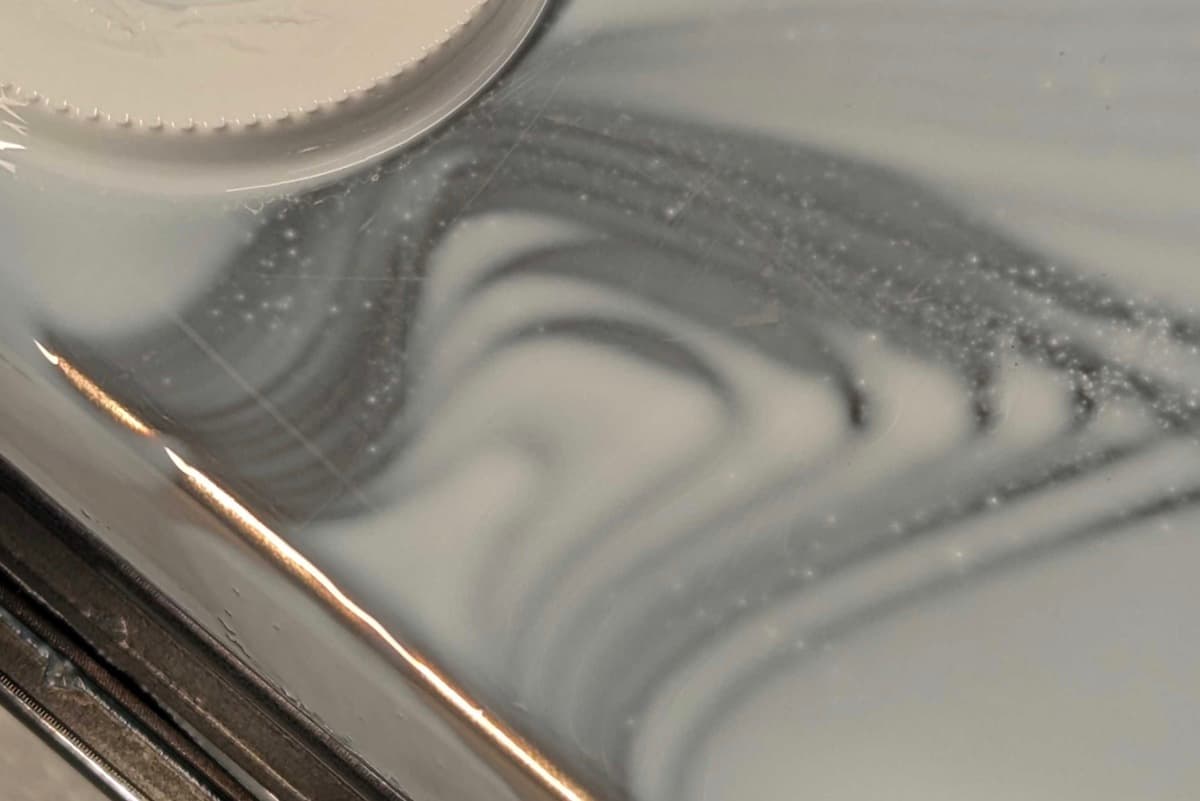
During a print, contaminants in the resin can be deposited on the build platform. These can be physical debris or the result of contact with water or isopropyl alcohol (IPA).
White particles in a tank of Alumina 4N Resin

If you notice white particles deposited on the build platform after a print:

Debris deposited on part surfaces

Larger debris deposited on part surfaces during a print can come from previous failed prints or failed sections of the current print. Flakes of cured resin can stay suspended in the resin tank or be peeled off the tank film by the mixer.
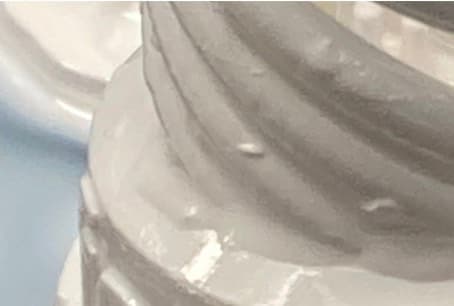
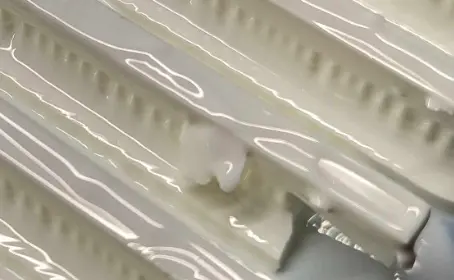
An example of debris left on the surface of a part printed in Alumina 4N Resin

If you notice flakes of cured resin on the surface of your printed parts:

  • Filter the resin in the resin tank.
  • Manually add supports in PreForm if necessary to avoid print failures.
  • Retry the print job without the specific model that failed. If possible, reorient that part to make it self-supporting, then reprint.

Rafts strongly adhered to build platform

Parts printed in Alumina 4N Resin adhere more strongly to a rough build platform surface. In some cases, your printed parts may adhere so strongly to the build platform that they are difficult to remove.

If your printed parts are over-adhered to the build platform:

Caution:

Using the included tools (e.g., flush cutters or scrapers) on slippery surfaces such as a resin-coated build platform can result in sudden movement. Orient sharp tools away from yourself, especially when cutting or scraping.

  • Secure the build platform. Use the scraper included in the Form 2/Form 3 Finish Kit, a putty knife, or other similar tool along with a hammer to separate your printed parts from the build platform.
  • Stainless Steel Build Platform only: If needed, after removing your printed parts and cleaning the build platform, media blast the build platform surface with glass beads.

Issues with parts in their green state

Parts are colored pink

After washing your printed parts with Ceramic Wash Solution, you may notice a pink tinge on the surface of your parts. This is due to a reaction between the resin and byproducts from certain types of building furnaces. This has not been shown to cause issues in fired parts beyond the aesthetic change—after firing, your parts should still meet their design dimensions and strength.
Part printed in Alumina 4N Resin tinted pink

If you notice a pink tinge on the surface of your parts after washing:

  • Keep airflow even across parts during drying. Consider placing your printed parts on a sieve, chicken wire, or v-grooved setters to allow for airflow across their bottom surfaces.

Parts are very difficult to remove from supports

Parts printed in Alumina 4N Resin must be removed from their supports before firing. Depending on part geometry, support geometry, and part orientation, removing supports may be difficult.

If it is difficult to separate your printed parts from their supports:

  • Ensure that support tips are the proper size. Formlabs recommends a touchpoint size of 0.4–0.8 mm. 0.5 mm touchpoints are preferred.
  • Make thin parts self-supporting or remove supports using end nippers or another similar precision tool.
  • If the supported surface is very large, it may be over-supported. Use PreForm to decrease the density of supports on that surface.

Cracks visible on part surfaces prior to firing
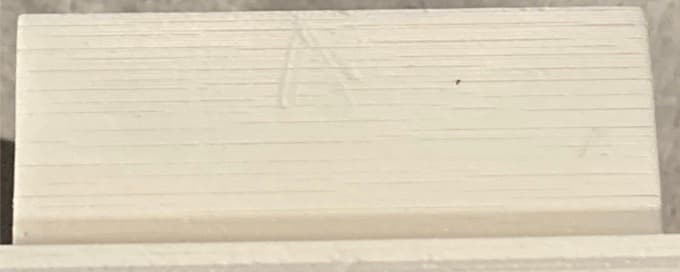
Parts printed in Alumina 4N Resin are fairly robust in their green state but are still susceptible to damage. In particular, washing or drying your printed parts improperly can cause surface cracks.
A crack visible on the surface of a part printed in Alumina 4N Resin before firing

If your printed parts develop surface cracks prior to firing:

  • Do not use IPA or water to clean your printed parts. Only use Ceramic Wash Solution to clean liquid resin off of parts printed in Alumina 4N Resin.
  • Limit time in the Ceramic Wash Solution to two minutes per wash cycle. Prolonged exposure to Ceramic Wash Solution can crack your printed parts.
  • Limit air speed along the surface of the part to lower evaporation rates. Aggressive drying rates can crack your printed parts.

Parts do not dry completely

After cleaning your printed parts with Ceramic Wash Solution, fully dry them before firing. Formlabs recommends drying parts on top of a sieve or mesh to increase air flow around the printed part. Parts require a warm room temperature of 20–30° C (68–86° F) with 30–45% humidity to completely dry. Oven dry parts at 45° C (113° F) for 8–24 hours when needed.

If your parts do not dry completely:

  • Ensure that the part was completely cleaned, as any remaining liquid resin will not evaporate.
  • Wipe or blow off as much of the Ceramic Wash Solution as possible.
  • Parts that are still somewhat wet with Ceramic Wash Solution can still fire successfully. If possible, slow down the initial burnout steps (at less than 150 °C) to compensate.

Holes or other negative features filled with resin

After printing, small holes and other negative features are often filled with liquid resin. During firing, this liquid resin traps burnout gasses and can lead to a crack in the part. If normal washing does not clear out the liquid resin, the hole may be too small or too long for the Ceramic Wash Solution to fully penetrate.

If liquid resin remains in holes in your printed parts after washing:

Parts warping during drying

After cleaning your printed parts with Ceramic Wash Solution, fully dry them before firing. If the airflow around a part is uneven, different surfaces may dry at different rates, leading to warping.

If your parts are warping during drying:

  • Keep airflow even across parts during drying. Consider placing your printed parts on a sieve, chicken wire, or v-grooved setters to allow for airflow across their bottom surfaces.

Issues during and after part firing

Large cracks in printed parts
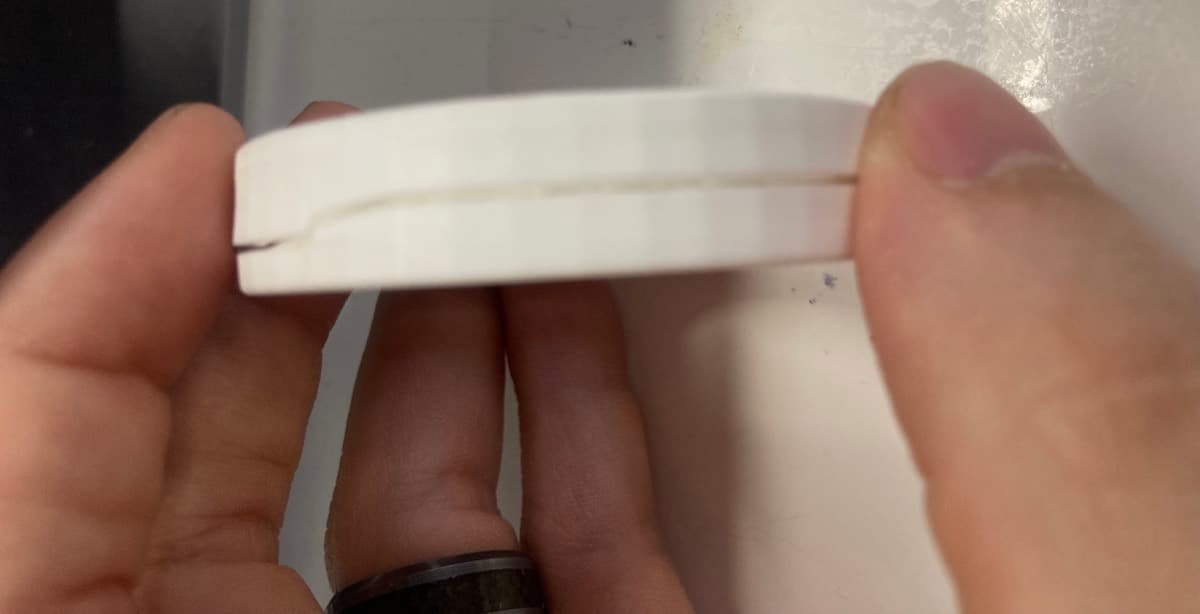
Large cracks in your printed parts can have a variety of causes. These include design issues such as stress concentrators, print preparation issues such as insufficient support, and firing issues such as poor thermal uniformity.
A large crack in a fired part printed in Alumina 4N Resin

If you notice large cracks in your printed parts after firing:

  • Follow Formlabs part design guidelines for Alumina 4N Resin.
  • Consider rounding or filleting sharp corners.
  • Orient your parts to avoid sudden changes in mass or cross-sectional area between layers.
  • Handle printed parts carefully before firing. Parts printed in Alumina 4N Resin are fairly robust in their green state but are still susceptible to damage.
  • Consider firing your parts in a refractory box to improve thermal uniformity and therefore shrinkage uniformity.

Small cracks in printed parts

Smaller surface cracks can be caused by overly-aggressive washing or damage from previous failed prints.

If you notice small cracks in your printed parts after firing:

  • Filter the resin in the resin tank.
  • Clean your printed parts quickly and efficiently, but without applying significant force. Ensure good airflow over all part surfaces when drying.

Printed parts are weaker than expected

The Alumina 4N Resin Technical Data Sheet lists the nominal material properties for parts printed in the resin. If your parts are weaker than expected, there are likely cracks in the parts affecting their strength. Check your parts for cracks and address them following the guidelines above.

Vertical lines visible on printed parts

Other imperfections on the surface of your printed parts may be related to your printer’s optics rather than a failed print or process issue. In particular, vertical lines can indicate that the optical window is dirty. This is similar to the pinhole/cut print defect.

If you notice vertical lines on the surface of your printed parts:

Part fused to the kiln during firing

Parts printed in Alumina 4N Resin require firing before they are ready for use. During the firing process, printed parts can fuse to the kiln if fired at too high a temperature or fired without a setter plate or setter sand. This can damage your printed parts.

If your printed parts fuse to the kiln during firing:

  • Fire all parts with a setter plate or setter sand.
  • Use a firing ring (Process Temperature Control Rings, or PTCR) or firing cones to troubleshoot the temperature of your kiln. Ensure that they read a similar temperature throughout the kiln. Follow the firing rates defined by the supplier, as longer ramps will cause the rings to shrink more.

Printed parts have inconsistent density

After firing, parts printed in Alumina 4N Resin should have consistent density. Any change in density within a part is indicative of impurities introduced during firing or an insufficient firing temperature. Note that impurities also generally cause a change in color or translucency of the fired part.

To resolve issues with fired part density:

  • Use a firing ring (Process Temperature Control Rings, or PTCR) or firing cones to troubleshoot the temperature of your kiln. Ensure that they read a similar temperature throughout the kiln. Follow the firing rates defined by the supplier, as longer ramps will cause the rings to shrink more.
  • Ensure that the kiln is as clean as possible before firing.
  • Check that the setter plates or sand are made of a pure refractory material and do not contain low temperature glass formers such as iron oxide or silica.

Printed parts did not shrink as expected

Parts printed with Alumina 4N Resin shrink during firing. The expected shrinkage is anisotropic: 21.8% along the X- and Y-axis and 26% along the Z-axis. These numbers are based on empirical testing and cannot be guaranteed for every geometry.

If your printed parts are shrinking differently than expected during firing, scale your design up or down as needed to meet your target part dimensions.

Fired part has non-white tint
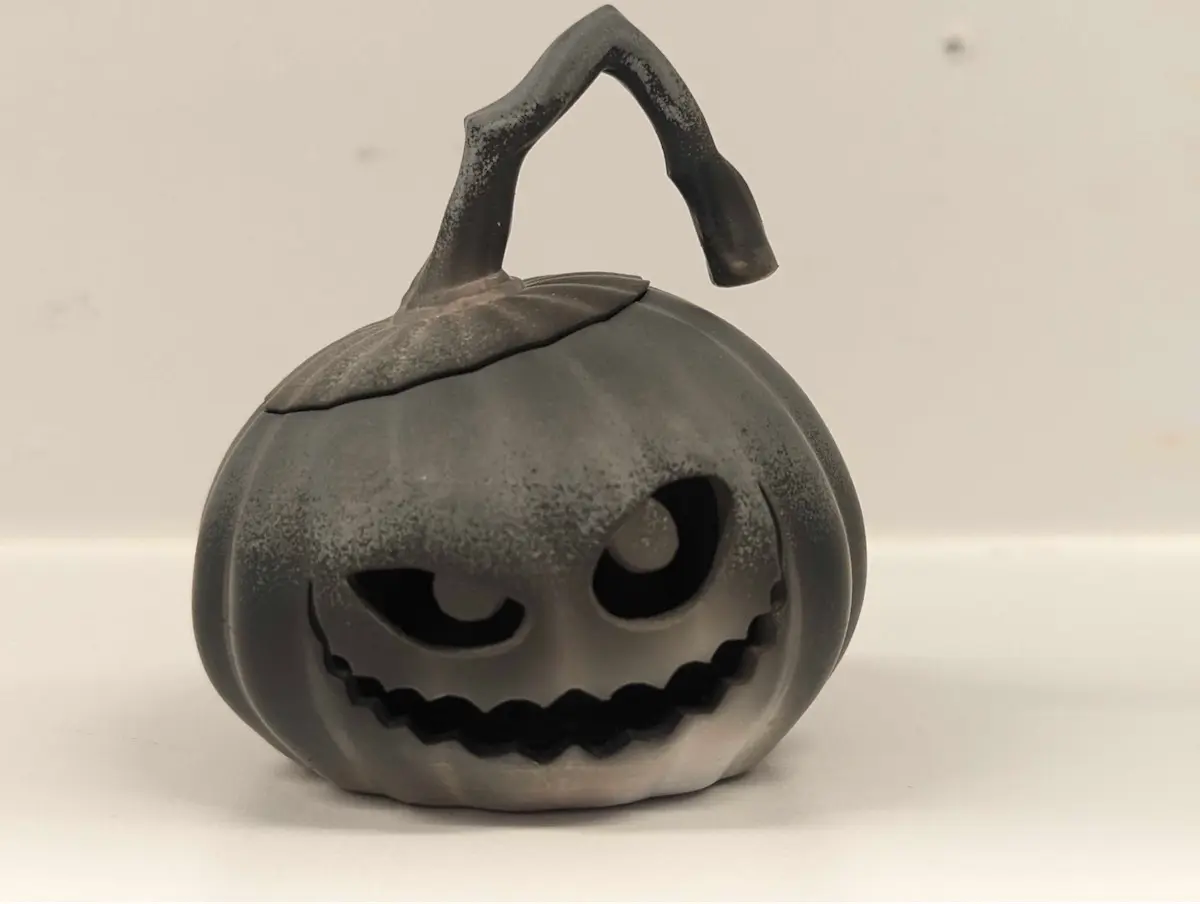
Fired Alumina 4N parts should be uniformly white in color. Contamination from low-temperature materials in the kiln can tint your printed parts. These colors and the associated contaminants include but are not limited to:
  • Red-pink: iron oxide
  • Blue-green: cobalt or copper oxides
  • Black: graphite, unvented carbon impurities, and raw metals
  • Ashy white: burnt potassium or phosphorus oxides
  • Tan or yellow: multiple different oxides in low concentrations
Black tinting on a fired part printed in Alumina 4N Resin

To prevent contaminants from coloring your printed parts:

  • Ensure that your setter plates, any setter sand, and any insulating bricks are free of contaminants and completely rated for high temperature operation.
  • If the kiln is contaminated, run the kiln in a ventilated mode to burn off as much of the contamination as possible. If possible, run a purge gas through your kiln.
    • In general, air is the best purge gas for cleaning out these contaminants.
    • Be sure to follow your kiln manufacturer’s recommendations, as using the wrong gas can damage the kiln.