WHITE PAPER
Formlabs Logo

Tuning the bed temperature of your Fuse 1+ 30W printer for improved part yield with Nylon 12 Tough Powder

Tuning the bed temperature of your Fuse 1+ 30W printer for improved part yield with Nylon 12 Tough Powder

Nylon 12 Tough Powder requires aging and bed temperature tuning before first use. After aging the powder, but prior to printing as normal, fine-tune your Fuse 1+ 30W printer to set up your prints for success. Fine-tuning the bed temperature prior to printing your first build results in fewer surface defects on your parts caused by variable printer temperatures. This process is run as a diagnostic print, uploaded through PreForm to the printer. The print contains several parts that need to be cleaned and inspected to determine the necessary temperature offset for your printer.

Formlabs offers two bed temperature tuning test prints: one for Default (v2.0) print settings and one for Legacy (v1.1) print settings. For the Default print settings test, run this process using the previously-aged powder, refreshed with the same percentage of fresh powder you intend to use in production. For the Legacy print settings test, run this process using the previously-aged powder, refreshed with 20% fresh powder.


Note:

  • Every Fuse 1+ 30W printer should be fine-tuned when printing with Nylon 12 Tough Powder for the first time.
  • Tune your printer before printing with the new Default (v2.0) print settings for the first time, even if the printer was previously tuned for v1.1 print settings. The new Default (v2.0) print setting was introduced in PreForm version 3.63.0.
  • Different printers in the same fleet may require different offsets.
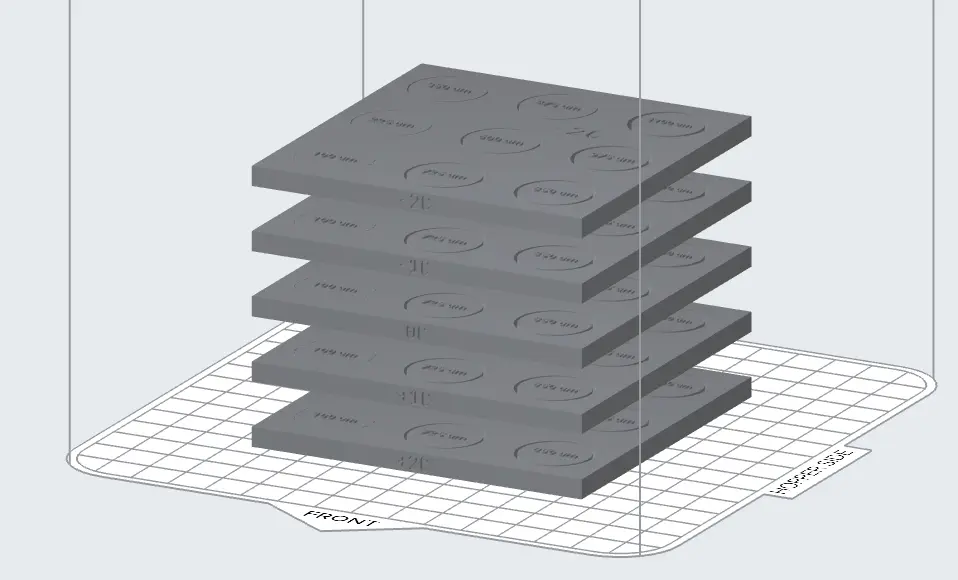
Default (v2.0) Bed Temperature Tuning print in PreForm

Default (v2.0) Bed Temperature Tuning print in PreForm

alttext

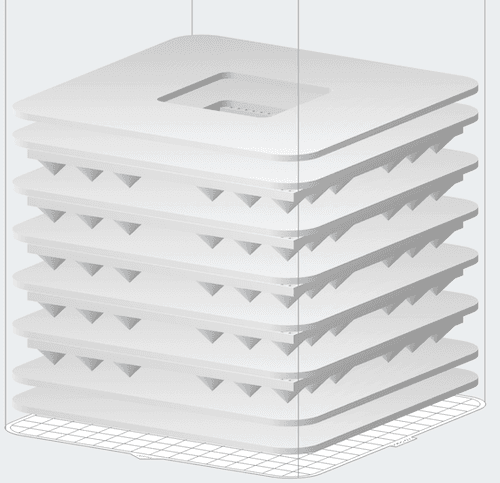
Legacy (v1.1) Bed Temperature Tuning print in PreForm

Run the Bed Temperature Tuning Print

Notice:

If you have previously used the printer with an applied offset, reset the printer’s offset to 0 prior to beginning the fine-tuning process. This can be done by following the directions to Set the bed temperature offset, and setting the printer offset to 0.

  1. Update PreForm to its latest version.
  2. Download the Bed Temperature Tuning Print for your powder and print setting.
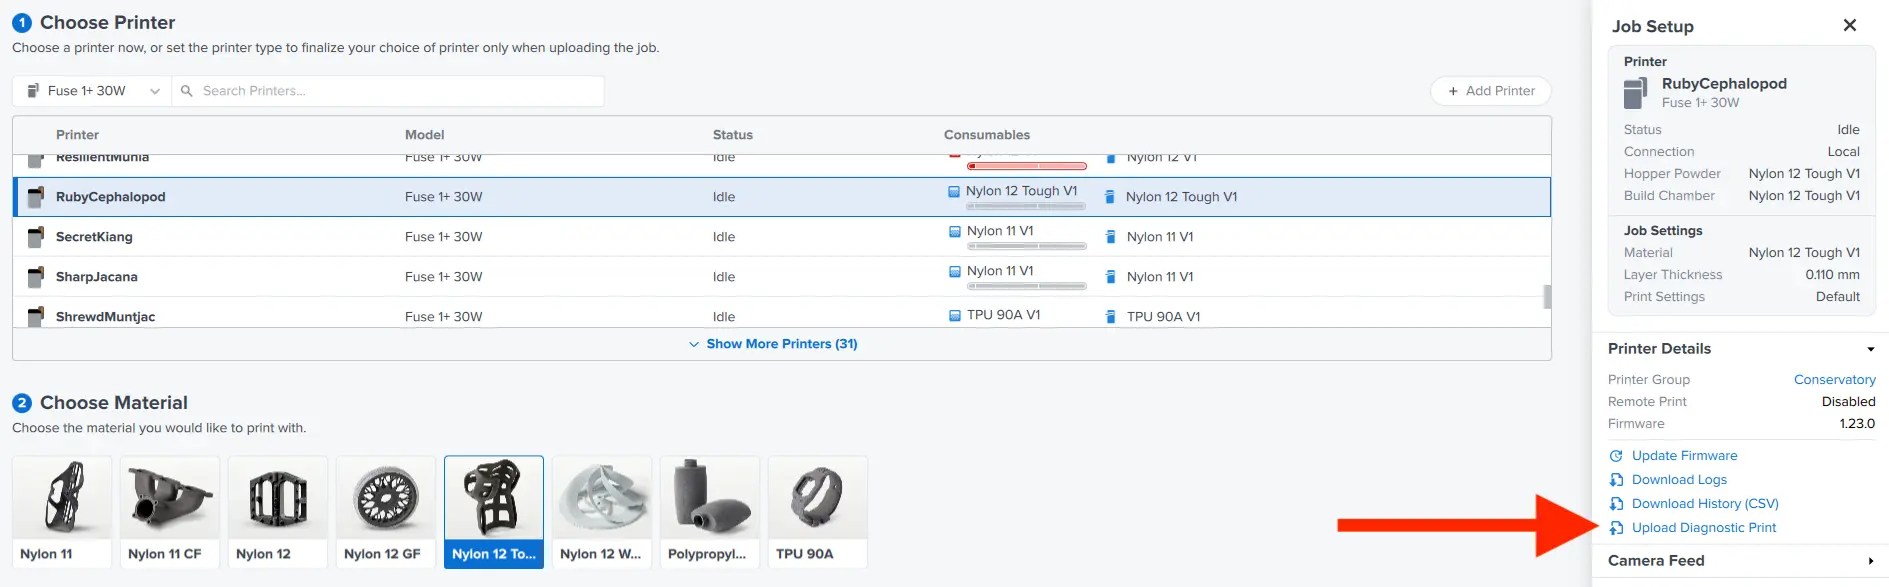
  3. Open PreForm and select Job Settings.
  4. In the Job Setup window, make sure the correct printer is selected, then select Upload Diagnostic Print.
alttext
  1. Select the file from your computer. Once the file has successfully uploaded, start the print from your printer.
  2. Load the necessary amount of powder.
    • Default (v2.0): To run the print, roughly 1.7 kg of powder is required. Use the Fuse Sift to mix aged and fresh powder at your intended production refresh rate (default 20%). To load the printer’s hopper with the required amount of powder, fill the hopper to the 4 L mark.
    • Legacy (v1.1): To run the print, 3 kg of powder is required. Use the Fuse Sift to mix 80% aged powder with 20% fresh powder (a 20% refresh rate). To load the printer’s hopper with 3 kg of powder, fill the hopper to the 7 L mark.
  3. Allow the print to fully cool per Formlabs recommendations.

Note:

If the print fails towards the start due to bed tearing, reduce the Bed Temperature Target by 2 °C and retry the print.

Clean the parts

Once the print completes, parts can be extracted from the build chamber by using the Fuse Sift or the Fuse Depowdering Kit. Excess powder can be sifted with fresh powder and re-used.

Parts should be fully cleaned of powder prior to inspection either by the Fuse Blast or other media blasting solutions. Extract the five plaques.

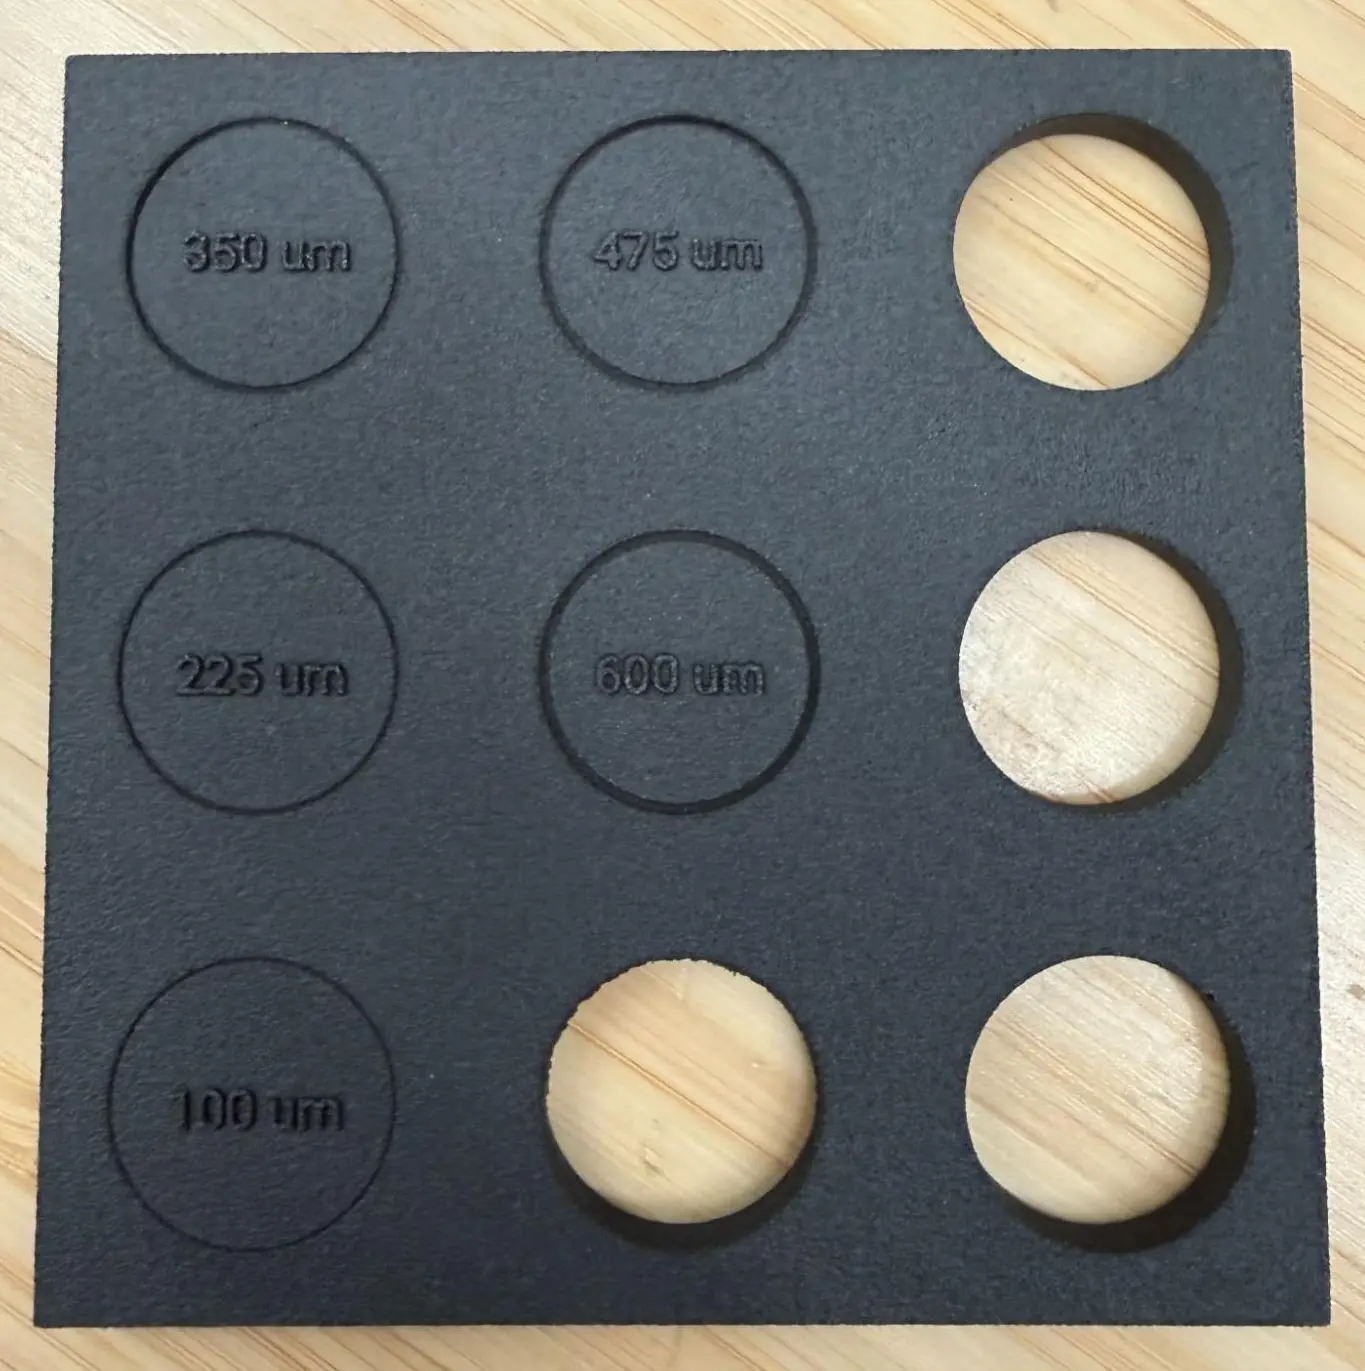
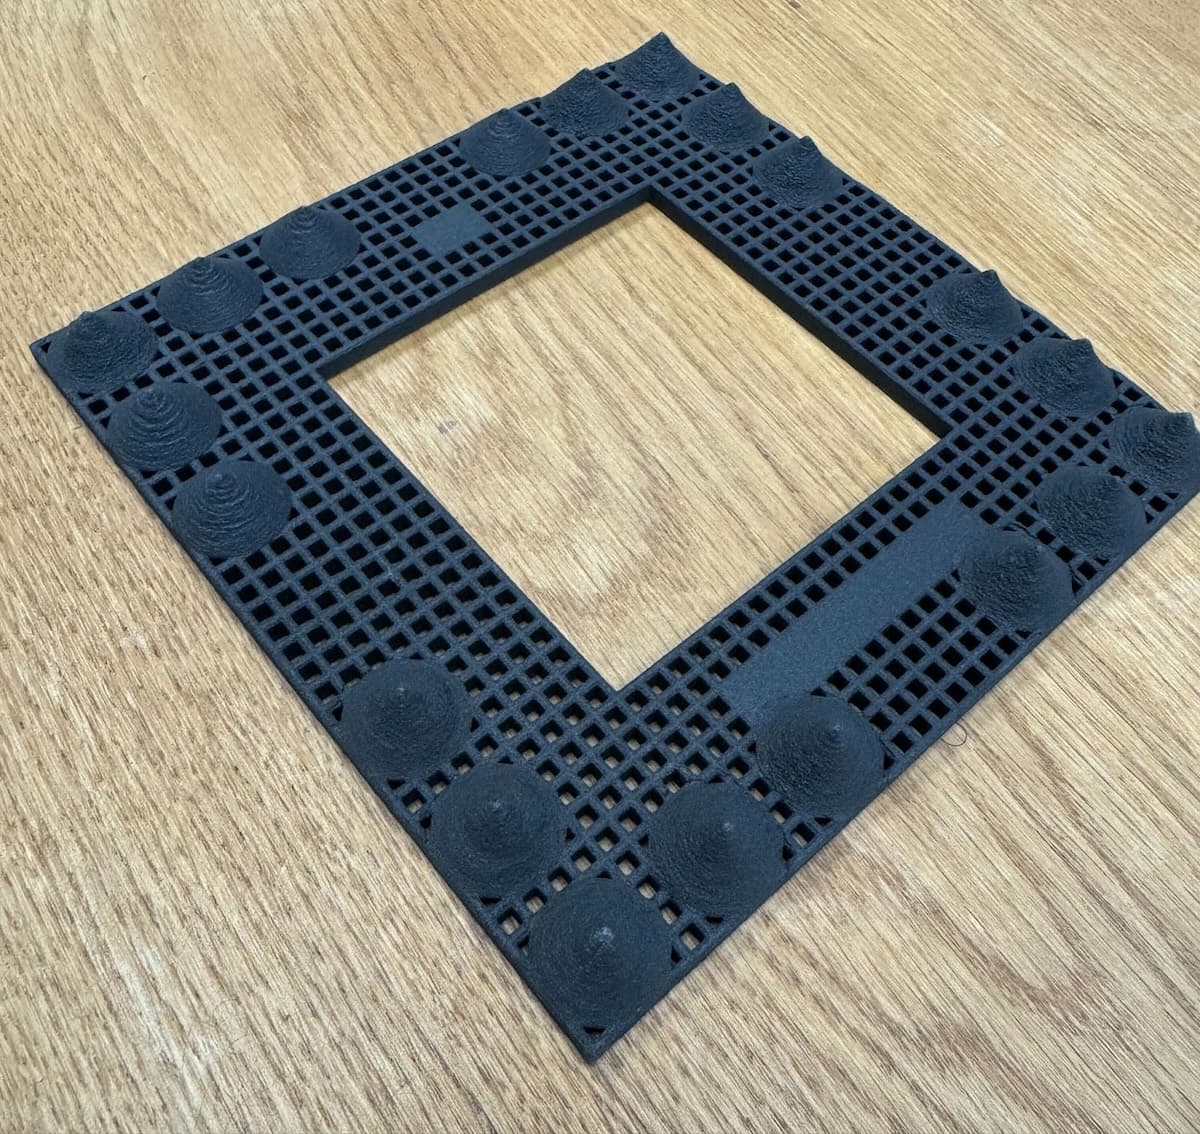
On the Default (v2.0) print setting test print, each plaque has nine clearance pieces. On the Legacy (v1.1) print setting test print, each plaque has cones on a grid. The additional flat plaques in the build are used to create equal cooling and separation between each cone plaque and can be discarded. 

Example of a cleaned plaque from the Default (v2.0) print settings test print ready for inspection

Example of a cleaned plaque from the Default (v2.0) print settings test print ready for inspection.

A cleaned Nylon 12 Tough Powder tuning print

Example of a cleaned plaque from the Legacy (v1.1) print settings test print ready for inspection. 

Each plaque is listed with the temperature offset it was printed with (-2 ºC, -1 ºC, 0 ºC, +1 ºC, +2 ºC). Line the plaques up from -2 ºC to +2 ºC to prepare for inspection.

Evaluating the Default (v2.0) print setting test

Inspect the plaques

Note:

If the test print fails and not all plaques are completed, complete the inspection using the plaques that printed successfully. The correct offset will be included in the parts that printed successfully.

To determine the appropriate temperature offset for your printer:

  1. By hand, attempt to punch out the clearance pieces from each plaque. The pieces labelled with larger numbers should be easier to punch out.
  2. Determine if any plaques have retained the 600 µm piece (in the center) and none of the higher clearance pieces. This means four out of the nine pieces were able to be punched out.
    • “Retained” means the piece does not punch out by hand.
  3. Apply the bed temp offset from the coldest/lowest bed temp plaque where the 600 µm piece is still retained.
  4. Interpolate your offset where necessary. 
    • For example, if your 0 ºC plaque has the 475 µm piece as the largest clearance retained and the +1 ºC plaque has the 725 µm piece as the largest clearance retained, apply a bed temp offset of +0.5 ºC.
Plaque with clearance pieces punched out

Plaque with clearance pieces punched out

After inspecting and testing all five plaques, determine the correct offset temperature that best matches the above criteria, by using the temperature offsets listed on the plaques. This offset can then be manually set on the machine. 

If the 725 µm piece cannot be pressed out of the coldest plaque, -2 ºC is still too hot. Decrease the bed temperature target on the printer to -2 ºC and run the print again. If the 725 µm piece still cannot be pressed out of the coldest plaque, reduce the bed temperature target on the printer to -4 ºC and run the print again.

Note:

The correct offset temperature may lie between two plaques, and the correct offset may be a half degree between the printed plaques (ie. +1.5 ºC). 

Example test results

Example 1:

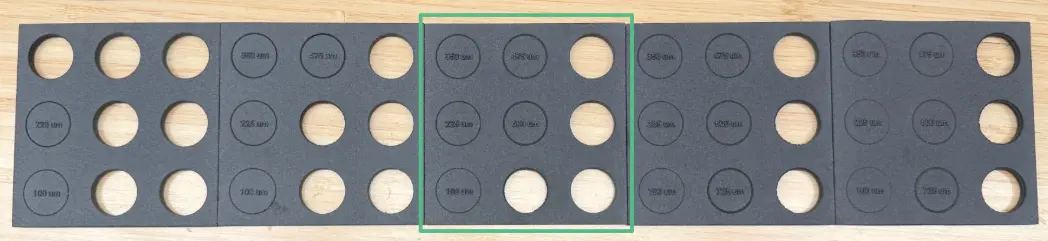
This result corresponds to applying a 0 ºC bed temperature offset, since the 0 ºC plaque is the coldest one that retained the 600 µm piece. The plaques are arranged from -2 ºC to +2 ºC from left to right.

Nylon 12 Tough Bed Temperature Tuning print showing a 0 ºC bed temperature offset

Example 2:

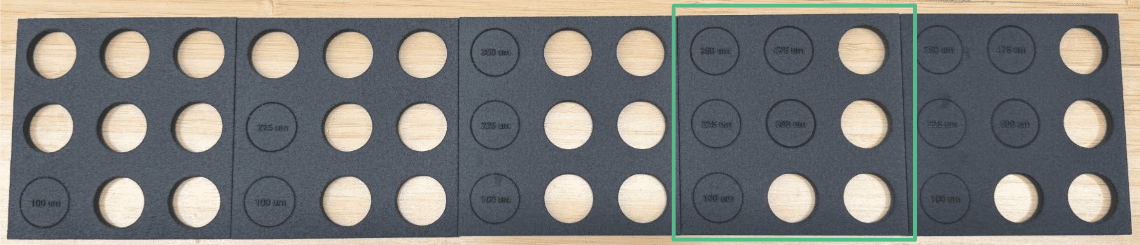
This result corresponds to applying a +1 ºC bed temperature offset, since the +1 ºC plaque is the coldest one that retained the 600 µm piece. The plaques are arranged from -2 ºC to +2 ºC from left to right.

Nylon 12 Tough Bed Temperature Tuning print showing a +1 ºC bed temperature offset

Evaluating the Legacy (v1.1) print setting test

Inspect the plaques

Note:

If the test print fails and not all plaques are completed, complete the inspection using the plaques that printed successfully. The correct offset will be included in the parts that printed successfully.

To determine the appropriate temperature offset for your printer, look for the plaque at the coldest temperature setting that has the fewest instances or no instances of orange peel.

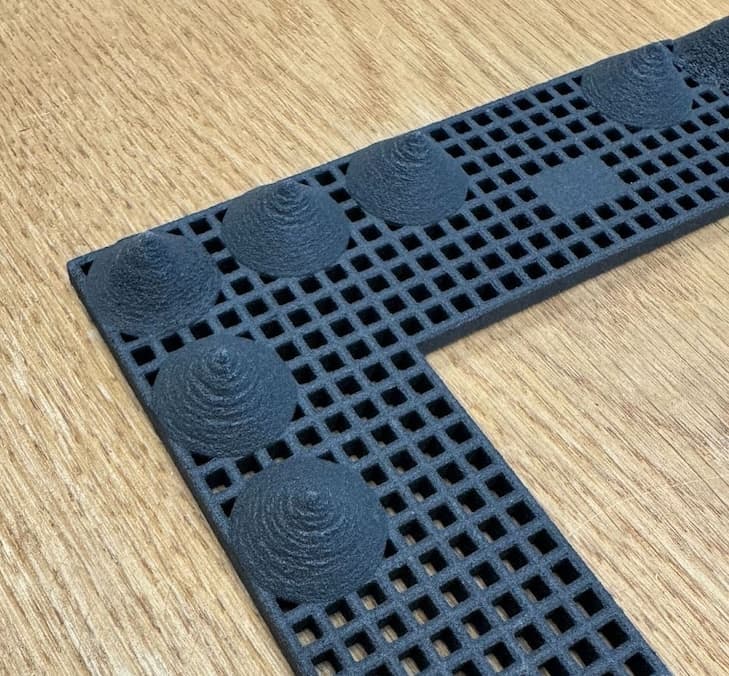
Rotate the plaques to inspect the cones from all angles. Orange peel appears as a slightly layered surface on the cones.

An example of orange peel on a part printed with Nylon 12 Tough Powder

After inspecting all five plaques, determine the correct offset temperature that best matches the above criteria, by using the temperature offsets listed on the plaques. This offset can then be manually set on the machine. 

If severe orange peel is present on the hottest plaque, +2 ºC is still too cold. Increase the bed temperature target on the printer to +2 ºC and run the print again. If the coldest plaque (-2 ºC) shows no orange peel, then it is still too hot. Reduce the bed temperature target on the printer to -2 ºC and run the print again.

Note:

The correct offset temperature may lie between two plaques, and the correct offset may be a half degree between the printed plaques (ie. +1.5 ºC). 

Set the Bed Temperature Target

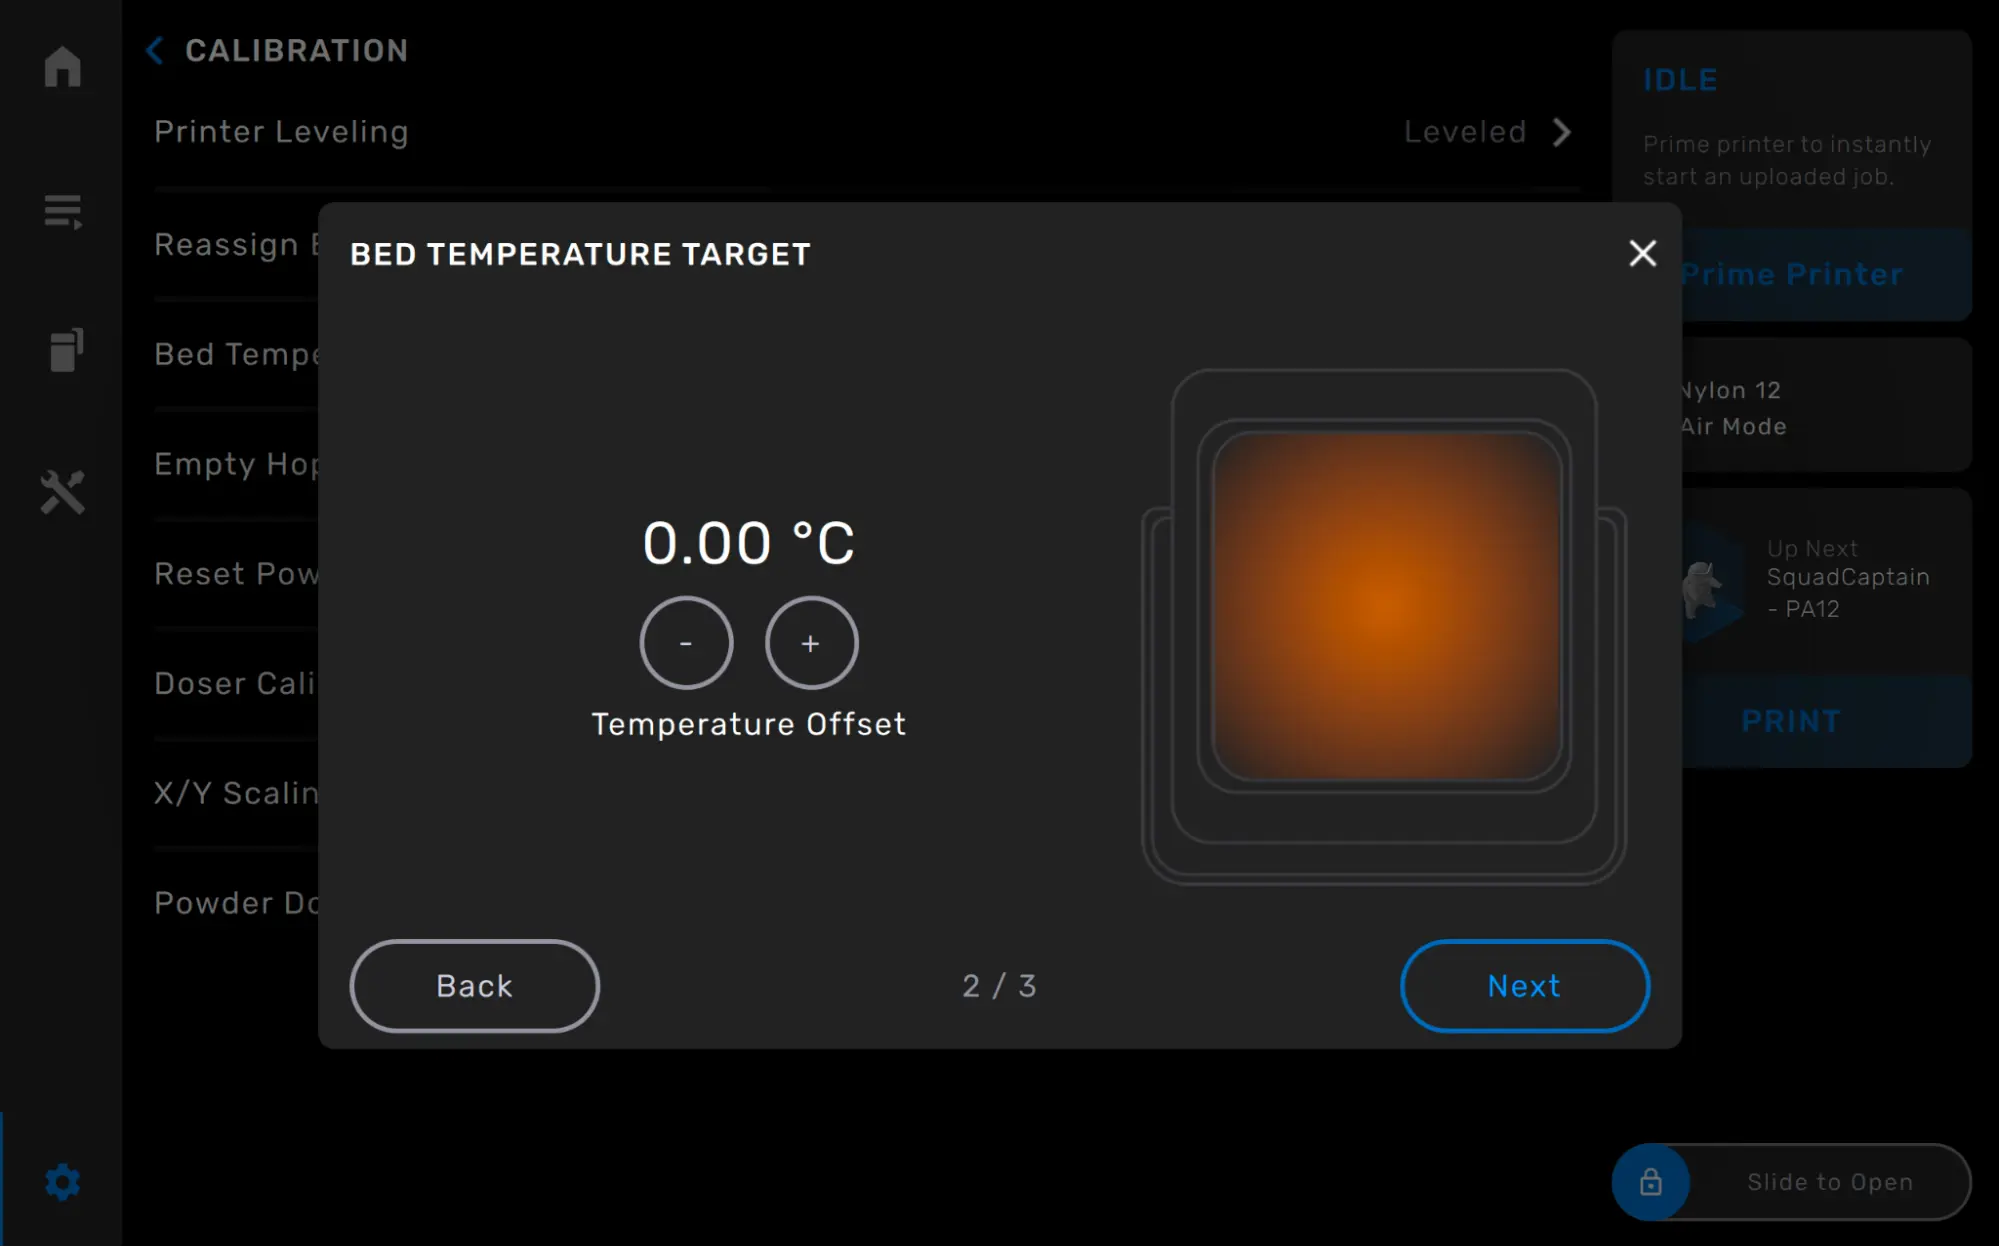
The Bed Temperature Target can be adjusted by up to ±5 °C in 0.25 °C increments. After completing the Bed Temperature Tuning Print, adjust the Bed Temperature Target on the printer to match the offset determined during the Bed Temperature Tuning inspection.

Note:

Two printers operating side by side may require different Bed Temperature Targets.

To adjust the Bed Temperature Target:

  1. Ensure that the printer is not running a print job and is currently Idle. The Bed Temperature Target can only be adjusted before a print, not while the print is running.
  2. Tap the gear icon on your printer’s touchscreen. The Settings screen appears.
  3. Tap Calibration. The Calibration screen appears.
  4. Tap Bed Temperature Target. A screen with information about the target temperature appears.
  5. Tap Next. The Bed Temperature Target screen appears.
alttext
  1. Tap + or - to increase or decrease the Temperature Offset.
  2. When you are done adjusting the Temperature Offset, tap Next. Confirm the new offset and tap Set.