
Notice:
To avoid damage to equipment, check the resin tank compatibility table in Choosing the right material to confirm you are using a resin tank that is compatible with this material.

Notice:
To avoid damage to equipment, check the resin tank compatibility table in Choosing the right material to confirm you are using a resin tank that is compatible with this material.
Investment casting is a foundry process for producing metal parts with intricate shapes that cannot be manufactured in other ways. Using Formlabs Clear Cast Resin, you can produce parts right away without tooling, soluble cores, or other complex wax formation techniques. Features like undercuts, channels, and thin walls that are difficult to pattern for wax injection are easy to 3D print.
Clear Cast is designed to work for larger molds, generally where the wall thicknesses are greater than ⅛ inch or 3 mm thick across the majority of the part. It requires latticing and drain holes to function properly, as a solid part is extremely likely to crack shells.
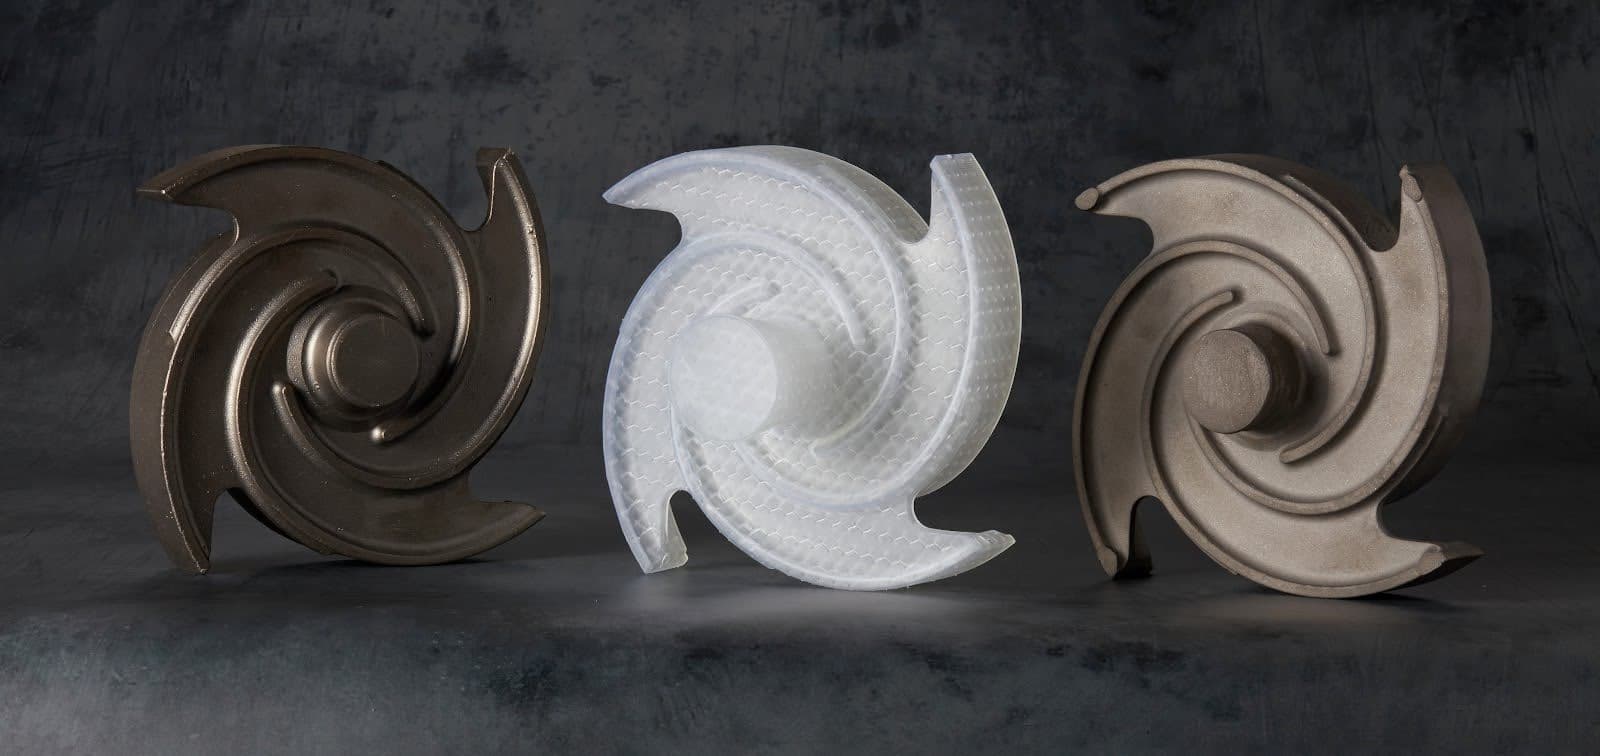
Clear Cast Resin prints at 50 and 100 microns.
Required resources
Tip:
The custom link to Materialise Magics provides a discounted price.
Notice:
Read the whitepaper for detailed instructions about the workflow.
Design guidelines
When choosing a casting resin, take the casting properties of each material into consideration. For smaller parts or wire filigree, use Castable Wax Resin. For medium to heavy jewelry or small engineering components, use True Cast Resin. For larger investment casting, use Clear Cast Resin.
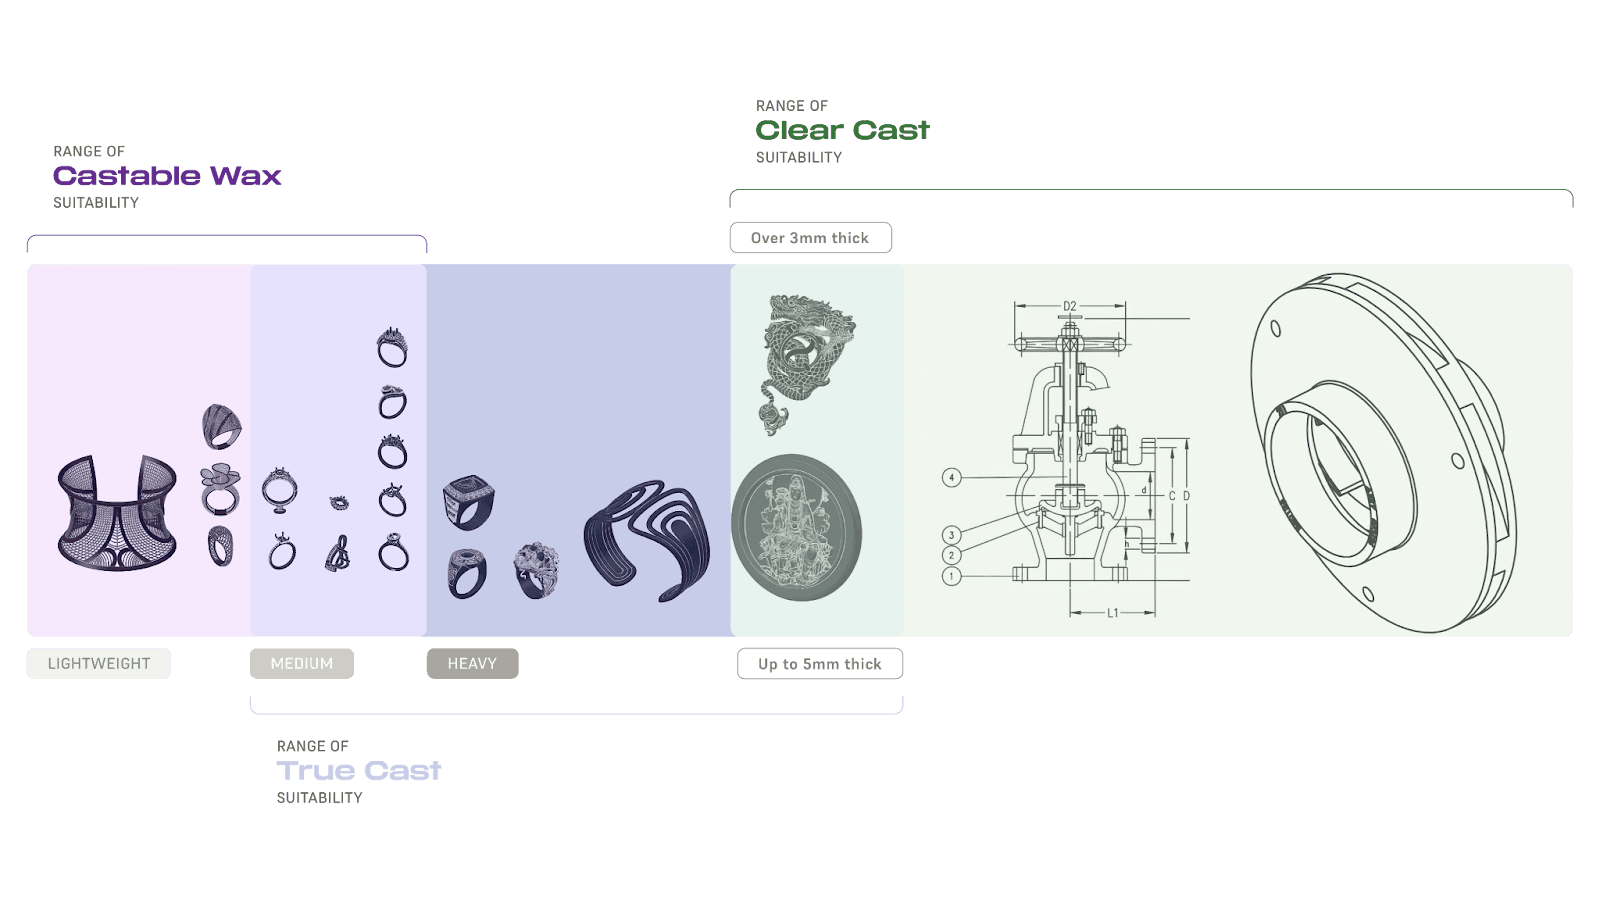
Sacrificial patterns for industrial investment casting must be strong enough to withstand the pressure of being dipped in ceramic slurry while also being thin enough to burn away. Thin walls prevent cracking caused by thermal expansion during burnout. Software solutions are available that hollow the part and build inner lattice scaffolding to strengthen the part. The lattice supports the exterior of the part, prevents warping, and enables printing with thin walls. The sprue can also be 3D printed as part of the pattern. Since the lattice is required to create quality castings, it is recommended not to go below ⅛ inch or 3 mm for the majority of the part.
After designing the part with your CAD software, import the CAD file into the lattice module and determine the settings for the outer shell, the lattice structure, and drain holes. Thinner walls improve casting success, but they increase the risk of print failures and may weaken parts.
Print feature recommendations
| Wall Thickness | Lattice Diameter | Lattice Distance | |
|---|---|---|---|
| Highly Conservative | 1 mm | 1 mm | 3 mm |
| Conservative | 1 mm | 0.50 mm | 3 mm |
| Common | 0.75 mm | 0.75 mm | 3 mm |
| Recommended | 0.5 mm | 1 mm | 3 mm |
| Detail Size | 0.5 mm (standard) | ||
| Hole Size | 2 mm (minimum, increase as needed) | ||
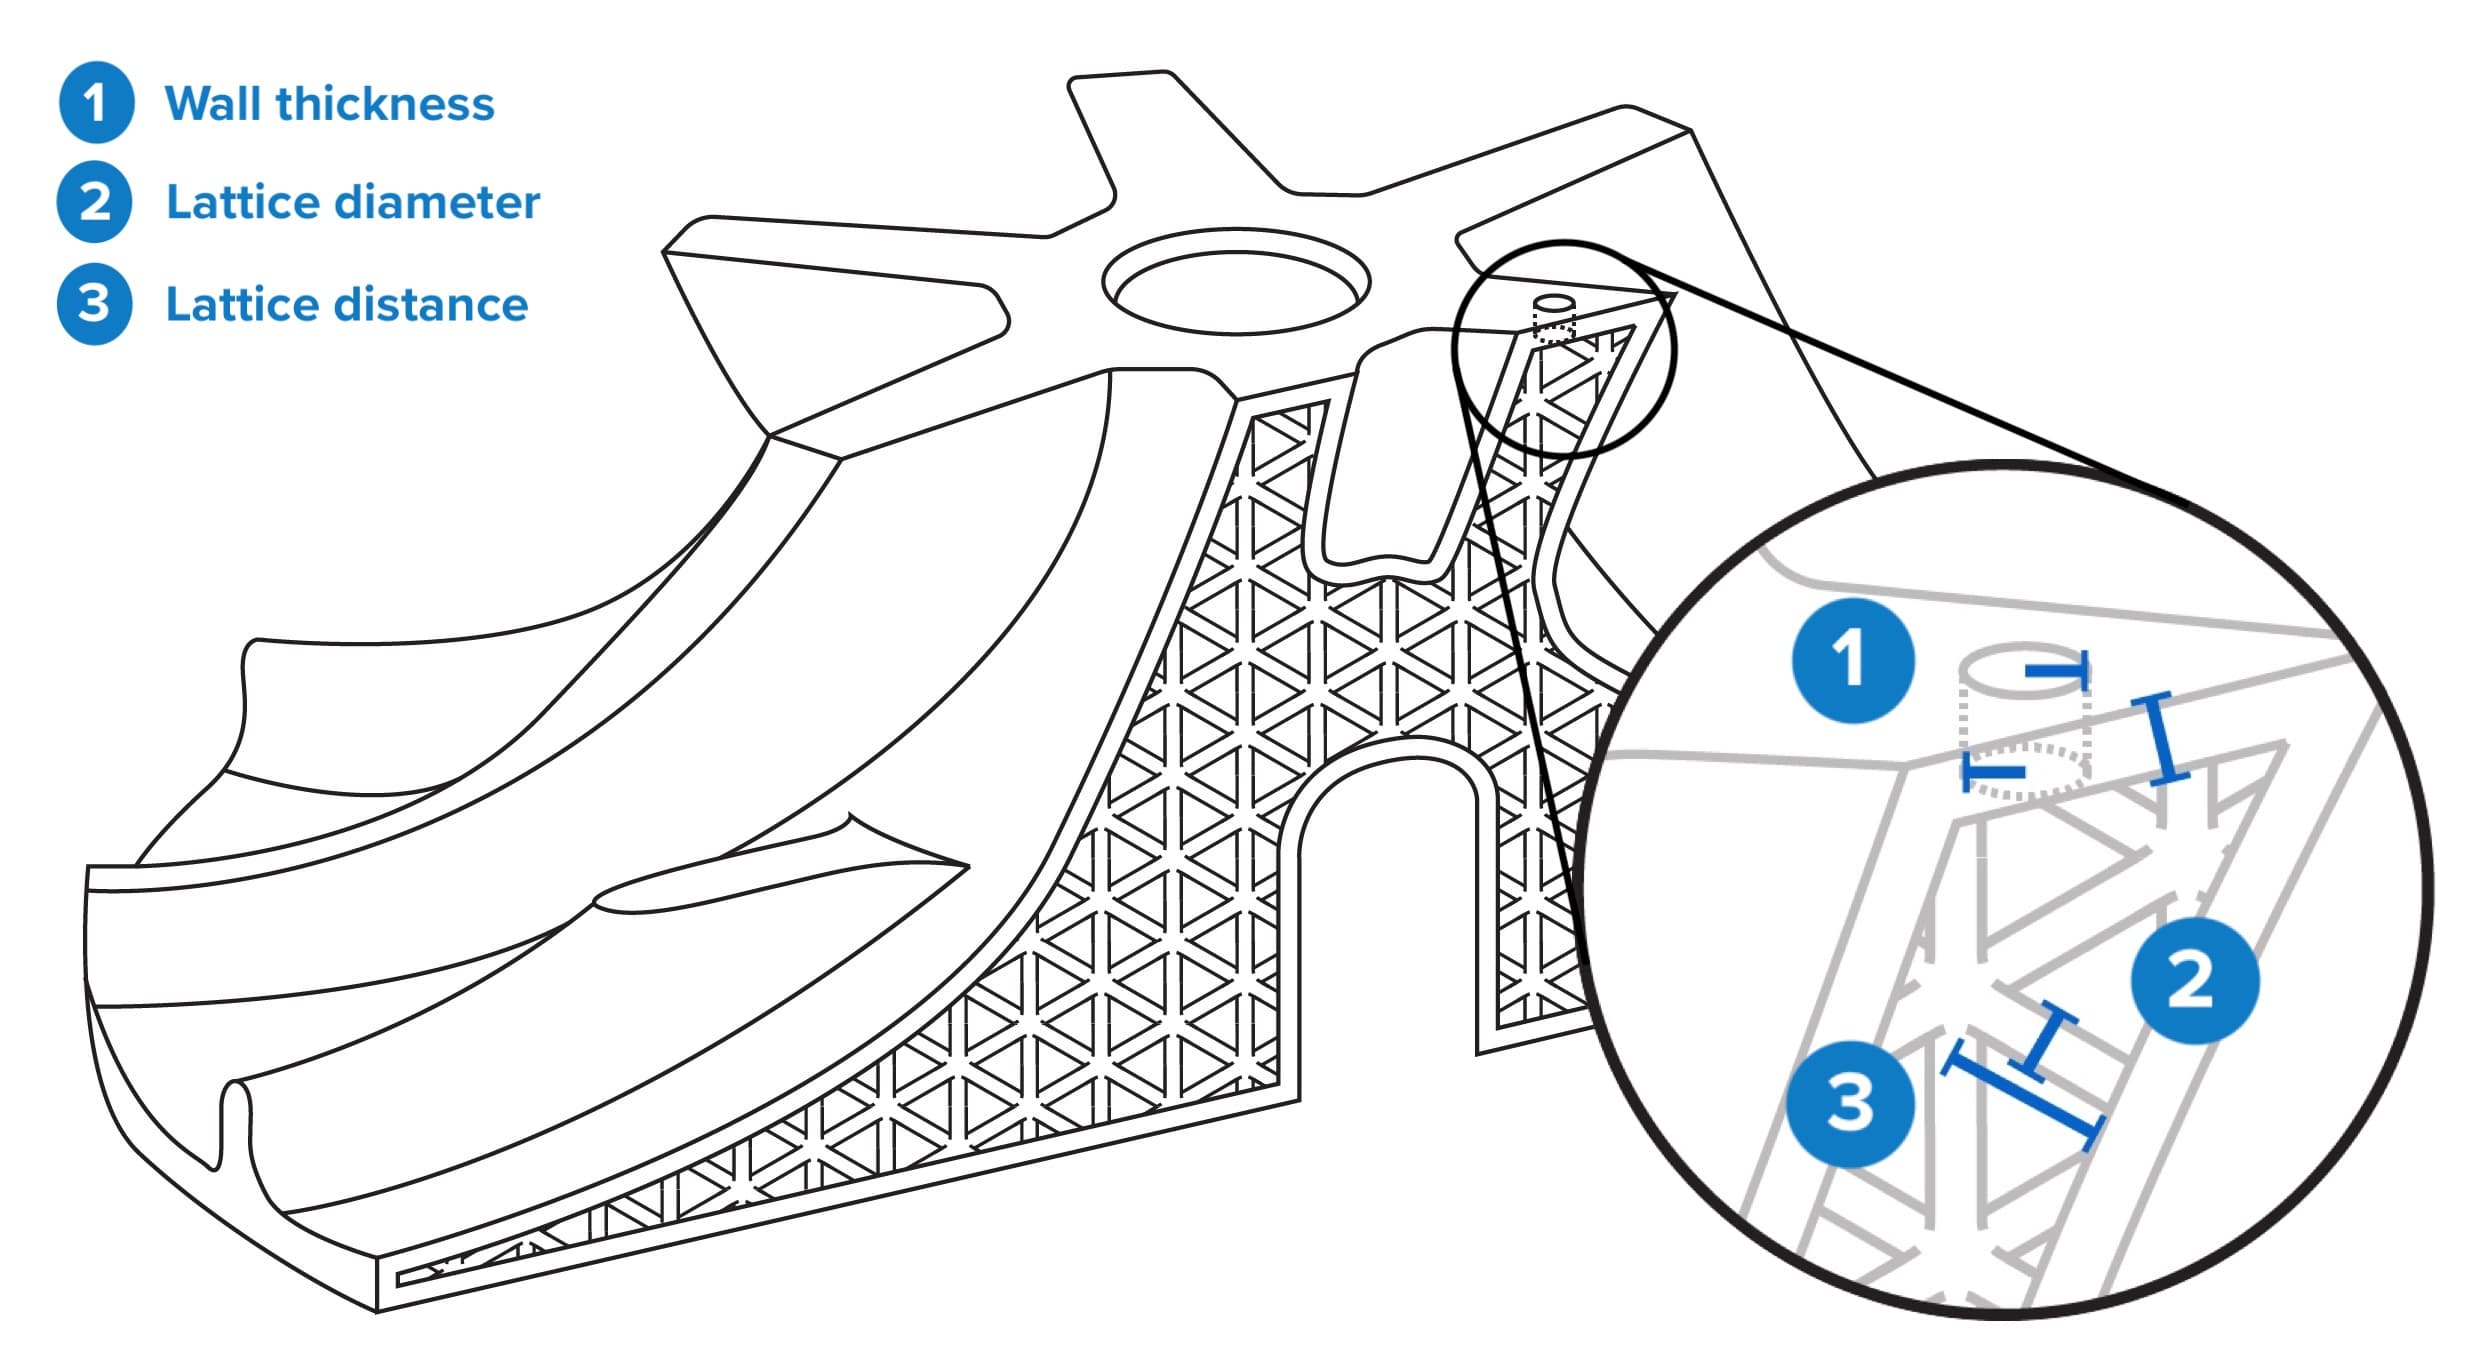
Large, thick-walled parts
For larger parts that are intended to have thicker walls, you can hollow the walls as well for printing. For example, you could print a large statue with walls that are 5 mm thick in total, provided that you hollow and lattice the walls themselves with your latticing software.
Drain holes
Drain holes reduce the risk of print failures caused by cupping and allow liquid resin to drain out of the part.
Latticed parts can result in large file sizes, which slow down the print preparation and support generation process. Convert your exported files to 3MF to reduce the file size.
Printing with Clear Cast Resin
Notice:
To avoid damage to equipment, check the resin tank compatibility table in Choosing the right material to confirm you are using a resin tank that is compatible with this material.
Install or update PreForm, then set up the next print job.
To prepare a model for printing in PreForm:
Finishing
The Form Wash and other washing systems agitate the solvent bath and remove parts from the bath after a set time. Wash parts according to the support article for your device. Pay particular attention to information that affects mechanical properties or biocompatibility requirements.
After an initial wash, dry parts and clear the lattice structure using compressed air. Wash the part again and thoroughly clear it with compressed air, taking care to clear out as much IPA and resin as possible from the interior. Allowing IPA and resin to sit in the part may cause the shell to become floppy, making it unsuitable for casting.
Post-curing requirements
Clear Cast Resin requires post-curing to reach its optimal mechanical properties. Follow Formlabs best practices when deciding whether to remove supports before or after post-curing. Refer to the support article for your device for post-curing recommendations.
Follow the instructions in the support articles Removing support marks and Advanced support removal techniques to post-process printed parts.
Preparing the pattern
Notice:
Read the whitepaper for detailed instructions about the workflow.
Patching drain holes
There are three main ways to patch drain holes:
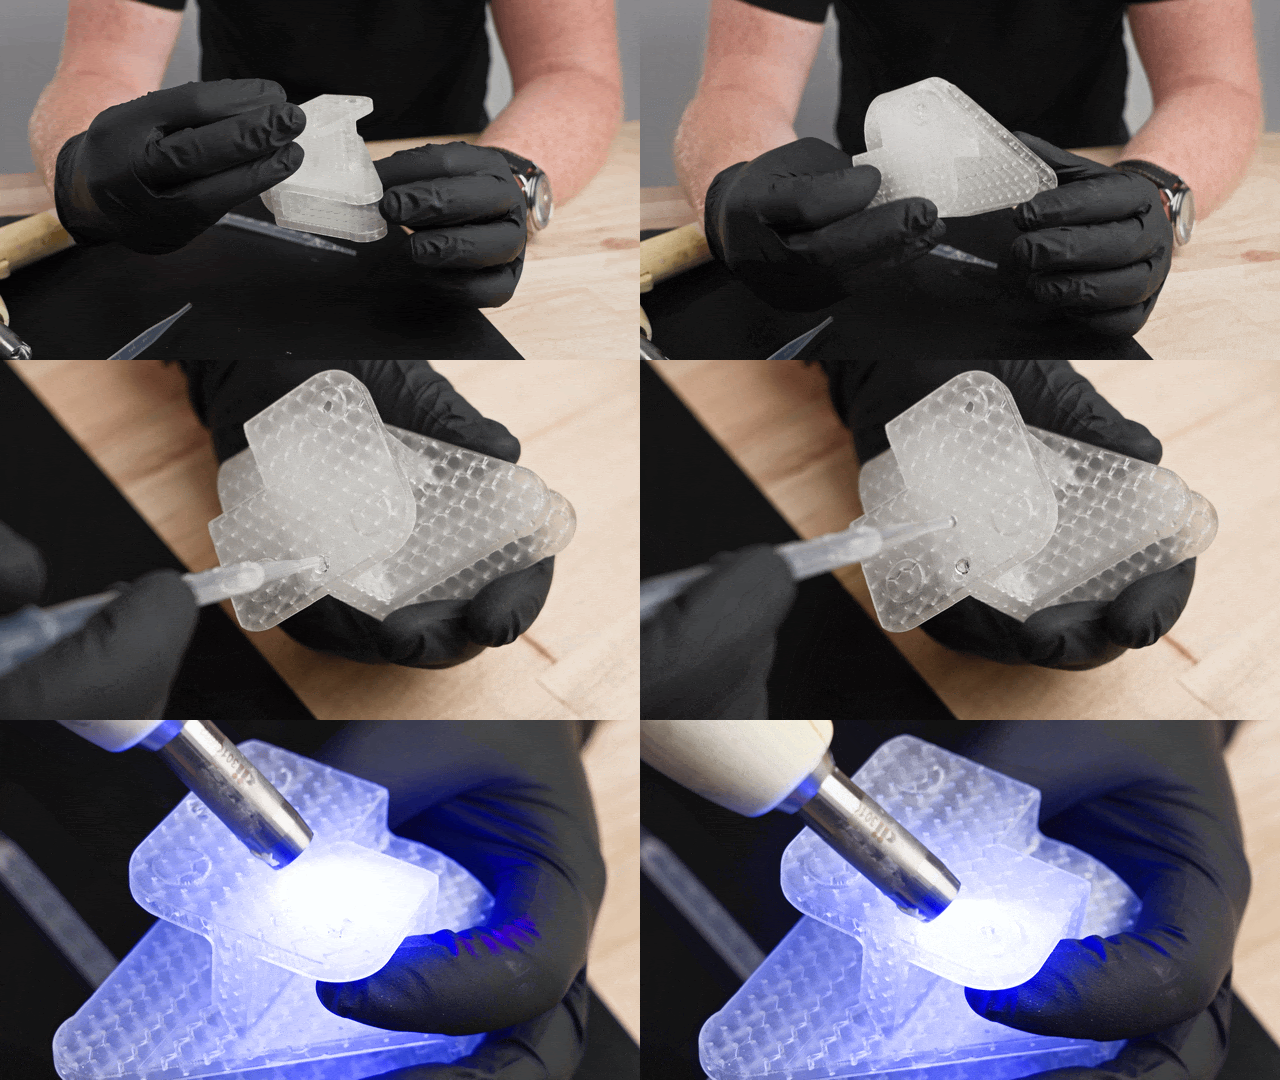
Check the fit of the holes by forcing compressed air into the last hole and looking for leaks.
Bonding multiple pieces
You have similar options for bonding multiple pieces together before casting if your design exceeds the build volume of your printer:
Burnout
Follow your usual process for pattern assembly, shell creation, and burnout. For burnout, Formlabs recommends flash firing at a temperature of 1300–1650 °F (700–900 °C) for two hours. Do not use an autoclave to dewax parts as this can cause parts to expand, warp, and buckle, and will often crack shells. Check for any cracking or flashing in the shell after the burnout and blow out any remaining ash from the mold.
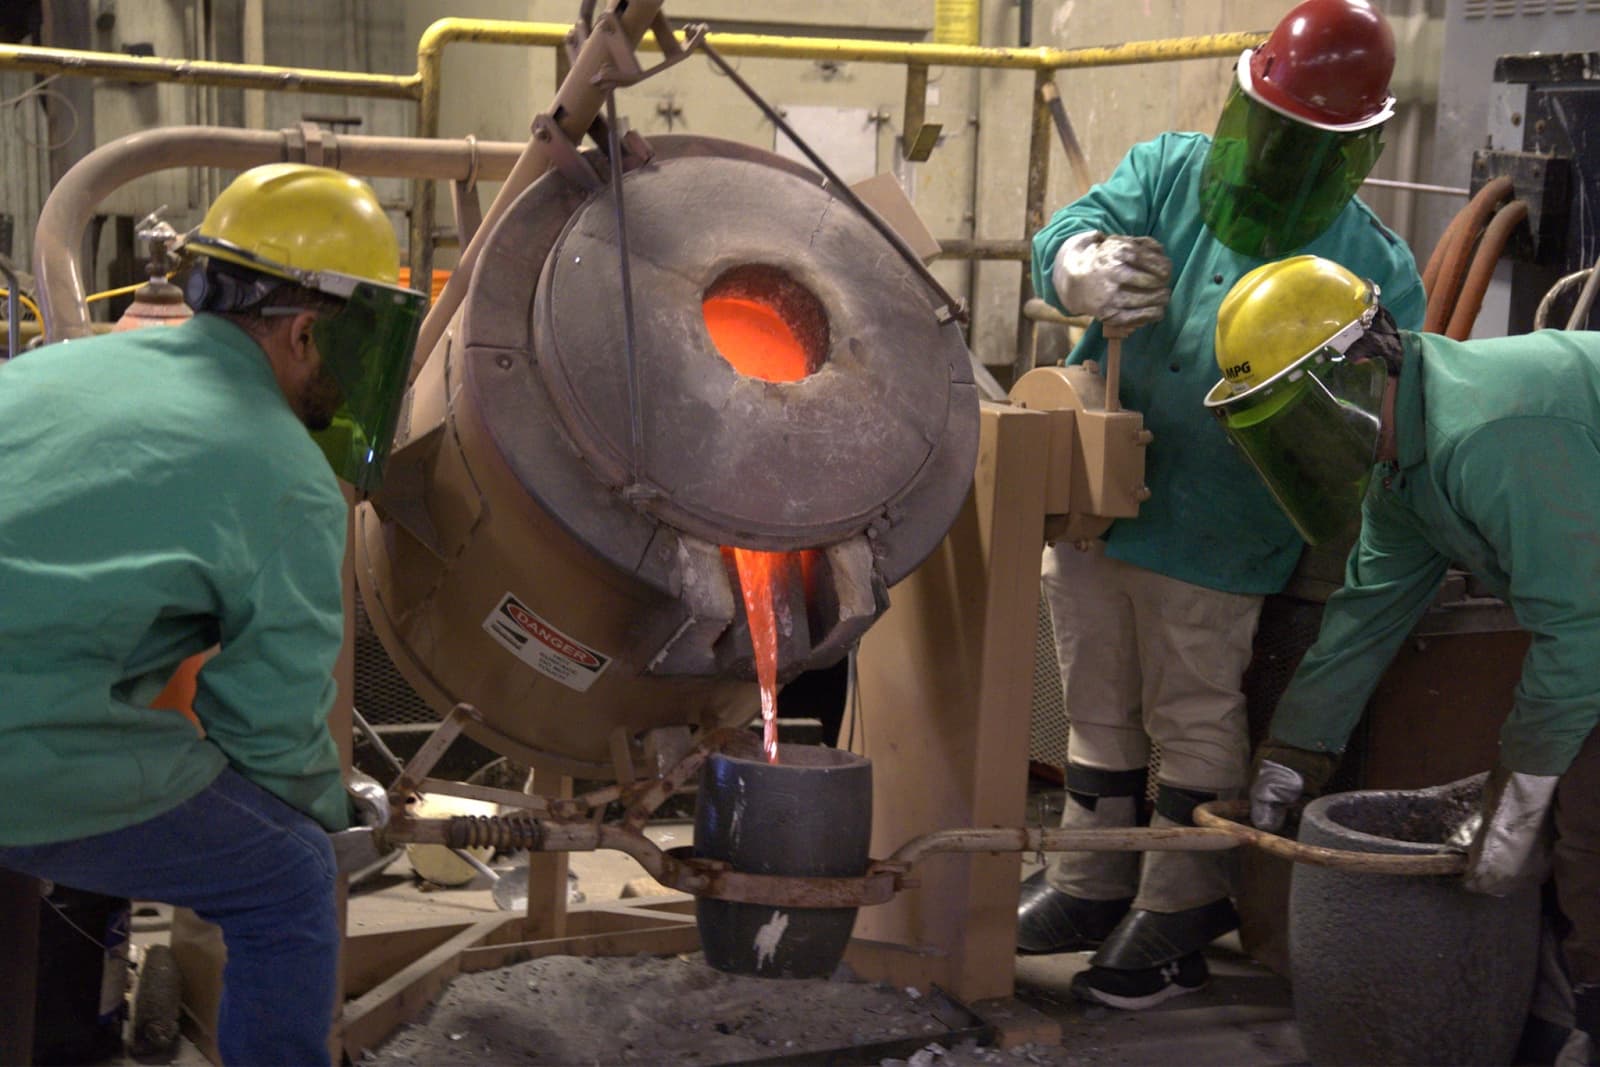
Follow your usual process for casting and finishing.