Rapid prototyping helps companies turn ideas into realistic proofs of concept, advances these concepts to high-fidelity prototypes that look and work like final products, and guides products through a series of validation stages toward mass production.
Engineers and designers have been creating hardware prototypes for decades, but the tools, materials, and methods used to create those prototypes have evolved tremendously. With rapid prototyping tools like 3D printers, product development teams can create prototypes directly from CAD data, and quickly execute rounds of design revisions based on real-world testing and feedback at a substantially lower cost than ever before.
Prototyping with 3D printers, however, can be quite different than with working with other traditional tools or outsourcing to machine shops and service providers. Cost factors, efficiencies, and design rules often don’t directly translate.
In this guide, we collected ten insights to help you optimize your 3D printing rapid prototyping workflow to be as cost and time efficient as possible, from choosing a technology to practical design tips.
1. Prototype In-House
For any business involved in prototyping, one of the first questions that comes up is whether to order prototypes from service bureaus and machines shops or to purchase equipment to prototype in-house.
Rapid prototyping stops being rapid when an outsourced part takes multiple days or even weeks to arrive. Outsourcing can quickly become expensive when a project requires dozens or more iterations. On the other hand, purchasing a variety of machinery to produce all the different parts in a single product often requires substantial investment, a dedicated location, and expertise to operate.
The answer is not always clear-cut, but the best practice for most companies is to bring the most frequently used prototyping tools in-house and outsource larger parts, and parts that require non-standard materials or complex machinery.
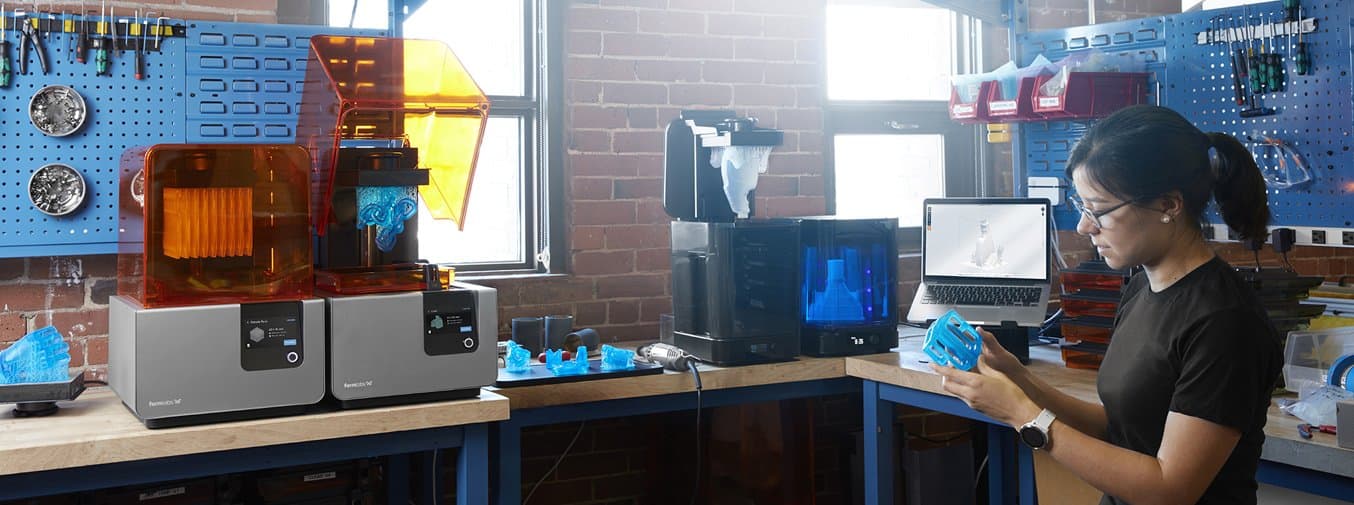
Smaller desktop or benchtop 3D printers can cover many of the prototyping needs for most companies. They’re fast, easy to use, can operate in an office environment, and require minimal training. Depending on the number of parts and printing volume, investment in a desktop 3D printer can break even within months and save weeks or months of lead time over the course of development.
Curious how 3D printing in-house compares to outsourcing or other prototyping or production methods for your application? Use our interactive tool to calculate return on investment and time savings with 3D printing.
2. Choose the Right Technology and Machinery
To find the right prototyping materials and equipment, first, consider what you need from your prototypes. Do you need prototypes for visual demonstration only or for testing the mechanical attributes of your product?
Understanding these needs will help you choose the right technology. For example, for basic concept models the only requirement could simply be speed—finish and details may not matter. Looks-like prototypes, however, may require technologies and materials designed for fine details and high-quality surface finishes, while functional prototypes might need to withstand mechanical stress or have specific properties, such as optical transparency.
Desktop 3D printers offer solutions for a wide variety of applications and can produce parts in materials with varied mechanical properties.
Compare the three most established 3D printing technologies for plastics today: fused deposition modeling (FDM), stereolithography (SLA), and selective laser sintering (SLS).
3. Automate Post-Processing
Post-processing is an often overlooked, but potentially time-consuming aspect of prototyping with 3D printing. Some technologies require less post-processing than others, but all 3D printed parts require a certain degree of post-processing.
Some aspects of post-processing can be automated to reduce labor time and costs. One example of an automated system is the Form Wash and Form Cure for Form 2 3D printers that simplify the cleaning and post-curing of stereolithography (SLA) parts.
4. Assemble Large Parts From Multiple Prints
3D printing large parts can be a costly and lengthy process, often requiring outsourcing parts to service providers with large industrial printers.
But, just as assemblies consist of many individual building blocks, splitting a model into smaller parts is a great solution to creating objects larger than what fits into the build volume of a 3D printer. You can add features to your design that will allow the prints to align themselves, or simply split the parts with straight cuts, requiring you to align them during the fastening process.
When selecting a bonding method, your primary consideration should be the strength of the bonded joints, which is dependent on the ultimate use case of the parts:
- Chemical fastening: Use a bonding agent for art, scale models, and complex shapes that are not meant for functional use and to sustain impact.
- Mechanical fastening: Add screw thread or pockets to functional engineering parts that require a robust mechanical connection or if you need to repeatedly attach and detach components.

5. Make Parts Hollow
By default, most 3D printers create fully dense parts. When you’re not printing functional parts that require a certain strength, hollowing out large and bulky designs can be a great way to save a considerable amount of material and printing time.

| Printing time on the Form 2 | Material | |
|---|---|---|
| Original Solid | 15 h 35 min | 246.28 mL |
| Hollow | 7 h 47 min | 77.37 mL |
| Savings | 50% | 68% |
Learn how to use Formlabs print preparation software, PreForm, and Meshmixer’s (free) hollowing tool to hollow and prepare your model for printing in three simple steps.
6. Adjust Layer Height
Adjusting the layer height is a great way to reduce printing time. On SLA systems, for example, the difference between parts printed with 50 and 100 micron layers is often barely noticeable, but reduces printing time by 50%.
7. Optimize Schedule
There are a few methods for optimizing your printing schedule to get the highest throughput possible, printing close to 24 hours a day.
Best practices for optimizing schedule include:
- Batch multiple parts into one build.
- Print small, shorter runs during the day and large builds overnight.
- Use multiple printers to distribute the workload and increase same-day throughput.
- Use Dashboard to receive alerts when a print finishes and to manage and watch multiple printers remotely.
8. Reduce or Eliminate Support Structures
A poorly oriented part can result in excessive support structures. Excessive supports use more material, increase printing time, and require more post-processing time. Depending on your design, a part can often be printed with limited or without any support structures. Most print preparation software tools allow you to experiment with different part orientations and check how different setups affect overall print time and material usage before printing.

Some technologies might also be better suited to your designs than others. FDM printers often require excessive support structures for designs with complex shapes, angles, and overhangs. Support structures on SLA printers are easy to break away and support requirements can be reduced through smart software. SLS machines do not need support structures at all, as the powder acts as a support for the parts while printing.
9. Optimize the Design
While 3D printers offer a high degree of design freedom, a bit of time spent on optimizing part geometries goes a long way to ensure efficient printing of high-quality parts. When designing a part for 3D printing, make sure to follow design guidelines for the specific technology or printer.
Common optimizations include:
- Maintaining wall thicknesses at or above minimum specifications.
- Eliminating or supporting angled walls and steep overhangs.
- Adding drain holes for hollow designs.
- Consider using lattice structures to achieve an ideal balance between part strength, material usage, and print speed.
10. Prevent Failures
Failed parts and broken machinery wastes expensive engineering time and can set development cycles back by days or even weeks.
Fortunately, 3D printers have developed tremendously since the first desktop printers entered the market ten years ago and professional 3D printers today are tools that companies can rely on.
As a rule of thumb, you can reduce failures to statistical insignificance by following some simple rules:
- Work with reliable machines and companies that provide training and technical support.
- Keep your machine and workspace clean.
- Take the time to set up your prints properly.
- Print only with reliable, tested materials.
- Check the expiration date of materials before printing.
- Carry out regular service and maintenance as specified by the manufacturer.
Get Started With Prototyping In-House
Add 3D printing to your toolset and create precision prototypes in-house for a fraction of the cost and lead time of traditional tools or outsourced solutions.
See the quality firsthand by requesting a complimentary sample part printed on the Form 2 SLA 3D printer.

