
Color can have a massive influence on how we interpret the world around us, but most of our communication around color is achieved verbally or via arbitrary standards and naming schemes. The way most of us think of color is analog, but Ontario-based Nix wants to turn color into a digital experience.
Lab grade tools already exist to sense color accurately, but these tools are only available to a limited market because of their price point and learning curve. The Nix Pro Color Sensor, as well as the Nix Mini Color Sensor, aim to open up new markets for color sensing with easy-to-use, affordable handheld devices.

Since launching their product, Nix has seen their sensors adopted for applications ranging from custom makeup tailored to the user’s skin tone to quality control for egg yolks and salmon before they hit grocery shelves. They’ve even received a Red Dot Design Award.
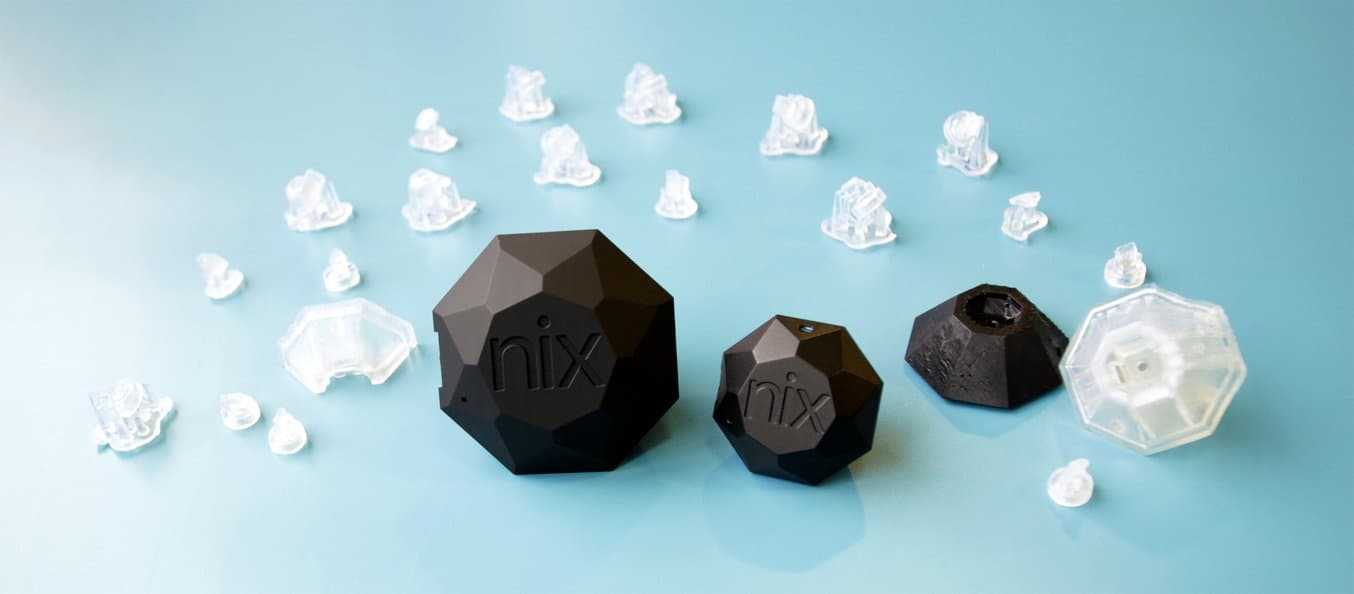
Creating an intuitive tool with a compelling design didn’t happen automatically. Many rounds of prototyping were required to reach the final design. Nix chose the Form 2 3D printer for its small footprint and ability to print in both opaque and transparent materials. The team uses Black Resin to print enclosures, and Clear Resin for transparent components like lenses and internal light pipes.
In this article, we'll focus on light pipe design basics and Nix's specific workflow for prototyping these sometimes-challenging components.
Considerations for Designing Light Pipes
Broadly speaking, a light pipe is an optical fiber or a solid transparent plastic rod for transmitting light from an LED mounted on a printed circuit board (PCB) to the user interface of a device. If you’ve seen a small blinking light on a router, for example, or a toy robot with eyes that light up, you’ve seen a light pipe in action.

Light pipes operate by carrying light from an entry point to an exit point via an optically transparent medium. When designing light pipes, it’s important to consider how to minimize loss of light and how to efficiently use the lowest number of LEDs.
Fit and Tolerancing
Nix’s product is diamond-shaped, so their light pipes need to sit within that constraint. This raises numerous questions. How will they fit inside? How big will they be? How will they interface with the LEDs of different sizes?
It was easy to make designs that appeared to work in CAD, but much harder to design parts that performed well on physical prototypes. The final design required an interference fit or a nice snap, something that the team needed to test numerous times on physical prototypes to get the right feel.
Material Selection and Post-Processing
As we’ll discuss further below, choosing the right fabrication method and material can be complicated, especially during prototyping, when many different iterations need to be produced within a short timeline. For Nix, options included laser cut acrylic, CNC acrylic, 3D printed molds, and directly 3D printed plastics.
Formlabs Clear Resin is great for showing internal details, housing LEDs, or creating windows. Learn how to polish Clear Resin for a transparent finish or read on to see Nix’s specific workflow.
Design for Manufacturing
As with any hardware component, a light pipe that looks and works right in a finished prototype may be difficult to produce successfully in bulk. Through the design process, consider what the final material will be and whether it will be possible to mass produce a final piece.
Different materials call for different post-processing methods, which can be time consuming, so it’s important to consider how parts will be finished during design. For example, avoid adding lots of intricate grooves to a part that needs to be meticulously sanded, as this will increase the time and labor required during post-processing.
Further Reading
- Learn By Example: How To Design Light Pipes (Fictiv)
- Fundamentals of LED Light Pipes (Electronic Design)
A Prototyping Method for Optically Clear Parts
It took a while for Nix to find a transparent material versatile enough for prototyping the internal light pipes in their sensors.
With laser cut acrylic, the material was clear, but could only produce 2D extruded shapes. With CNC machined acrylic, surfaces became cloudy so they couldn’t achieve the desired internal reflection unless the team polished parts with toothpaste or flame. They could 3D print molds, but this process took a long time.
Initially, Nix opted for outsourcing CNC parts. Even though they had their own CNC machine in the office, it was difficult for them to achieve the cuts they needed for the small, intricate light pipes. For each prototype, this CNC process took 3 to 5 days, and cost per part sometimes ended up being hundreds of dollars.
For a single part, this wouldn’t be a big deal. However, many prototypes inevitably fail before landing on a final design. Spending so much time and money on each iteration added weeks or even months of time–and thousands of dollars–to the product development process.
Workflow: 3D Printing Light Pipes With Clear Resin
Nix has been using Formlabs 3D printers from the start, starting with a Form 1+ alongside a CNC machine when the company was based in a 10x10' bedroom. Now, they use the Form 2 desktop stereolithography 3D printer. 3D printing light pipes in Clear Resin meant that they could print ten different lenses on a single build platform in an afternoon, instead of waiting days between iterations.
For each version, the process starts with CAD software and ends with a finished prototype for testing.
First, the team creates a new light pipe design, or set of designs, in CAD. Import the design into Formlabs PreForm software and make sure it’s optimally oriented and supported for successful printing. If needed, they can lay out multiple lenses on a single build platform.
Lenses are printed using Clear Resin at 25 microns.

The team removes the parts from the build platform and removes the supports using the Form 2 Finish Kit.

Each part is inspected for bubbles or other defects that might prevent light from traveling through. Parts are washed thoroughly in isopropyl alcohol (IPA) using the Finish Kit or Form Wash. If any residue remains, the parts will come out lumpy and sticky, which causes problems during the polish step, so parts must be completely rinsed.

After parts are washed, they can be polished using Novus 1 acrylic cleaner (or the polish of your choice).

To sand the parts, the team places sandpaper on a piece of cork board that has some give, and swirls the lenses in a random pattern to avoid marks on surface. The grit of the sandpaper is increased until the parts are polished to satisfaction.

The result is a functional, optically clear part that can be incorporated in Nix’s prototypes.

Photos provided by Nix. Because the light pipes are quite small, in some steps, a larger 3D printed cube was used for the sake of visual clarity in this demonstration.
3D Print Light Pipes on the Form 2
Stereolithography 3D printing technology makes clear prints possible on the desktop and takes the hassle out of prototyping transparent parts like light pipes. Formlabs Clear Resin is great for fluidics and moldmaking, optics, lighting, and any parts requiring translucency.