
Since first introducing accessible, industrial-quality desktop 3D printing, Formlabs has continuously improved our product and business strategy to ensure that producing high-quality parts is easy, affordable, and scalable for our customers. Desktop stereolithography (SLA) printers, including Form 3 Series printers, and masked stereolithography printers (MSLA), Including Form 4 Series printers, make it easy to print high-performance, end-use quality parts, without worrying about print settings or machine calibration.
As with any type of 3D printing, however, there are ways to further optimize your workflow. From the printing experts at Formlabs, here are 10 ways to get the most out of your printer.
#1: Internet Connection and Dashboard

Connecting your printer to the internet lets you upload prints remotely, so you can start a print job from home, while commuting, or just from a different internet network at work. An internet connection also ensures that printers can automatically search for firmware updates, so that you always have access to optimized material and printer settings.
Once your printer is connected, register it to Dashboard, Formlabs’ online printer monitoring software. Dashboard lets you monitor print status from your browser or through PreForm, and Fleet Control adds even more functionality to both platforms for increased printer productivity. To learn more about the features available in Dashboard and Fleet Control, and to learn how to connect your printer, visit our specific support pages.
#2: Optimize Design for Print Success
Although SLA 3D printing can achieve incredibly fine feature size, tolerances, and resolution, there are still design constraints that should be considered before starting a print.
For example: While wall features thinner than 0.2 mm are possible under ideal conditions, they may be too mechanically weak to withstand forces during the print and post-processing phases. To ensure print success, keep wall features to 0.2 mm or thicker. Download the full design guide to learn more.
#3: Understanding PreForm Warnings and How to Adjust
Before sending your part to the printer, PreForm will analyze the file for printability and detect possible problematic features and geometries. To ensure print success, it’s important to understand the different types of problems and how to adjust your design or print orientation in order to avoid them.
Yellow Highlight: Cups, or ‘Suction Cups,’ are regions where the part is oriented in a way that would cause it to trap liquid resin inside during the print. This results in worse surface resolution, and can even cause the print to fail completely. If a large enough amount of resin is cupped inside a feature, it can create a ‘blowout’ effect. To avoid cupping, orient your parts in a way that allows resin to flow freely, or create a drainage channel inside your design. Alternatively, PreForm’s “Hole” function allows you to create a drain hole, allowing resin to flow out of the cup.
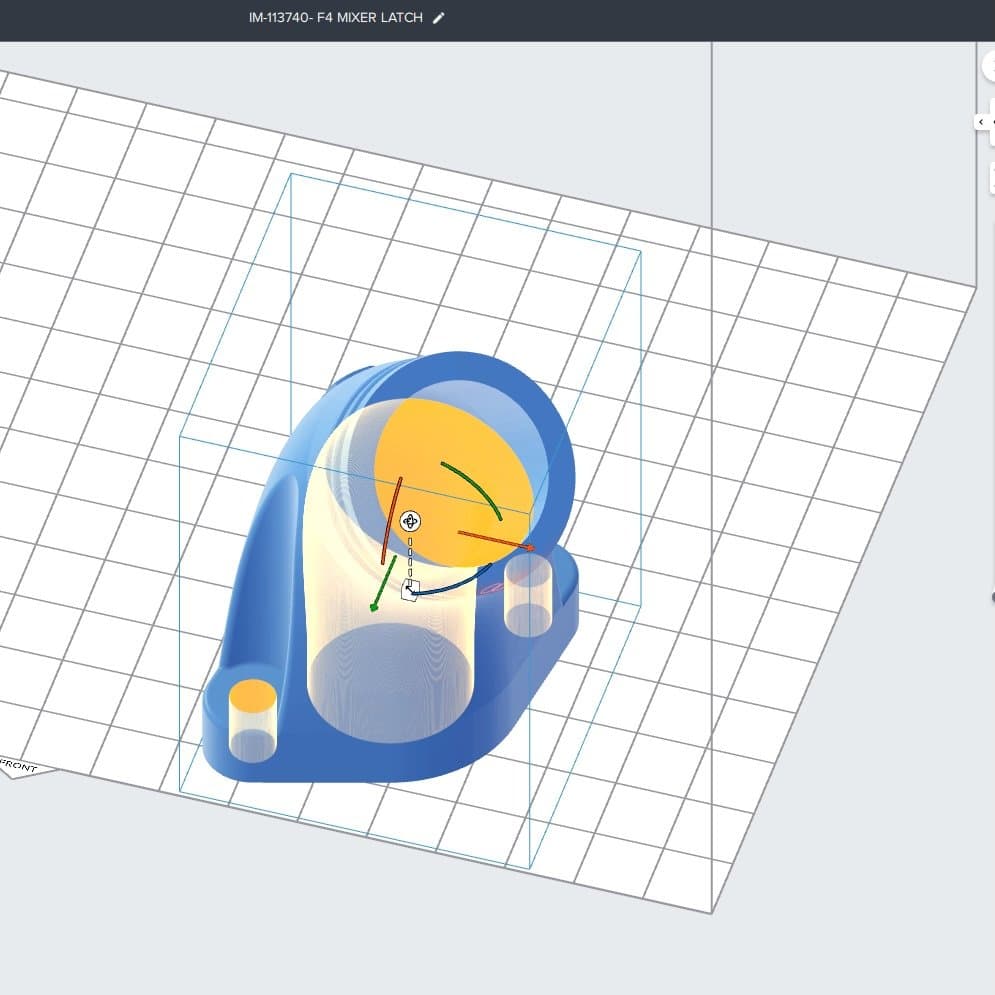
Yellow highlighting indicates 'cupping' areas, where the orientation of the part might cause liquid resin to get trapped inside.
Changing the orientation slightly allows liquid resin to drain during the print process.
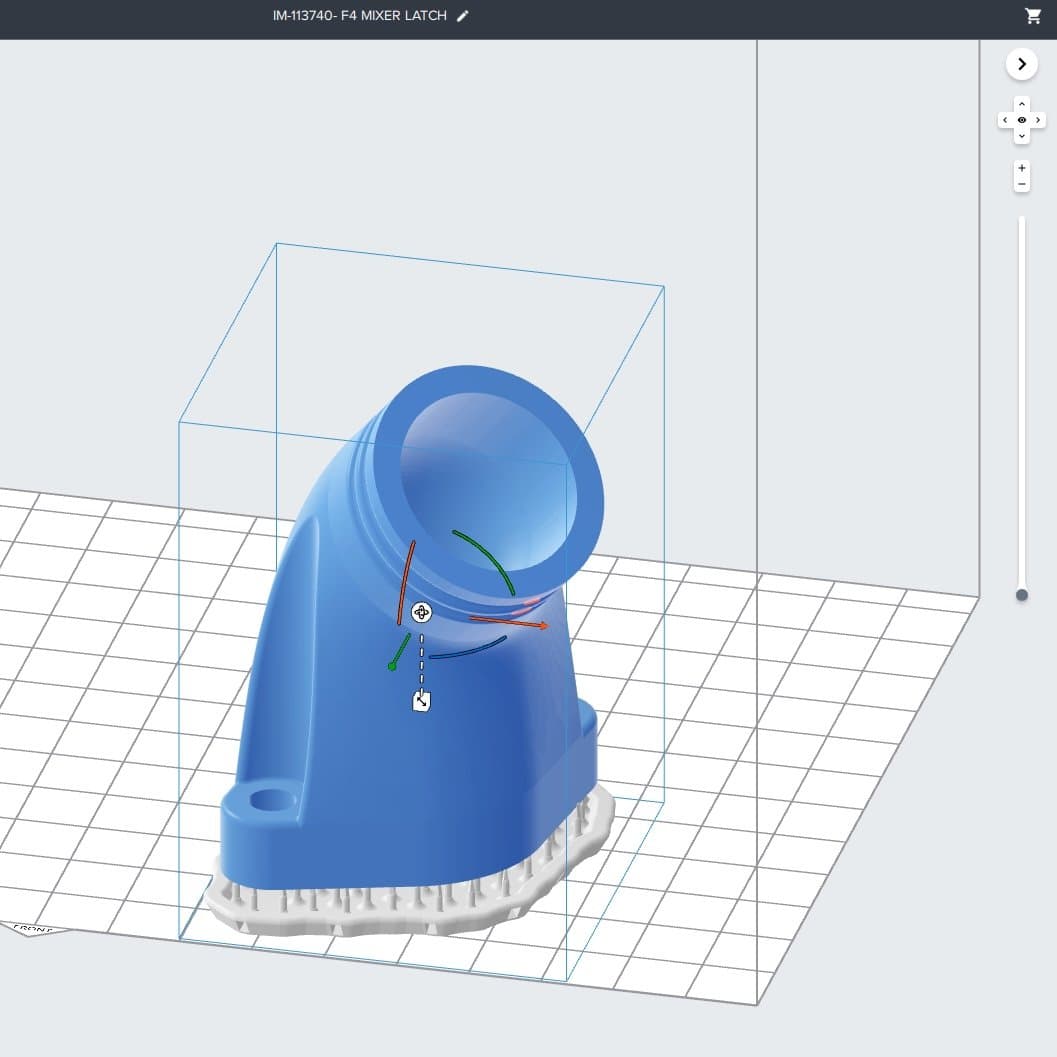
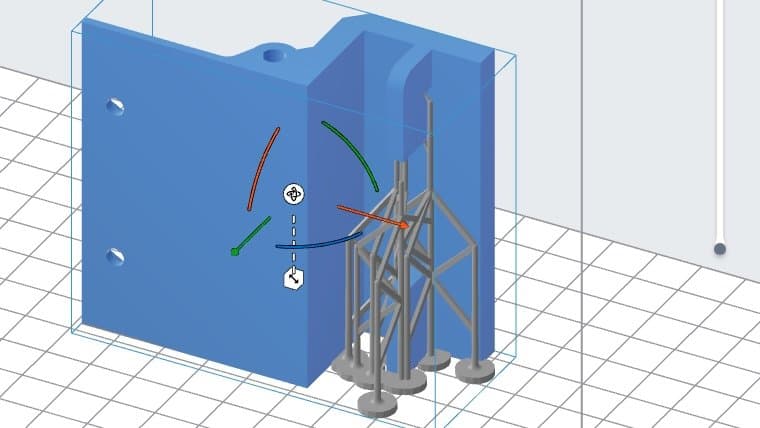
Red Outline: Unsupported minima occurs when the lowest point (or minima) of a part or feature is hanging free and unsupported. Since Form Series printers print layer-by-layer, these minima won’t be attached to the rest of the model. Instead, they will remain stuck to the bottom of the tank when the build platform lifts and moves to the next layer, causing failure. To avoid this, add support to the model where it is highlighted.
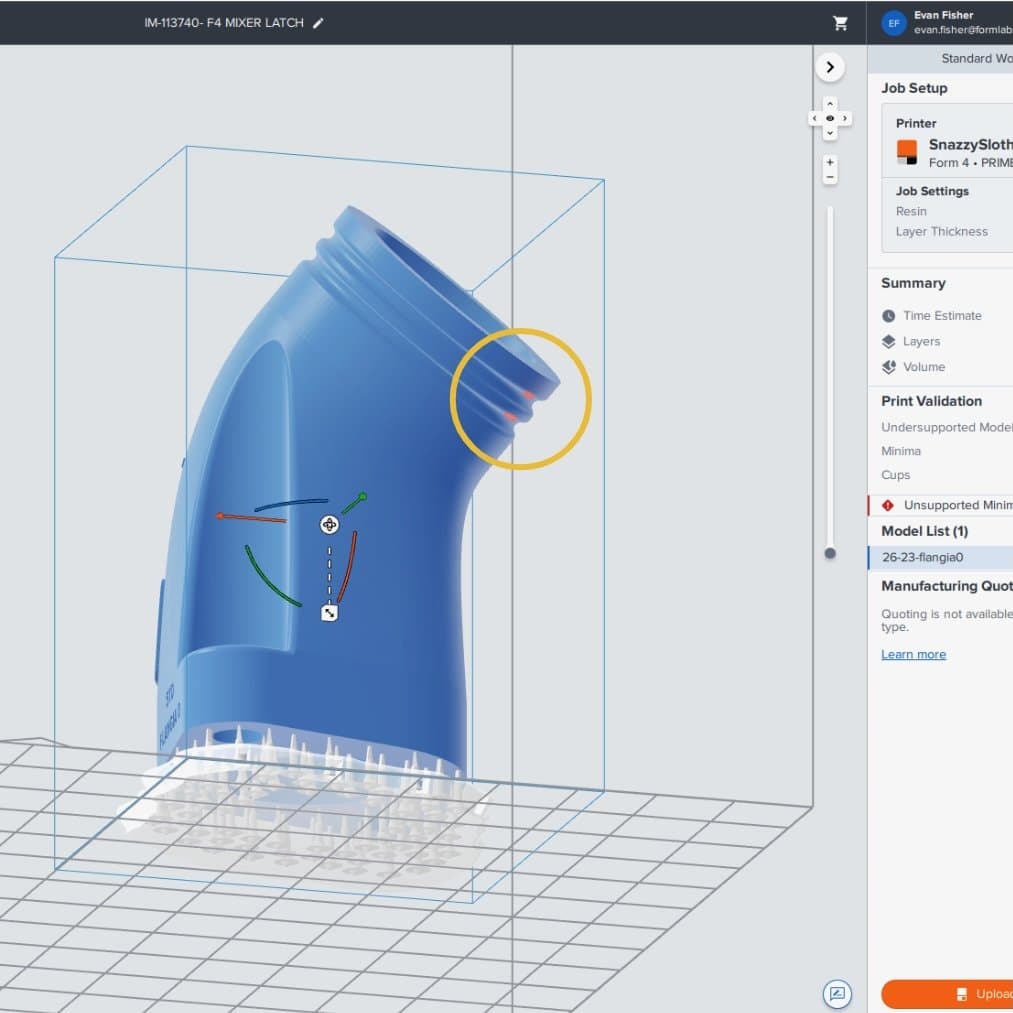
Red outlines (circled in yellow) show where unstable or under-supported features need to be better supported.

Adding more supports can address the red outline warning and ensure print success.
Red Shade: Under-supported regions are areas that overhang or are geometrically unstable and need to be further supported. Under-supported geometry will lead to print failures. The intensity of the red shade represents the severity of the issue — lighter regions indicate a minor concern, while darker regions represent more significant issues. Adding more supports to these regions will solve these issues.
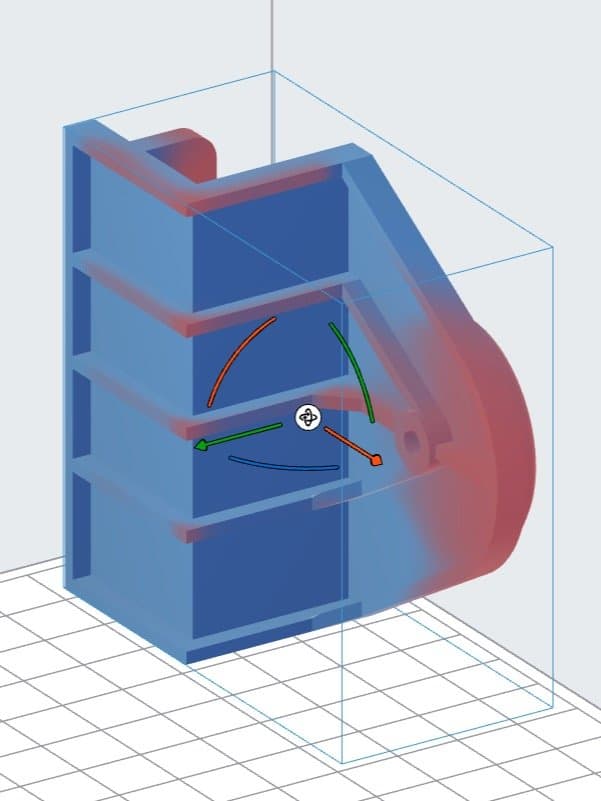
Red shading indicates potential problem areas where the model's features are unsupported.
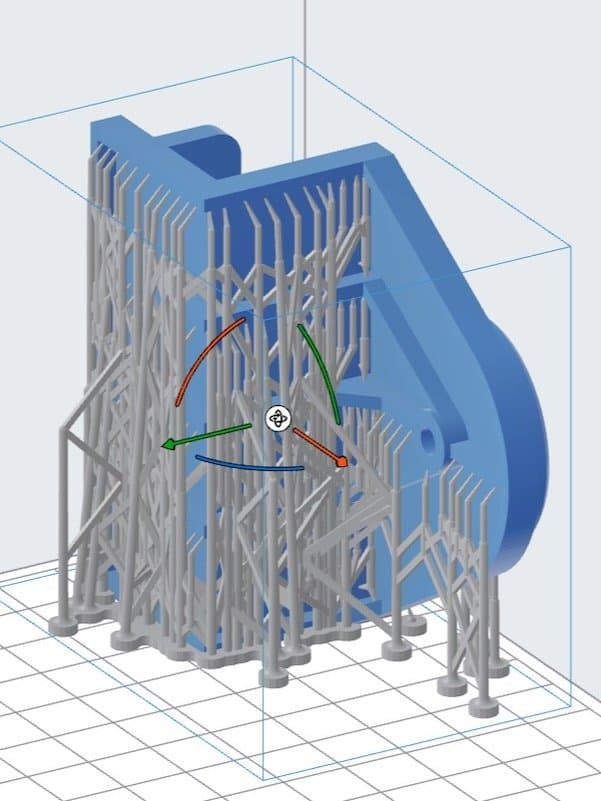
Adding more supports to these regions will solve the issues highlighted by red shading.
To learn more about avoiding problematic geometric features, shapes, or orientations, visit our resources pages.
#4: Optimize Support Generation and Placement
Understanding how to effectively support parts is a critical part of 3D printing. PreForm can automatically generate supports, and excels at supporting your parts effectively. However, PreForm does err on the safe side, and if you’d like to edit the number or placement of supports, you have the ability to customize them completely.
For example, you can decide if you’d like a raft — the foundation under your model — to connect all of our supports, or if you want your supports to individually touch the build plate. You can also select the density and touch point size of the supports.
More supports and larger touchpoints will provide more stability to difficult geometry, but smaller touchpoints and less dense support are easier to remove. Advanced users can also manually add and remove supports with the support paint brush.
To learn more about placing supports, visit our support page.
#5: Understanding Raft Printing vs. Printing Directly on the Build Platform
While some parts can be printed directly on the build platform (and should be, for efficiency), very small parts should be printed with a ‘full raft,’ or a ‘mini raft.’ A full raft is created by the individual supports converging as they meet the build platform, lifting the entire part farther away from the platform’s surface. A mini raft is used for features that need support, even if the rest of the part is printed directly on the build platform. This option saves on support material, but can cause issues if the rest of the part does not have a flat base.
This 'full raft' structure is created as individual support structures converge as they meet the build platform.
With multiple parts, a full raft makes more sense than several smaller rafts.
Printing directly on the build platform with mini rafts for features that need support can be a good compromise.
Large parts with flat surfaces can be printed directly on the build platform, though it is recommended to use Build Platform 2 or Build Platform 2L for Form 3 Series printers or Build Platform Flex or Build Platform Flex L for Form 4 Series printers to ensure that parts are easily removable. These build platforms use patented Quick Release technology to remove parts without scraping.
#6: Optimizing Post-Processing Workflow
SLA 3D printed parts need to be washed in isopropyl alcohol (IPA) and post-cured after the print finishes. Form Wash and Form Wash L are automated solutions that agitate IPA to precisely clean your parts and remove all resin from the surface, while keeping your workspace clean and organized. The solvent will saturate with resin over time, so it needs to be changed out. Leaving parts in IPA for too long will cause them to swell.
Alternatively, Formlabs Resin Washing Solution can be used instead of IPA for washing most resins. This solution is non-flammable per GHS classification and cleans as well as IPA, but can dissolve nearly twice as much resin before becoming saturated.
Form Cure, Form Cure L, and Fast Cure use 405 nm light and heat to post-cure parts so they can reach their optimal mechanical properties. All post-curing solutions have presets for Formlabs resins, so optimized times and temperatures are as easy as turning the control knob.
Beyond washing and post-curing parts, there are a variety of ways to further post-process SLA prints. Everything from metal-plating to coating, dyeing, painting, and media blasting can help your parts improve their surface finish and mechanical properties.
To learn more about post-processing, visit our support page or Guide to SLA Post Processing.
#7: Become Familiar With Formlabs’ Materials Library
Formlabs offers over 45 materials, each purpose-built to solve a problem that engineers, designers, manufacturers, and dental and medical professionals face. Materials are engineered to expand the range of things you can do with Form Series printers and include true technical ceramics, pure silicone, electrostatic dissipative, flame retardant, and a library of biocompatible materials.
We’ve made it easy to find the material that’s right for you through our interactive materials hub, where you can find detailed information about each material, compare properties side by side, and download technical and safety data sheets. Another way to find a material that will work for you is to explore the Applications section of the Formlabs website, and read through workflow guides or case studies to see how other Formlabs customers are leveraging certain materials in similar applications.
#8: Understanding Resin Tank Care and Maintenance
Resin Tanks are an integral part of what makes our printers reliable, consistent, and highly accurate. Some best practices for tank care and handling are:
-
Do not touch or damage the bottom surface of the Resin Tank.
-
Contamination, dust, or scratches will obstruct the light’s path and cause print defects.
-
-
Never use sharp tools to remove things from the Resin Tank (instead use the provided plastic part removal tool).
-
When changing resin types, always change both the tank and the cartridge. Remove the cartridge before removing the tank to prevent the cartridge valve from dripping resin into the printer interior.
-
Use a different resin tank for each type of Formlabs resin.
-
Whenever a resin tank is not installed in the printer, store it in its case for Form 3 Series printers, or with the reusable lid for Form 4 Series printers. When covered with a lid, resin tanks for Form 4 Series printers can be stacked for easy storage.
-
If the inside of the tank case or the bottom of the resin tank has liquid resin on it, clean them before storing the tank.
-
Keep the resin tank covered to prevent ambient light from curing the liquid resin in the tank.
-
Make sure to only use recommended tools to interact with the resin tank to avoid scratching the bottom of the tank.
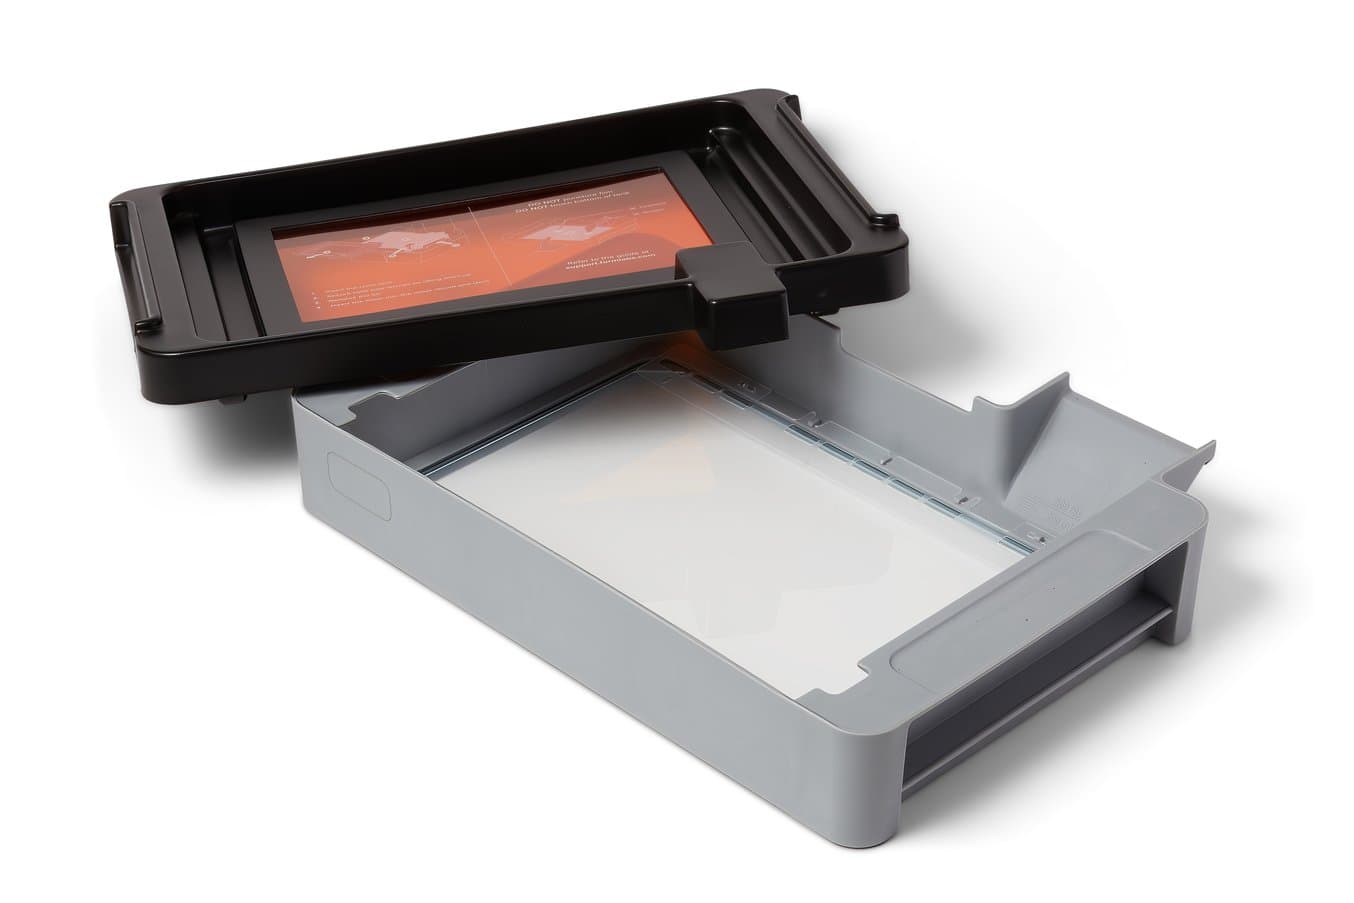
The Form 4/B resin tank comes with a reusable cover.
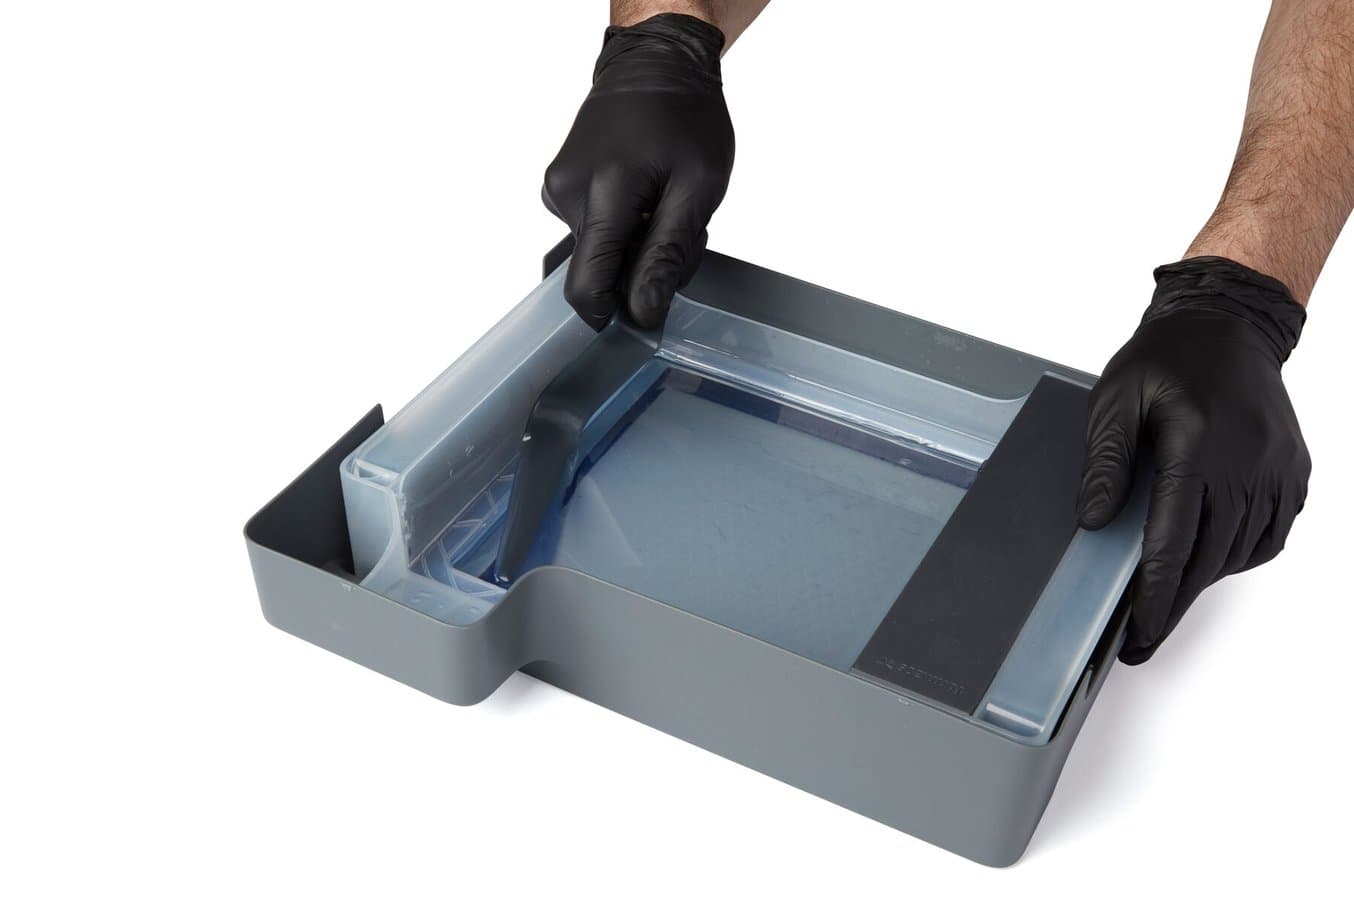
Wear gloves when handling resin, such as with this Form 3 resin tank.
#9: Optimize Start Times
Formlabs SLA printers use an automated resin dispensing system that allows resin to fill the tank automatically. This process is ideal for keeping resin in the tank when printing.
Form 4 Series printers feature 5-10x faster resin filling and similar print times across the build platform whether you're printing one part or many. Therefore, packing a build platform will result in more parts at similar speeds, optimizing your printing time.
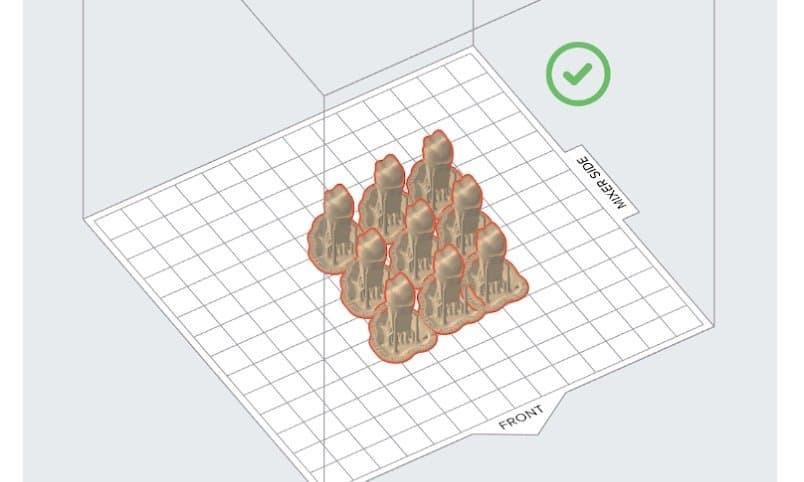
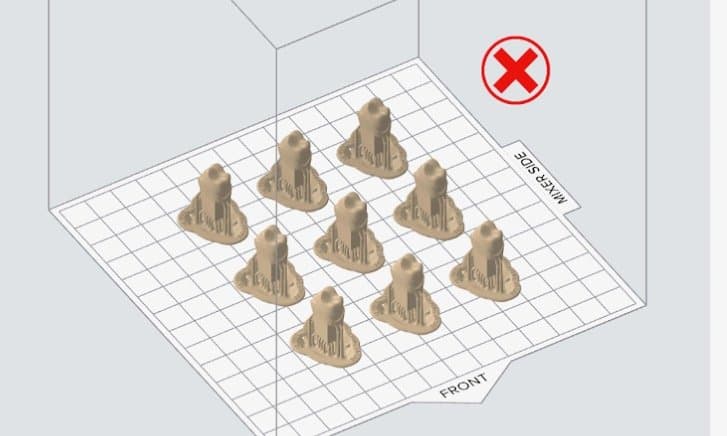
Form 3 Series printers start printing at the right side of the tank, so placing parts closer to the end called “MIXER SIDE” in PreForm will usually result in shorter print times. Placing parts close together (especially on the X-axis) will reduce the distance that the Light Processing Unit (LPU) has to travel and allow for shorter print times. To see this effect in action you can hit the “time estimate” button in PreForm and see how the estimate changes with different part orientations.
SLA 3D printing is also a layer-by-layer process, so orienting a part to have a lower Z-axis height will result in fewer layers and faster print times.
#10: Keep a Learning Mindset
One of 3D printing's biggest advantages is that mistakes aren't as costly as they might be with other fabrication methods. If a part doesn't come out as planned, the design and means of production are readily available to try again. The resin may be a sunk cost, but it is far less expensive than making mistakes in a traditional tooling workflow. Learning how to optimize your designs, print orientation, support placement, and material choice comes from time spent with the printer and from making the wrong choices first, so that you can hone in on what makes a good print.
The resources to help you in that learning process are everywhere: Formlabs' website has webinars, whitepapers, and guides for everything from design to post-processing. Beyond our own resources, our community of Formlabs users is an incredible wealth of knowledge. Ask your sales contact to connect you with someone working within a similar application or industry or attend events like the Formlabs User Summit or The Digital Factory to meet up with customers who can inspire or guide you. Use social media groups or the Formlabs Forum to communicate, share tips, or ask questions.
Formlabs introduced the first accessible workflow for industrial-quality SLA 3D printing years ago, and we've learned (just like our users) as we've grown. 3D printing makes the iterative process better, more thorough, and faster, and that applies to the learning process of printing itself as well as the design changes your parts will undergo.
To speak with an expert in your industry, or be connected to another user, contact our sales team. To discover Form 4 Series 3D printers, visit our website.