
Stereolithography (SLA) 3D printing has become vastly popular for its ability to produce high-accuracy, isotropic, and watertight prototypes and end-use parts in a range of advanced materials with fine features and smooth surface finish.
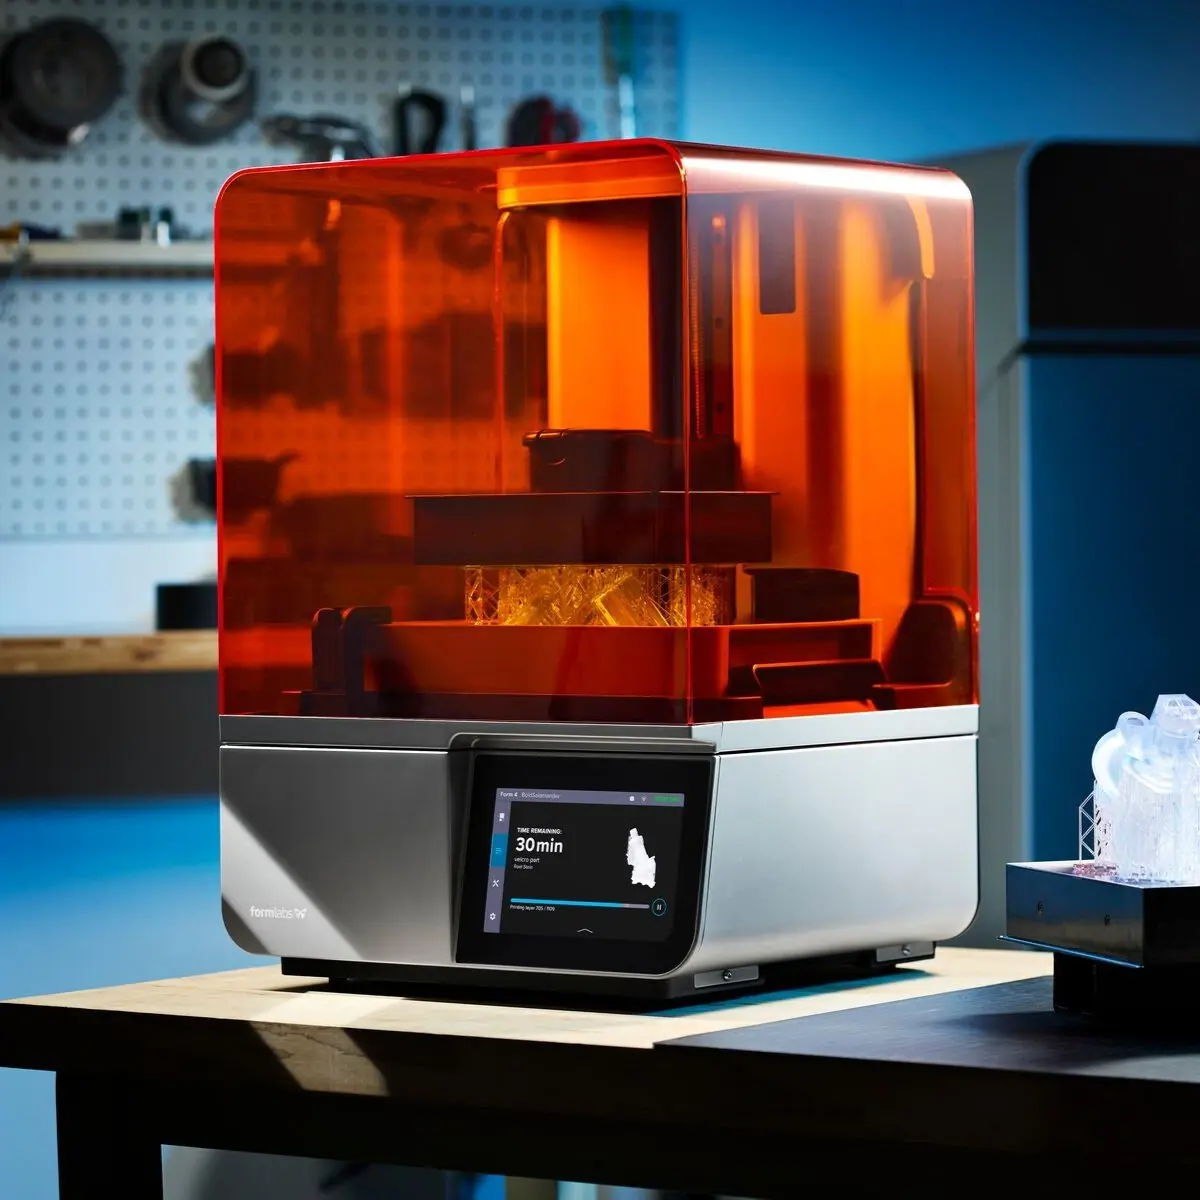
However, parts do not come out of the printer 100% finished: they often require post-processing. Every part requires a quick wash and many materials require a short post-cure. These two steps can be streamlined with post-processing equipment such as the Form Wash and Form Cure and the large-format Form Wash L and Form Cure L from Formlabs.
Additionally, some parts could also benefit from further steps like sanding, coating, plating, or media blasting. These post-processing methods can achieve a wide range of results, such as making parts better suited for outdoor applications through UV protection, or increasing the mechanical strength of a part by plating it in metal or a ceramic solution like Cerakote.
In this guide, we cover everything you need to know about the various 3D printing post-processing methods available, and how to choose the right process for your application.
Book a Free Consultation
Get in touch with our 3D printing experts for a 1:1 consultation to find the right solution for your business, receive ROI analyses, test prints, and more.
SLA Post-Processing Basics
Washing
The foundational step in any SLA post-processing workflow is to remove any excess resin on the surface of the parts through an alcohol or ether wash. This washing step can be done manually by soaking the parts in the solution, or by using an automated machine that agitates the liquid for a pre-set amount of time. The easiest and most effective washing workflow is detailed below. This step prepares parts for secondary processes such as painting, dyeing, smoothing, or polishing.
Tips for washing resin 3D printed parts:
- Formlabs recommends washing SLA parts with isopropyl alcohol (IPA), Formlabs Resin Washing Solution, or tripropylene glycol monomethyl ether (TPM). IPA is the most commonly known and used solution for washing resin parts, while Formlabs Resin Washing Solution is a non-flammable alternative that is safe enough for any workspace and can dissolve twice as much resin before becoming saturated to reduce cost per washed part.
- The Form Wash and Form Wash L automatically agitate the liquid to effectively clean parts, even those with channels, negative features, or surface texture. If using a manual solution, move the liquid around yourself to achieve the same result. When creating designs with narrow channels, such as microfluidics, a syringe may be necessary to clean out internal resin and stop resin from curing and blocking channels.
- Some parts may require two washes in IPA or TPM to be fully clean. Many higher volume printing locations have a ‘clean’ wash and a ‘dirty’ wash, to make this step even more efficient. All parts get rinsed in the ‘dirty’ wash first (which can be a manual soaking solution), before moving to a more extreme clean in fresher IPA (often this ‘clean’ wash is the Form Wash or Form Wash L).
- Formlabs recommends Form Wash alongside Formlabs desktop printers, and Form Wash L for large-format SLA printers to automate washing and rinsing your printed parts.
- Certain materials can be washed together, while others should be separately washed to avoid any particles dissolved in the isopropyl alcohol from affecting the color, finish, or performance of others. The chart below details which resins should be grouped together for best results and for adherence to biocompatible guidelines.
| Light | Dark | Biocompatible | Other (wash separately by themselves) |
|---|---|---|---|
| Clear Resin, White Resin, Rigid 4000 Resin, Rigid 10k Resin, Durable Resin, Elastic 50A Resin, Flexible 80A Resin, High Temp Resin | Black Resin, Grey Resin, Grey Pro Resin, Fast Model Resin, Draft Resin, Precision Model Resin, Model Resin, Tough 2000 Resin, Tough 1500 Resin, Flame Retardant Resin | Biomed White Resin, Biomed Black Resin, Biomed Clear Resin, Biomed Amber Resin, Biomed Durable Resin, BioMed Elastic 50A Resin, BioMed Flex 80A Resin, Surgical Guide Resin, Dental LT Clear Resin, Dental LT Comfort Resin, Custom Tray Resin, IBT Flex Resin, Temporary CB Resin, Permanent Crown Resin, Premium Teeth Resin, Denture Teeth Resin, Denture Base Resin | ESD Resin, Color Kit, Color Resin, True Cast Resin, Castable Wax Resin, Castable Wax 40 Resin, Silicone 40A Resin*, Alumina 4N Resin** |
* Silicone 40A Resin must be washed in a mixture of 80% IPA and 20% n-Butyl Acetate. If using the Form Wash, add a 2 L bottle of n-Butyl Acetate to the wash bucket and then fill to the maximum fill line with IPA.
** Alumina 4N Resin requires a separate wash. Do not allow Alumina 4N Resin parts to come into contact with water or IPA, as this will cause cracking. Only wash Alumina 4N Resin in the Ceramic Wash Solution.
Curing
When an SLA part finishes printing, the polymerization reaction may not yet be completed. This means parts have not achieved their final material properties and may not perform as expected, especially tough parts under stress. Exposing the print to light and heat, called post-curing, will help solidify its material properties.
Tips for post-curing resin 3D printed parts:
- Post-curing is optional for standard resins. Other resin types, such as Rigid 10K Resin, require post-curing to achieve their optimal mechanical properties.
- For biocompatible materials, post-curing is necessary to achieve the safety standards determined by regulatory agencies.
- Each material should be exposed to the curing process for a specific amount of time. Find all up-to-date recommended post-cure settings for Form Cure (2nd Generation), Form Cure (1st Generation), or Form Cure L on our website.
Form Cure and Form Cure L, the two post-curing solutions from Formlabs for desktop and large-format SLA 3D printers, are designed to post-cure parts printed in Formlabs Resins with speed and consistency. With Form Cure and Form Cure L, SLA 3D printed parts can be post-cured at precisely the correct wavelength, at different temperatures, and for varying lengths of time.
Sanding, Buffing, and Polishing
Sanding 3D printed parts is often the best method for smoothing edges, removing blemishes, and getting rid of any leftover support marks. Hand sanding is most effective on simple shapes, but it can be hard or nearly impossible to sand complex objects with deep crevices and internal supports. Media blasting or polishing might be more effective solutions in these cases.
The best way to sand SLA parts is to start with a low grit sandpaper, and slowly move to finer grit levels over time. For example, SLA 3D printed parts can be sanded to be smooth and glossy with 3,000 grit sandpaper. Slowly increase the grit, polishing and smoothing the part until it reaches its desired texture. At around 12,000 grit, the parts should become reflective. If you’re having trouble, sanding your part under running water or on a wet piece of sandpaper can sometimes help create a smooth surface on tough parts.
SLA parts come off the build platform with notably fewer layer lines than parts printed with other 3D printing processes, like fused deposition modeling (FDM). Oftentimes, the layer lines on resin 3D printers are not noticeable. This means FDM prints often require significantly more sanding to smooth parts. That said, if you need a glass-smooth finish, SLA does require sanding to fully remove any trace of layers, especially on spherical parts. Slowly increasing sandpaper grit will allow you to eliminate or reduce layer lines to a minuscule level on any SLA part.
The most common reason for sanding 3D printing parts is to remove support markings. As you become more comfortable with 3D printing, it may be worth spending additional time during the print preparation process to angle 3D prints in ways that remove or reduce supports from important parts of a print. For example, if you are printing a bust or model, it is often possible to angle the part so that the model face does not require supports. This will make the sanding process much easier.
Once you are happy with the sanding process, a basic microfiber cloth can be used to remove any minor imperfections and sandpaper powder left on the surface of the print.
If you are performing a significant amount of sanding on a single part, we have found that rubbing the part in mineral oil after a wash can create a super smooth surface finish. Like most techniques, mineral oil may or may not produce significant benefits for your print based on part geometry; you may have to try sanding multiple parts before finding the perfect finishing technique.
For anyone focused on high-quality, precise SLA parts, Formlabs Finishing Tools is a set of curated products designed to streamline the SLA post-processing workflow and help users achieve superior surface finish, perfectly smooth planes and edges, and an elevated appearance, all while driving down your labor time and cost per part.
Guide to Stereolithography (SLA) 3D Printing
Looking for a 3D printer to realize your 3D models in high resolution? Download our white paper to learn how SLA printing works and why it's the most popular 3D printing process for creating models with incredible details.
Overview of Advanced SLA Post-Processing Solutions
Smoothing, coating, and coloring processes can add mechanical benefits as well as aesthetic improvements to SLA 3D printed parts. Each of these processes has its own benefits and drawbacks, and each can impact different material properties to different degrees. When considering these workflows, including whether to bring the equipment and skills in-house or to outsource it, consider the capital cost and skill required.
The summary below shows the barrier to entry and potential outcomes of different advanced post-processing techniques on SLA 3D printed parts.
| Method | Barrier to Entry (Cost & Skill) | Mechanical Properties | UV Resistance | Chemical Resistance | Surface Hardness | Color | Conductivity |
|---|---|---|---|---|---|---|---|
| Media Blasting | Low | ✔ | |||||
| Printing With Dyed Resin | Low | ✔ | |||||
| Dyeing After Printing | Low | ✔ | |||||
| Painting | Low | ✔ | ✔ | ||||
| Ceramic Coating | High | ✔ | ✔ | ✔ | ✔ | ✔ | |
| Electroplating | High | ✔ | ✔ | ✔ | ✔ | ✔ |
These steps can be done in sequence to achieve multiple attributes. In this article, we will discuss each option separately. If you are interested in stacking post-processing techniques to achieve a specific outcome, contact our team to speak with a specialist who can consult on your use case.
Media Blasting
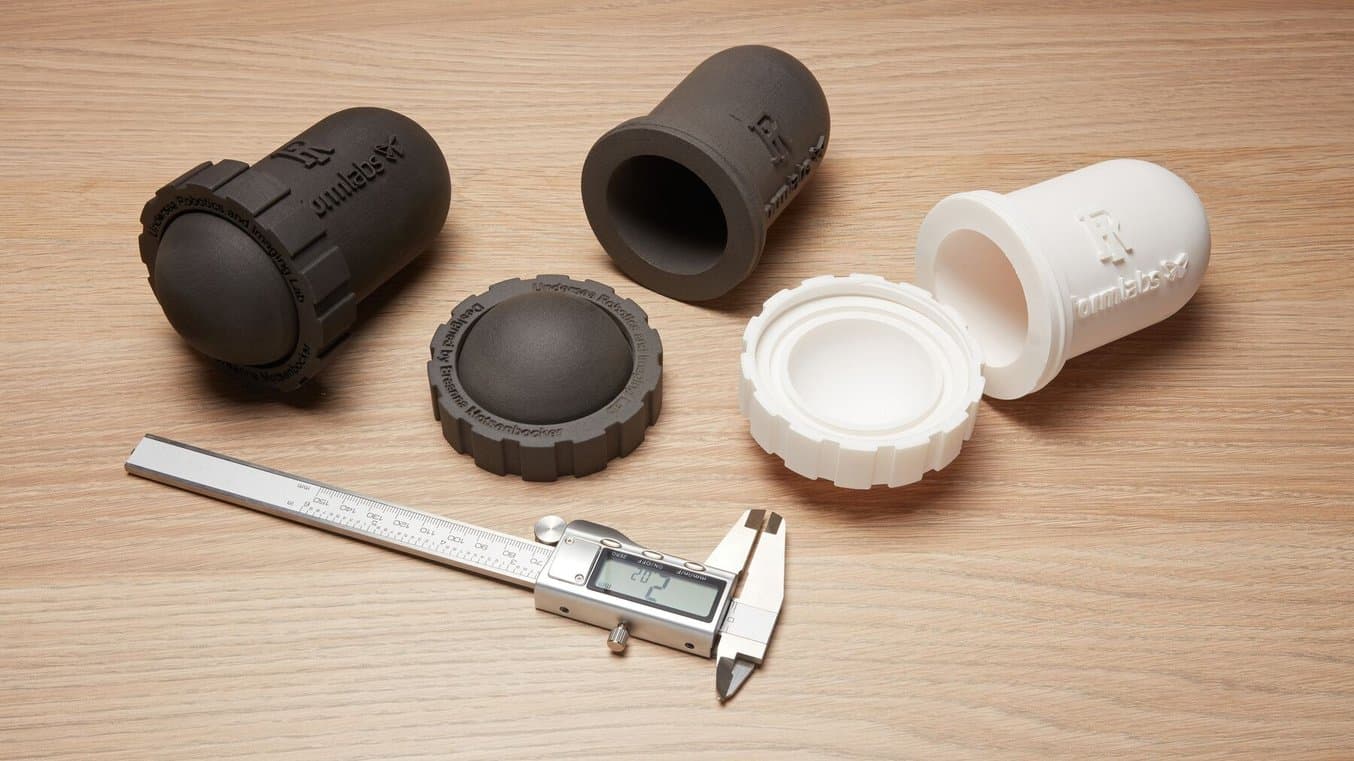
For certain resins, media blasting can be helpful for smoothing the surface and even improving mechanical properties. In testing conducted on Rigid 10K Resin parts before and after media blasting, the material’s elongation at break improved by 70%, ultimate tensile strength improved by 35%, and impact strength improved by 180%.
Manual media blasting solutions have been available for years and are suitable for low-volume applications or situations where blasting is required once or twice a week for large parts. Manual media blasters are affordable and do not require complex infrastructure.
For higher volumes, Formlabs’ Fuse Blast is the first affordable, automated media blasting solution on the market. It is designed to complete the Fuse Series selective laser sintering (SLS) 3D printing ecosystem, but can be used as a media blaster for SLA parts as well.
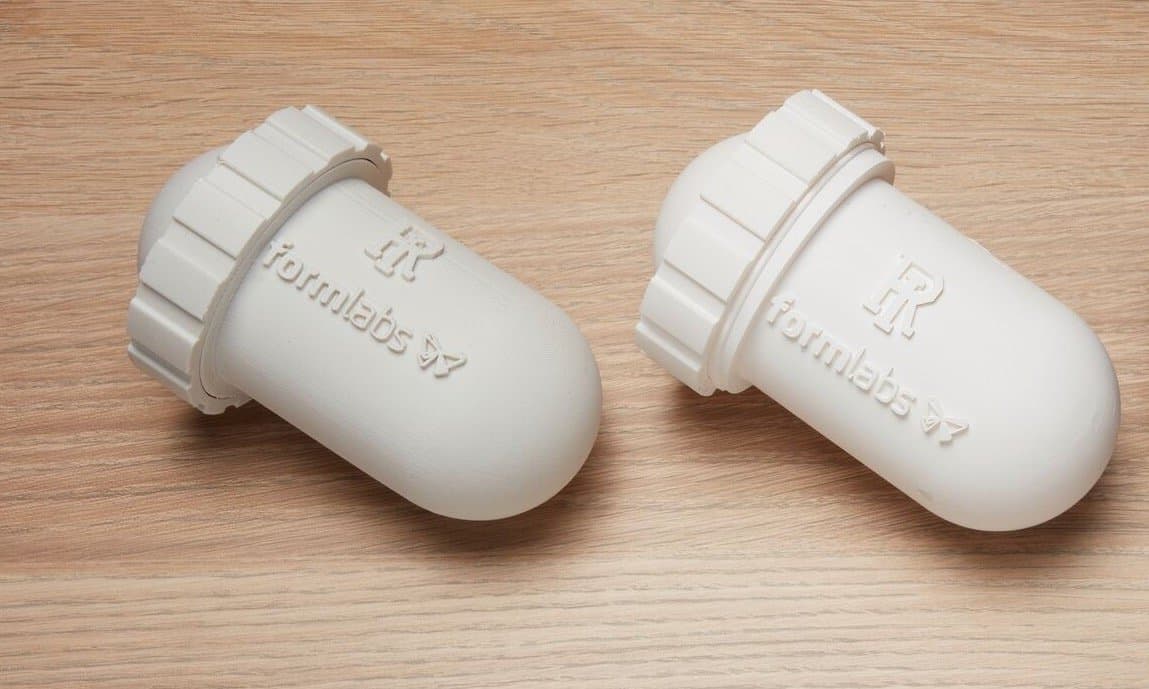
Media blasting improved the water pressure resistance of enclosures tested by the University of Rhode Island Undersea Robotics and Imaging Lab (URIL).
3D Printing Watertight Enclosures and Pressure Testing Results
In this white paper, we will provide the testing results and clear guidelines on how to affordably 3D print customized watertight enclosures.
Options for Coloring Resin 3D Printed Parts
Printing With Color Resin
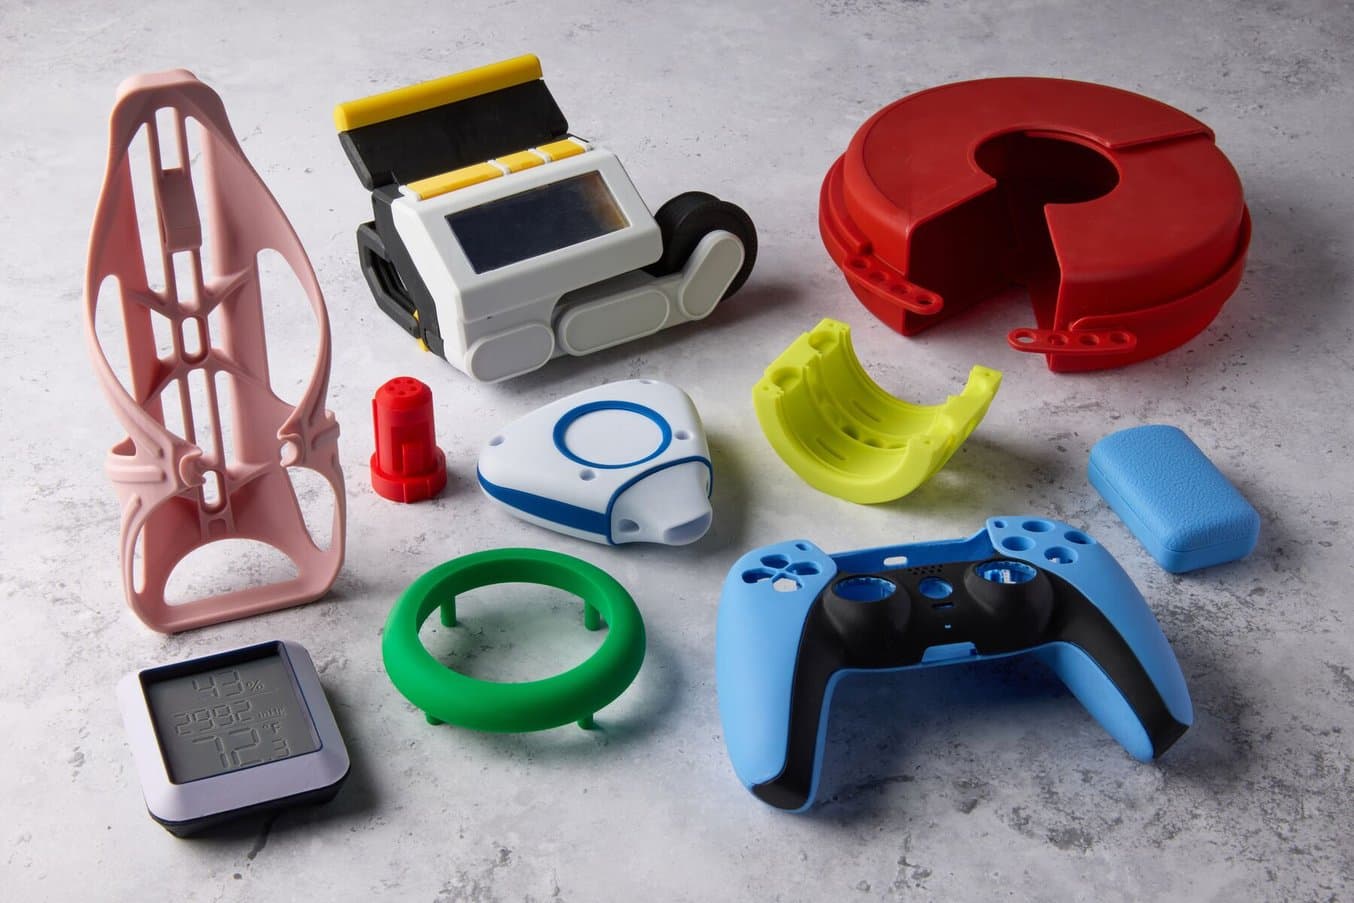
Color Resin is a custom-colorable General Purpose Resin custom-manufactured and quality-checked.
Color Resin enables the direct printing of parts in colors from nuanced neutrals to saturated, bold colors with the speed and ease of printing of any other Formlabs General Purpose Resin. With Color Resin, It's possible to achieve colors that represent your brand, product line, or creative vision with accuracy and consistency. Custom colors can be selected with a Hex code or RGB profile, or selected using the online color picker.
After parts are printed in Color Resin, they are washed in Form Wash and post-cured in Form Cure for one minute, for a post-processing workflow as easy as printing with any other General Purpose Resin. Unlike adding dyes to a resin, Color Resin ensures consistent production of uniform color parts and enables color-matching. Additionally, direct printing with Color Resin reduces the lead time associated with painting parts and the cost of labor, for efficient production of colored parts.
Color Resin V5 is currently only available in the USA, with expansion to other regions coming in the near future.
Printing With Dyed Resin
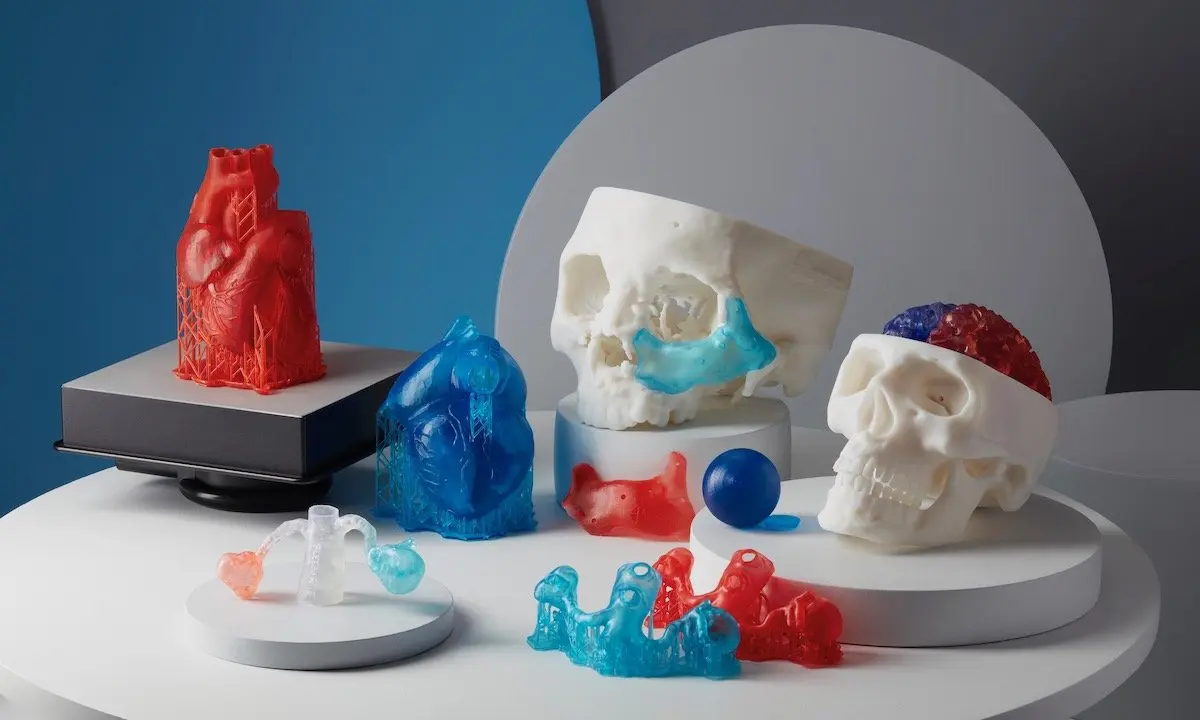
Anatomical models printed in Clear Resin mixed with alcohol ink.
This process requires taking 1 L of Clear Resin and dyeing it, normally with alcohol ink, to create a custom color. The modified Clear Resin can then be put into a Formlabs 3D printer for use, and the part will print in the new custom color that you have created. Alcohol inks completely dissolve into Clear Resin, making them the ideal coloring agent to give you consistent colors throughout your print. If you are going to be coloring 3D printed parts with dyed resin, note that you will want to use a separate wash solution for these parts, as the colored resin will dissolve in the wash. Label your wash solution to keep track of which types of dyes have been used to make sure you don’t accidentally wash a White Resin part in water containing a dark dye.
Printing With Color Kit
Color Kit is a standard integrated color mixing package offered by Formlabs. Color Kit enables 3D printing in a range of colors without the manual work of finishing and painting.
To see Color Kit in action, learn how how boutique synthesizer manufacturer birdkids developed a new product using 3D printing with a wide range of materials, including Color Kit, to prototype the color palette for their new product.
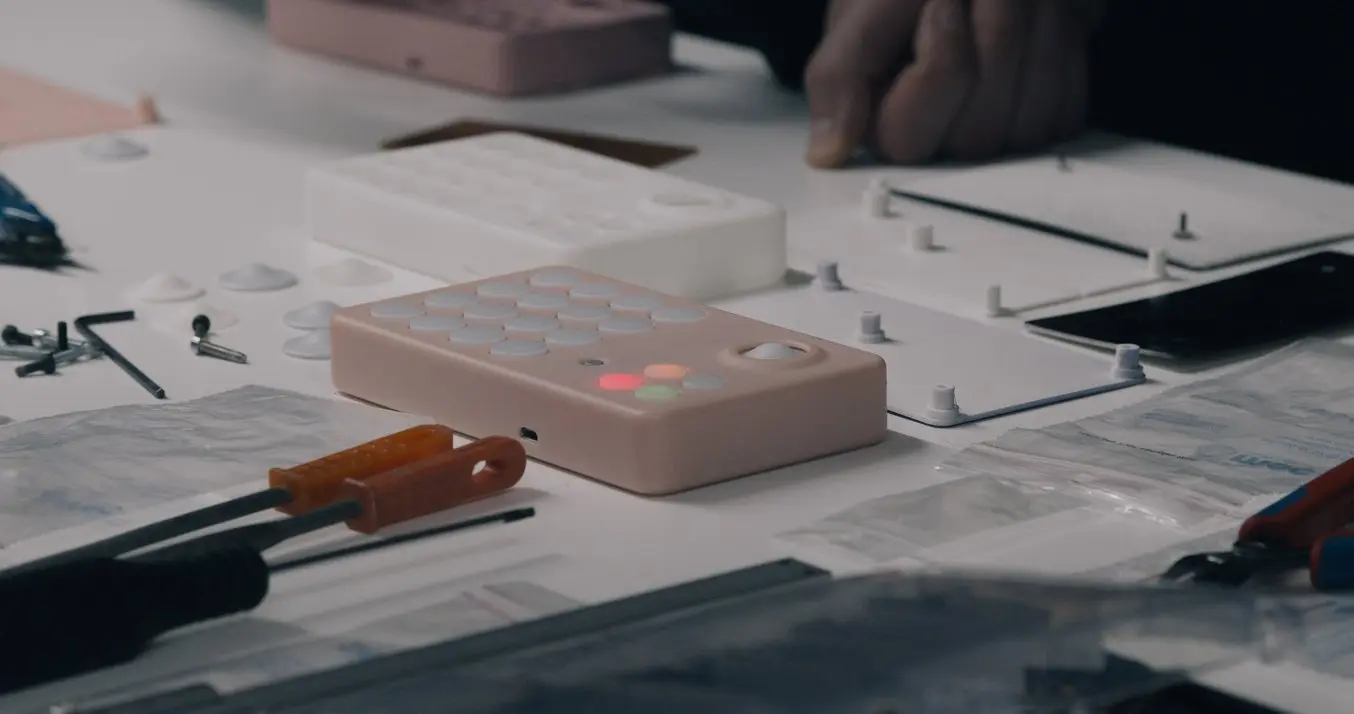
birdkids' team used Color Kit to prototype different colors, such as the “peach” variant.
Dyeing After Printing
If you don’t want to mix an entire batch of dyed material, but still want to dye your parts, you can apply the dye after printing. You can easily dip regions of interest into different dye solutions to obtain multi-colored parts.
Certain resins are going to be easier to dye than others, such as Clear Resin and Elastic Resin. We recommended creating an alcohol and dye solution and soaking your 3D printed parts, with the supports, in the solution. To learn more about dyeing SLA parts, download our white paper.
Painting With Acrylic

A skilled painter using acrylic can bring 3D printed parts to life.
For complex models with intricate details, it might only be possible to add some color with the use of paint. Although this process can be time-consuming and the result is determined by your painting abilities, it offers more artistic license to the user. As painting is done after the part is already washed and cured, this workflow also does not require a dedicated IPA wash.
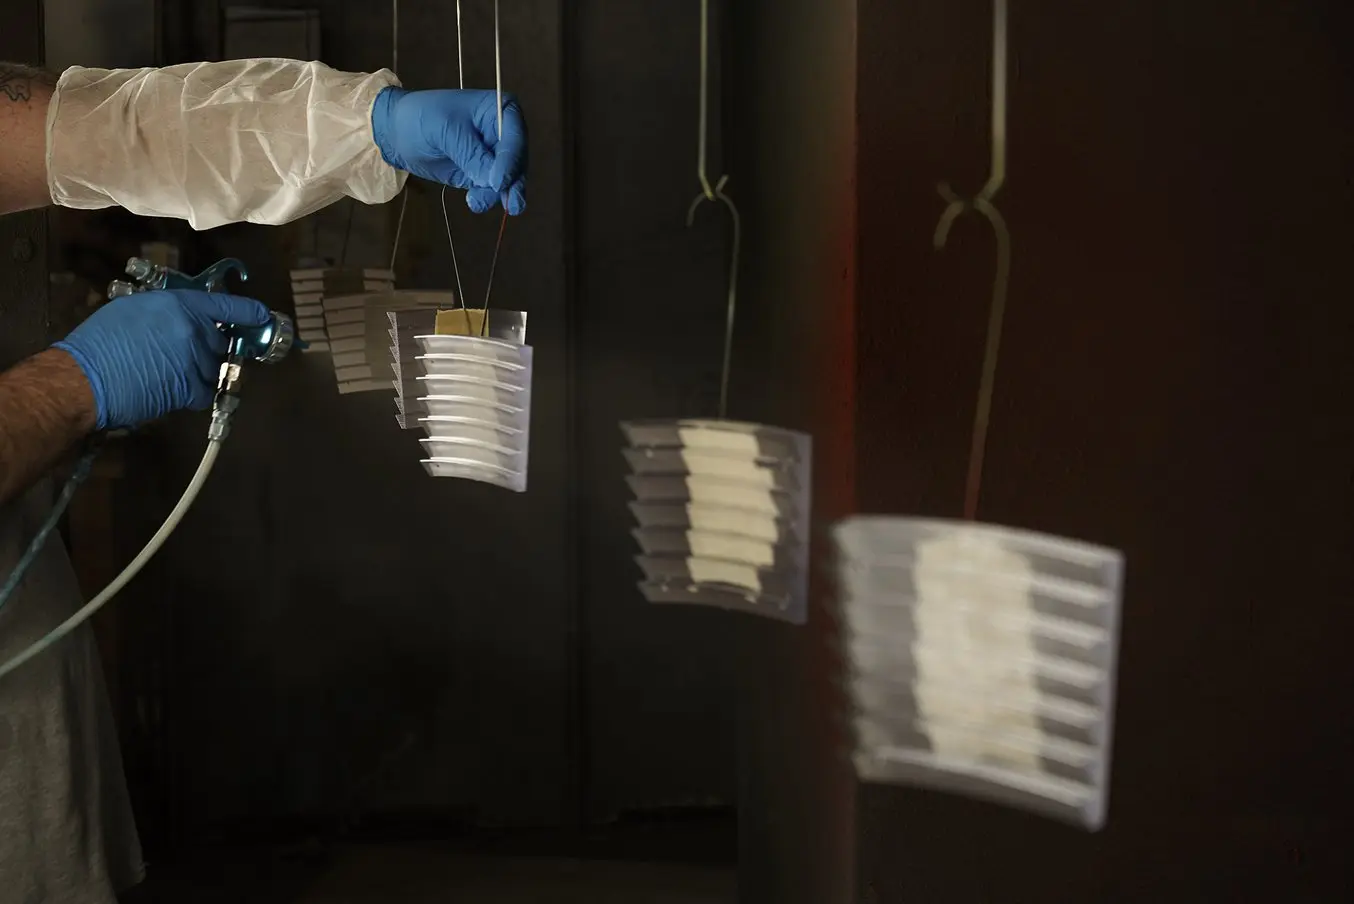
Spray Painting
Spray paint creates smooth surfaces and deep color gradients, and is especially efficient for large or flat prints. In the hands of a skilled user, SLA 3D printed parts can quickly be spray painted. The best technique for spray painting is to use multiple, thin coats, ideally done in a single session. A spray-on primer is the best way to paint your printed parts because it quickly covers a surface with an even coating. We recommend you to read our in-depth guide for a step-by-step tutorial on best practices on painting 3D printed parts.
Options for Coating Resin 3D Printed Parts
Liquid Polymer
For an installation in Times Square, Window to the Heart, the Formlabs and Aranda/Lasch teams worked with an auto body shop to spray coat each tile in Lesonal Universal Clear.
There are a number of liquid polymer coatings on the market that provide different degrees of smoothing and chemical resistance. They may be clear, tinted, or opaque; may be applied by dipping, brushing, or spraying; and may be based on different chemistries, such as epoxy, lacquer, and polyurethane. Generally, a clear spray coating is best to bring parts to a glistening finish.
Spray coatings should be applied only after the part has been meticulously sanded. When coating 3D printing parts, it is recommended to skip the curing process for Clear Resin, as it can sometimes cause yellowing in parts. If the part you are coating is going to be used for pure aesthetics, then curing to bring out its mechanical properties may not be necessary. Instead of curing, a part should be left to air dry after an IPA and water wash. Once it’s completely dry, apply two to three spray coats in a dust-free environment.
Ceramic Coating
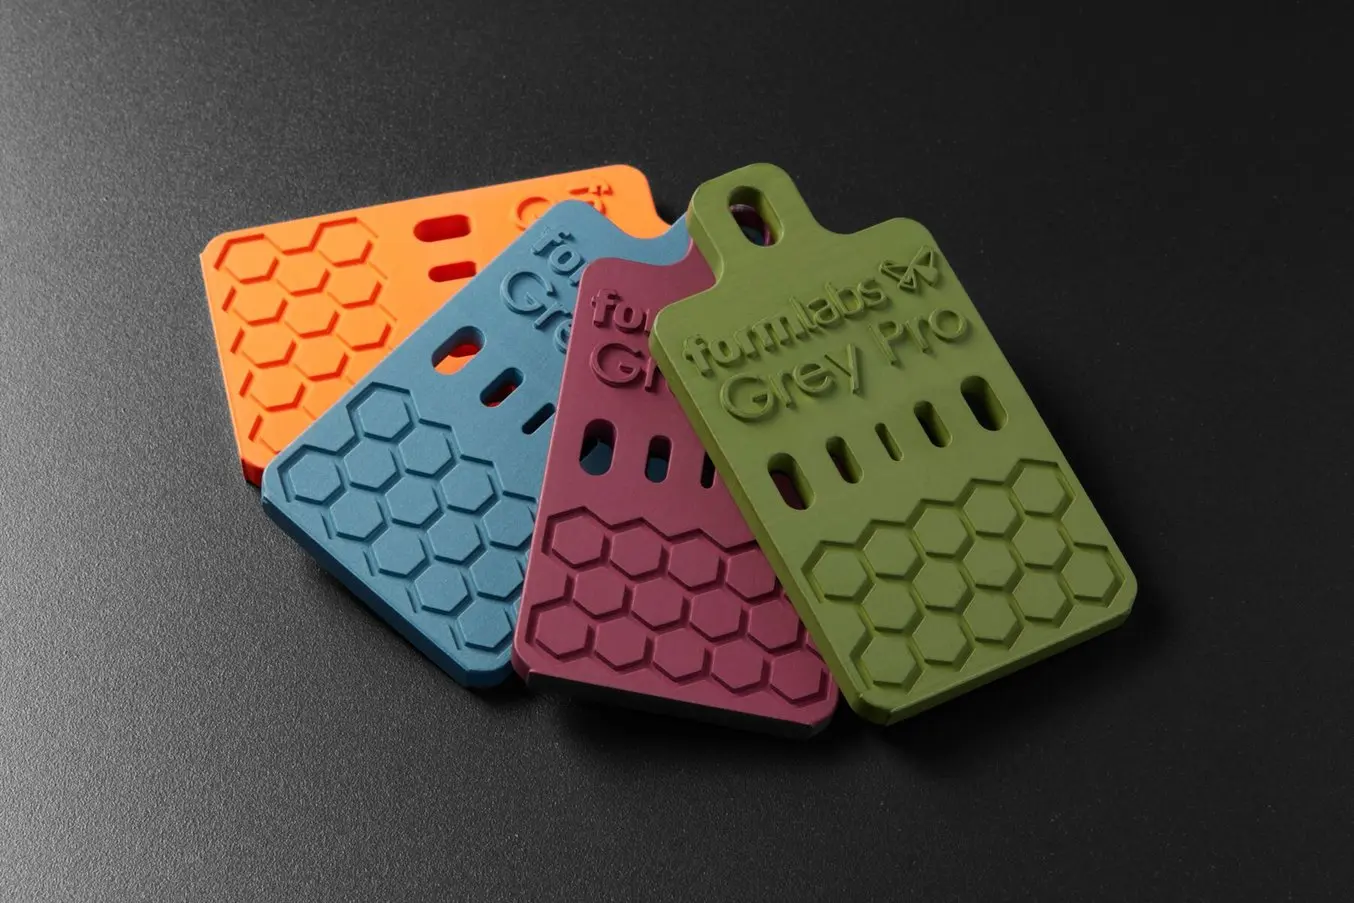
These samples, printed on the Form 3+ in Grey Pro Resin, have been Cerakoted - a process that improves both the surface finish as well as the strength, durability, UV, chemical, and heat resistance.
Ceramic coatings provide both performance and aesthetic benefits for a range of materials. Their inherent resistance to chemicals and temperature make ceramic coated parts ideal for a wide range of industries, such as automotive and aerospace, where extreme environments can damage parts, as well as consumer products, where superior surface is highly important.
Cerakote is a thin, high-performance ceramic coating developed by NIC Industries that provides numerous mechanical and aesthetic advantages. To learn more about Cerakoting your SLA parts, download our white paper or watch the webinar with Cerakote manufacturer NIC Industries.
Complete Guide to Cerakote: Ceramic Coating for SLA and SLS 3D Printed Parts
This whitepaper will cover how to coat stereolithography (SLA) and selective laser sintering (SLS) 3D printed parts through the Cerakote process.
Electroplating
Electroplating is an electro-chemical process in which metal ions are deposited in a thin layer on the surface of a part. Electroplating surfaces significantly strengthens the underlying parts and improves material resistance to wear, UV exposure, and corrosion. This is excellent for end-use parts, and is a cheaper alternative to metal 3D printing.
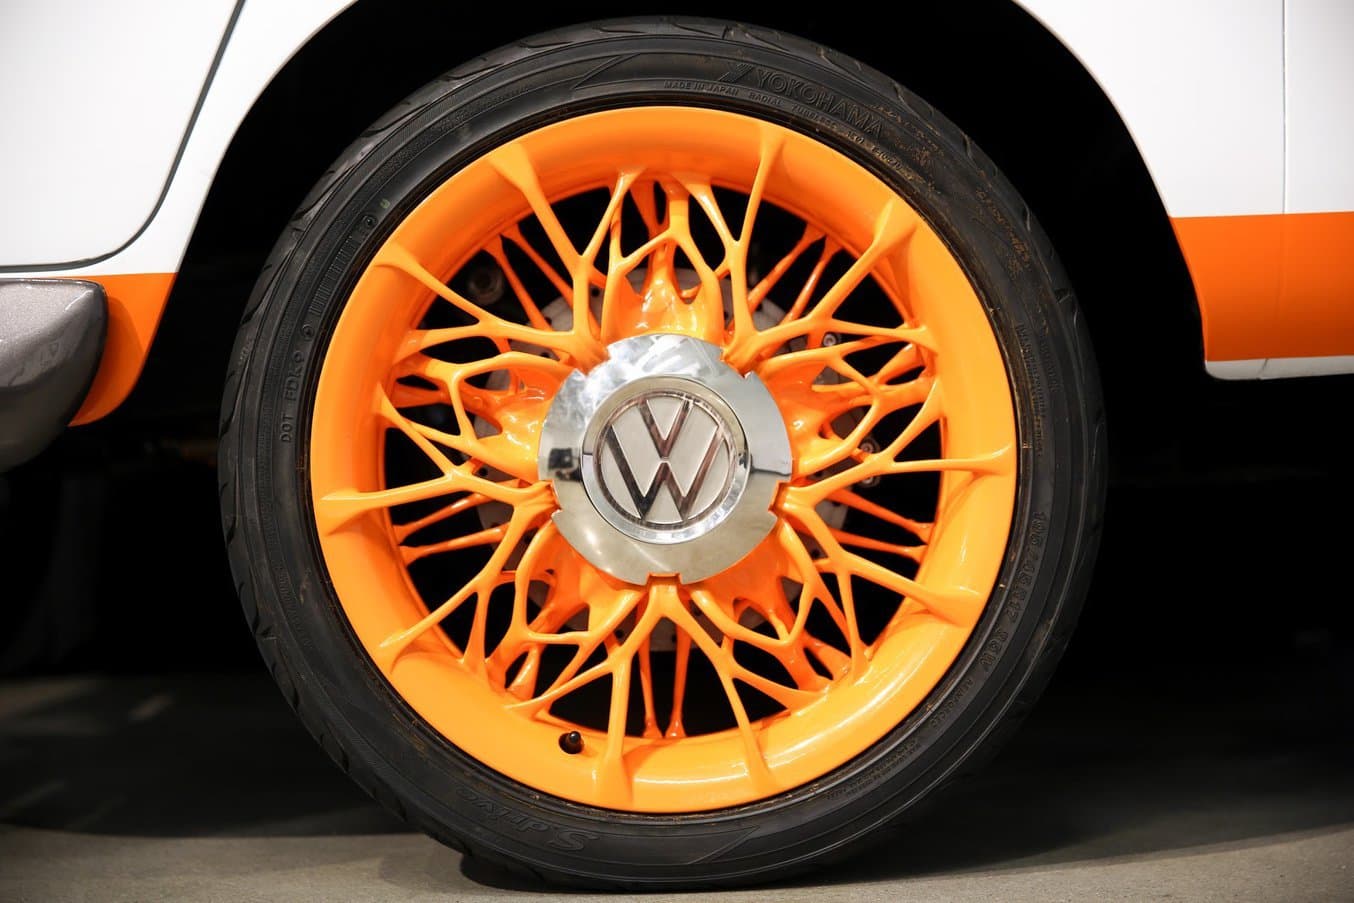
The electroplated hubcaps not only look and feel like metal, but the plated surfaces significantly strengthen their underlying parts and improve material resistance to wear, UV exposure, and corrosion.
Volkswagen 3D printed hubcaps on a Formlabs desktop SLA 3D printer for a concept vehicle using Clear Resin, then electroplated them with a 0.004-inch-thick layer of nickel. The resulting parts look and feel like metal, but they could be produced quickly as designs evolved, with minimal geometric constraints.
Elliptika, a designer of state-of-the-art custom filters and antennas that are used for research and development in the automotive, defense, medicine, and education industries, uses 3D printing and electroplating to manufacture high-performance antennas, cutting cost and lead time by more than 90%. To learn more about electroplating, download the full white paper.
Strength from Metal: Strategies and Use Cases for Electroplating SLA Parts
Read on to learn how engineers are adding metal to resin 3D prints, and why hybrid metal parts can open doors to a surprising range of applications, including (but not limited to) end-use strength and durability.
Learn More About SLA 3D Printing
The power, accuracy, and range of materials that SLA 3D printers provide enable designers, engineers, and manufacturers to leverage the technology in almost any application. As these applications expand, aesthetic and mechanical demands change. Post-processing methods can help advance your SLA parts from standard polymer to high-performance parts tailored to advanced end-use applications, all at a low cost and with a simple workflow.
Download our white paper to learn more about SLA 3D printing. Want to hold a high-quality SLA part in your hands? Order a free sample part below.
Not sure which 3D printing solution fits your business best? Book a 1:1 consultation to compare options, evaluate ROI, try out test prints, and more.