LIVRE BLANC
Formlabs Logo

Messages d’erreur de la Form Auto

Messages d’erreur de la Form Auto

Si l’imprimante ou la Form Auto rencontrent des anomalies, l’écran tactile de l’imprimante affiche des messages d’erreur et plus de détails sur l’erreur. Pour plus d’informations sur les messages d’erreur de l’imprimante, consultez la page Messages d’erreur de la Form 3/Form 3B.

Conseil :

Pour déterminer si une erreur est causée par la Form Auto ou l’imprimante, débranchez la Form Auto et voyez si l’erreur se reproduit.

Configurez les paramètres de Dashboard pour recevoir des notifications par SMS ou par e-mail à propos des erreurs listées dans cet article et d’autres événements relatifs à l’impression.

Collecte des fichiers diagnostic

Les imprimantes Formlabs tiennent à jour des fichiers diagnostic afin de fournir des informations détaillées sur l’imprimante. Joignez ces fichiers diagnostic, ainsi que les autres observations et détails pertinents, lorsque vous contactez l’assistance Formlabs ou votre revendeur agréé afin d’accélérer la résolution de votre problème.

Pour accéder aux fichiers diagnostic de l’imprimante installée sur votre Form Auto, tournez l’imprimante en position de l’écran tactile.

Pour les imprimantes connectées à Internet via une connexion Wi-Fi ou Ethernet active :

  1. Appuyez sur l’icône de la clé anglaise en bas à gauche de l’écran Home (Accueil) de l’imprimante. L’écran Settings (Paramètres) s’affiche.
  2. Appuyez sur System (Système). L’écran System (Système) s’affiche.
  3. Appuyez sur Upload Diagnostic Info (Charger les fichiers infos de diagnostic). Un message de confirmation du chargement des fichiers infos de diagnostic s’affiche.
  4. Appuyez sur Next (Continuer) pour démarrer le chargement. Un message de confirmation apparaît lorsque le chargement est terminé.
  5. Si l’imprimante affiche un message d’erreur indiquant qu’elle ne peut pas charger les fichiers diagnostic, il se peut qu’il n’y ait pas assez d’espace de stockage sur l’imprimante pour le chargement. Supprimez des tâches d’impression de la Queue (File d’impressions) pour libérer suffisamment d’espace de stockage et charger les fichiers diagnostic.
  6. Redémarrez l’imprimante et réessayez.

Pour les imprimantes non connectées à Internet :

  1. Ouvrez PreForm.
  2. Cliquez sur Edit Job Setup (Modifier la configuration de la tâche). La fenêtre Job Setup (Configuration tâche) s’ouvre.
  3. Sélectionnez le nom de série de l’imprimante.
  4. Cliquez sur Download Logs (Télécharger les fichiers diagnostic). Une fenêtre de confirmation apparaît.
  5. Cliquez sur Browse (Parcourir) pour télécharger les fichiers diagnostic à l’emplacement souhaité sur votre ordinateur.
  6. Cliquez sur OK. Les fichiers diagnostic sont enregistrés et s’affichent au format crypté FORMLOGS.
  7. Envoyez le fichier en pièce jointe lorsque vous contactez l’assistance Formlabs ou votre revendeur agréé.
  8. Si PreForm affiche le message ERROR_BAD_STATE, il se peut que l’espace mémoire sur l’imprimante ne soit pas suffisant pour le chargement. Supprimez des tâches d’impression dans Queue (File d’impressions) pour libérer suffisamment d’espace de stockage et charger les fichiers diagnostic.
  9. Redémarrez l’imprimante et réessayez.

En savoir plus sur les options de connexions réseau et hors réseau.

L’imprimante n’est pas alignée
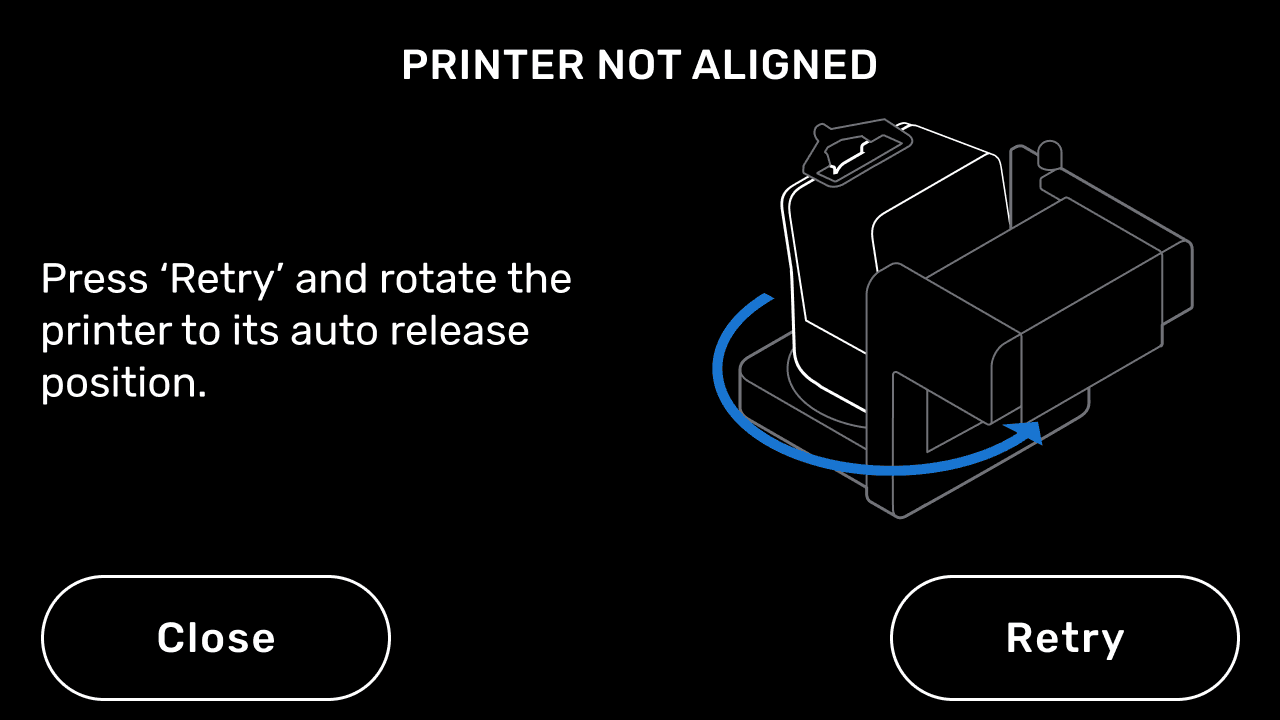
Message d’erreur de la Form Auto : L’imprimante n’est pas alignée

L’imprimante doit se trouver face à l’enceinte de retrait des pièces pour permettre la récupération automatique des pièces imprimées. L’imprimante affiche le message d’erreur Printer not aligned (Imprimante non alignée) si elle n’est pas orientée vers l’enceinte de récupération des pièces à la fin d’une impression. Tournez l’imprimante en position d’impression (face à l’enceinte de retrait des pièces) et appuyez sur Retry (Réessayer).

Échec de retrait des pièces

Message d’erreur de la Form Auto : Erreur moteur
Message d’erreur de la Form Auto : Échec de retrait de la pièce

Si la Form Auto ne peut pas libérer automatiquement une pièce imprimée après plusieurs tentatives, l’imprimante affiche le message d’erreur Part removal failure (Échec du retrait de la pièce) ou le message Motor error (Erreur du moteur).

Récupérez vos pièces imprimées manuellement, puis réinsérez la plateforme de fabrication et continuez à imprimer. Pour récupérer vos pièces imprimées :

Erreur de communication

Message d’erreur de la Form Auto : Erreur de communication

L’imprimante affiche le message d’erreur Communication error (Erreur de communication) si elle ne peut pas communiquer avec la Form Auto. Vérifiez que le câble USB de la Form Auto est bien connecté au port USB situé à l’arrière de l’imprimante. Pour résoudre ce problème :

  1. Inspectez le port USB de l’imprimante et la prise USB de la Form Auto pour vérifier qu’ils ne sont pas contaminés par de la résine liquide, par exemple. Lorsque la Form Auto et l’imprimante sont éteintes, nettoyez le port ou la prise USB si nécessaire avec une petite quantité d’alcool isopropylique. Laissez le port ou la prise sécher complètement avant de procéder au test.
  2. Essayez de connecter une autre imprimante à la Form Auto, si une autre est disponible.
    • Si une seule imprimante ne peut pas communiquer avec la Form Auto, il se peut que son port USB doive être remplacé. Contactez l’assistance Formlabs ou votre revendeur agréé.
    • Si aucune imprimante ne peut communiquer avec la Form Auto, continuez.
  3. Retirez le portique arrière de la Form Auto pour accéder à la carte mère. Suivez les instructions du guide Remplacement de la carte mère de la Form Auto [EN] [DE] [ES] [FR] [IT] [JA] [ZH].
  4. Débranchez le câble USB du côté gauche de la carte mère.
  5. Branchez un autre câble USB-A vers USB-B, tel que celui fourni avec les imprimantes de génération Form 3, directement dans l’imprimante et dans la carte mère de la Form Auto.
    • Si l’imprimante peut maintenant communiquer avec la Form Auto, faites passer le câble par la base de la Form Auto pour remplacer le câble USB d’origine.
    • Si l’imprimante ne parvient toujours pas à communiquer avec la Form Auto, il se peut que la carte mère de la Form Auto soit endommagée ou défectueuse. Contactez l’assistance Formlabs ou votre revendeur agréé.

Erreur de moteur

Message d’erreur de la Form Auto : Erreur moteur

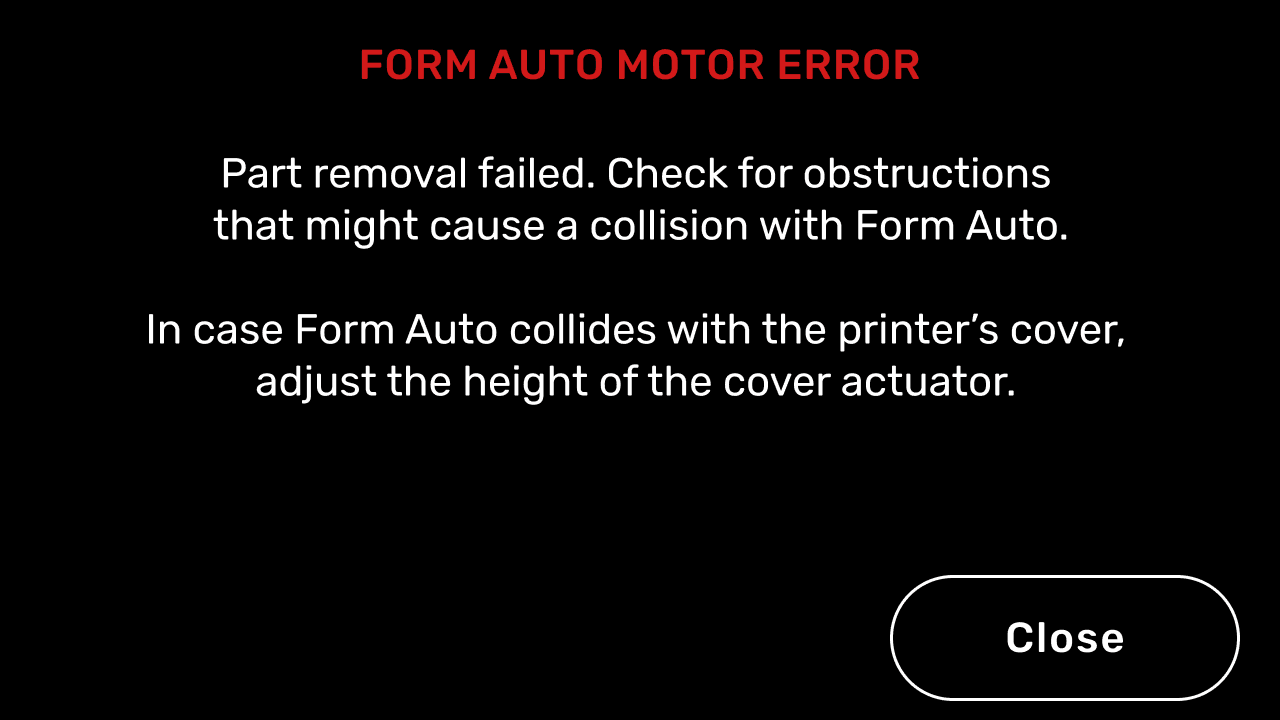
The printer displays a generic Motor error message if the Form Auto motors cannot move as expected. Check for obstructions around the printer and Form Auto that interfere with the movement of the cover or part removal mechanism. If the part removal mechanism interferes with the printer cover, adjust the cover actuator.

The printer may also display a more specific motor-related error, such as Error 357 (which indicates a general motor movement failure) or Error 358 (which indicates that a specific motor failed to reach its home position). These errors also have subcodes: Error 357/1 and 358/1 are related to the part removal mechanism, while Error 357/2 and 358/2 are related to the part release gantry. To resolve these errors:

Error 357

A generic Error 357 is not usually indicative of a more pervasive issue and can often be fixed by resetting and recalibrating the machine. This error and its subcodes occur when the printer sends a command to a motor and the encoder on the motor doesn't detect the expected movement after a few seconds.

  1. Power cycle the Form Auto using the power switch on the unit.
  2. Recalibrate the Form Auto. On the printer’s touchscreen, tap Settings > Form Auto > Calibrate Form Auto and follow the on-screen instructions.
  3. When the calibration is complete, run a test harvest. On the printer’s touchscreen, tap Settings > Form Auto > Run Print Removal Cycle.
  4. If the issue recurs, record a video of the print removal cycle showing the error and contact Formlabs Support or your authorized reseller. Include the video you recorded.

Error 357/1

Error 357/1 indicates an issue with the motor that closes and opens the part removal mechanism or its encoder.
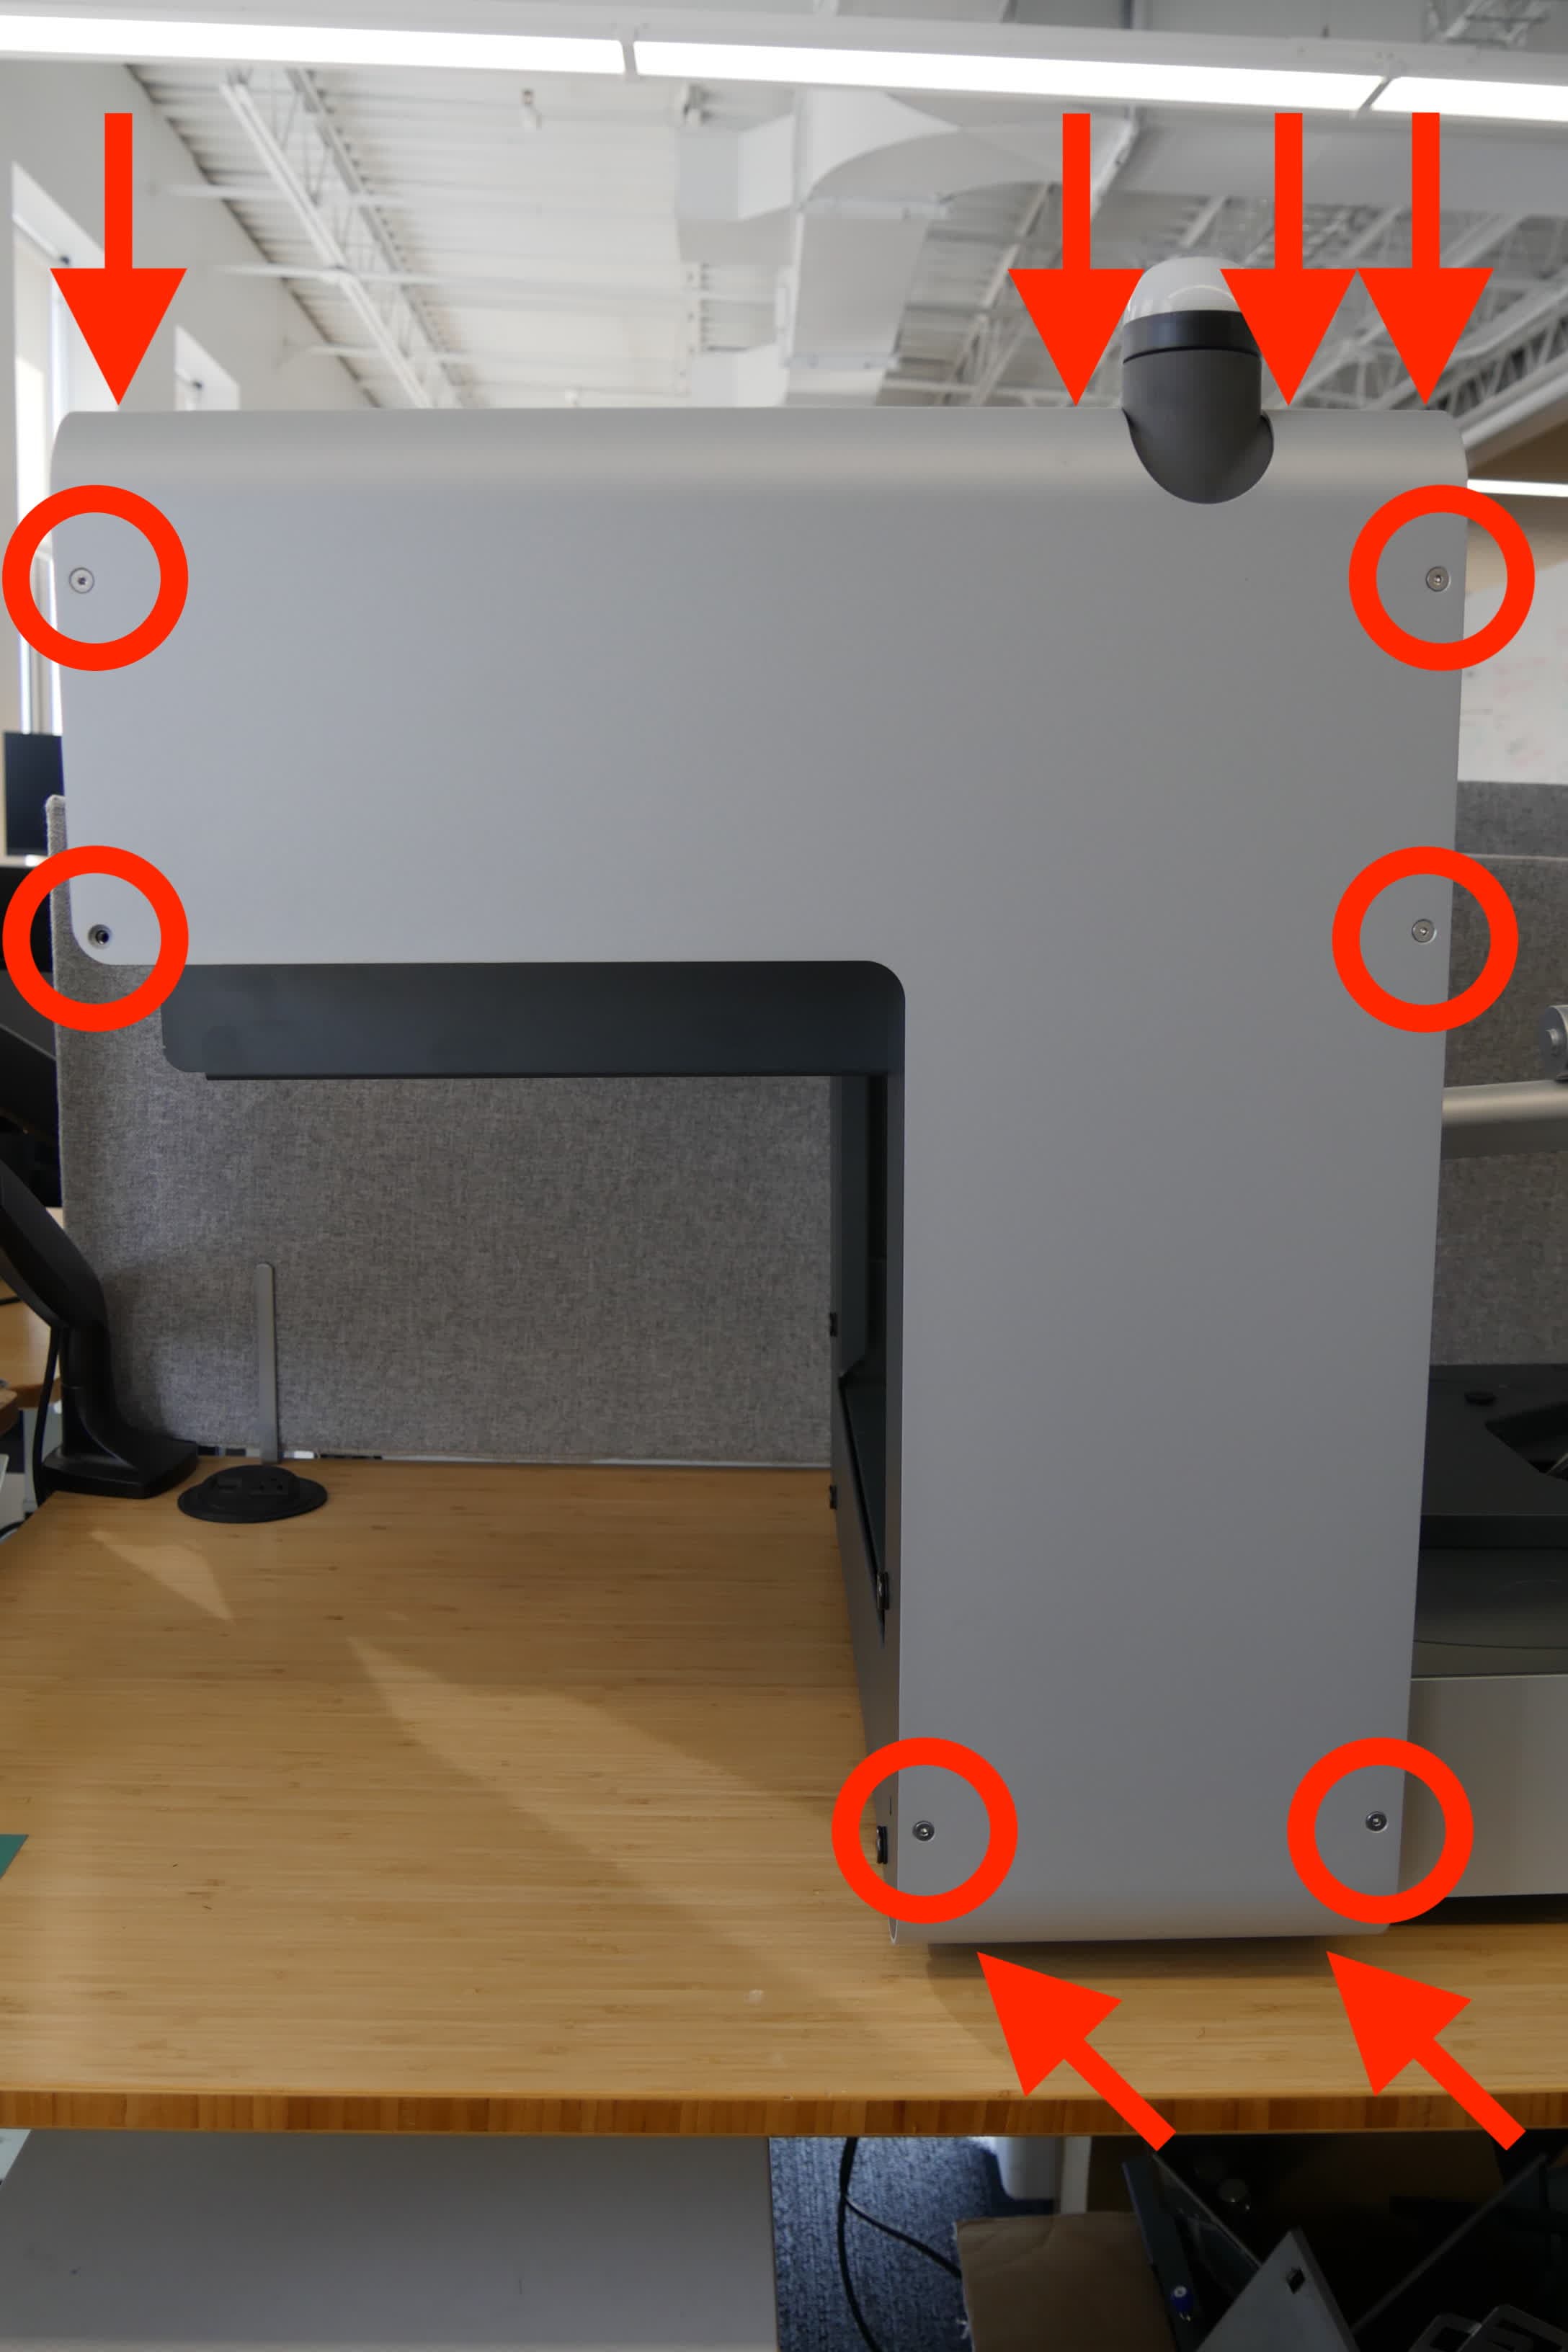
  1. Run a test harvest. On the printer’s touchscreen, tap Settings > Form Auto > Run Print Removal Cycle. Check if the part removal mechanism attempts to close or open at all.
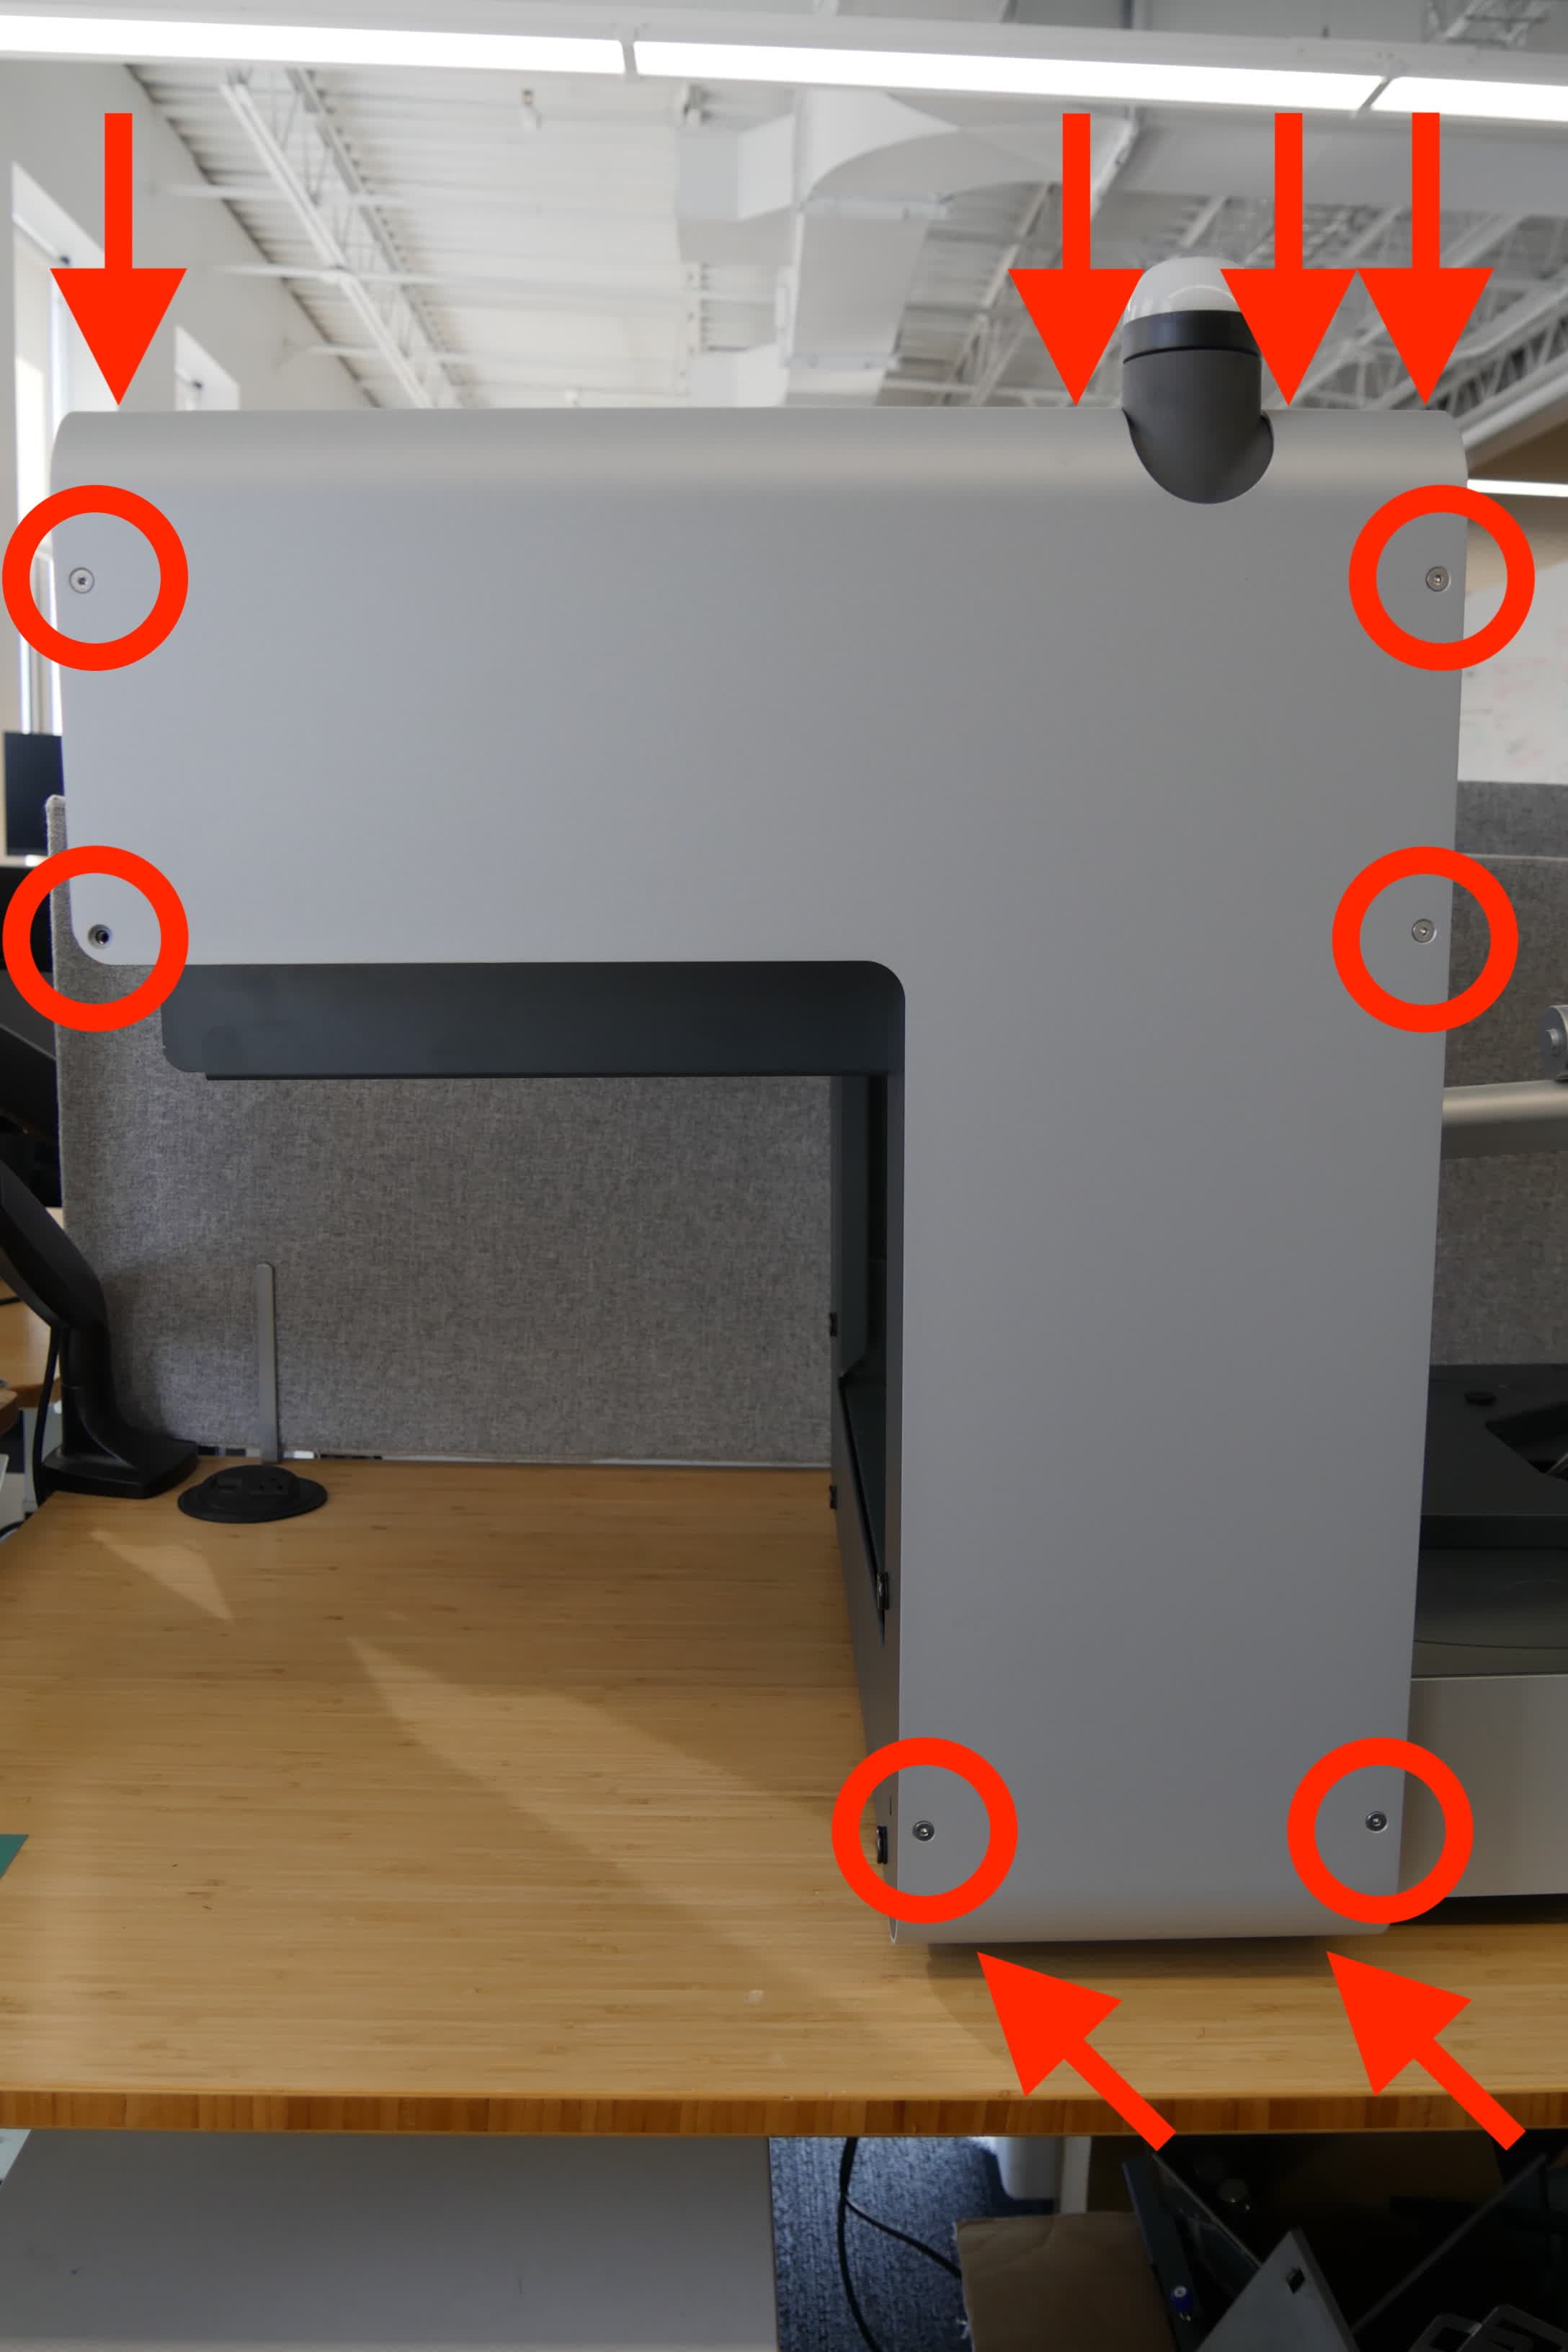
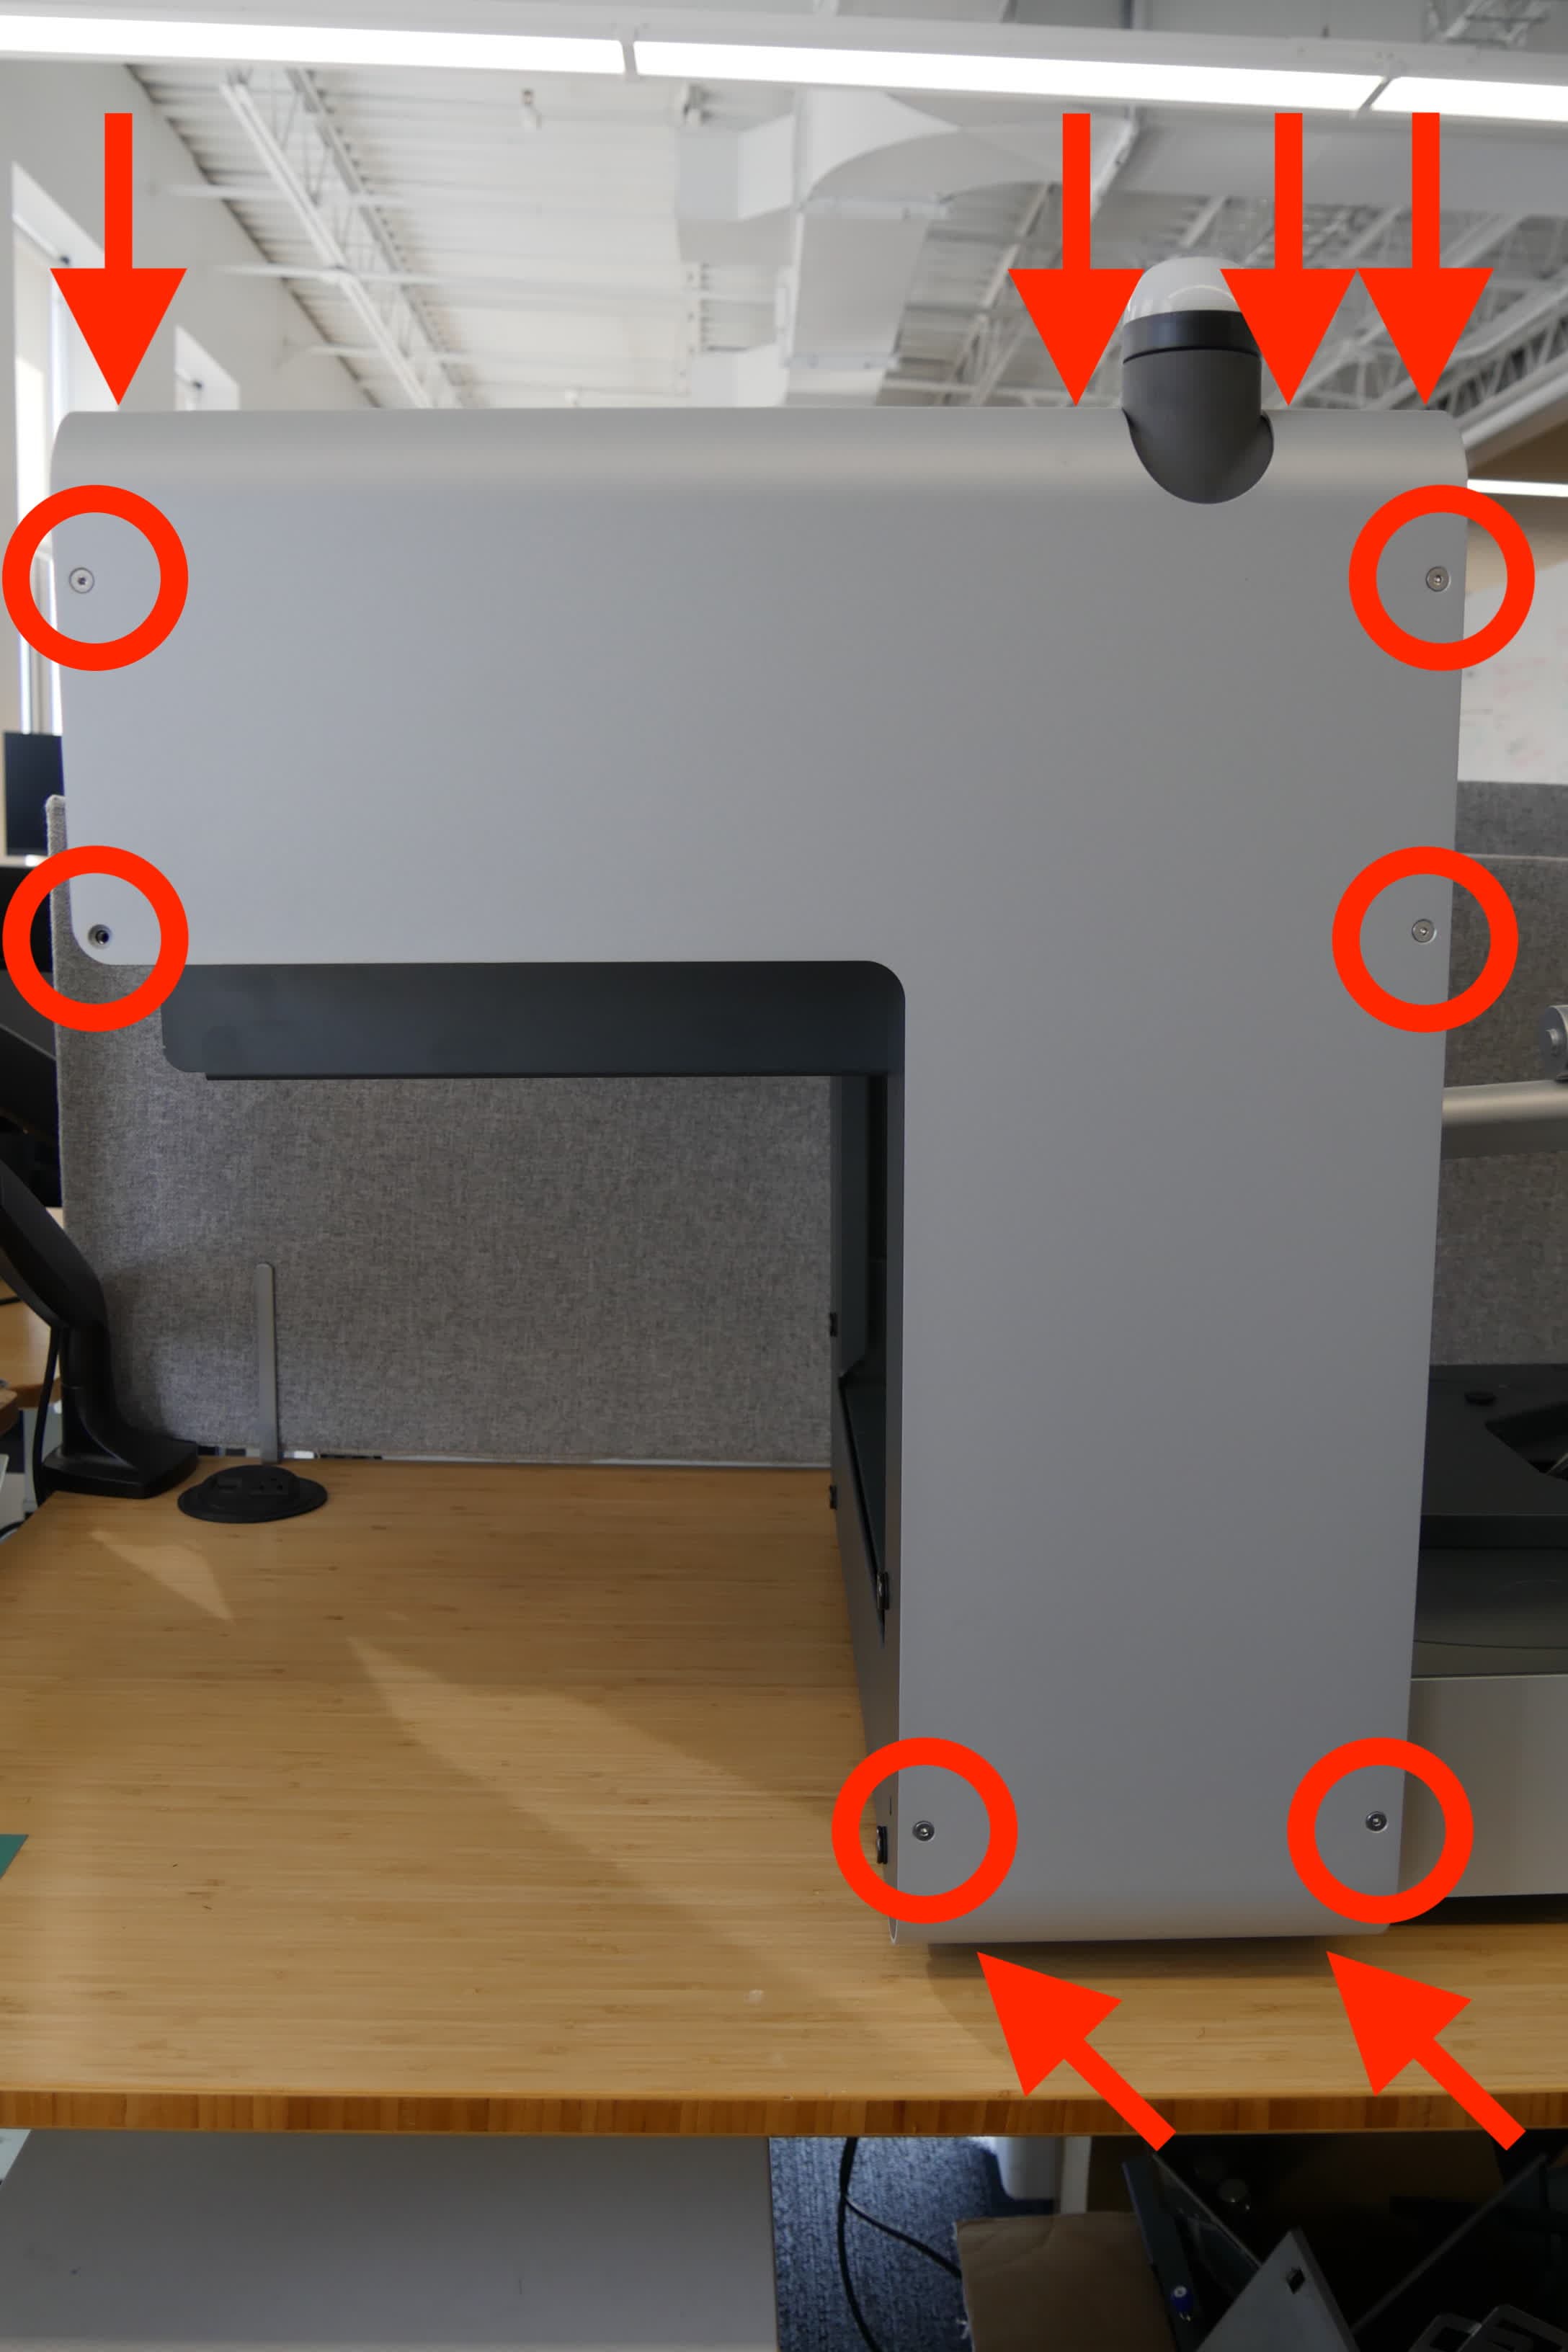
    1. If the part removal mechanism does move and the error appears while or after it squeezes the build platform part release paddles, there may be an issue with the motor encoder or limit switch. Power off and unplug the machine, remove the rear shell (on the same side as the power switch), and reseat both ends of the encoder and limit switch cables.
Form Auto rear shell screws
Form Auto print removal mechanism motor
    1. If the part removal mechanism stalls in an unusual place, power off and unplug the Form Auto and move the mechanism by hand to search for a physical obstruction. Replace the part removal mechanism if necessary.
    2. If the mechanism does not move, then the motor is likely the cause of the error. Power off and unplug the machine, remove the rear shell (on the same side as the power switch), and reseat both ends of the motor cable.
Form Auto rear shell screws
Form Auto print removal mechanism motor
  1. If the issue recurs, record a video of the print removal cycle showing the error and contact Formlabs Support or your authorized reseller. Include the video you recorded.

Error 357/2

Error 357/2 indicates an issue with the motor that moves the part removal mechanism towards and away from the printer (also known as the gantry motor) or its encoder.
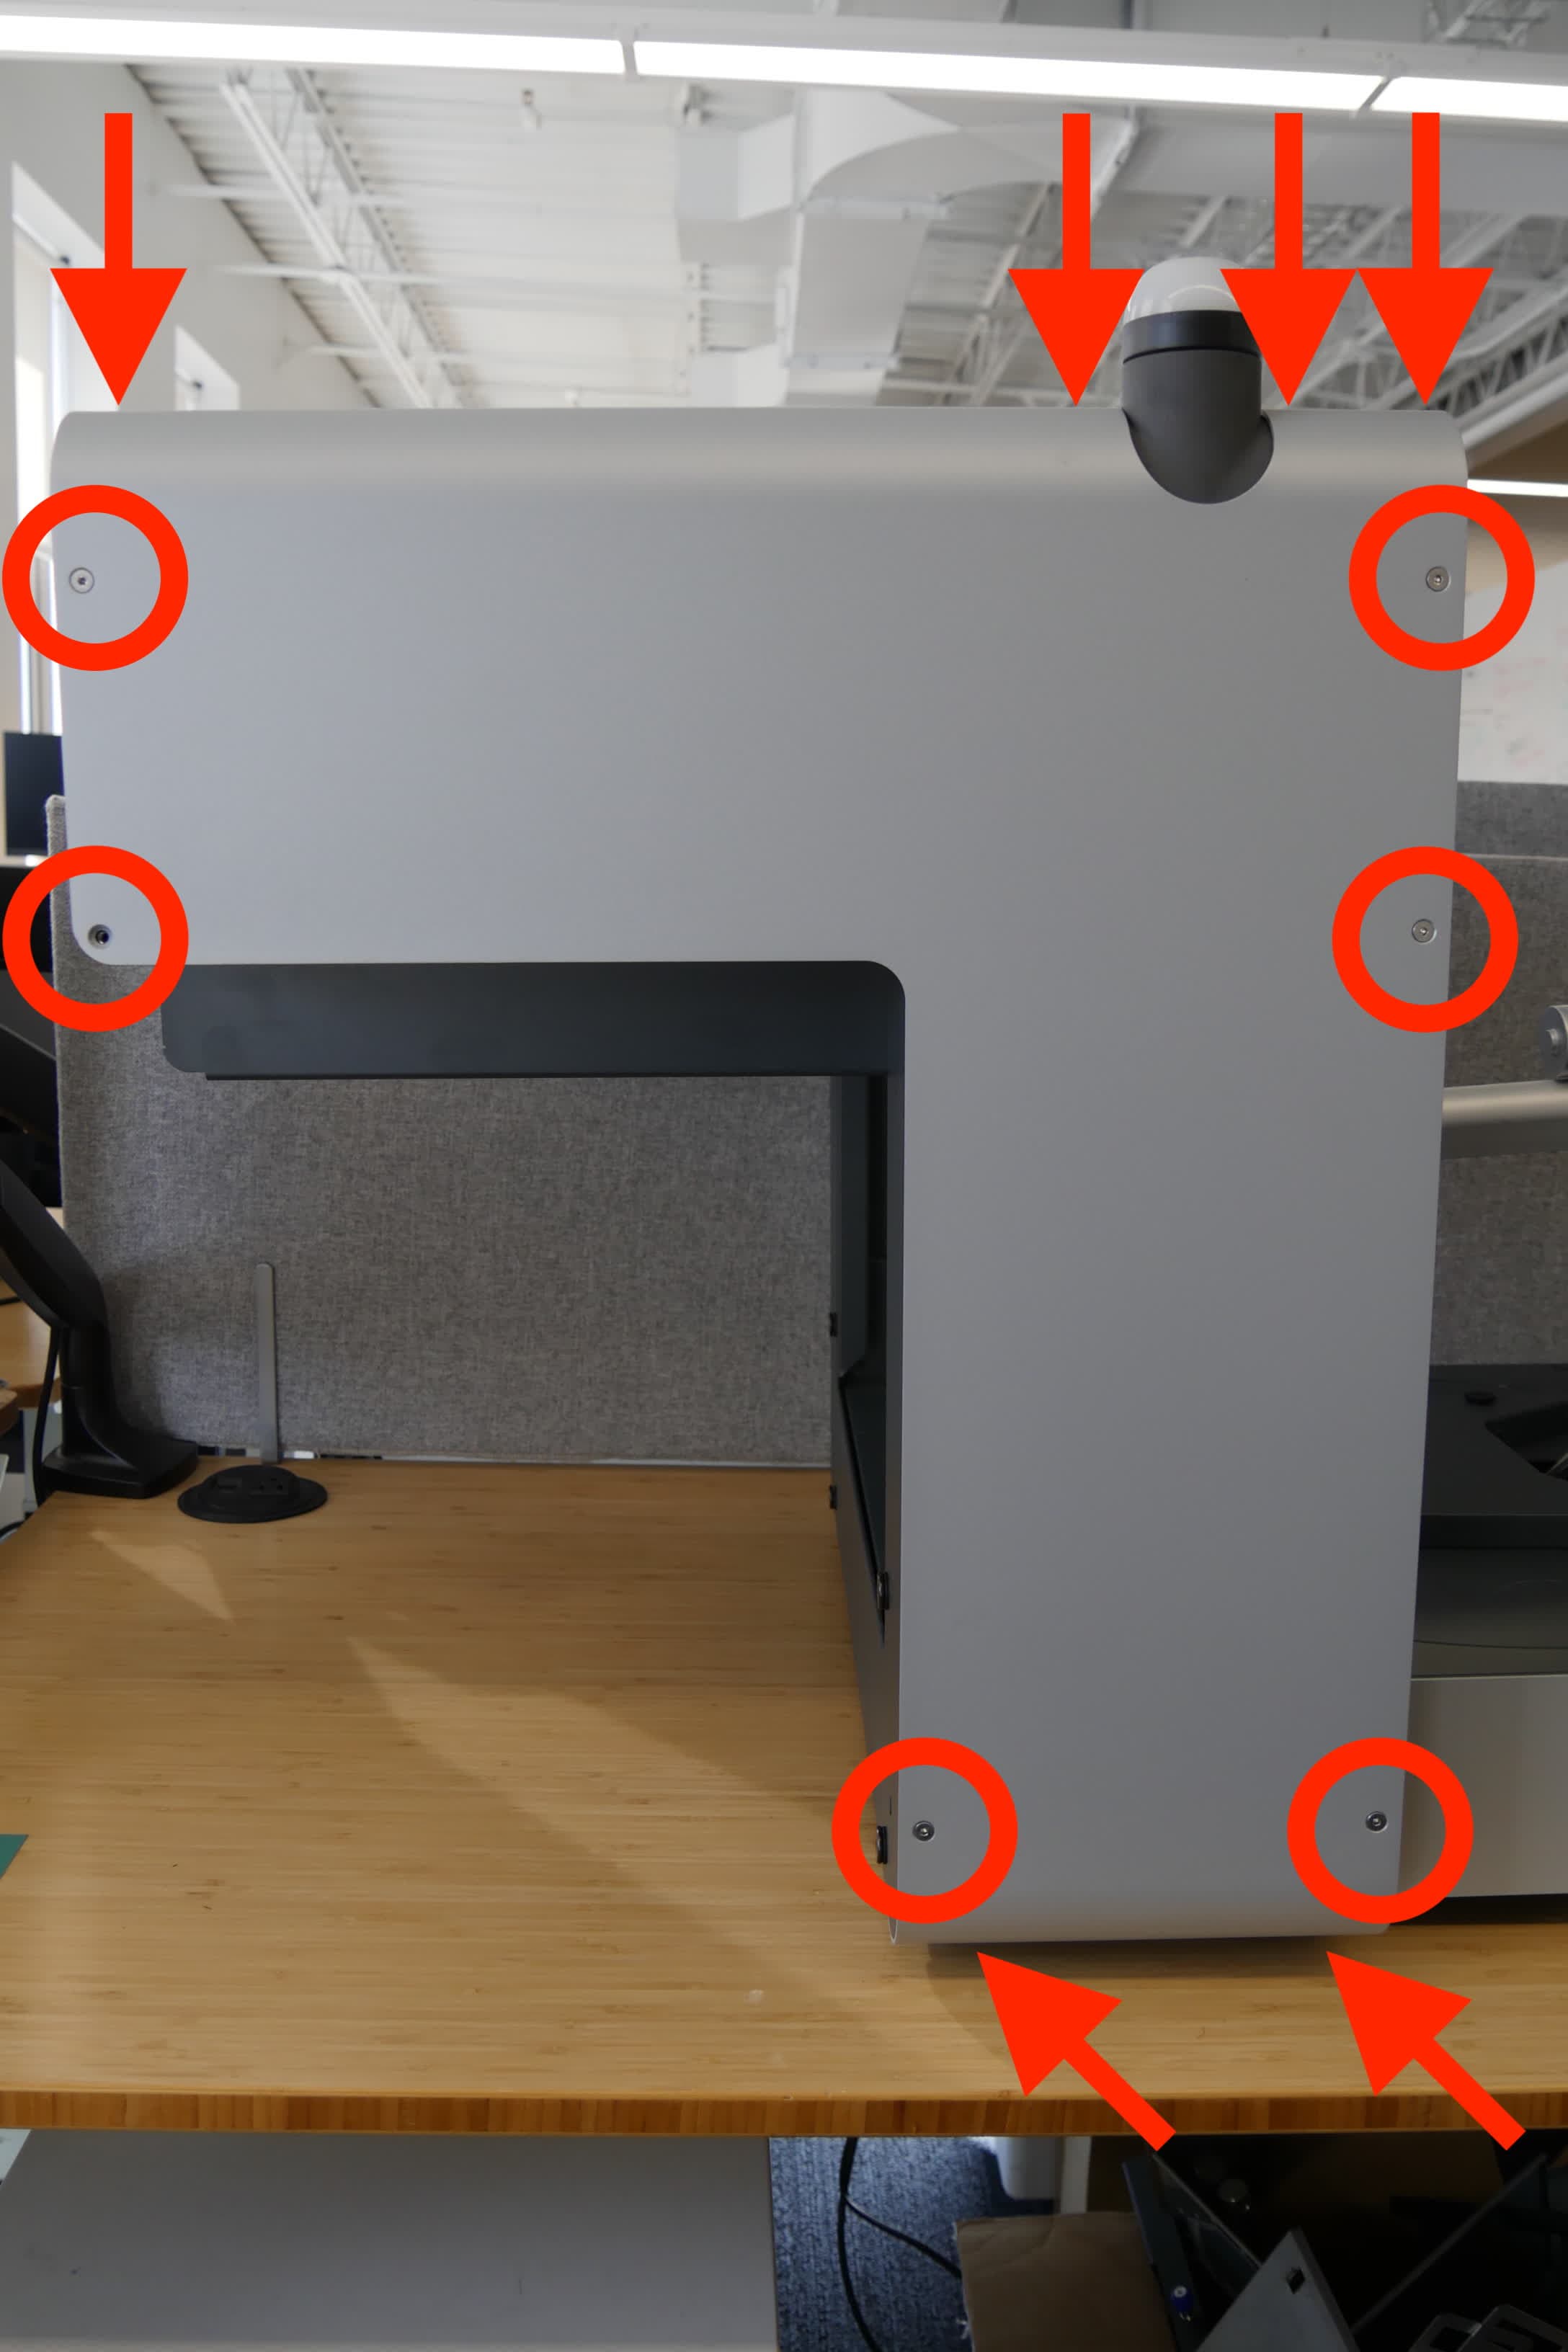
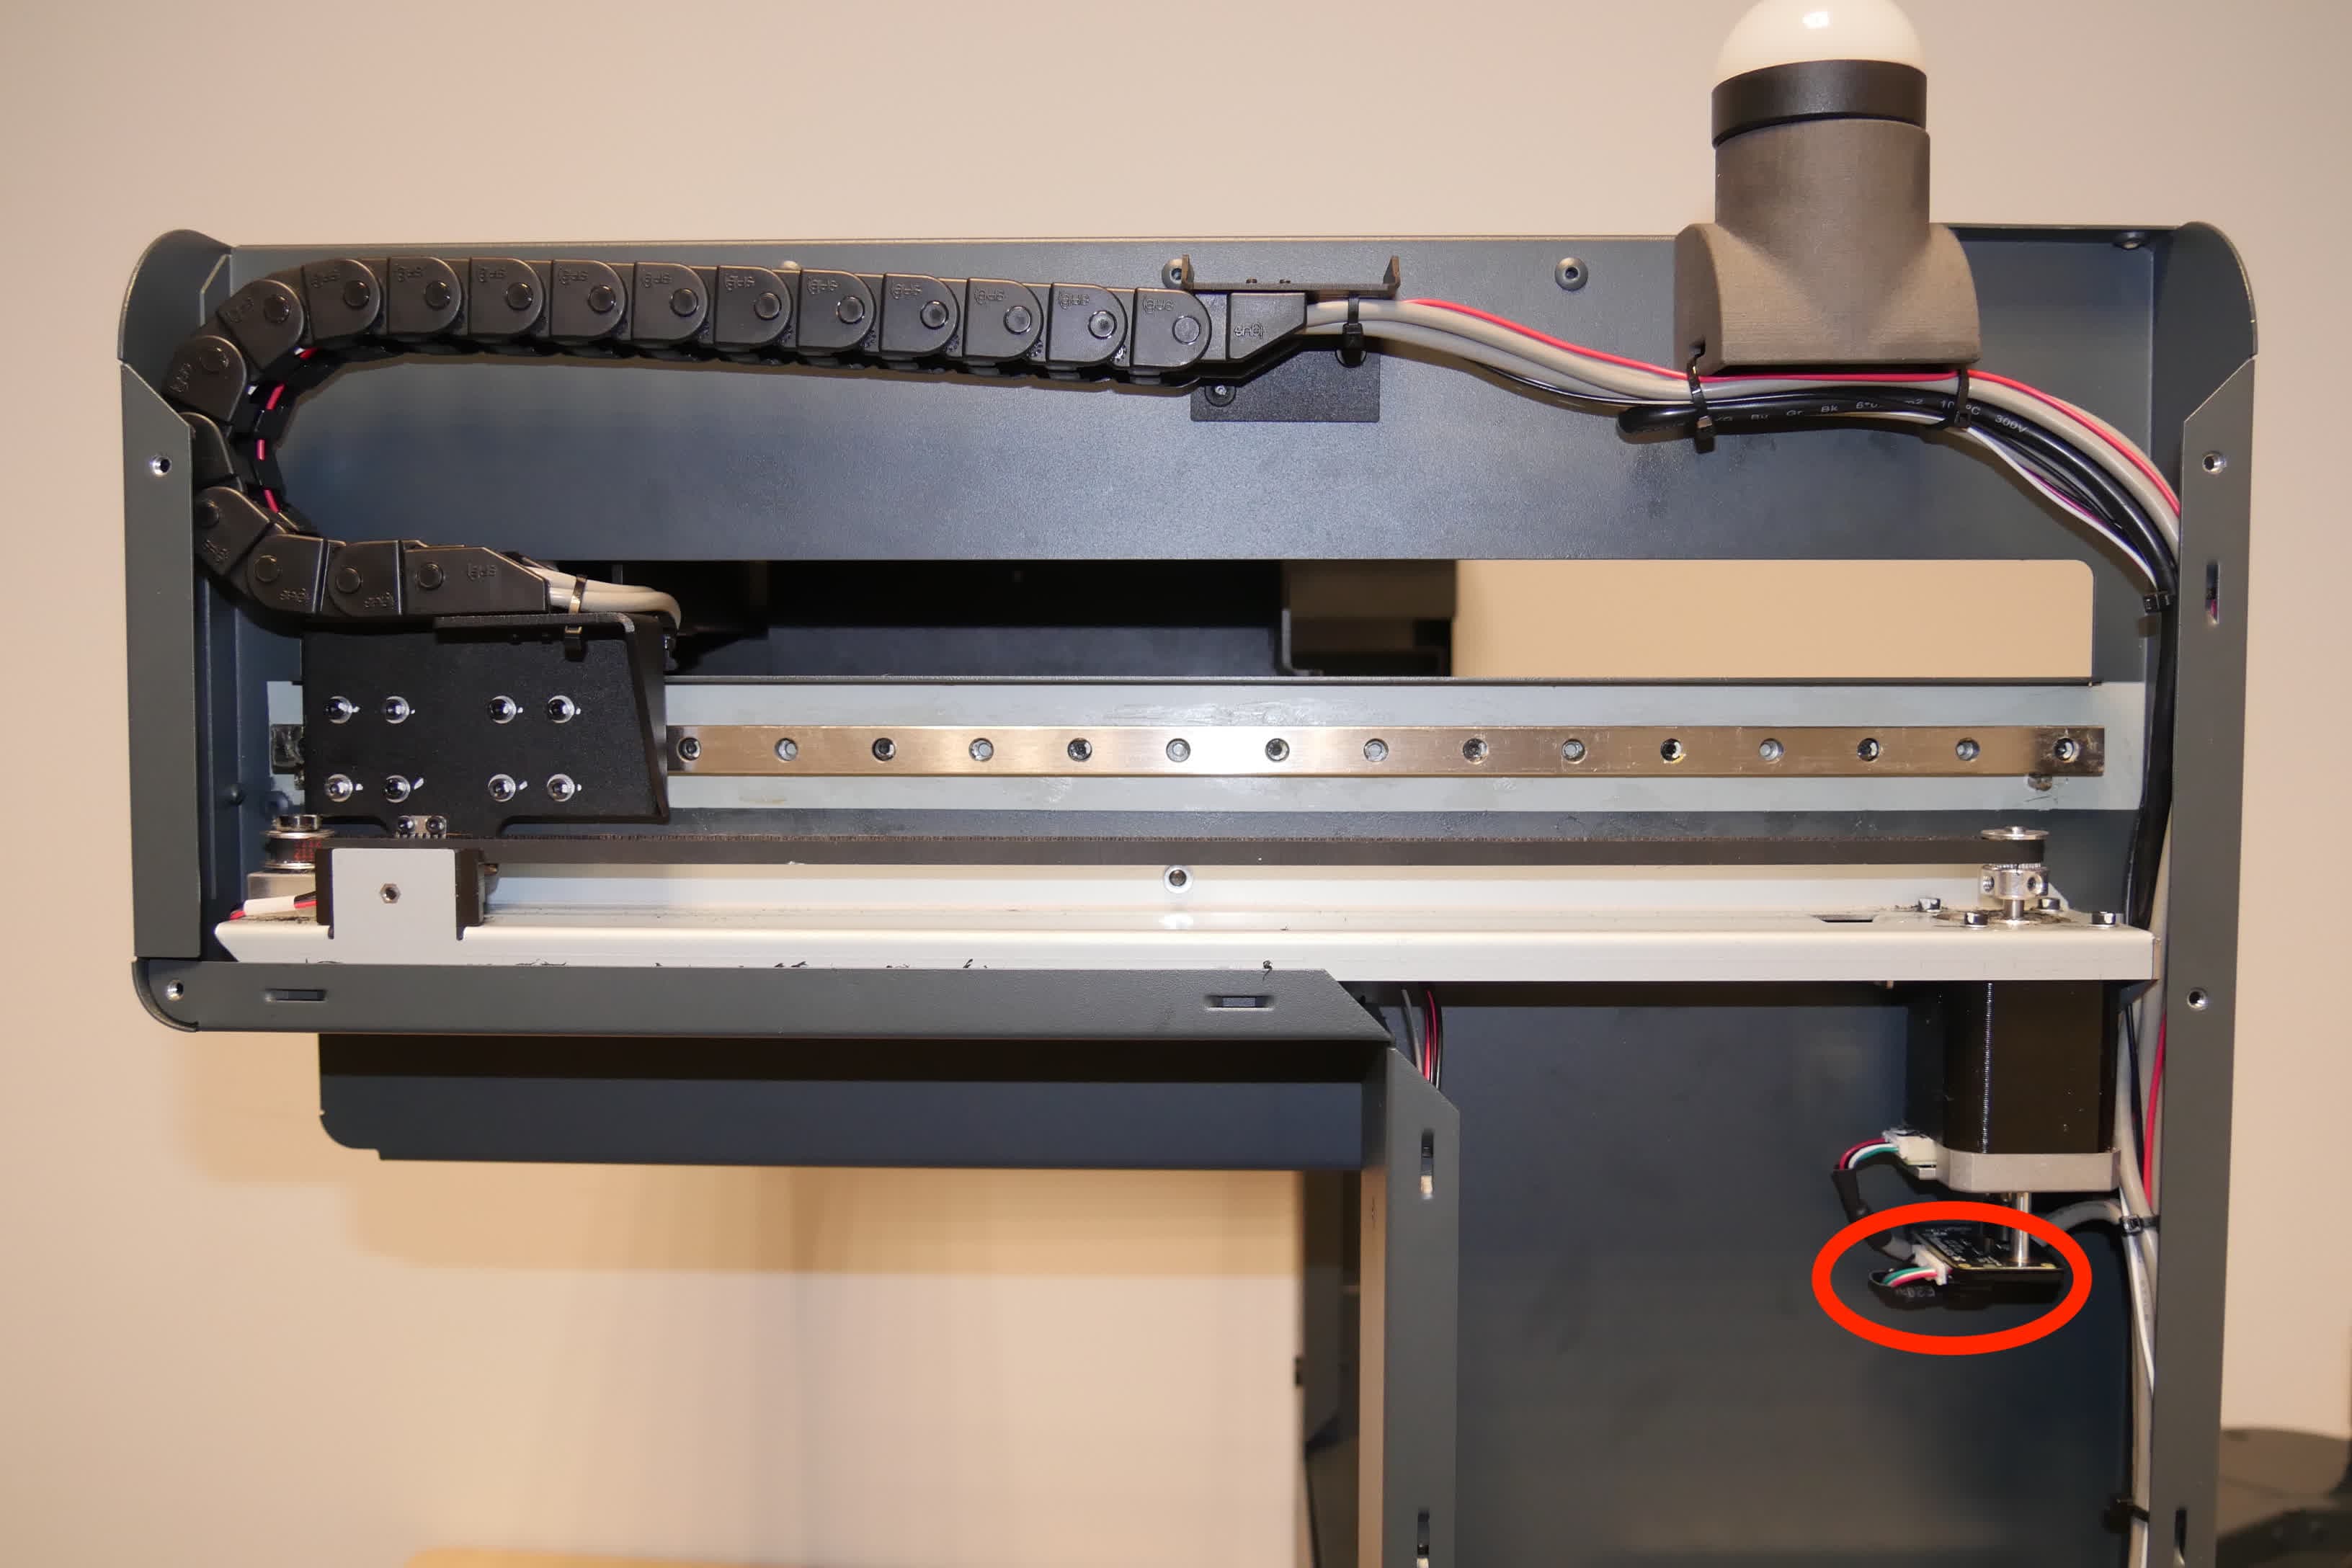
  1. Run a test harvest. On the printer’s touchscreen, tap Settings > Form Auto > Run Print Removal Cycle. Check if the gantry moves towards the printer at all during the cycle.
  2. If the gantry moves, the gantry motor encoder may be malfunctioning. Power off and unplug the machine, remove the rear shell (on the same side as the power switch), and reseat both ends of the encoder cable.
Form Auto rear shell screws
Form Auto gantry motor encoder
    1. If the gantry does not move, the motor may be malfunctioning. Power off and unplug the machine, remove the rear shell (on the same side as the power switch), and reseat both ends of the motor cable.
Form Auto rear shell screws
Form Auto gantry motor
  1. If there's any obvious physical issue with the gantry moving (e.g., a grinding noise, motor stalling noise, excessive resistance when moving the gantry by hand while the machine is powered off, etc.), the mechanism may be misaligned or the belt that drives the gantry may be damaged. Replace the gantry drive assembly if necessary.
  2. If the test harvest completes normally but the printer shows this error, contact Formlabs Support or your authorized reseller.

Error 358/1

Error 358/1 indicates that the motor that closes and opens the part removal mechanism failed to reach its home position.

  1. Check for obstructions around the printer and Form Auto.
  2. Re-rack the part removal mechanism by pulling the arms to the closed position, then reopening them.
  3. Inspect the part removal mechanism pulley and service it if it is slipping. Follow the instructions in the guide Proactively servicing the Form Auto part removal mechanism pulley [EN] [DE] [ES] [FR] [IT] [JA] [ZH].
  4. If the pulley axle is damaged, replace the part removal mechanism. Follow the instructions in the guide Replacing the Form Auto part removal mechanism [EN] [DE] [ES] [FR] [IT] [JA] [ZH]. Replacement part removal mechanisms are available on the Formlabs Store.

Error 358/2

Error 358/2 indicates that the motor that moves the part removal mechanism towards and away from the printer failed to reach its home position.

  1. Check for obstructions around the printer and Form Auto.
  2. Re-rack the part release gantry by pulling it fully towards the printer, then pushing it back to its home position.
  3. Inspect the gantry pulley and service it if it is slipping. Follow the instructions in the guide Repairing a slipping gantry pulley [EN] [DE] [ES] [FR] [IT] [JA] [ZH].
  4. If the pulley axle is damaged, replace the part release gantry. Follow the instructions in the guide Replacing the Form Auto gantry drive assembly [EN] [DE] [ES] [FR] [IT] [JA] [ZH]. Replacement part removal mechanisms are available on the Formlabs Store.

If you see any of these error messages repeatedly, contact Formlabs Support or your authorized reseller.

Form Auto non étalonnée
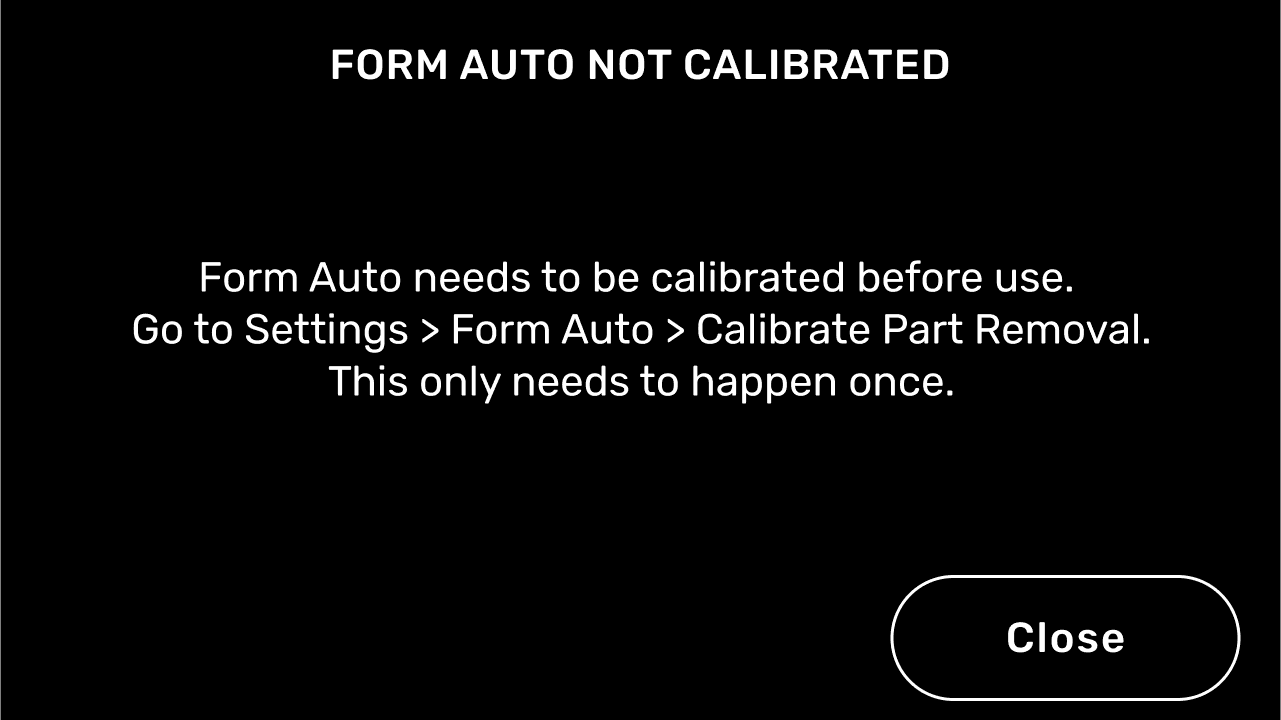
Message d’erreur de la Form Auto : Form Auto non étalonnée

La Form Auto doit être mise de niveau et étalonnée avant de lancer une impression. La routine d’étalonnage détecte l’emplacement exact de la Build Platform 2 par rapport à l’enceinte de retrait des pièces.

Appuyez sur l’icône de la clé sur l’écran
  1. Accueil. L’écran Settings (Paramètres) s’affiche.
  2. Appuyez sur Form Auto. L’écran Form Auto s’affiche.
  3. Appuyez sur Calibrate Part Removal (Étalonner le retrait des pièces). L’écran Calibration (Étalonnage) apparaît. Ne commencez pas le processus d’étalonnage sans avoir inséré une Build Platform 2 dans l’imprimante.
  4. Tournez l’imprimante pour la mettre en position d’impression.
  5. Appuyez sur
  6. Calibrate (Étalonner) pour lancer le processus d’étalonnage. Il se peut que vous n’ayez à étalonner la Form Auto que lors de la configuration initiale.