
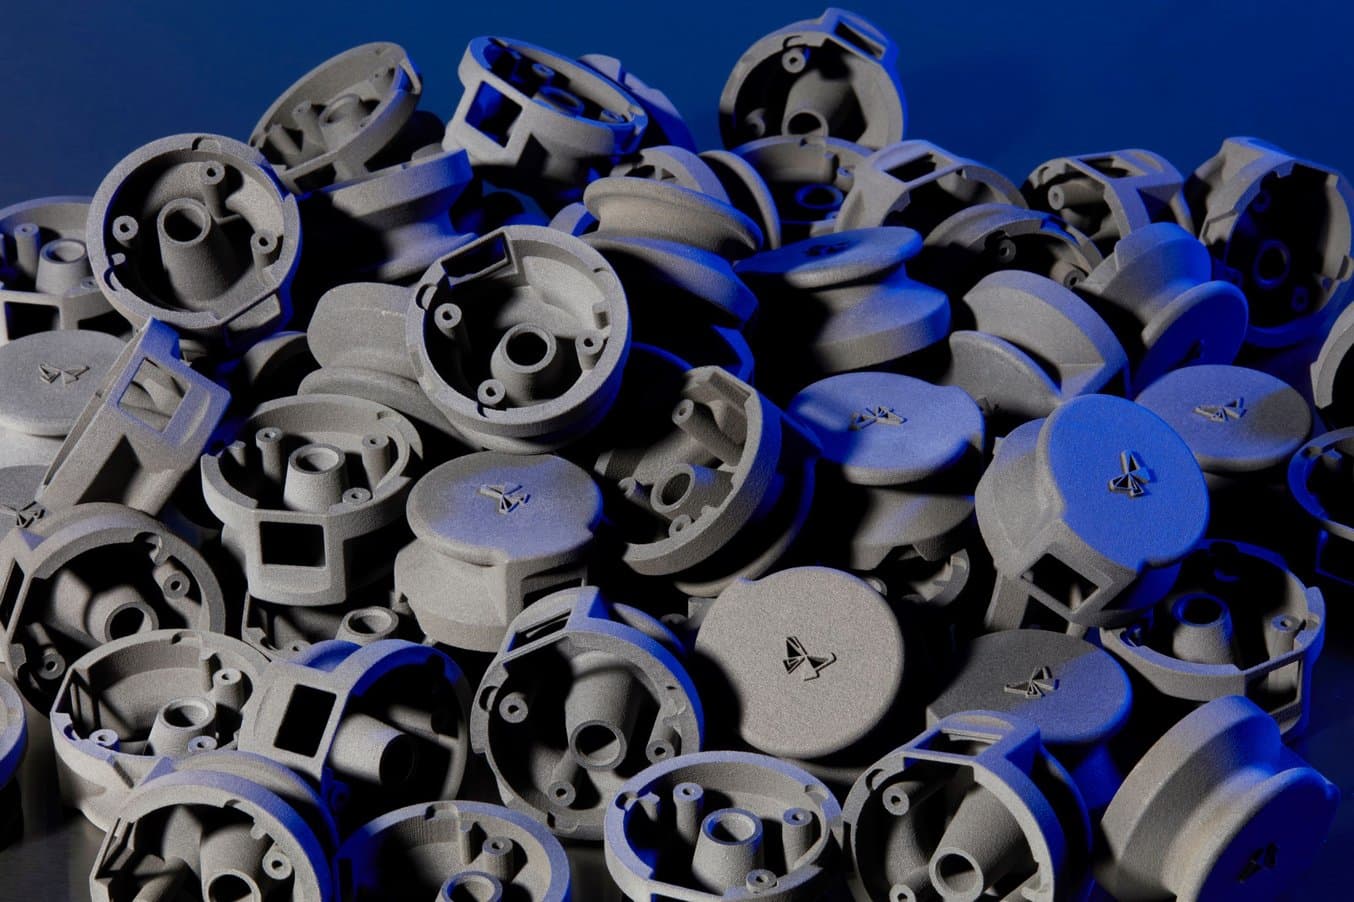
Just like any other fabrication technology, successful selective laser sintering (SLS) 3D printed designs are optimized for the SLS additive manufacturing process. Until now, SLS has been unavailable to most businesses, due to high costs and difficult workflows. At Formlabs, we’re changing the industry with the most approachable SLS 3D printing ecosystem yet, the Fuse 1+ 30W.
Design Guidelines for SLS 3D Printing
While SLS printing on the Fuse 1+ 30W has many advantages, such as no support material, isotropic material properties, and production-quality parts, SLS 3D printing comes with its own set of design guidelines and constraints. By following these practices and recommendations, you can get started printing successful parts as soon as your Fuse 1+ 30W is set up. Formlabs created the Fuse Series SLS Design Guide to share some of the most important considerations to keep in mind when designing parts to be printed on the Fuse 1+ 30W.
The Fuse 1+ 30W Design Guide covers:
- Reference dimensions for minimum feature sizes including holes, wall thicknesses, and embossed text
- Recommendations for designing successful prints that function as intended
- Strategies for orienting and packing parts within the Fuse 1+ 30W build chamber
How to Improve Your Designs for SLS 3D Printing
Like any other piece of manufacturing equipment, the Fuse 1+ 30W has its own set of part size constraints and minimum feature sizes. The Fuse 1+ 30W brings the quality and finish of industrial-grade SLS 3D printing down to an affordable price point, meaning that it can resolve fine, crisp features like small holes, embossed and engraved text, and thin walls. The Fuse Series Design Guide has the full list of minimum hole diameters, minimum wall thicknesses, engraved and embossed feature sizes, and more.
Designing Escape Holes
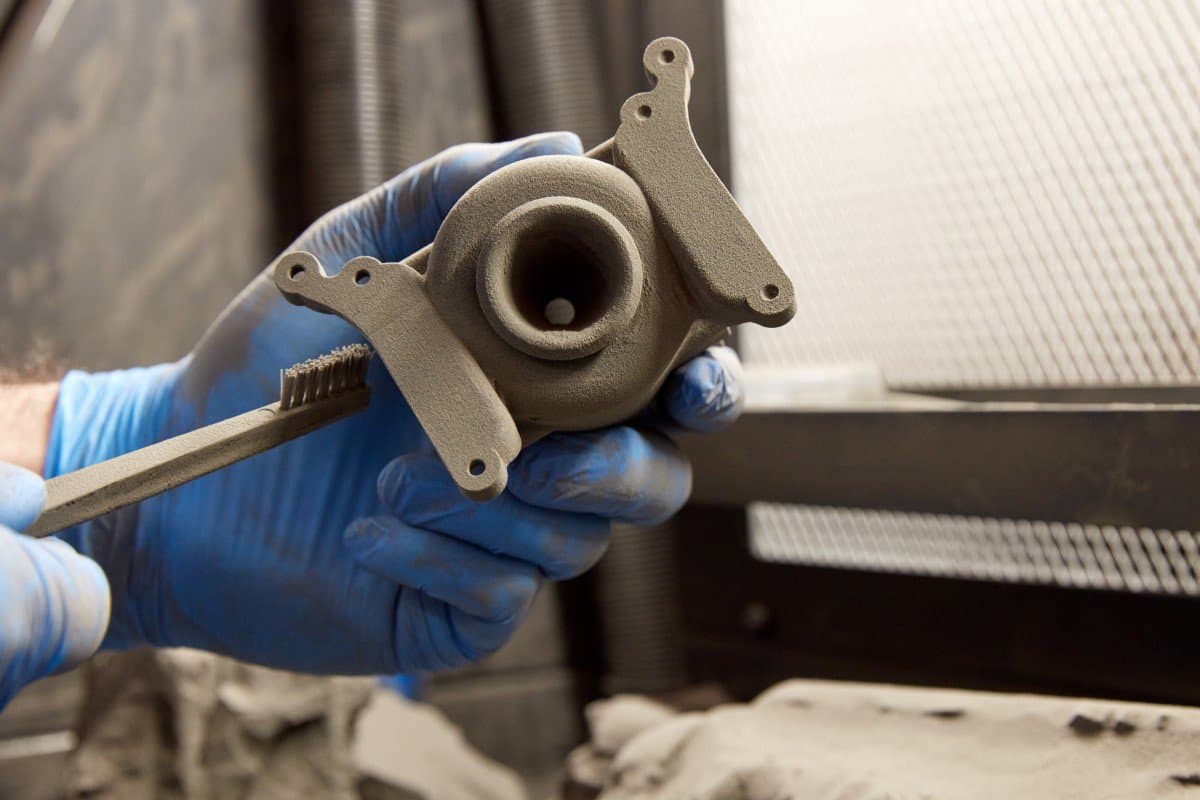
Escape holes are necessary to free unsintered powder from enclosed or deep cavities when cleaning parts in the Fuse Sift.
Because the Fuse 1+ 30W is an SLS machine, any enclosed cavities will remain filled with unsintered powder unless escape holes are designed into the part. While Formlabs recommends adding at least 2 escape holes to your printed enclosed cavities, more and larger escape holes make it easier to remove unsintered powder from internal cavities. To guarantee a clean internal surface, design your part so that the surface in question is easy to access with cleaning tools.
Maintaining Consistent Wall Thickness
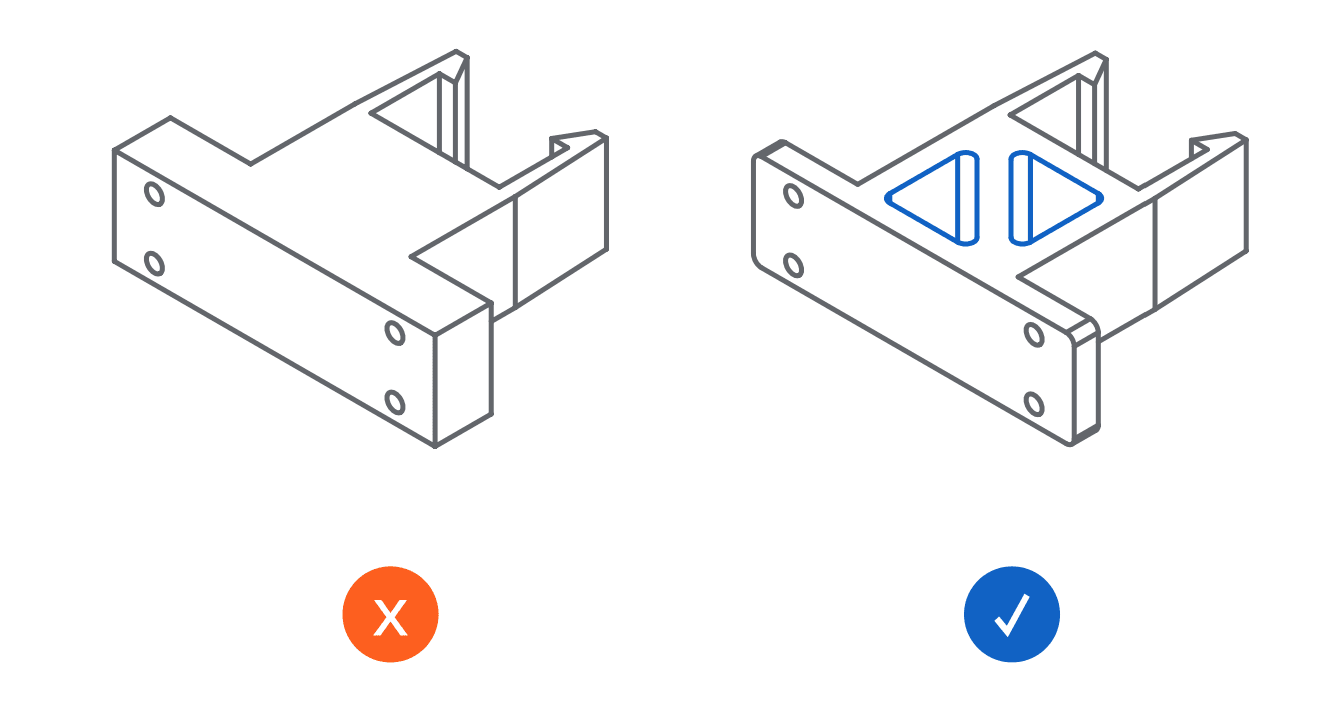
Shelling your parts to maintain a consistent wall thickness will reduce thermal stress buildup at large changes in cross-section.
Another aspect of design for SLS 3D printing to keep in mind is to maintain a consistent wall thickness. Since SLS is a sintering-based process, cooling times may differ depending on the thickness of the part, causing thermal stress concentrations around features with sharp changes in cross sectional area. Shelling your part and designing gradual edge transitions instead of sharp ones not only alleviates these thermal stresses, but also saves you material and print time.
Print-in-Place Assemblies
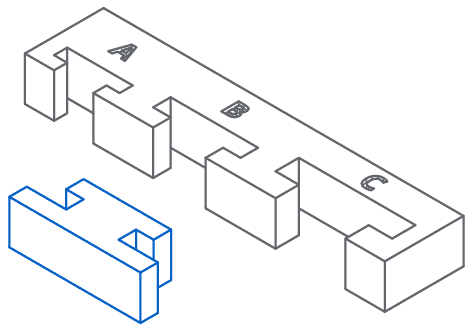
Since the printing process doesn’t require any support material, you can design print-in-place assemblies easily. This can make for unique, integrated designs that do not require assembly hardware and come out of the printer fully built. You can see many of these features in action in our Nylon 12 sample part, which has multiple moving printed-in-place components and details showing the Fuse 1+ 30W’s minimum feature sizes.
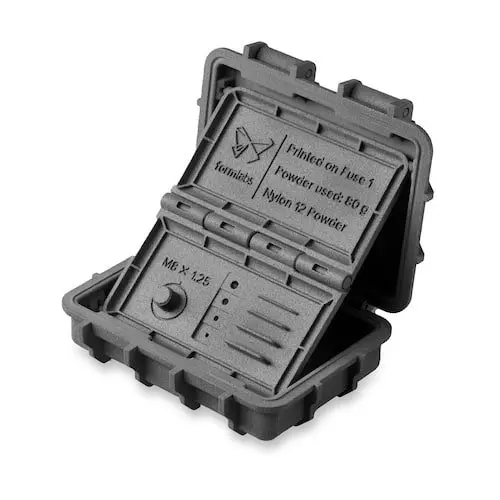
Request a Free Sample Part
See and feel Formlabs SLS quality firsthand. We’ll ship a free sample part to your office.
Applying 3D Printed Unit Tests
Designing parts for SLS 3D printing doesn’t just mean that your parts will print successfully, but also that they will perform as intended, so that you can get the right part on the first try. One of the most useful ways to ensure that certain features will print and fit as intended is by 3D printing a unit test.
A 3D printed unit test can confirm that printed features will fit together as expected without having to print the entire part.
A 3D printed unit test is a small test print that validates the success of a feature connected to a larger part. For example, if you had a 20 hour print with a dovetail joint intended to fit into a secondary part, you might want to consider isolating and printing only the dovetail feature, testing the fit of the feature, and then updating the full design accordingly. Testing a small segment of the part saves you from having to reprint the entire design because of a small tolerance issue.
Part Orientation and Chamber Packing
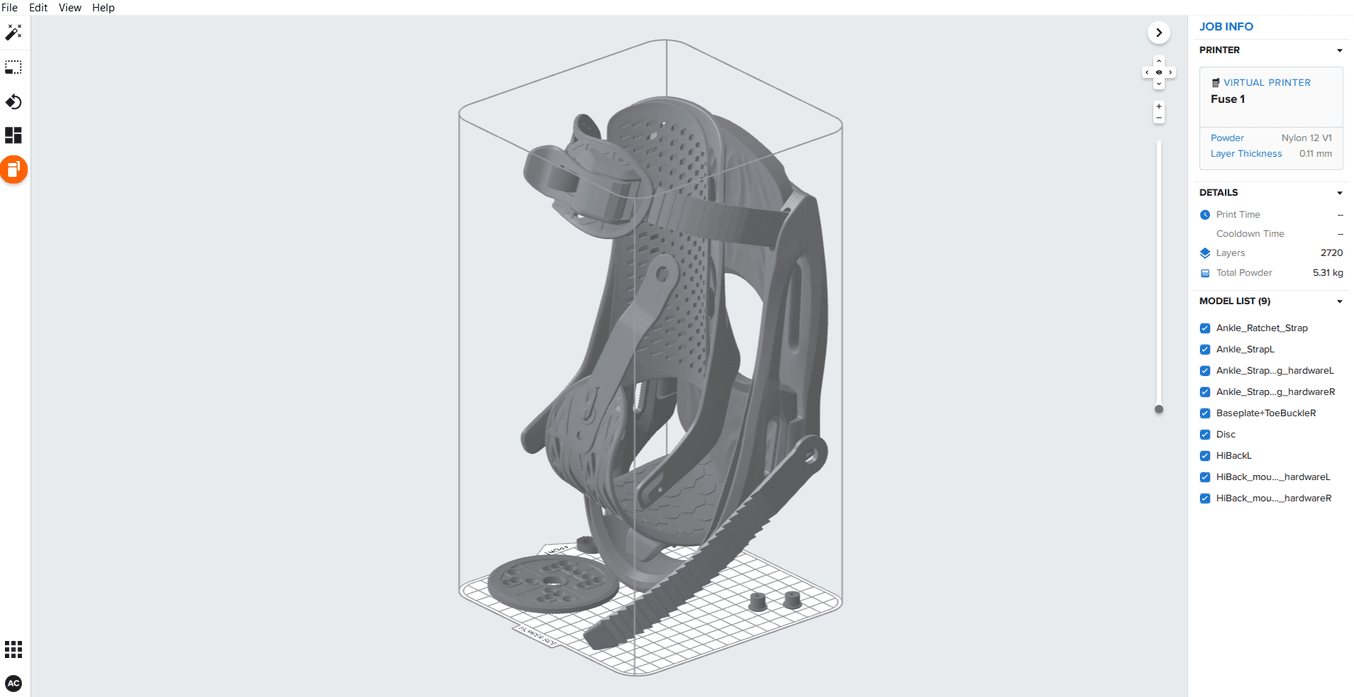
Parts printed on the Fuse 1+ 30W do not require supports, enabling higher density packing than other 3D printers. Evenly distributing your parts in the build chamber minimizes heat concentration when the printer is operating.
Part layout within the Fuse 1+ 30W build chamber is another aspect of the SLS 3D printing process that can affect design success. Distributing parts evenly across the Fuse 1+ 30W build chamber reduces the potential for thermal buildup, and keeping parts close to the bottom of the chamber keeps your print times low.
Download the Fuse Series Design Guide
To learn more in depth about the specific design and packing guidelines we recommend for the Fuse 1+ 30W, click below to download the Fuse Series Design Guide.
Formlabs offers an extensive support documentation for all of our 3D printers. If you are looking for additional information about your Fuse 1+ 30W printer, please visit our support website.