
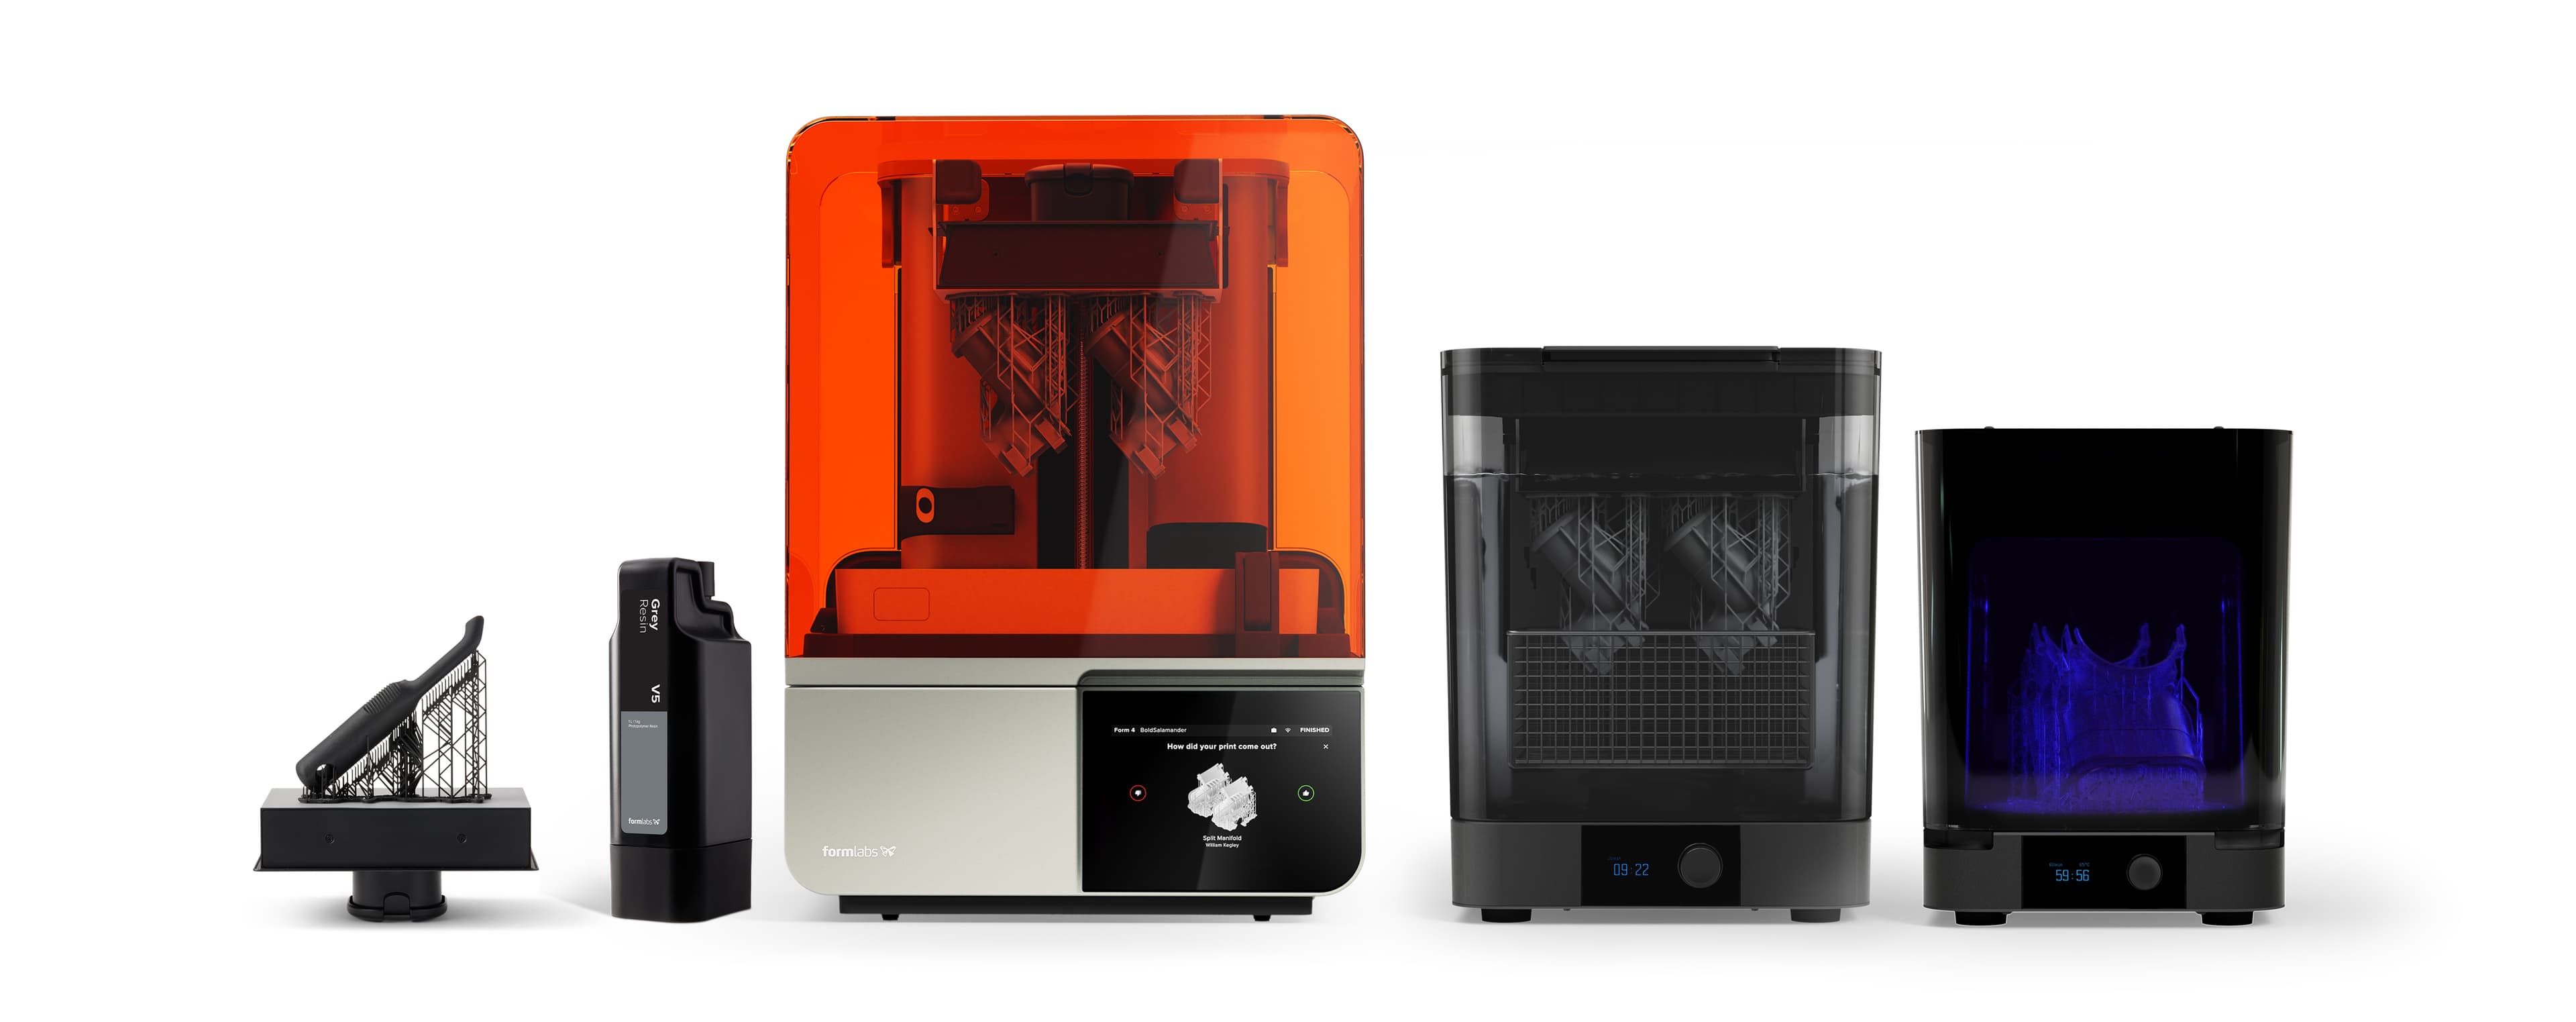
Independently Tested Reliability of Form 4 and Other Resin 3D Printers
Independently Tested Reliability of Form 4 and Other Resin 3D Printers
Download as PDFIntroduction
History: Additive manufacturing (AM), also known as 3D printing, is a powerful, popular tool to accelerate product development and manufacturing across many industries. Reliability is critical for any tool designed to create parts, and 3D printing is no exception. While 3D printing has made huge leaps over the past decade, many printers are still held back by poor reliability. In a 2024 survey by 3D Printing Industry, leaders in additive manufacturing listed “Machine and Process Reliability” as the number one barrier to achieving broader adoption of 3D printing.
Problem: Unfortunately, to date there hasn’t been any reliable quantitative information available to customers to make purchasing decisions from, requiring dependence on brand name and ‘get what you pay for’ mentality. To help address this, Formlabs created this report to summarize a series of comprehensive performance tests conducted on select stereolithography (SLA) 3D printers, including Form 4, Form 3+, and two comparatively low-cost resin 3D printers. This testing was to evaluate the print success rate and repeatability of parts printed on the respective printers.
What: To ensure data quality and integrity, the testing was conducted by an independent global leader in product testing, and was performed onsite at the third-party testing lab’s facilities. Formlabs, the manufacturer of Form 4, defined the tests and procedures that were used during testing, which are detailed in a later section of this white paper, with the goal of standardizing this testing across all printers. This standard operating procedure (SOP) largely consists of printing models from a standard setup and maintaining equivalent processing, with quality checks at each step of the process to eliminate the risk of user error changing results.
Method: Following the SOP, 15 models were printed three times each on five different factory condition printers from each manufacturer, resulting in 225 prints for each printer model, with the success or failure of the prints recorded.
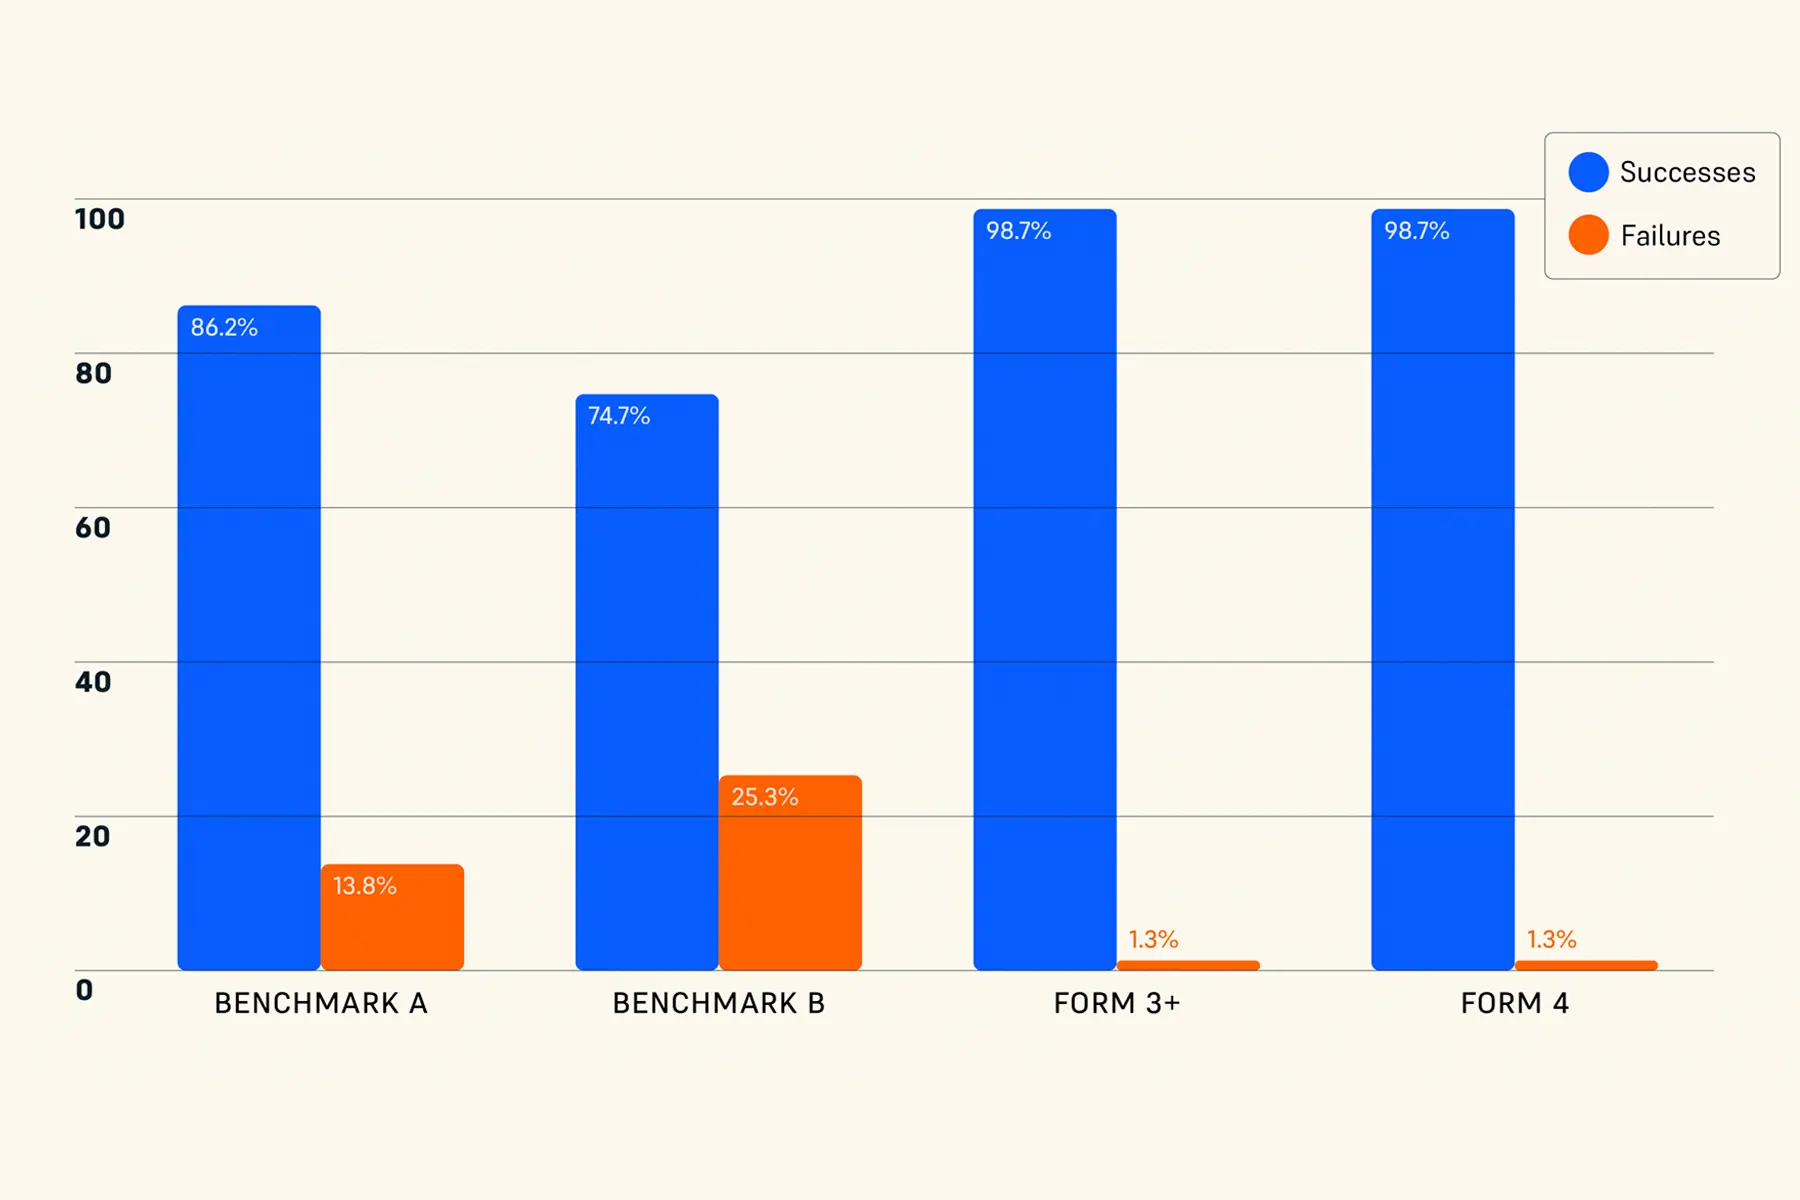
Results: Form 4 was measured to have a 98.7% print success rate, which is equal to that of Form 3+, a printer that has been continuously optimized for five years to improve its performance in the field. The benchmark printers, A and B, measure 86.2% and 74.7% print success rates respectively, or equivalently 13.8% and 25.3% failure rates (versus 1.3% for Form 4). This shows that the benchmark printers have 10x-20x the failure rate of Form 4, with benchmark B failing 1 out of every 4 prints. Notably, these results don’t even include hardware reliability — two of the printers from benchmark B arrived dead and had to be replaced in order to commence testing. This resulted in several working days lost purely in replacing hardware, in addition to many hours of labor troubleshooting problems, cleaning failed prints, and resetting the printer to reattempt the print.
These results were all obtained in a laboratory with optimal conditions, and with prints that had been validated to print successfully on all four of the tested printers. It's important to note that conditions outside of the lab with user-generated models will typically be lower across the board. For example, the field print success rate of Form 4 at the time of writing (measured by Formlabs) was 94%.
Print Success and Failure Rate Across 225 Prints
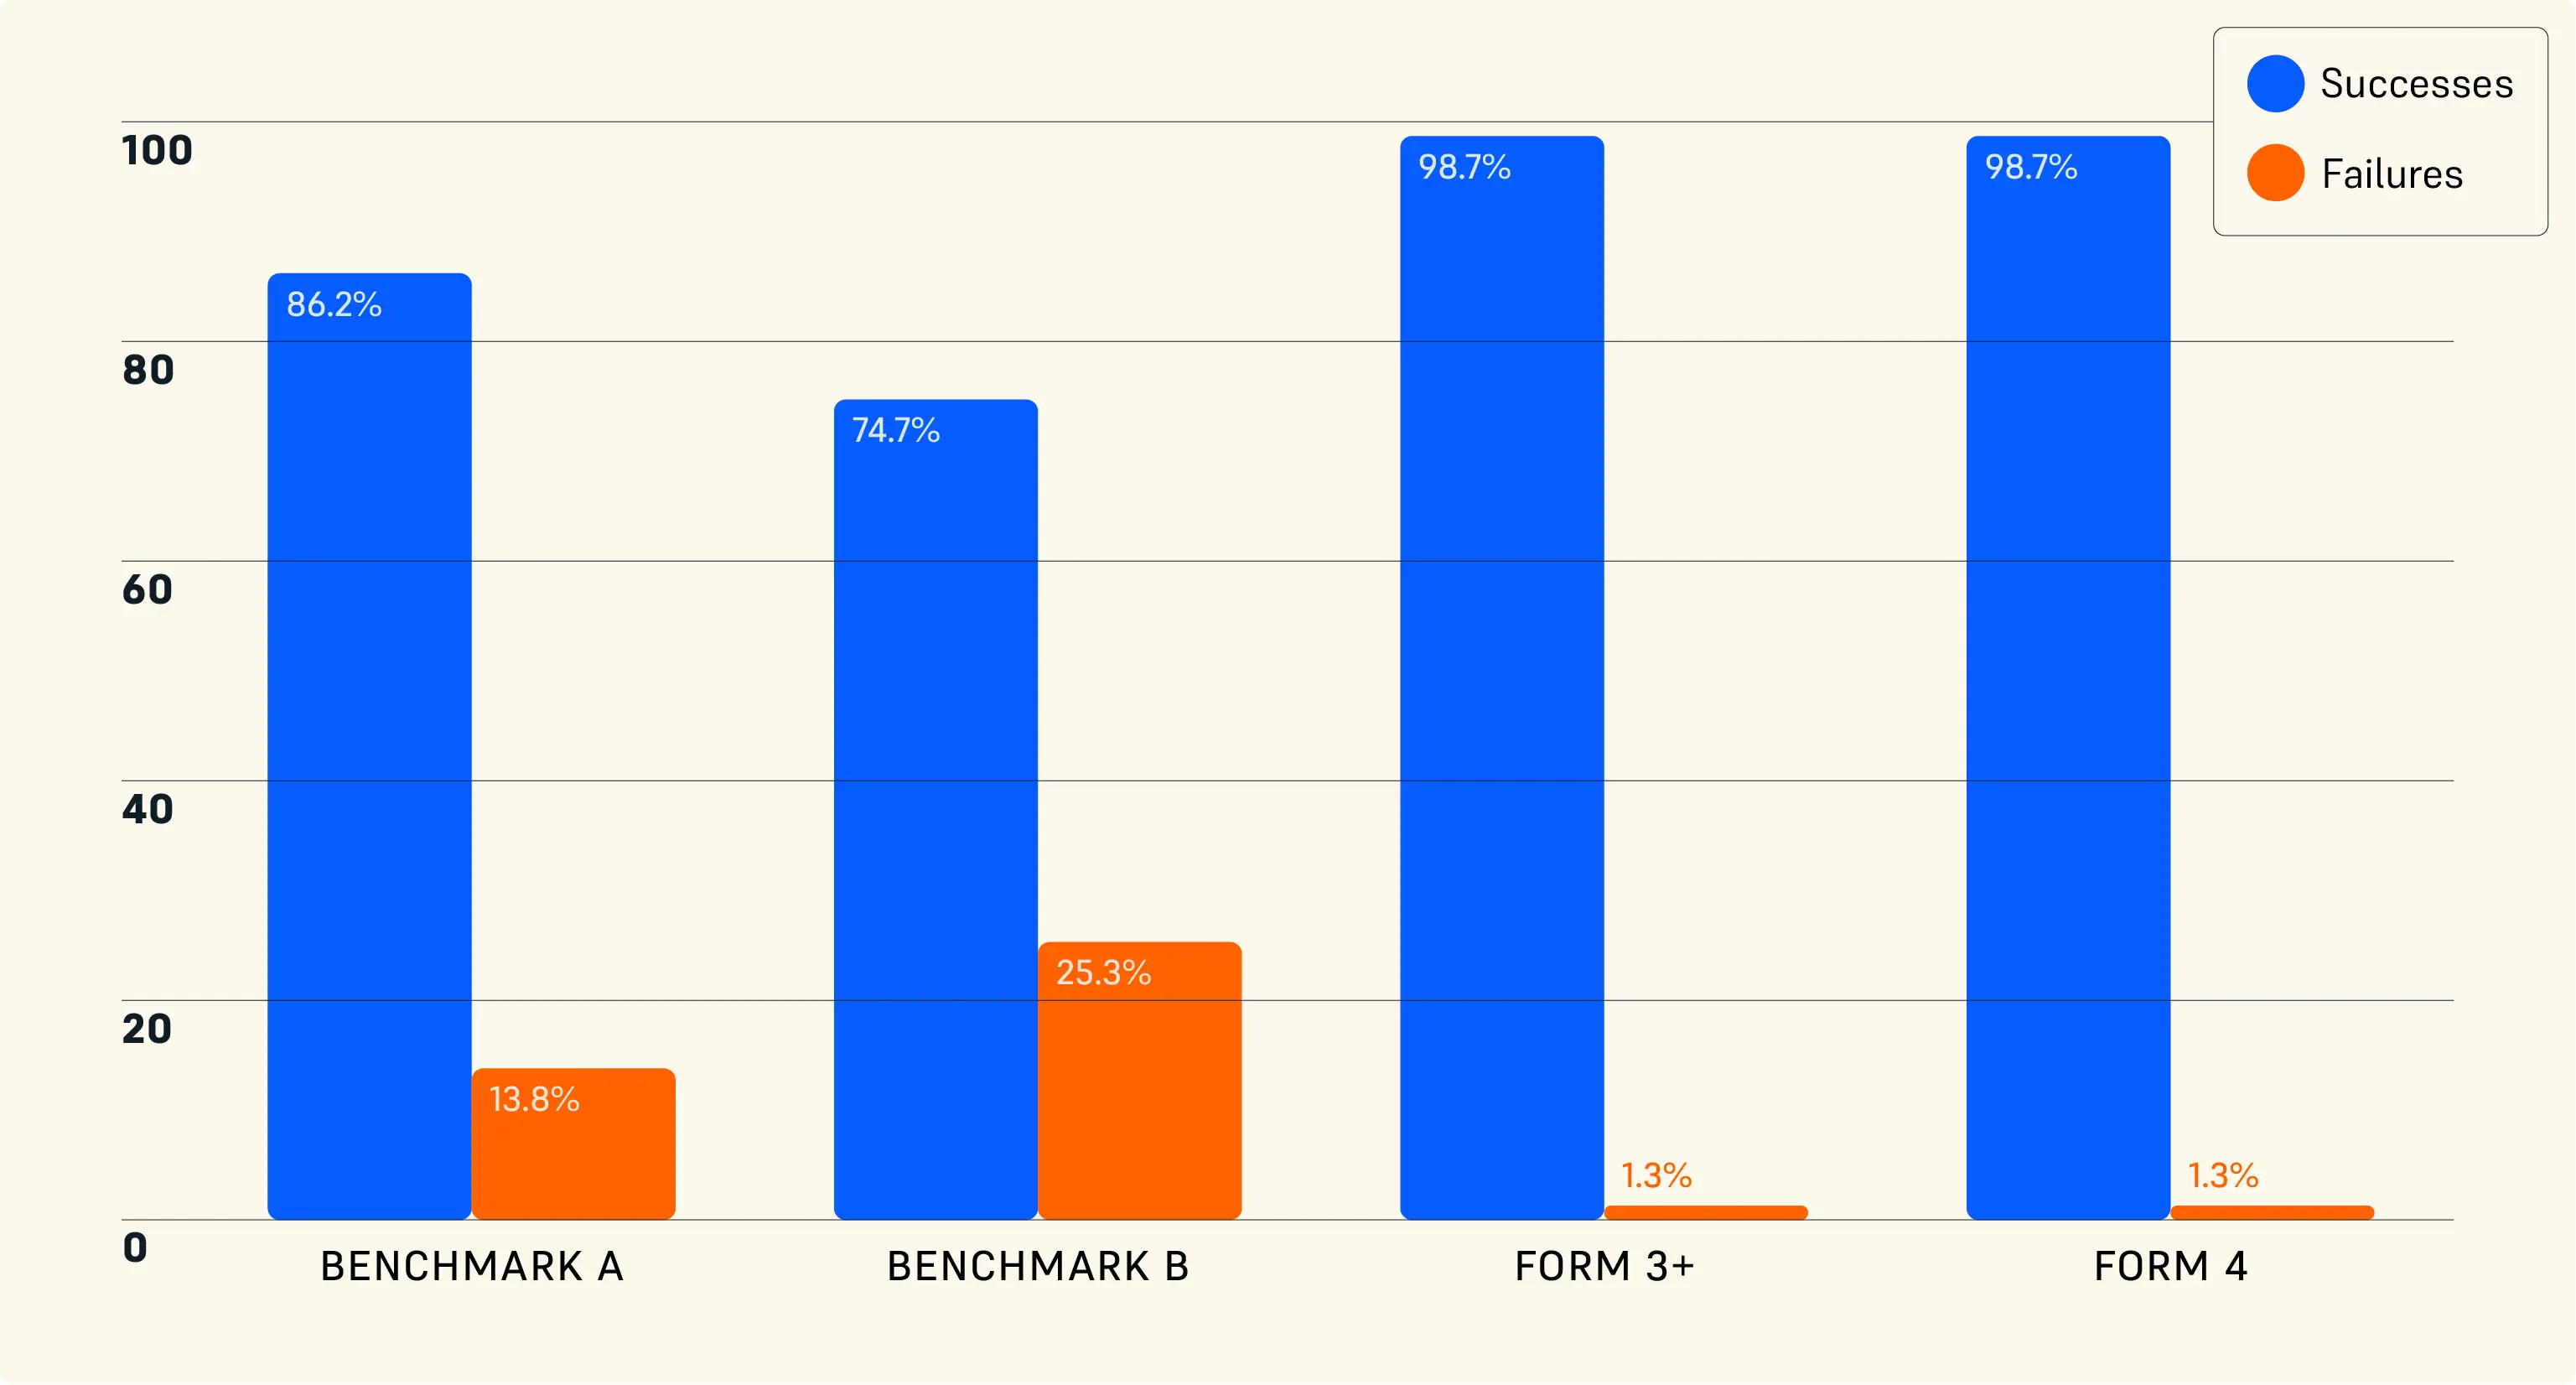
This graph shows that Form 4 is much more reliable than other desktop resin printers.
There are many factors that contribute to the reliability of a 3D printer. Formlabs, for example, spends several weeks validating print settings for each material before publicly releasing it, and has automated diagnostics and monitoring to provide continuous improvement in the field. This is in addition to several rounds of validation and testing performed on every new printer model, and a 60-point calibration and quality control inspection before every printer leaves the factory. A combination of hardware engineering, material science, settings tuning, in-situ monitoring, and strict QC led to the high reliability number presented here.
It is Formlabs’ intention to continue this work, setting the standard for printer performance both for their own printers and to work to publish those standards so that customers can have trustworthy reliability information, for Formlabs as well as its competitors.
|
Printer |
Form 4 |
Form 3+ |
Benchmark A |
Benchmark B |
||||
|
Dead on Arrival |
0 |
0 |
0 |
2 |
||||
|
Target Number of Prints |
225 |
225 |
225 |
225 |
||||
|
Completed Prints |
225 |
225 |
225 |
216 |
||||
|
Failed Prints |
3 |
3 |
31 |
55 |
||||
|
Failure Rate |
1.3% |
1.3% |
13.8% |
25.3% |
||||
|
Launch Year |
2024 |
2019 |
2023 |
2022 |
||||
|
Build Volume |
7.9 x 4.9 x 8.3 in |
5.7 x 5.7 x 7.6 in |
7.8 x 4.7 x 8.6 in |
8.6 x 4.8 x 9.3 in |
||||
|
Technology |
MSLA |
Laser SLA |
MSLA |
MSLA |
||||
|
Failure Modes |
- Missing chunks (x2) - Print stopped (x1) |
- Missing chunks (x2) - Warping (x1) |
- Non-adherence (x13) - Delamination (x7) - Missing chunks (x6) - Cracking (x5) |
- Non-adherence (x31) - Cracking (x10) - Missing chunks (x6) - Delamination (x5) - LCD failure (x3) |
||||
|
Non-Print Issues |
- Outdated firmware (x1) |
None |
- Required film replacement (x5) |
- Homing failure (x7) - LED module failure (x1) LCD failure (x2) |
||||
|
Lost Hours Printing Due to Failures |
9 |
17 |
>100 |
>250 |
||||
Book a Consultation
Get in touch with our 3D printing experts for a 1:1 consultation to find the right solution for your business, receive ROI analyses, test prints, and more.
Methodology
Printers and Materials
Selection
In order to fully understand the different available options, four different types of SLA or resin 3D printers were selected for this testing, all of which function based on vat photopolymerization. The first two were Formlabs’ existing printer types — the longstanding Form 3+, an update of Form 3, which was originally released in 2019, and the new Form 4 released in 2024. Additionally, two benchmark printers were selected to compare against lower cost printers with comparable build area. The first benchmark printer costs around $450 and the second costs around $650 in the US. Pricing on the Formlabs printers can be found on the website. At time of testing, the printers cost $2,500 for Form 3+ and $4,500 for Form 4.
Each printer was used with only the most up-to-date hardware for its respective printer, i.e. Form 3 Resin Tank V2.1 and Build Platform 2 for Form 3+. Similarly, the resin selected for each printer was identified as the standard grey resin produced by the respective brands and advertised for that printer, such as Grey Resin V4 for Form 3+ and Grey Resin V5 for Form 4.
Procurement
Formlabs printers, accessories, and 30 L of each resin were procured from Formlabs’ website and shipped directly to the testing lab. No special treatment was placed on the order, nor were any modifications done to the printers.
The benchmark printers, hardware, and materials were ordered from Amazon if they were available or directly from the OEMs’ websites if not. All of the printers tested were received by the test labs as new and unboxed directly.
3D Models and Slicing
Selection
15 different 3D models were selected from a wide range of applications, sizes, and form factors. Parts ranged in size from a bounding box of only 20 mm to filling the entire build volume of the printer (including supports). Most models required supports and could not be printed directly to the build plate. The breakdown of parts was as follows:
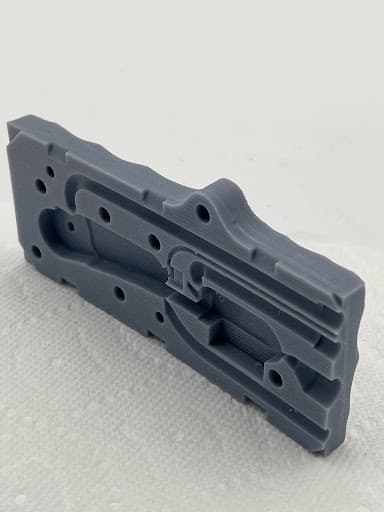
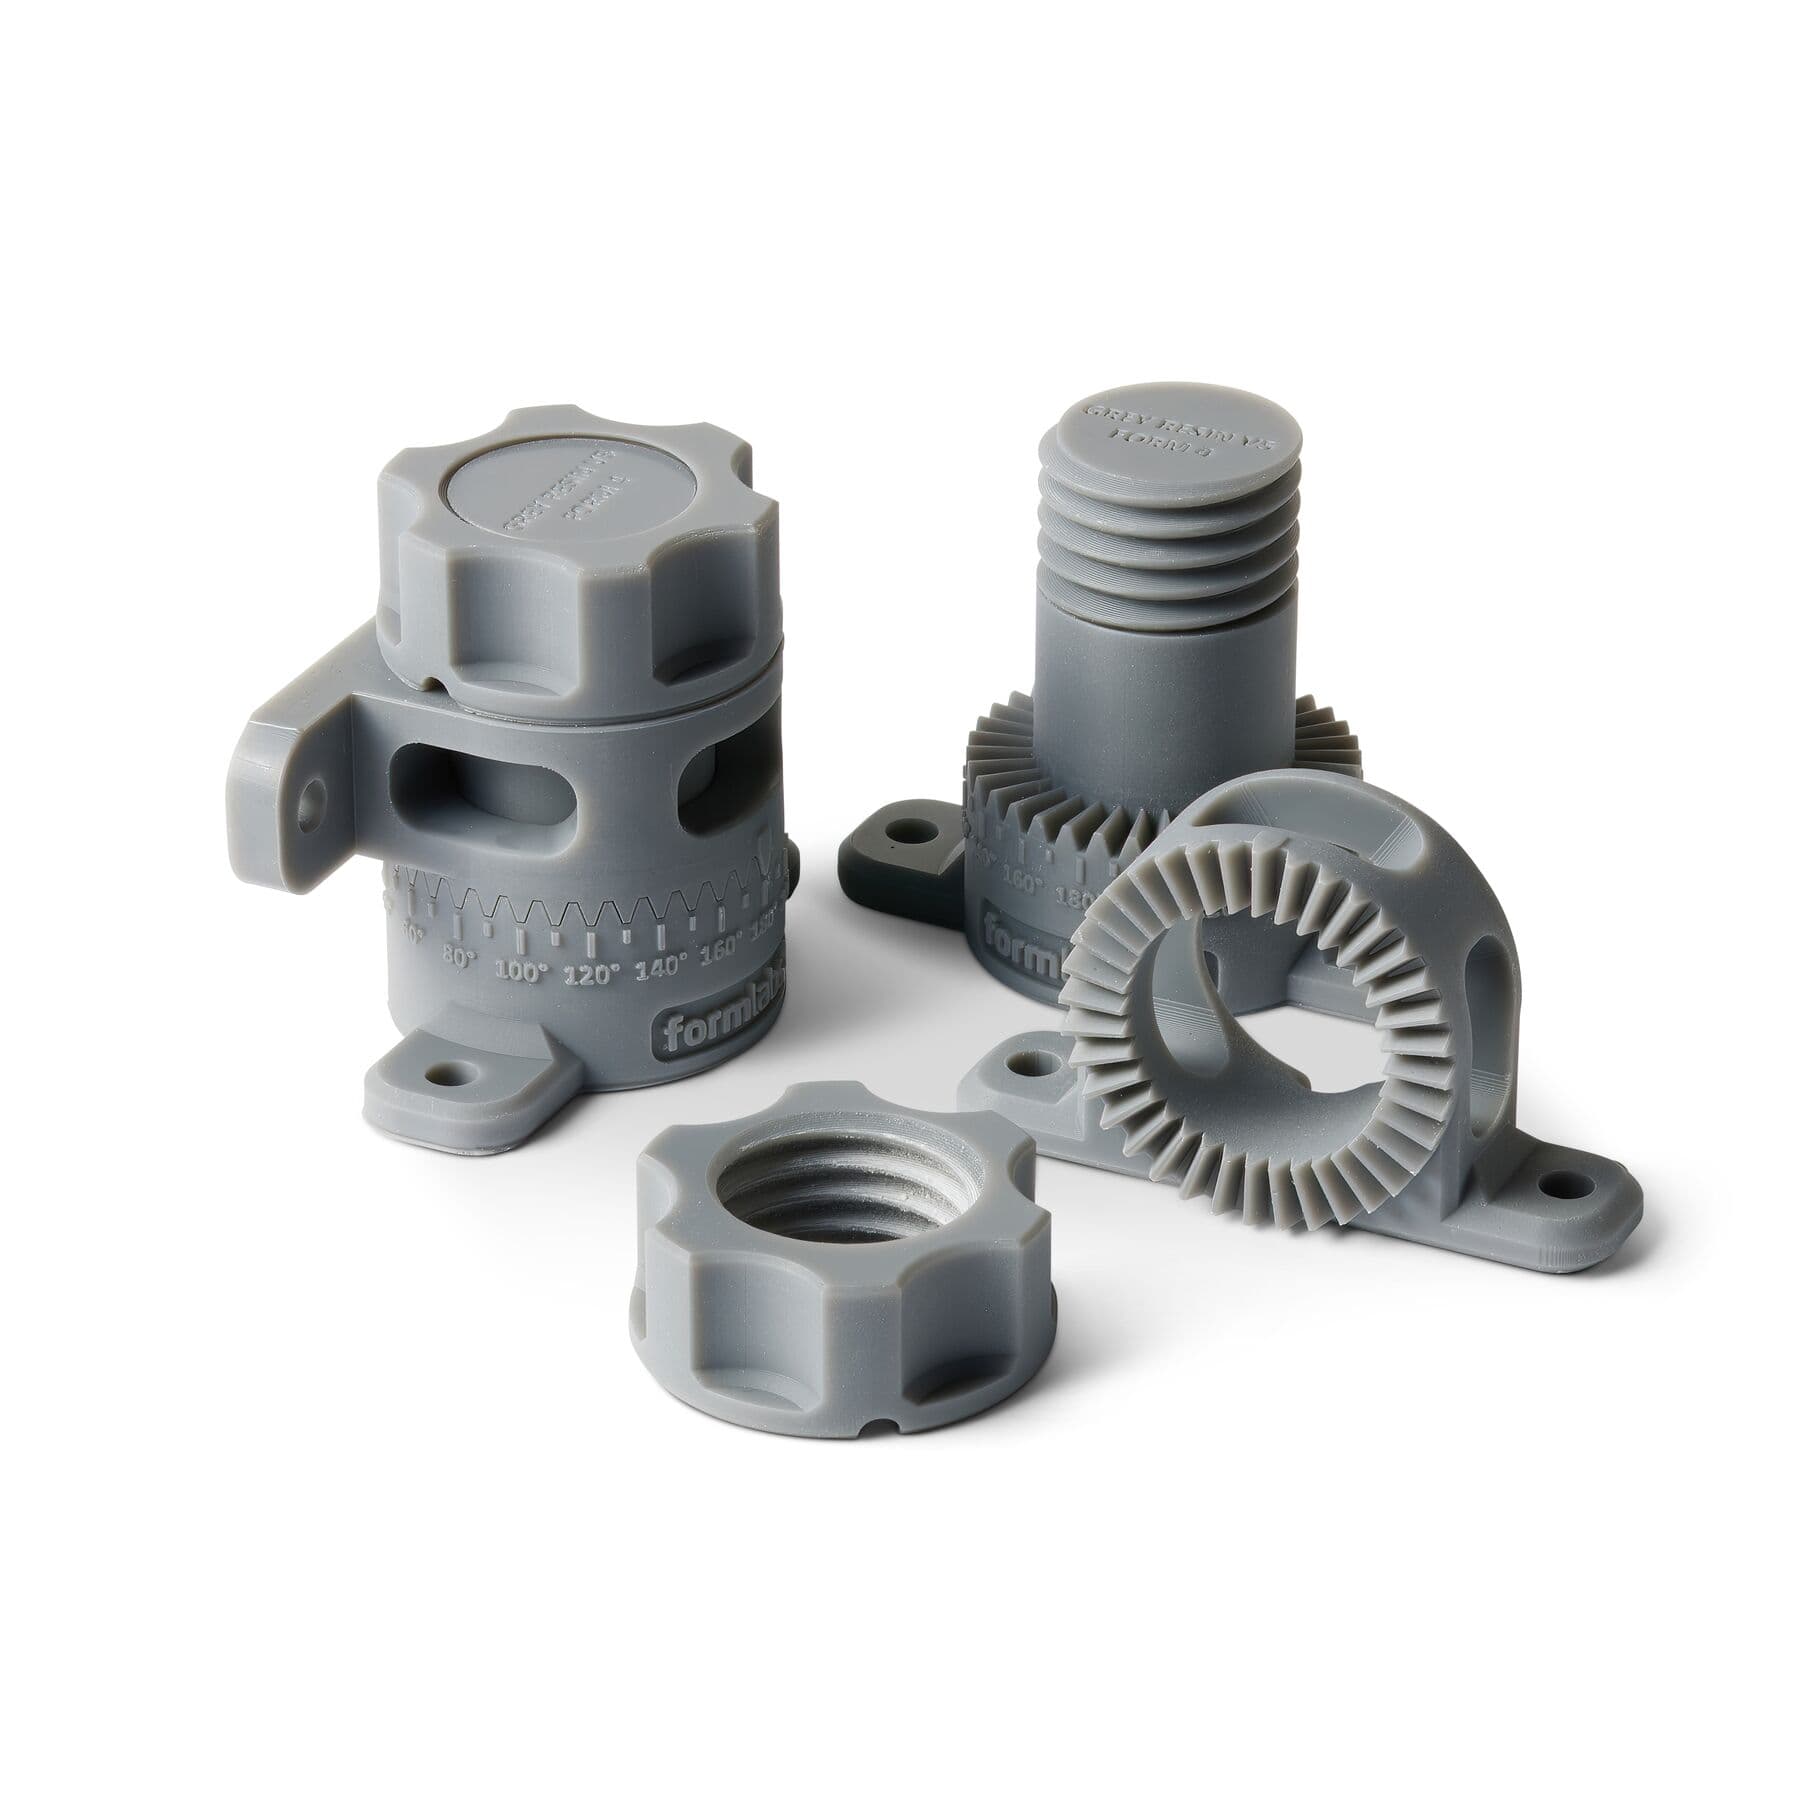
- Engineering/Manufacturing Applications: Eight parts
- Six end use parts for automotive, consumer, or industrial use
- One fixture for tooling support
- One form for molding
- Biomedical Applications: Five parts
- One surgical guide
- One scanned organ model (an aorta)
- One prototype medical device
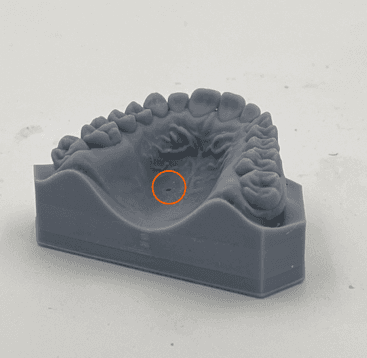
- Dental Models: Two parts
- Formlabs Print Diagnostic Models: Two parts
All the models, their designers, and descriptions, can be found in the appendix. Many of the parts are actual Formlabs customer parts used with permission by the designers, and those that aren’t are designed as functional equivalents of real world parts that have been printed. The two diagnostic models are used by Formlabs to evaluate the performance of both resins and printers.
Slicing and Setup
In order to give the best opportunity for printing success, models were oriented via PreForm’s Auto-Orient tool. This orientation was preserved for all printer types (both Form 3+ and Form 4, as well as both benchmark printer types).
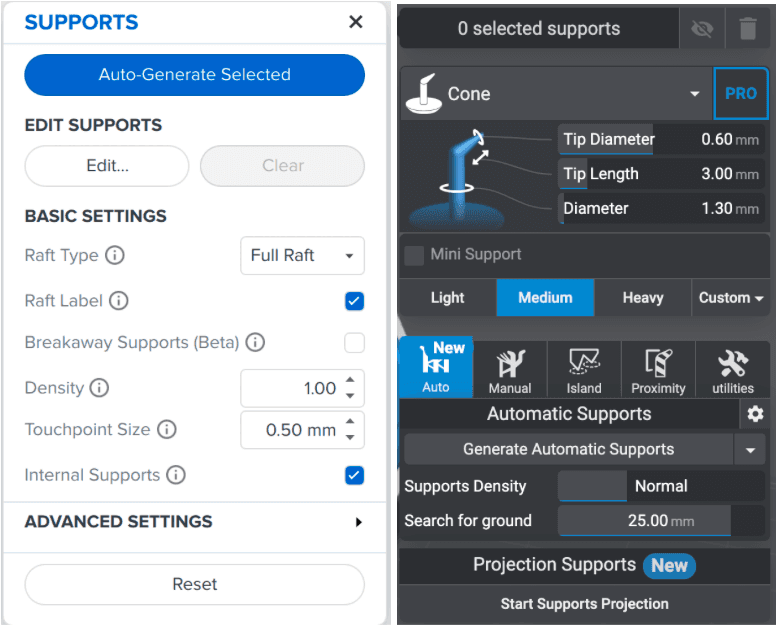
PreForm (left) and Lychee (right) automatic support generation tools on standard settings.
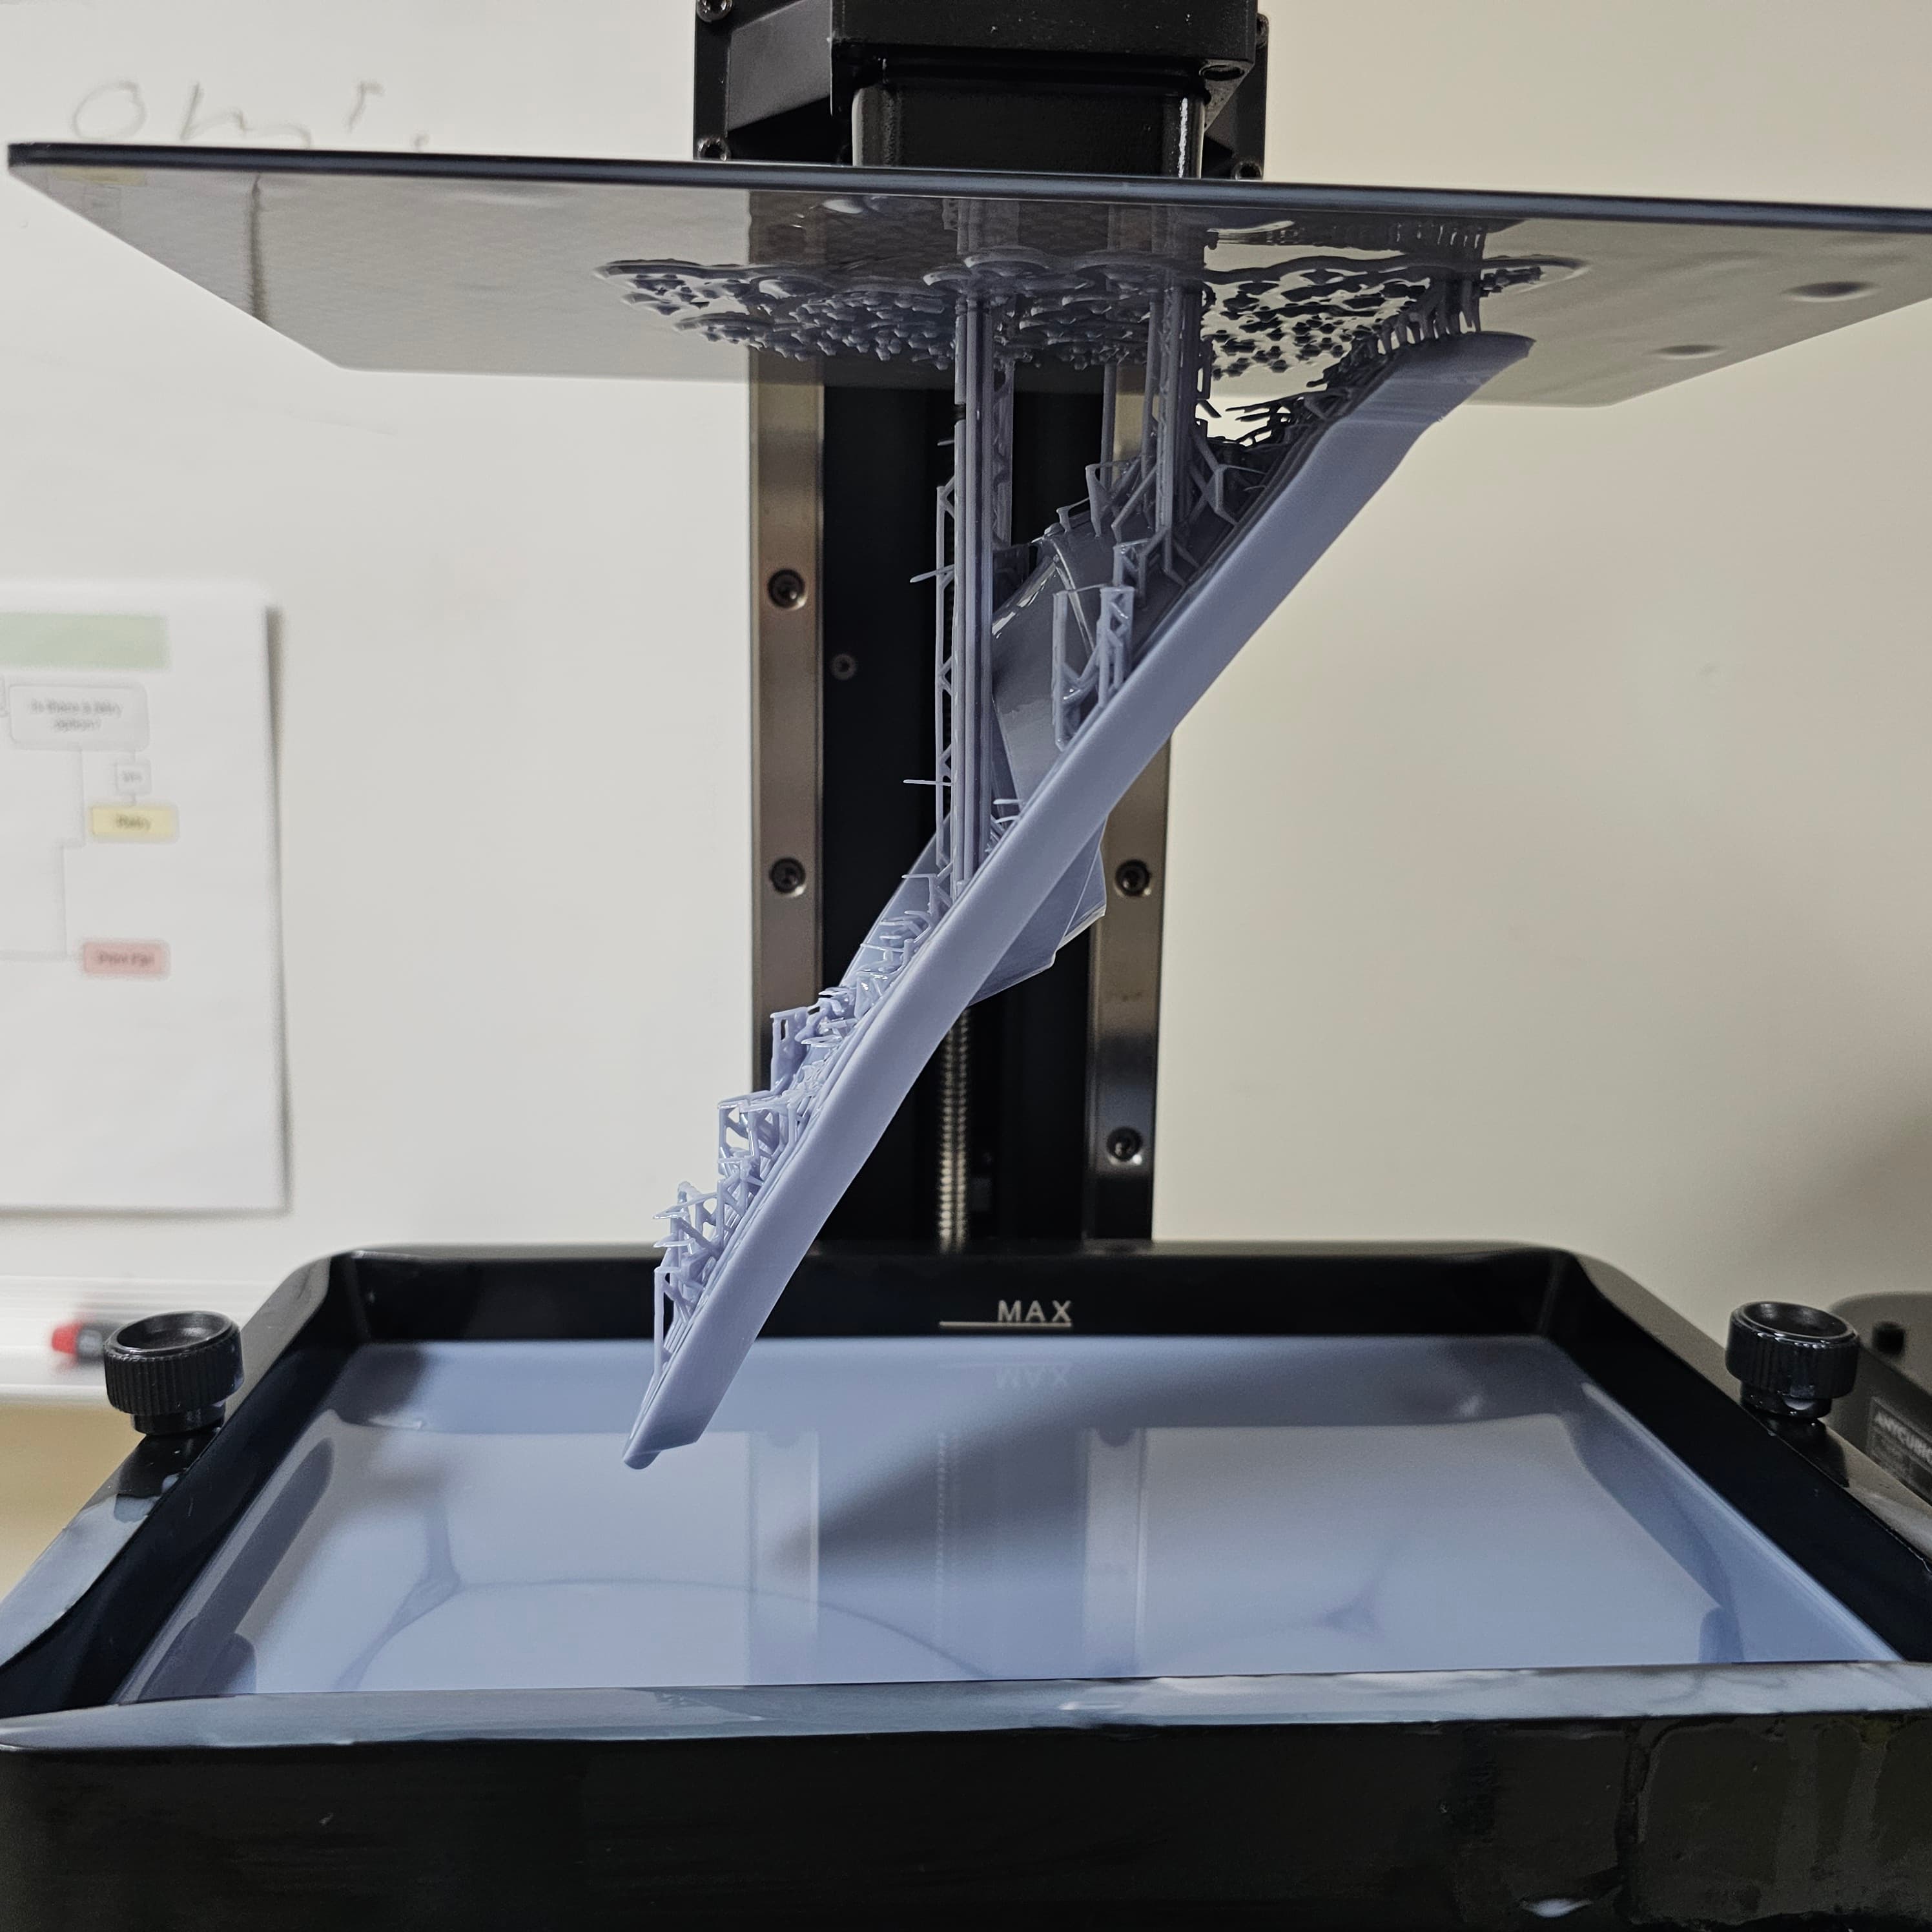
Support generation and final slicing was done in the slicing software of each printer. For the Formlabs printers, this was PreForm, and for both benchmark printers the Lychee Slicer software was selected. Supports for Formlabs were always generated with the default settings (no modifications) using the “Auto-Generate Selected” tool pictured. Similarly, supports for all of the prints for both benchmark printers were generated using the Automatic Supports from Lychee, pictured. In Lychee, the Medium support setting was used for all models with the exception of Model D8, which, due to its large flat surface, was more prone to warping, so Heavy support settings were used to prevent delamination.
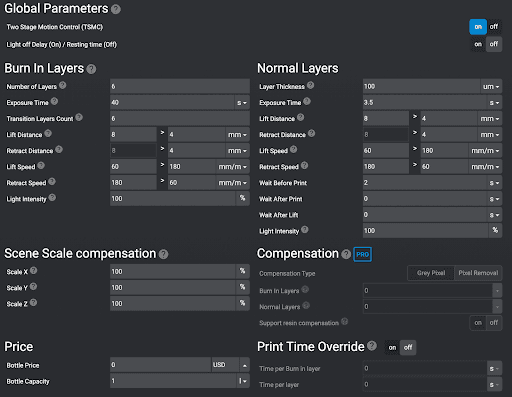
Settings for each printer were set using the manufacturer recommended settings. From Formlabs, these settings were already built into PreForm, the only selections being the printer (Form 3+ or Form 4), the material (Grey Resin V4 or Grey Resin V5), and the layer height (100 microns). The benchmark resins have a more complex settings editor, but all of the settings for the chosen materials are published by the printer’s respective manufacturers. In addition, many community-published settings exist that have been user validated on both printers, and so the settings were selected based on this, staying at 100 microns to keep the layer heights the same for both printers. The full set of settings is reported in the appendix.
Standard Operating Procedure
An SOP was followed for all four printers, with only small modifications necessary between each type. A quick visual reference is shown here.

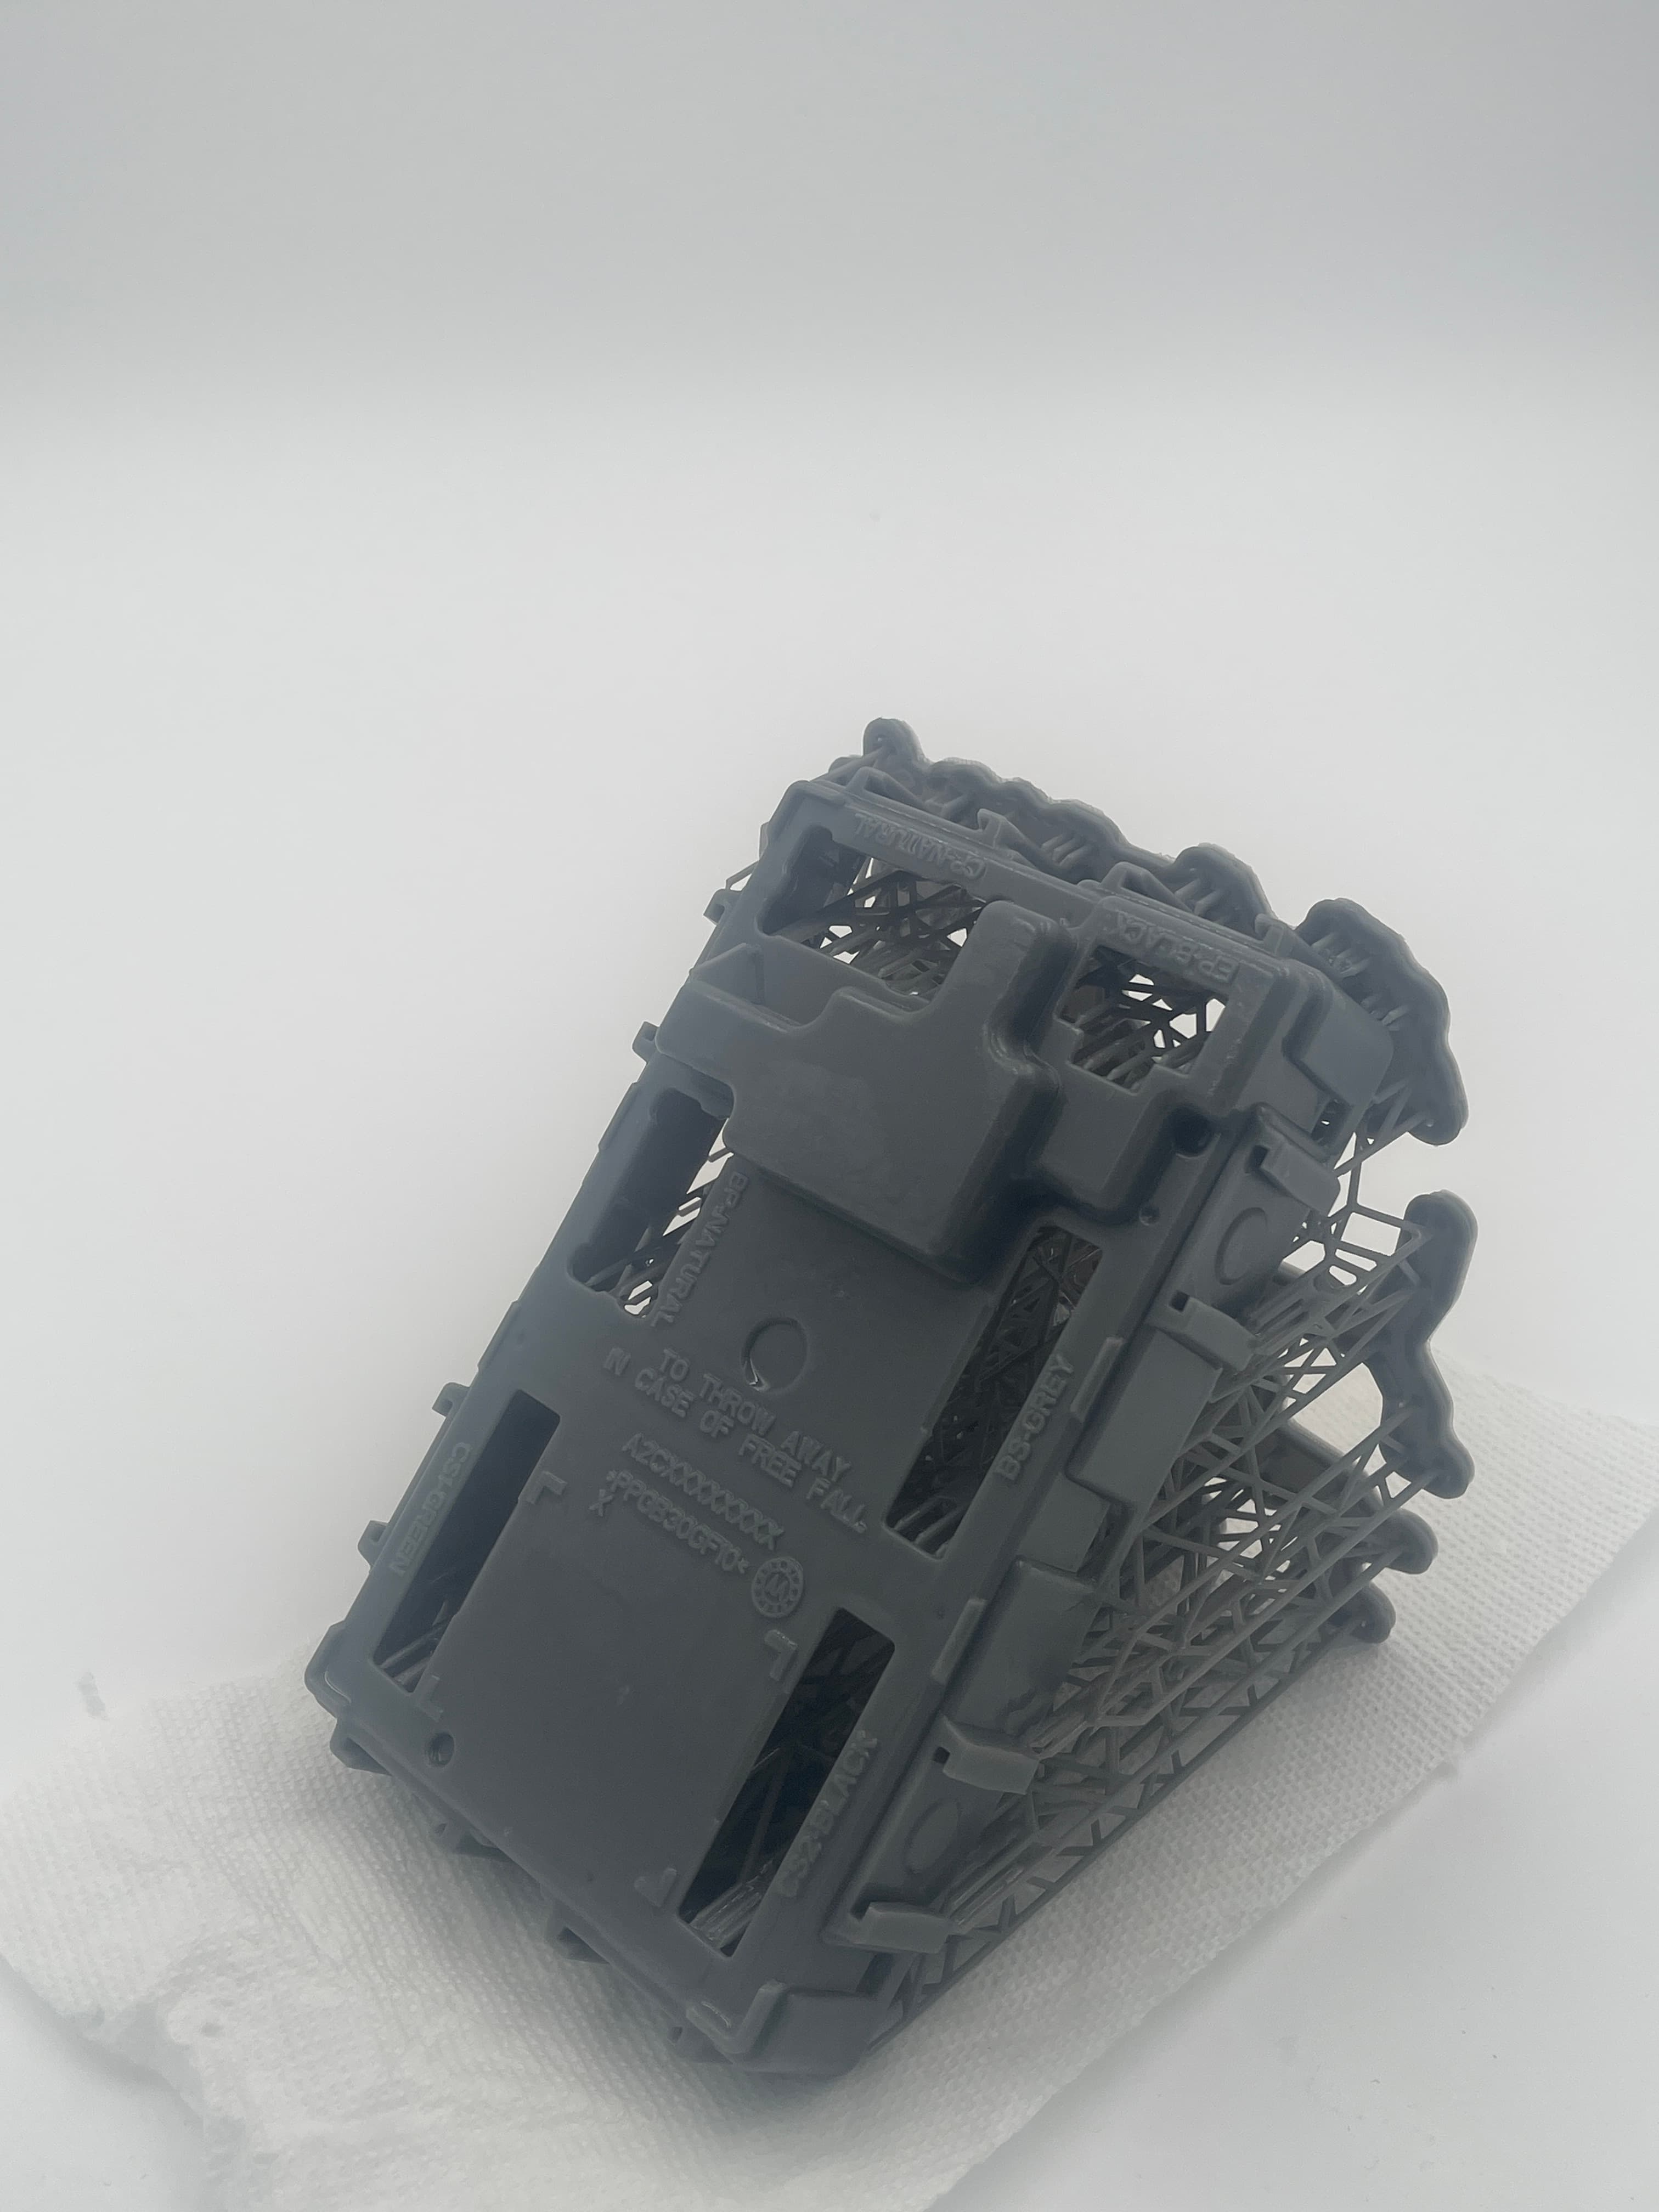
For each printer, the build platform (BP) and resin vat (tank) were kept locked to that printer, to prevent issues from variation between tanks and BPs to a minimum. These were visually inspected on a weekly basis for damage, punctures, or blemishes.
For the printers that do not dispense resin automatically, the tank was prefilled with resin to just below the recommended maximum fill height each print to minimize the risk of resin running out. Since both Formlabs printers have automatic dispensing technology, this was unnecessary. For Form 3+, an initial prefill was done to accelerate printing, but with Form 4 that was also unnecessary, as the redesigned valve system offers faster filling than Form 3+. From here, the resin would be automatically dispensed into the tank as needed by the printer and cartridges swapped out when they ran empty.
All of these consumables and accessories were checked prior to selecting the print from the queue and starting the print. Prints were then allowed to run with no interference unless they output an error. Error codes were noted down and then the operators followed the onscreen prompts to either reset and resume the print or fail the print and stop printing as required. If prints had a failure, the tanks were checked for material left in them, which was cleaned away prior to starting the following print.
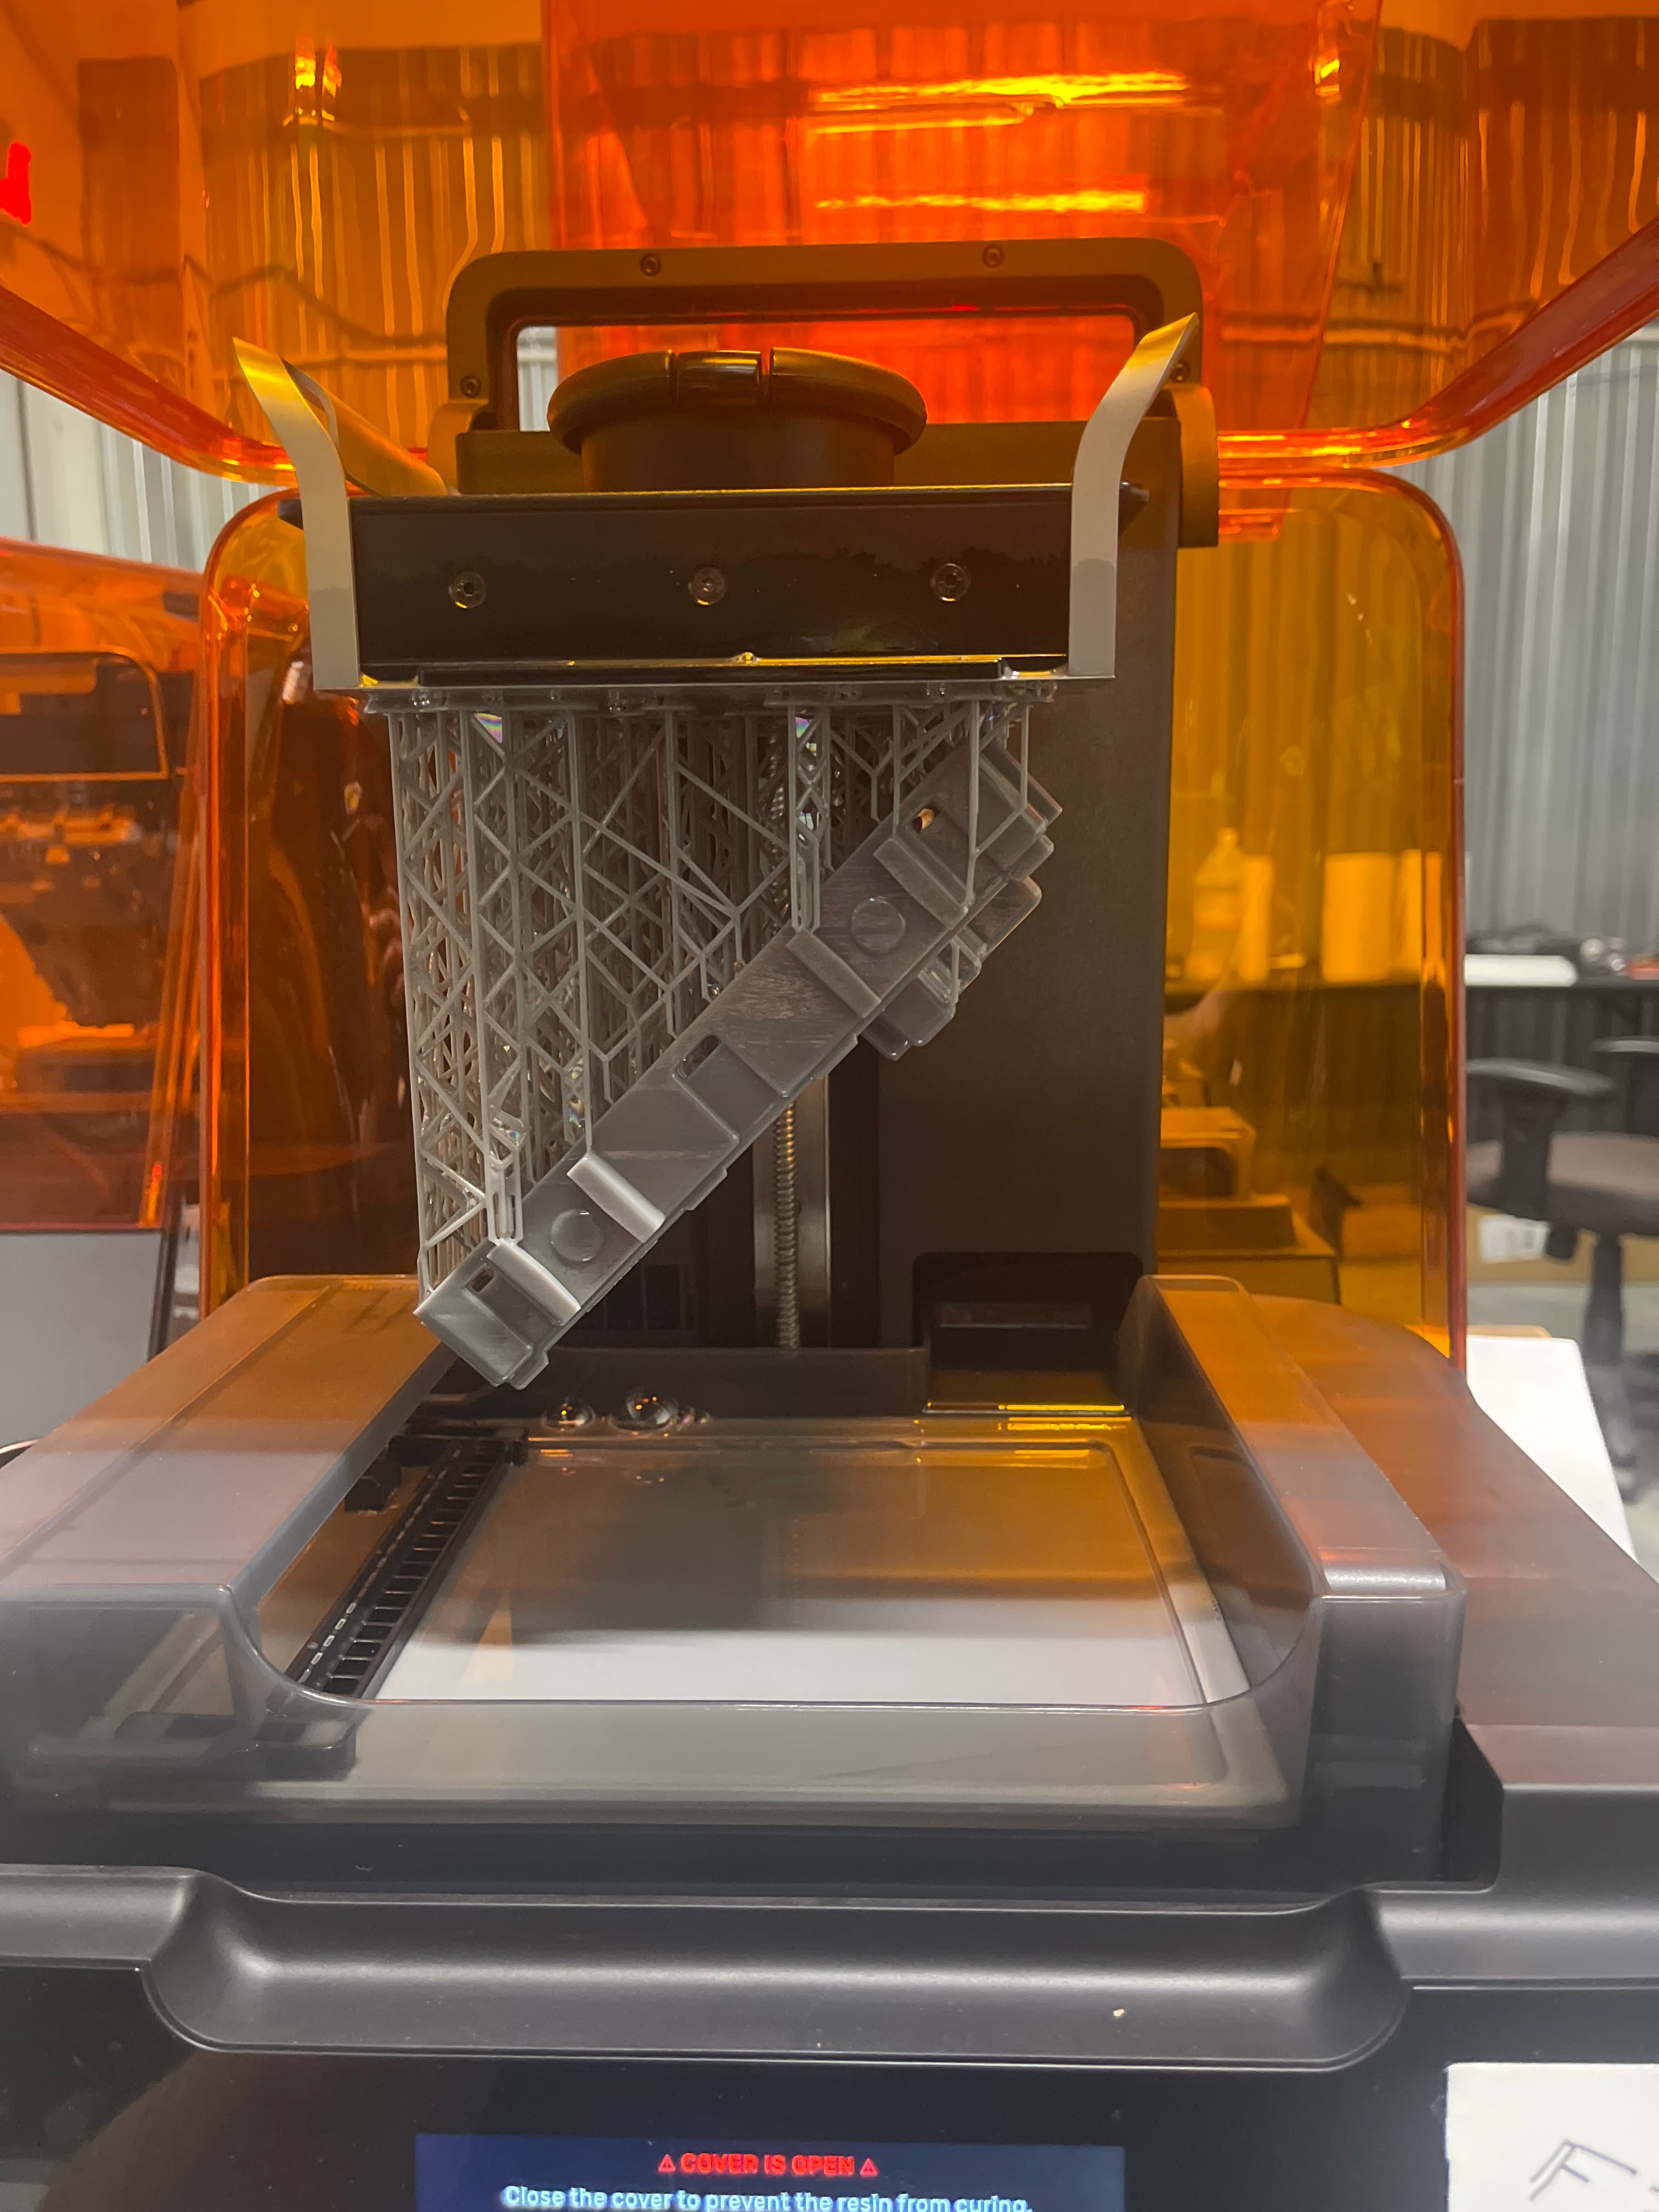
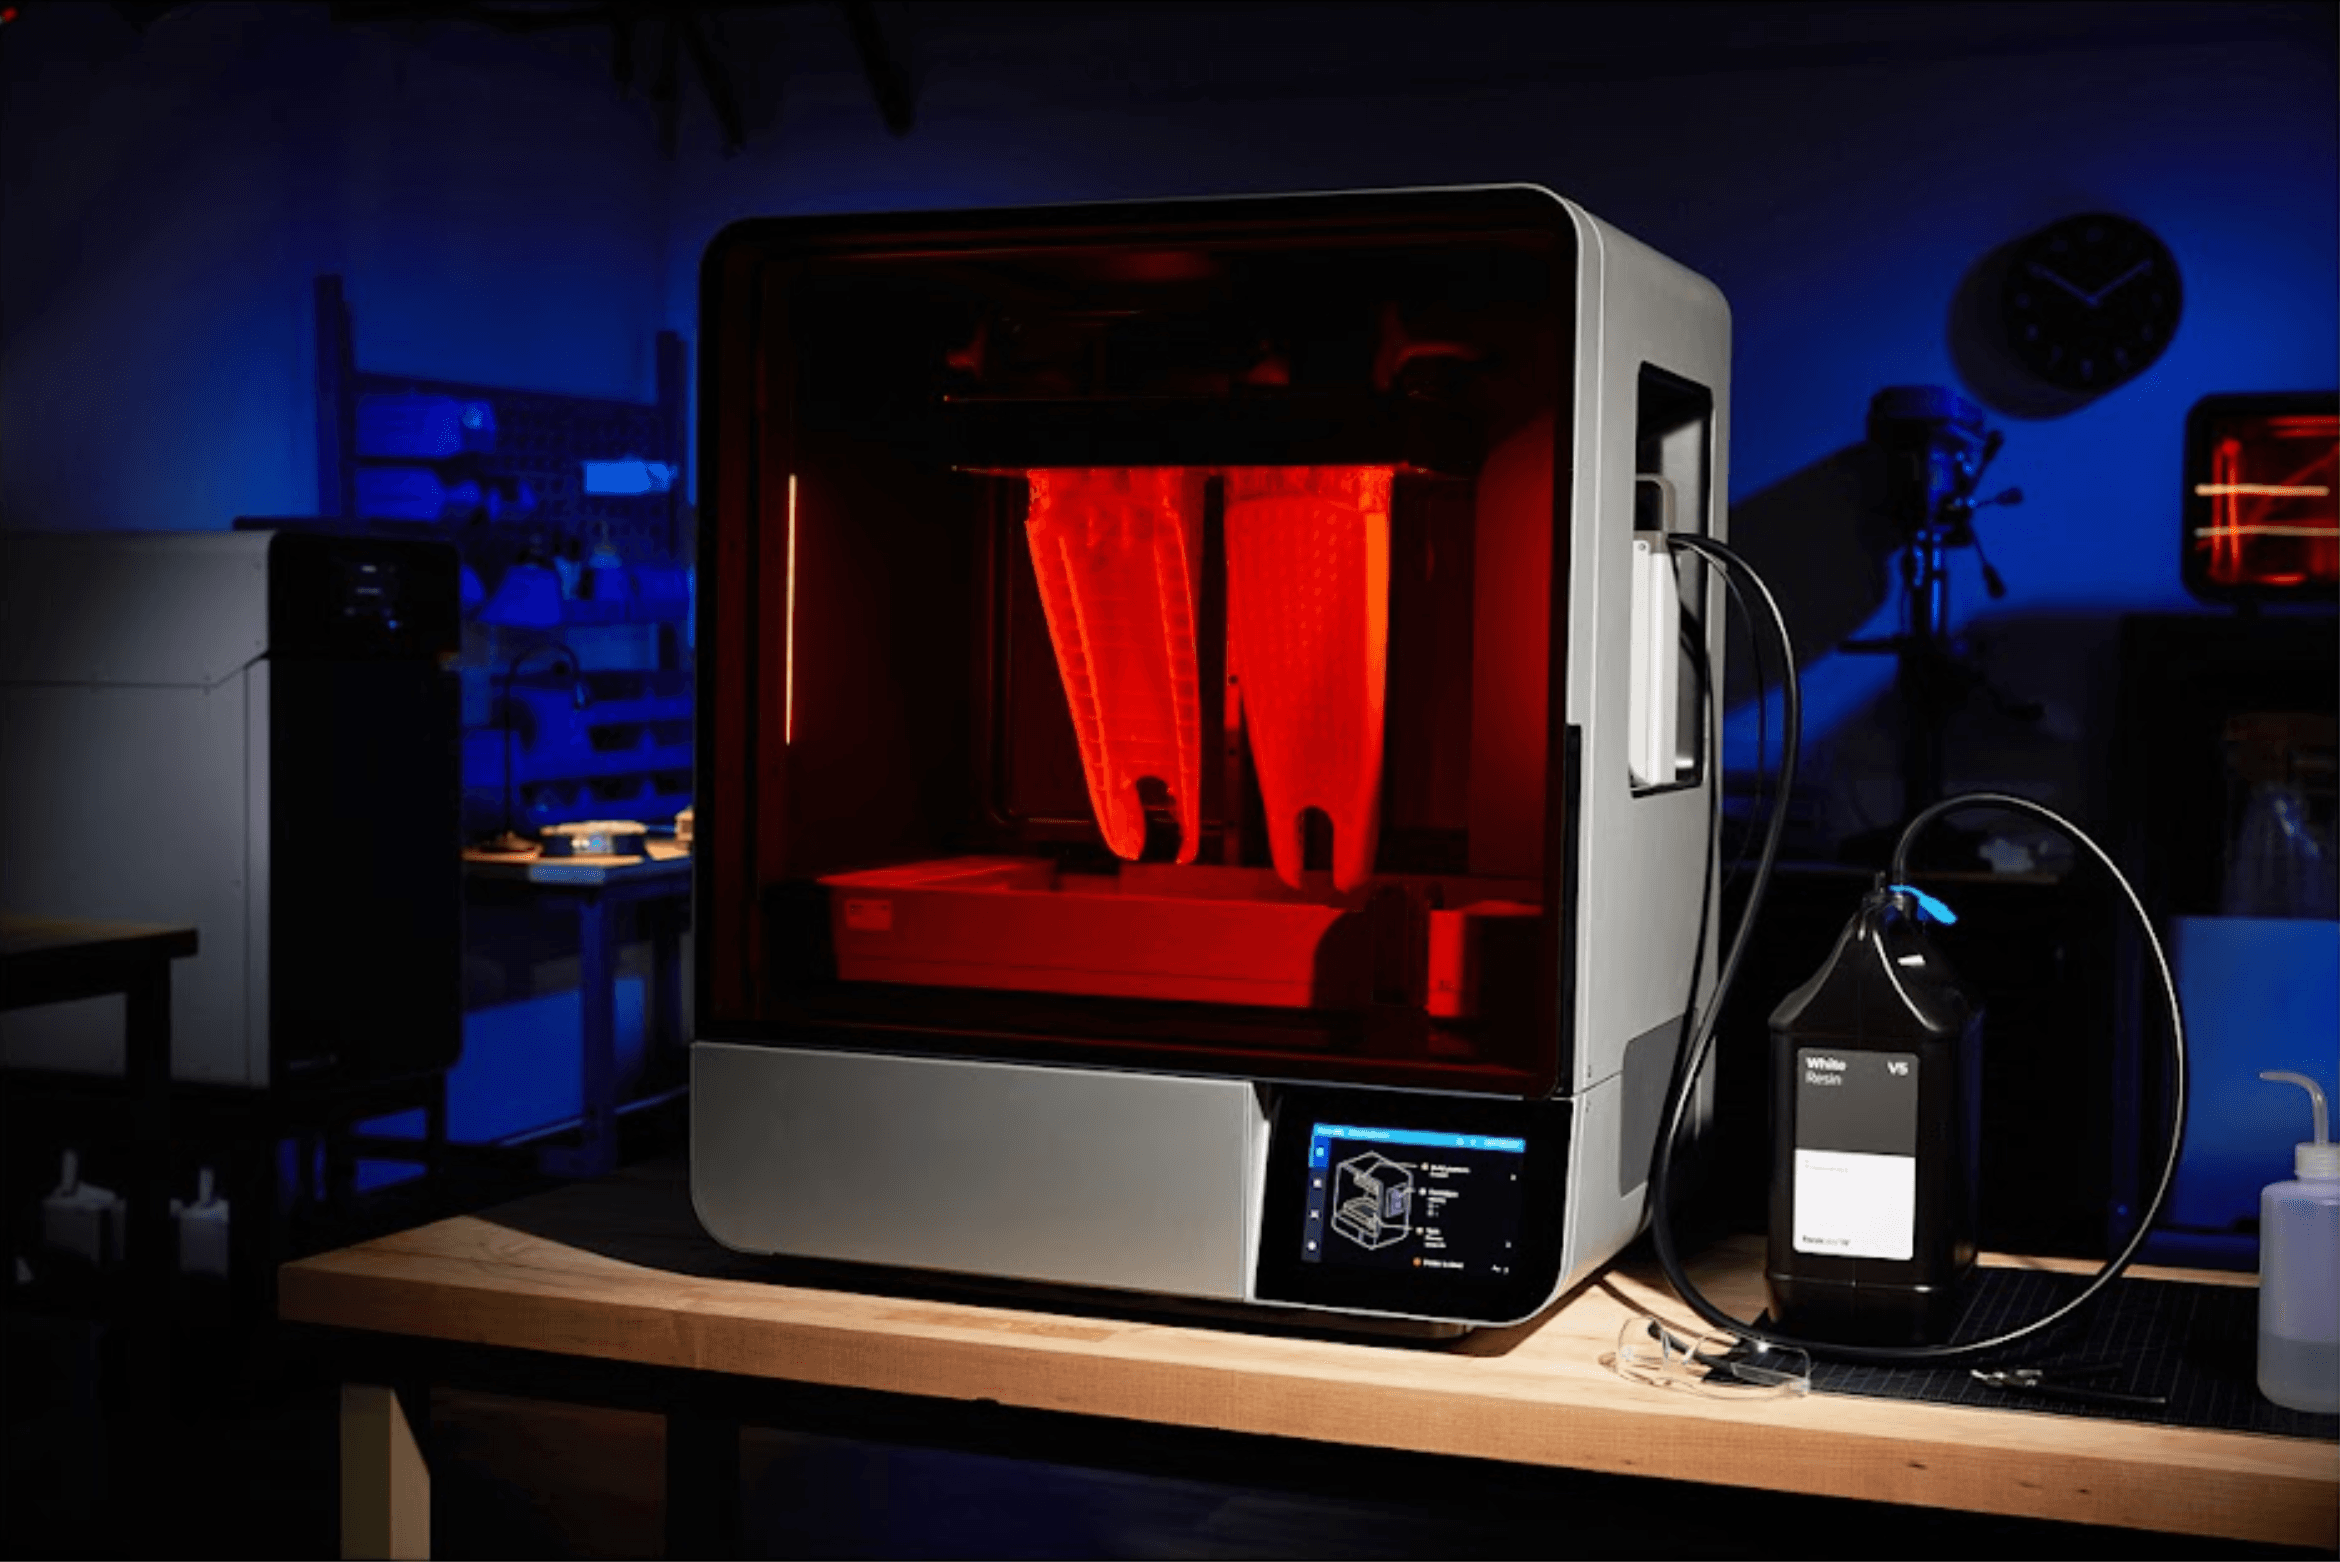
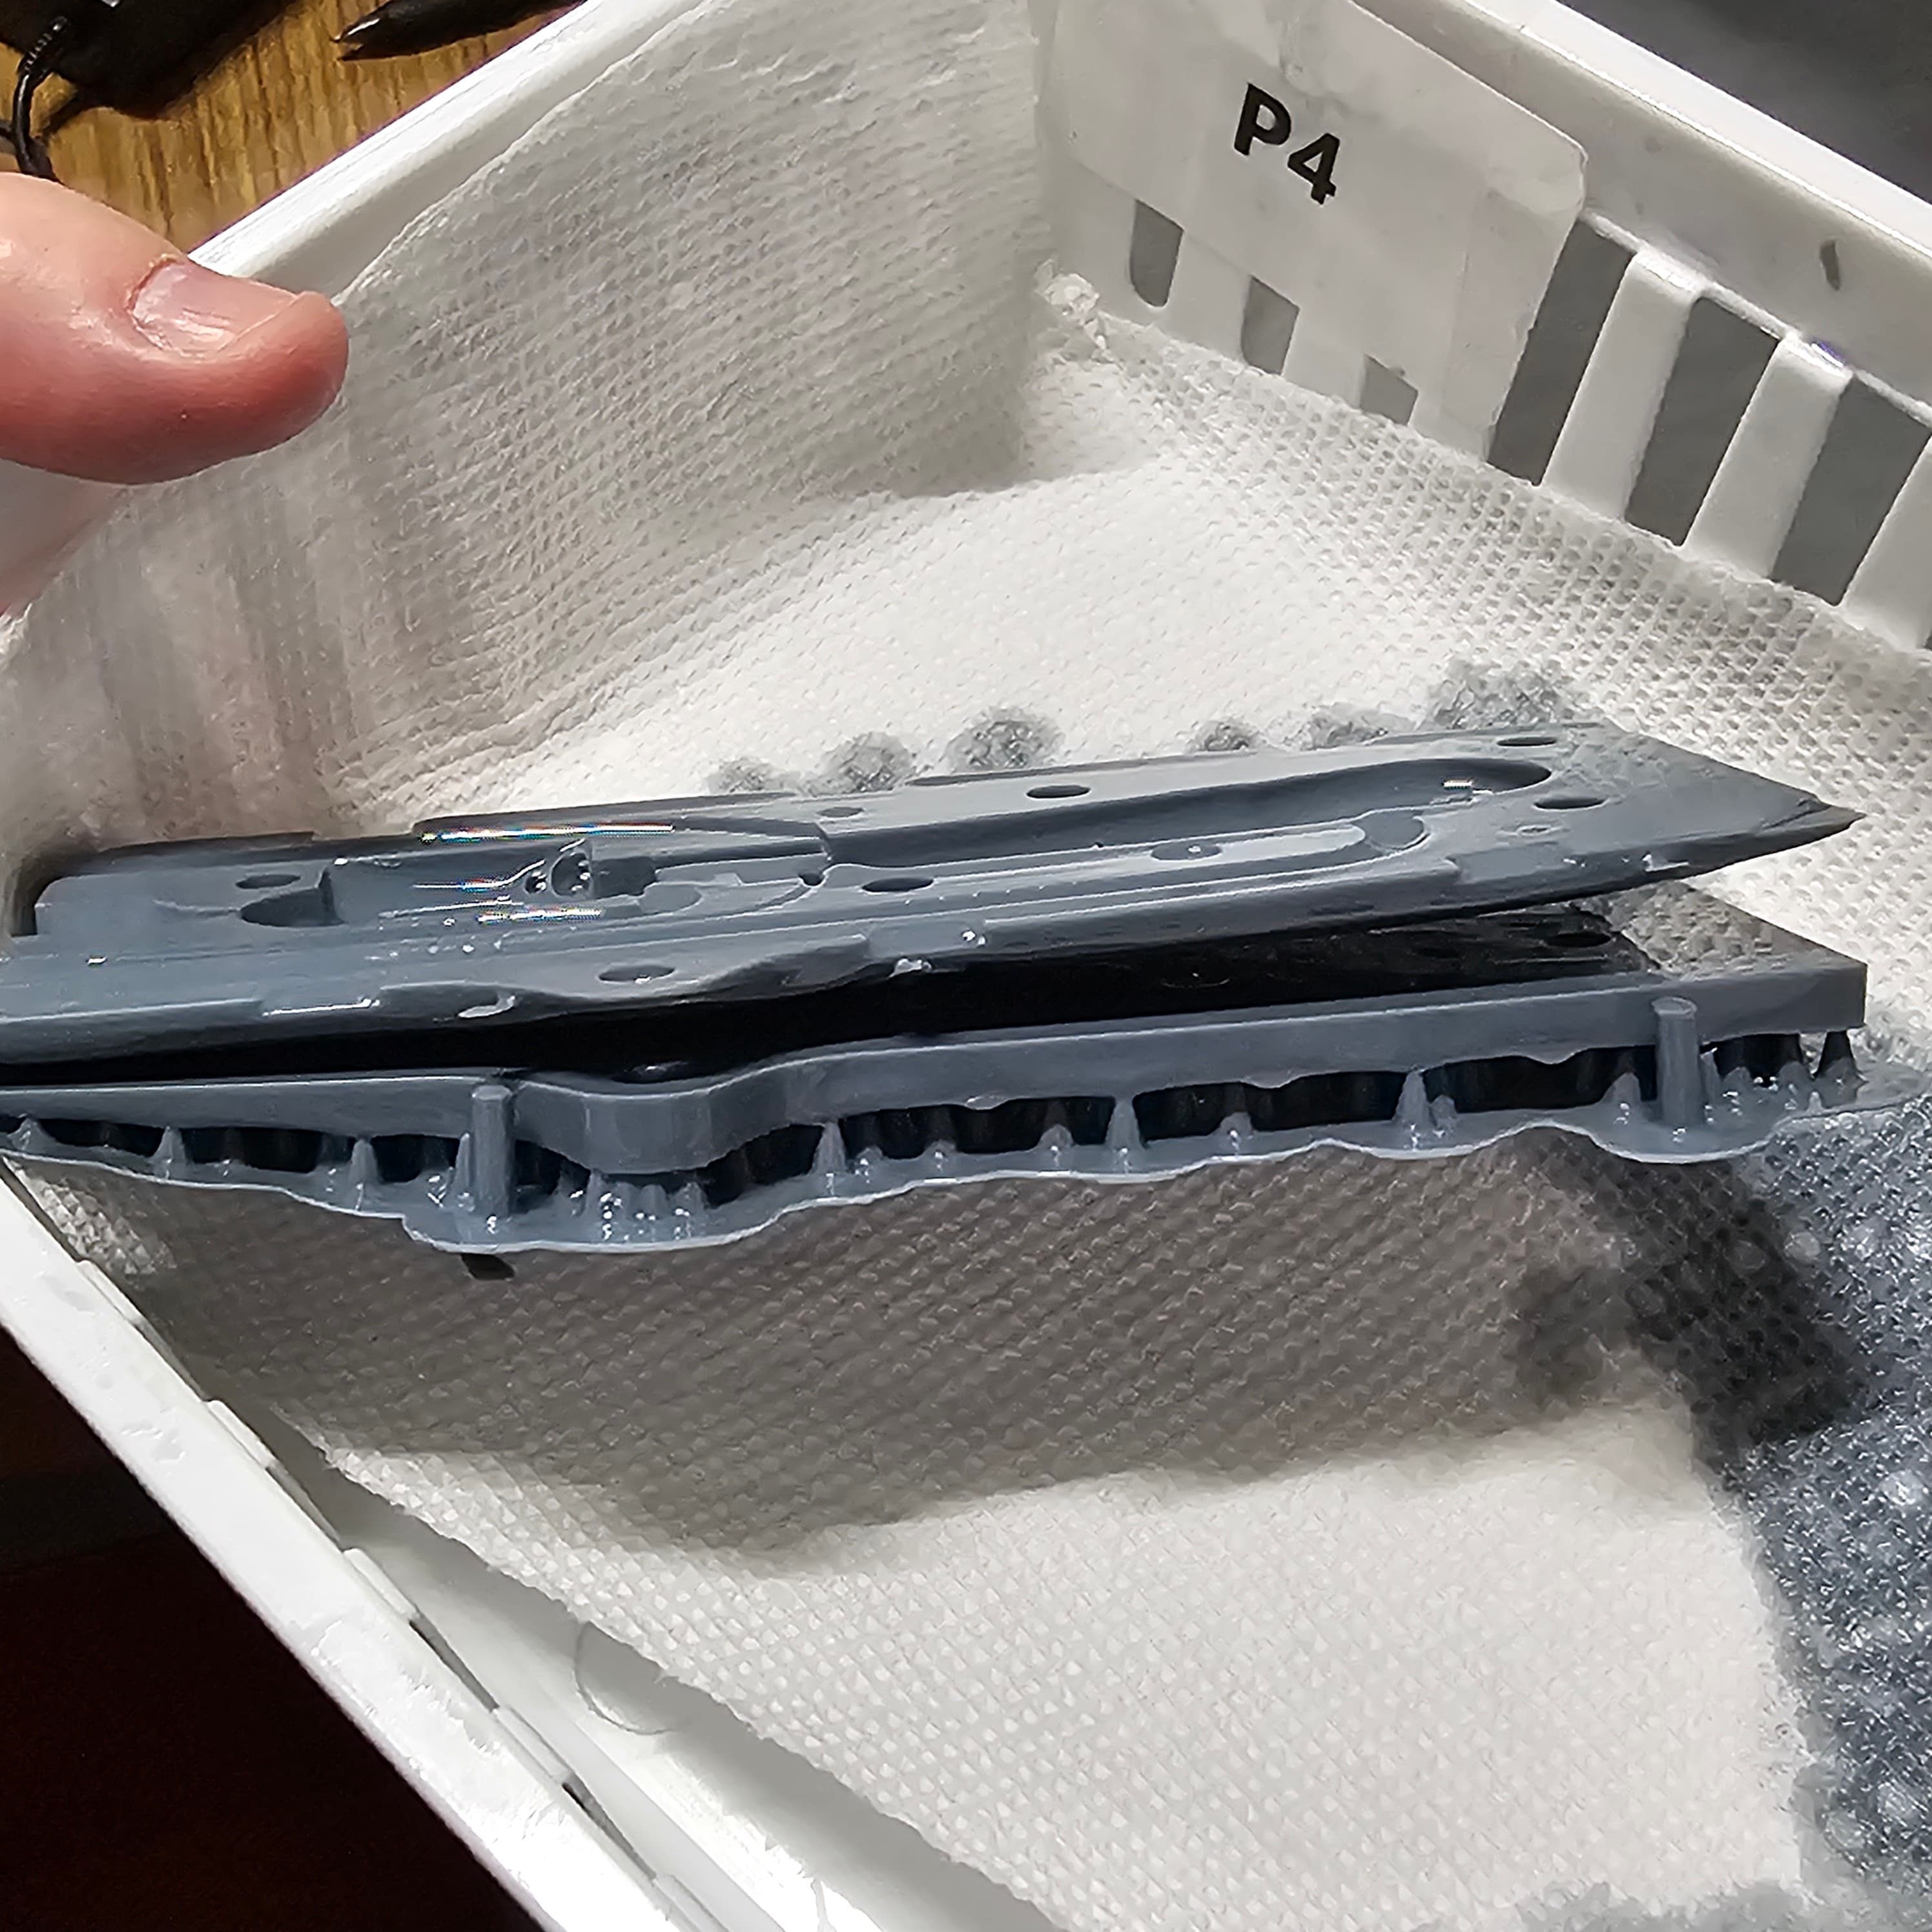
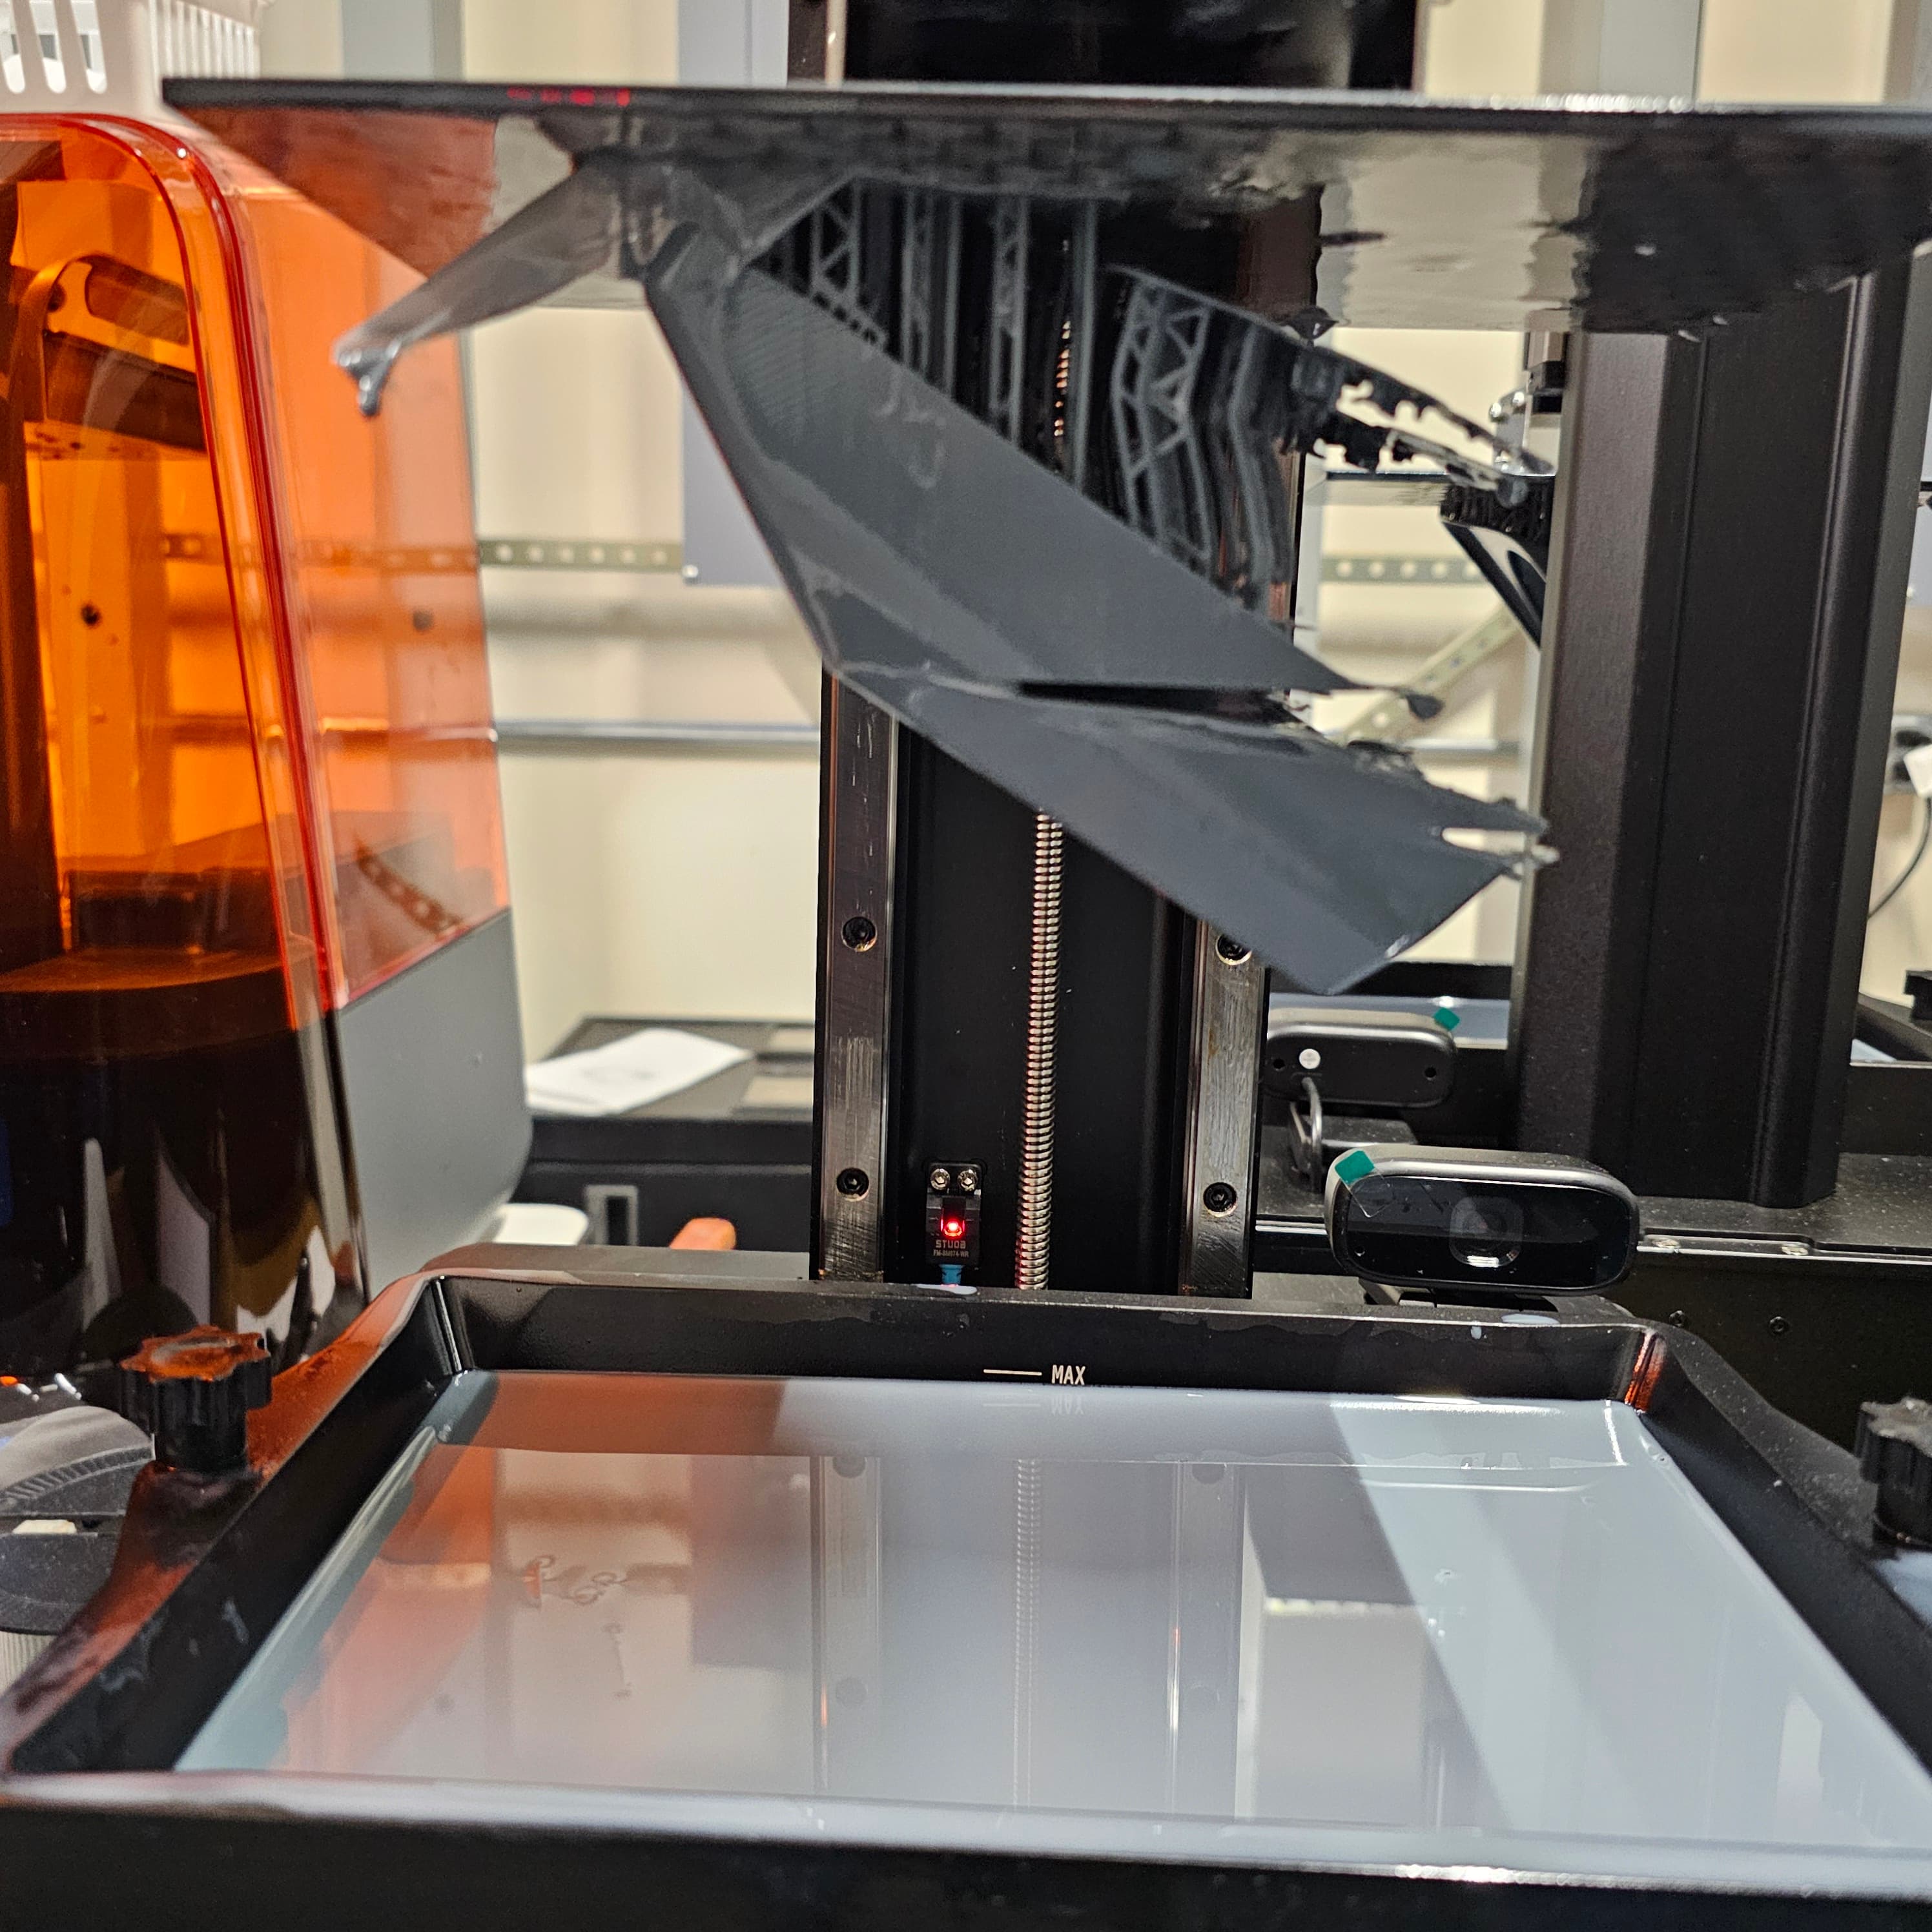
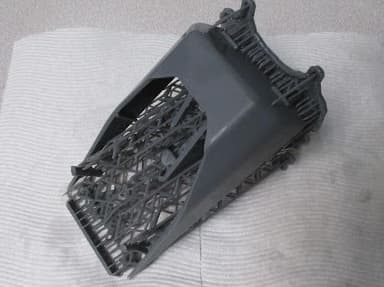
Part completed on Form 3+ (N3) in various different stages: immediately after printing and still on printer (left), after the first wash with supports still on (middle), and after support removal and cure in its final state (right).
Upon completion of the print, all prints were immediately photographed on the printer, and then were removed from the BP using a scraper as necessary. The wet parts were then taken to a Form Wash full of isopropyl alcohol (IPA) and washed for 5 minutes. The parts were then taken out and photographed with the supports still attached. The supports were then removed, the parts placed in a second IPA wash for 10 minutes to fully remove any resin on the surface. All parts were then cured using the Form Cure under UV light and to cure the part fully and eliminate any surface tack. At this point a final set of images was taken of the part.
For the post-processing, Formlabs equipment was used for both the washing stage (Form Wash) and curing stage (Form Cure) due to the similar post-processing requirements of all vat photopolymerization technologies. Two washes were used for each type of printer to prevent excessive cross-contamination: one primary wash to remove the majority of the resin, and one secondary wash that was much cleaner to remove any remaining resin. These washes were cycled with new IPA every 100 washes to prevent the IPA from becoming saturated with resin and losing its efficacy.
Observations and Measurements
After each print, the success/failure of the print was determined, being marked failed if there was a significant issue with printing that would obviously render the part non-functional. Some examples are:
-
Non-adherence to build platform: Either the first layer never adhered to the build platform or it delaminated from the build platform at some point during the print, resulting in no print on the build platform

- Major delamination: Part either printed partially or has a major open space
- Print ending warping: Part warped in such a way that it left the build plane and became unusable
- Undeveloped features in print: Normally this is caused by some piece of a print delaminating and causing a cascading failure.
More minor blemishes were noted, but as the print was completed successfully, were still marked as a success. Examples are:
-
Surface pinstriping: Surface defect that appears on parts as a series of lines or ripples
-
Limited warping: Part warped in such a way that didn’t impede the print, but could cause issues with fitting
-
Pinholes through print: Unintentional holes in the print, typically vertical
- Heavy support residue: Issues where supports left damage on the part that could impede the function of the part
The remaining parts were considered perfect, ignoring any cosmetic issues or dimensional accuracy issues that may have occurred.
Request a Free Sample Part
See and feel Formlabs quality firsthand. We’ll ship a free 3D printed sample part to your office.
Test Results
Hardware Reliability
The first result on the reliability of the printers was whether they came in working order and if they continued to function throughout the period of the testing. All five Form 4 printers, Form 3+ printers, and printers from benchmark A came in with no issues and were all able to be set up and started within 15 minutes, requiring no troubleshooting or calibration procedures. This remained largely true throughout the testing process, with no mechanical issues arising from either the Form 4 or benchmark A’s printers, and the only issue on Form 3+ printers was one of the five developing a squeaking sound in the X axis after 2.5 weeks of testing that did not result in any printing issues. Benchmark A’s printers did require a preventative release film change after three weeks of printing, which was indicated on the UI, although no damage was seen on the screen at this point.
Benchmark B’s printers had significantly more issues, with one printer coming in dead on arrival and one printer having an LCD failure after three days of printing. These printers required build platform leveling prior to use, and three of these printers required changing of the leveling procedures as the printer lost homing position and attempted to lower the BP below the LCD, causing the BP to crash when starting a print. This was solved by the operator by manually increasing the homing height until there was no longer a motor jamming action when starting a print.
Printer Reliability
Print Success and Failure Rate Across 225 Prints
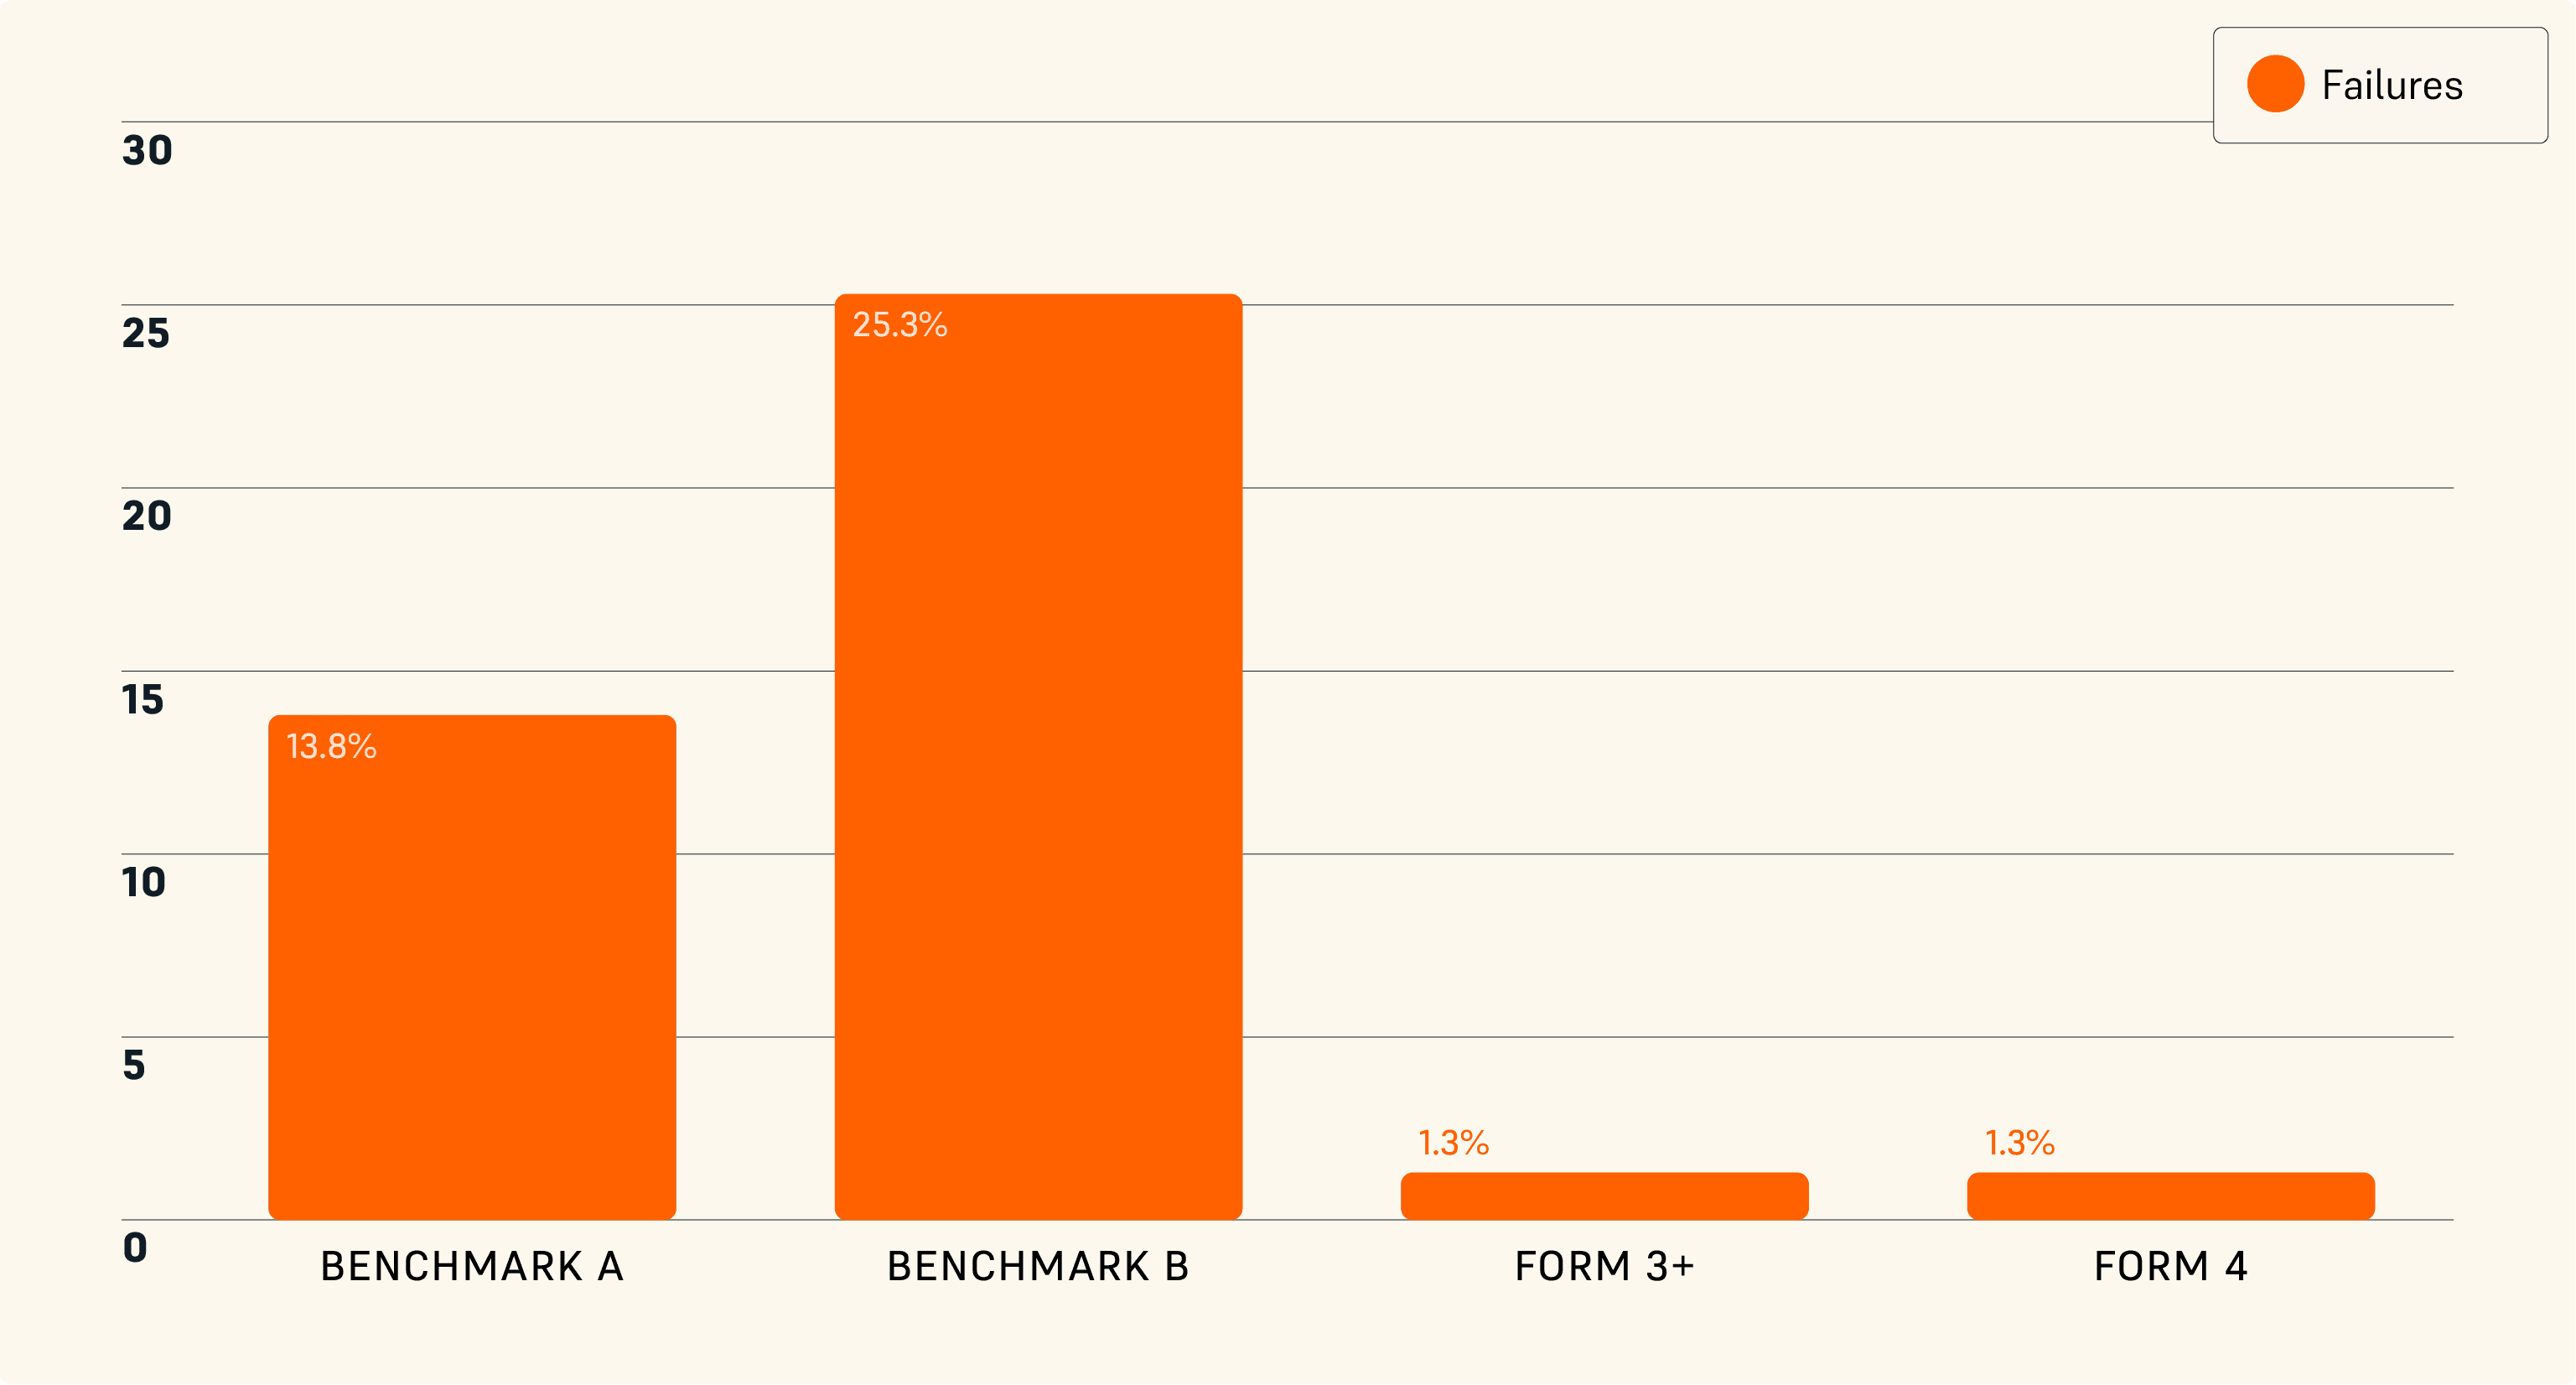
The testing showed that Formlabs’ Form 4 and Form 3+ had failure rates of 1.3% and 1.3% respectively, while Benchmark A had a failure rate of 13.8% and Benchmark B performed the worst at a failure rate of 25.3%. To really zoom in on the problem levels, it is possible to focus simply on the error rates, shown below. These failure rates are often directly attributed to part costs, failure mode and effects analysis (FMEA), and many other important criteria. Further, to eliminate potential outliers, this can be further broken down to the individual models to determine if there is any bias toward particular geometries causing failures.
Print Failure Rate
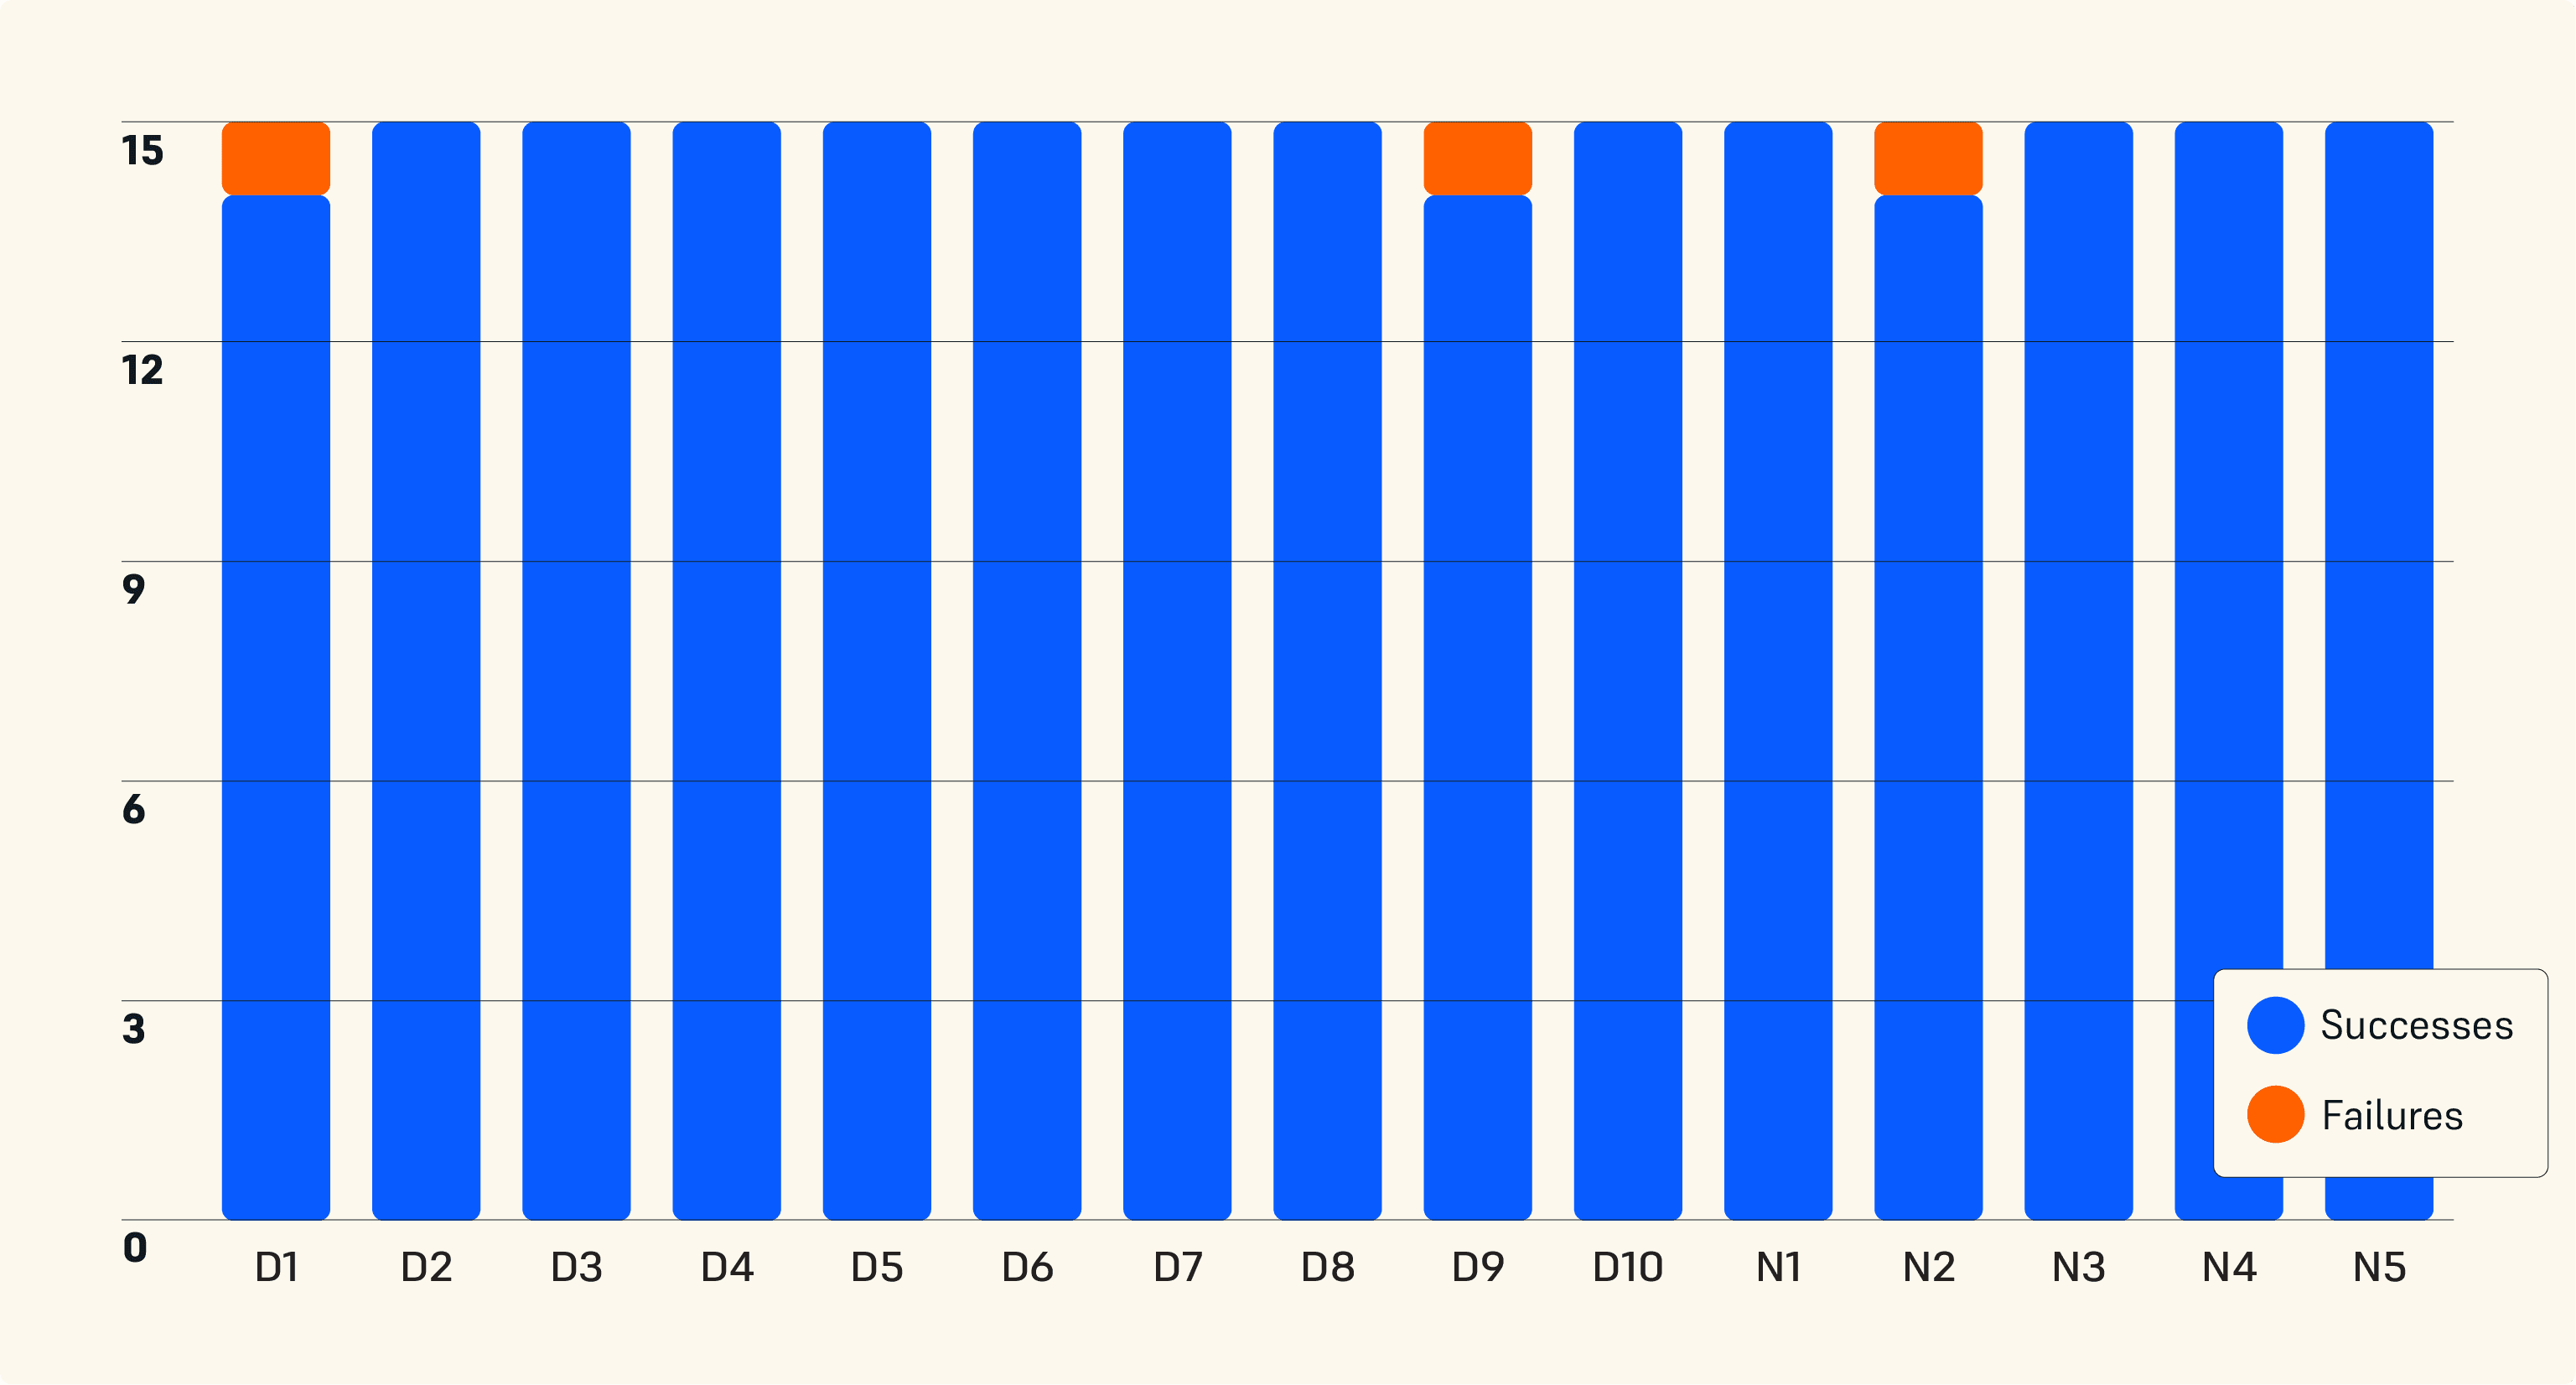
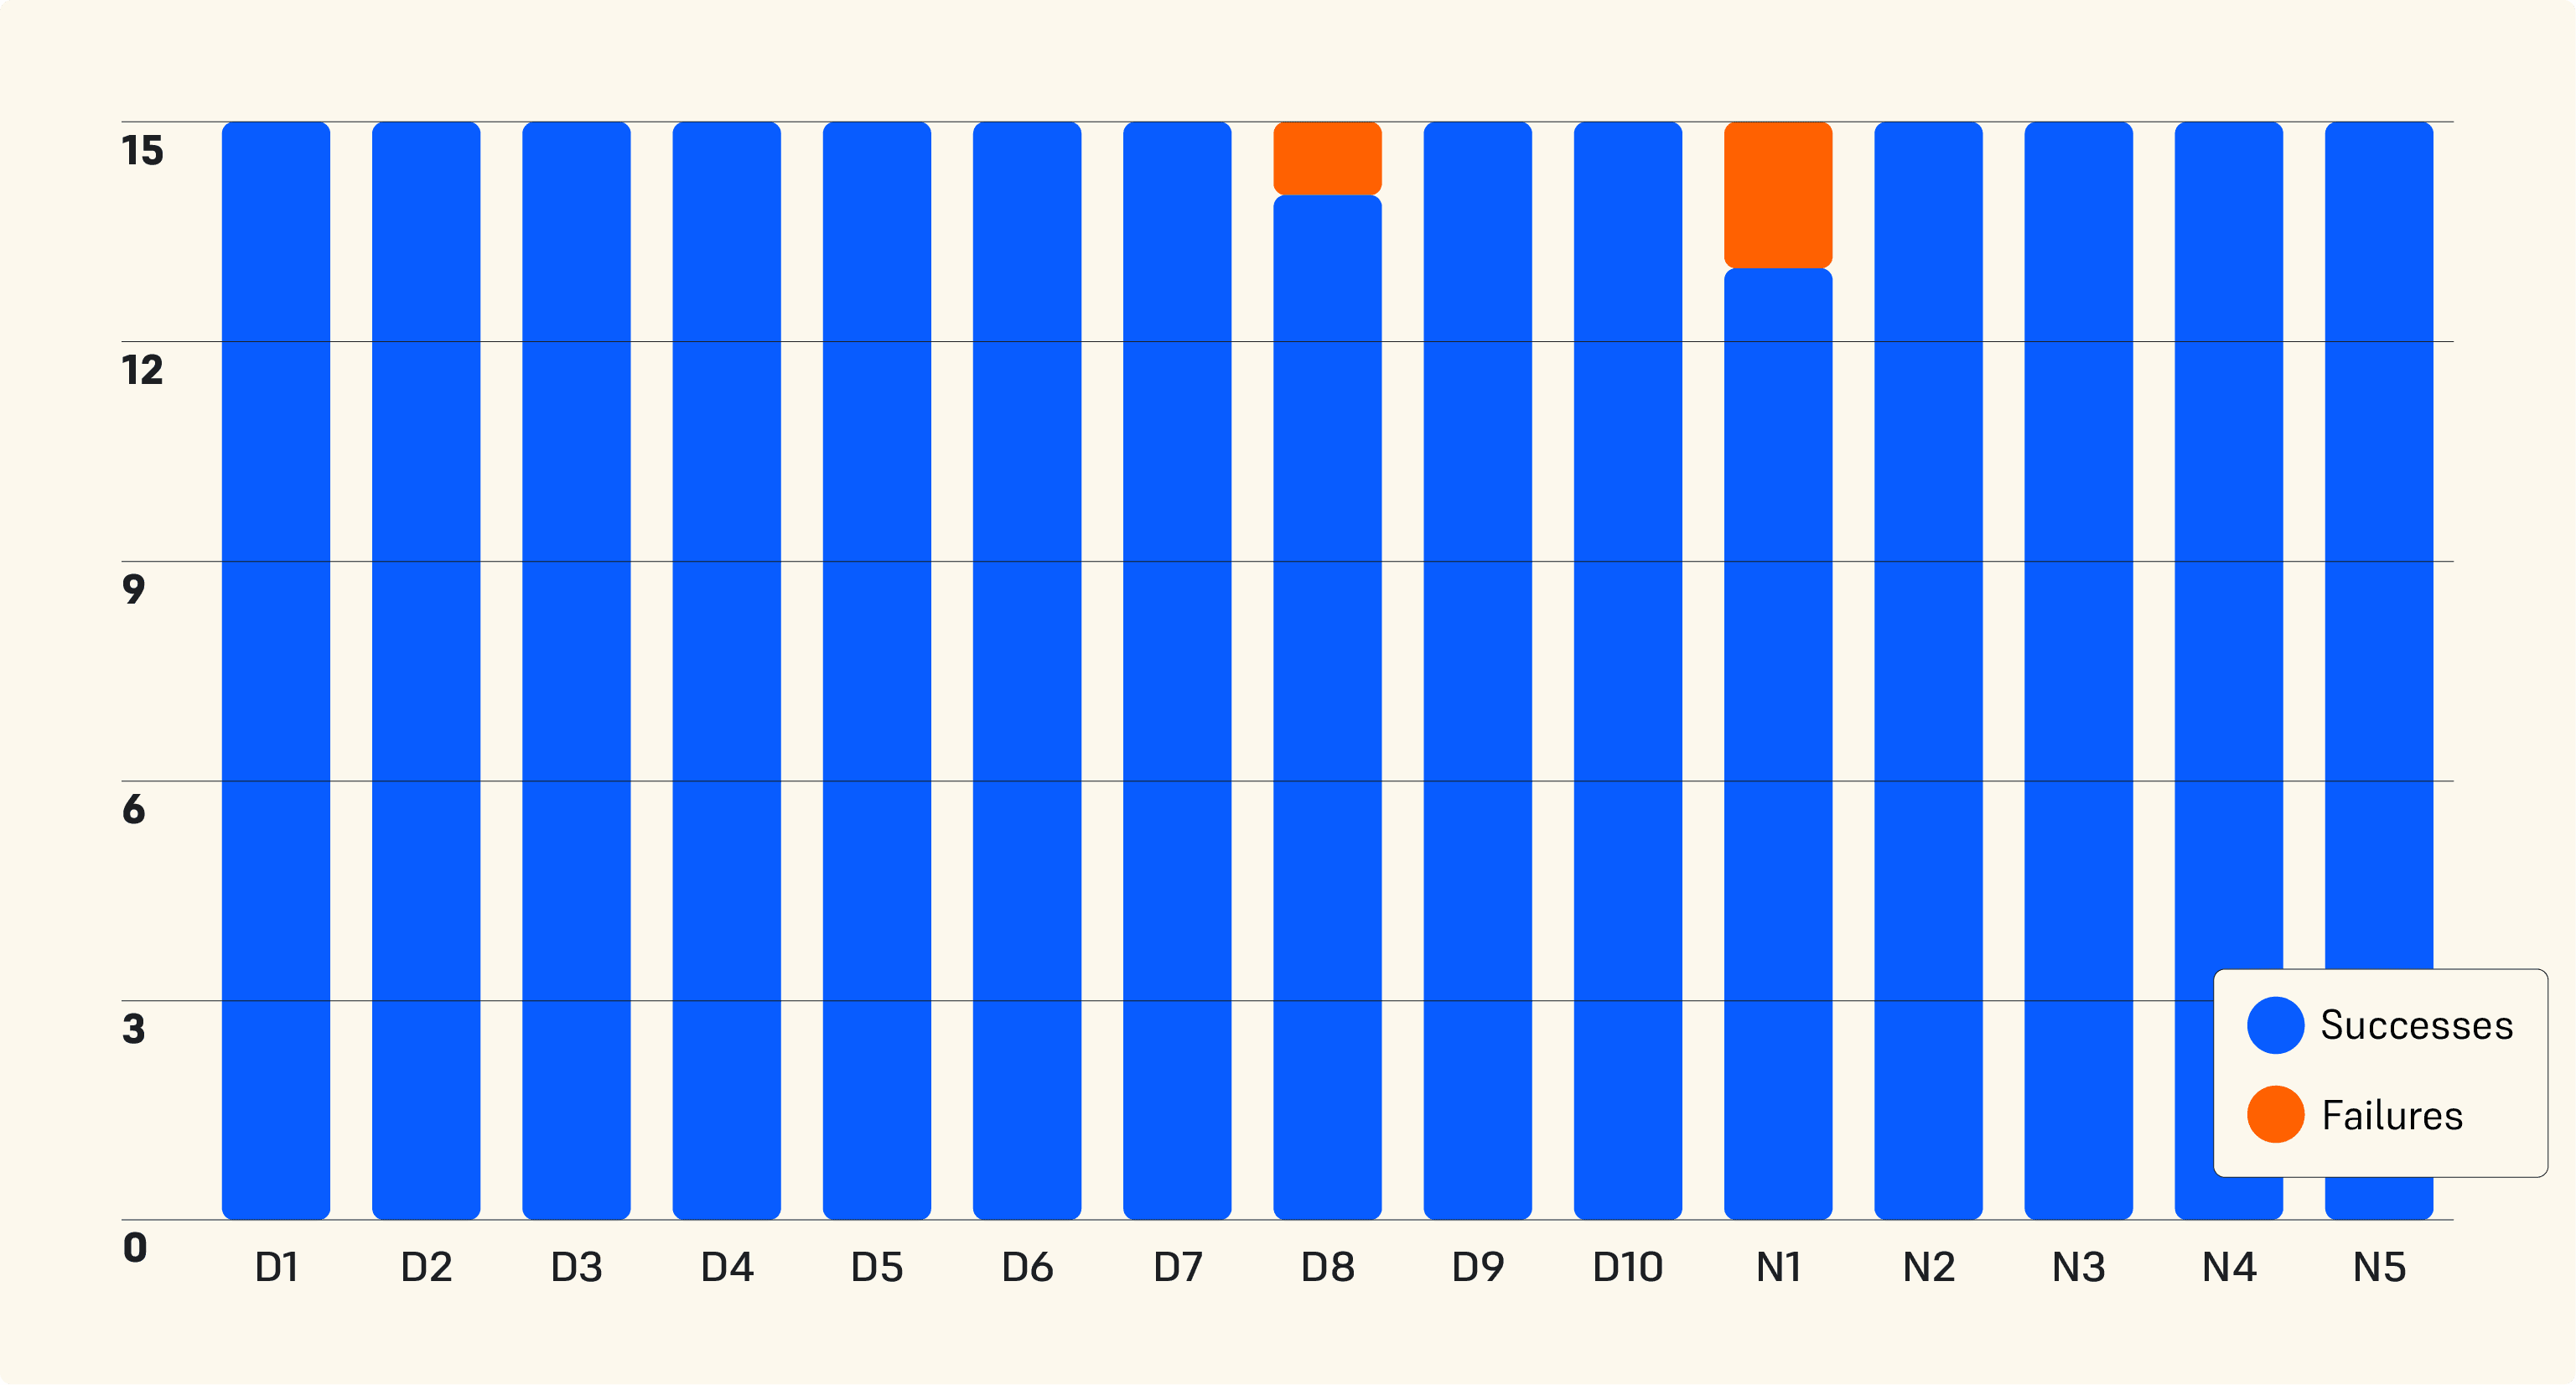
Printer Reliability by Model
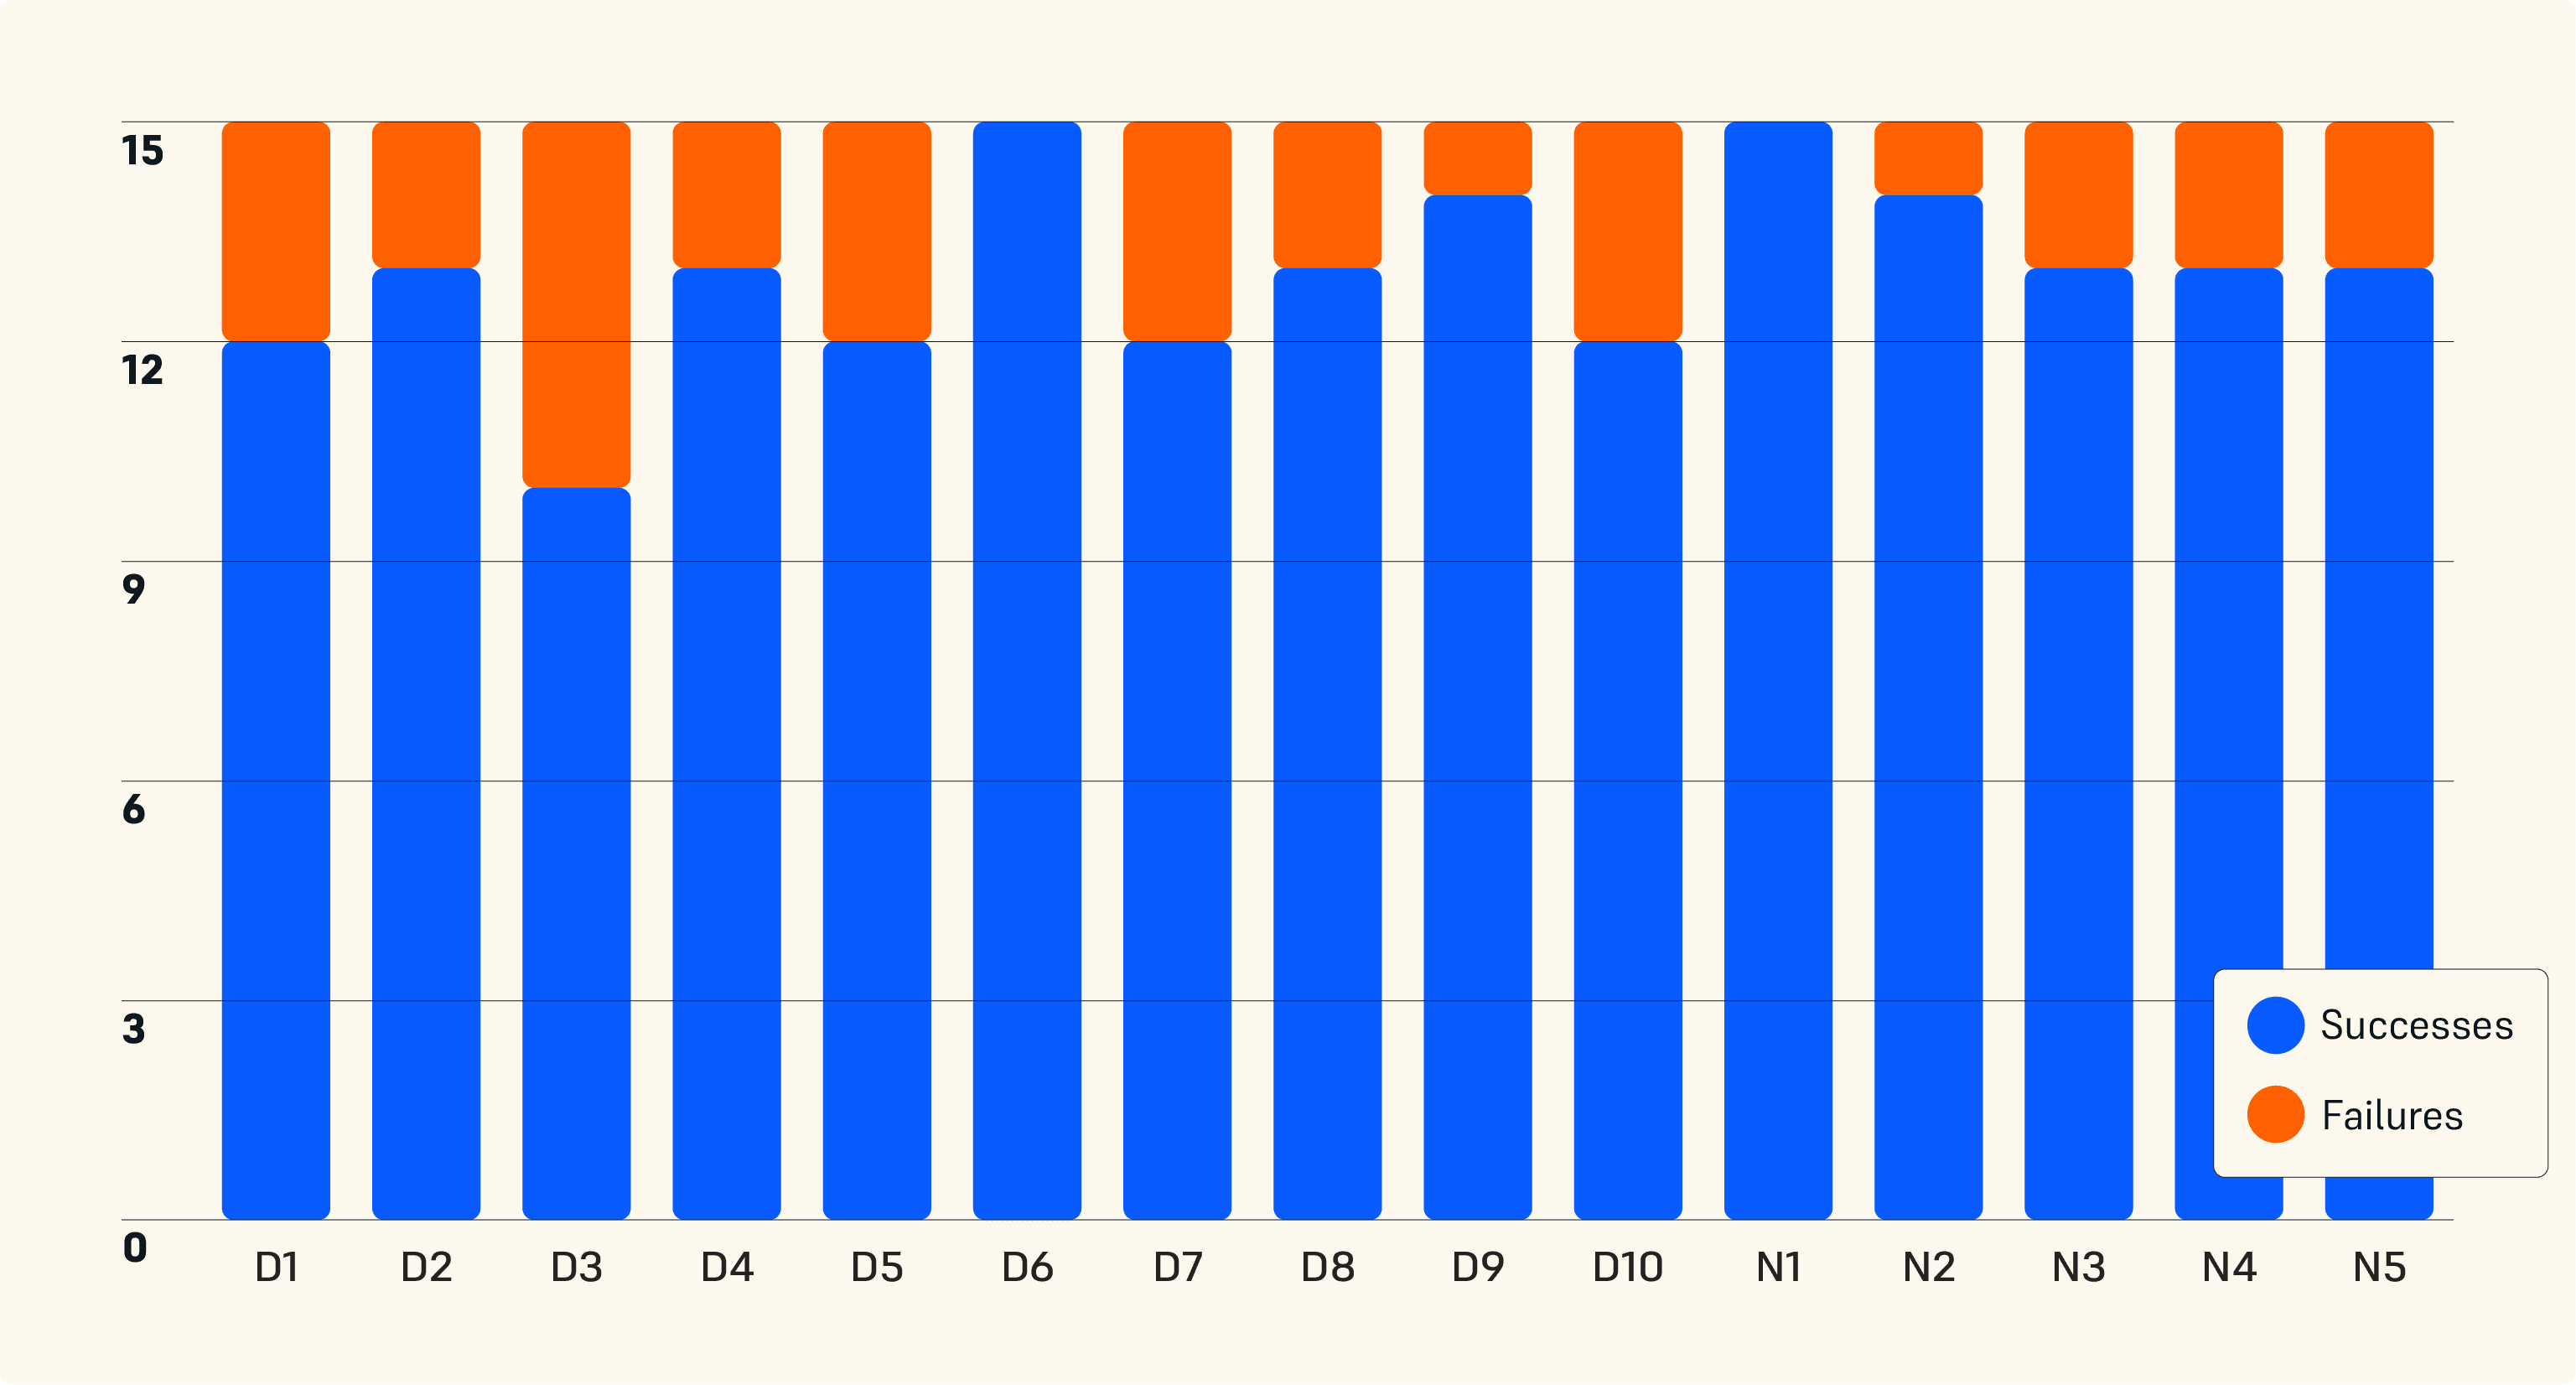
Form 4 Print Outcomes per 3D Model
Form 3+ Print Outcomes per 3D Model
Benchmark A Print Outcomes per 3D Model
Benchmark B Print Outcomes per 3D Model
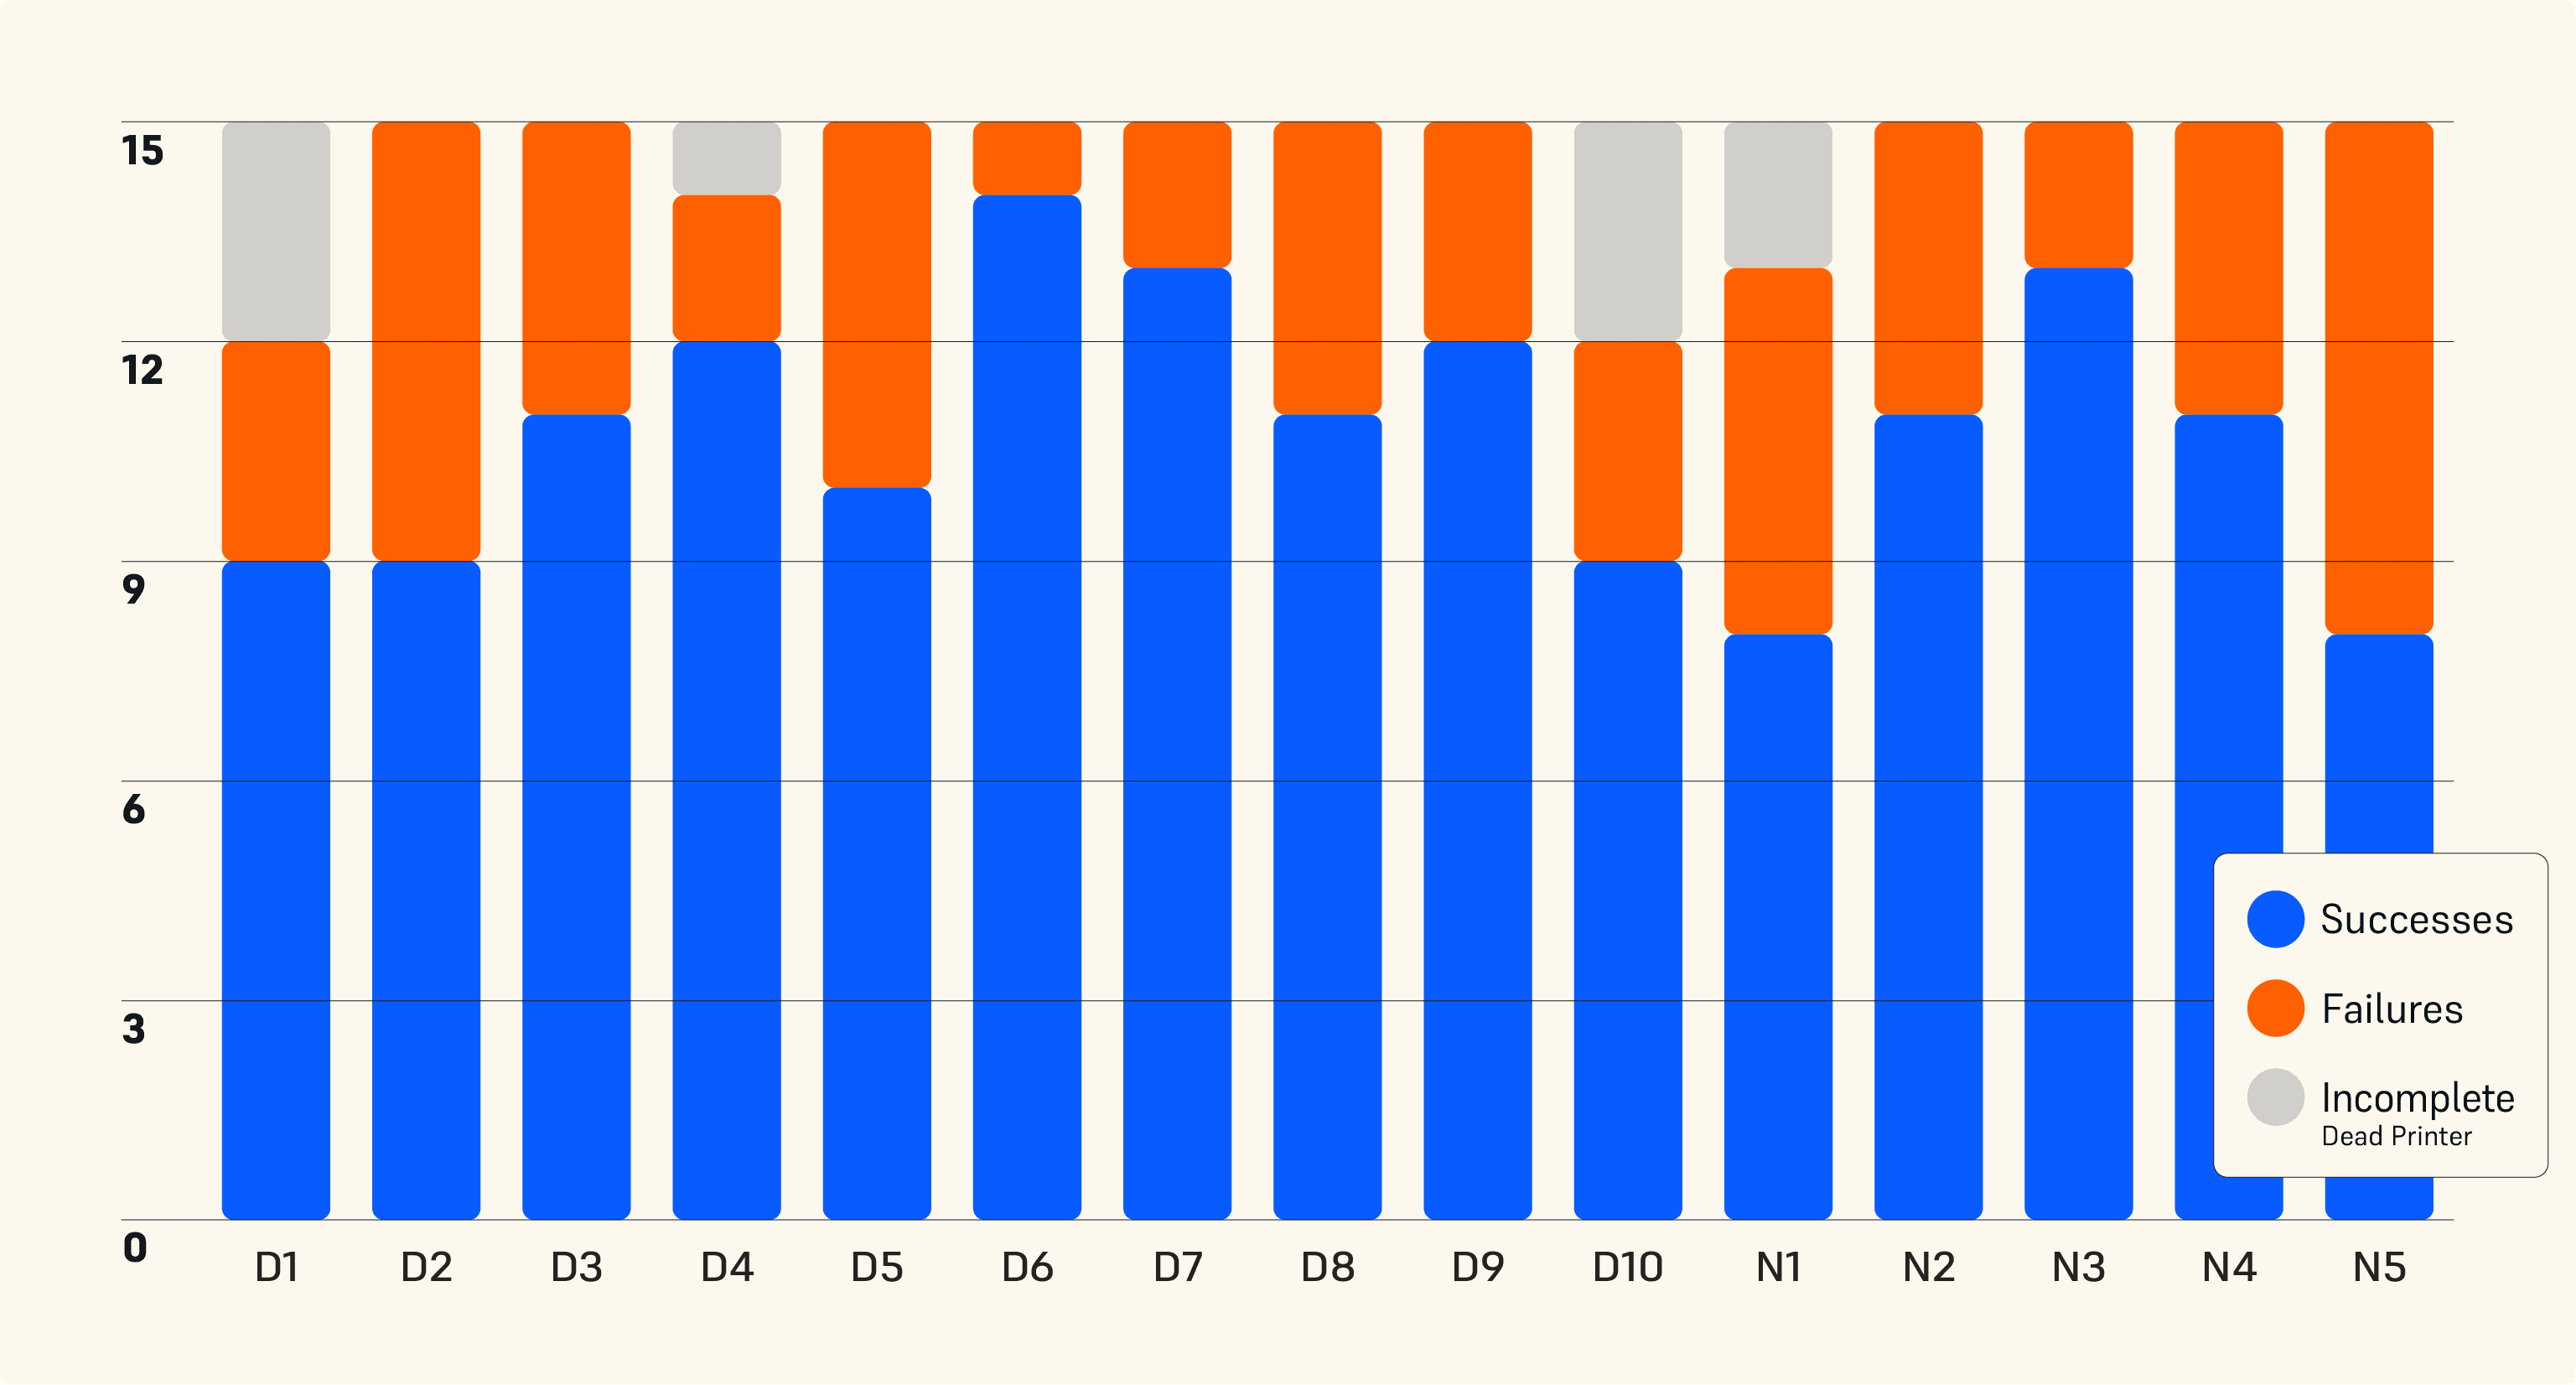
While some geometries do show more failures on individual printer types, failures are seen to occur fairly uniformly across different prints. Most geometries on Form 3+ and Form 4 perform well without print failures.
Conclusion
Over the last decade, 3D printing has become a go-to tool for many professionals, meaning the need for reliable printers is higher than ever. This report is meant to explore the performance of current vat photopolymerization printers by presenting data that has been collected by an unbiased third party.
This data should help inform decisions on which printers will best suit the user’s particular needs. For non-demanding applications, low-cost printers may be the correct choice, but for professionals who require parts to be printed reliably, accurately, and without manual labor overhead, Formlabs’ printers will perform far better. Print failures can result in not only lost resin and consumables, but also lost time, additional labor, and increased frustration.
To ensure data quality and integrity, the testing was conducted by an independent global leader in product testing. Formlabs, the manufacturer of Form 4 and Form 3+, defined the tests and procedures that the third-party testing lab used during testing, with the goal of standardizing this testing across all printers.
By completing the testing with a third-party testing laboratory, Formlabs is able to maintain the validity, integrity, and data quality of these results, and is beginning the process of standardizing the testing of reliability. Previously, claims of reliability, accuracy, speed, etc. were largely dependent on the individual company to verify, unlike material properties, which follow established methodologies and are often verified at third-party labs. The current work is an attempt to begin creating these standards and continue to push for more ASTM/ISO standards for the additive manufacturing industry, in the hopes that this will make it easier for all printing companies to validate their claims, as well as to provide reliable data to manufacturers who plan to use printing to produce production parts.
Appendix
1.0 Description of Models

|
ID |
Name |
Designer |
|
D1 |
Dental Arch Model |
Formlabs |
|
D2 |
Dental Palatal Model |
Formlabs |
|
D3 |
EV J1772 Connector Port |
Formlabs by J1772 standard |
|
D4 |
Drill Locating Jig |
Formlabs |
|
D5 |
Formlabs Test Article 1 |
Formlabs |
|
D6 |
Pelvic Surgical Guide |
Insight Surgery |
|
D7 |
Bicycle Brake Lever |
Formlabs |
|
D8 |
Soft Actuator Overmolding Mold |
RightHand Robotics |
|
D9 |
Formlabs Test Article 2 |
Formlabs |
|
D10 |
Scanned Aorta |
Northwell Health |
|
N1 |
Pour Spout Prototype |
Formlabs |
|
N2 |
Battery Enclosure Cover |
Avance Design |
|
N3 |
Automotive Cover |
Continental |
|
N4 |
Airway Device |
VIDA Medical Devices |
|
N5 |
Fog Lamp Cover |
Formlabs |
The models designed by Formlabs are available for download as a ZIP file here. The STL files are already oriented for successful resin printing, but support structures should be generated in the slicer being tested.
2.0 Print Settings
2.1 Benchmark A printer settings
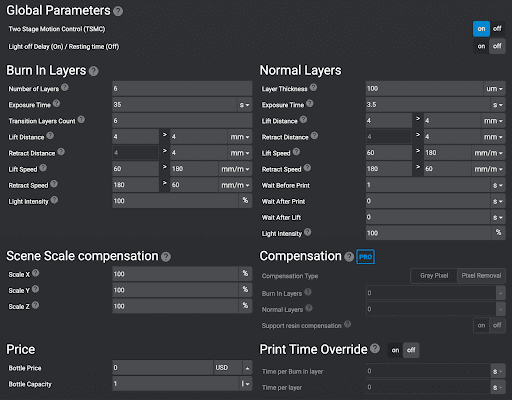
2.2 Benchmark B printer settings
3.0 Definitions
|
Term |
Definition as it applies to this report |
|
Printer |
Individual 3D printer, each machine is serialized |
|
Model |
A design file of a specific geometry |
|
|
A physical 3D print of a model |
|
Mechanical Reliability |
Reliability of a printer to function as intended, i.e. motor moves, LCD screens, power functions, etc. |
|
Print Reliability |
Reliability of a printer in successfully printing a model, without a significant issue that would render the part non-functional |