
Formlabs recently launched a white paper discussing 3D printed injection molds for low-volume rapid injection molding, and hosted a free webinar with a panel discussion in which experts from the injection molding industry discussed how 3D printing enables in-demand mold fabrication to generate hundreds of parts, from idea to production, in a matter of days.
The webinar was one of our most popular, and we received almost 100 questions from attendees. In this article, we answer some of the most frequently asked questions about injection molding with 3D printed molds.
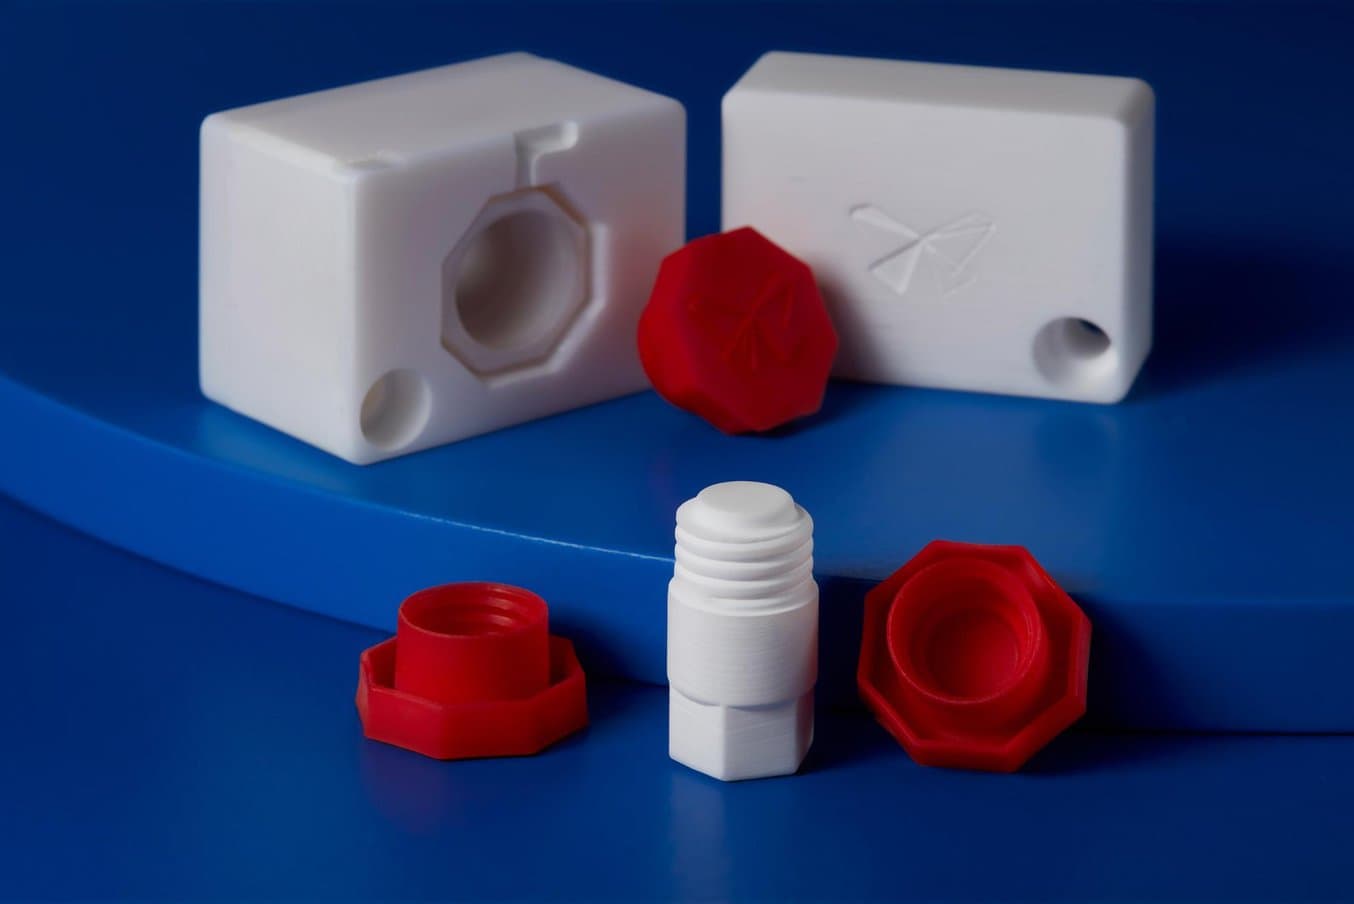
Low-Volume Rapid Injection Molding With 3D Printed Molds
Download our white paper for guidelines for using 3D printed molds in the injection molding process to lower costs and lead time and see real-life case studies with Braskem, Holimaker, and Novus Applications.
How to Quickly Fabricate Short Run Injection Molds
Watch this panel discussion in which experts from the injection molding industry will discuss how 3D printing enables in-demand mold fabrication to generate hundreds of parts, from idea to production, in a matter of days.
Equipment
Q: Could you recommend an injection molding machine?
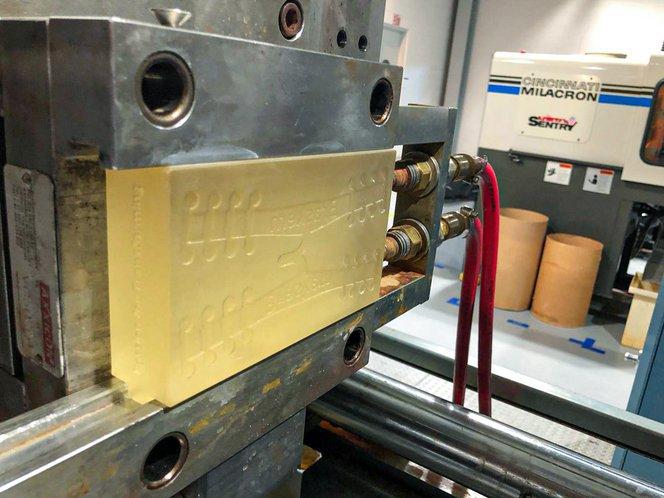
The type of injection press does not have a significant influence on the process as long as you can set critical parameters such as pressure, temperature, and clamping pressure. Of the companies featured in our white paper, Braskem uses an all-electric press Cincinnati Milacron 110 Ton Roboshot, and Novus Applications uses an all-electric Sumitomo 50 ton press. Desktop automated molders such as the product line from Babyplast are good alternatives for mass production of small parts.
If you are new to injection molding and are looking into testing it with limited investment and maintenance, using a manual desktop injection molding machine such as the Holipress or the Galomb Model-B100 is a convenient and affordable option.
Some of our customers have recommended systems from Minijector, Morgan, APSX, or Micromolder as well.
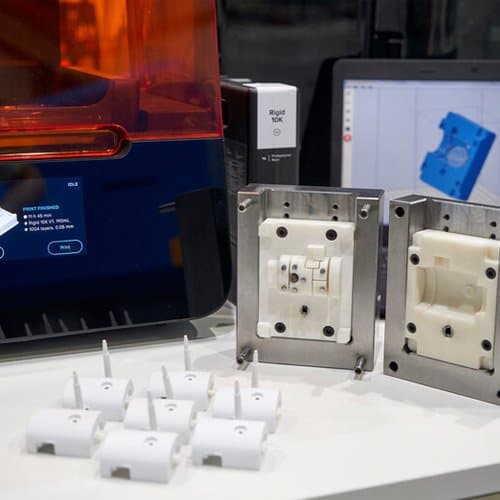
3D printed injection molds can be used with both industrial injection molding machines and smaller desktop devices.
Q: What injected materials are compatible with Formlabs materials?
Our customers have been injecting a broad range of thermoplastics using 3D printed molds made of Formlabs materials, including PP, PE, TPE, TPU, POM, ABS, and PA. A low viscosity material will help reduce the pressure and extend the lifetime of the mold. Polypropylene and TPE plastics are easy to process at a high number of cycles. In contrast, more technical plastics like PA will allow a lower number of runs. Using a release agent helps to separate the part from the mold, in particular for flexible materials such as TPUs or TPEs.
Process Overview
Q: What is the longevity of a 3D printed mold and how does the mold fail? What does short-run mean?
The longevity of a 3D printed mold varies with the design, the injected material, and the molding conditions. We should not expect the same performance from a 3D printing polymer mold as from a machined metallic one. Critical dimensions are harder to meet, cooling time is longer because the thermal transfer occurs slower in plastic. Molds printed with High Temp Resin or Rigid 10K Resin can crack or break under pressure. Usually, failure starts to appear in the form of stress fracture, sometimes corners and features can delaminate and come off with the molded part.
Most of our users can produce hundreds of parts per mold, with low viscosity materials such as polypropylene. More technical plastics like PA will allow a lower number of runs. However, molds can be printed multiple times and are easily interchangeable depending on your system. We have not studied the impact of cycle time on mold breakage.
Q: How do SLS and FDM technologies compare to SLA for 3D printed injection molds?
Stereolithography (SLA) printing technology is a great choice for injection molding. It is characterized by a smooth surface finish and high precision that the mold will transfer to the final part and that also facilitates demolding compared to fused deposition modeling (FDM) or SLS molds. 3D prints produced by SLA are chemically bonded such that they are fully dense and isotropic, producing functional molds at a quality not possible with FDM.
Q: What is the difference in cost between this process and the standard metal mold?
3D printed injection molds generally cost around $25-$200 in materials, depending on their size. Standard metal molds can cost anywhere from a couple of hundred dollars to $10,000+, depending on their size, complexity, and whether your company has in-house CNC capabilities or has to outsource the production of the mold.
As a rule of thumb, the economics of using metal injection molds improve at higher volumes, as the cost of the mold is divided among more parts.
The cost-savings generated by 3D printed injection molds can be quite substantial. For 6,000 mask straps, Braskem reduced costs by 97% compared to outsourcing a metal mold.
Q: When does injection molding make sense vs. 3D printing for low volume production?
3D printing can produce prototypes and functional parts fast and at a low cost from a wide range of materials. In general, we recommend 3D printing parts and prototypes in the earlier stages of product development when the design often changes and for lower volume production. Depending on the application, 3D printing can also be suitable for end-use parts. 3D printing can also be used to create complex designs that would be impossible to produce with injection molding.
If you cannot find a suitable 3D printing material or you prefer to use a type of standard thermoplastic, injection molding with 3D printed molds might be the better choice. When you need hundreds of identical prototypes, it is often faster to print one mold and inject, rather than 3D printing hundreds of parts (depending on the geometry and the printing technology). Since 3D printing materials are more expensive, the economics for injection molding parts also become favorable as the volume increases.
Q: Do you have any issues with part crystallinity when using the 3D printed molds?
We have not noticed nor received any feedback on part crystallization when using 3D printed molds.
Design Process
The complexity of the injection molding process is mostly driven by the complexity of the part and the mold structure. Some design features help to improve dimensional accuracy and extend the lifetime of a mold. Our white paper provides detailed design guidelines to consider when using a 3D printed mold versus a metal mold.
Q: What is the recommended draft angle? What is the recommended vent/overflow depth? Is the large vent/overflow to move air or to move polymer?
We recommend adding a 2 to 5 degrees draft angle if possible.
Air venting allows air to escape and helps prevent air entrapment. We recommend a 0.05 mm depth.
Q: How can we avoid wasting printing material? Can you clarify what you mean by "backing out large mold"? Is backing out of the mold similar to keeping the wall thickness consistent?
Backing out a large mold means adjusting the back of the mold to reduce material consumption. Reducing the cross-section in areas that are not supporting the cavity will save material costs and lower the risk of print failure or warpage. The wall thickness should be consistent in the areas that support the cavity.
Q: How do you overcome alignment and parting line issues when using two mold halves?
We recommend designing one side of the stack flat while the other side carries the design. This will lower the chances of block misalignment and the risk of flashing. If this is not possible we recommend post-processing the printed mold: desktop milling or hand-sanding will help to fit both halves of the mold together and avoid flashing.
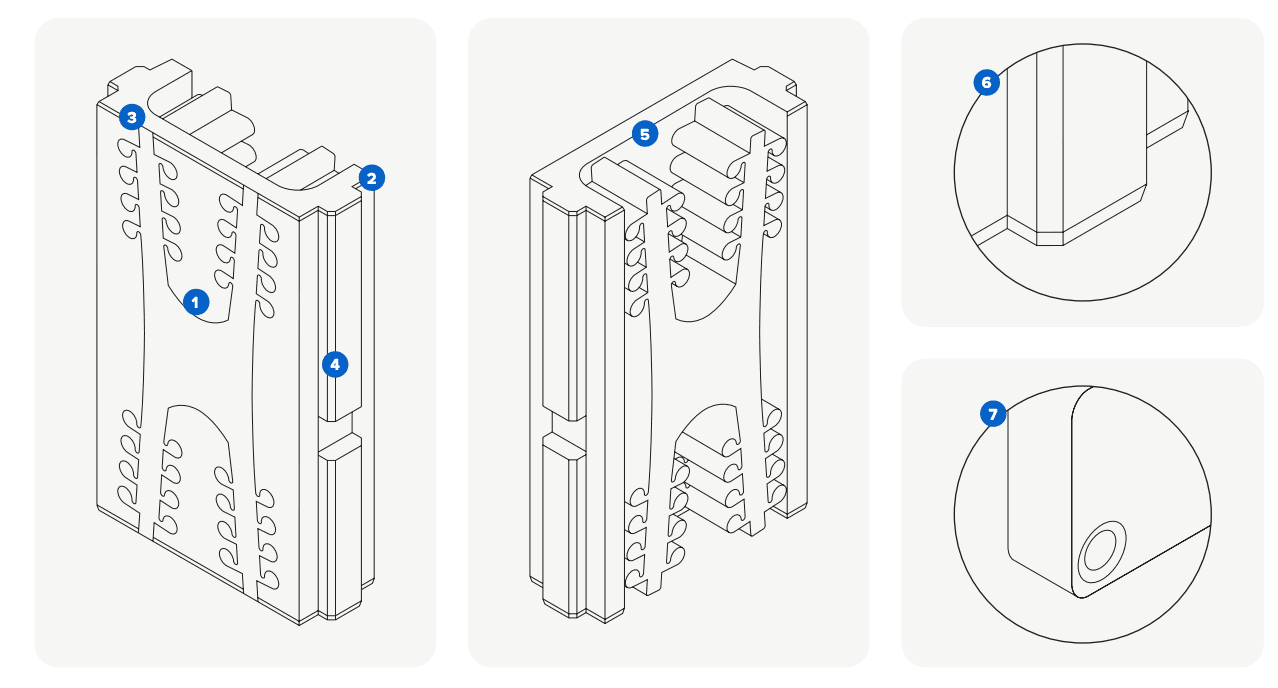
Beyond the general rules for injection mold design, there are several ways to extend the lifetime of a mold and ensure dimensional accuracy. Download our white paper for the detailed guidelines.
Q: How small can the features be?
We recommend following the guidelines of design for additive manufacturing—you can download the design guide for the Formlabs Form 3 here. In addition, thin cross-sections should be avoided: surface thickness less than 1-2 mm may deform with heat. Negative features smaller than 0.5 mm can be challenging to get a good definition on, while standing features smaller than 0.1 mm can be prone to break off.
Q: Can you accommodate side actions in 3D printed molds?
Yes, see the Novus application case study in the white paper.
Printing Process
Q: Are there any recommendations to account for the shrinkage encountered when printing molds?
Print a preliminary mold to understand dimensional deviations. We recommend adding stock allowance to the CAD model of the mold to compensate for any dimensional variation. Post-process the mold for manual adjustments. Desktop milling or hand-sanding will help to meet critical dimensions, fit both halves of the mold together, and avoid flashing.
Q: How do you deal with layer lines on cavity style prints?
We recommend printing at the smallest layer height available. SLA printing technology is a great choice for molding because its parts are characterized by a smooth surface finish and high precision.
Q: Can you add a surface finish, texturing, and patterns to 3D printed injection mold tools? Would that be a post-process step or can you print it directly onto the surface?
SLA is a great solution for texturing parts. Thanks to its high resolution, it can reproduce small features and intricate details. Surfaces printed without support structures usually do not require any post-treatment.
Q: Are there any other materials you would recommend for injection molding besides High Temp and Rigid 10k?
Some customers, including Holimaker, use Grey Pro Resin. It has lower thermal conductivity and dimensional stability than High Temp Resin and Rigid 10K Resin, but is softer and has a higher elongation at break, which allows it to sustain a large number of cycles before breaking.
Q: What is the curing process for the High Temp Resin and Rigid 10K Resin for this application?
We recommend post-curing High Temp Resin part with supports for 120 minutes at 80°C and thermally post-curing for three hours at 160°C. Read our support page here.
We recommend post-curing Rigid 10K Resin parts with supports in Form Cure for 60 minutes at 70°C and then heating the part at 125°C for 90 minutes for a higher HDT. Read our support page here.
Q: What’s the maximum size of a mold that can be made with this process? Does the process work on the Form 3L machine?
Molds from High Temp Resin and Rigid 10K Resin can be printed on the Form 3L, with a maximum build volume of 33.5 × 20 × 30 cm (13.2 × 7.9 × 11.8 in). However, large printed molds will be more difficult to print and inject.
Molding Conditions
Q: Are the 3D printed injection molds only compatible with low-temp, low-pressure processes? What are the recommended injected pressure and temperature?
Lowering the pressure and temperature will help reduce the risk of mold breakage and extend the longevity of the mold. However, the design of the mold will largely influence the impact of the pressure in the cavity.
In the case studies featured in our white paper, Braskem injected parts at 230 °C and 5000 PSI, while in Novus Applications’ case the pressure at failure was 11500 PSI at 210 °C.
High Temp Resin has a heat deflection temperature (HDT) of 238 °C @ 0.45 MPa. Rigid 10K has an HDT of 218 °C @ 0.45 MPa and a tensile modulus of 10,000 MPa.
Q: Are aluminum mold frames recommended for using 3D prints as inserts? Can you use the 3D printed mold without the aluminum?
Yes, 3D printed injection molds can be used without an aluminum mold frame but it is recommended to place the printed molds inside a metallic frame or print the insert and machine the outside of the mold to provide support against the downward pressure and heat of the injection nozzle.
3D printed injection mold can accommodate side actions.
Cooling
Q: Is cooling time longer with a 3D printed mold than with a metal mold?
Yes, the cooling time is longer with a 3D printed injection mold as the thermal transfer occurs slower in plastic parts. Placing the printed mold inside a metallic frame partially absorbs the heat and helps reduce cooling time. Alternatively, 3D print multiple molds and switch them between cycles to reduce the cycle time.
Q: How do you deal with cooling the part? Do you add cooling channels?
Cooling can be accelerated by using interchangeable stacks to run new cycles while the other sets cool in order to decrease the cycle time, which compensates for the low thermal conductivity of a plastic mold. The molds in our case studies did not include cooling channels, but they could be an option, as well as applying compressed air.
Demolding
Q: How do you eject the part? Do 3D printing molds require the use of a mold release agent? Could you recommend one?
No ejection pins were utilized in the case studies featured in our white paper, each part was manually pulled. Including large draft angles and printing at small layer height for a smooth surface finish helps the demolding process. Depending on the injected material, adhesion of the part to the mold can cause deterioration of the mold during extraction, in particular with flexible materials such as TPUs or TPEs.
Using a mold release agent is a good solution to help separate the part from the mold. Silicone mold release agents are compatible with Formlabs Grey Pro Resin, High Temp Resin, and Rigid 10K Resin. Novus Applications uses solutions from Slide and Braskem uses the MR303 silicone food grade release agent from Sprayon.
Related Processes
Q: Could we consider electroplating the printed mold to extend its lifetime?
SLA 3D printed parts can be electroplated—watch our webinar on this topic to learn more about it. Whether electroplating extends the lifetime of 3D printed molds is not something we can comment on at this time.
Q: Can you use Formlabs 3D printed parts for other molding processes?
Yes. Engineers and manufacturers have adopted 3D printing for various mold-making techniques across a wide range of industries. Visit our resources site to learn more about using 3D printed molds and patterns for techniques such as thermoforming, silicone molding, sand casting, investment casting, laminating processes.
Do you have more questions about using 3D printing for injection molding? Download the white paper and watch the webinar for detailed guidelines and real-life case studies or contact our sales team directly.