Formlabs developed our own print preparation software, PreForm, to make the pre-print process for our desktop stereolithography (SLA) 3D printer, the Form 2, as simple and automated as possible.
In the latest update to PreForm, we’ve optimized the mechanics of the Form 2 to make print times faster, added the ability to save support locations when switching materials, and updated print bases to make the pre-print process and post-processing of parts even easier. We’ve also added support for the new Color Kit and Black Resin v4.
Read on to learn more about the latest features, and download the new version to try the new tools.
Update, February 20, 2018: The faster print speeds previously enabled in this PreForm release (2.14.0) have unexpectedly contributed to lower print success than the high standard we hold for our products. As such, we have reverted these changes in version 2.15.0 in favor of restoring the same level of reliability you've come to expect from the Form 2. We continue to work to improve print speeds while maintaining best-in-class print reliability.
Reuse Support Locations After Switching Materials
Different materials have different support requirements. Previous versions of PreForm would automatically reset supports every time the material changed. But what if you spent a lot of time manually placing supports? Previously, it was necessary to redo that work with every material switch.
In PreForm 2.14, it’s now possible to “Import” the previous support positions when you switch materials.
Let’s look at an example. Here is a part originally created with Tough v5 selected as the material. If you decided to change materials to Durable v2, you would see the following dialog:

Clicking on “Delete Supports” will delete all of the supports. This means you have to recreate all of the supports, whether automatically or by hand, to adjust for different support requirements for different resins.
Clicking on “Import” imports the previous support positions. The supports themselves are then recreated to suit the parameters of each resin, and it’s no longer necessary to place those supports from scratch.
Make sure to check the printability report when importing support locations into a different material. Some materials require much more support than others. In those cases, consider adding additional supports before printing.
Click “Advanced” on this dialog to access advanced features, such as using the tip sizes previously specified when placing the supports.
Improved Bases
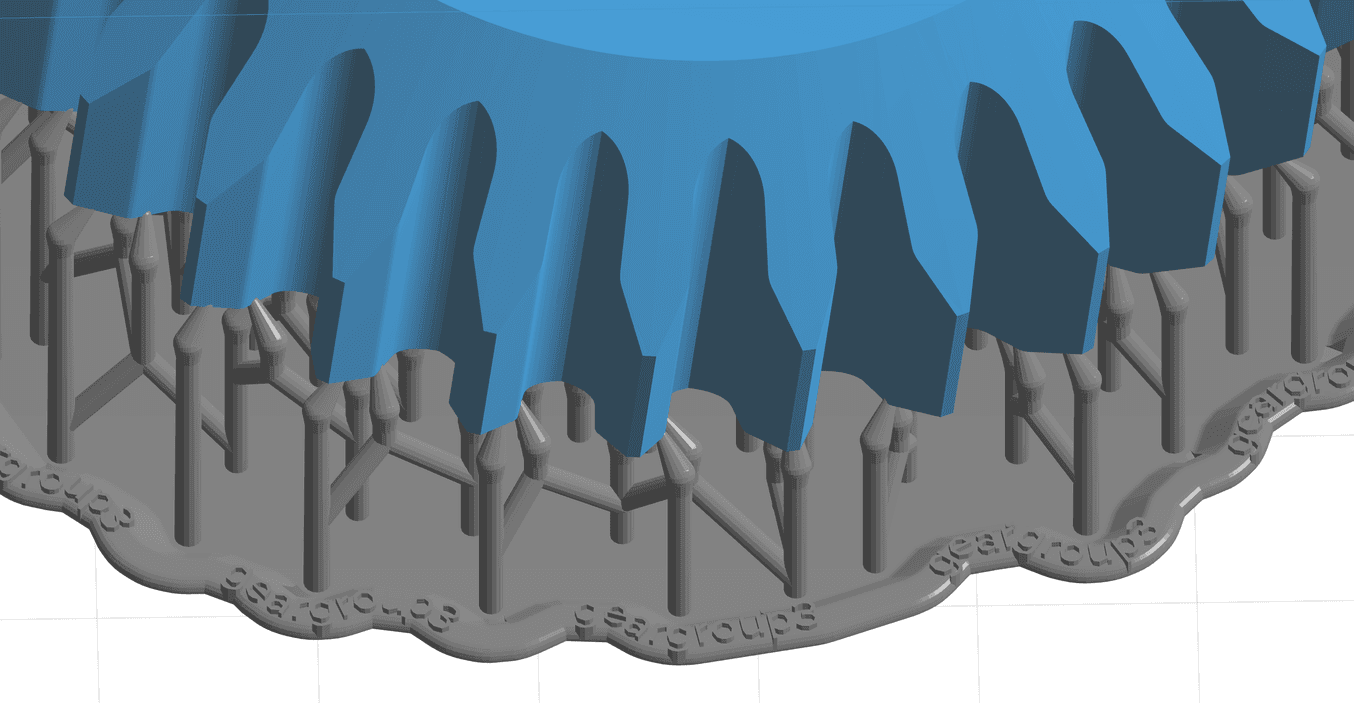
Version 2.14 of PreForm also includes a number of improvements to the bases that connect the supports to the build platform. The edges are more rounded, and small holes have been added to the sides, as pictured below.

Through extensive testing, we've found that these changes help ensure that the bases adhere better to the build platform. This can prevent some issues we’ve seen with specialty materials and with large, unusually shaped models.
We’ve also added new text indicating the name of the model around the edge of the base. This can be extremely useful when printing large numbers of similar looking parts. If need be, you can easily remove this text by unchecking the “Base Label” button when generating the supports.

Manually Navigate Layers with the Slicer
The slicer tool in PreForm is a handy tool for looking for islands or manually placing supports. In PreForm 2.14, you can manually edit the layer number indicated in the text box to navigate to view any individual layer.

Improved Printability Display
In addition to under-supported areas, the printability check now detects minima (highlighted in red) and cups (highlighted in yellow) that may cause print issues.

Try PreForm 2.14 for Yourself
Visit the PreForm web page to read the release notes and give the newest tools a try. Even if you’re not already using the Form 2, PreForm is free for anyone to download and experiment with your 3D models.