Vibratory tumbling, also known as vibratory finishing, is a well-established method of improving the surface hardness and smoothness of different materials. Traditionally used on metal parts to deburr them after machining or pressing, many manufacturers now rely on vibratory tumbling as a vital post-processing step for 3D printed parts as well.
Specifically for selective laser sintering (SLS) 3D printed parts, which can sometimes have a slightly grainy surface, vibratory finishing can help make them ready for end-use or smooth their integration into functional assemblies.
Read this guide for an introduction to vibratory finishing for SLS 3D printed parts and watch our webinar to see the full results of our tumbler comparison, testing results, and learn more about the workflow.
Vibratory Tumbling for SLS 3D Printed Parts
In this report, we’ll detail how to choose the right machine and materials for your workflow as well as highlight best practices and methods to achieve superior results.
Vibratory Finishing Process and Benefits
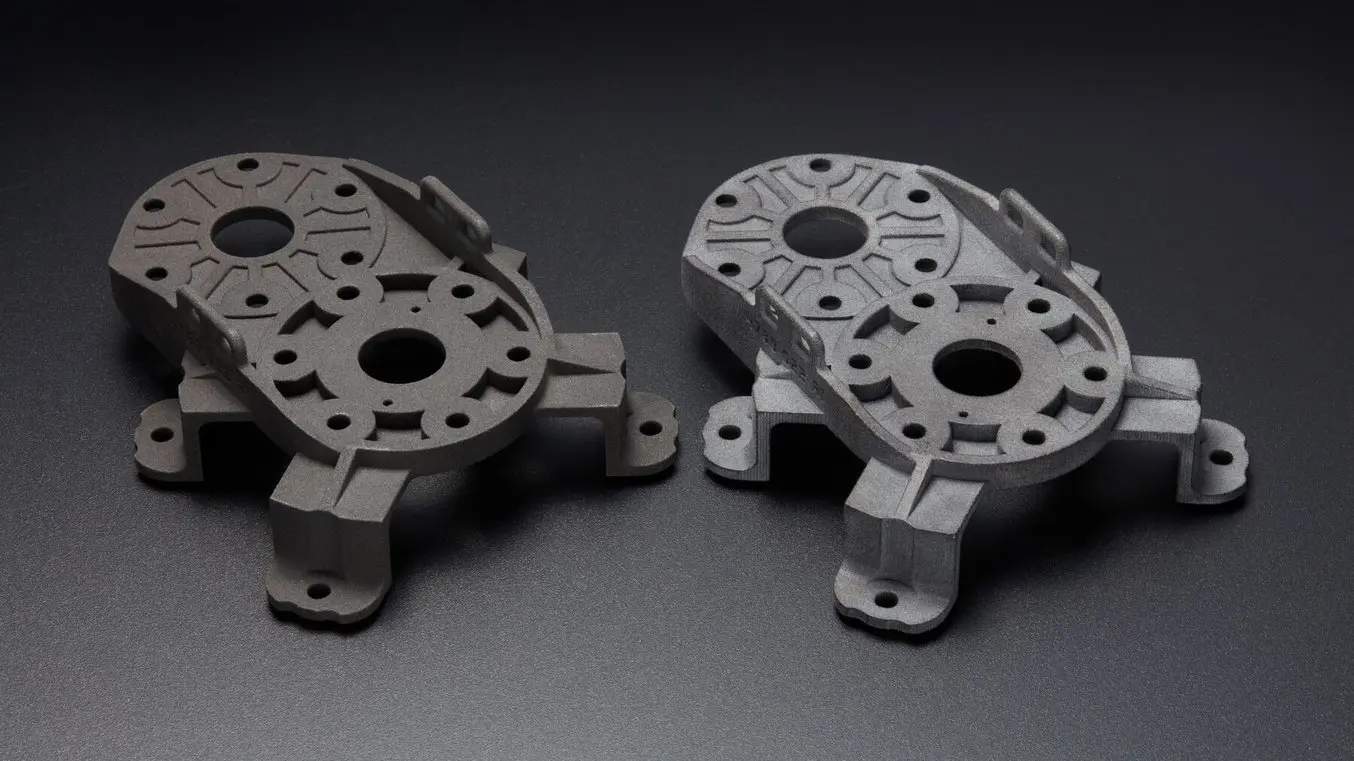
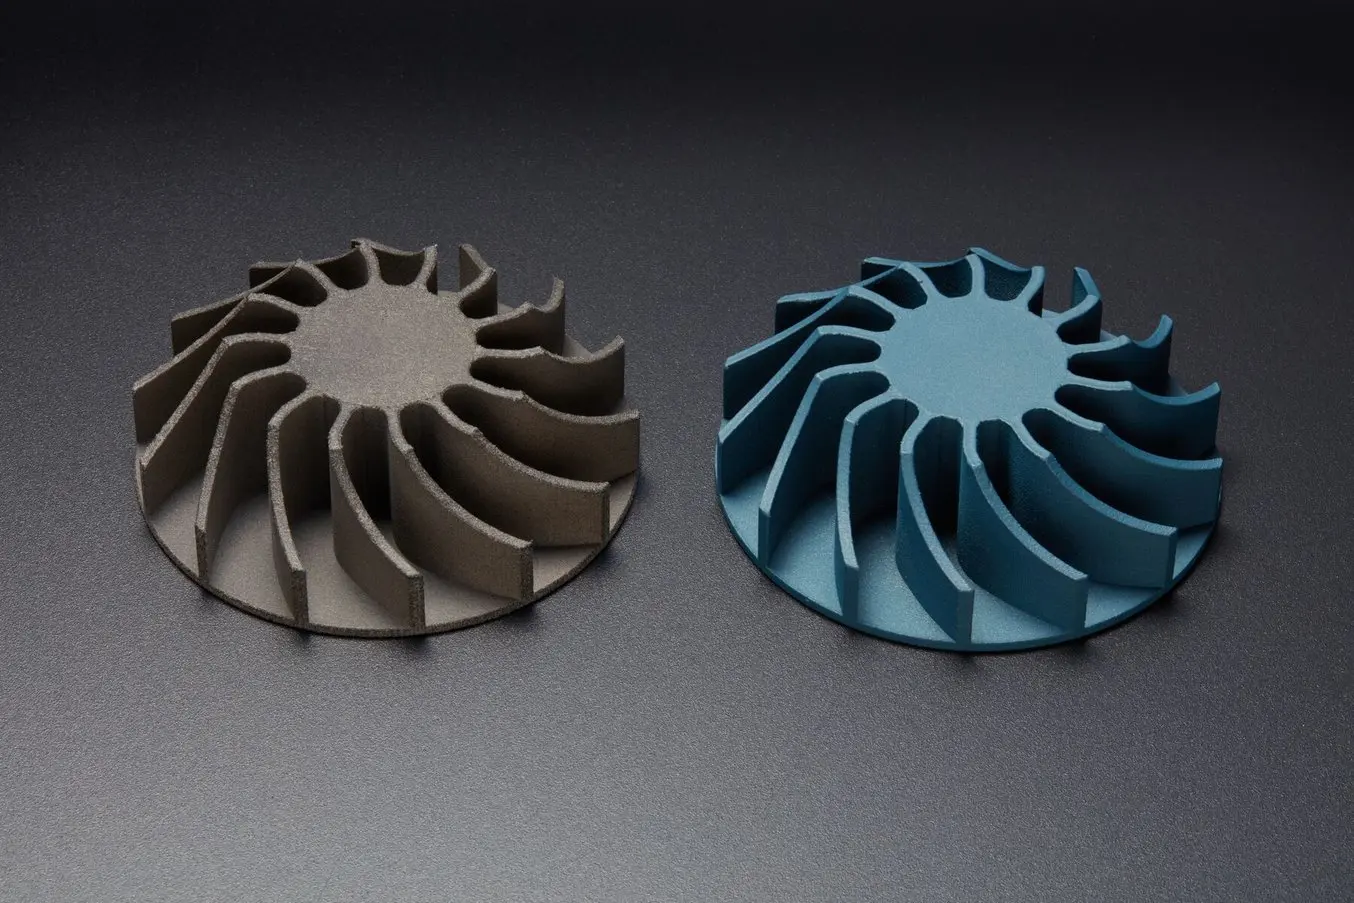
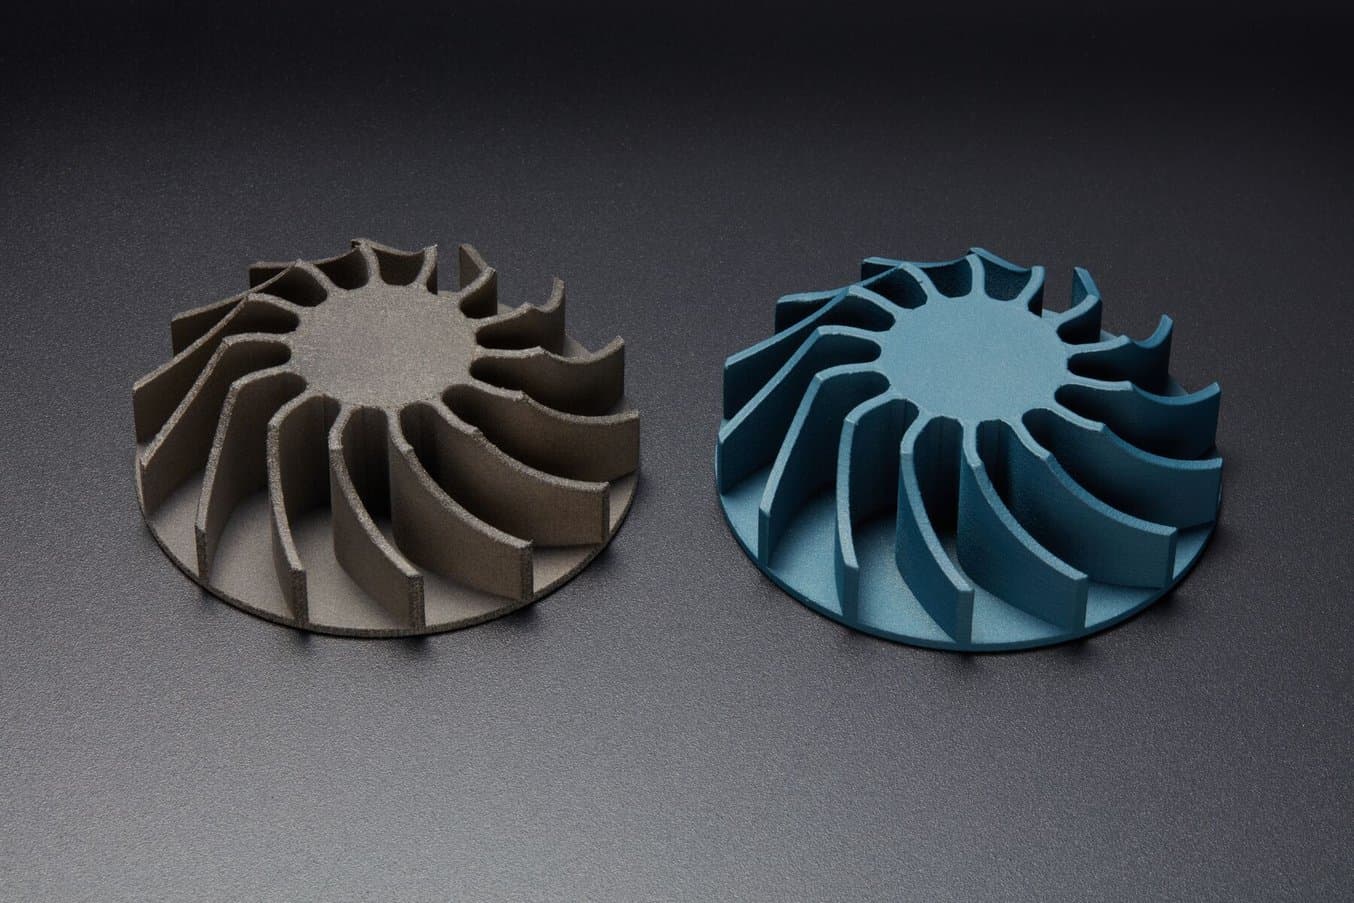
Our test part, before and after vibratory tumbling. The tumbled part is light gray and matte in appearance.
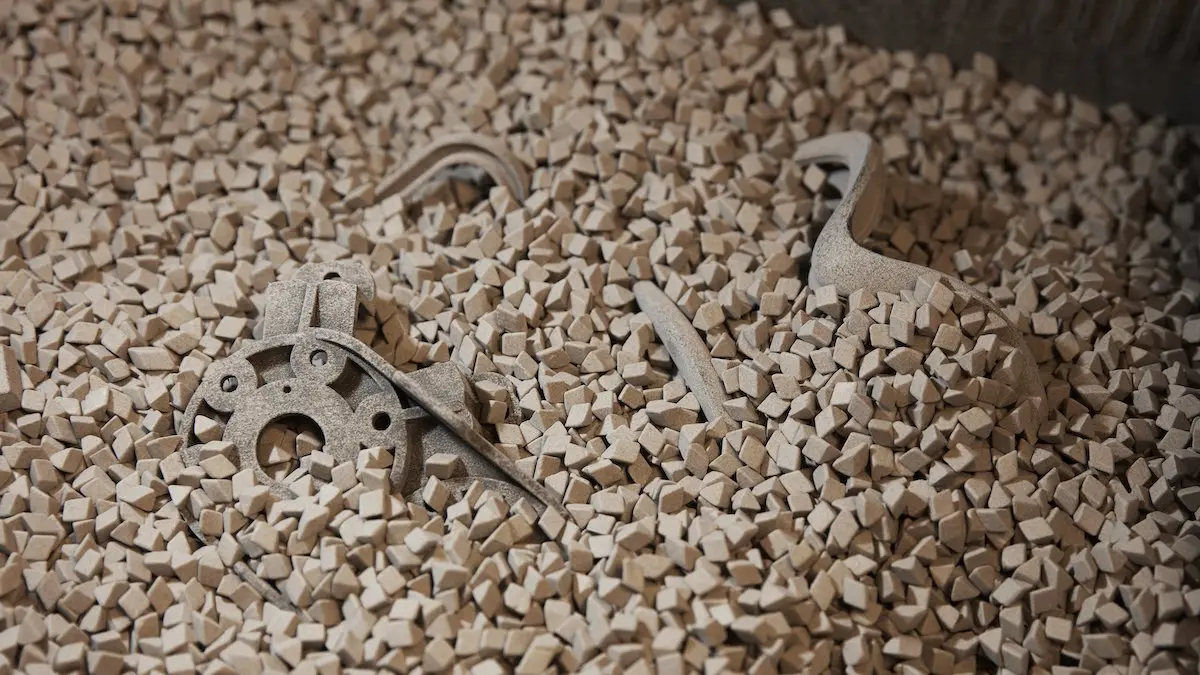
A vibratory tumbler agitates small pellets of media (typically metal, ceramic, plastic, or organic material like walnut shells) and the end-use parts to create friction, which smooths the surface of the parts and improves hardness. Vibratory tumblers are widely used due to their accessible size, affordability, and the range of benefits they provide without adding extra hands-on labor to the production cycle.
Vibratory finishing provides two key benefits to the 3D printing workflow — improved functionality and improved aesthetics. Reducing the surface roughness allows moving components to operate with a lower coefficient of friction, making vibratory tumbling an ideal post-processing technique for applications such as printed hinges, actuating components, functional clips, and any other parts that are either moving or part of a moving assembly. The improved surface texture also improves porosity, making tumbled parts more resistant to fluid absorption.
The aesthetic benefits of tumbling are primarily the improved surface texture and cleaner appearance, but tumbling also provides a more consistent substrate on which to apply additional coatings, such as acrylic paint or Cerakote.
For any 3D print that will be handled as an end-use part, is part of a functional assembly, or has high visibility in a proof-of-concept prototype, vibratory tumbling is an easy way to drastically improve the surface hardness and smoothness for a 3D printed part.
Tumbling provides a more consistent substrate on which to apply additional coatings, such as acrylic paint or Cerakote ceramic coating.
Advanced Post-Processing Techniques for 3D Printing
Watch this webinar to learn about 11+ advanced post-processing techniques for 3D printing, including Cerakote, electroplating, vapor smoothing, and more.
Choosing a Vibratory Tumbler for 3D Printed Parts
Vibratory tumbling machines for 3D printed parts can be broken down into two main categories — industrial and consumer. Industrial machines have a larger capacity and higher power requirements, and are typically priced around $5,000 or more. Industrial tumblers are suitable for production-level volumes, such as mass customization or stopgap manufacturing.
They can easily handle multiple batches of parts, even medium-to-large parts, making them ideal for businesses like service bureaus or large-scale manufacturing. Many industrial machines, like the Rösler tumbler, are designed to integrate into an automated workflow, loading and unloading parts through a conveyor belt or robotic system. The tumbling cycles for these larger machines can run as short as four to six hours, with impressive reductions in surface roughness.
Many smaller vibratory tumblers can deliver the same end product as industrial tumblers, but have a smaller capacity and may take longer cycles of tumbling to achieve those results. To achieve nearly the same reduction in surface roughness, these smaller machines may have to tumble parts for closer to 72 hours, compared to industrial machines at six hours.
However, their accessible price point and small footprint enable small businesses to access their benefits without the capital expenditure necessary for an industrial volume machine. For 3D printer users who have volumes of under 100 parts a week, small vibratory tumblers are sufficient.
Though we did not include them in the testing protocol for this study, centrifugal tumblers are a third option for smoothing. The workflow varies slightly from traditional vibratory tumblers in that they use high-speed rotation to smooth parts, rather than agitation. In a centrifugal tumbler, components and media are sealed in a canister and then spun at high speeds; the resulting G-forces can smooth parts quite quickly. Centrifugal tumblers can be a good option when looking to decrease overall cycle time, though it should be noted that it is a more aggressive process and can damage delicate features on some parts.
Industrial, High-Volume Production
Example: Rösler
Cost: > $5000
Ideal for:
-
High throughput
-
Large parts
-
Multiple large parts
-
Automated workflow
Mid-Volume Production
Example: CM Topline
Cost: $1000-5000
Ideal for:
-
Large parts
-
Batched build volumes of smaller parts
Entry-Level, Low Volume
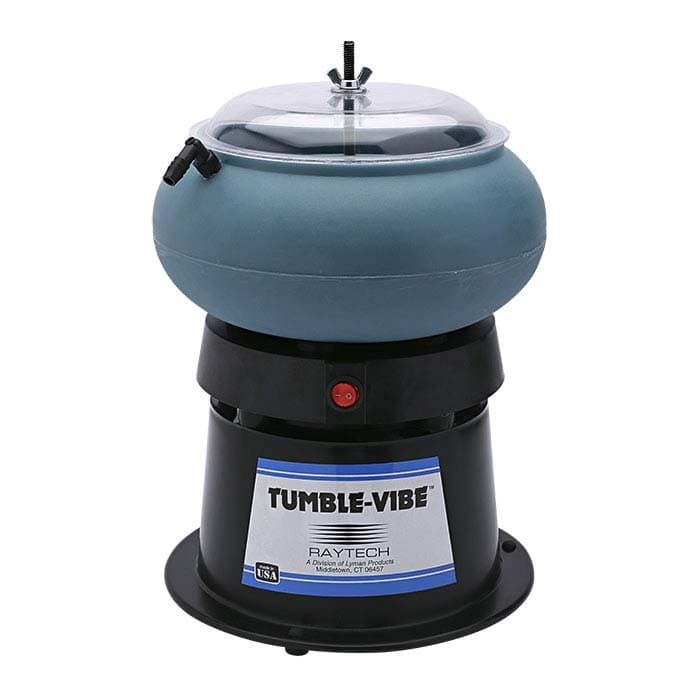
Example: Raytech, Tumble Vibe
Cost: <$1000
Ideal for:
-
Singular medium parts
-
Full build volumes of smaller parts
Choosing Vibratory Finishing Media and Detergent
There are many different options for media pellets to use in vibratory tumbling workflows, and choosing the right one will have a major impact on the outcome of your parts. Typical media include stainless steel, porcelain or silica, polyester composites, or walnut shells. Their effects range from aggressive smoothing and elimination of surface roughness to light polishing for aesthetic benefits.
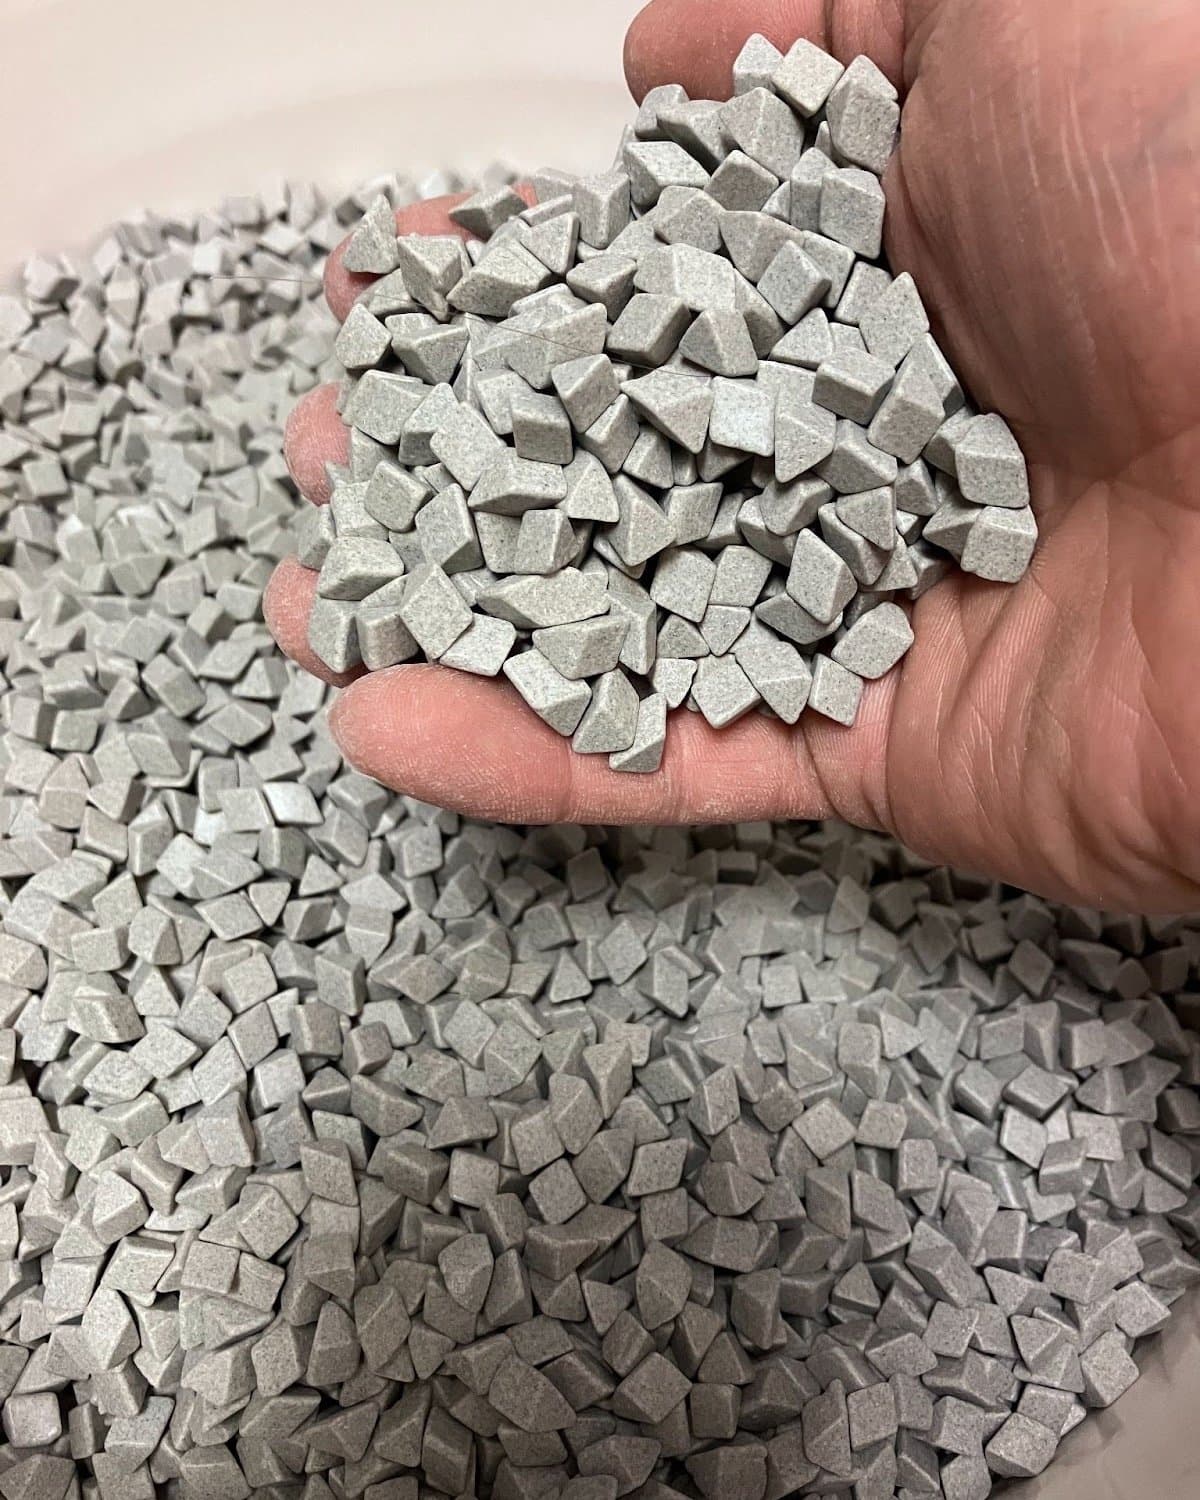
Media Shapes
When choosing media to be used in a vibratory tumbler, the size and shape of the individual pellets should be considered along with the type of material. Pellets come in large and small sizes and sharp or rounded shapes. Large pellets are used for rougher grinding, such as removing burrs or rust from metal parts. Smaller pellets are used for finer pieces, offer more polishing or burnishing effects, and can be used on a broader range of materials. Sharp pellets (triangles, wedges, and arrowheads) are ideal for finishing complex parts with edges, crevices, and channels, though they have a higher instance of chipping or flaking. Rounded pellets are ideal for lighter-touch polishing and burnishing, and very rarely chip or flake. Though they are slower to fully smooth surfaces, they are much more gentle and can be used for delicate parts.
Detergents
In some vibratory workflows, called ‘wet vibratory finishing,’ water or chemical detergents are added in with the pellets. The liquid helps temper the heat generated by the high friction and can help in removing contaminants or oxides on the surface of the part. Parts will appear cleaner and more polished than with a dry tumbling workflow. However, detergents can be expensive and generate chemical waste, which has to then be disposed of and treated properly. Metal, ceramics, or plastic media can be used in a wet workflow, but organic media such as walnut shells or corn cobs should not be.
Comparison Table: Tumbling Media
| Typical Material | Cost | Advantages | Disadvantages | Aggressiveness | |
|---|---|---|---|---|---|
| Metal | Hardened carbon and stainless steel | $$$ | Short Run Times Prolonged service life and superior wear-resistance Heavy-duty burnishing and polishing | Might damage parts | High |
| Ceramic | Porcelain Aluminum oxide Silicone Carbide Silica | $$ | Heavy-duty burnishing and polishing Most commonly used media | Might damage parts Ceramic bits may flake off and get stuck in channels/negative features | High |
| Plastic | Polyester, urea, and formaldehyde | $ | Ideal for safely finishing threaded or fragile parts Creates soft, bright surfaces and edges Range of densities available for customization per application | Longer run times | Medium |
| Organic | Walnut shells Corn cobs | $ | Can be used as a secondary vibratory step Can absorb oils and moisture | Longer run times May need to be used in a two-part process | Light to medium deburring |
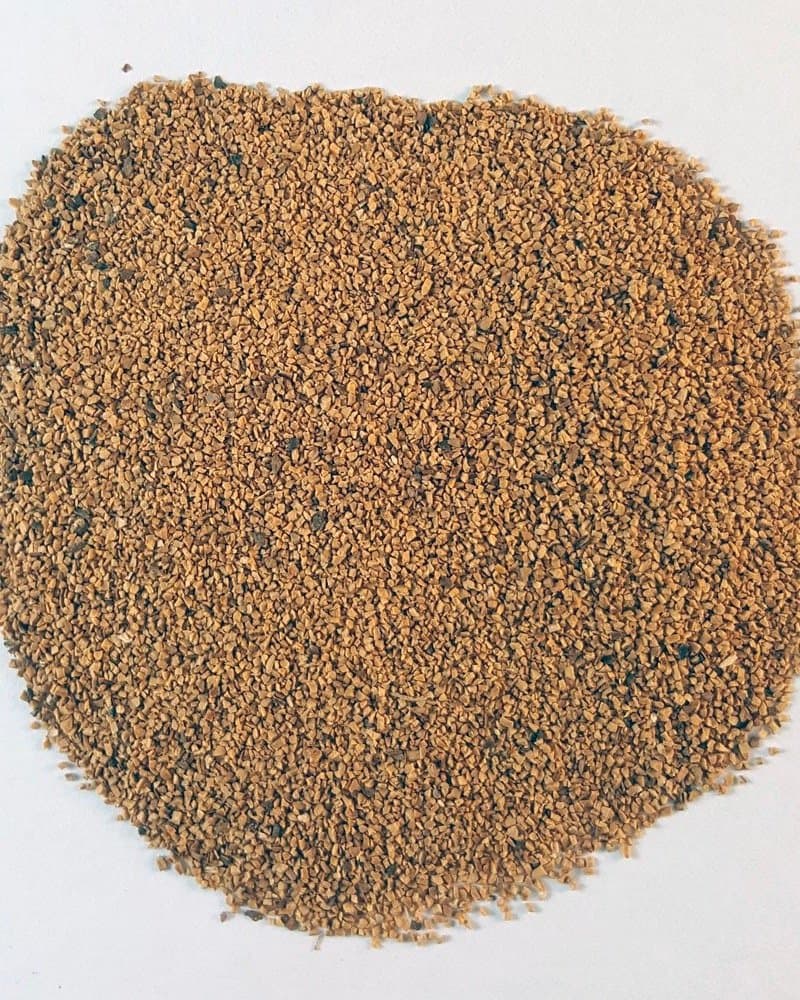
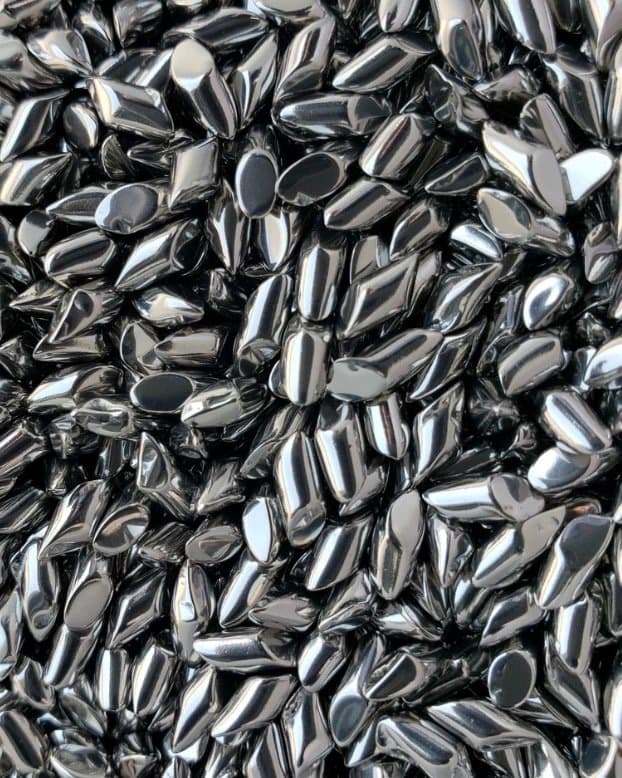
From left to right: walnut media, ceramic media, and steel media.
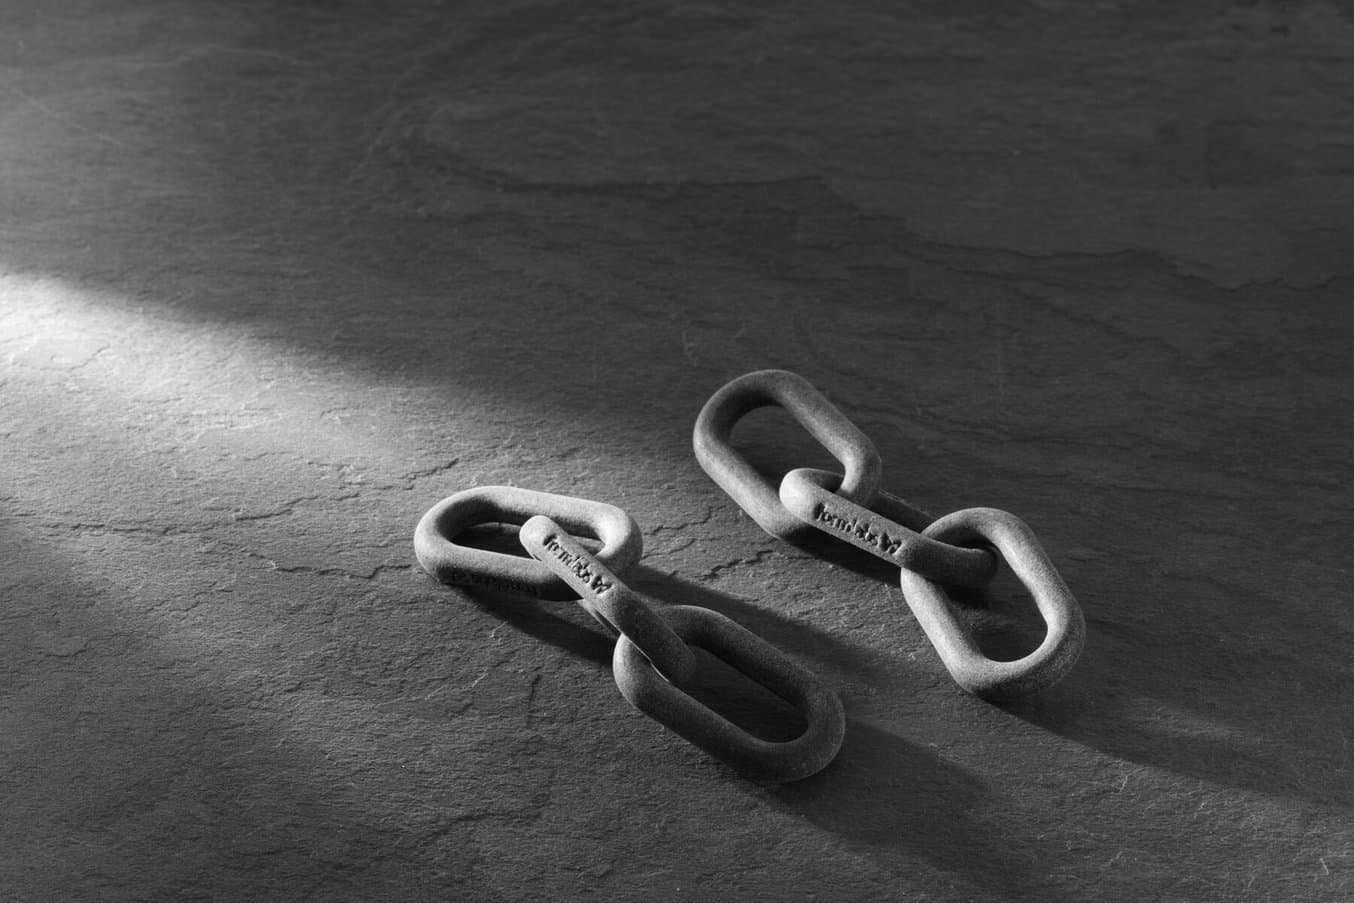
Request a Free Tumbled Nylon 11 CF Powder Sample
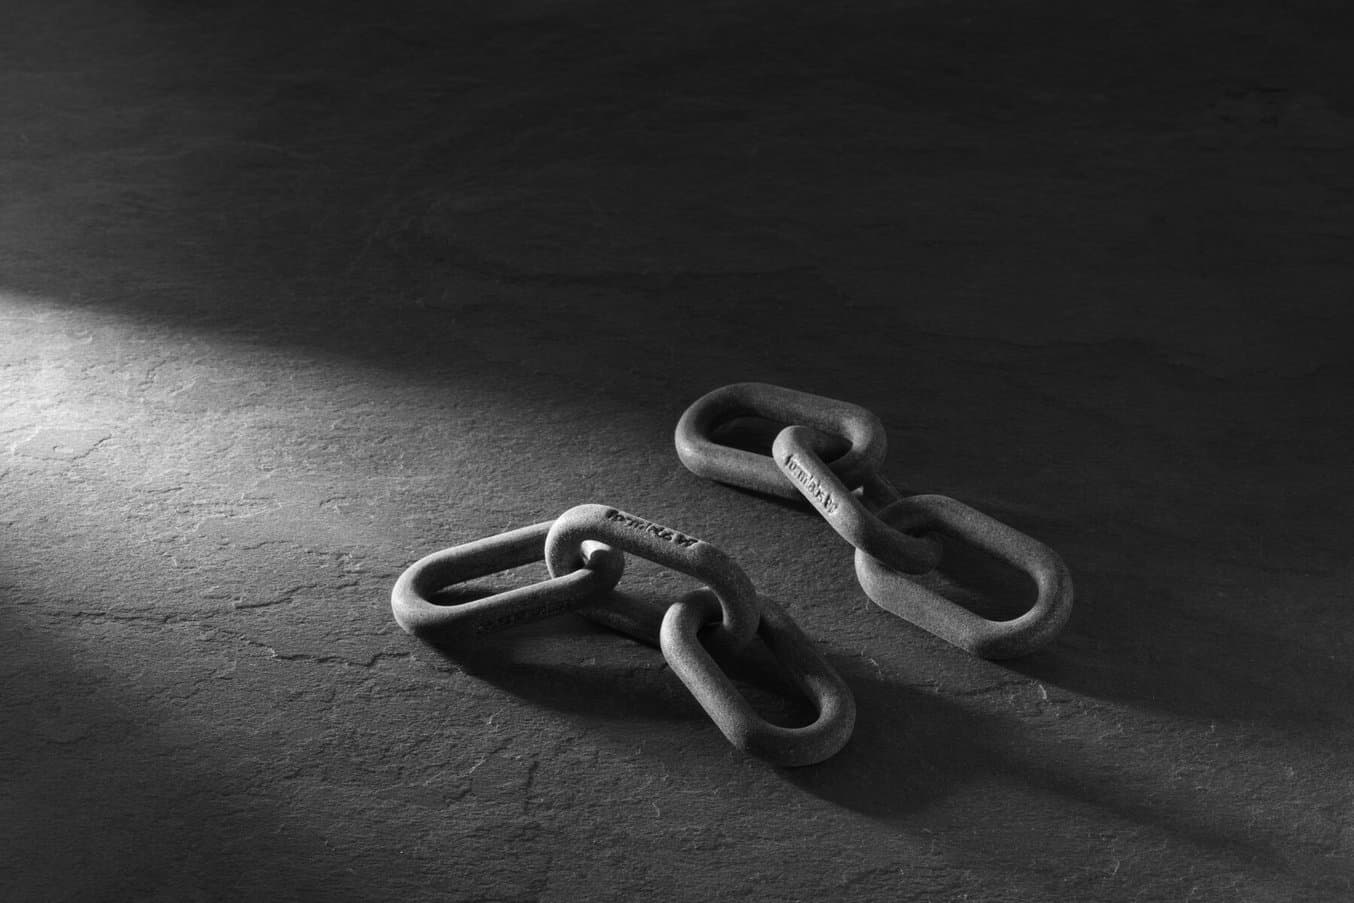
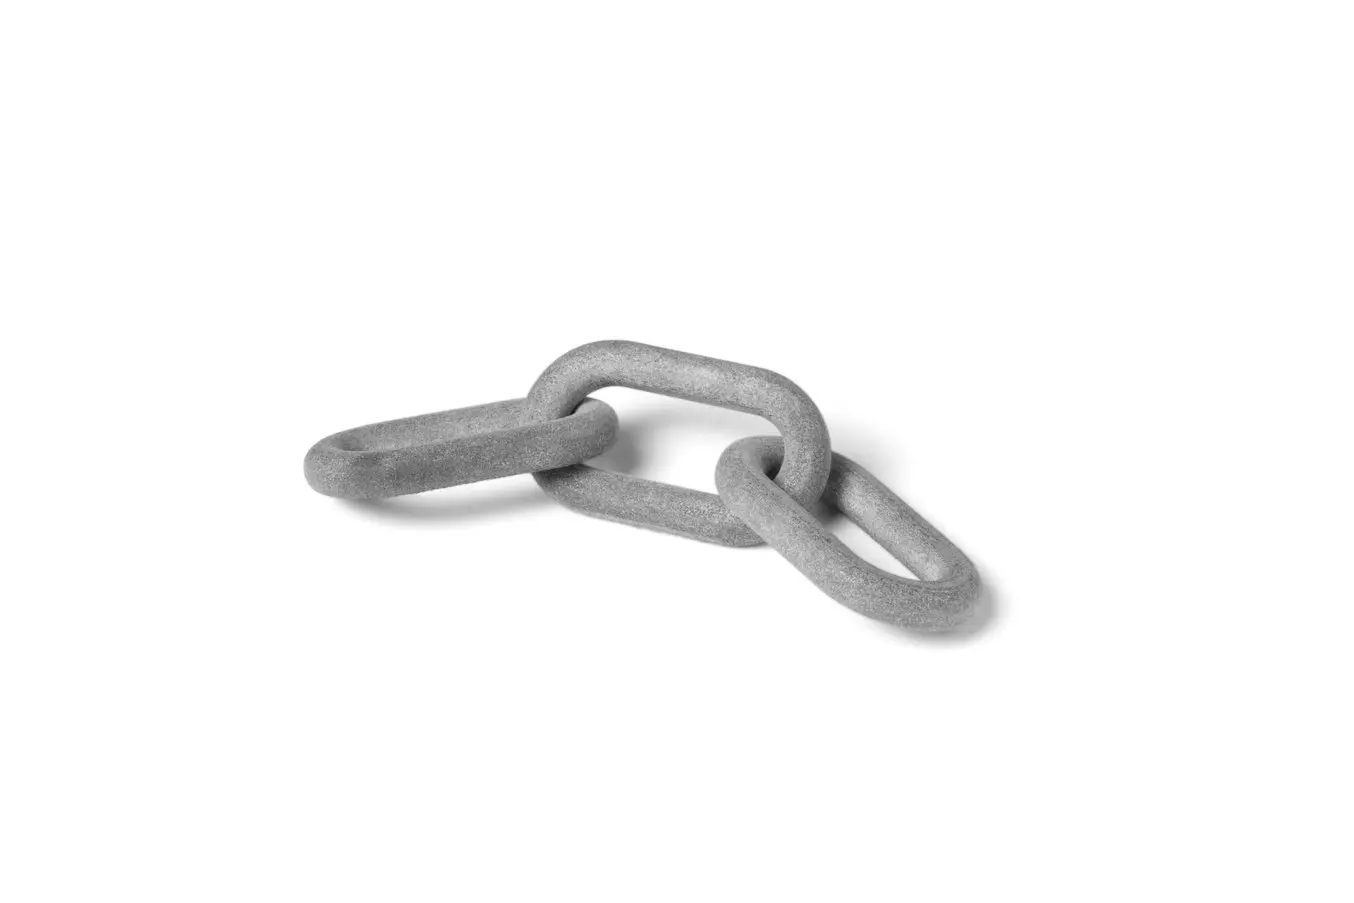
This SLS interlocking chain was fully printed in place and would be near impossible to finish using manual methods. The part was tumbled overnight in a DB-300 vibratory tumbler filled with angle cut ceramic triangle media. The improved surface is ideal for painting, coating, and electroplating.
Applications for Vibratory Tumbled SLS Parts
Many 3D printing applications demand a smooth surface finish and a low coefficient of friction. Adding vibratory tumbling to your workflow improves both the functionality and appearance of parts used in a variety of industries and settings.
Vibratory Tumbling for End-Use Goods
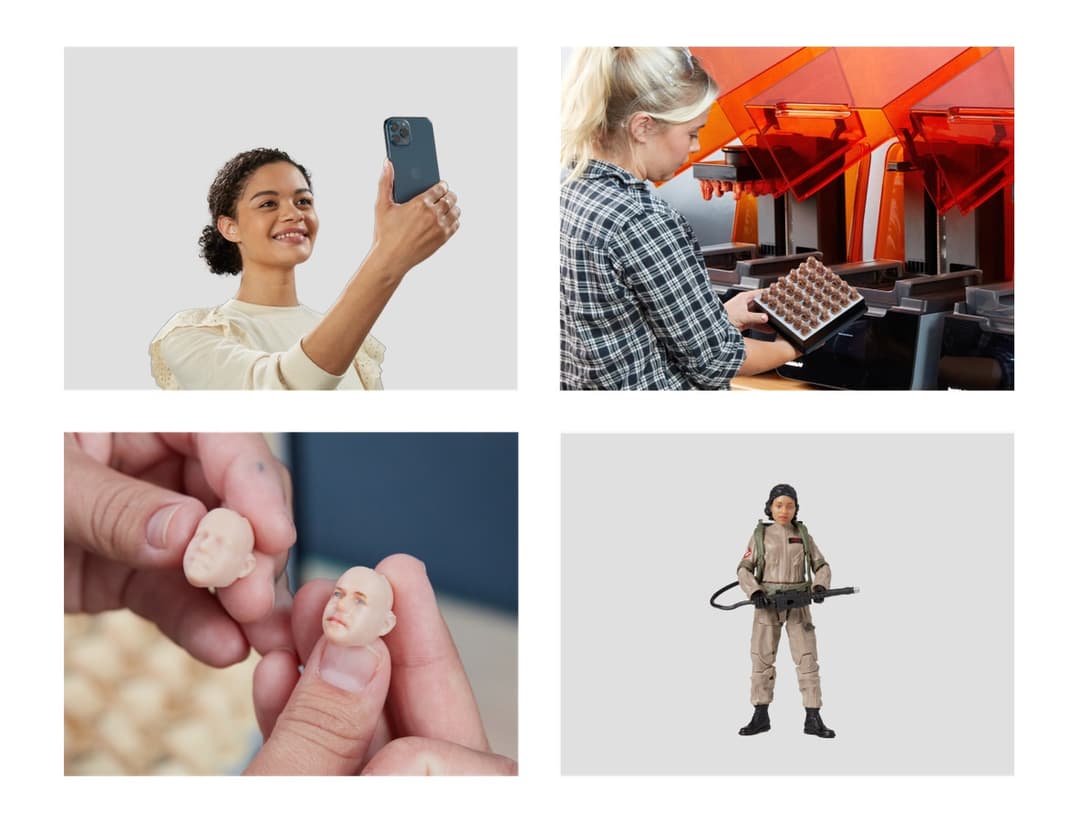
As 3D printing technology makes mass customization a reality, high-throughput 3D printing applications become more common. The Fuse Series ecosystem enables mid- to high-volume manufacturing of end-use goods that function like injection molded parts while still taking advantage of the design freedom of SLS technology.
Vibratory tumbling is a low-cost method to achieve a surface finish comparable to injection molding, without adding hours of labor or manual post-processing. Batching parts together in a larger tumbler keeps touchpoints low and results optimal. Tumbling also prepares parts for further coating, which can further elevate the functionality, finish, and color of SLS 3D printed parts.
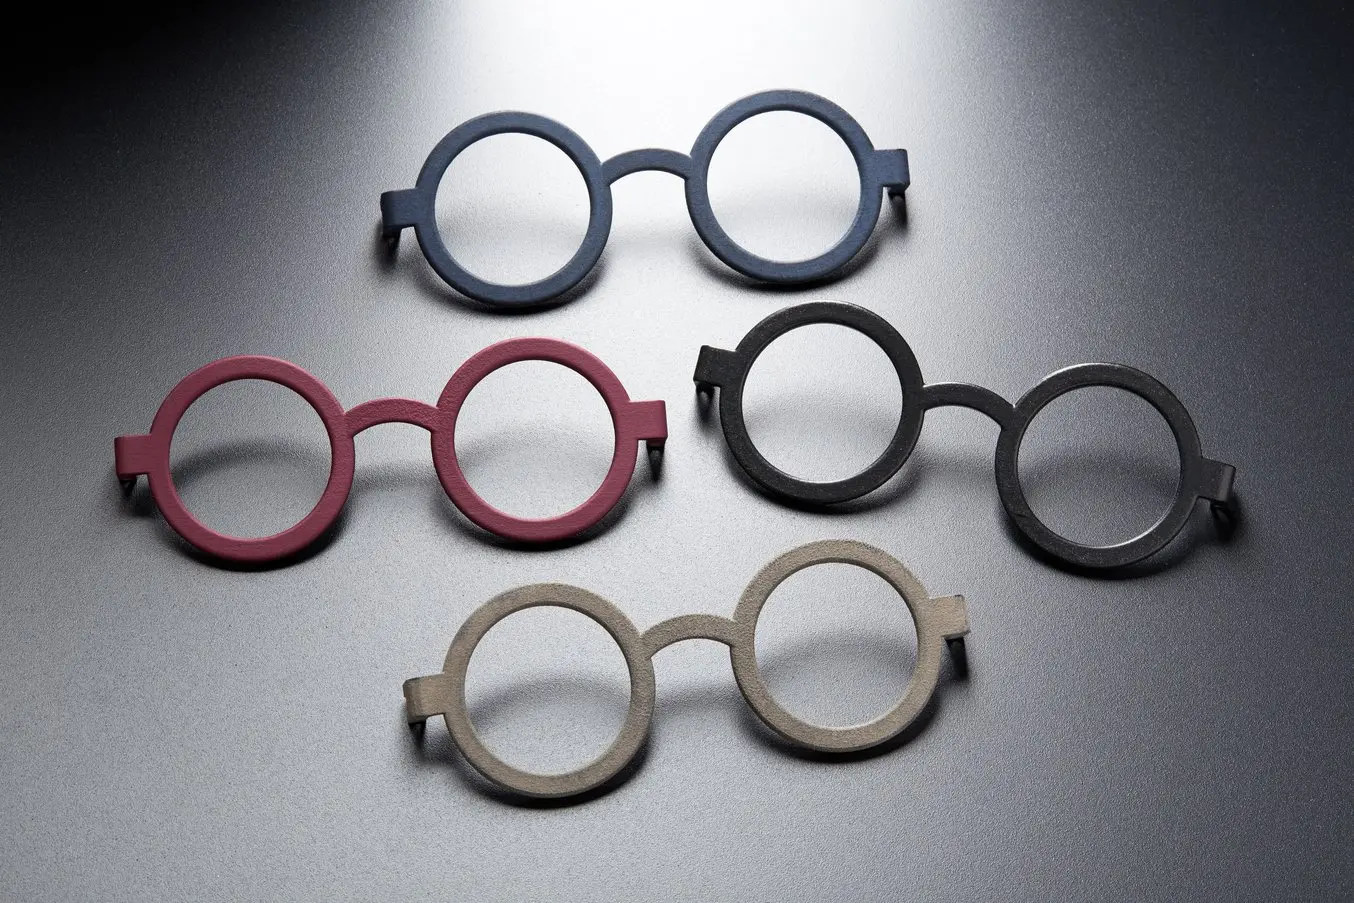
Vibratory tumbling is ideal for improving surface finish and preparing parts for further post-processing, such as dyeing, painting, or coating.
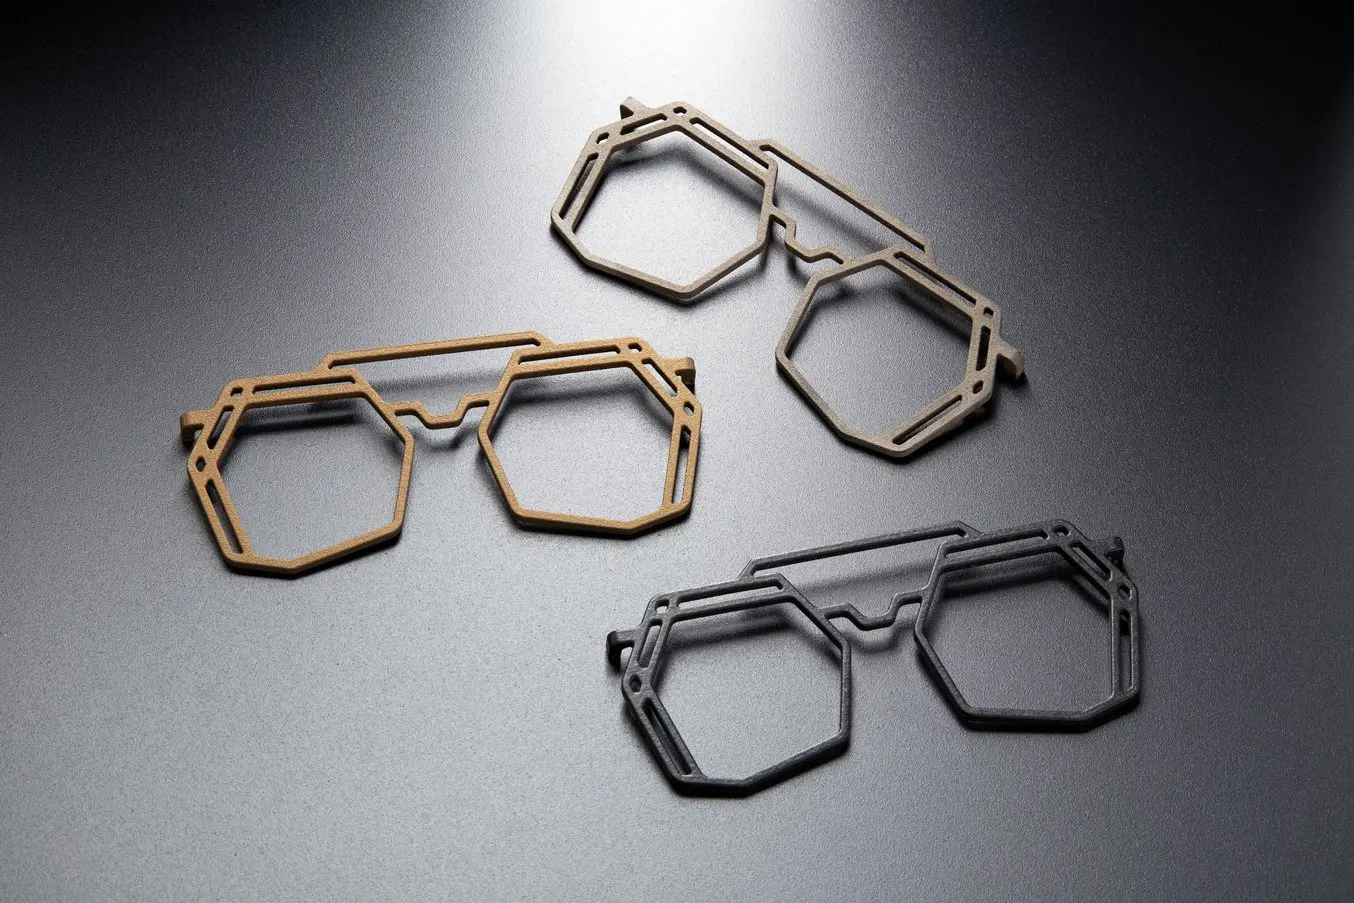
End-use eyewear frames are a perfect application for vibratory tumbling to have a major impact.
Vibratory Tumbling for Healthcare
3D printing in medicine enables innovation in almost every specialty, from customizable prosthetics and orthotics to low-volume production of new medical devices. For some orthotics and prosthetics customers, the surface roughness of SLS 3D printed parts can be a pain point. Vibratory tumbling can go a long way to improving the look and feel of braces, orthotics, and prosthetics.
The wrist brace pictured below was printed on the Fuse 1+ 30W in Nylon 12 Powder and customized to fit the exact shape of the patient’s forearm. Though the file is designed to fit comfortably and the finished part has a 0.1 mm tolerance, improved surface smoothness would help the patient feel more comfortable. Vibratory tumbling would improve the comfort level, as well as the porosity of the device’s surface, increasing its resistance to ambient moisture in the air and making it more functional.
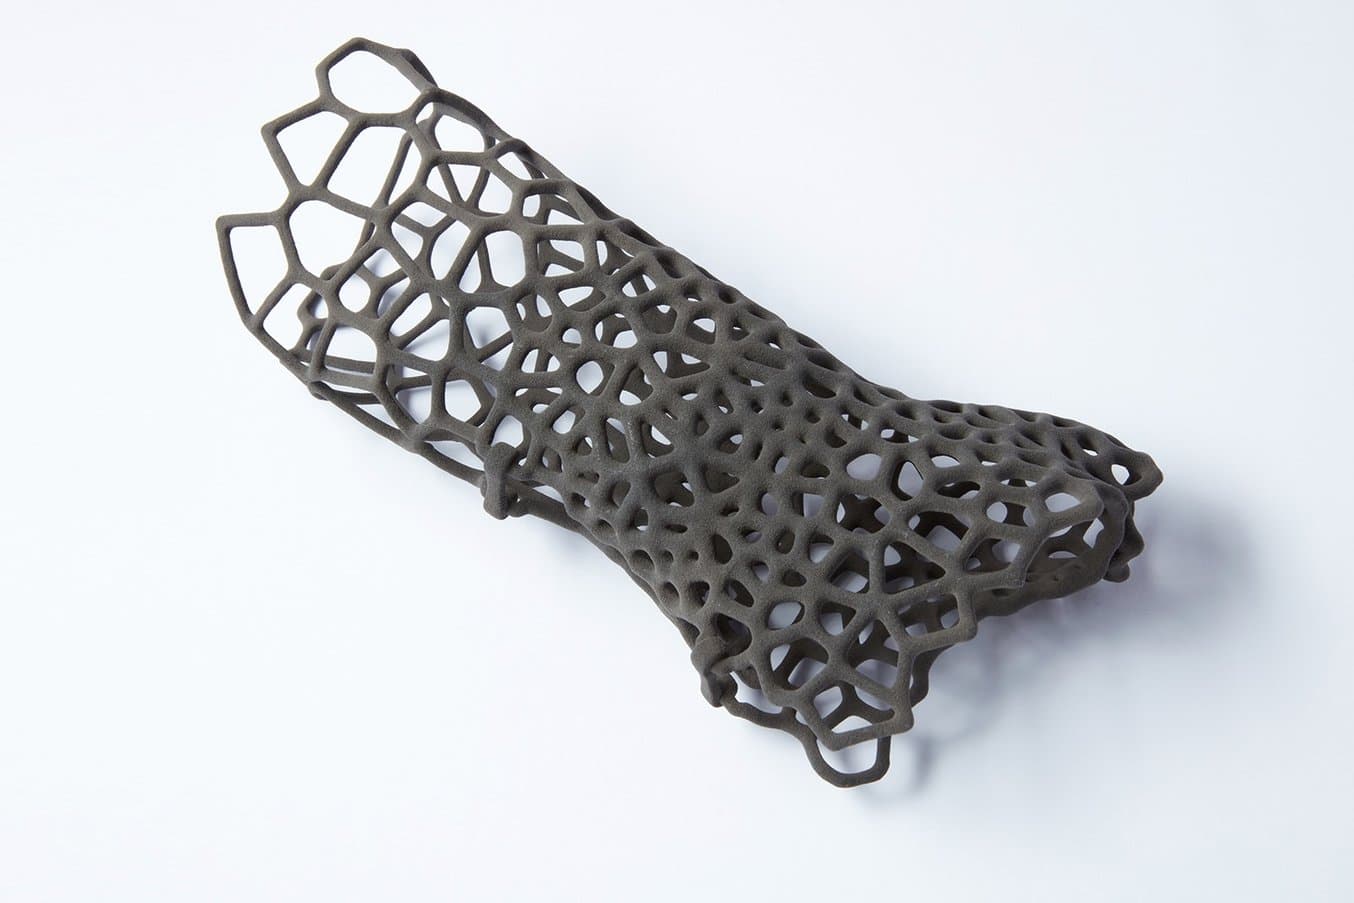
Tumbling improves the wearability and surface roughness of SLS 3D printed parts like this arm brace. For braces, which are highly visible and often touching the skin of patients directly, a smoother surface finish, closer to that of injection molding, can make a big difference.
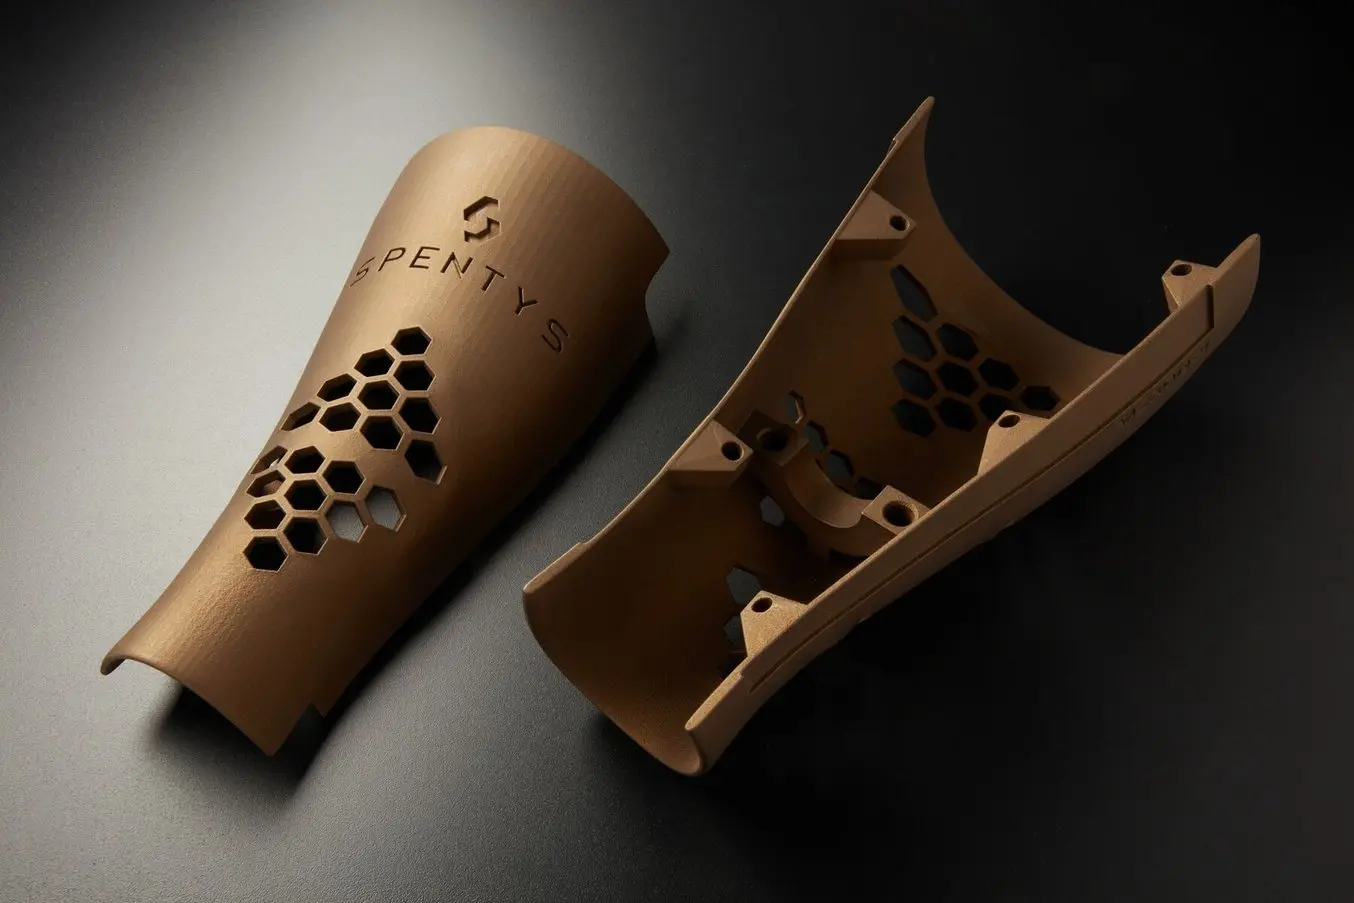
Tumbling also helps prepare the surface for coating — these Spentys aesthetic covers (right) were tumbled for eight hours with ceramic media and then Cerakoted. The covers are for lower limb prosthetics with the aim to provide a customizable coating, so users can choose different covers to suit their mood and outfit.
Vibratory Tumbling for Manufacturing Aids
Manufacturing aids are often used in high-friction applications and as part of assemblies on the factory floor. Using vibratory tumbling can improve their coefficient of friction and increase the surface hardness, which leads to better durability and longer usage.
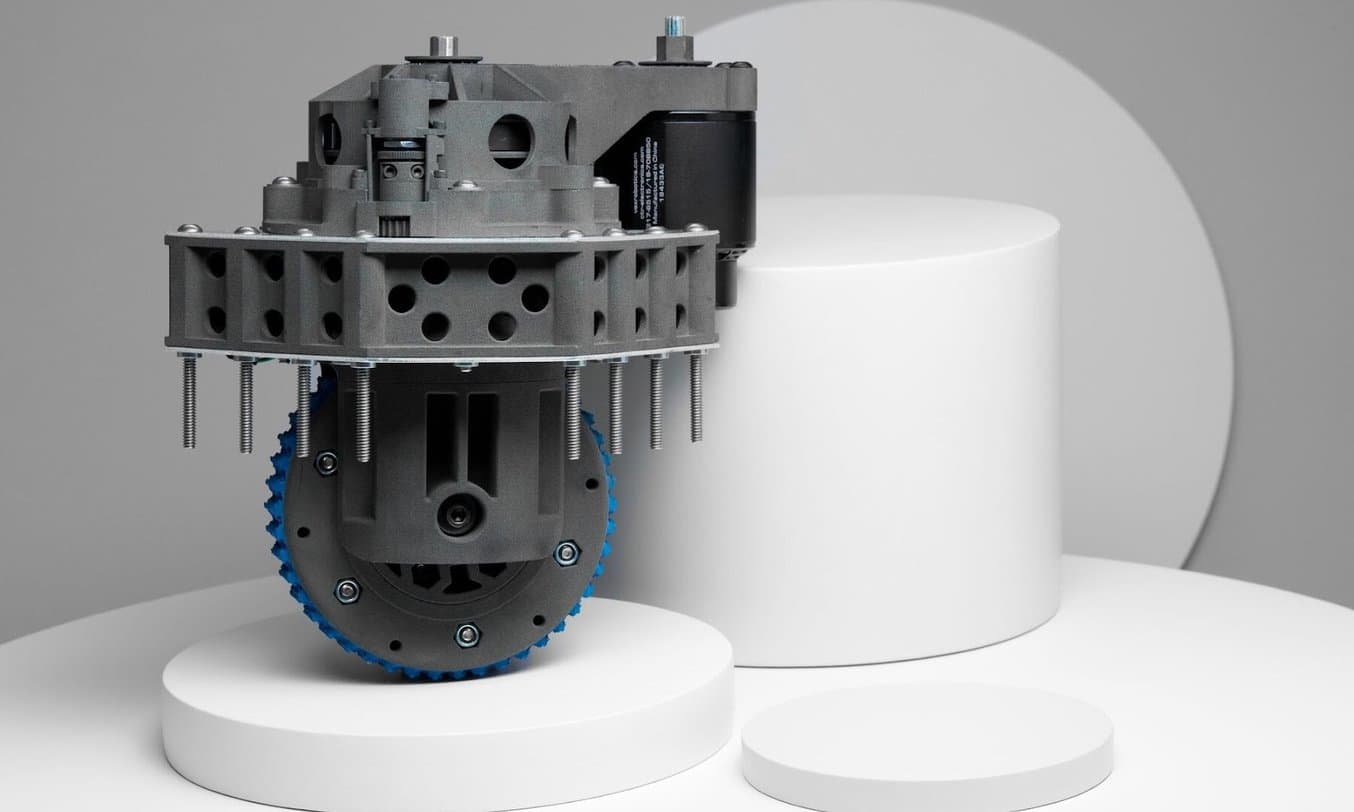
Vibratory tumbling improves the durability of complex assemblies and manufacturing aids.
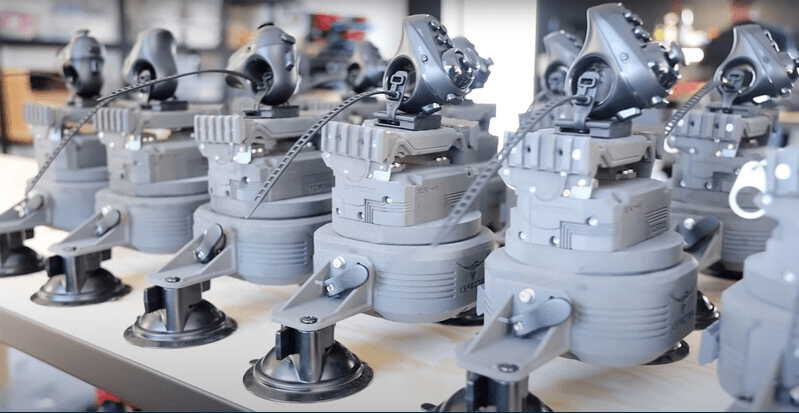
End-of-arm-tooling (EOAT) parts, like this pick and place robot tooling arm, can benefit from vibratory tumbling, which ensures that they integrate easily and without friction into existing machinery and workflows.
Testing and Results
Formlabs has conducted extensive testing on vibratory tumbling in-house using SLS 3D printed parts in order to recommend appropriate workflows for optimal results.
The Process
We 3D printed several parts based on one standard design that has flat and curved surfaces as well as interior and exterior surfaces. The parts were printed on the Fuse 1+ 30W SLS 3D printer, depowdered in the Fuse Sift according to standard post-processing guidelines. Parts were printed in both Nylon 12 Powder and Nylon 11 Powder.
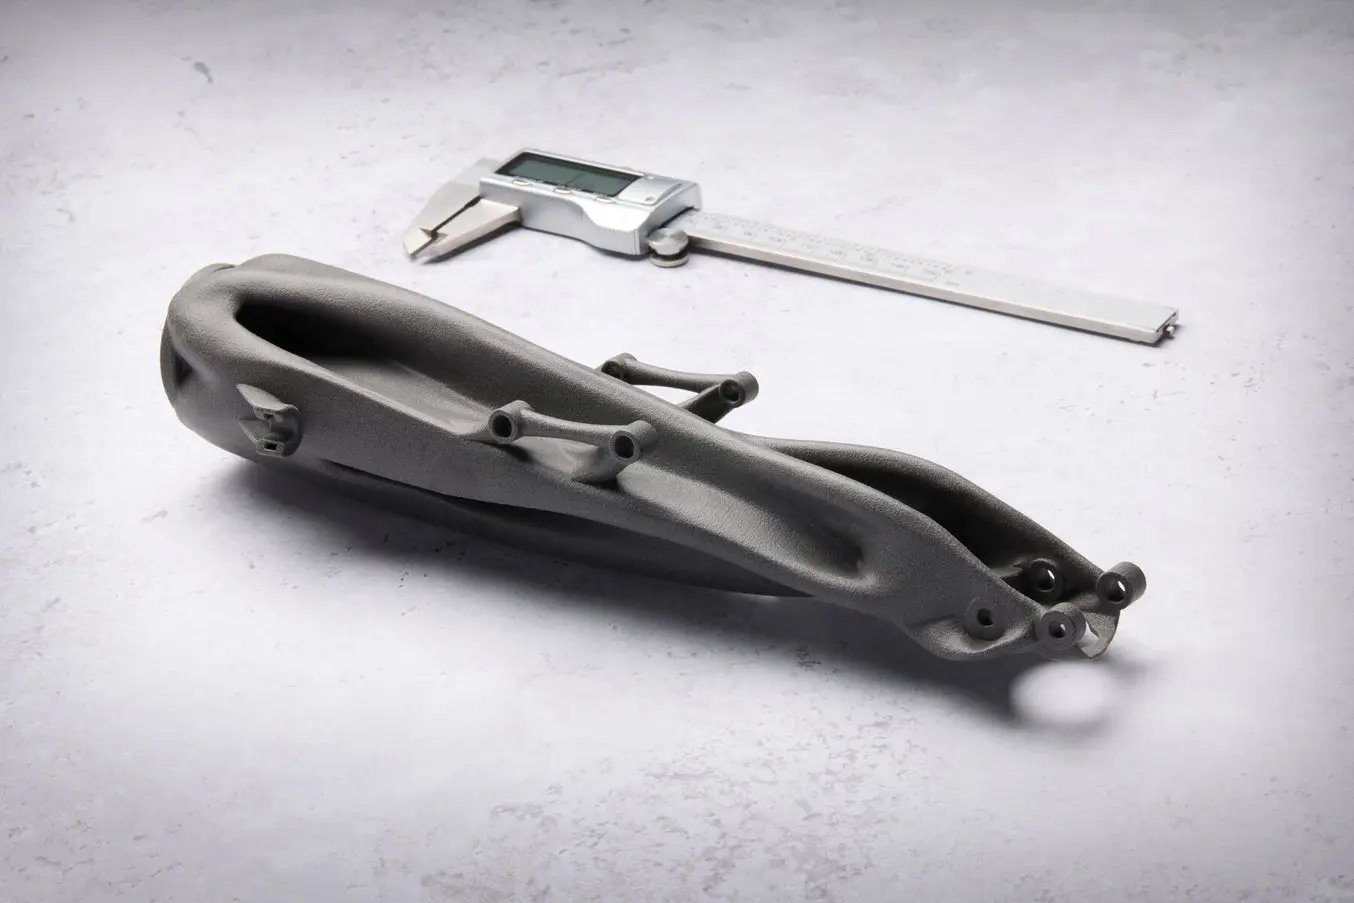
Aside from an identification number, each part was identical. These parts were each measured for dimensional accuracy using calipers and for surface roughness using a laser scanning microscope by manufacturer Keyence.
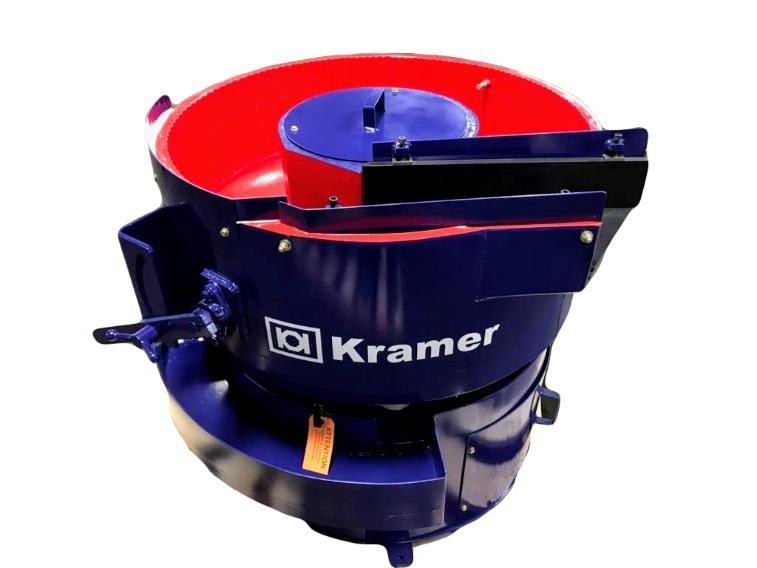
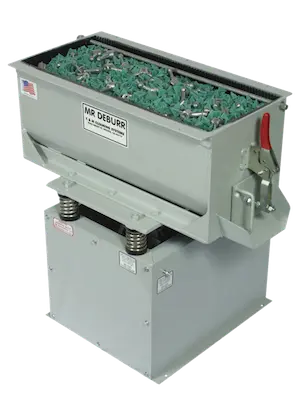
We chose to primarily test in a CB300 vibratory tumbler, commonly referred to as Mr.Deburr. This machine has three cubic feet of tumbling capacity and operates using a 0.75 horsepower motor. Retailing for $3500, Mr. Deburr is a good choice for high-throughput applications. The volume capacity enables multiple batches of SLS 3D printed parts to be tumbled at the same time, or a lower quantity of very large parts. The media used were ceramic pellets in angle-cut triangle shapes, with side dimensions of ¼ inch. A general-purpose finishing compound was used to assist with the process. The liquid compound chosen was “Kramco 1010” provided by Kramer Industries. This liquid works well with ceramic media and is good for deburring and light cutting.
The components tumbled for two, four, six, and eight hours before being removed and re-measured to determine if changes in dimensions and reduction in surface roughness occurred, and to what degree. The surface roughness was again measured using a Keyence VR-5000. The roughness was measured in terms of Sa. Sa is the arithmetic mean of a surface. The Keyence profilometer takes the average height of a surface and then compares the difference in height of each point when compared to the mean. The dimensional accuracy measurements were taken using vernier calipers with an accuracy of ±0.02mm. This allows us to determine the amount of material removed from each surface during the tumbling process. It should be noted that the outcome may be different if using different media, detergent, or machine and that there is a huge range of media in different materials, shapes, and sizes — all of which will impact your results. Based on our discussions with industry leaders, we chose to use ceramic for our tests.
A Note on Smaller Machines
To test out the efficacy of smaller, more entry-level tumbling machines, we also tested parts in a lower-cost model and found that it was unable to achieve the same results as Mr. Deburr, most likely due to the less aggressive churning of the media. However, the smaller tumbler was still able to get the parts mostly polished, to about a 70% reduction in surface roughness over a 48-72 hour period. These results are not included in our tables in order to highlight the efficacy of larger machines and their efficiency for volumes of this size.
Results With Mr. Deburr
Both Nylon 11 Powder parts and Nylon 12 Powder parts were able to have their surface roughness reduced by more than 80% of their original surface roughness after eight hours of vibratory tumbling, and some of the parts managed to reach 80% or less in four to six hours.
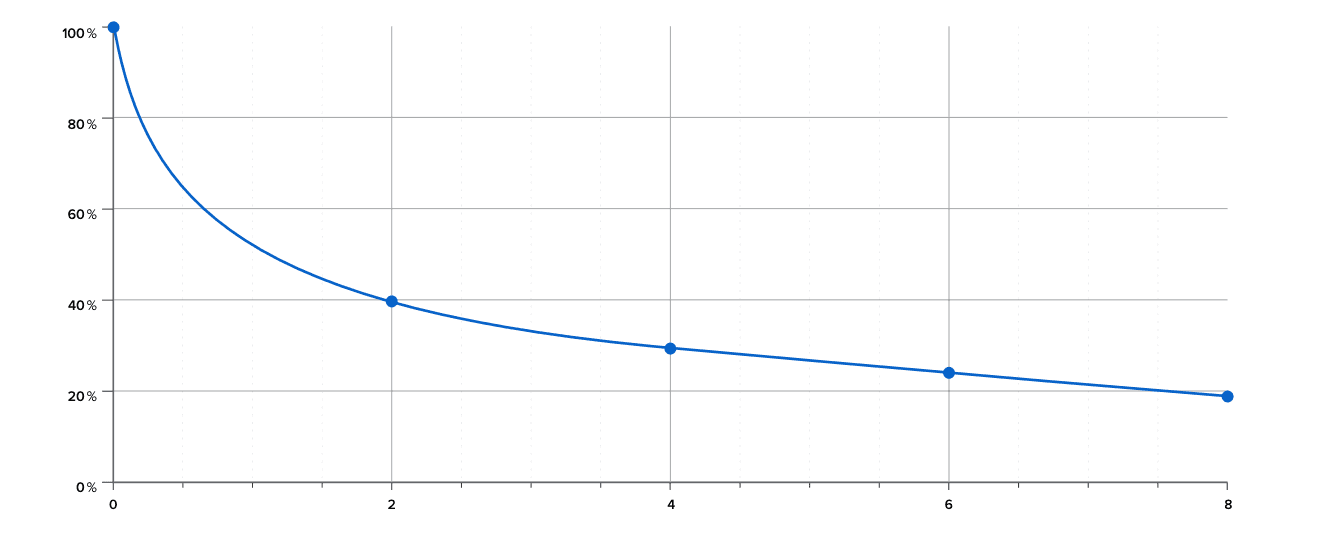
A key finding — Nylon 11 Powder and Nylon 12 Powder both started and finished with different surface roughnesses, but their proportional changes are quite similar. In our trials, we determined that Nylon 11 Powder parts have an average initial surface roughness of approximately 35 µm, whereas Nylon 12 Powder parts have an initial surface roughness of approximately 26 µm. Nylon 12 Powder parts were reduced to 4 µm, whereas the Nylon 11 Powder parts saw a reduction down to 5.5 µm. In terms of overall material removed, Nylon 11 Powder (0.12 mm) exhibited slightly less wear than Nylon 12 Powder (.15 mm) over the eight hours of tumbling. This is approximately the same surface roughness as commercial steel piping.
Looking at both graphs that compare the surface roughness reduction to tumbling time, it is apparent that both the smoothing rate and the amount of material removed per hour are decreasing. For both materials, it does not appear that the surface roughness has plateaued, and we hypothesize that if we were to continue tumbling for longer, you would see the Sa values continue to decrease but at increasingly slower speeds.
Visually, we saw several changes over longer tumbling periods; hard corners and edges became slightly rounded, thinner extrusions and highly detailed embossing became slightly worn, and media became embedded in holes and pockets closer to the 72-hour mark.
Nylon 12 Vibratory Tumbling Results
| Runtime (hours) | Surface Loss (mm) | Surface Roughness (Sa) | Surface Roughness Reduction (%) |
|---|---|---|---|
| 0 | N/A | 25.687 | 0% |
| 2 | -0.108 | 10.393 | 59.54% |
| 4 | -0.126 | 6.314 | 75.42% |
| 6 | -0.139 | 6.168 | 75.99% |
| 8 | -0.150 | 4.513 | 82.43% |
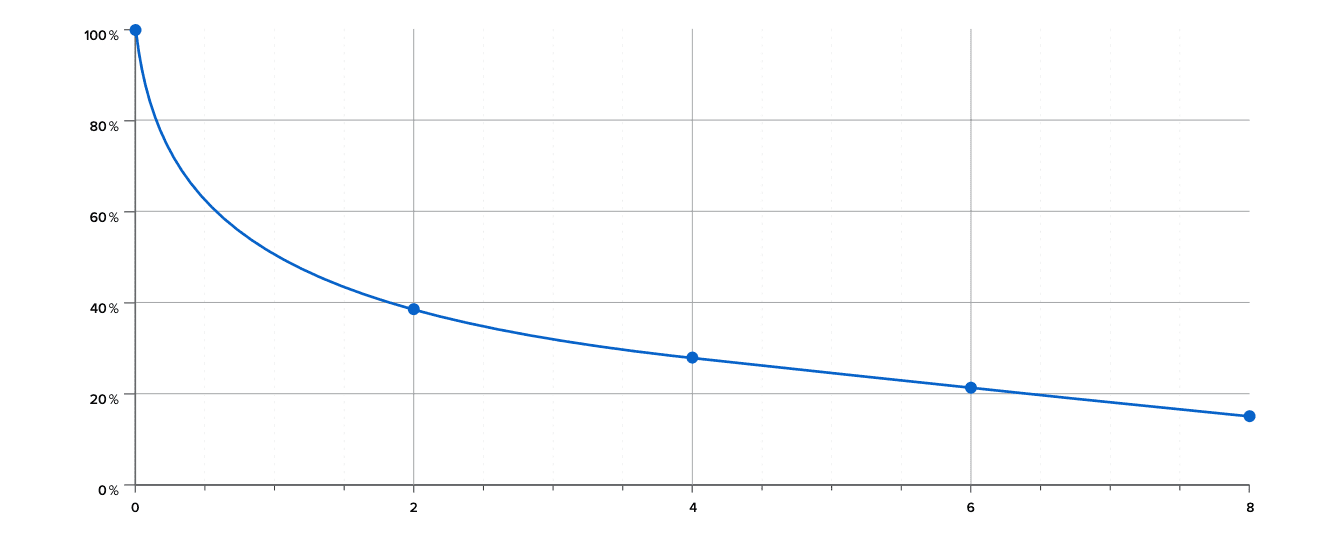
Nylon 11 Vibratory Tumbling Results
| Runtime (hours) | Surface Loss (mm) | Surface Roughness (Sa) | Surface Roughness Reduction (%) |
|---|---|---|---|
| 0 | N/A | 35.081 | 0% |
| 2 | -0.046 | 11.916 | 66.03% |
| 4 | -0.081 | 10.056 | 71.43% |
| 6 | -0.106 | 8.367 | 76.15% |
| 8 | -0.120 | 6.712 | 80.87% |
Recommendations
Vibratory tumbling is an excellent way to improve the surface finish of your 3D printed parts. Equipment is affordable, and the workflow is customizable to your exact needs. When adding tumbling to your workflow, keep in mind that different machines and media will produce different results.
When choosing which tumbler to purchase for a 3D printing workflow, first consider your volume of 3D printed parts: mid to high production volumes will require a larger industrial tumbler, while prototyping, manufacturing aids, and rapid tooling applications might only require a smaller, inexpensive tumbler. In these applications, the longer time required by the smaller tumbler shouldn’t negatively affect your workflow.
Choosing your media is the next consideration, and very part dependent. For SLS 3D printed parts, ceramic, plastic, or organic materials will all work, while metal might be too abrasive. For parts with many internal pockets or channels, ceramic media might become flaked and embedded in the parts. Although removal is simple with small hand tools, organic or plastic media might be a better option. For parts that have very fine features, delicate embossing, or thin extrusions, a less abrasive media is optimal. Likewise, choosing rounded media instead of sharp media will help protect delicate parts.
Get Started With 3D Printing and Vibratory Tumbling
Vibratory tumbling is an accessible method of making SLS 3D printed parts more similar in appearance and functionality to injection molded parts. Adding this process as a step in your 3D printing workflow doesn’t have to be complicated or expensive — there are many options for tumbling equipment that are affordably priced and accessible in terms of footprint and power requirements. For applications such as rapid prototyping, manufacturing aids, or end-use parts, vibratory tumbling widens the scope of possibilities for 3D printing. When coupled with the geometric freedom of SLS 3D printing and the customization capabilities of a low-volume production workflow, vibratory tumbling presents benefits for every industry.
To learn more about how to streamline your SLS and vibratory tumbling workflow, or get expert advice on which machine and media to choose for your particular needs, contact the Formlabs Sales Team. Or, continue exploring options for SLS post-processing possibilities on our website.