Erforderliches Zubehör:
Formlabs:
- Tür
- 2,5-mm-Innensechskantschlüssel (im Werkzeugkasten des Form 4 oder Form 4L enthalten)
Drittanbieter:
- Nitrilhandschuhe


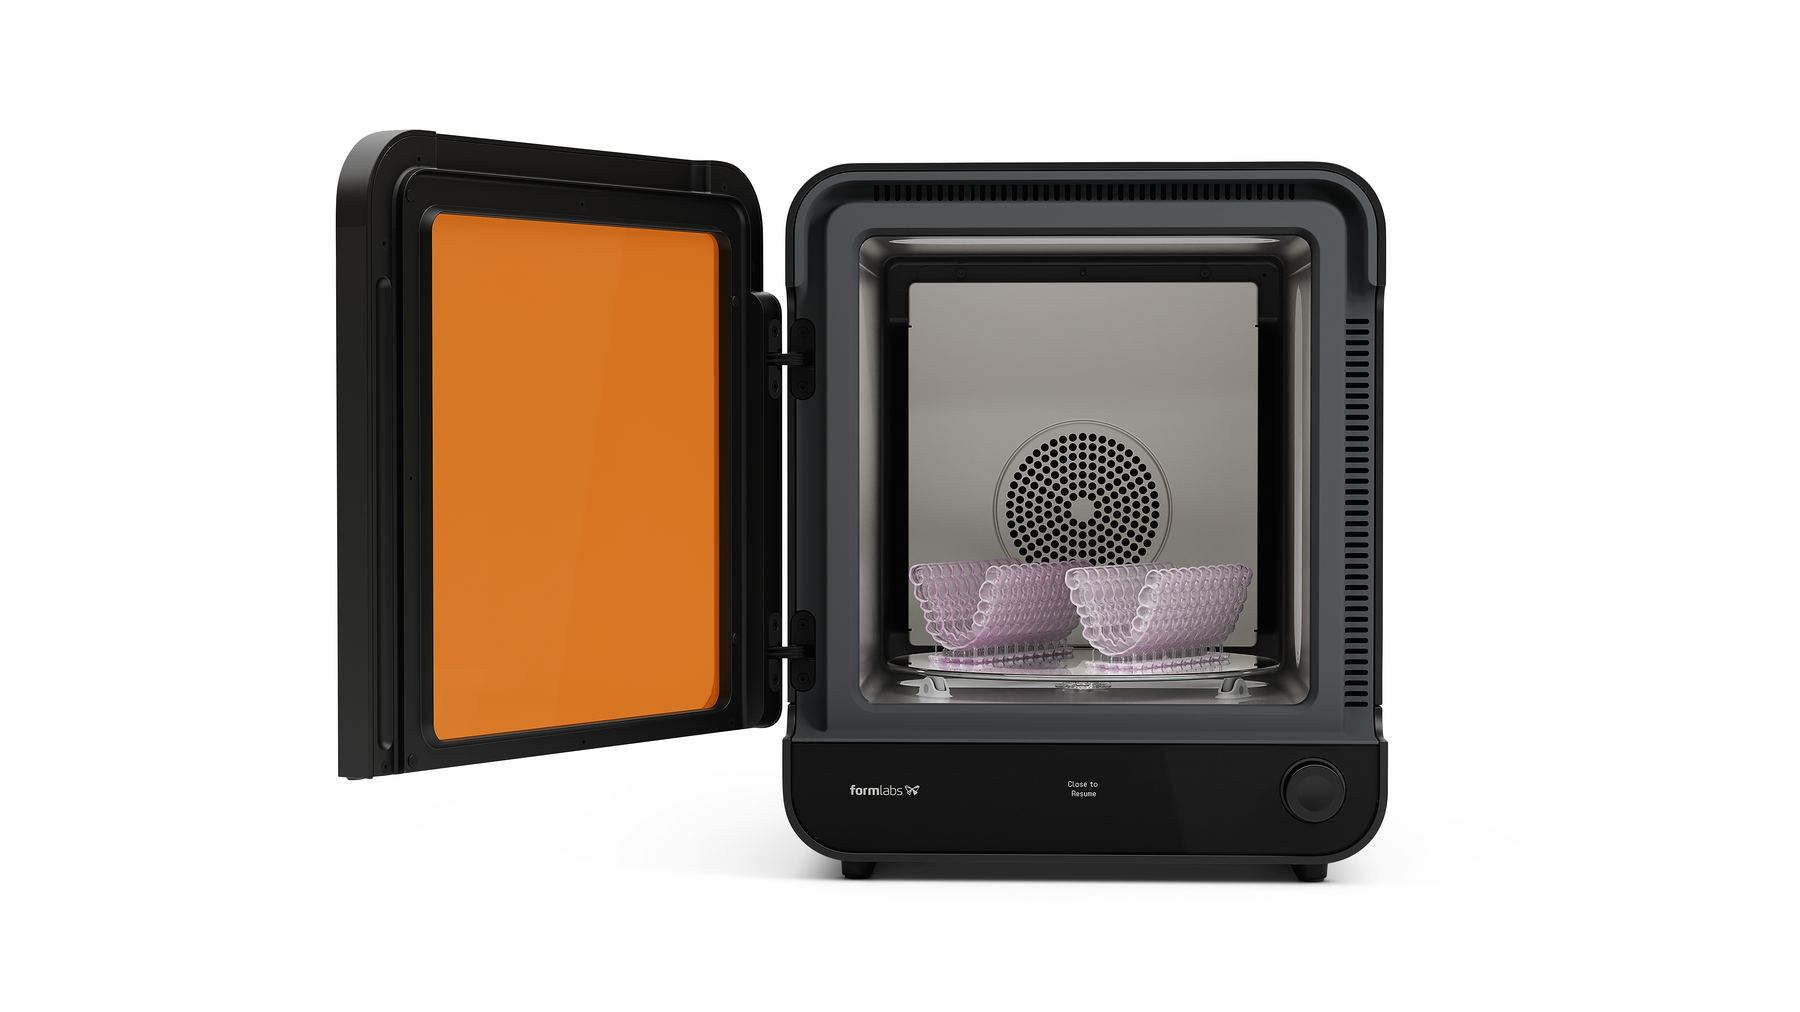
Der Form Cure (2. Generation) verfügt über eine Tür, die das Gerät isoliert und das Licht der LED-Module abschirmt. Wenn die Tür beschädigt ist, erreicht oder hält der Form Cure möglicherweise nicht die Solltemperatur. Wenn sich die Tür nicht vollständig schließen lässt, kann das Gerät keinen Nachhärtezyklus starten.
Verwenden Sie diesen Leitfaden, um die Tür des Form Cure (2. Generation) zu entfernen und zu ersetzen.
Erforderliches Zubehör:
Formlabs:
Drittanbieter:
Geschätzte Dauer: 10 Minuten
Vorbereitung des Arbeitsbereichs
Überblick: Vorbereiten des Form Cure (2. Generation) und des Arbeitsbereichs für den Austausch der Tür.
Schritt 1: Arbeitsbereich vorbereiten
Räumen Sie einen Arbeitsbereich um Ihr Gerät frei. Vergewissern Sie sich, dass der Arbeitsbereich gut belüftet und frei von Staub ist.
Schritt 2: Aushärtekammer reinigen
Warnung:
Kunstharz kann Hautreizung oder allergische Hautreaktionen hervorrufen. Tragen Sie bei der Handhabung von flüssigem Kunstharz oder kunstharzbeschichteten Oberflächen stets Handschuhe. Waschen Sie Ihre Haut mit ausreichend Wasser und Seife.
Öffnen Sie die Tür des Form Cure. Entfernen Sie Harz, das sich in der Nachhärtekammer angesammelt hat oder ausgehärtet ist, mit Küchenpapier. Befeuchten Sie das Küchenpapier bei Bedarf mit Isopropylalkohol.
Gefahr:
IPA ist entzündlich. Bewahren Sie Behälter geschlossen und außerhalb der Reichweite von Kindern auf. Lassen Sie IPA vollständig verdampfen, bevor Sie einen Nachhärtezyklus beginnen.
Schritt 3: Das Gerät ausschalten
Schalten Sie das Gerät mit dem Netzschalter auf der Rückseite des Geräts aus. Trennen Sie das Netzkabel, bevor Sie mit der Wartung fortfahren. Führen Sie keine Wartungsarbeiten an dem Gerät durch, solange es mit der Stromversorgung verbunden ist. Warten Sie noch fünf Minuten, nachdem Sie das Gerät von der Stromversorgung getrennt haben, bevor Sie fortfahren. Wenn das Gerät kürzlich in Betrieb war, ist die Nachhärtekammer warm. Warten Sie mindestens 10 Minuten, bis die Kammer abgekühlt ist.
Gefahr:
Die Durchführung von Wartungsarbeiten an dem Gerät, während es an die Stromversorgung angeschlossen ist, erhöht das Risiko eines Stromschlags.
Ausbauen der Tür
Überblick: Schrauben Sie die Tür des Form Cure ab und entfernen Sie sie.
Schritt 1: Tür des Form Cure öffnen
Öffnen Sie die Tür des Form Cure, um an die Schrauben der Türscharniere zu gelangen.
Schritt 2: Die Schrauben des Türscharniers entfernen
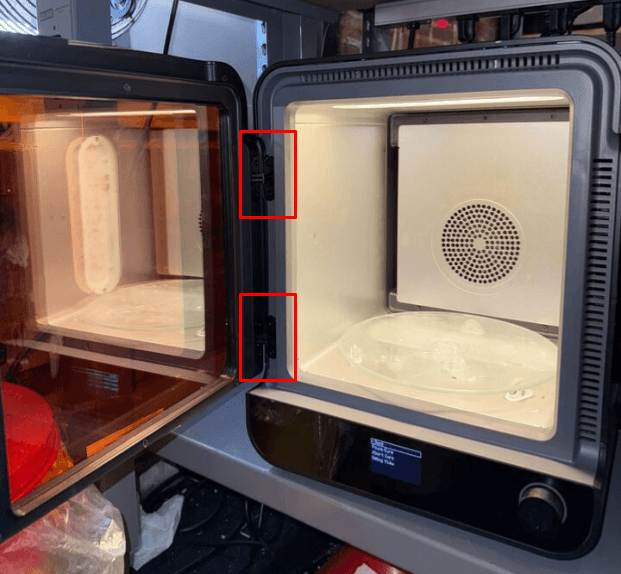
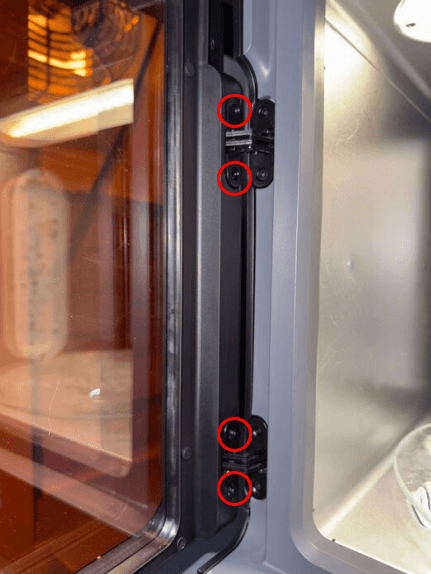
Die Tür des Form Cure ist mit zwei Scharnieren an der linken Seite des Geräts am Rahmen des Geräts befestigt. Lösen Sie die vier Schrauben, mit denen die Tür an den Scharnieren befestigt ist, mit einem 2,5-mm-Innensechskantschlüssel und entfernen Sie sie. Legen Sie die Schrauben beiseite.
Schritt 3: Tür ausbauen
Ziehen Sie die Tür direkt vom Form Cure weg, um sie vom Gerät zu trennen. Legen Sie die Tür zur Entsorgung beiseite.
Ersatztür einbauen
Überblick: Ersetzen Sie die Tür und befestigen Sie sie.
Schritt 1: Die Ersatztür ausrichten
Die Ersatztür in Position schieben. Vergewissern Sie sich, dass die Vorderseite der Tür bündig mit der Vorderseite des Geräts abschließt und dass die linke Kante der Tür bündig mit dem Rahmen ist.
Schritt 2: Die Ersatztür befestigen
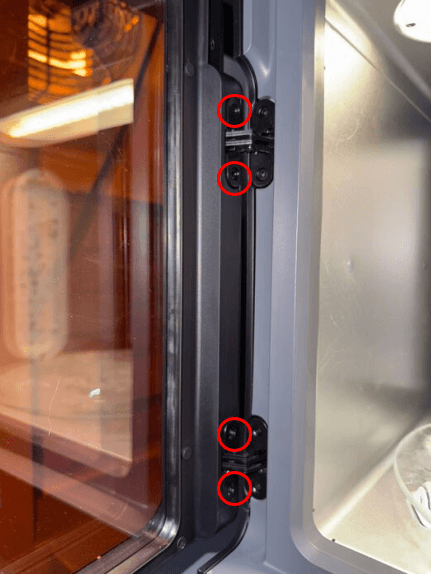
Drehen Sie in jedes der vier Scharnierlöcher eine Schraube. Ziehen Sie die Schrauben mit einem 2,5-mm-Innensechskantschlüssel handfest an.
Abschließen der Reparatur
Überblick: Nach dem Einbau der Ersatztür das Gerät einschalten und letzte Prüfungen durchführen.
Schritt 1: Gerät einschalten
Schließen Sie das Netzkabel an den Form Cure und die Stromversorgung an. Schalten Sie den Unterbrecherschalter auf der Rückseite des Geräts auf ON (EIN), um das Gerät einzuschalten.
Schritt 2: Reparatur testen
Starten Sie einen Nachhärtezyklus, um die Ersatzklappe zu testen. Überwachen Sie den Form Cure, um sicherzustellen, dass der Nachhärtezyklus normal abläuft. Wenden Sie sich an den Formlabs-Kundenservice oder Ihren autorisierten Vertriebspartner, um die Ergebnisse des Verfahrens mitzuteilen.