WHITE PAPER
Formlabs Logo

Printing with the Build Platform 2

Printing with the Build Platform 2

The Formlabs Build Platform 2 enables the quick, clean, and controlled release of printed parts from the build platform, allowing for a faster, easier, and more reliable post processing workflow.

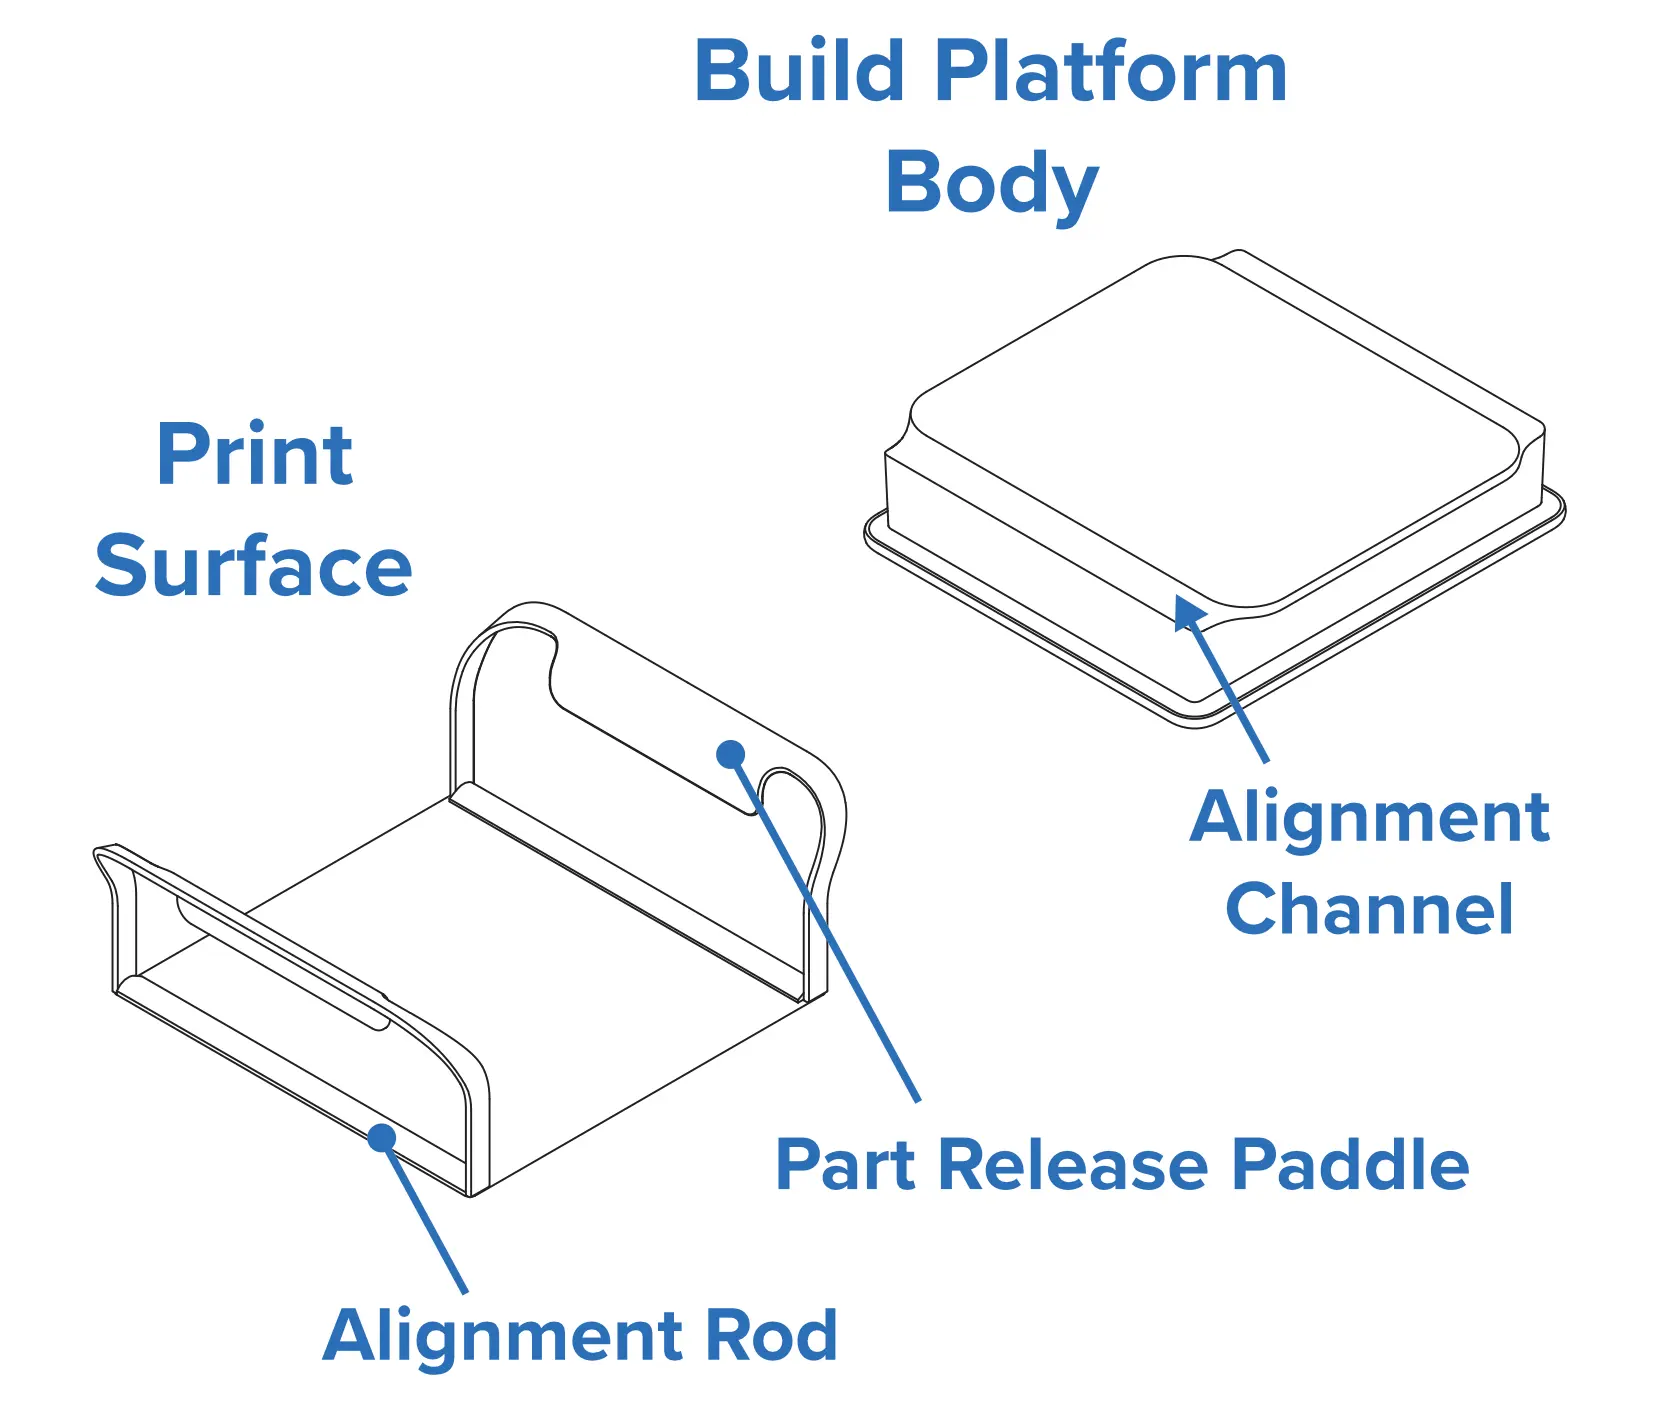
The Build Platform 2 is made of two main components: the build platform body and the print surface. The print surface is magnetically attached to the build platform body using magnets positioned within the alignment channels and throughout the top surface of the build platform body. The print surface bends when you push the part release paddles inwards, causing printed parts to release for easier post-processing.

Build Platform 2 schematic
Build Platform 2 schematic with labeled components

When using the Build Platform 2, make sure that both the build platform and your models are properly prepared before printing. Ensure that the build platform is clean and properly assembled. Certain part orientations and support options release more easily from the build platform than others, so set up your print with this in mind.

Note:

The Build Platform 2 is not approved for use as part of a biocompatible workflow with Temporary CB Resin and Permanent Crown Resin. When using those resins as part of a biocompatible workflow, use a Stainless Steel Build Platform. The Build Platform 2 is approved for use with other Formlabs resins for biocompatible applications. Always follow the Instructions for Use when using Formlabs resins to produce biocompatible parts.
For the best print results:

After printing:

  • Remove parts from the build platform
  • Clean your printed parts
  • Clean the build platform

Inspecting the print surface

Before printing with the Build Platform 2, ensure that it is ready to be used:

  • Inspect the build platform and make sure that it is clean and dry.
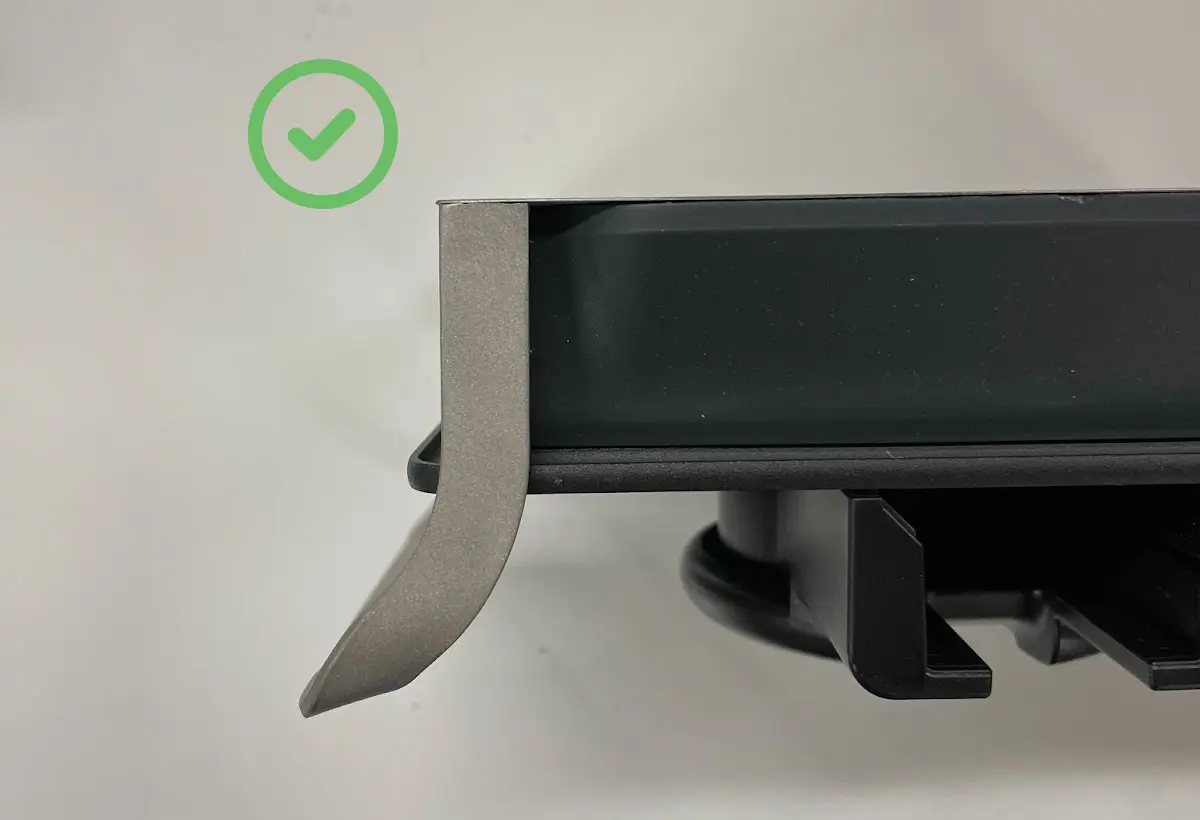
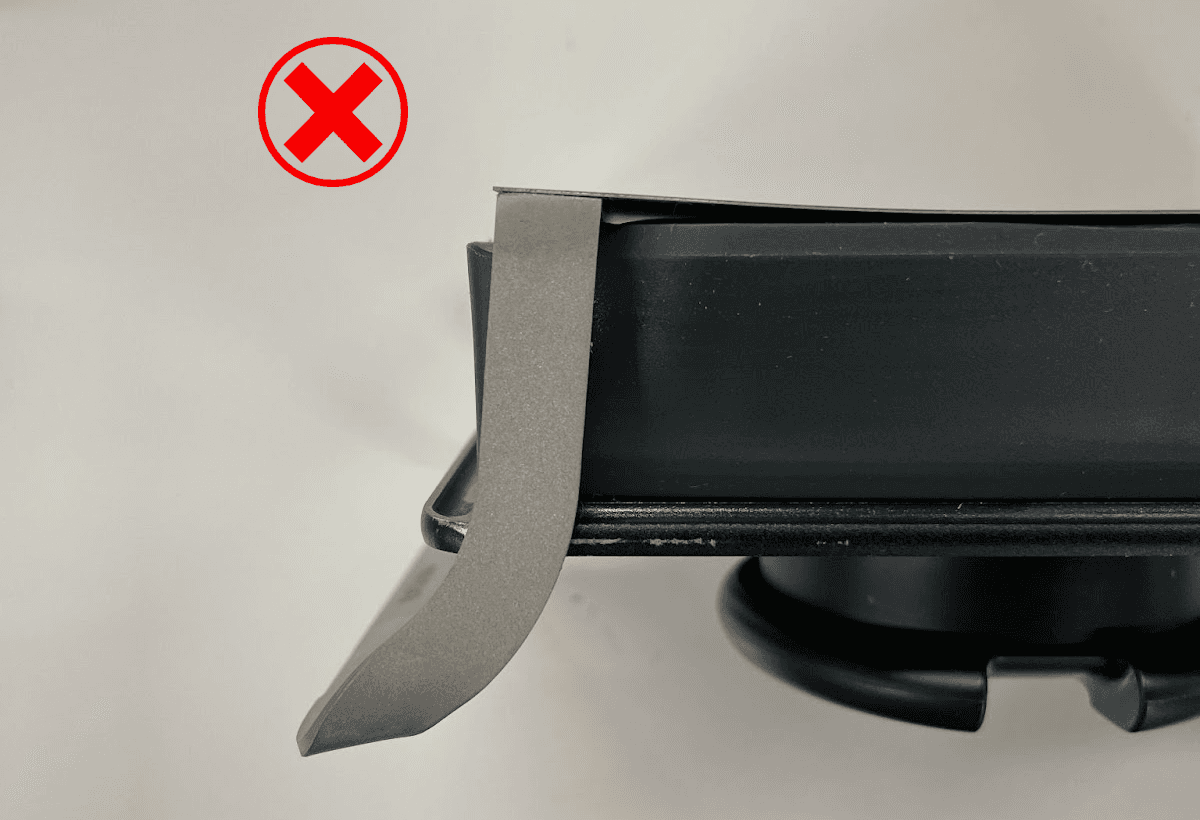
  • Check that the print surface is flat and properly aligned on the build platform body.
    • Actuate the part release paddles one at a time and check that the two alignment rods are fully seated in their respective alignment channels.
Build Platform 2 with properly aligned print surface
Build Platform 2 with improperly aligned print surface

Notice:

Printing with an improperly assembled Build Platform 2 can damage the build platform, your resin tank, or your printer.

Preparing your models in PreForm

Step 1: Orient models parallel to the front of the build platform

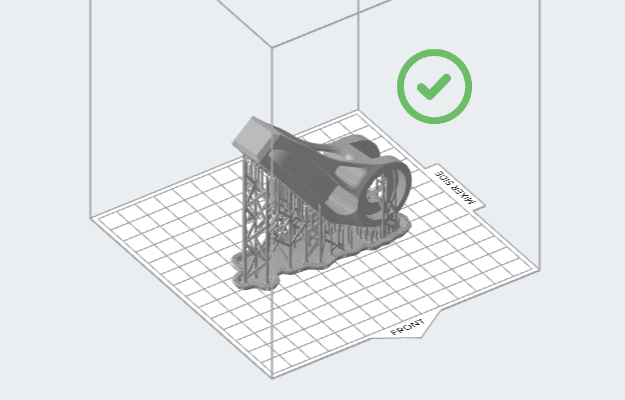
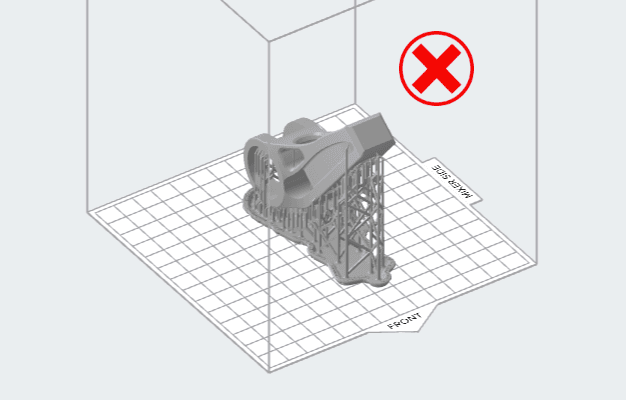
The print surface bends as the paddles are pushed inward. Align the long axis of models perpendicular to the paddles so that parts are more likely to release. Place models parallel to the front of the build platform for easy part removal as the surface flexes.

Models oriented parallel to the front of the build platform
Models oriented perpendicular to the front of the build platform

Step 2: Overlap support rafts on smaller parts

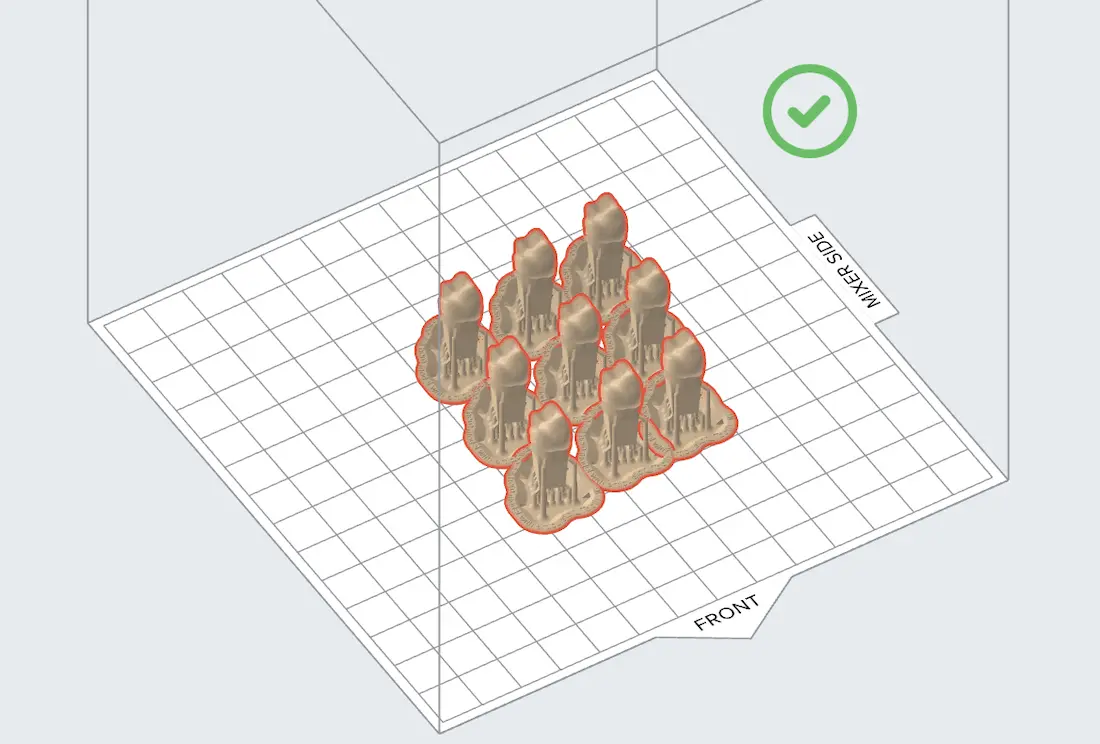
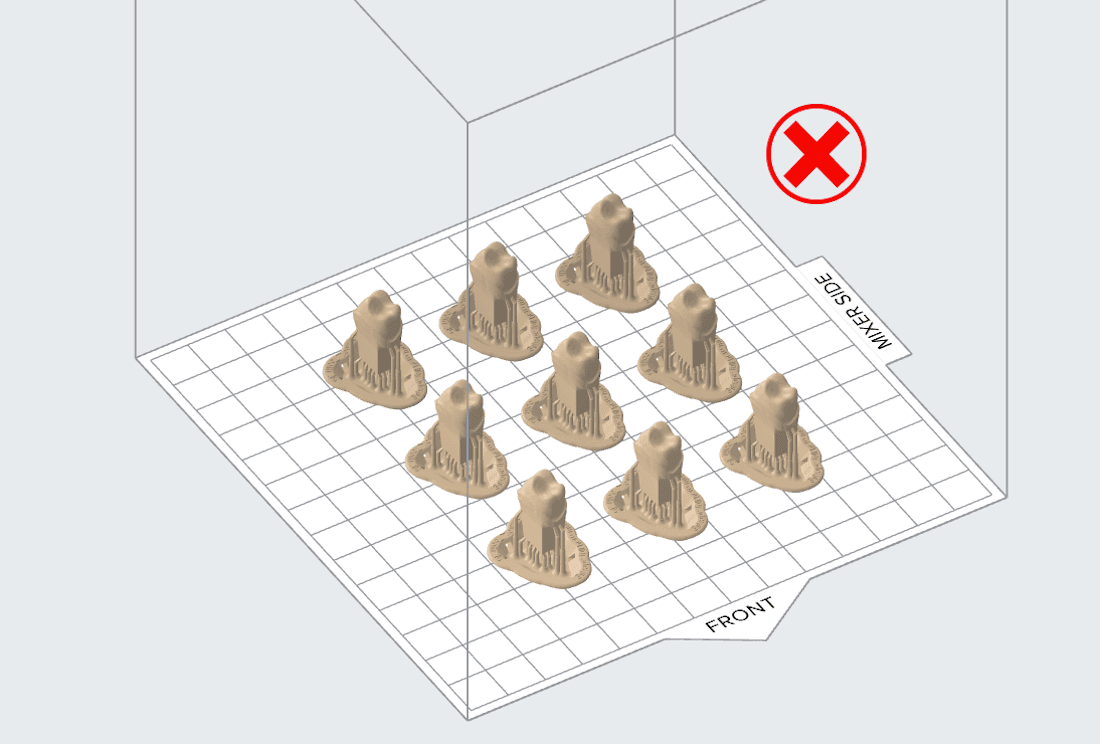
Parts that are three centimeters at their longest point may be too small to completely release from the build platform when the surface flexes. Place these models close together in PreForm so that their rafts overlap and create a larger surface area. If you are using the automatic layout tools in PreForm, check the Overlap Rafts box.

Note:

Avoid using mini-rafts with the Build Platform 2. The surface area on each mini-raft is too small to properly release from the print surface when it bends.

Small parts arranged in PreForm with overlapping rafts
Small parts arranged in PreForm with separate rafts

Step 3: Print parts with large flat surfaces directly on the build platform

Printing parts directly on the build platform can reduce print time and resin consumption, as well as simplifying post-processing steps.

Part printed directly on the Build Platform 2

Removing parts from the Build Platform 2

The Build Platform 2's print surface bends, releasing printed parts for post-processing. Released parts may separate entirely from the build platform or remain partially adhered due to liquid resin, allowing them to be removed by hand.

Warning:

Wear gloves when handling printed parts and surfaces that are contaminated with solvent or liquid resin to prevent skin contact.

Caution:

Do not point the print surface of the Build Platform 2 upward or toward your face. Flying parts or debris may lead to injury.

  1. Remove the build platform from the printer and wash the attached parts using your solvent of choice.
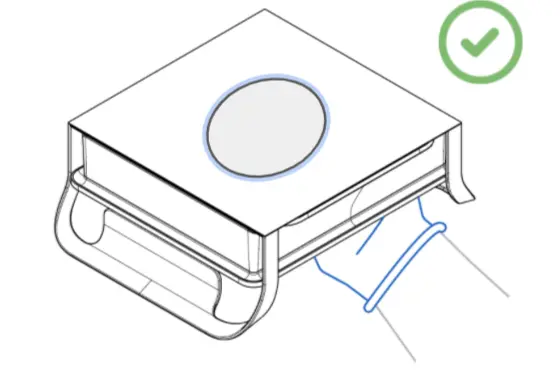
  1. After washing, hold the Build Platform 2 over a clean and level surface with the print surface facing downward.
Holding Build Platform 2 with print surface facing downward
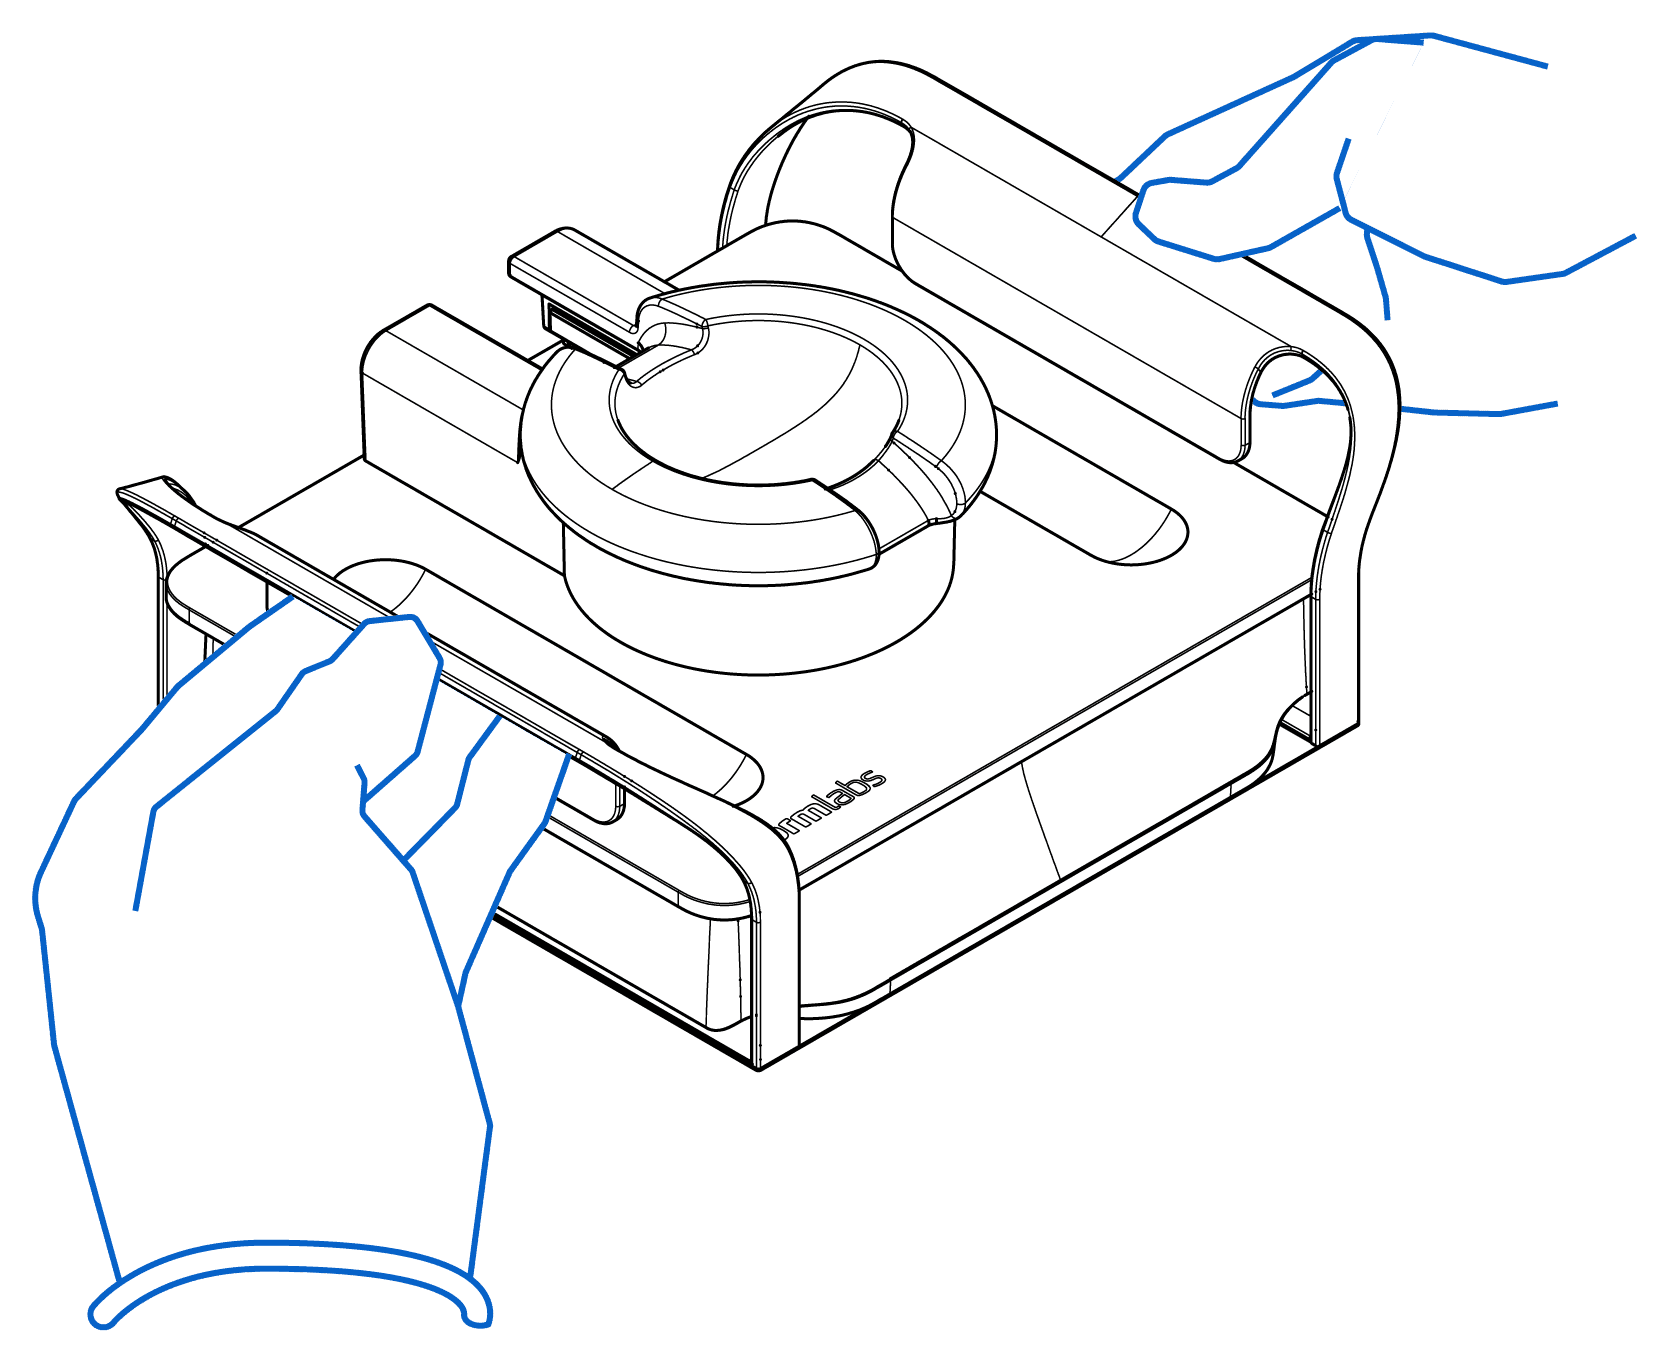
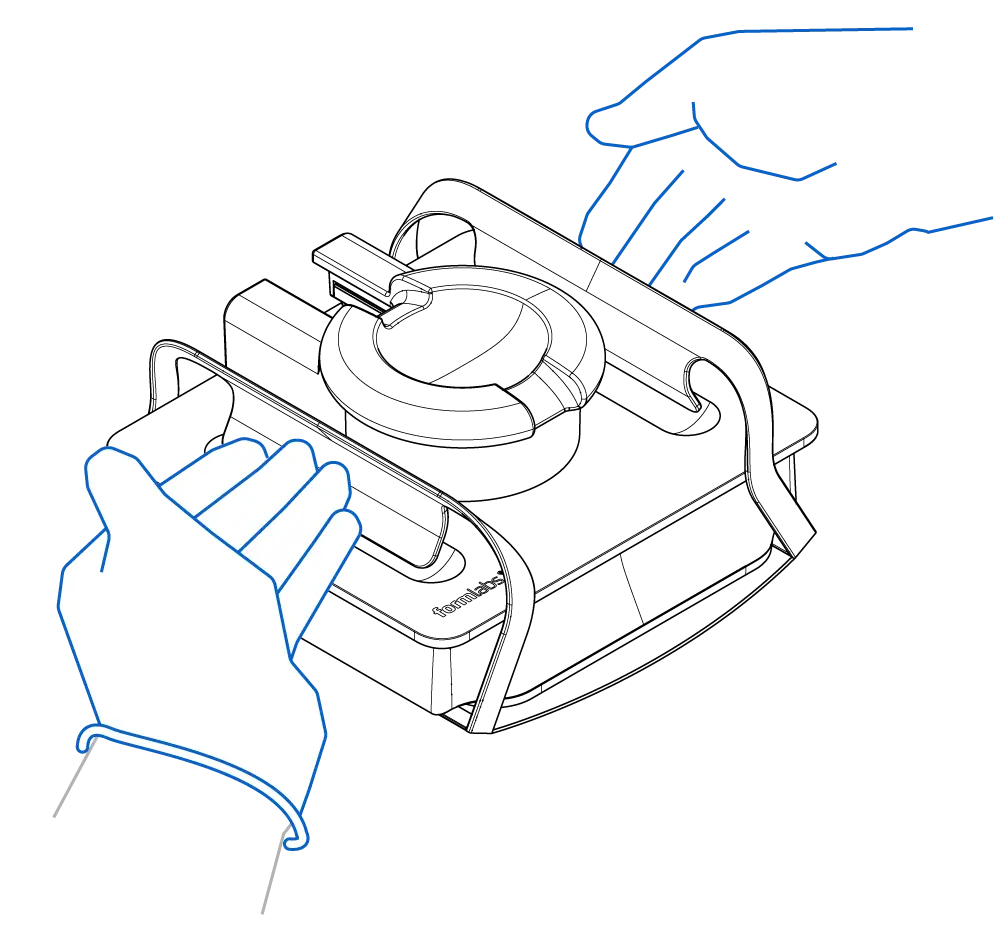
  1. Press the part release paddles inward toward the center. Pressing one paddle before the other can make the removal process smoother. Parts separate from the build platform as the surface bends.
Pressing the part release paddles inward on the Build Platform 2
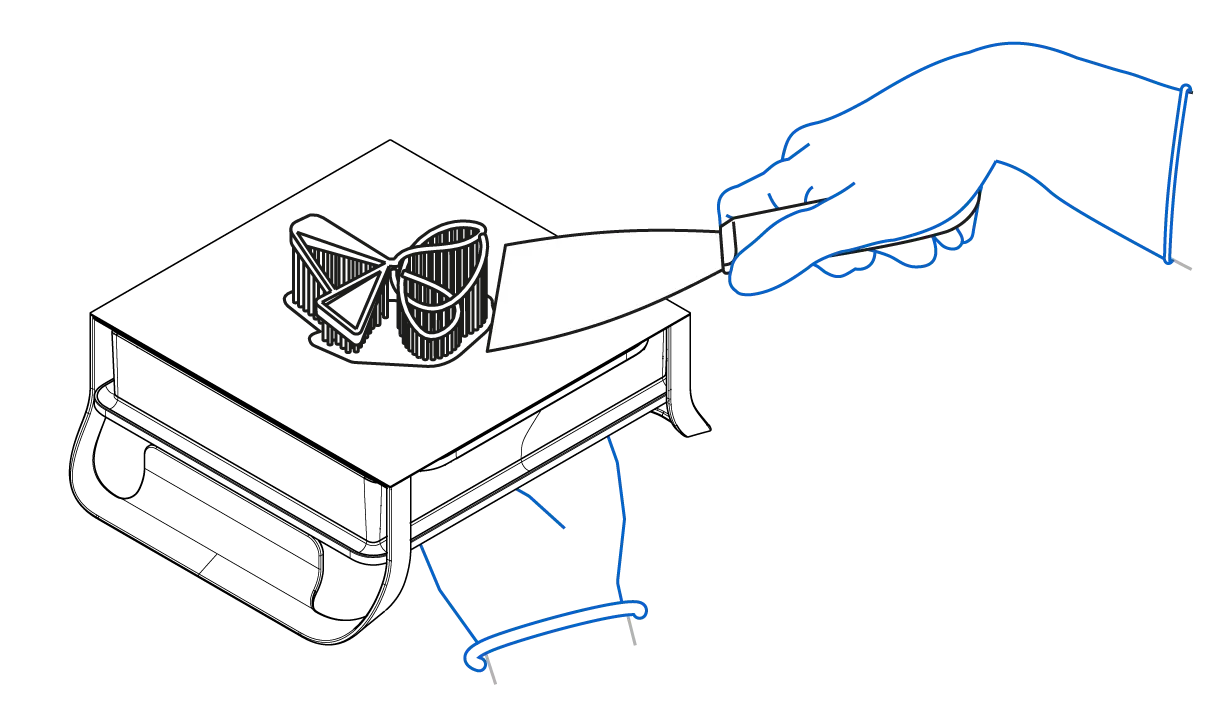
  1. If parts remain on the build platform, use a part removal tool or scraper to manually remove them or pull them off with a gloved hand.
Using a removal tool to manually remove parts from the Build Platform 2
  1. Clean the print surface if you plan to print again with the same resin, or thoroughly clean the entire Build Platform 2 to completely remove all traces of resin before printing with a different material.
  2. When finished, store the build platform inside the printer or somewhere out of direct sunlight.

Other removal methods may be effective, depending on your part geometry. Experiment to find the method that works best for your parts and your workflow. For example, for large or fragile parts:

  1. Place the Build Platform 2 on its side on your work surface.
  2. Support the printed part with one hand.
  3. Squeeze one part removal paddle while peeling the printed part away from the print surface.