
Required supplies:
Formlabs:
- Roller holder
- T6 Torx driver, T8 Torx driver, or 2 mm hex driver
Third-party:
- Nitrile gloves
- Paper towels
- Cell phone (optional)
- PEC*PADs
- Clean isopropyl alcohol (IPA, 90% or higher)

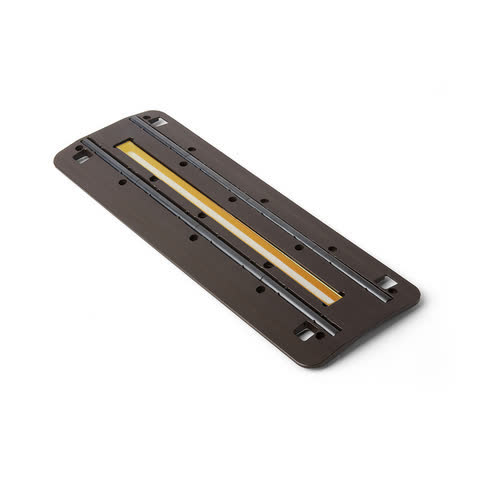
The roller holder sits on top of the Light Processing Unit (LPU) housing inside the Form 3L. The roller holder houses two sets of pins that pull the resin tank’s flexible film taut. It also houses the optical window that the laser fires through to cure each layer in a print. A dirty or damaged roller holder can affect print quality or lead to damage to the LPUs themselves.
Use this guide to replace the Form 3L roller holder.
Required supplies:
Formlabs:
Third-party:
Estimated time: 20–30 minutes
Preparing the workspace
Overview: Prepare the Form 3L and a dust-free workspace for replacing the roller holder.
NOTICE:
Avoid touching the optical window or rollers on the roller holder to limit contamination from skin oils and/or resin.
Step 1: Remove the build platform
Remove the build platform first to avoid dripping resin into the printer cavity.
Step 2: Remove the resin cartridges
Remove the resin cartridges and close the vent caps to prevent resin from dripping out of the bite valves.
Step 3: Remove and store the resin tank
Remove the resin tank, place it in the resin tank case, and cover it with its lid. Set the case and tank aside on a clean, flat surface.
NOTICE:
Wear gloves and hold the resin tank by the tank grips on either side to avoid contamination or damage to the underside of the tank.
Step 4: Prepare the workspace
Clear a workspace around your printer. Ensure that the workspace is well-ventilated and free of dust. Layer several clean paper towels to the side of your work area to set the old roller holder on.
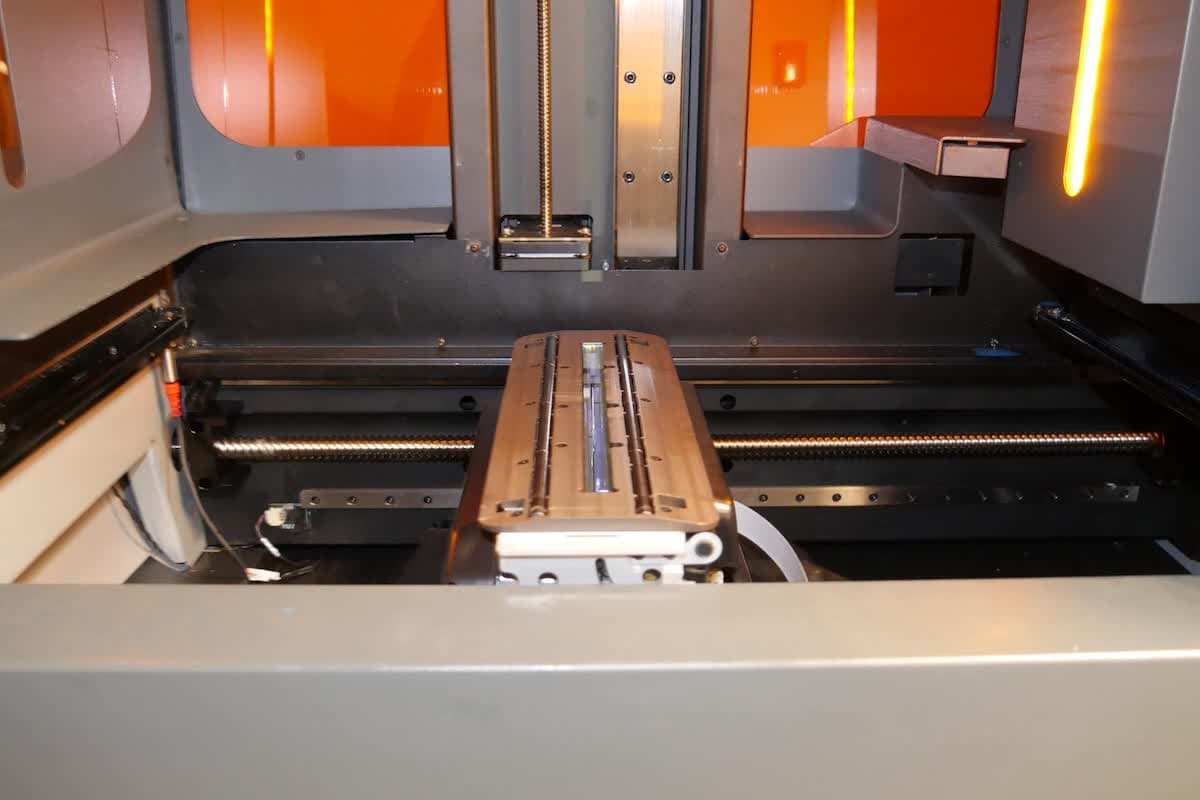
Tap the wrench icon to access the Maintenance screen, then tap Roller Holder Replacement. Follow the onscreen prompts. The LPU housing moves to the middle of the printer cavity. When prompted by the touchscreen, replace the roller holder following the steps below.
Removing the roller holder
Overview: After moving the LPU housing into its maintenance position, remove the roller holder.
Notice:
Do not allow any resin or other debris to fall into the rectangular laser opening below the roller holder. Contamination may require additional cleaning or repairs.
Step 1: Unscrew the roller holder screws
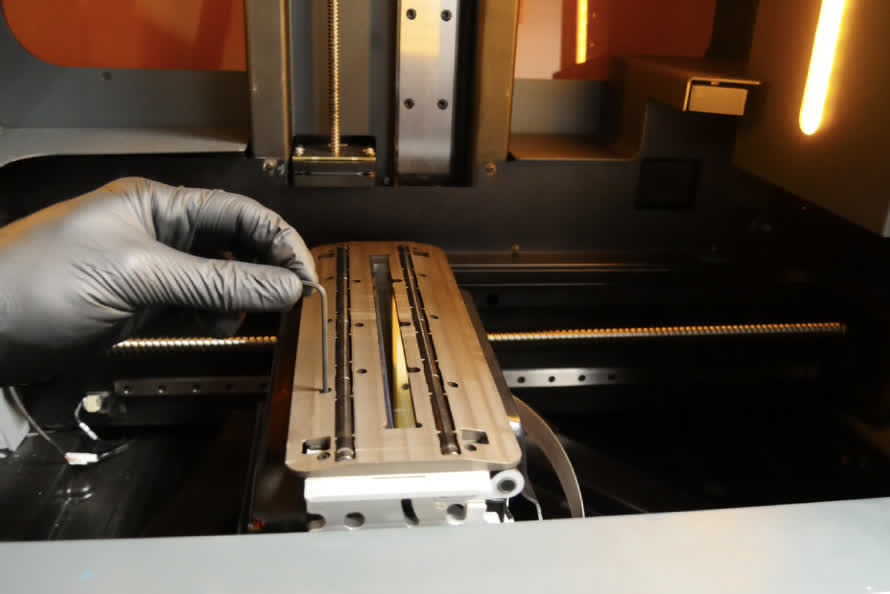
The roller holder is secured to the LPU housing with 16 screws. Depending on the age of your printer, they may be 2 mm hex screws, T6 Torx screws, or T8 Torx screws. Carefully loosen the 16 screws on top of the roller holder with the appropriate driver to avoid dropping the screws into the printer cavity. Set the screws aside to reinstall later.
Step 2: Lift the roller holder
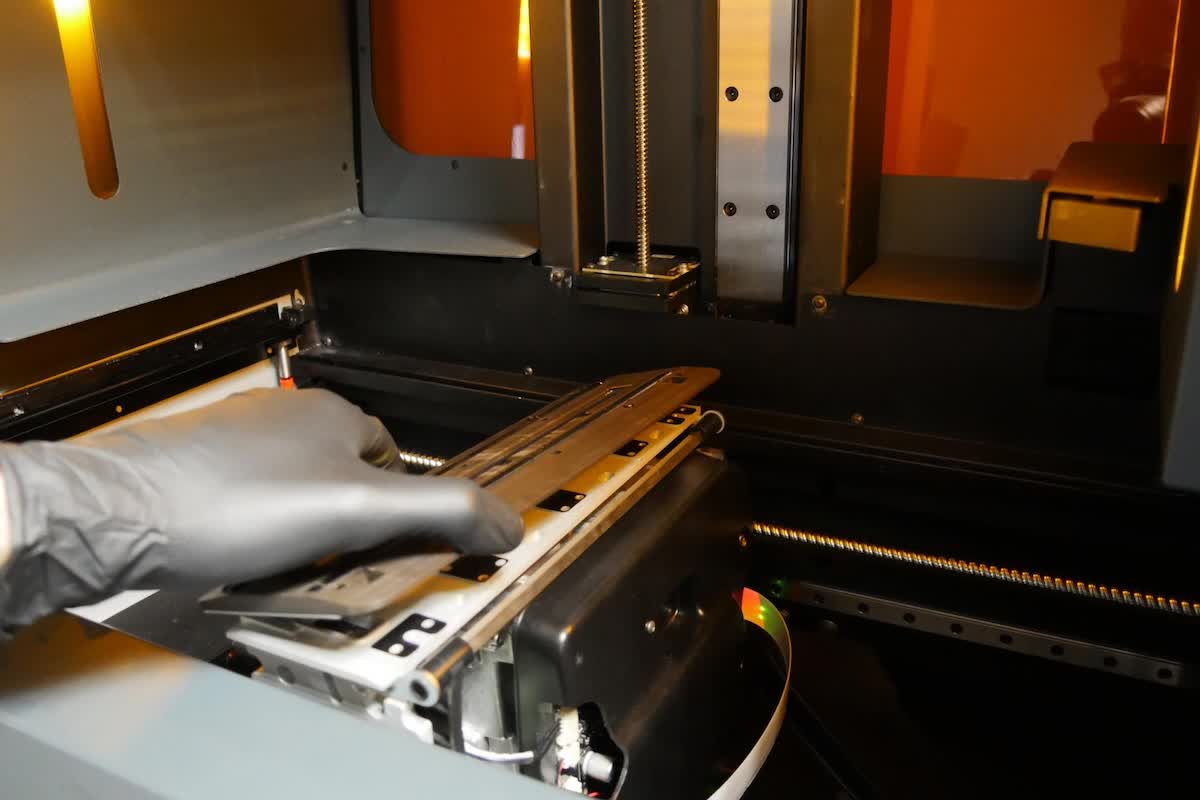
Carefully lift each edge of the roller holder to separate it from the LPU housing.

Notice:
Remove the roller holder from the LPU slowly. If there is liquid resin on or around the roller holder, quickly lifting the roller holder creates a suction effect that can pull resin into the LPUs.
Once the roller holder is free, lift it away from the LPU housing and place it onto the paper towels to prevent any resin from dripping into the printer.
Installing the replacement roller holder
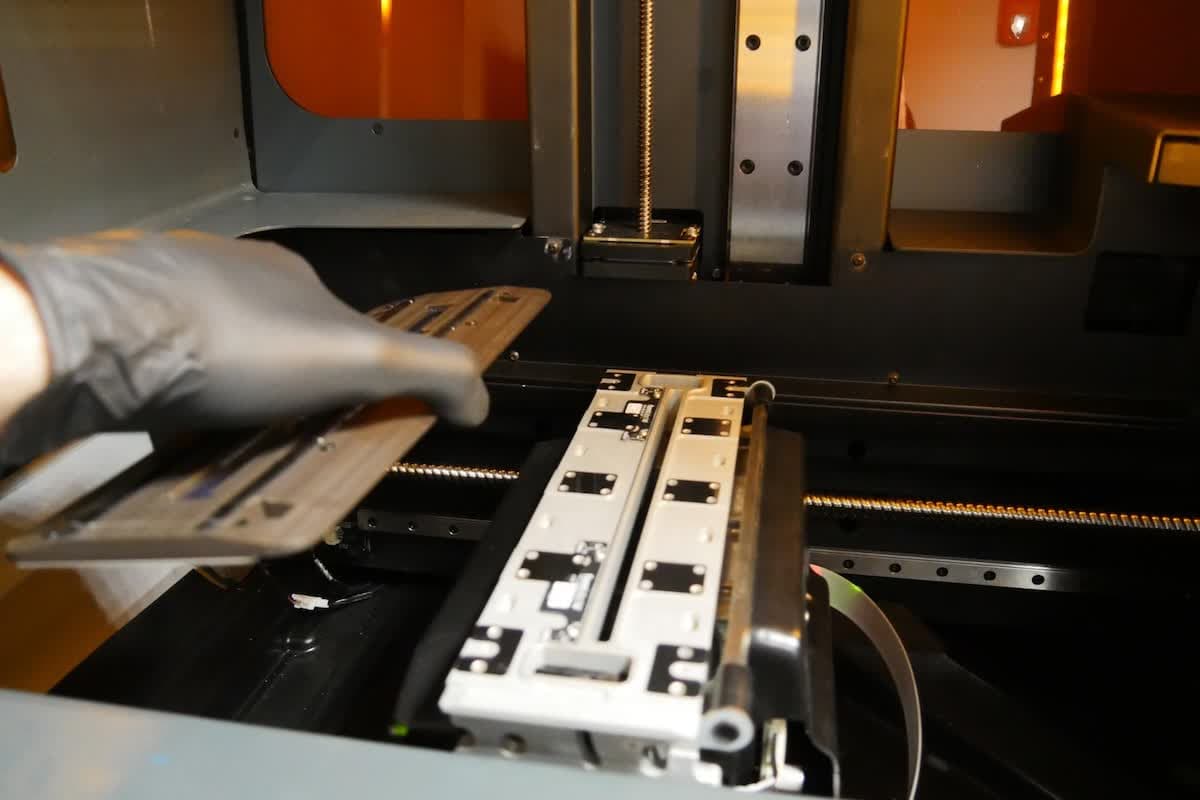
Overview: Clean the top of the LPU housing and install the new roller holder.
Step 1: Prepare the LPU housing
Clean any pooled resin that remains on the top surface of the LPU housing with paper towels dampened with IPA. Be gentle to avoid damaging the gasket surrounding the laser opening or the printed circuit board.
Step 2: Inspect the new roller holder
Carefully remove the new roller holder from its packaging. Remove the protective film from the optical window. Inspect the glass optical window in the roller holder and ensure that it is clean and free of dust or smudges. Clean the optical window with a PEC*PAD and IPA if necessary.
Step 3: Install the new roller holder
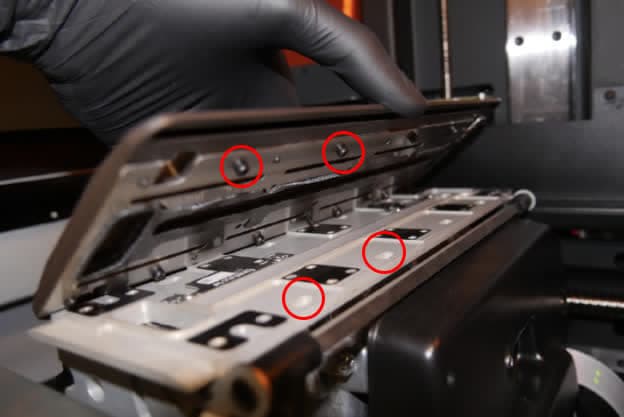
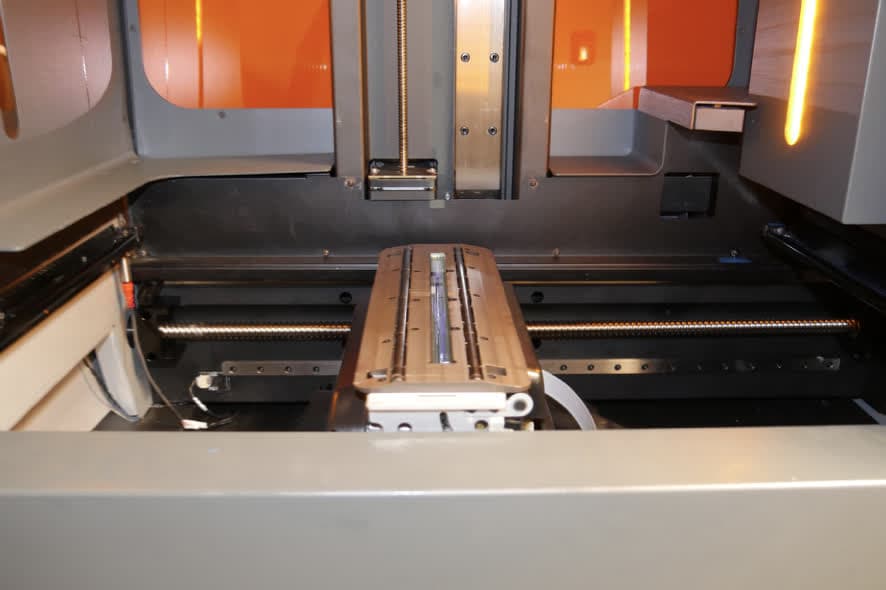
Hold the roller holder above the LPU housing. Align the posts on the bottom of the roller holder with the corresponding cutouts in the mounting surface. The laser window and screw holes in the roller holder should also align with the laser opening and the screw holes in the LPU housing, respectively.
Note:
The roller holder can only be installed in one orientation.
Place the new roller holder onto the mounting surface.
Place one of the included screws into each of the 16 mounting holes on the roller holder.
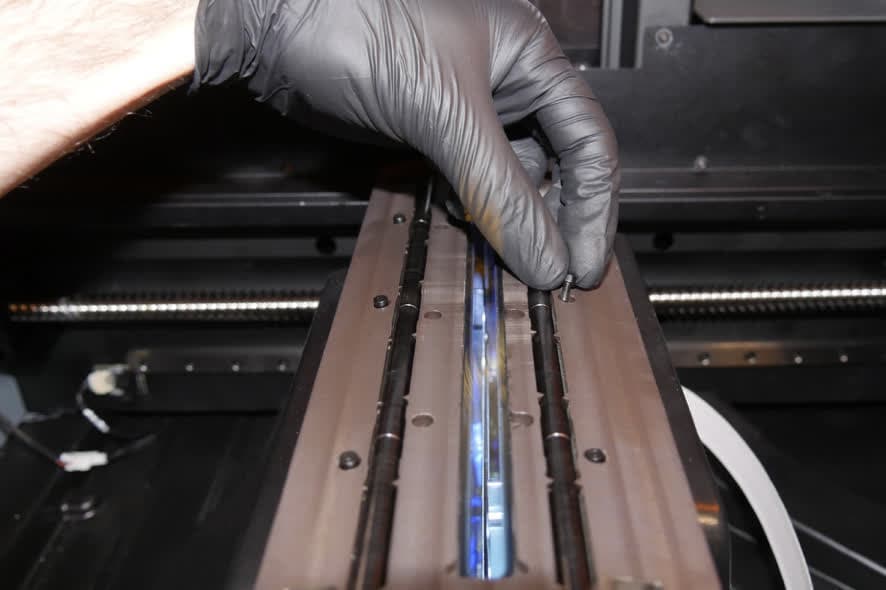
Step 5: Thread the roller holder screws
Use a 2 mm hex driver, a T6 Torx driver, or a T8 Torx driver (depending on the type of screws in your printer) to thread the screws in each numbered region shown before moving on to the next. Do not fully tighten the screws.
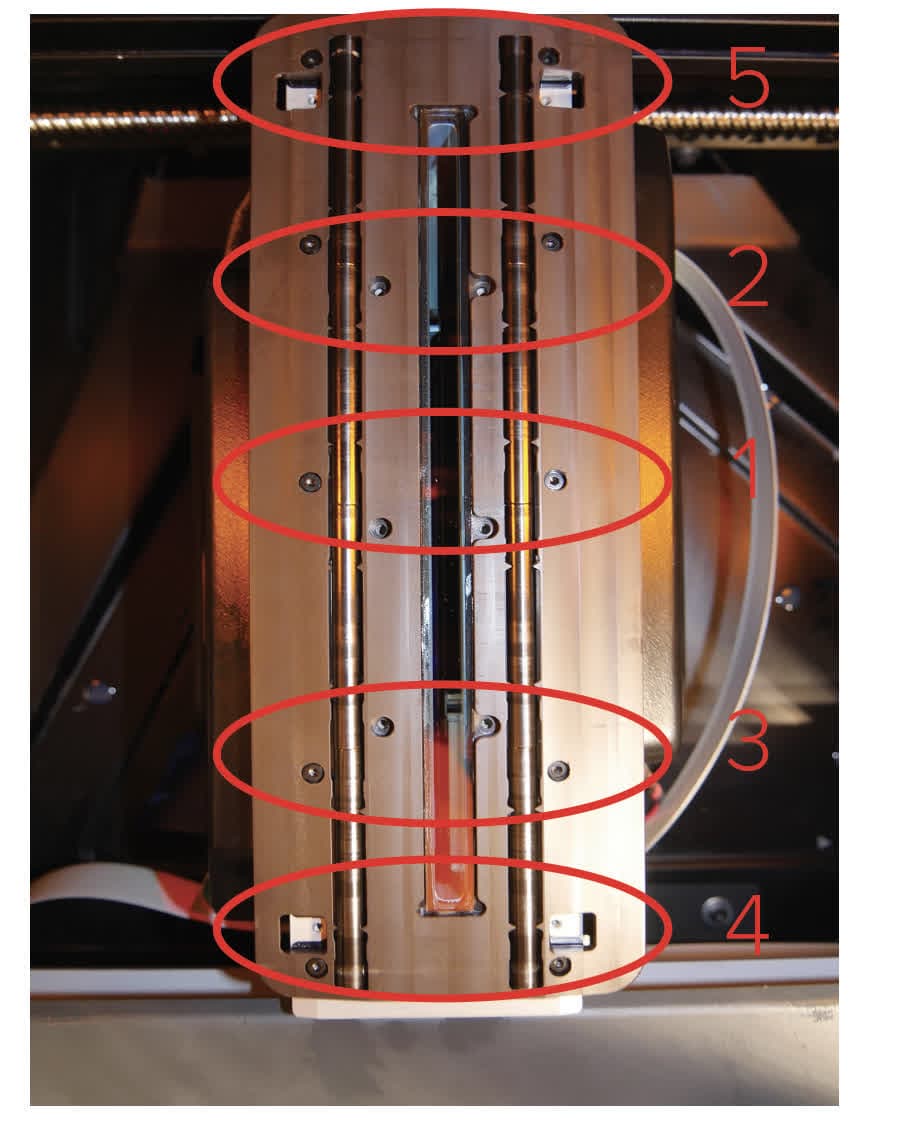
Notice:
Overtightening the screws during this step or tightening them out of order may cause the roller holder to sit unevenly on the LPU housing. This may lead to print failures.
Step 6: Tighten the roller holder screws
Following the same sequence, tighten the screws until they are finger tight.
Finalizing the repair
Overview: After installing the new roller holder, perform final checks.
Step 1: Inspect the roller holder
Inspect the optical window in the roller holder and ensure that it is clean and free of dust or smudges. Clean the glass optical window with a PEC*PAD and IPA if necessary.
Step 2: Complete the maintenance process on the touchscreen
Close the printer cover and tap Next. Follow the remaining steps on the touchscreen until the maintenance process is complete and the LPU housing returns to its home position.
Step 3: Dispose of the old roller holder
If the old roller holder is clean and dry, discard it with household waste. If liquid resin remains on the roller holder, cure the resin before disposing of the roller holder. Cure resin in sunlight (for 1–10 days) or under a UV lamp. Formlabs resins cure most effectively when exposed to 405 nm light and heat.
Step 4: Run a test print
Insert the resin tank, resin cartridges, and build platform. Start a print to ensure that the roller holder is correctly replaced. Contact Formlabs Support or your authorized reseller to share the results of the procedure.