WHITE PAPER
Formlabs Logo

Replacing the Form 4 cover hinges

Replacing the Form 4 cover hinges

The cover hinges keep the Form 4 cover aligned and hold it in the open position. The hinges are located at the rear of the printer under the back panel. If the cover hinges fail, the cover may shut unexpectedly or become misaligned with the printer.

Use this guide to replace the cover hinges.

Required Supplies:

Formlabs:

  • Cover hinge replacement kit
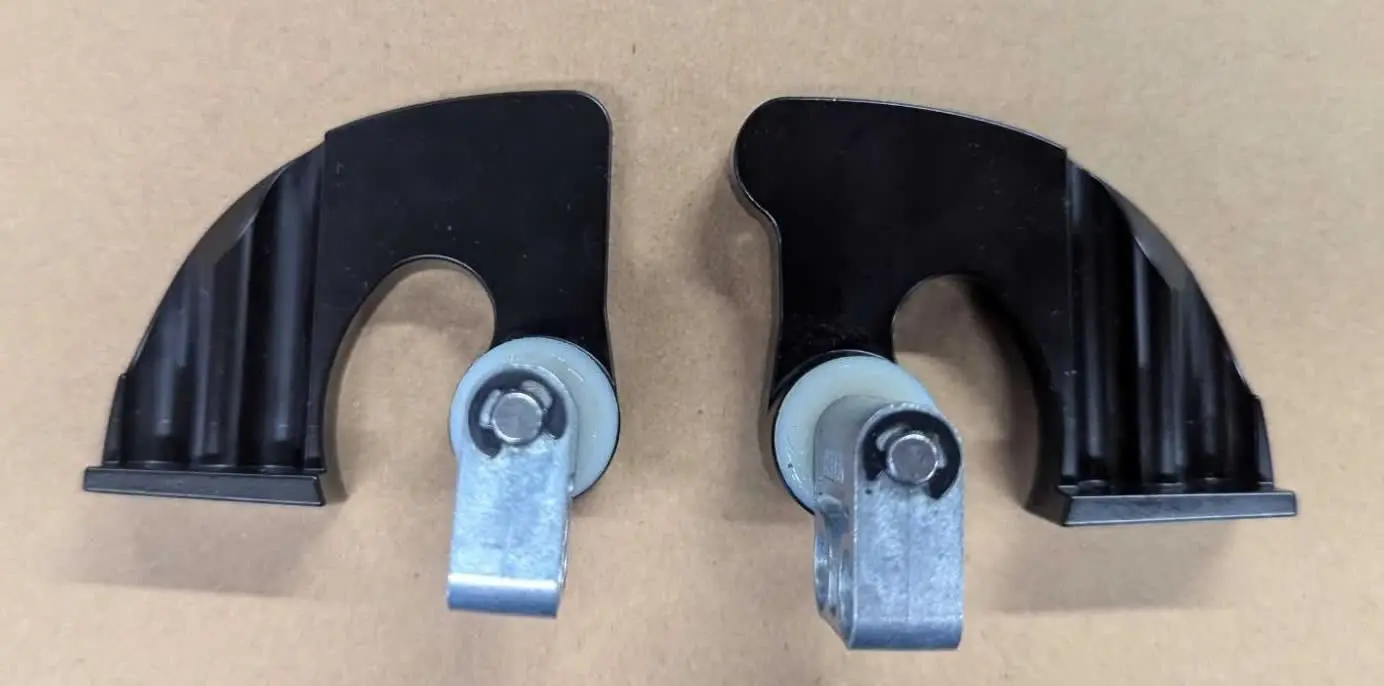
    • Left cover hinge
    • Right cover hinge
    • Form 4 cover tool
    • M4 x 8 mm cover tool screws (2x)
    • 2 mm hex driver
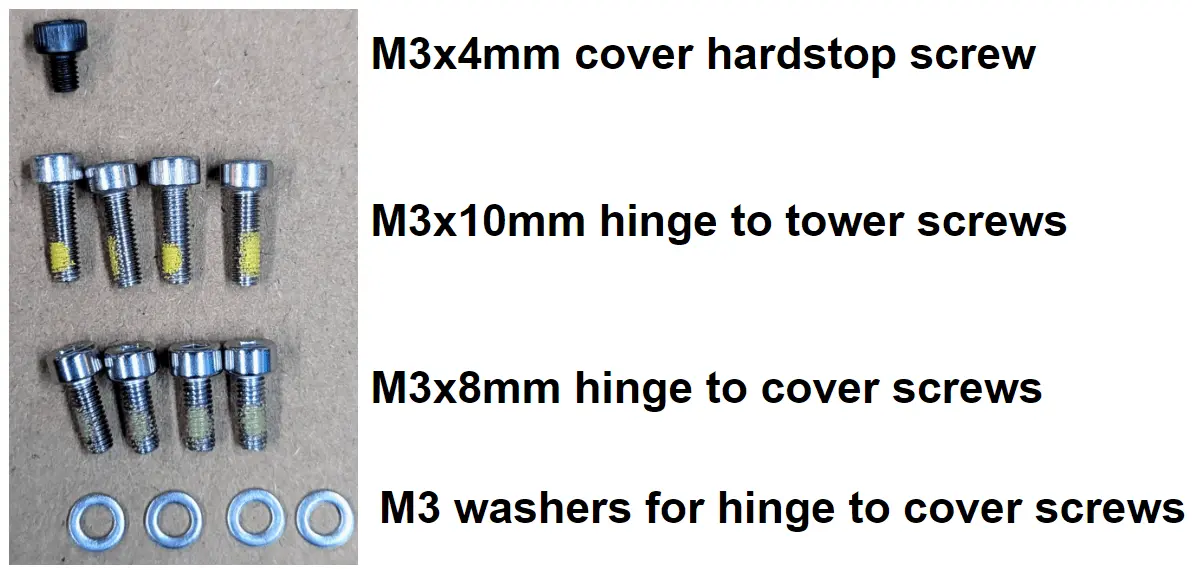
    • Replacement fasteners (13x, see photo)
  • Cover damper and bracket (in some repair kits)
  • 2.5 mm hex driver (included in the Form 4 tool caddy)

Third-party:

  • Adhesive tape
  • Nitrile gloves
Form 4 cover hinge replacement parts
Form 4 cover hinge kit replacement fasteners

Estimated time: 30–45 minutes

Preparing the workspace

Overview: Prepare the printer and a dust-free workspace for replacing the cover hinges.

Step 1: Remove the build platform

Remove the build platform first to avoid dripping resin onto the Light Processing Unit (LPU).

Step 2: Remove the resin cartridge

Remove the resin cartridge and close the vent cap to prevent resin from dripping off of the bite valve and into the printer.

Step 3: Remove and store the resin tank and mixer

Unlatch the mixer and resin tank. Remove the resin tank and cover it with its lid. Set the tank aside on a clean, flat surface.

Notice:

Wear gloves and hold the resin tank by the tank grips on either side to avoid contamination or damage to the underside of the tank.

Step 4: Prepare the workspace

Clear a workspace around your printer. Ensure that the workspace is well-ventilated and free of dust. Prepare additional space for storing the back panel of the printer during maintenance.

Step 5: Clean the printer

Warning:

Resin may cause skin irritation or an allergic skin reaction. Wear gloves when handling liquid resin or resin-coated surfaces. Wash skin with plenty of soap and water.

Open the printer cover and clean any resin pooled on and around the LPU with non-abrasive wipes. Dampen the wipes with isopropyl alcohol if necessary to fully remove the resin.

Danger:

Fire hazard. IPA is flammable. Keep containers closed, and keep out of the reach of children.

Step 6: Unplug the printer

Disconnect the power cable before continuing with maintenance. Do not perform maintenance on the printer while it is connected to power. Wait five minutes after disconnecting the printer from power before proceeding.

Danger:

Performing maintenance on the printer while it is plugged in increases the risk of electric shock. Never remove the back panel of the printer while the printer is plugged in. Never reconnect the printer to power while the back panel is uninstalled.

Removing the back panel

Overview: Remove the back panel to access the cover hinges.

Notice:

Formlabs printers contain sensitive electronic components. Ground yourself before touching any electronics in the printer by using a grounding strap or touching a grounded piece of metal.

Step 1: Remove the back panel screws

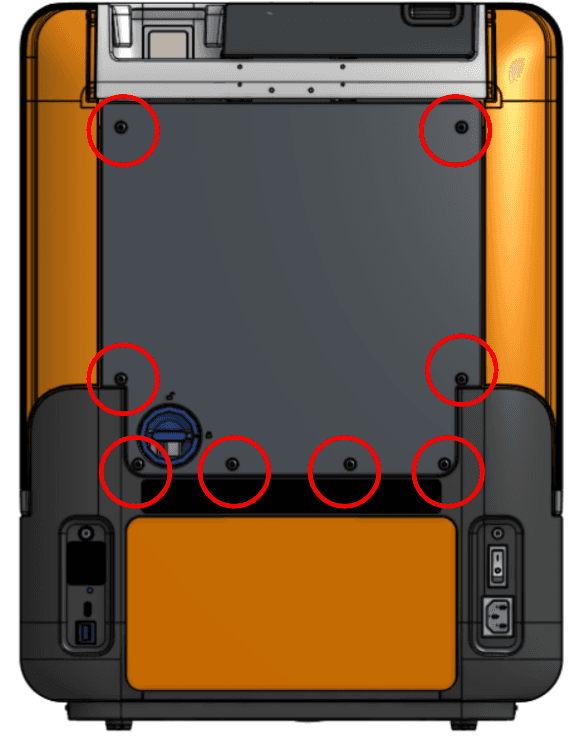
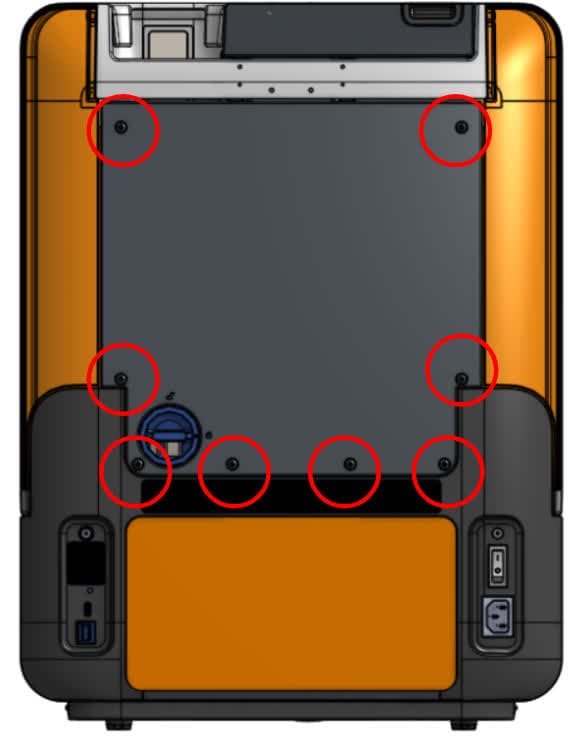
Use a 2.5 mm hex driver to remove the eight screws securing the back panel to the printer. Set the screws aside.

Form 4 back panel screws locations

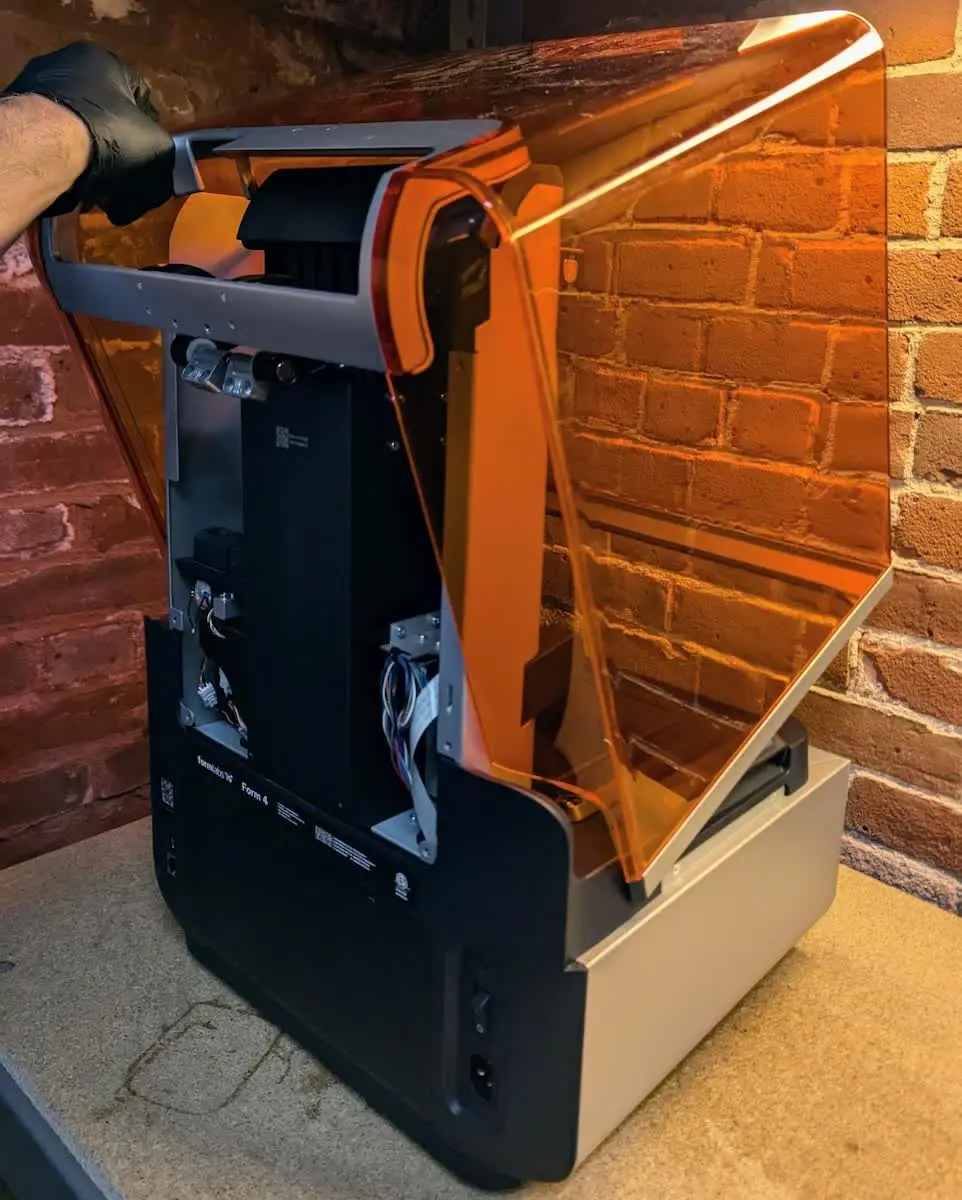
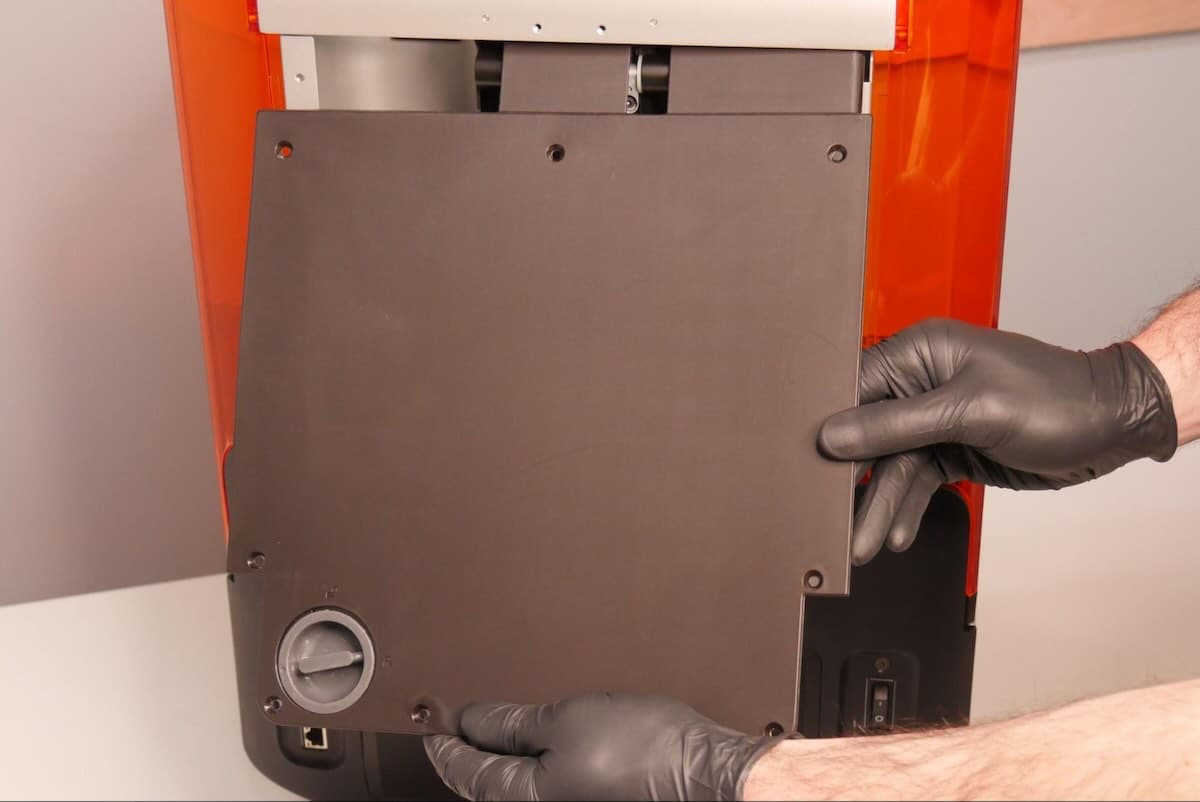
Step 2: Remove the back panel

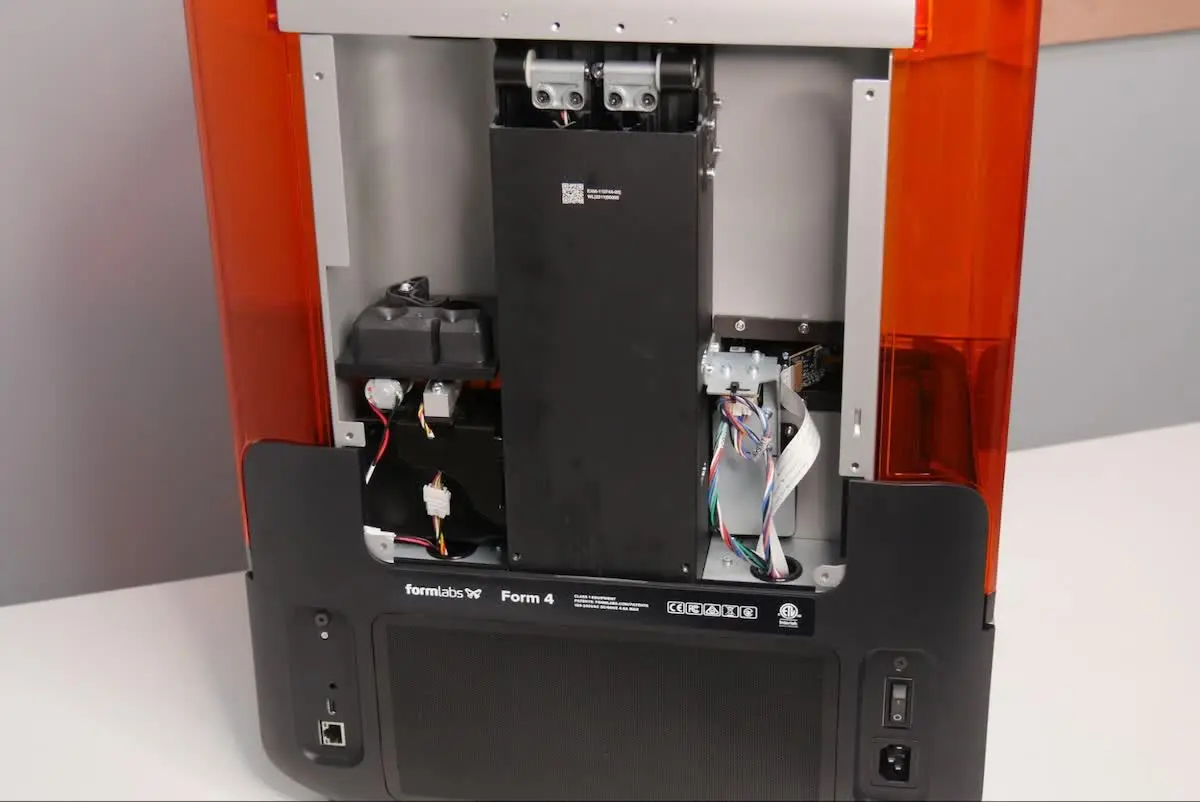
Remove the back panel by sliding it down and away from the back of the printer. If necessary, open the cover slightly to ease removal. Set the back panel aside.

Form 4 back panel removed

Removing the cover

Overview: After preparing the printer and workspace, remove the cover.

Step 1: Remove the tool caddy

If you have not done so already, remove the tool caddy from the tower cap to access the 2.5 mm hex driver provided with the printer. Set the tool caddy aside.

Removing the Form 4 tool caddy from the tower cap

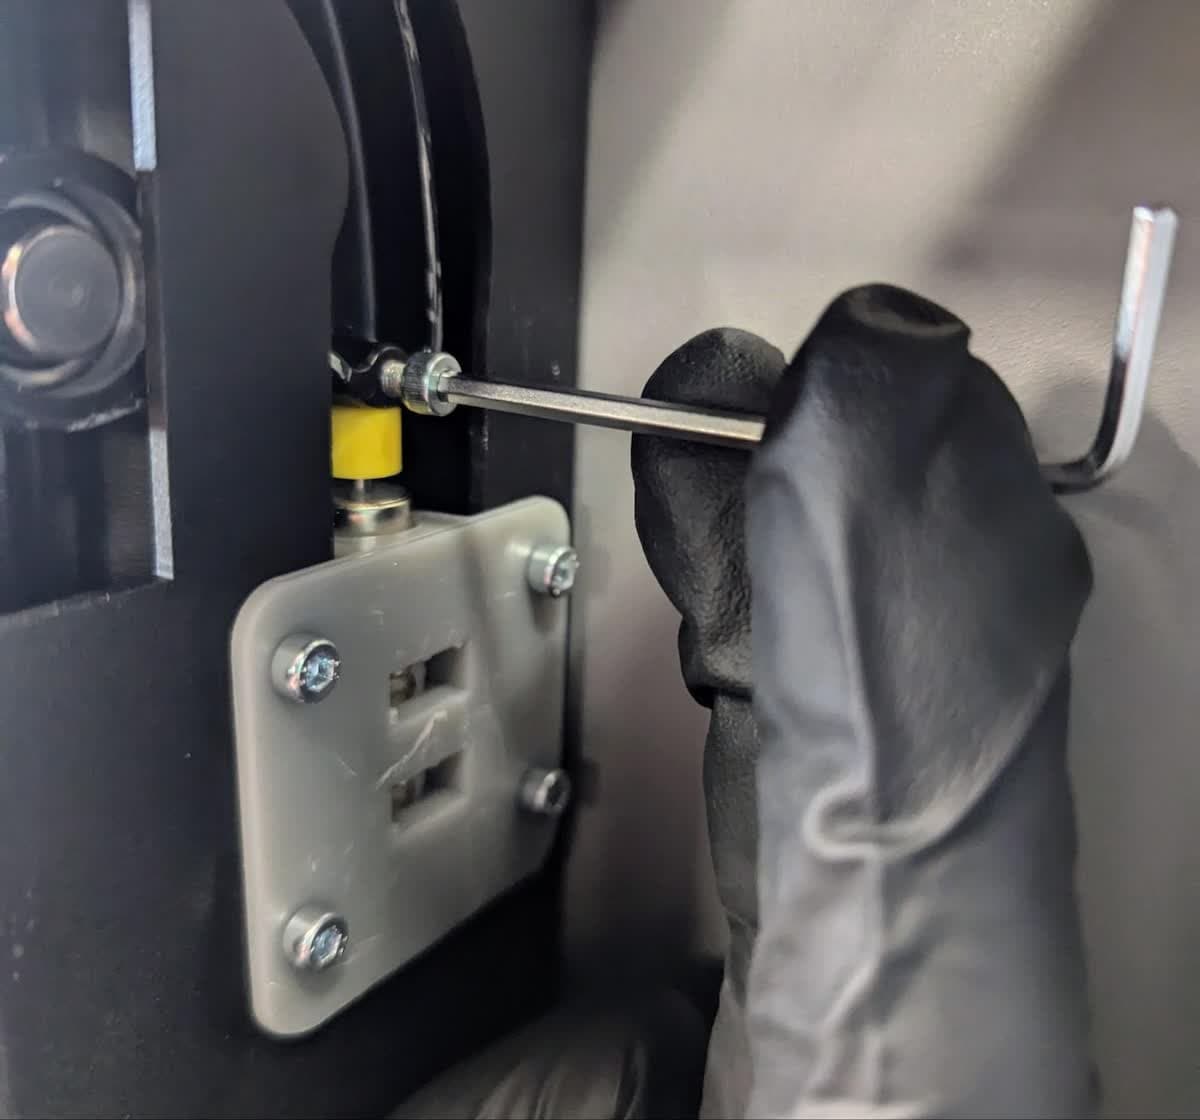
Step 2: Remove the cover hard stop screw

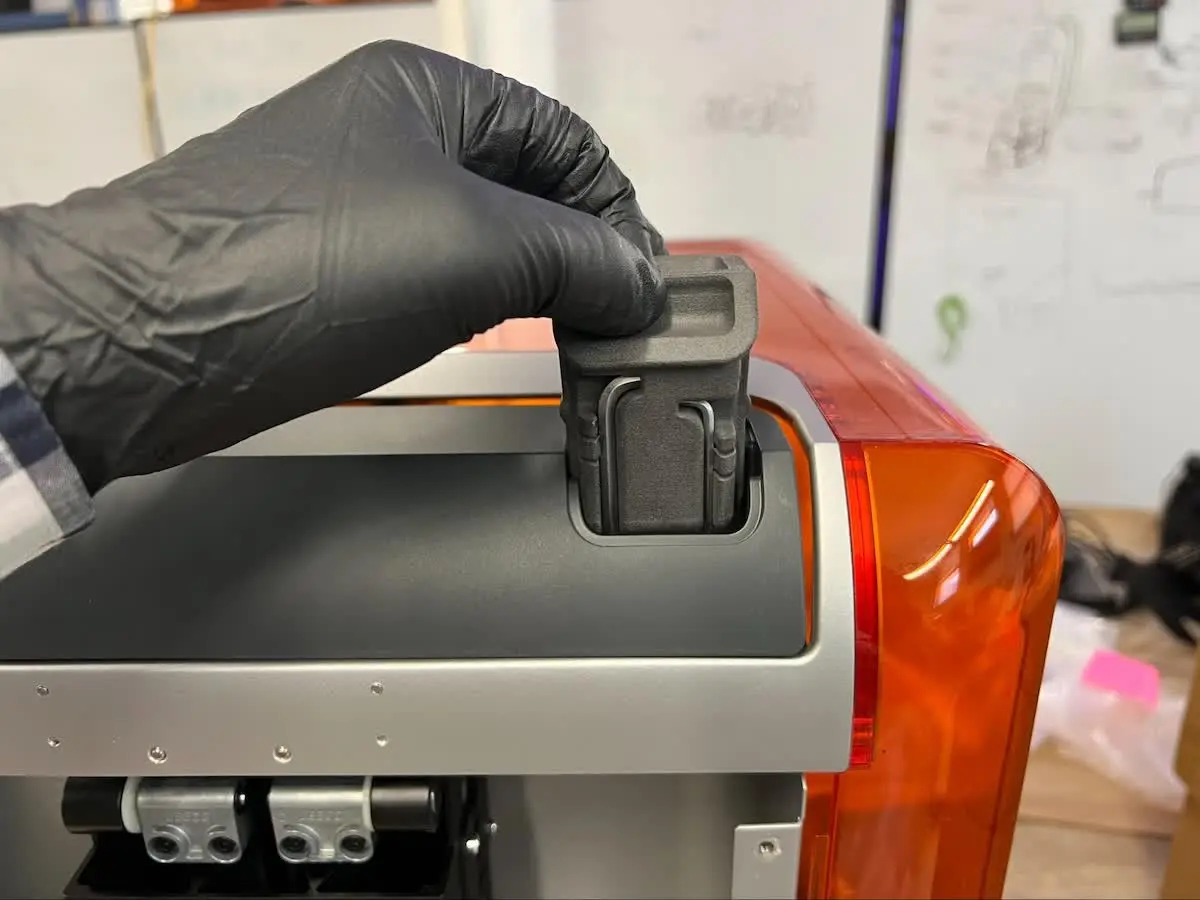
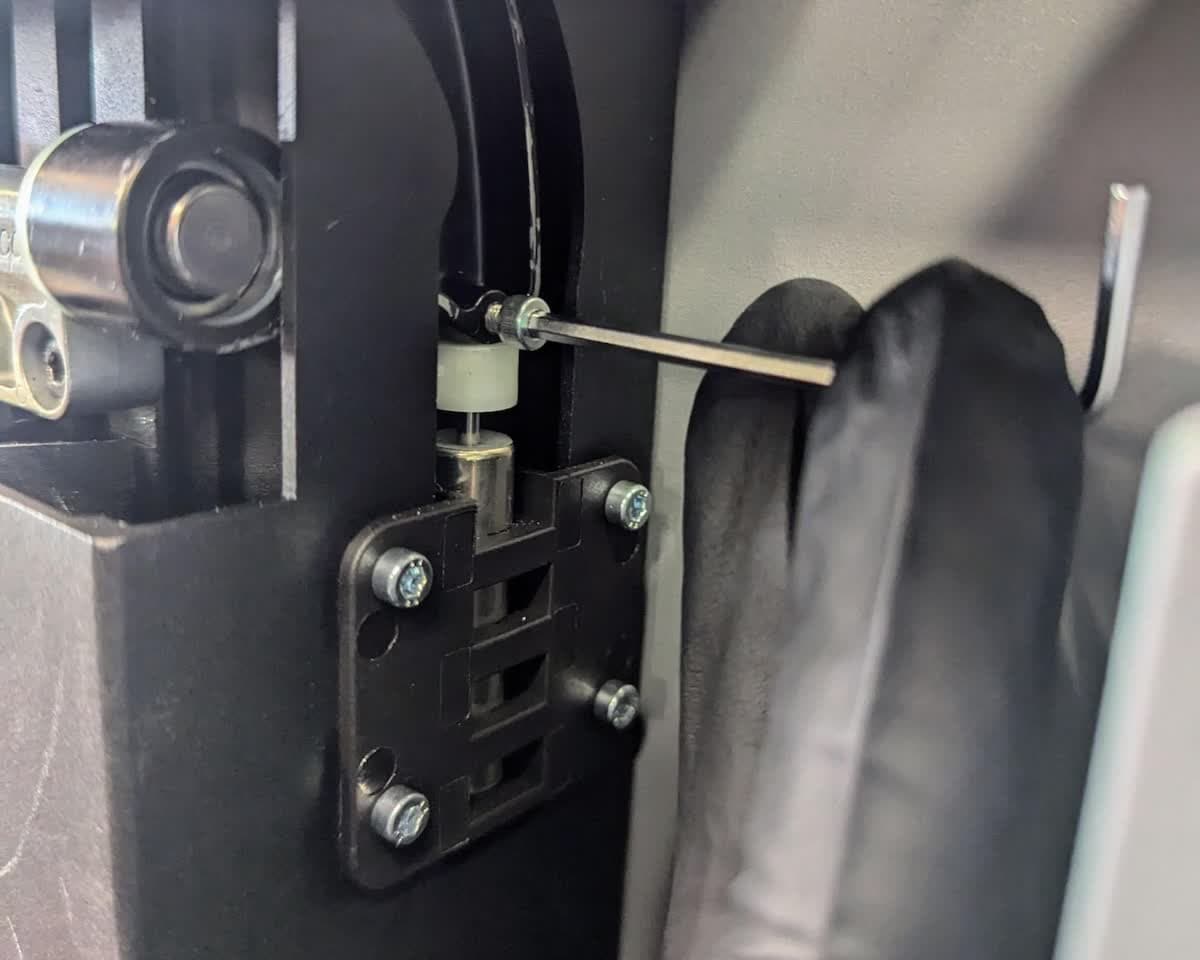
The cover's range of motion is constrained by a screw at the end of the hinge assembly that interacts with the cover damper. Using a 2.5 mm hex driver, loosen and remove the M3 x 4 mm hard stop screw. The screw can be accessed through a cutout in the Z-tower. Be careful not to drop the screw into the Z-tower. Set the hard stop screw aside.

Removing the Form 4 cover hard stop screw

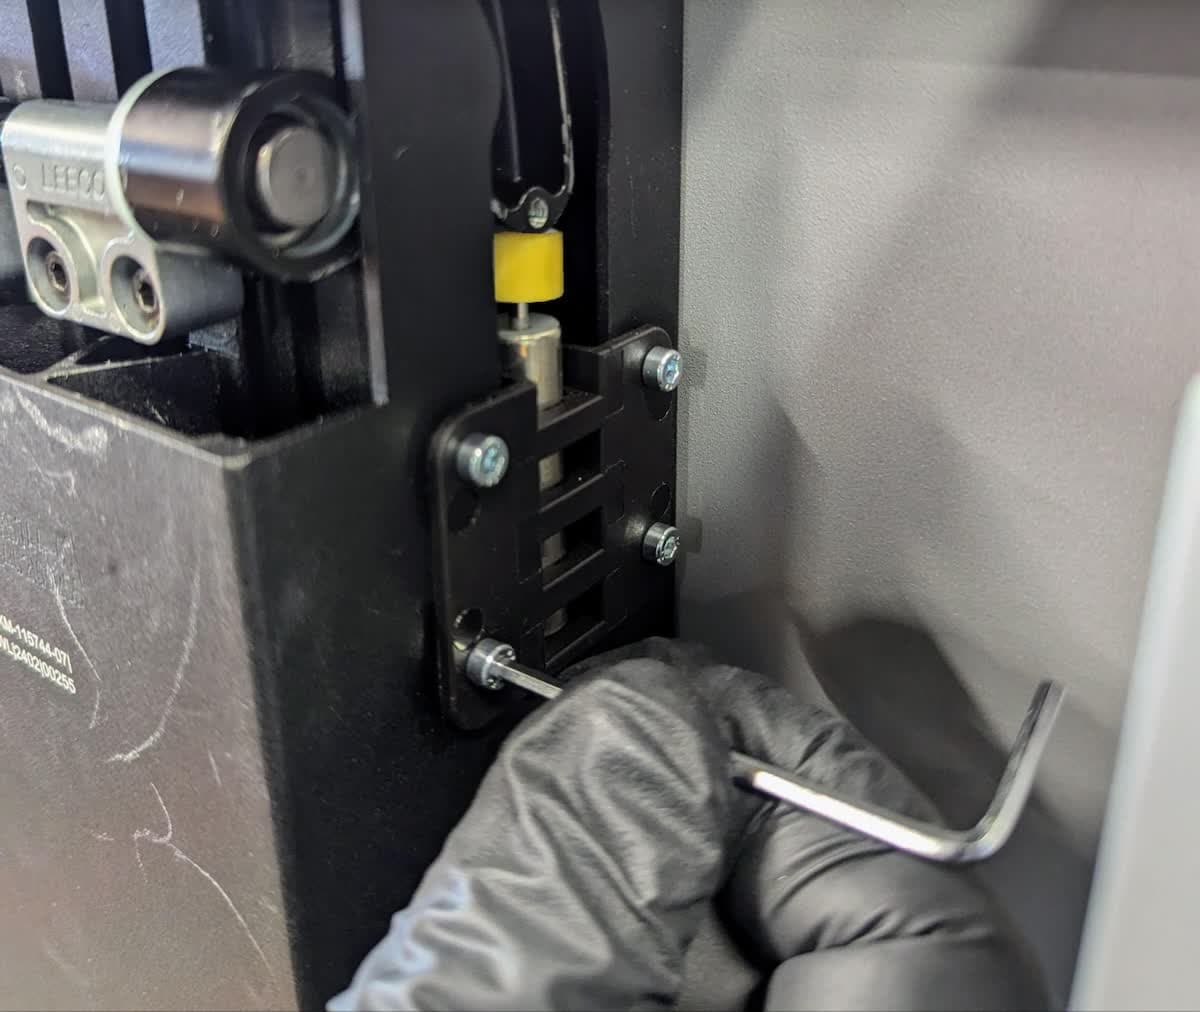
Step 3: Remove the cover damper if your kit contains a new cover damper and bracket

If your repair kit came with a cover damper and cover damper bracket, remove the existing damper and bracket. Otherwise, proceed to step 4.

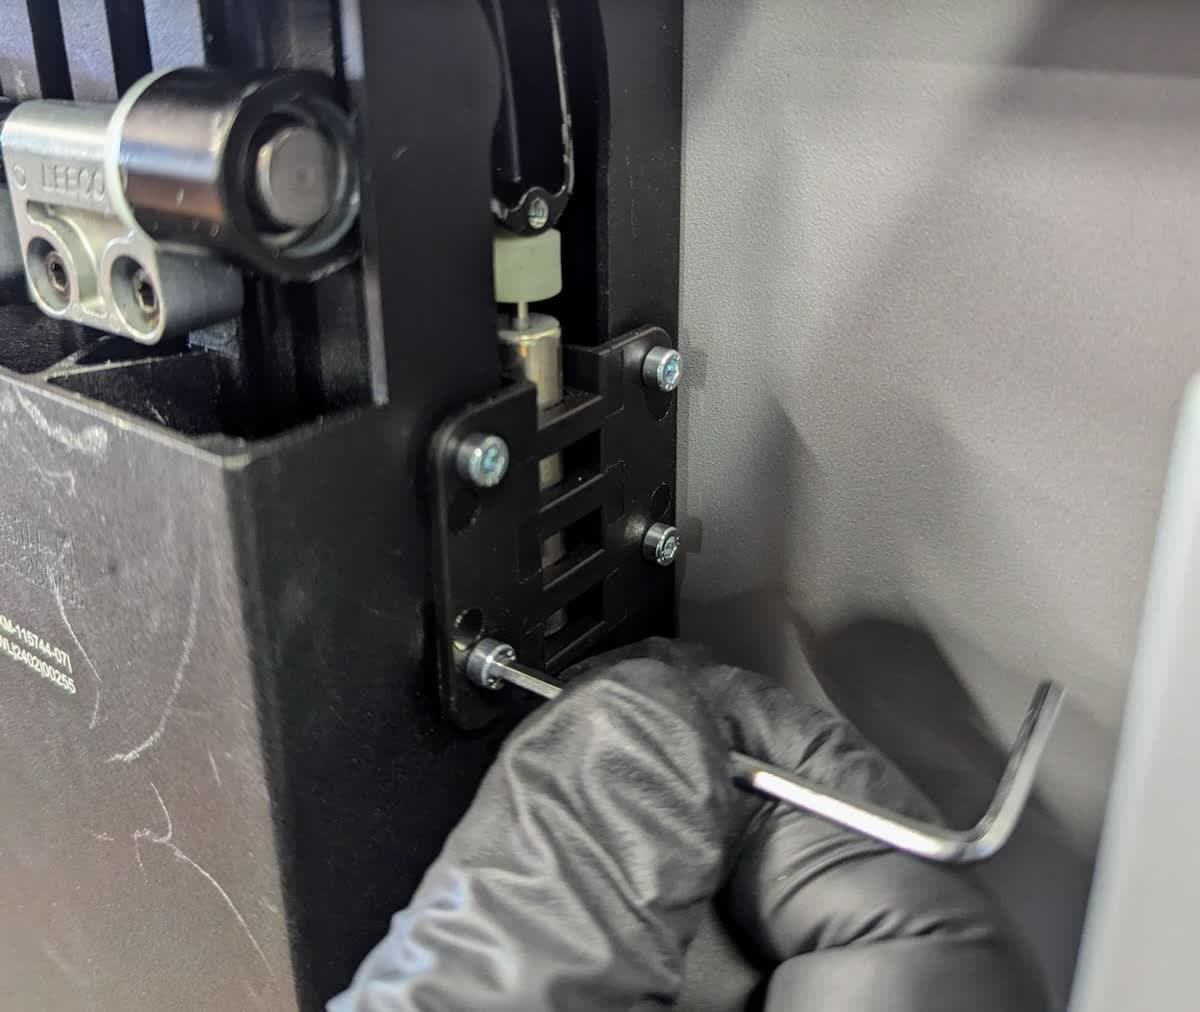
The cover damper sits in a bracket, which is secured to the Z-tower with four screws. Use a 2.5 mm hex driver to loosen and remove the four M3 x 6 mm screws. Remove the cover damper, bracket, and screws and set them aside. If necessary, open the cover to ease removal.

Removing the Form 4 cover damper bracket screws

Step 4: Cover the Z-tower opening

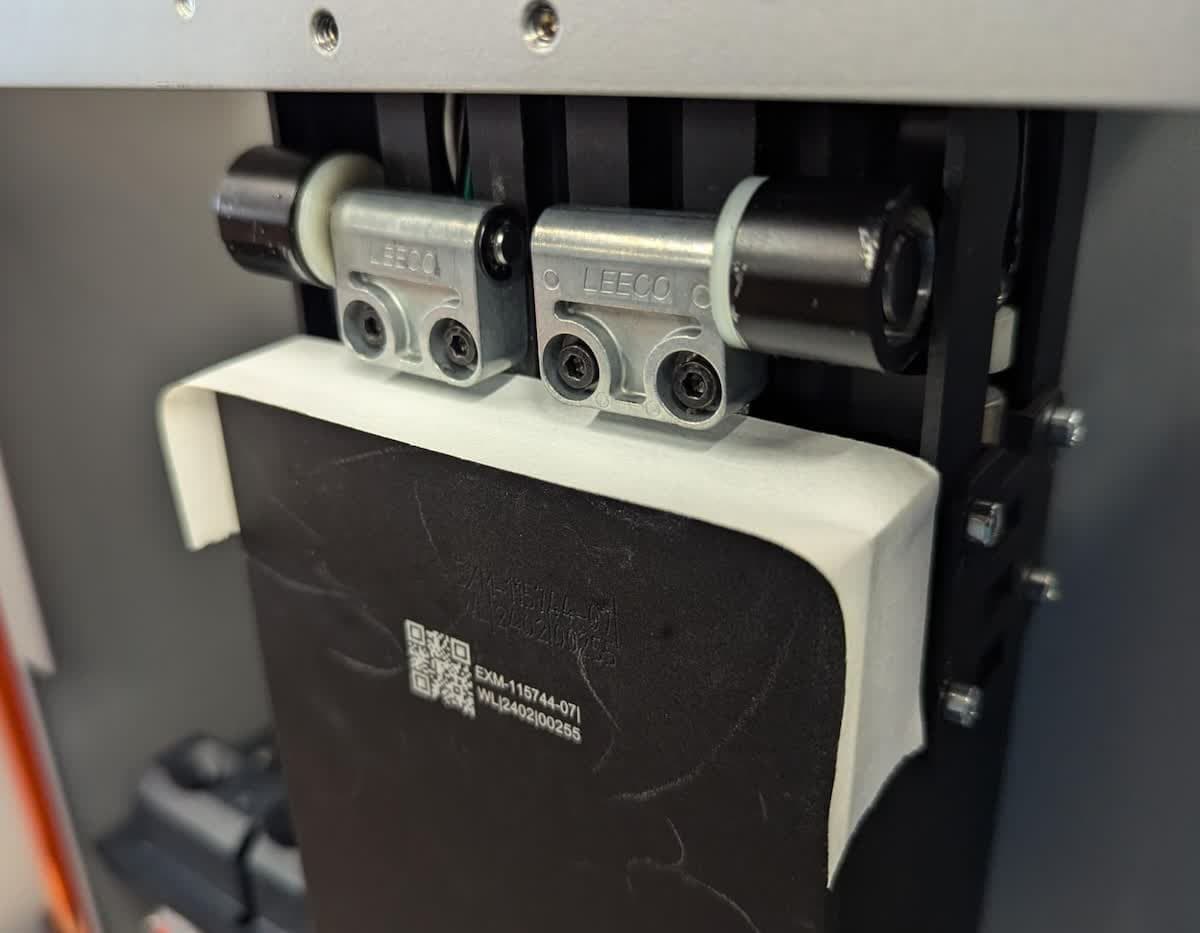
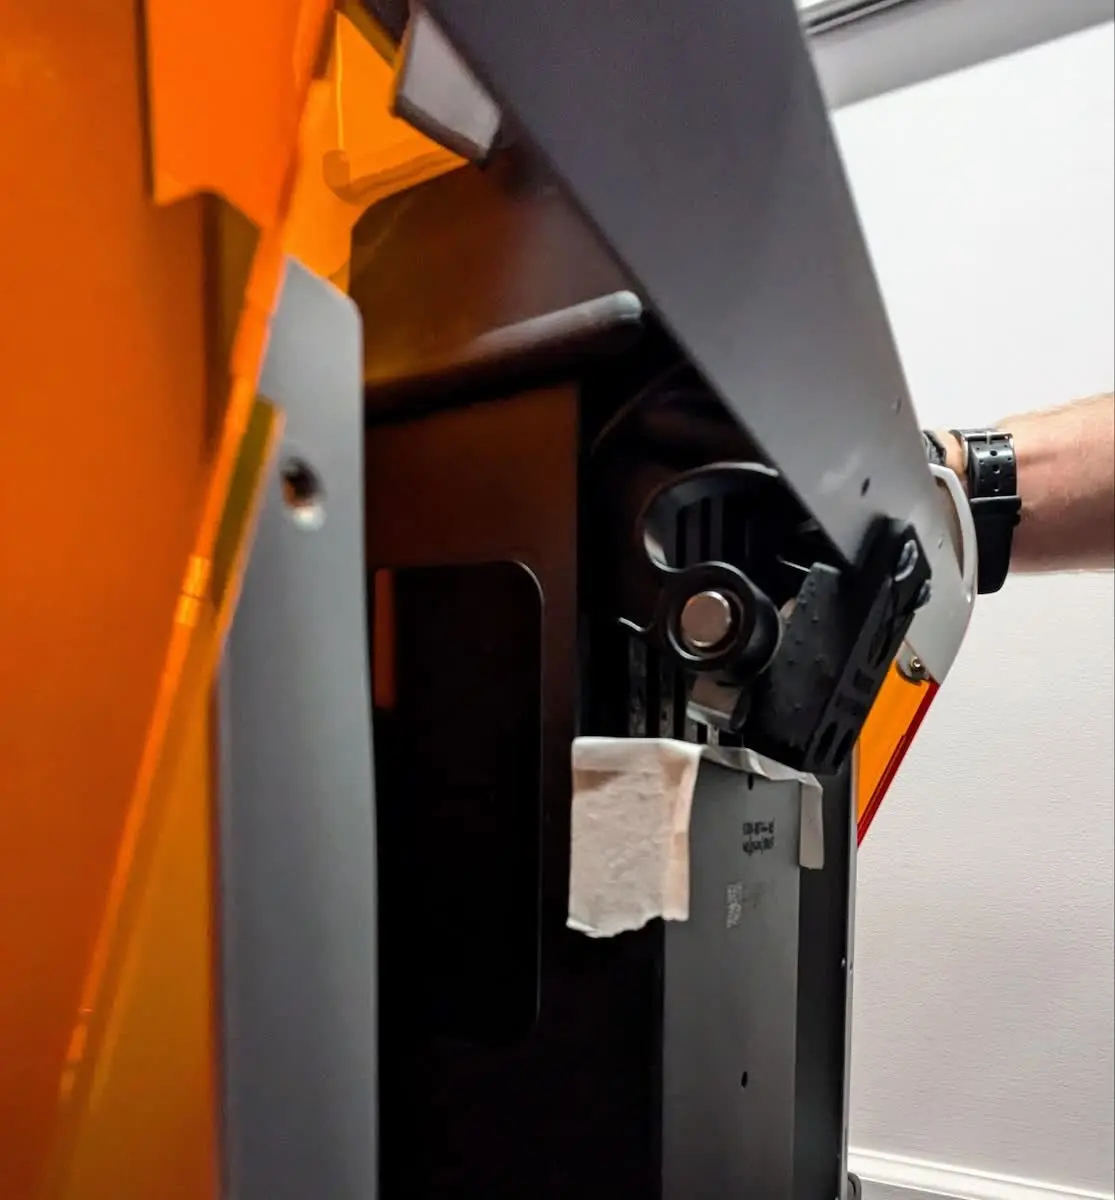
Place a piece of tape over the top of the Z-tower to prevent screws from accidentally falling into the opening.

Tape covering the Form 4 Z-tower opening

Step 5: Remove the cover screws

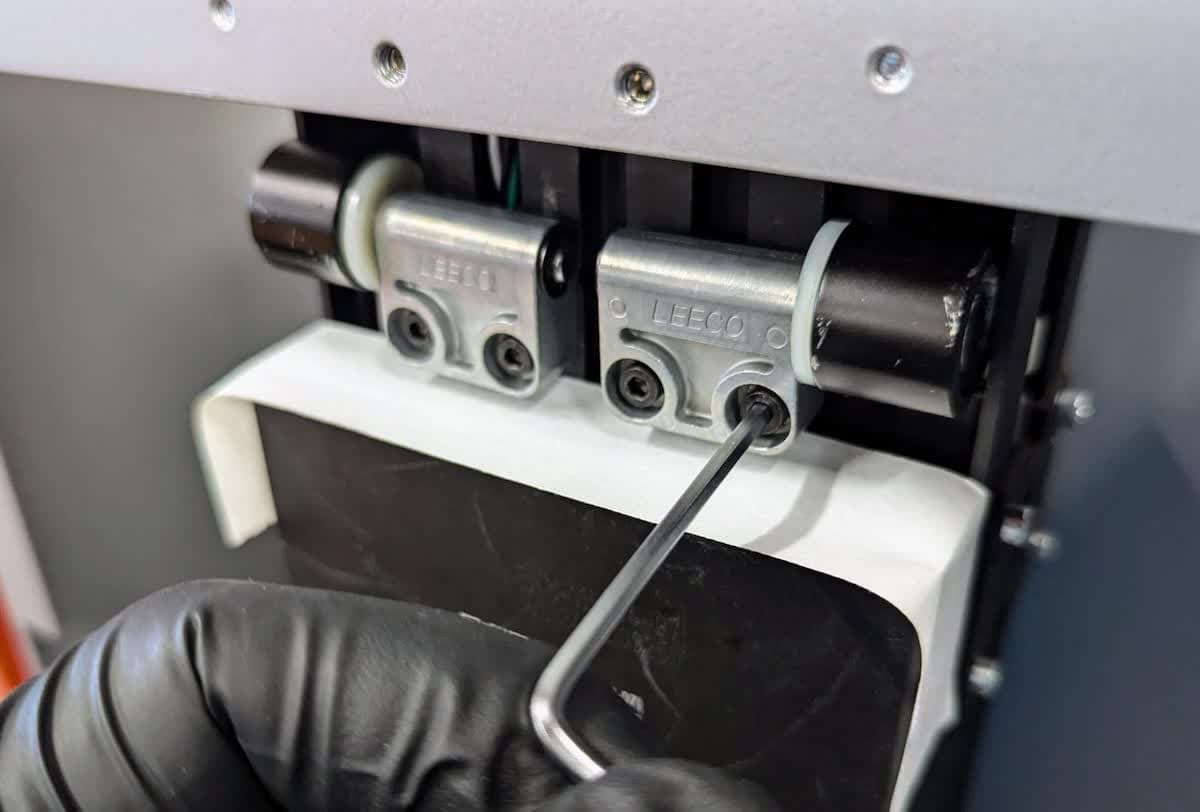
The two cover hinges are secured to the printer with two screws each. Use a 2.5 mm hex driver to loosen and remove the four M3 x 10 mm hinge screws. Discard the screws.

Removing the Form 4 cover hinge screws from the Z-tower

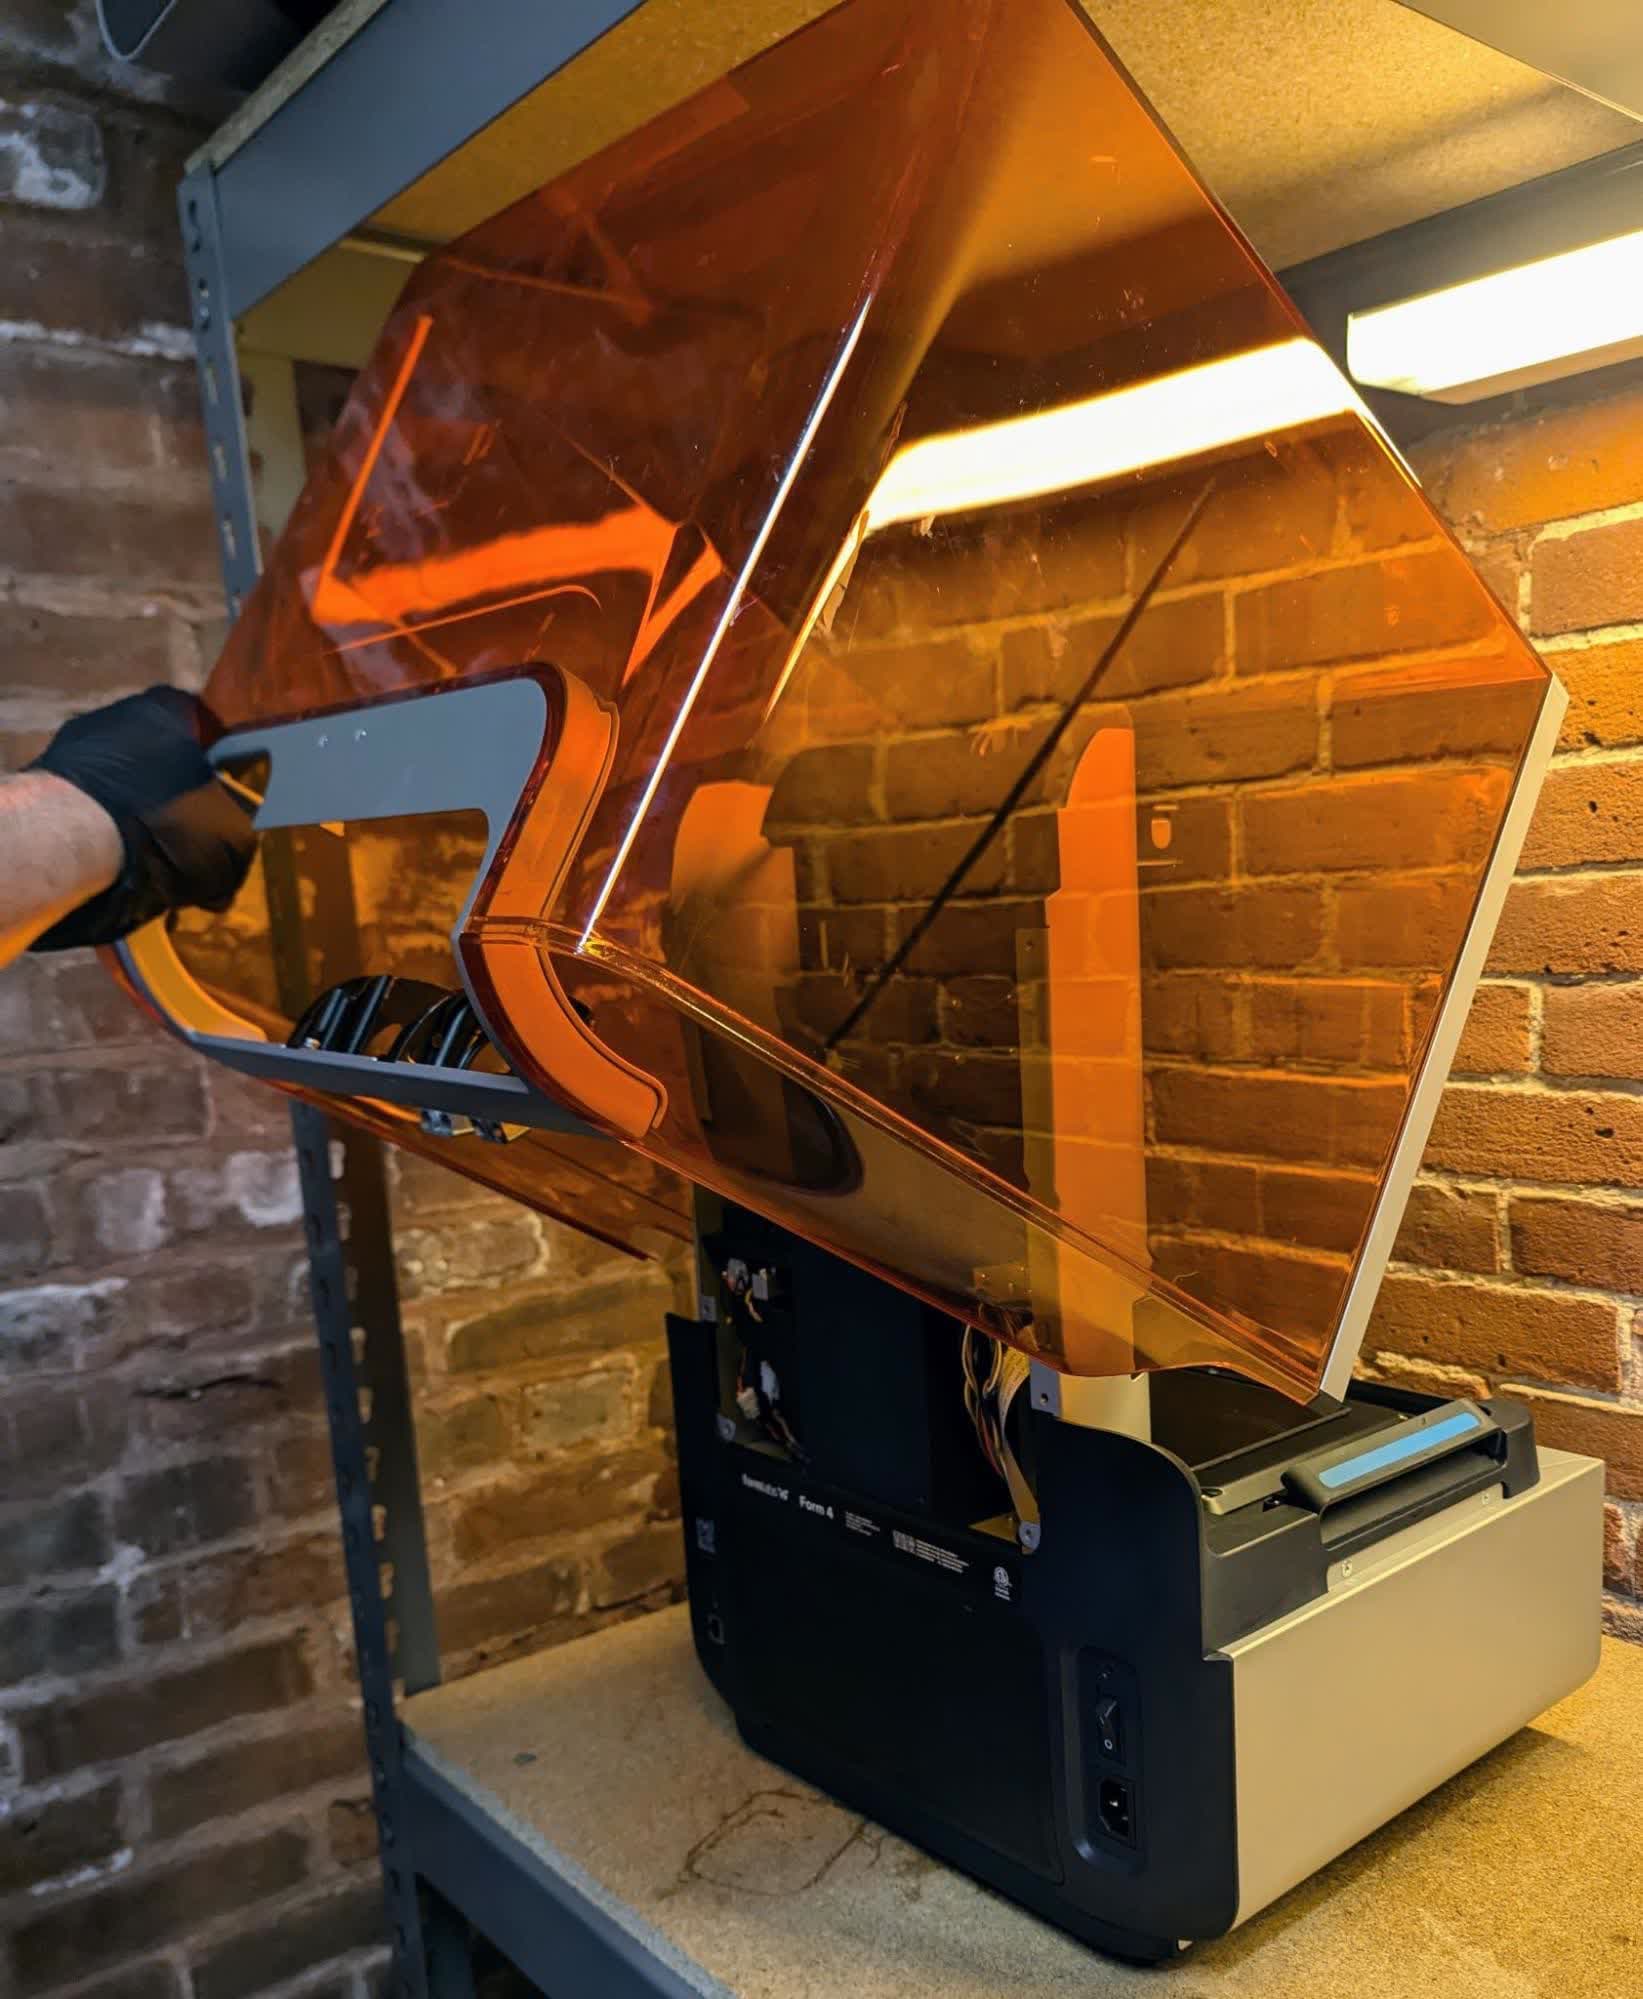
Step 6: Remove the cover

Rotating the Form 4 cover to remove it step 1
Sliding the Form 4 cover away from the printer

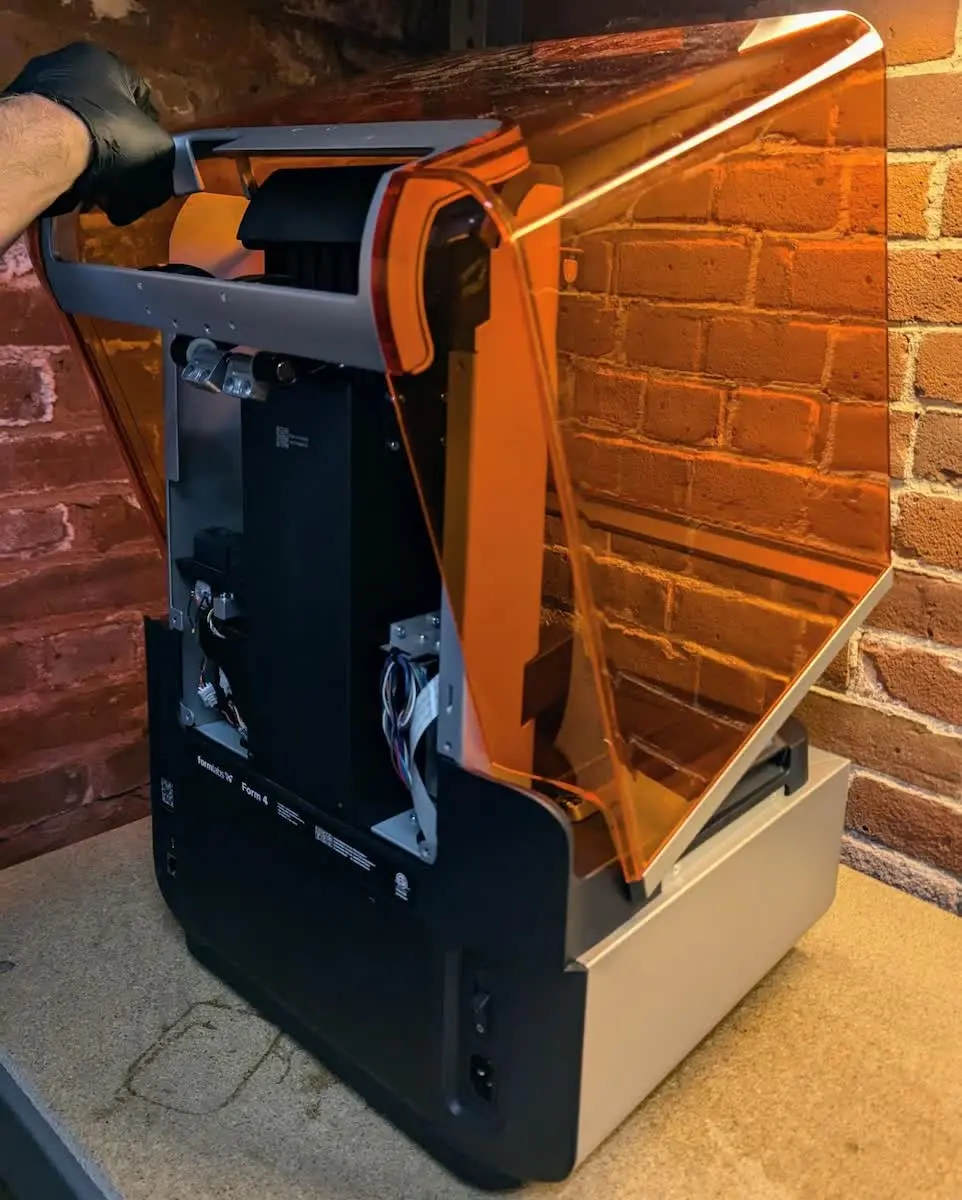
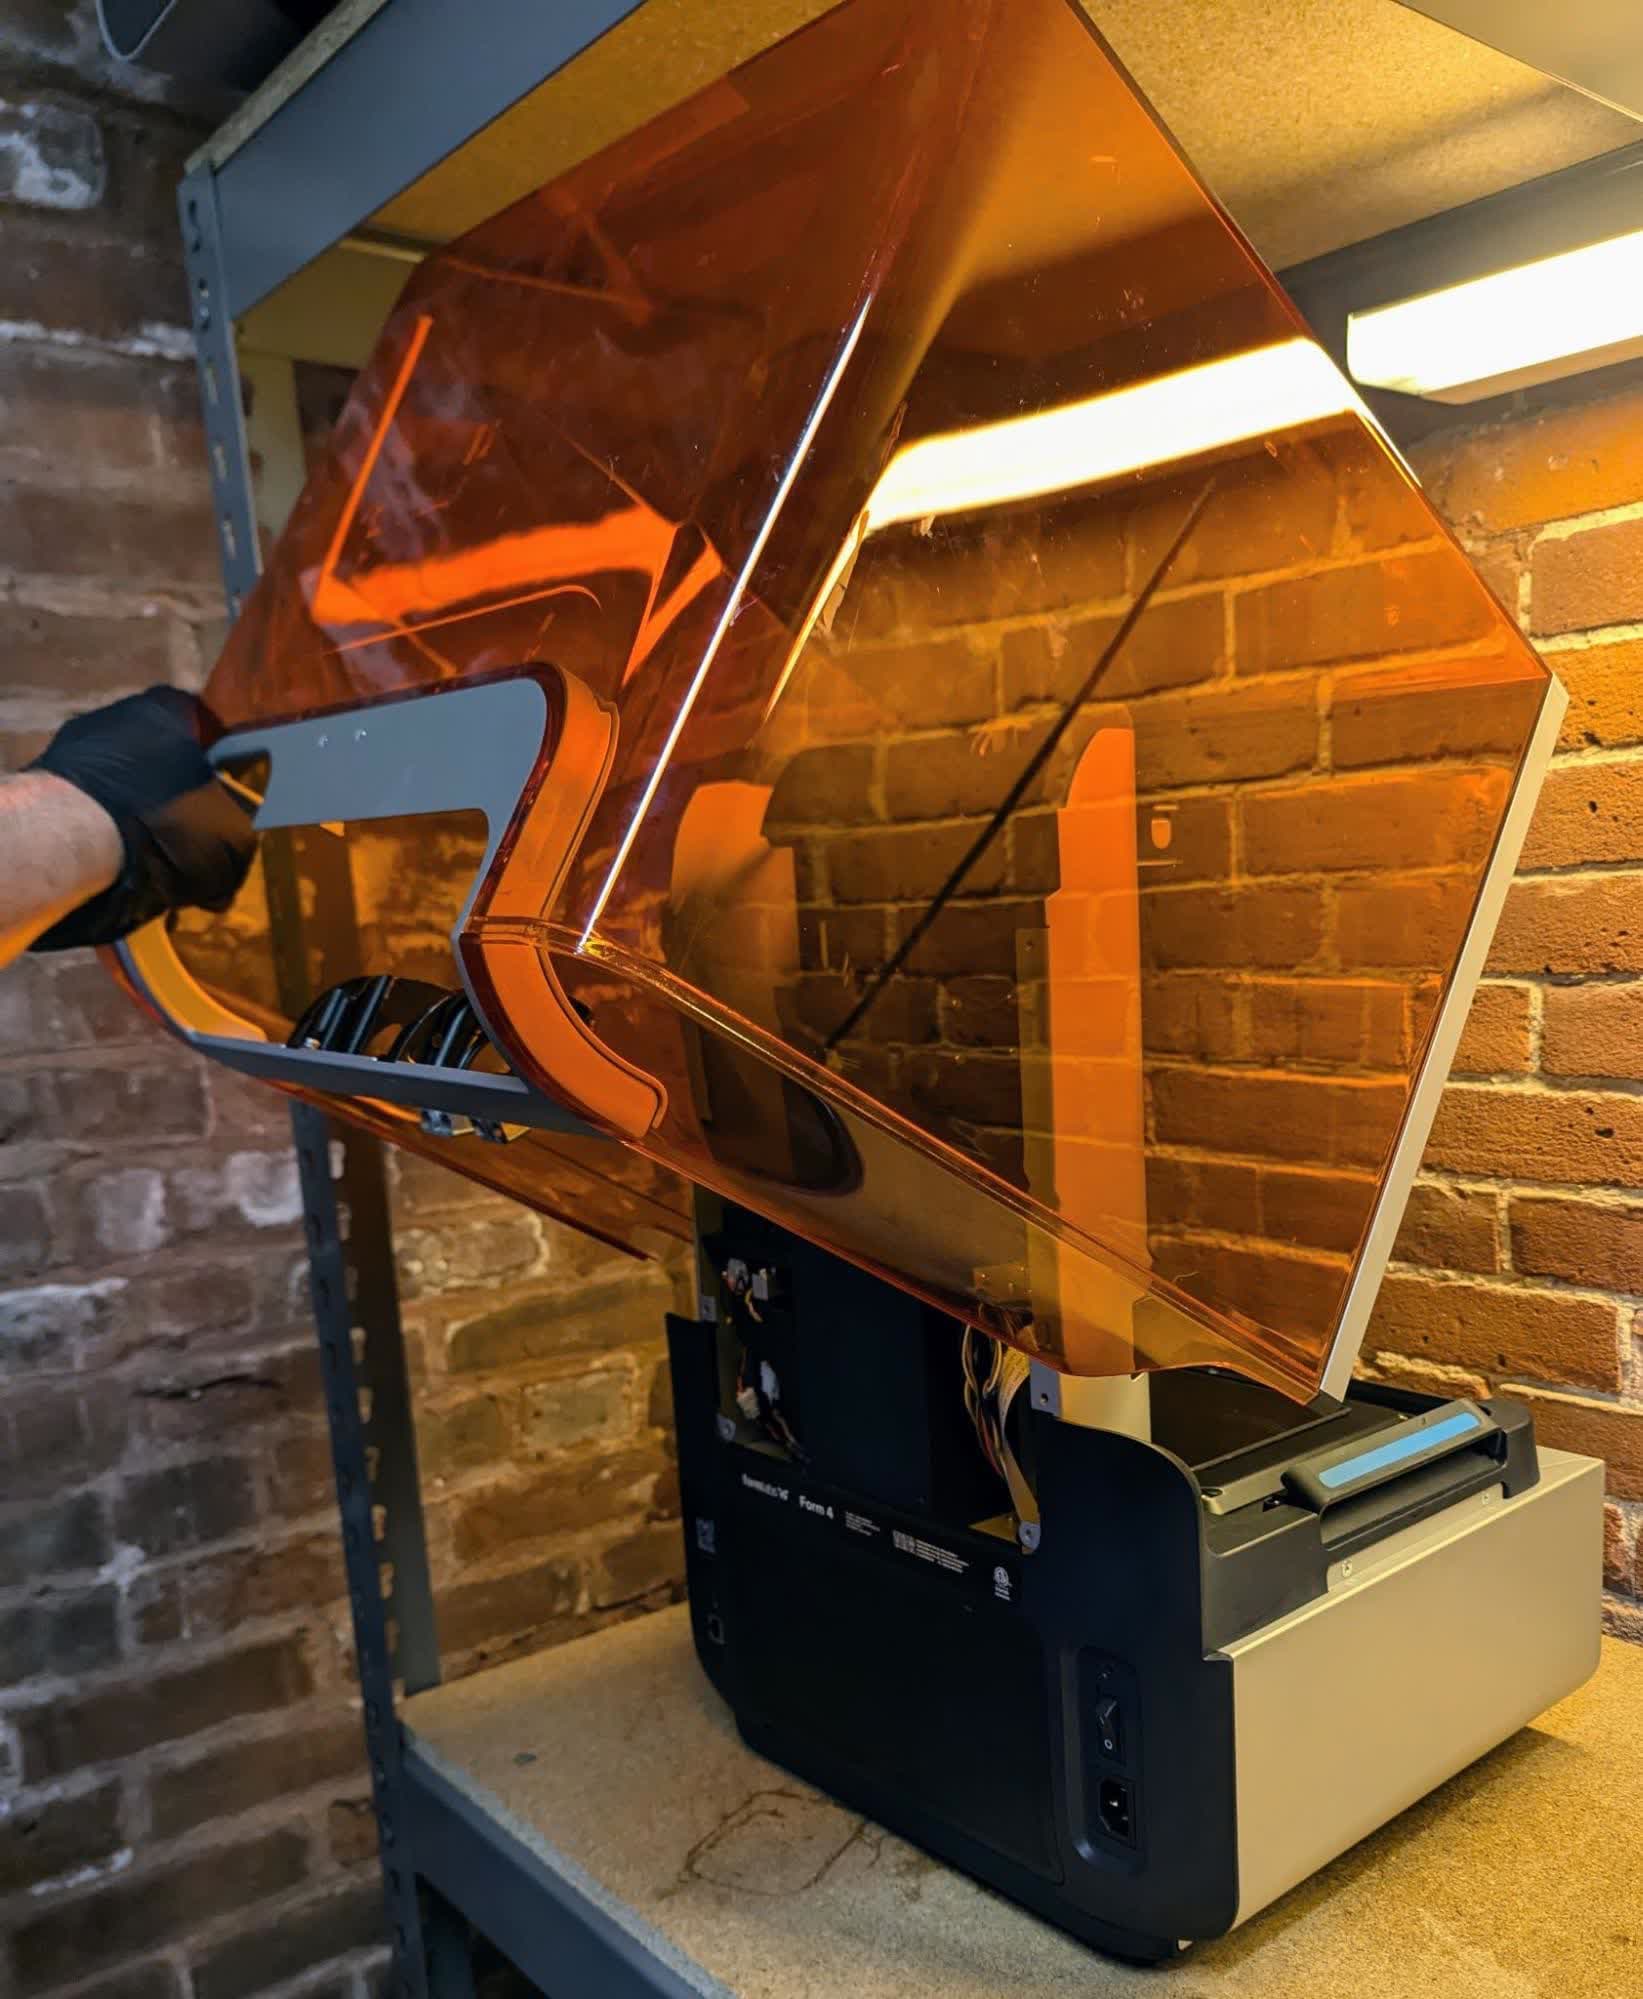
Rotate the cover as if you were opening it and slide it away from the back of the printer. Set the cover aside.

Installing the replacement cover hinges

Overview: After removing the cover, replace the cover hinges.

Step 1: Remove the original hinges

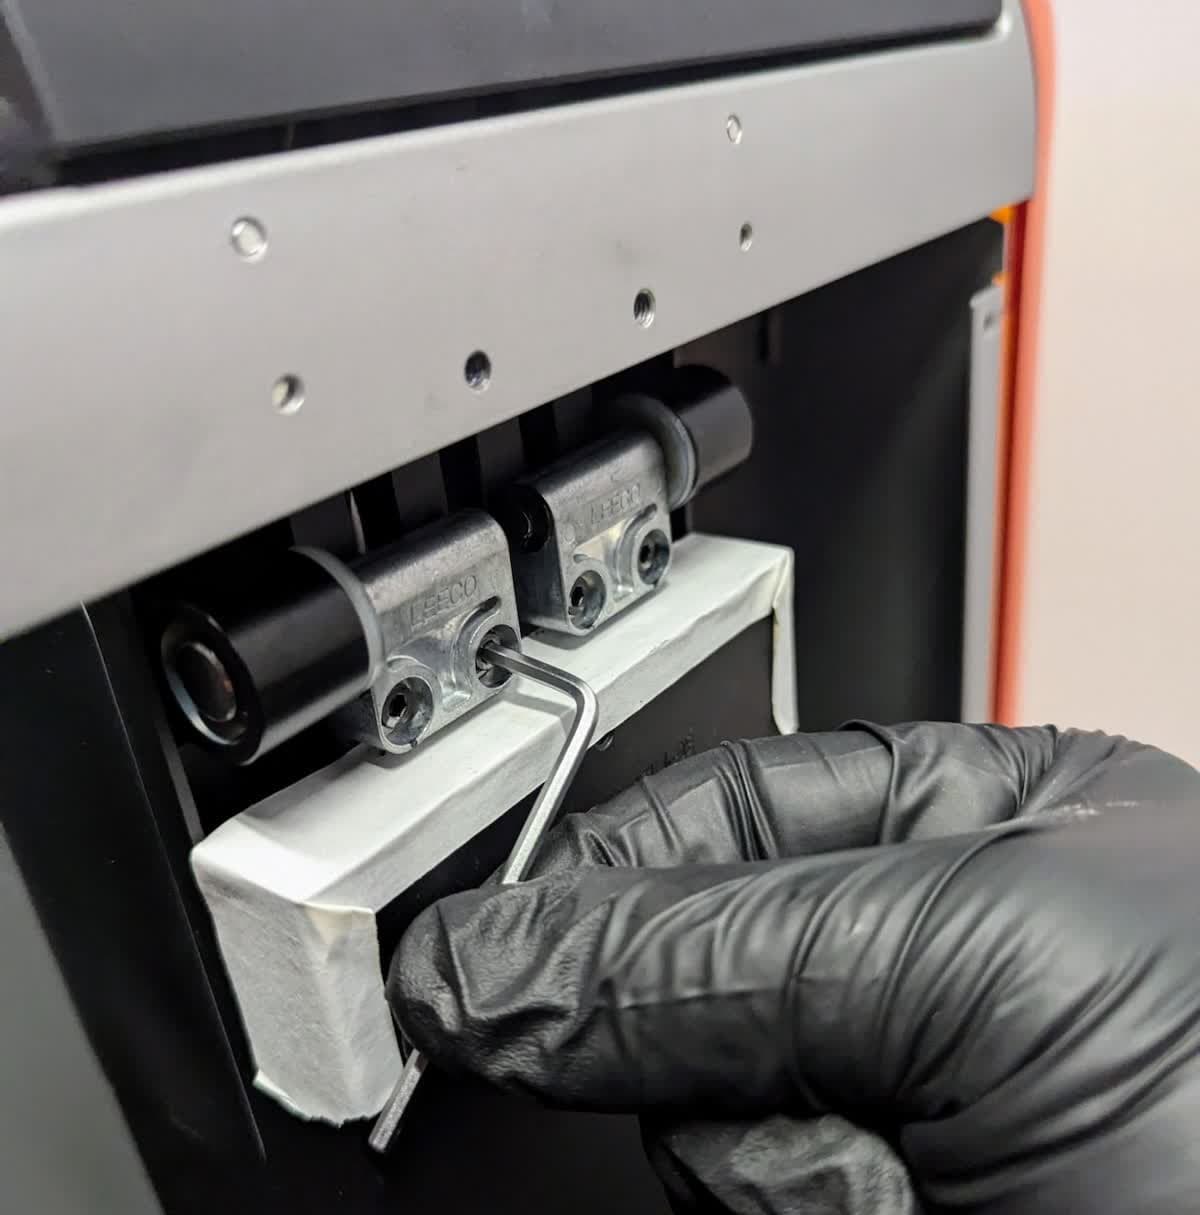
Use a 2.5 mm hex driver to remove the four screws and washers securing the cover hinges to the cover. There are two screws per hinge. Discard the original fasteners. Remove the original cover hinges and discard.

Removing the original Form 4 cover hinges

Step 2: Position the replacement cover hinges

Form 4 replacement cover hinge position in the cover bracket
Form 4 replacement cover hinge alignment detail

Place the replacement cover hinges in the grooves in the cover bracket. Identify the four M3 x 8 mm screws with pre-applied threadlocker and the four M3 flat washers included with the cover hinge kit. Slide a washer onto each screw. Loosely install the four screws to secure the replacement cover hinges. Align the hinges with the outer and bottom edges of the grooves, as shown.

Step 3: Secure the cover hinges

Use a 2.5 mm hex driver to tighten the four screws until snug. Ensure that the alignment of the hinge does not change while tightening.

Installing the cover

Overview: After replacing the cover hinges, reinstall the cover.

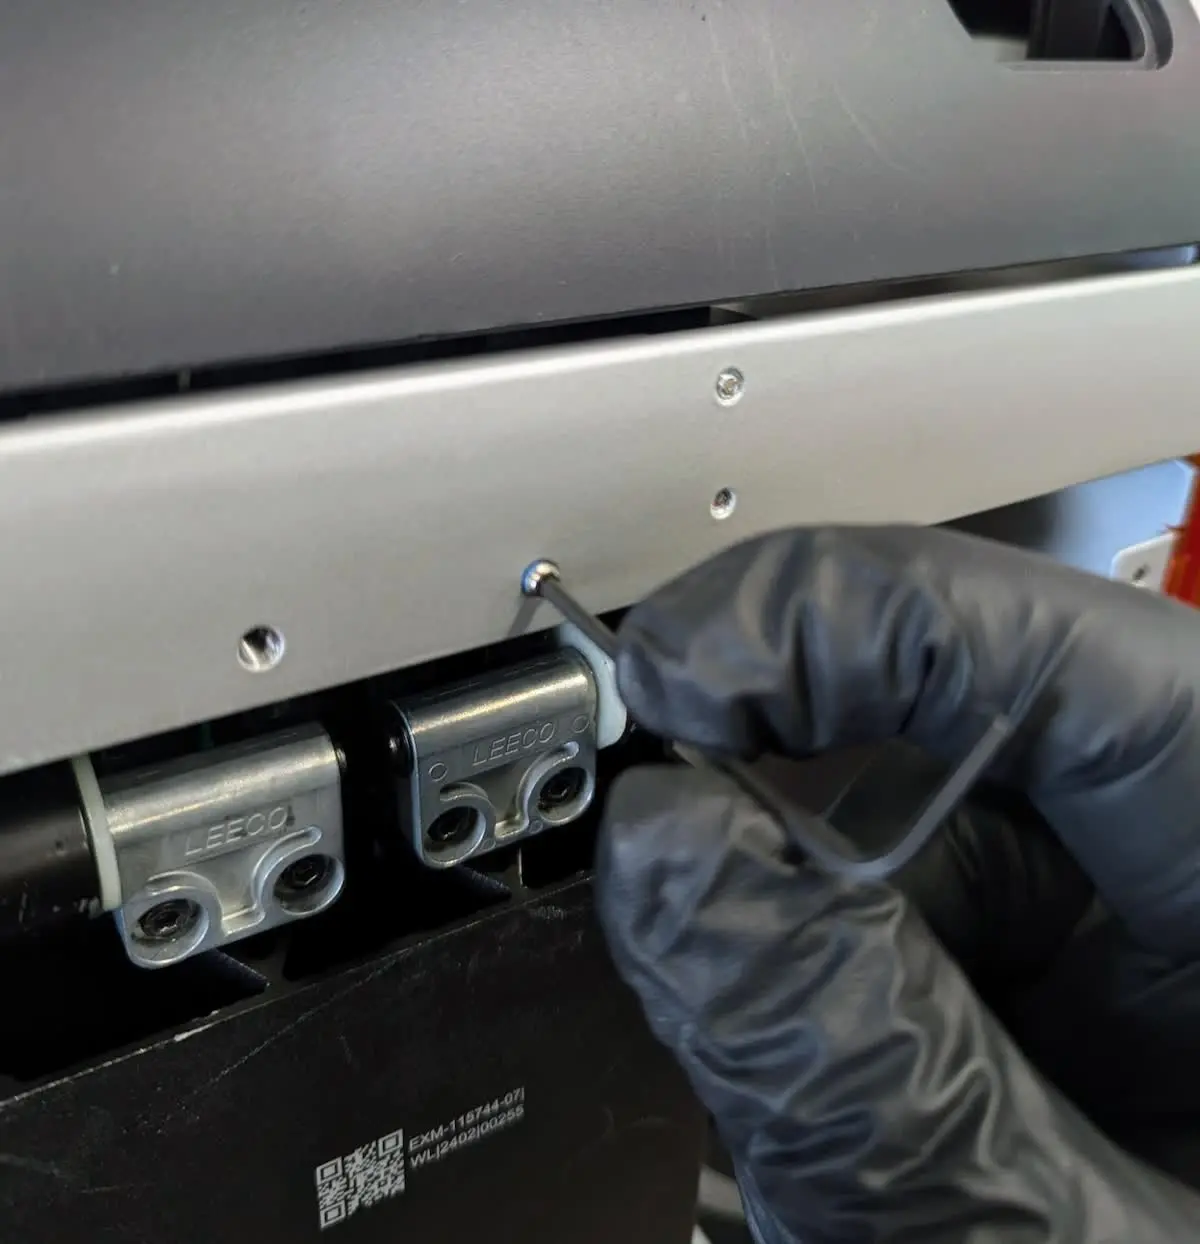
Step 1: Remove the cover set screws

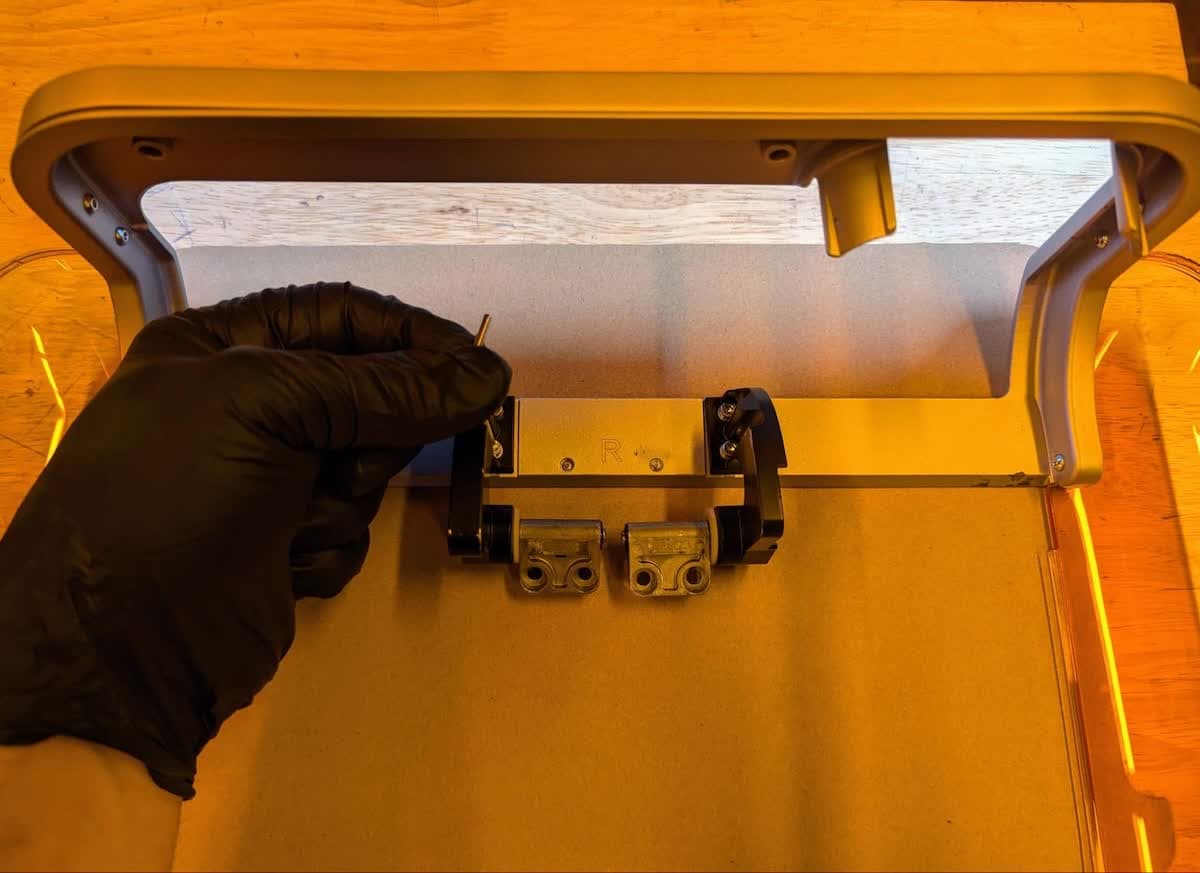
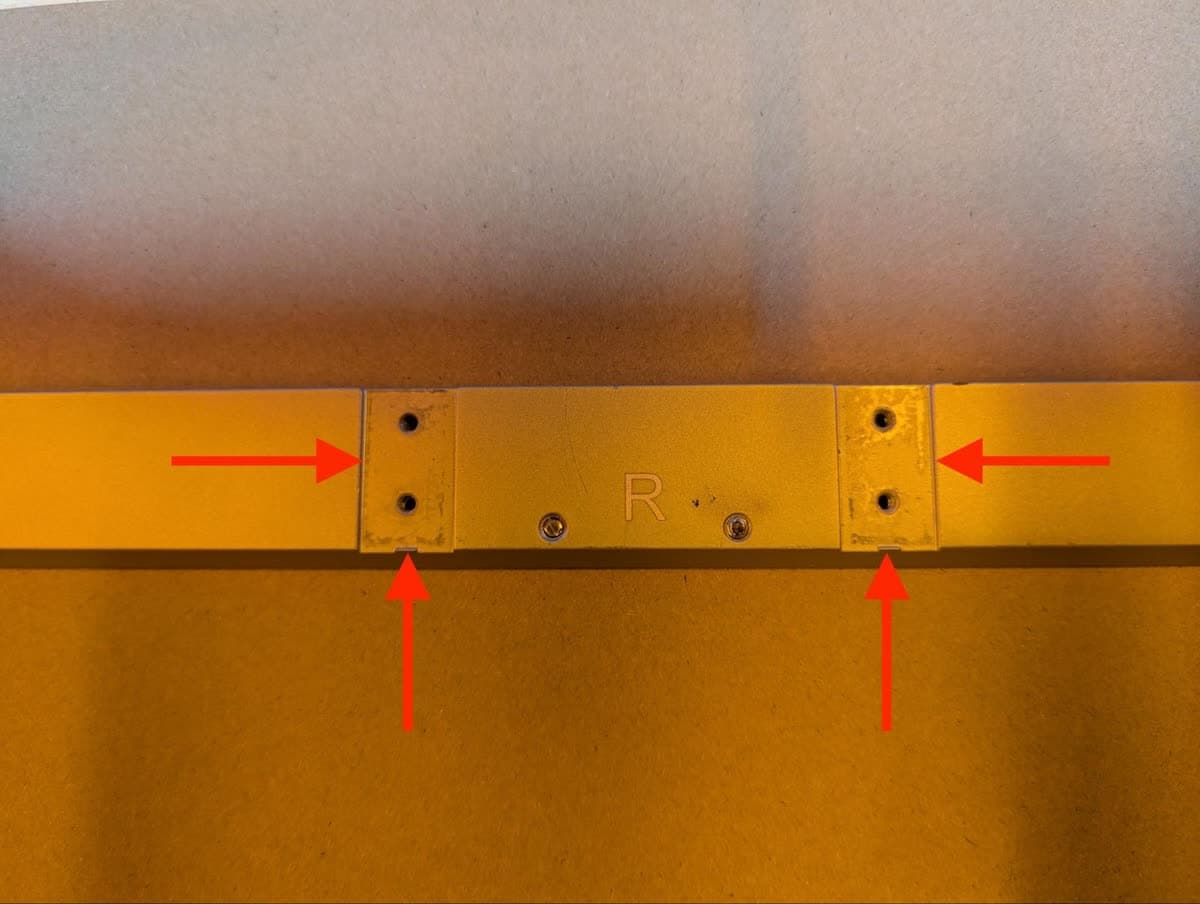
Use a 2 mm hex driver to remove the two set screws located on the metal band of the cover between the hinges. Set the set screws aside.

Removing the Form 4 cover set screws

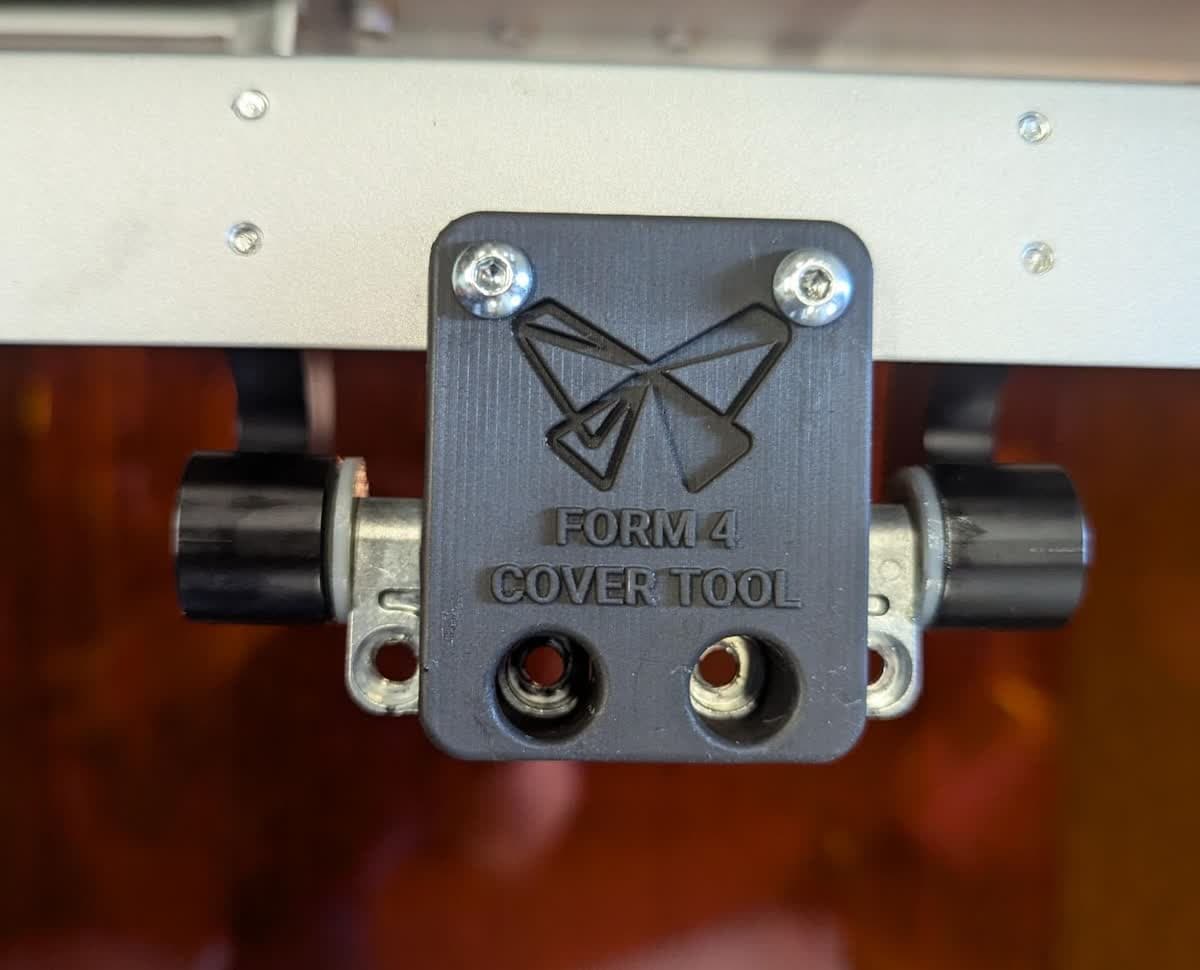
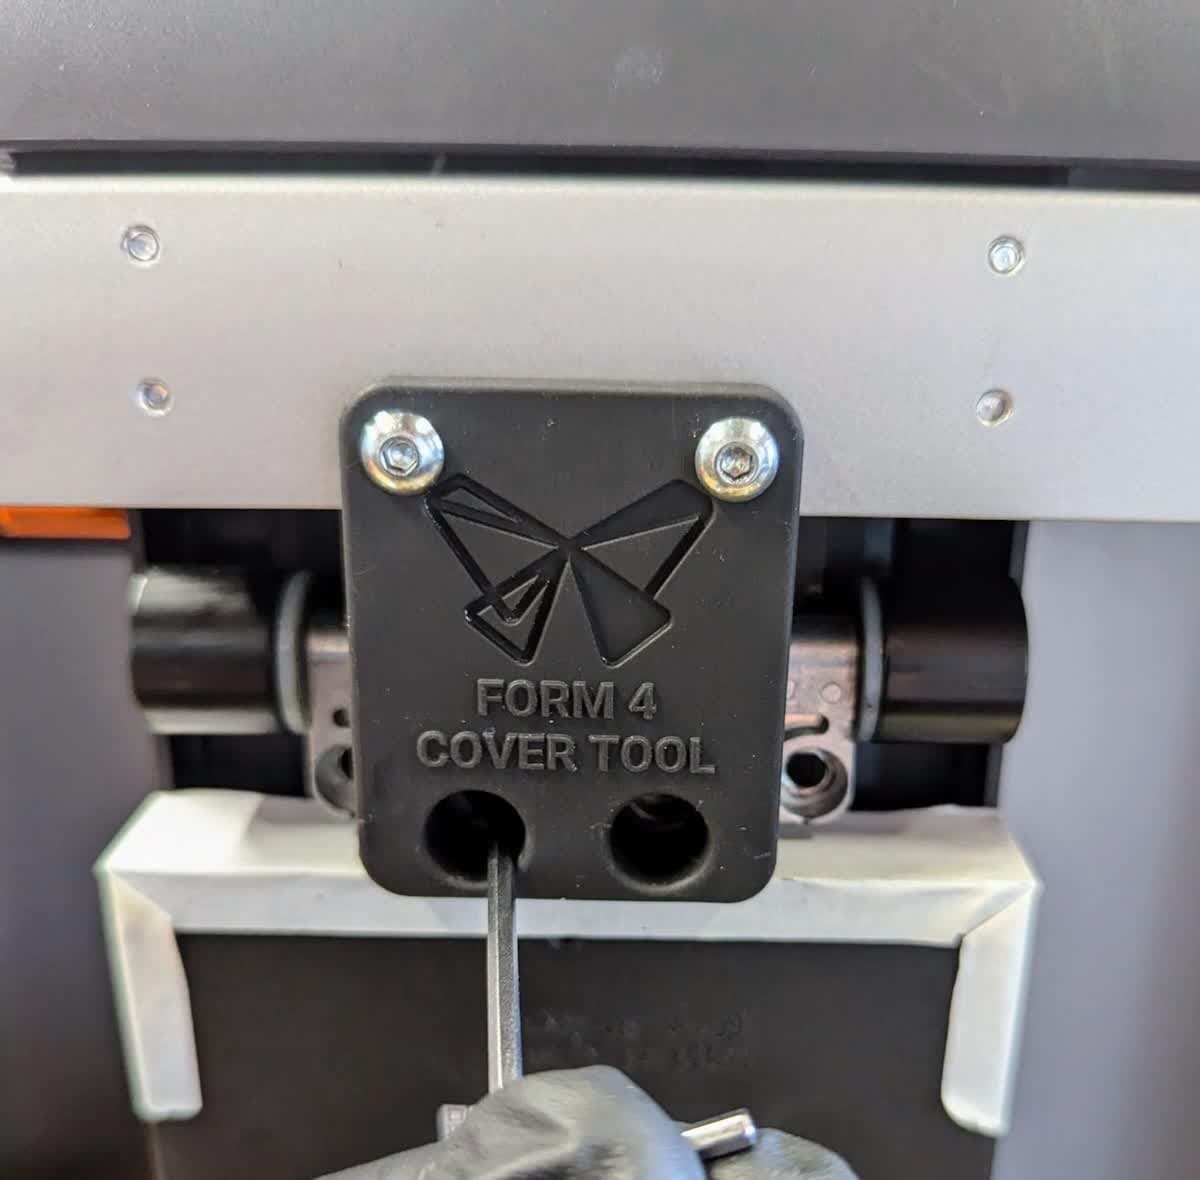
Step 2: Install the Form 4 cover tool

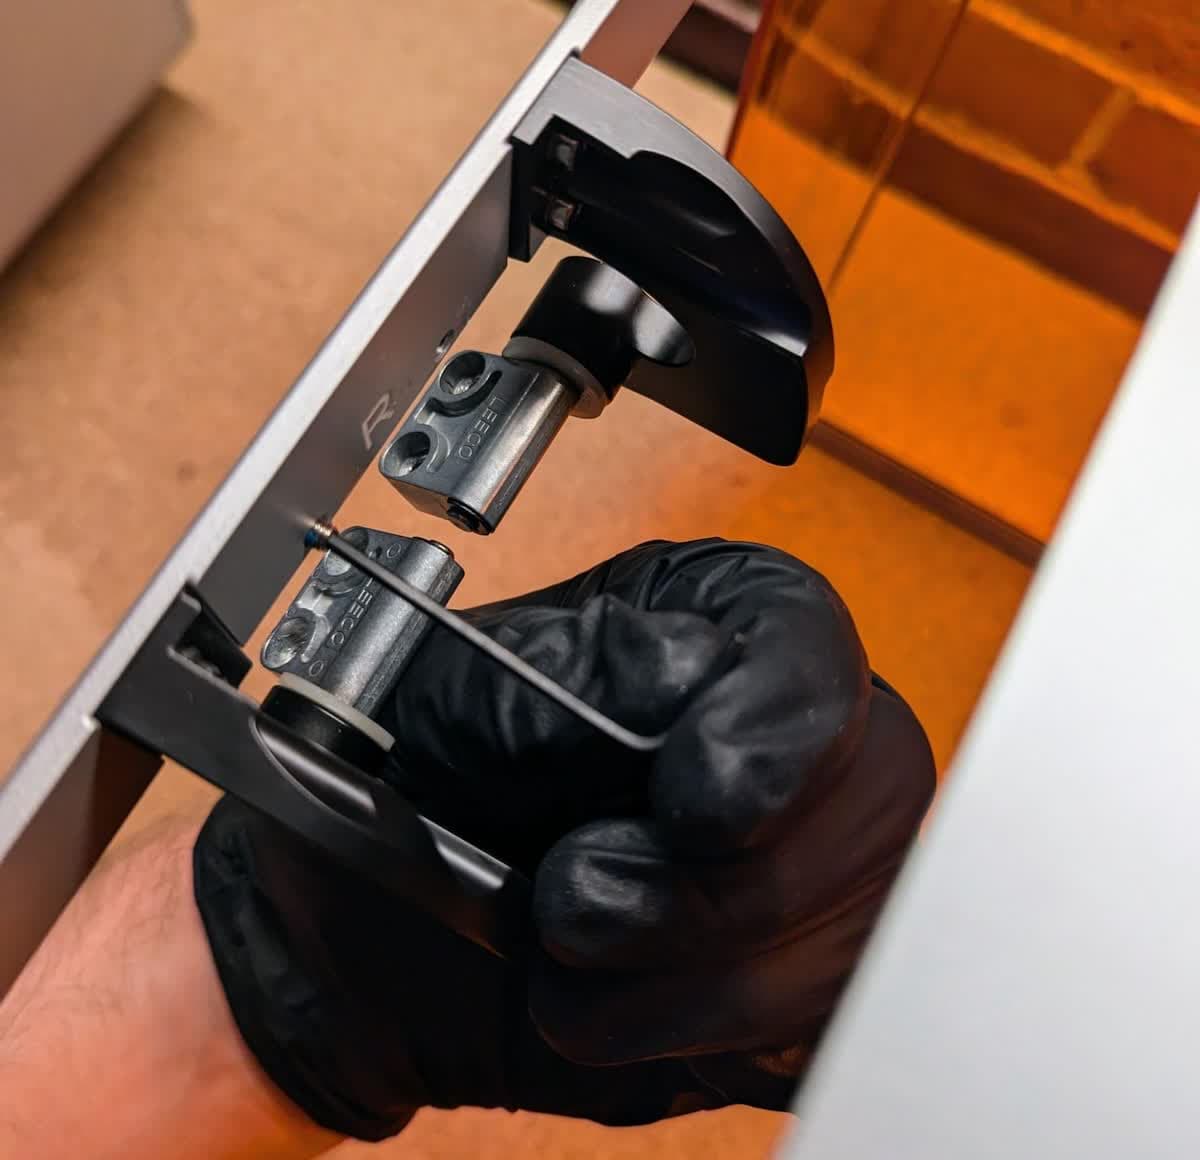
Installing the Form 4 cover tool step 1
Installing the Form 4 cover tool step 2

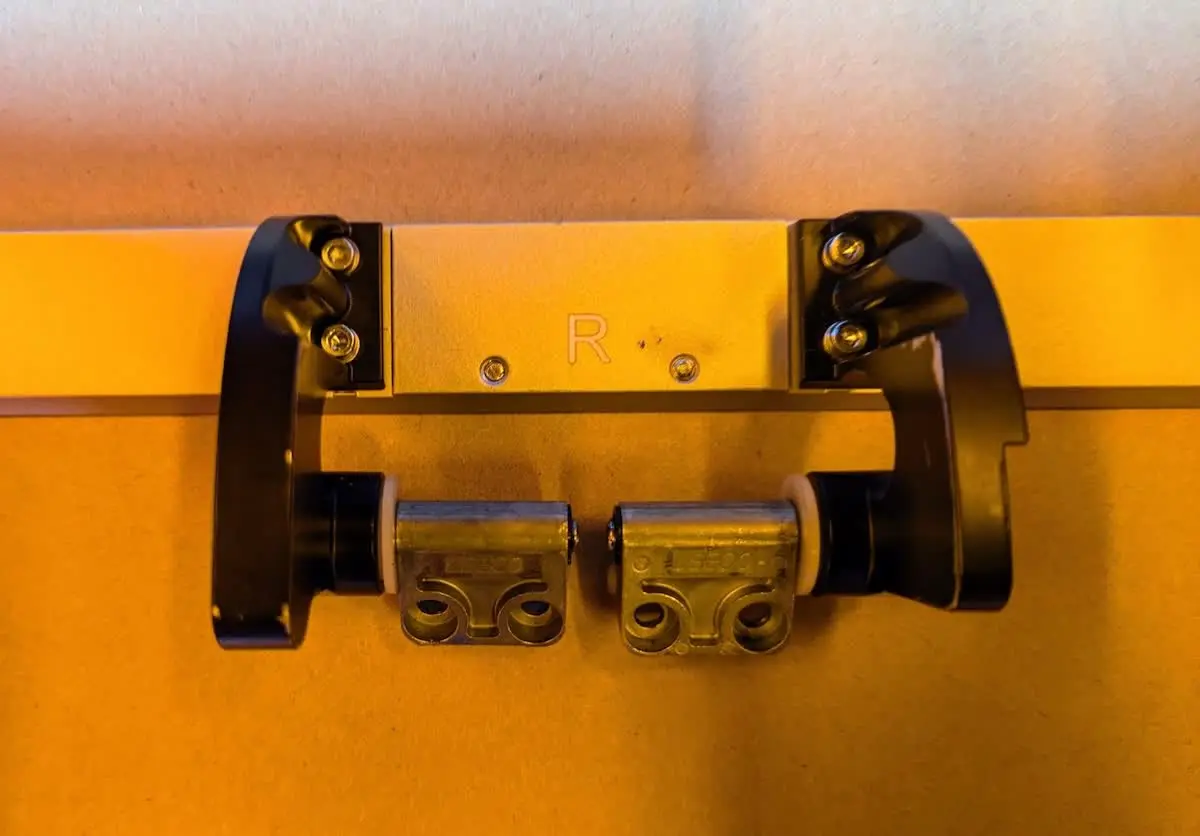
Identify the two M4 x 8 mm screws included in the kit. Rotate the cover hinges so they are angled towards the inside of the cover. Slide the cover hinges so the white washer is flush with the black hinge bracket. Align the two holes in the top of the Form 4 cover tool with the threaded set screw holes from step 1. Thread one M4 x 8 mm screw into both of the screw holes, then use a 2.5 mm hex driver to tighten until snug.

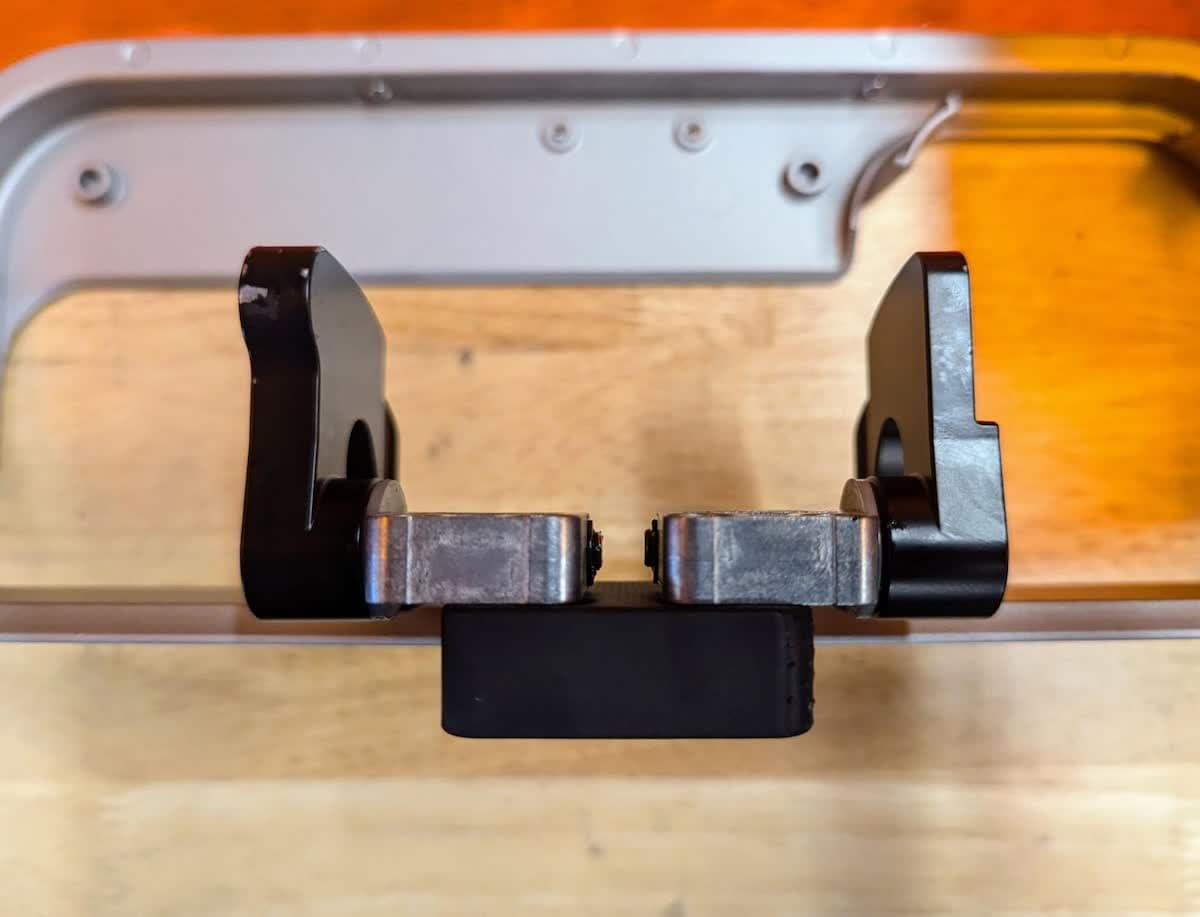
Step 3: Position the cover hinges

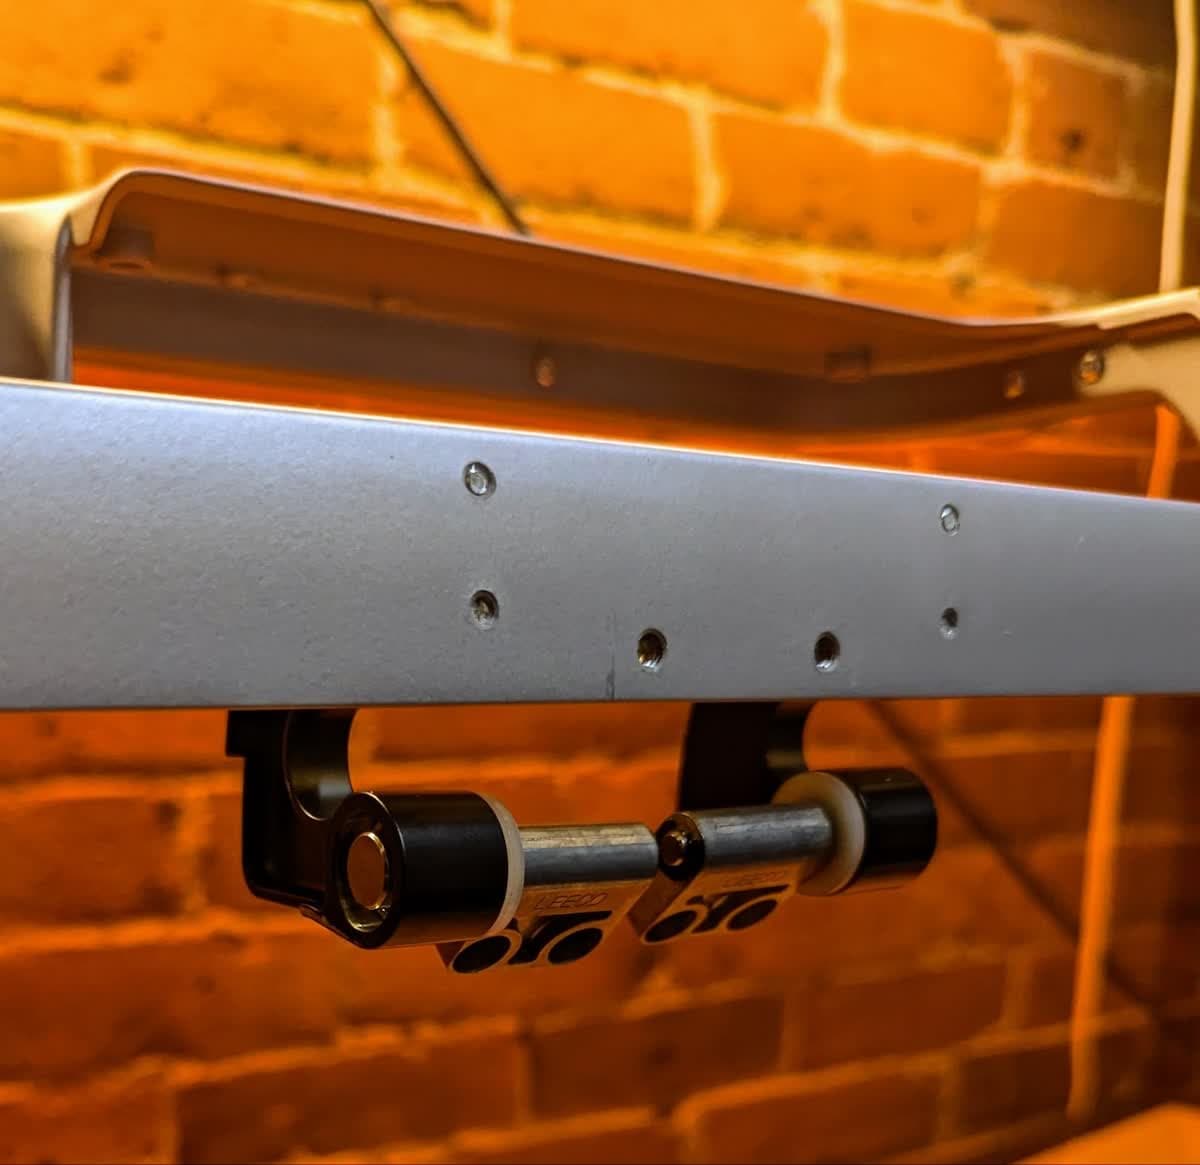
Rotate the cover hinges until they sit flush with the Form 4 cover tool.

Form 4 cover hinges positioned flush with the cover tool

Step 4: Position the cover

Sliding the Form 4 cover onto the printer step 1
Sliding the Form 4 cover onto the printer step 2
Rotating the Form 4 cover closed onto the printer

Slide the cover onto the back of the Form 4 and rotate as if you were closing the cover. The hinges should slide into the slots on the Z-tower.

Step 5: Loosely install the cover screws

Identify the four M3 x 10 mm screws with pre-applied threadlocker included in the kit. Loosely thread the four screws into the screw holes in the cover hinges to secure the cover to the Z-tower. You may have to lift the cover slightly to start threading the screws. Do not tighten.

Loosely installing the Form 4 cover hinge screws with the cover tool

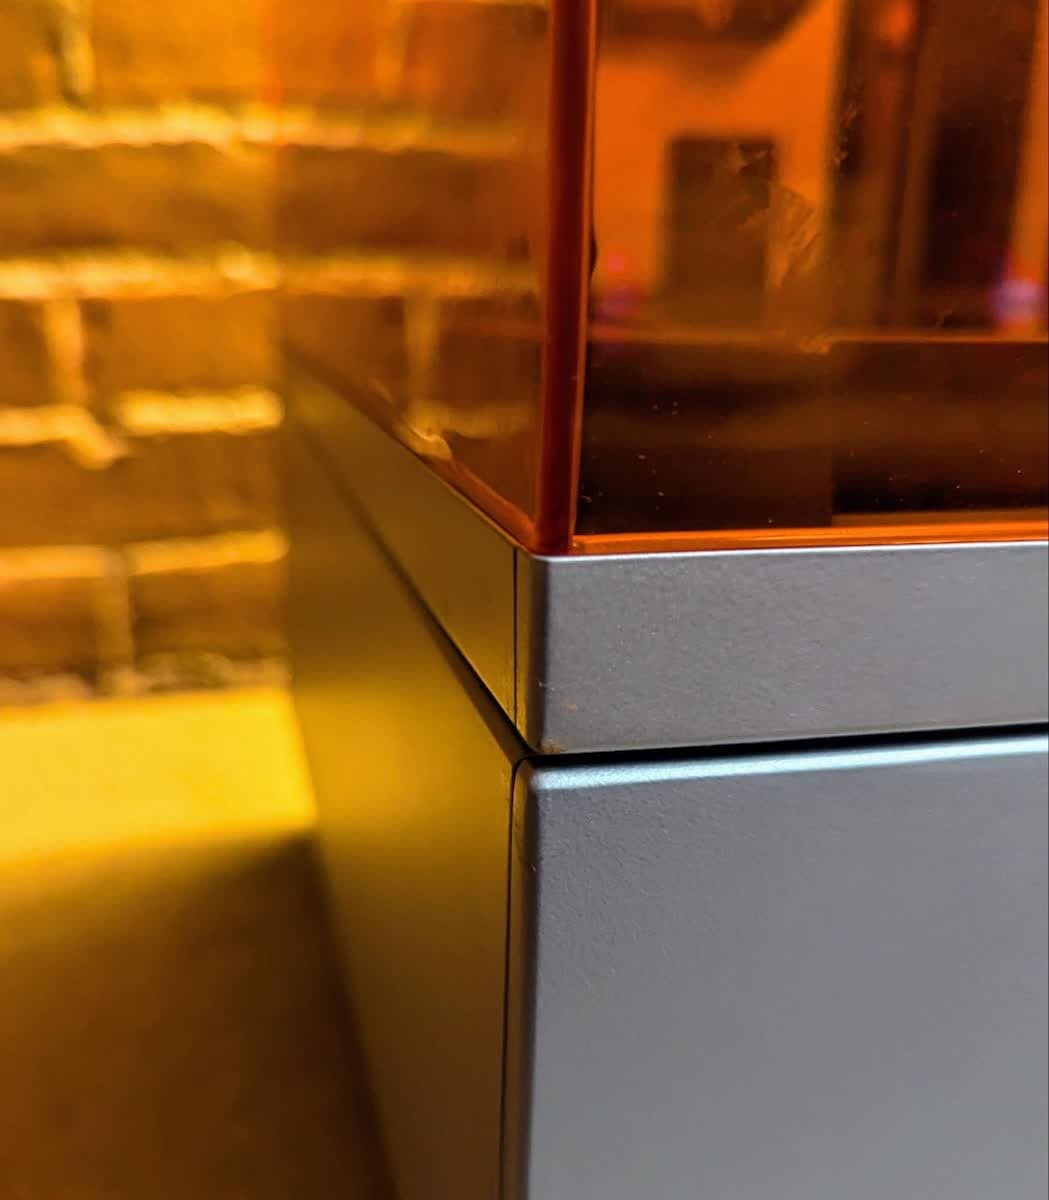
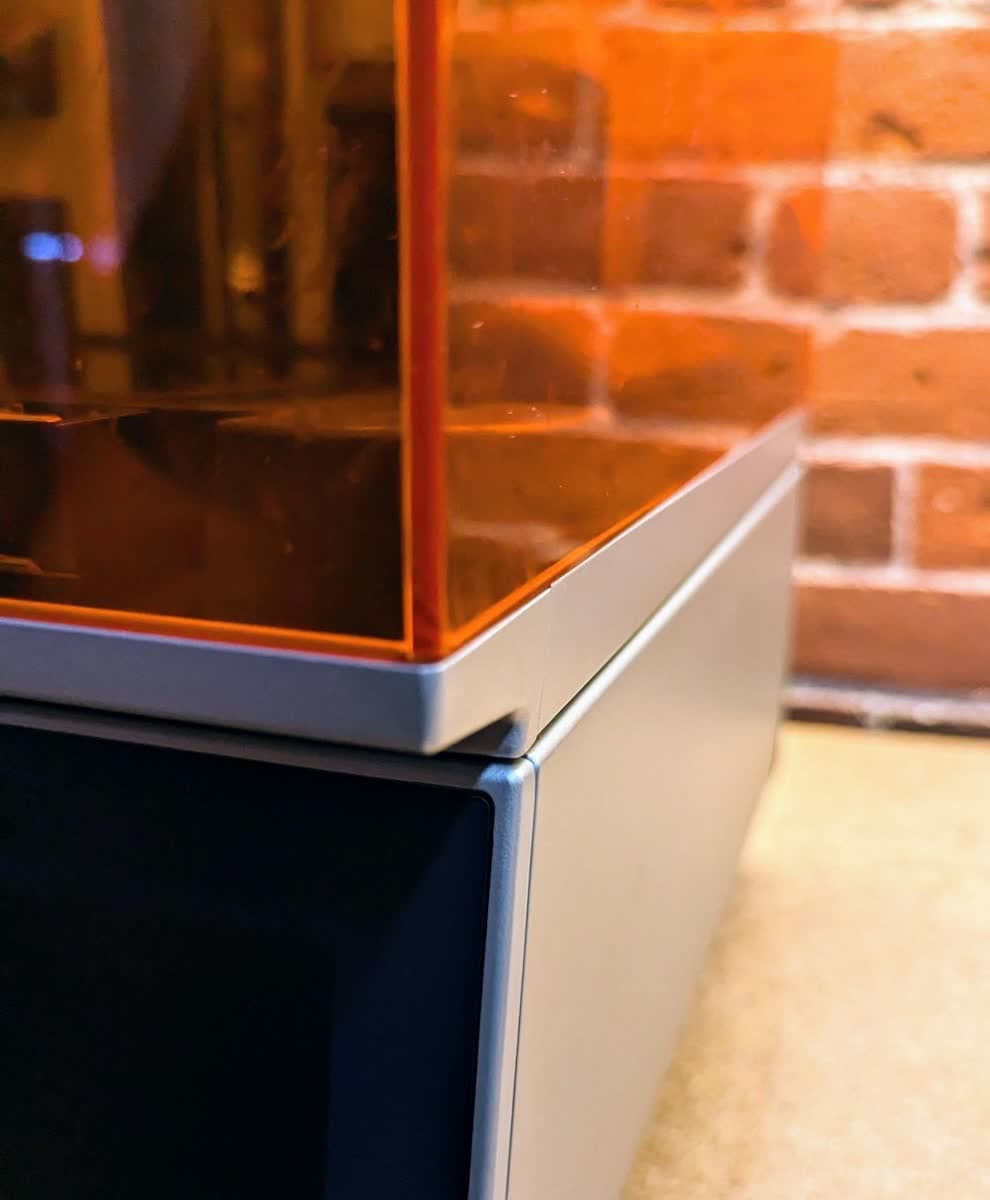
Step 6: Align the cover

Form 4 cover alignment with sides of the printer step 1
Form 4 cover alignment with sides of the printer step 2

Slide the left and right sides of the cover until the edges are aligned with the sides of the printer.

Step 7: Tighten the cover hinge screws

Use a 2.5 mm hex driver to tighten the four cover hinge screws.

Step 8: Remove the Form 4 cover tool and check the cover screws

Use a 2.5 mm hex driver to remove the Form 4 cover tool. Use the short end of the hex driver to fully tighten the four cover hinge screws. If the screws turn with little to moderate resistance continue tightening until you encounter firm resistance. At this point, tighten the screw another quarter turn.

Tightening the Form 4 cover hinge screws

Step 9: Install the replacement cover damper if your kit contains a new cover damper and bracket

If your repair kit came with a cover damper and cover damper bracket, install them after securing the cover hinges. Otherwise, proceed to step 10.

Open the cover. If the replacement cover damper is not already installed in its bracket, orient the replacement cover damper with the piston section facing up. Slide the cover damper into the cover damper bracket. Place the rounded portion of the cover damper bracket into the slot in the side of the Z-tower. Align the four screw holes in the replacement cover damper bracket with the corresponding holes in the printer's Z-tower. Thread one M3 x 6 mm cover damper bracket screw into each of the four screw holes. Use a 2.5 mm hex driver to tighten until snug.

Installing the Form 4 cover hard stop screw

Step 10: Install the hard stop screw

Identify the M3 x 4 mm hard stop screw included in the kit. Use a 2.5 mm hex driver to install the hard stop screw into the right-hand cover hinge, as viewed from the rear of the printer.

Installing the Form 4 replacement cover damper bracket screws

Step 11: Reinstall the cover set screws

Use a 2 mm hex driver to reinstall the set screws in the top of the cover. Tighten the set screws until they are flush with the outer surface of the cover.

Reinstalling the Form 4 cover set screws

Reinstalling the back panel

Overview: After replacing the cover, reinstall and secure the back panel.

Step 1: Close the printer cover

Close the printer cover before reinstalling the back panel.

Step 2: Mount the back panel

Slide the top edge of the back panel under the cover bracket. Ensure that the eight screw holes in the back panel align with the corresponding holes in the printer and the back panel sits flush with the sides of the cover.

f4-mount-back-panel.jpg

Step 3: Secure the back panel

Thread one back panel screw into each of the eight screw holes in the back panel. Use a 2.5 mm hex driver to tighten until snug.

f4-back-panel-screws.jpg

Finalizing the repair

Overview: After installing the new cover, power on the printer and perform final checks.

Step 1: Power on the printer

Connect the power cable to the printer and the power supply. Turn on the switch at the back of the printer. The printer initializes.

Step 2: Test the cover

Open and close the cover several times. Check that it moves smoothly and the printer properly detects when the cover is open or closed. Contact Formlabs Support or your authorized reseller to share the results of the procedure.