
Required supplies:
Formlabs:
- Replacement LED module (RP-CU2L-LED-01)
Third-party:
- 2 mm hex driver driver
- Nitrile gloves

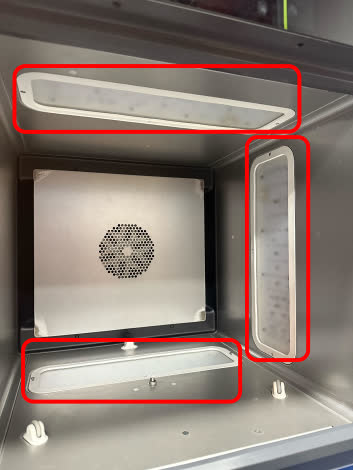
The Form Cure L V2 has three LED modules that expose printed parts to light during post-curing. If any of the LED modules are malfunctioning or broken, printed parts may not post-cure properly and may not reach their optimal mechanical properties.
Use this guide to remove and replace the Form Cure L V2 LED modules.
Required supplies:
Formlabs:
Third-party:
Estimated time: 15 minutes
Danger:
Read and follow all safety instructions and warnings in the operator manual. Replacement with incorrect parts can lead to burns, shock, fire, or explosion. Dispose of all parts in accordance with local regulations.
Preparing the workspace
Overview: Prepare the Form Cure L V2 and workspace for replacing the LED modules.
Step 1: Prepare the workspace
Clear a workspace around your machine. Ensure that the workspace is well-ventilated and free of dust.
Step 2: Unplug the machine
Turn off the machine using the power switch on the back of the unit. Disconnect the power cable before continuing with maintenance. Do not perform maintenance on the machine while it is connected to power. Wait five minutes after disconnecting the machine from power before proceeding. If the machine was recently in use, the post-cure chamber will be warm. Wait at least 10 minutes for the chamber to cool.
Danger:
Performing maintenance on the machine while it is plugged in increases the risk of electric shock. Never remove the machine's shells while it is plugged in. Never reconnect the machine to power while the shells are uninstalled.
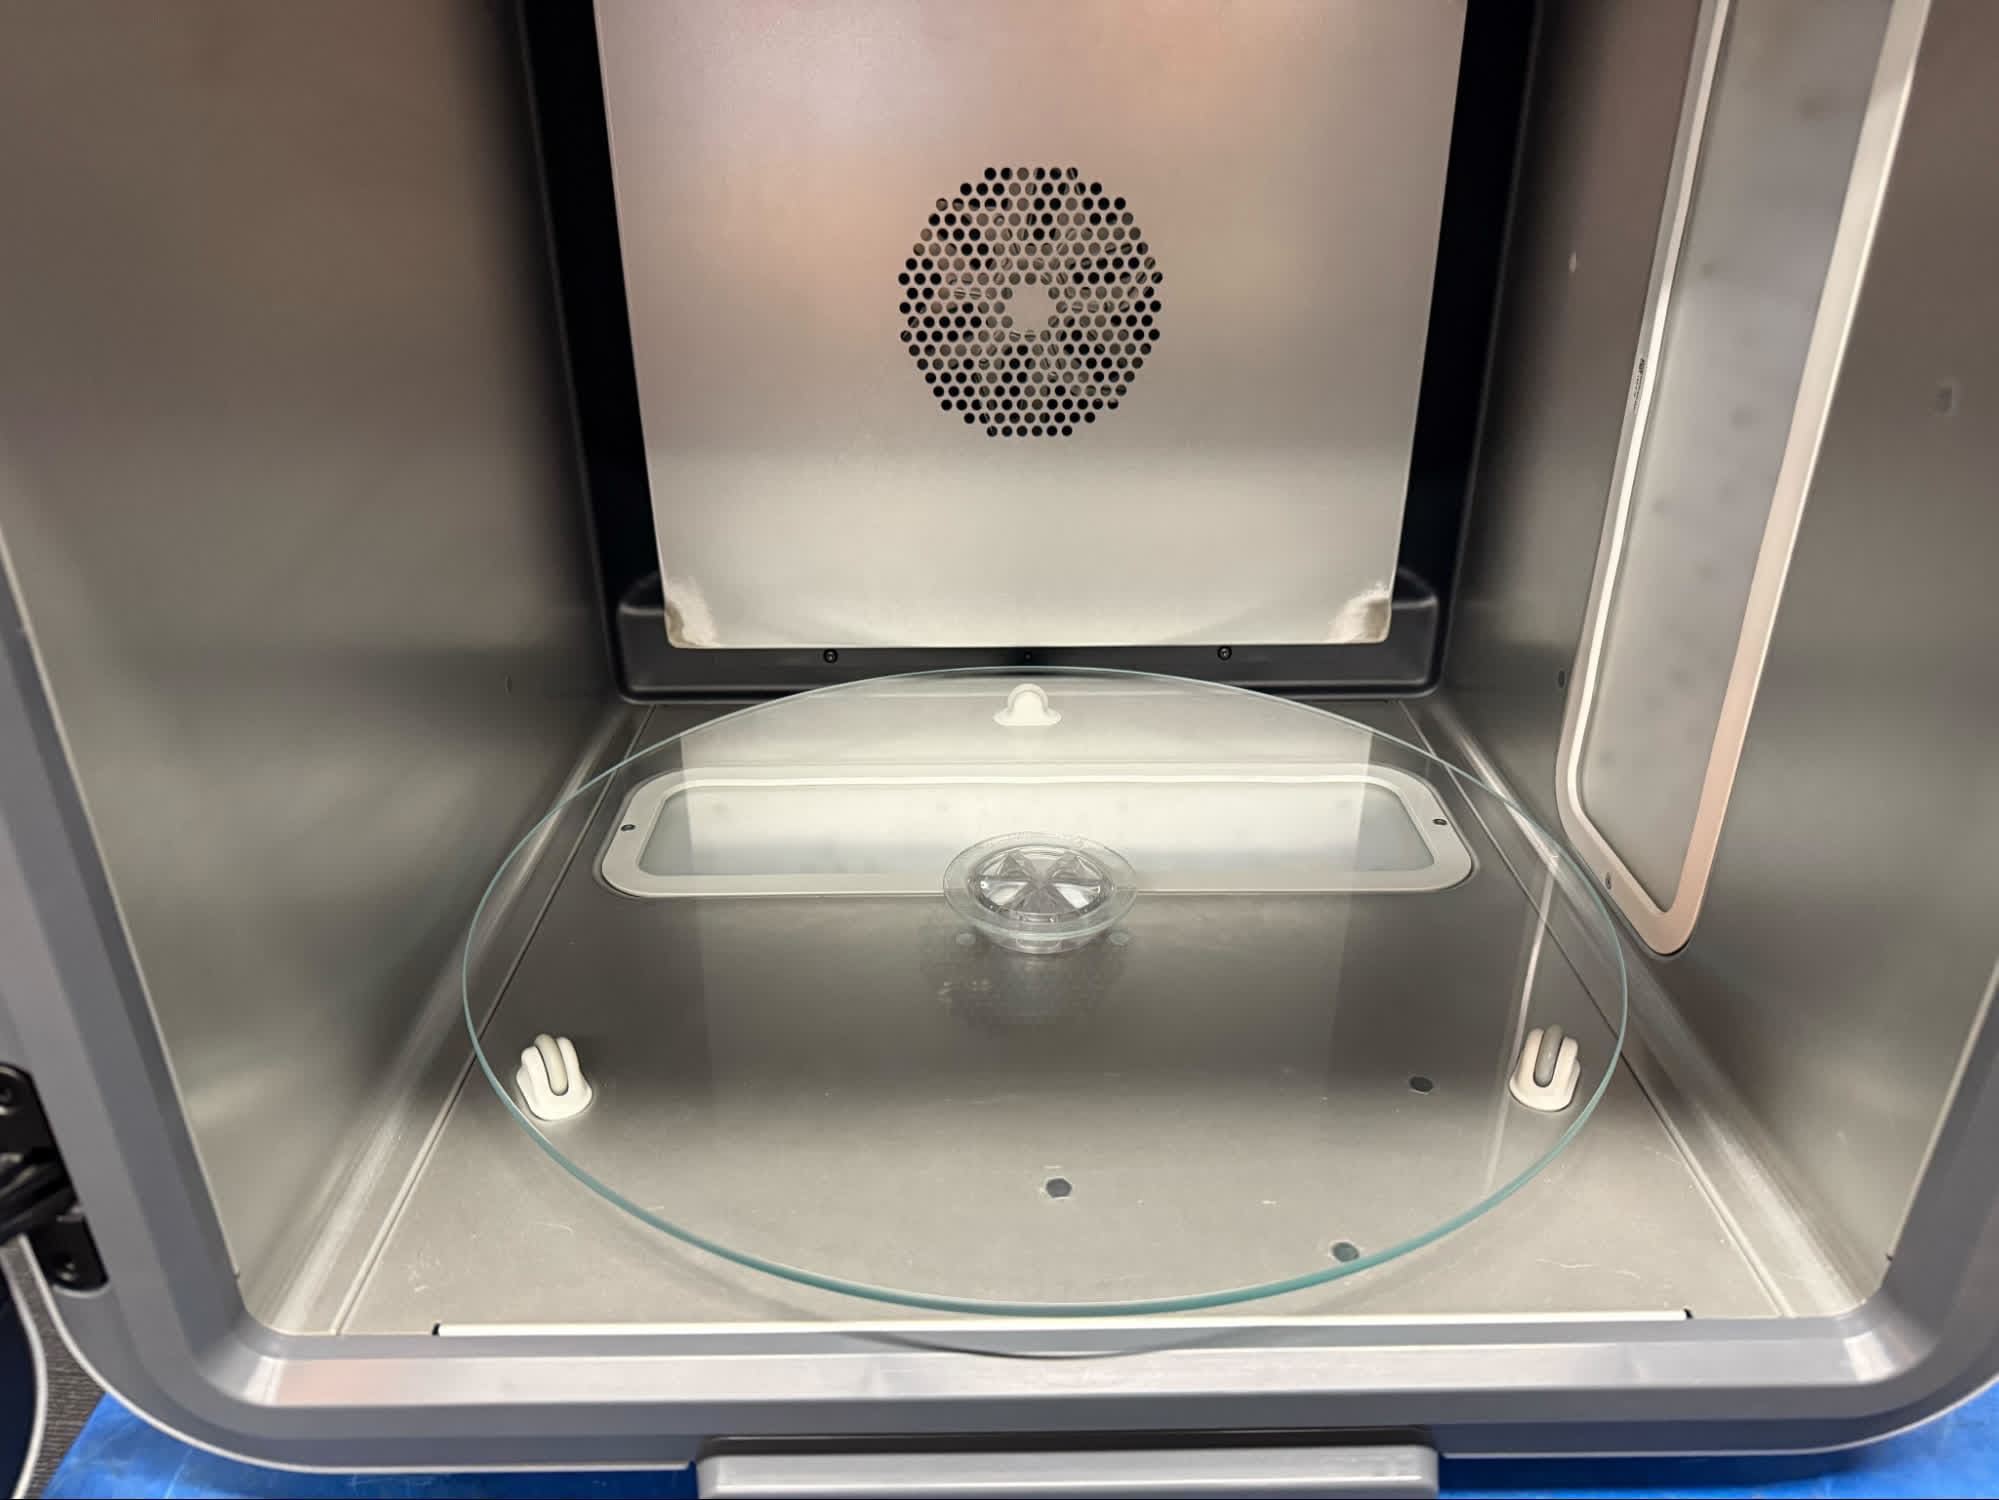
Open the curing chamber door. Gently lift the glass turntable off of the turntable coupler and set it aside.
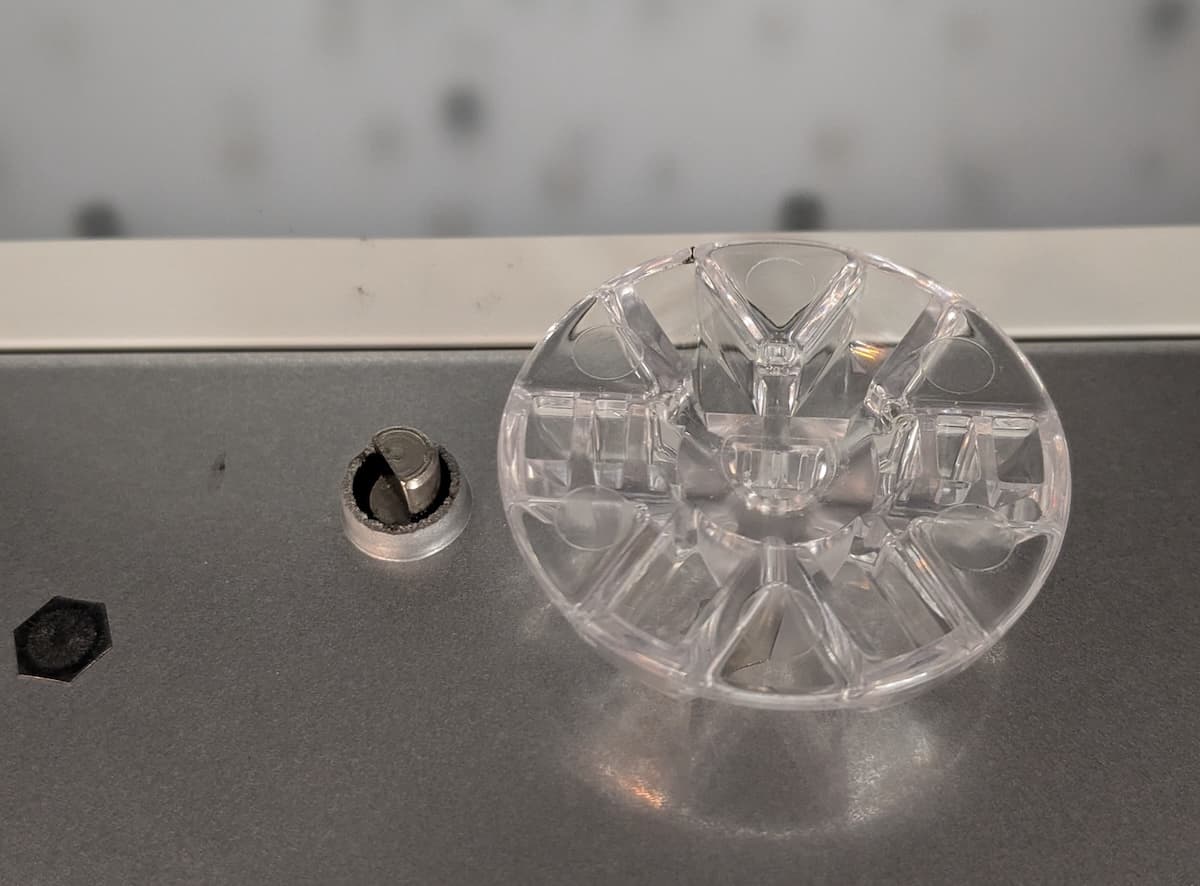
If you are replacing the bottom LED module, pull the turntable coupler up off of the motor shaft. Set the coupler aside.
Removing the LED module
Overview: Disconnect and remove the LED module or modules you are replacing.
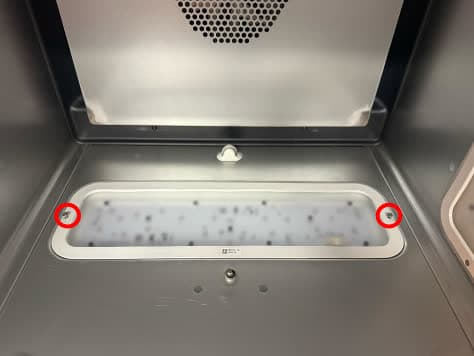
Locate the LED module you are replacing. There is one on the bottom of the post-cure chamber, one on the right wall, and one on the ceiling. Each is secured to the machine with two screws. Using a 2 mm hex driver, loosen and remove the screws and set them aside for disposal.
Step 2: Disconnect the LED module cable
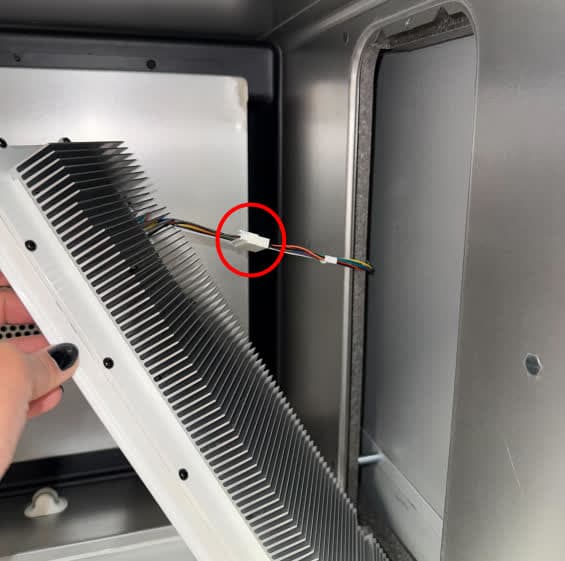
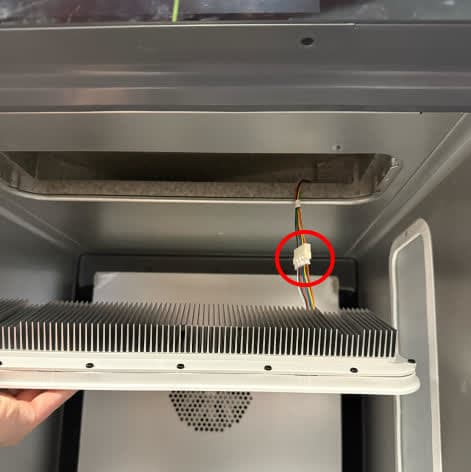
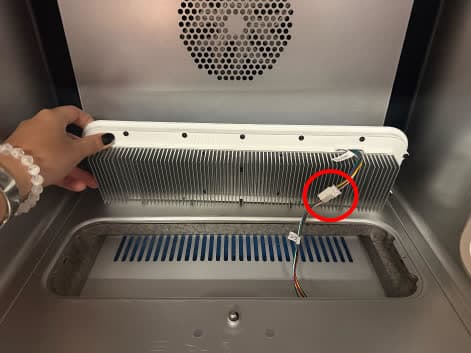
Gently pull the LED module away from the machine, exposing a cable. Squeeze the locking tab and pull the cable connectors apart. Do not pull on the wires themselves. Ensure the internal cable does not fall into the enclosure.
Step 3: Remove the LED module
Fully remove the LED module from the machine and set it aside for disposal with electronic waste.
Step 4: Remove other LED modules (optional)
If you are replacing multiple LED modules, repeat steps 1–3 as needed.
Installing the replacement LED module
Overview: Connect, mount, and secure the new LED module or modules.
Step 1: Connect the LED module cable
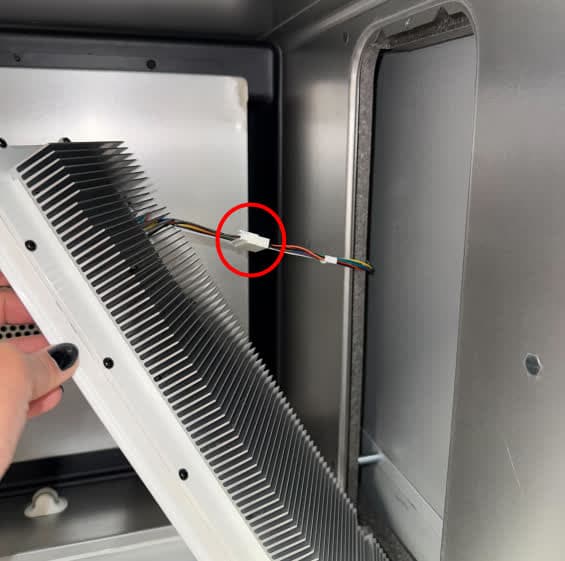
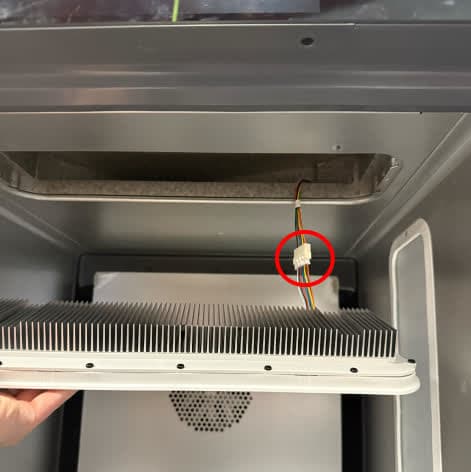
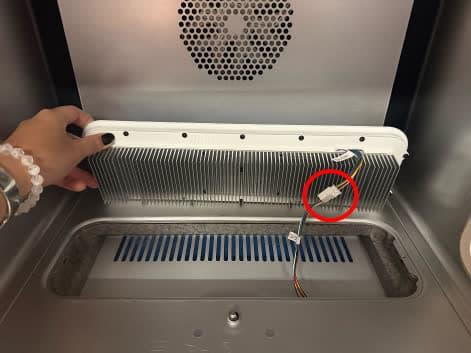
Remove the new LED module from its packaging and hold it near its mounting position within the post-cure chamber. Connect the LED module cable. The cable only fits into its connector in the correct orientation. The locking tab clicks into place when the cable is fully connected.
Step 2: Mount the LED module
Slowly feed in the cable into the cavity behind the LED module. Ensure that the module sits flush against the inside of the post-cure chamber.
Step 3: Secure the LED module
Thread one of the included LED module mounting screws into both of the screw holes in the LED module. Using a 2 mm hex driver, tighten until snug.
Step 4: Install other LED modules (optional)
If you are replacing multiple LED modules, repeat steps 1–3 as needed.
Finalizing the repair
Overview: After installing the replacement LED modules, power on the machine and perform final checks.
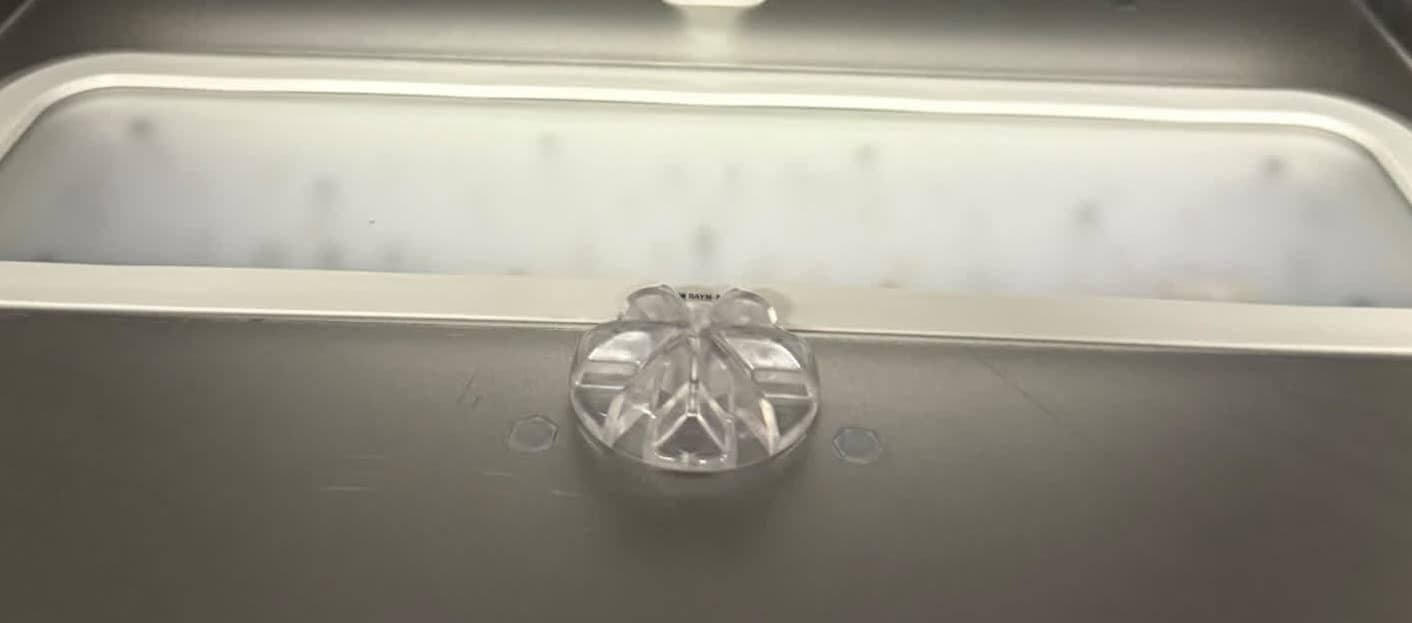
Carefully rotate the machine to its upright position. Open the curing chamber door and press the new turntable mount onto the motor shaft. The shaft has a D-shaped profile, so the mount should fit snugly on it in one orientation.
Place the turntable back on its mount.
Step 3: Power on the machine
Close the Form Cure L door. Connect the power cable to the Form Cure L and the power supply. Flip the breaker switch on the back of the unit to the ON position to turn on the machine.
Step 4: Test the repair
Start a post-cure cycle to test the replacement LED modules. Monitor the Form Cure L to ensure it lights up properly.