
Required Supplies:
Formlabs:
- Replacement impeller motor and magnetic clutch
Third-party:
- 2.5 mm hex driver
- 2.0 mm hex driver
- Calipers
- Nitrile gloves

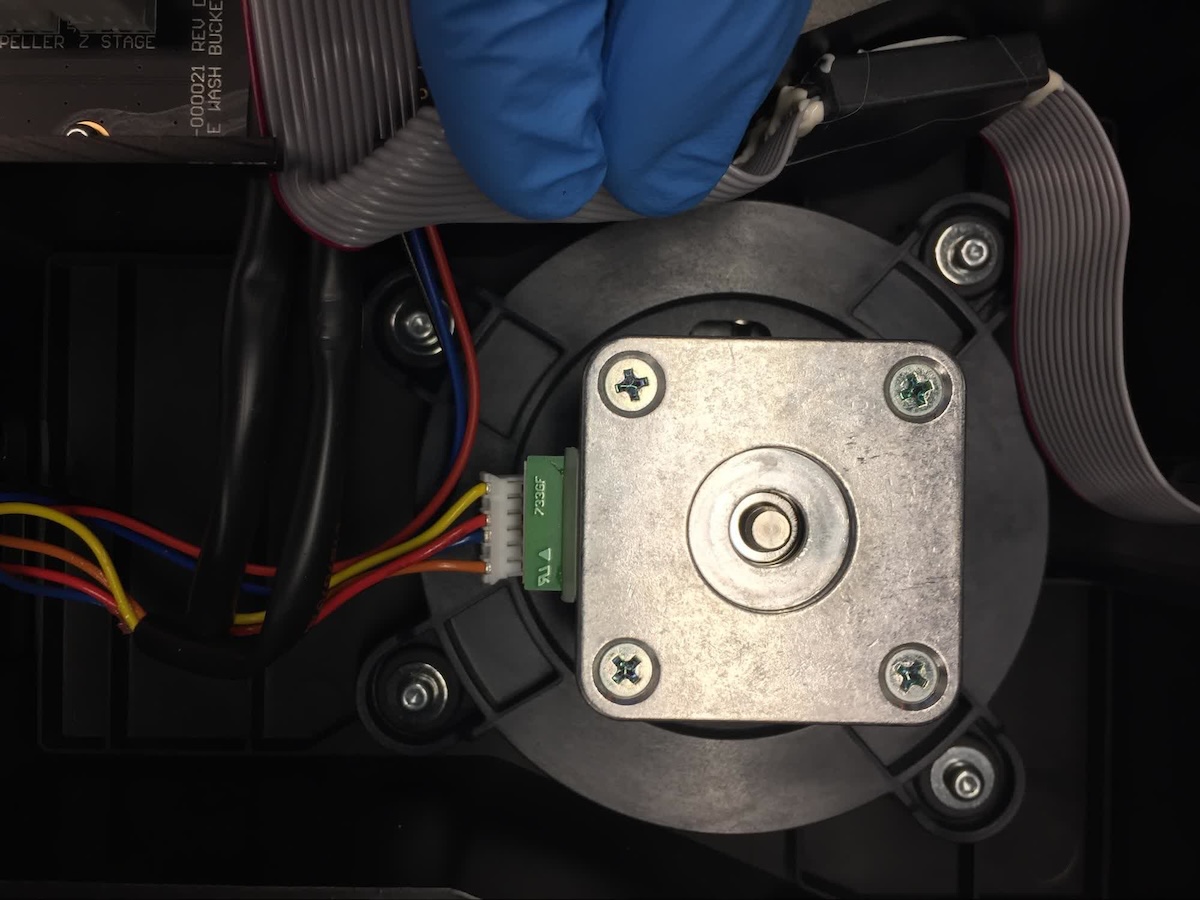
The magnetic clutch is mounted to the impeller motor in the Form Wash. Three magnets inside the clutch help rotate the impeller in the wash bucket. A loose magnetic clutch can interact with the plastic base, which can cause unusual noises and improper impeller motor movement. A damaged impeller motor can prevent the unit from cleaning your printed parts.
Use this guide to replace or reseat the Form Wash impeller motor and magnetic clutch.
Required Supplies:
Formlabs:
Third-party:
Estimated time: 10–20 minutes
Preparing the workspace
Overview: Prepare the Form Wash and a level workspace for replacing or reseating the impeller motor and magnetic clutch.
CAUTION:
Wear gloves when handling parts and surfaces that have come into contact with solvents or liquid resin.
Disconnect the Form Wash from its power source.
Lift the Form Wash by gripping its base, not the handles of the wash bucket. Move the unit to a well-ventilated area. Set the unit and the outer lid hinge on a level surface for easy access.
Lift the outer lid to expose the wash bucket and platform mount.
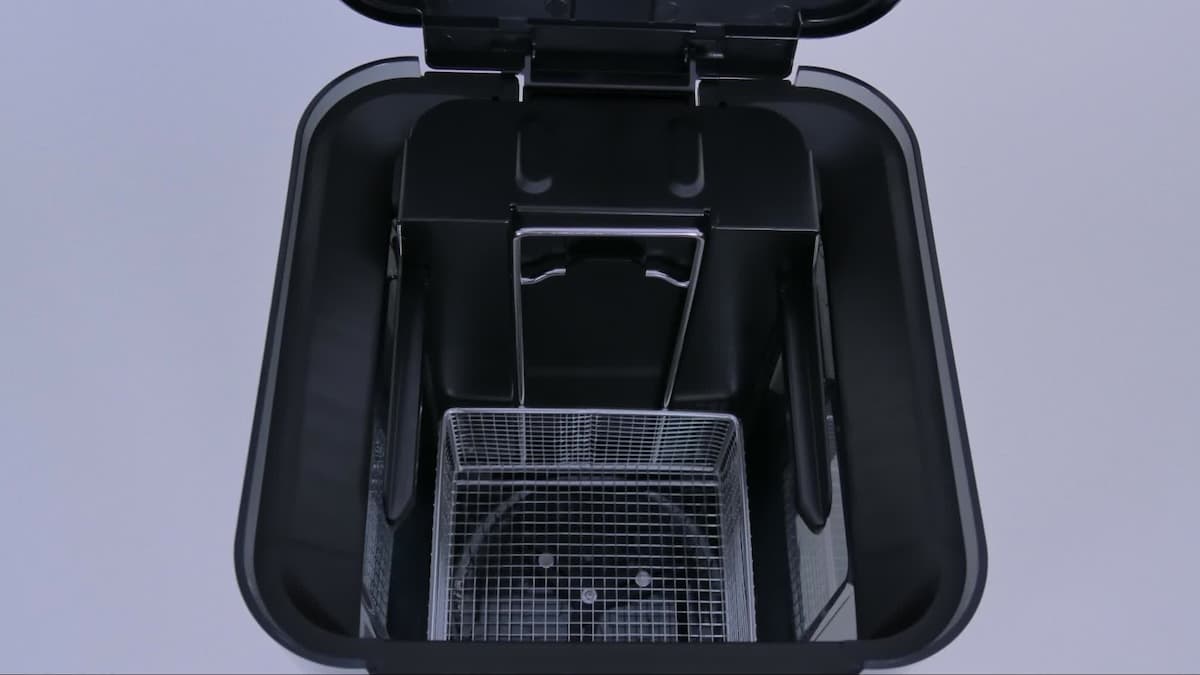
Step 4: Lift the platform mount
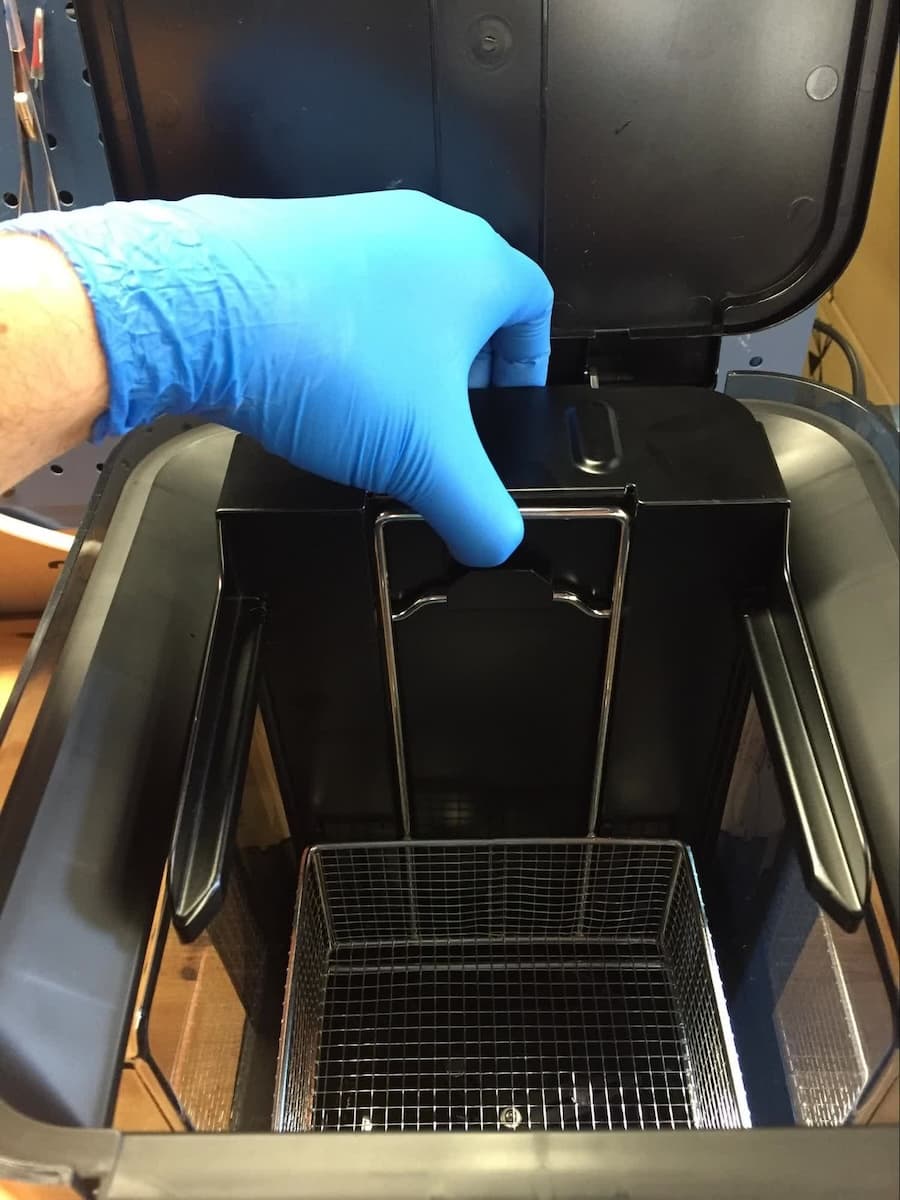
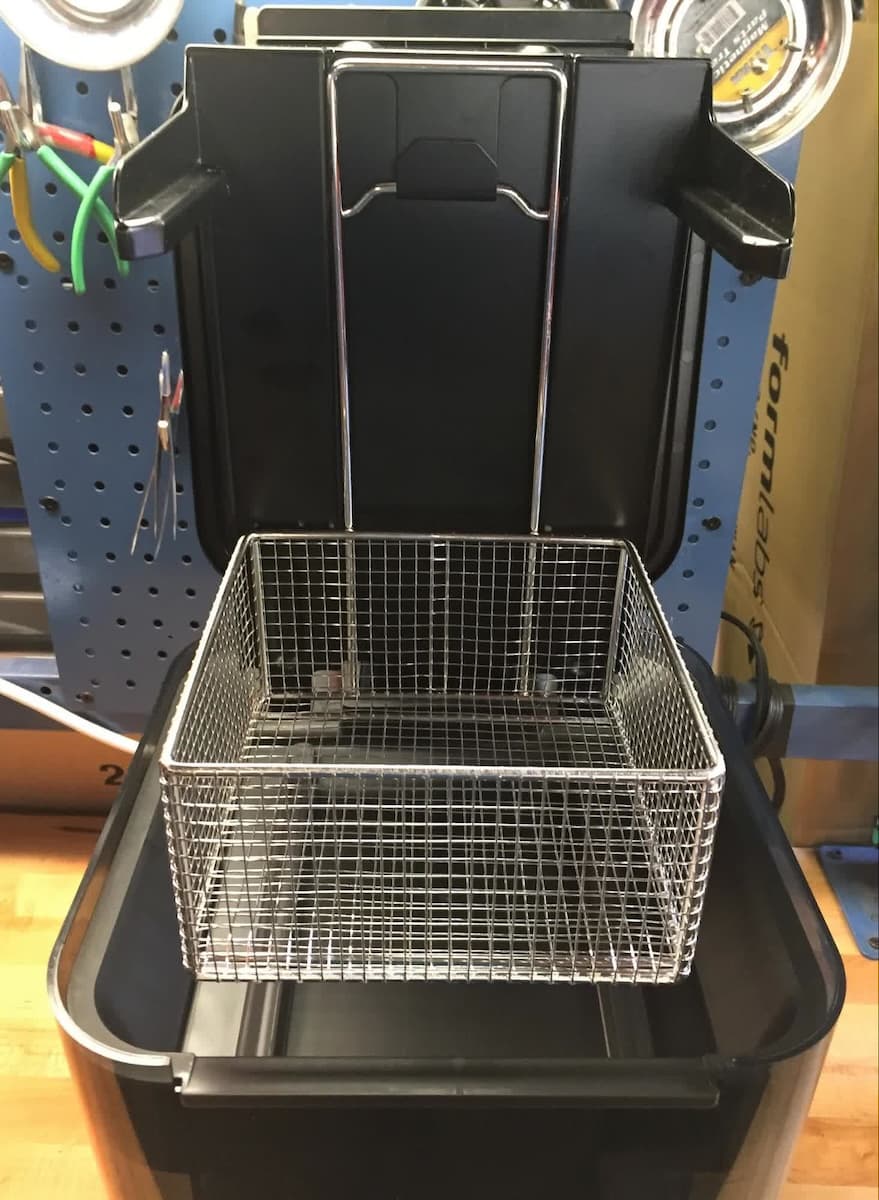
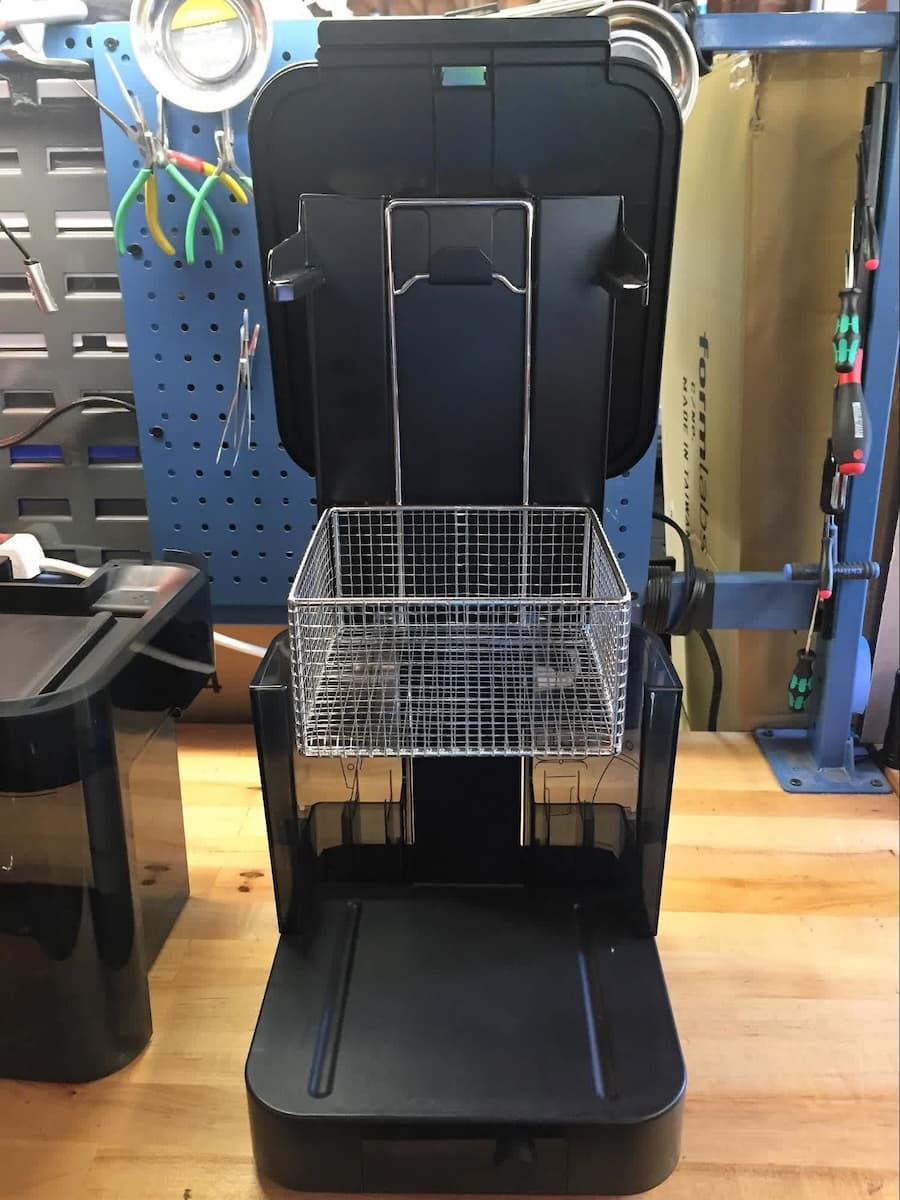
Lift the platform mount until it rests at the top of the lead screw. Some friction or shaking while lifting the mount is normal and should not affect the unit.
Step 5: Remove the wash bucket
Remove the wash bucket from the base and set the bucket aside on a stable, flat surface. To reduce the likelihood of spillage, remove the solvent from the wash bucket with a siphon pump.
Removing the bottom plate
Overview: Close the cover and turn the unit over to rest on its back. Unscrew the outer screws in the bottom plate to remove it.
Step 1: Turn the unit over
Close the cover and turn the unit over so that it rests on its top and the bottom plate faces up.
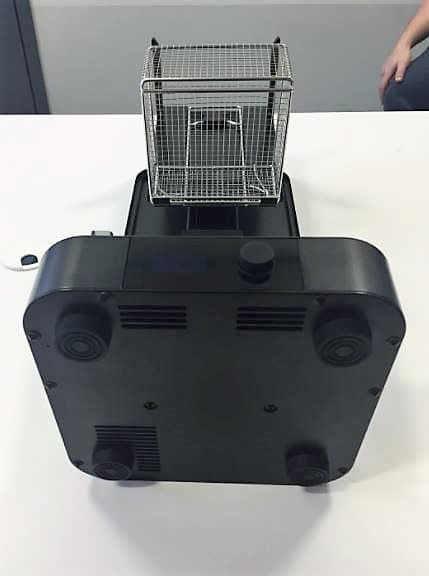
Step 2: Remove the outer screws
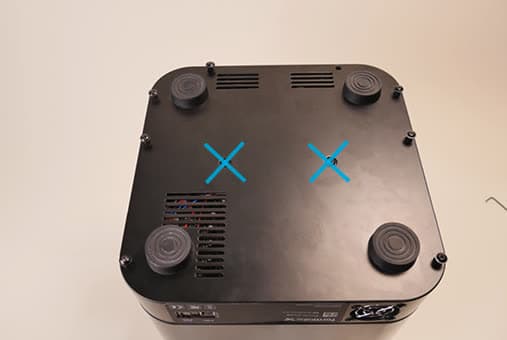
Turn the 2.5 mm hex driver counterclockwise to remove the eight screws around the bottom plate edge.
NOTICE:
Do not remove the two screws in the center of the bottom plate. The center screws secure the base assembly.
There are two screws along the top edge, three screws on the left edge, and three screws on the right edge. Set aside the bottom plate and the eight screws for reassembly.
Replacing or reseating the impeller motor and magnetic clutch
Overview: Disconnect the cable from the motor. Remove the four screws holding the motor to the base, and then remove the motor.
Step 1: Disconnect the cable from the motor
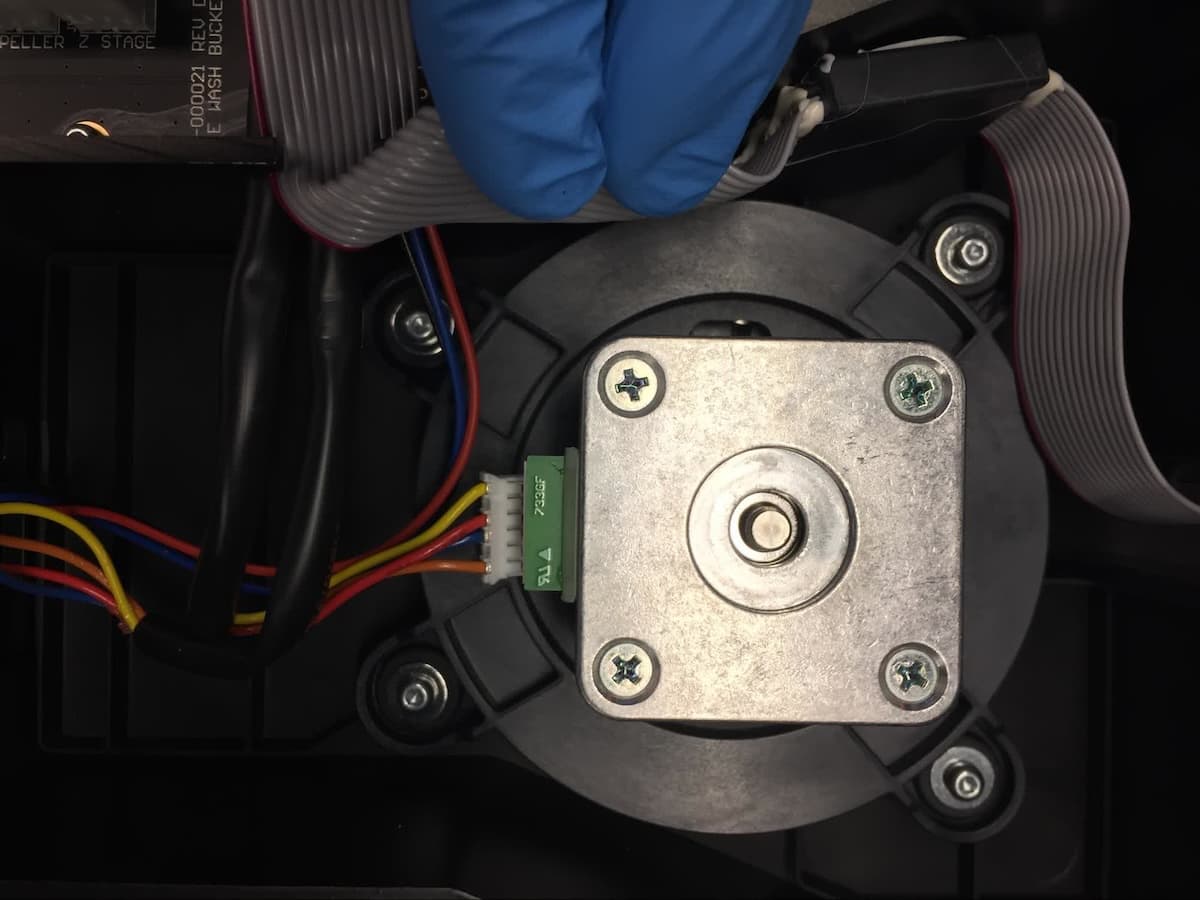
Disconnect the cable from the motor. Pull on the plastic connector and not the wires to avoid damage.
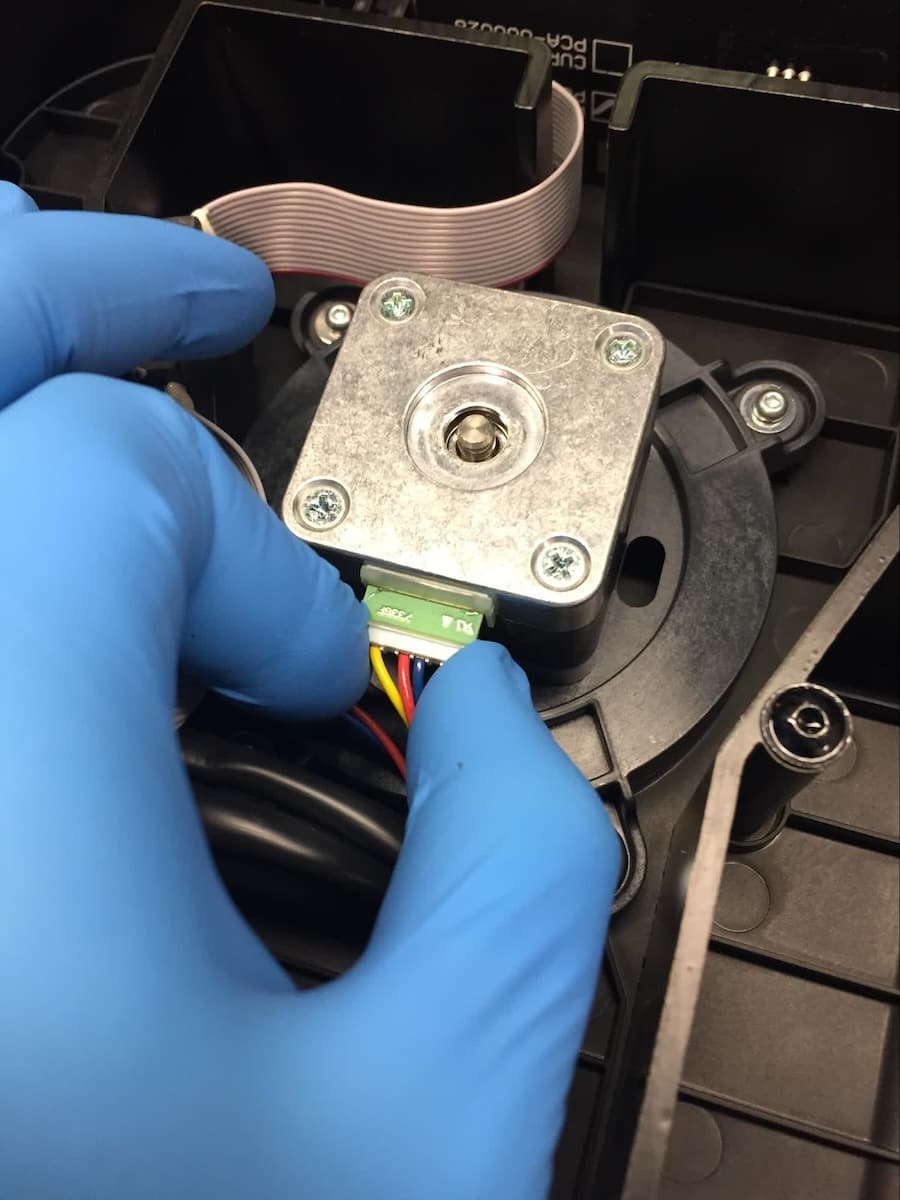
Using the 2.0 mm hex driver, remove the four screws and four washers that connect the motor to the base. Do not unscrew the four screws on the motor body itself. Set aside the screws and washers for reassembly.
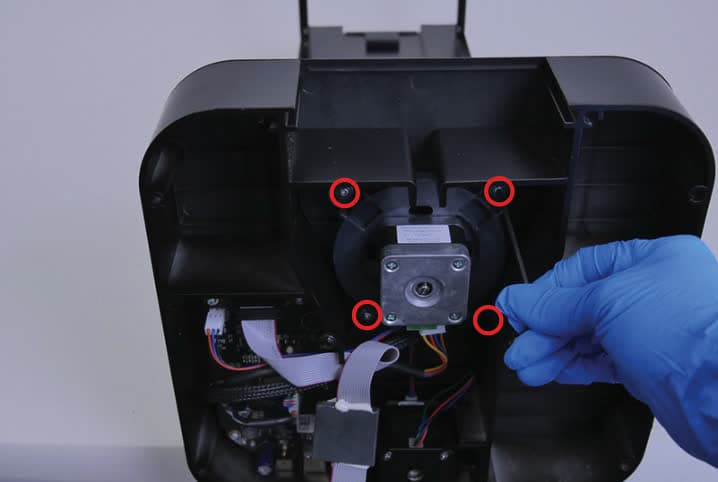
Pull evenly to remove the motor assembly. If you are replacing the impeller motor and magnetic clutch, proceed to step 6 to install the replacement assembly. If you are reseating the magnetic clutch without replacing the motor, process to step 4.
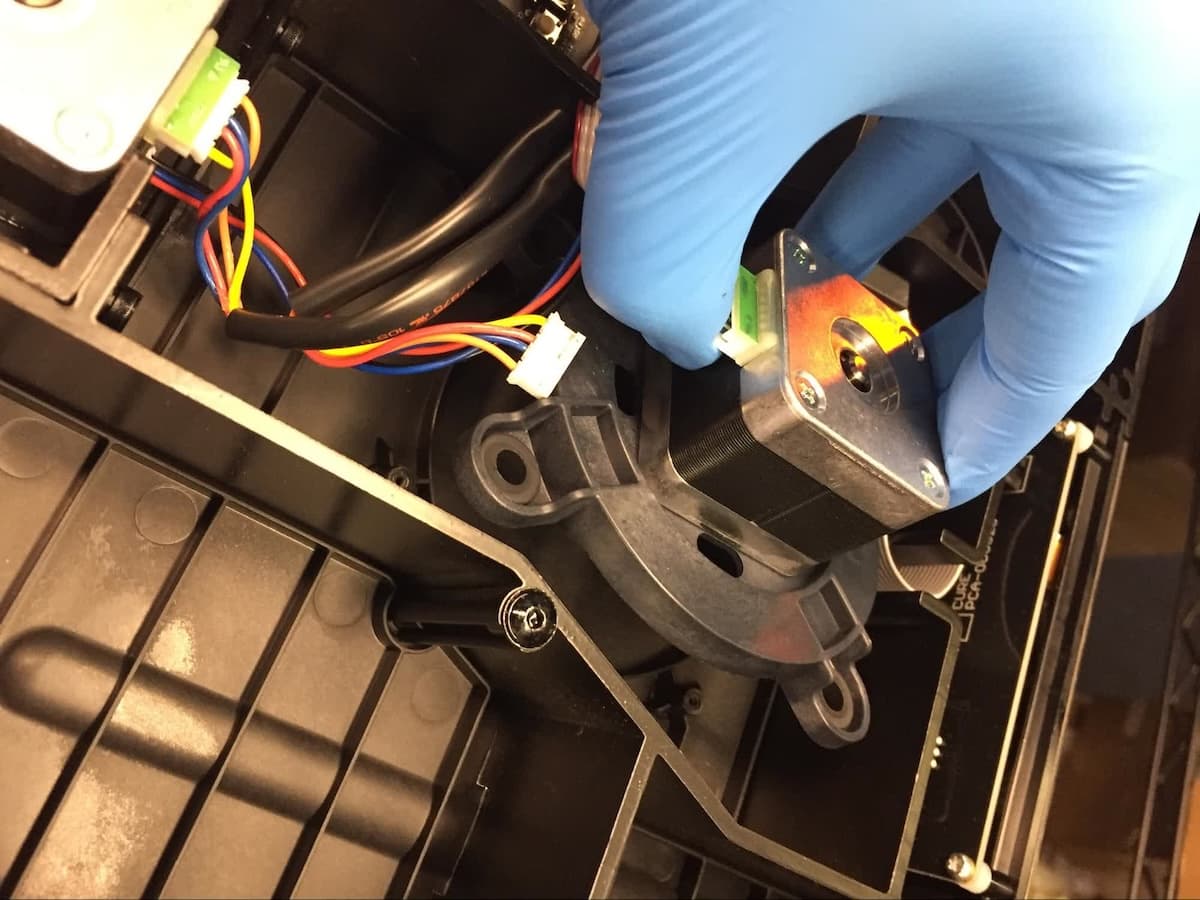
Step 4: Measure the distance between magnetic clutch and motor mount
Measure the distance from the top of the magnetic clutch to the underside of the motor mount.
If the distance is greater than 17.70 mm, the magnetic clutch is likely to prevent the motor from rotating properly and should be reseated.
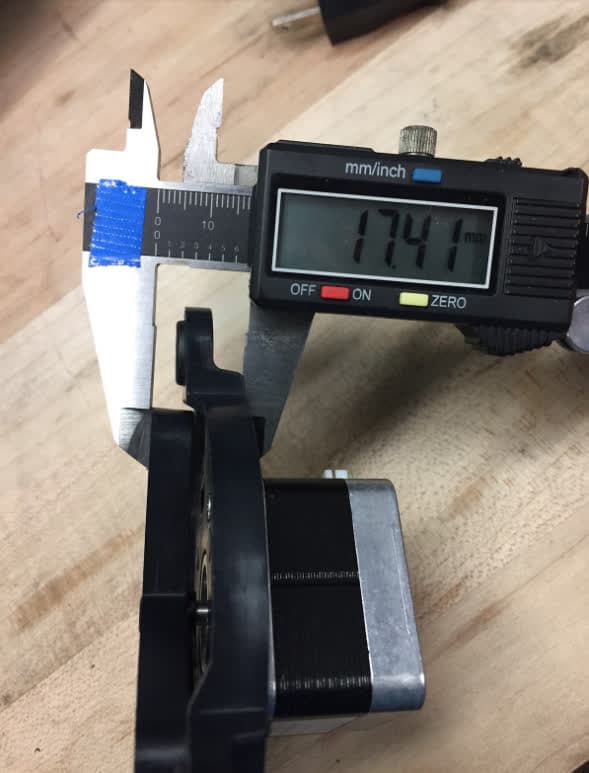
Step 5: Press the magnetic clutch down
Using both hands, press together firmly the back of the motor and the magnetic clutch to remove any excess space between them. The clutch is seated correctly when it cannot be pressed down further.
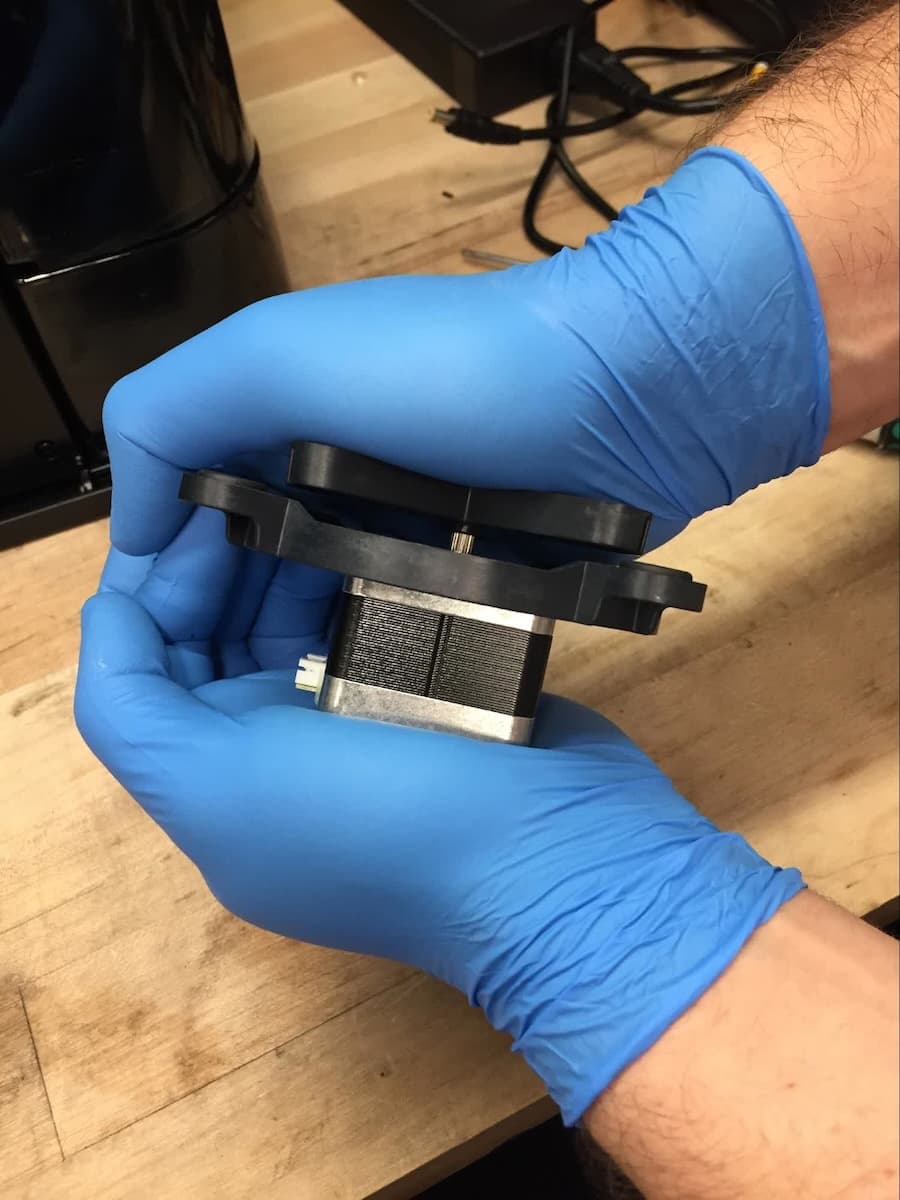
Reinstall the motor assembly by aligning the holes in the motor assembly with the holes in the base, If any cables obstruct the reinstallation, hold them to one side. Use a 2.0 mm hex driver to reinstall the four washers and four screws.
Connect the motor cable to the motor.
Reassembling the unit
Overview: Reinstall the bottom plate. Stand the unit upright to reinstall the wash bucket.
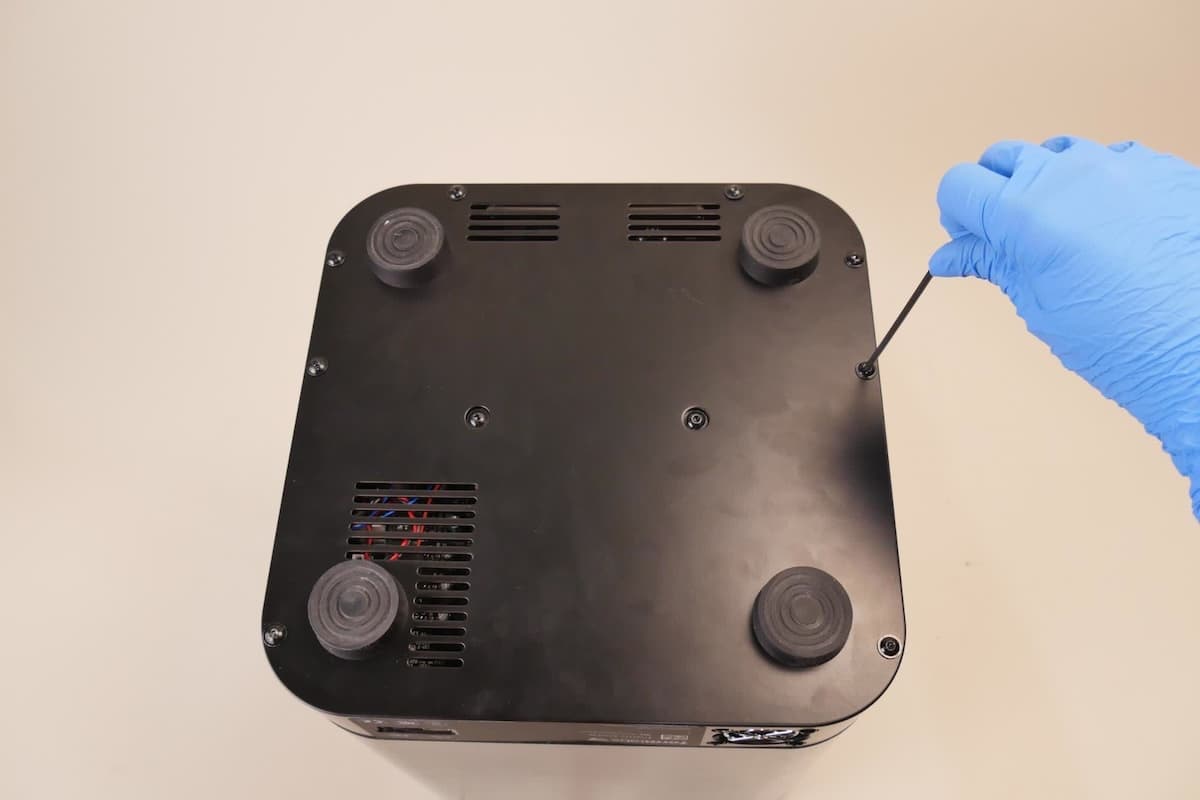
Place the bottom plate on the unit with the feet pointing upward. Insert the eight screws along the edges of the bottom plate. Turn the 2.5 mm hex driver clockwise to tighten all eight screws until they are finger-tight.
Return the unit to the upright position.
Reinstall the wash bucket in the Form Wash.
Finalizing the repair
Overview: After replacing or reseating the impeller motor and magnetic clutch, power on the unit and perform final checks.
Step 1: Power on the Form Wash
Connect the Form Wash to power. It should show the startup screen.
Step 2: Test the impeller motor and magnetic clutch
Rotate the knob to the Start option on the display and press the knob to select it. This activates the wash cycle and confirms that the motors respond. Ensure the impeller moves without making unusual noises. Contact Formlabs Support or your authorized reseller to share the results of the procedure.