Step 1: Remove the lower rear panel screws
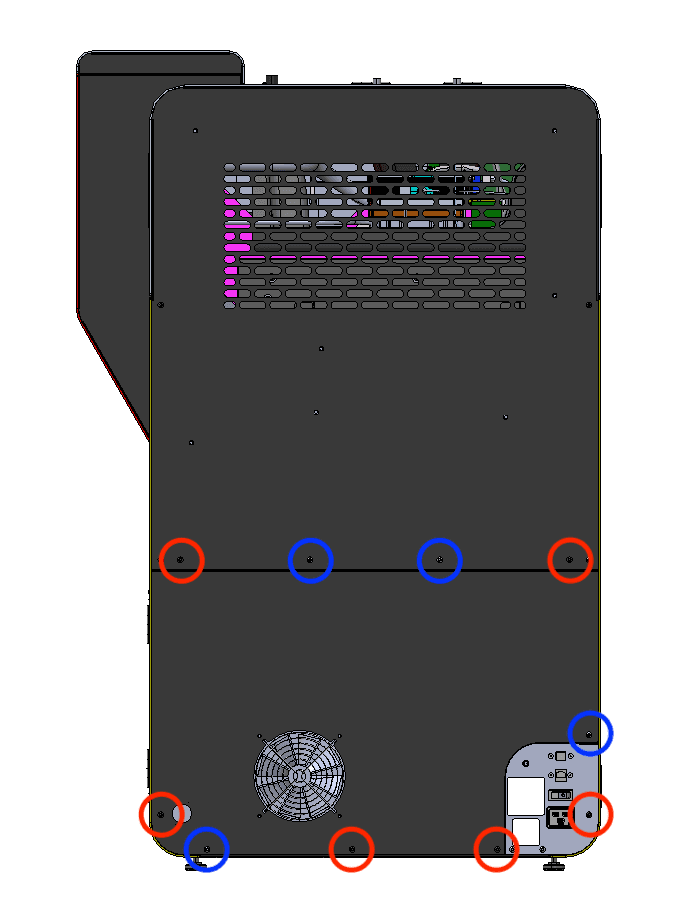
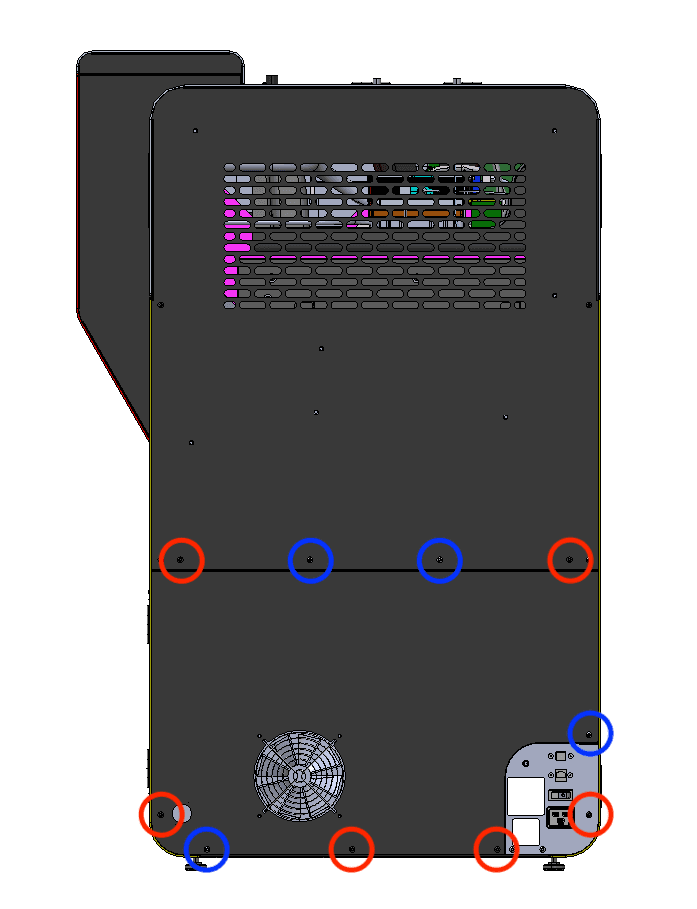
The six black lower rear panel screws are circled in red. The four chrome lower rear panel grounding screws are circled in blue.
Using a 2.5 mm hex driver, remove the
six black panel screws and the four chrome panel grounding screws securing the lower rear panel to the printer.
Set the screws aside, taking care to separate the
black
and
chrome
screws for later reinstallation.
Step 2: Remove the lower rear panel from the printer
Pull the lower rear panel straight back and away from the printer. Lay it down on a flat, clean surface.