
Required Supplies:
Formlabs:
- Replacement gas springs
Third-party:
- 2.5 mm hex driver
- 7 mm wrench or nut driver
- Pliers
Estimated time: 20–30 minutes

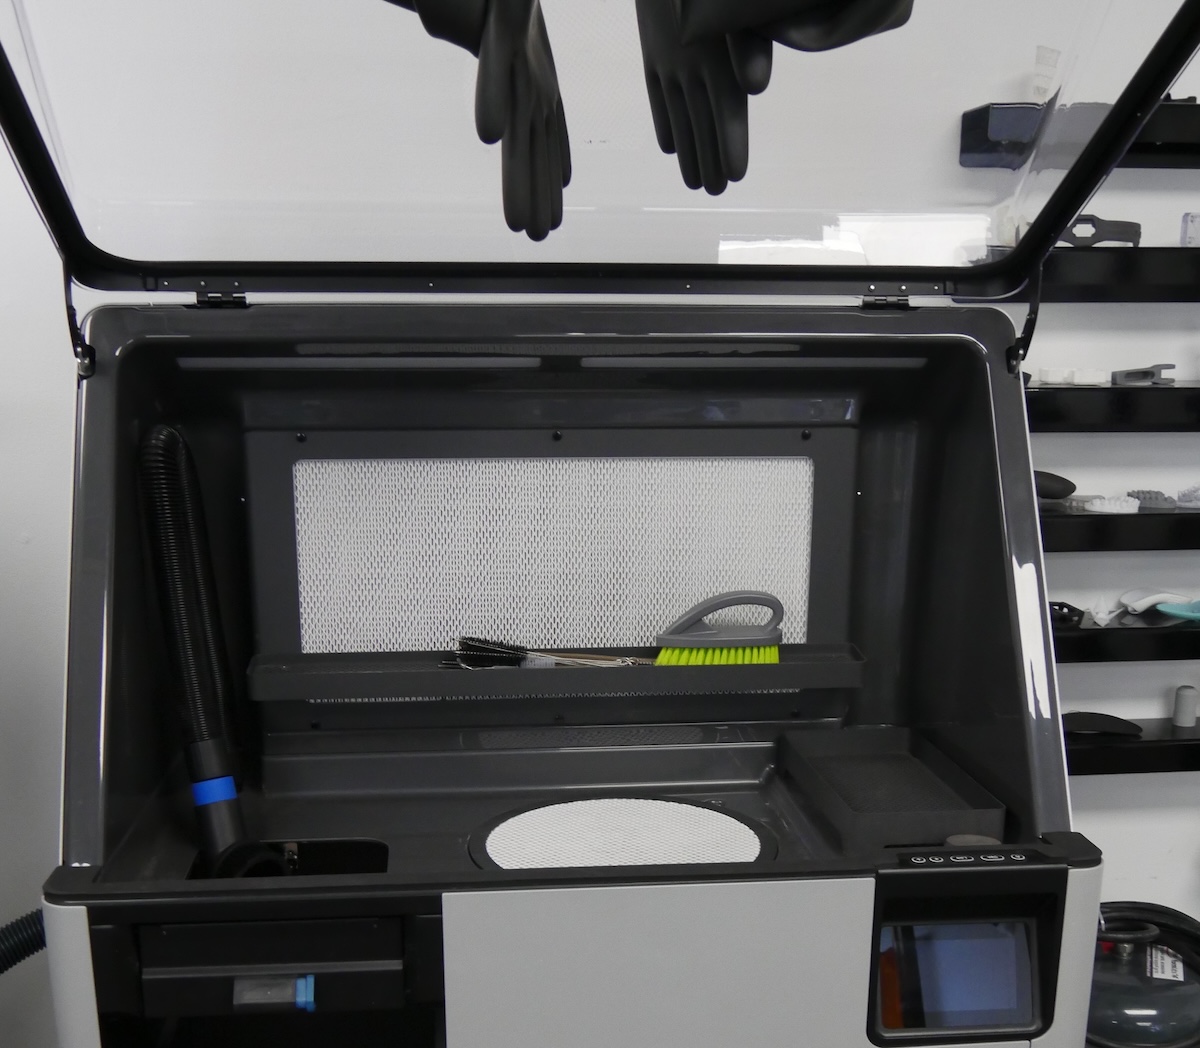
The Fuse Sift hood is secured in the upright position with two gas springs to prevent it from closing suddenly. A damaged gas spring may prevent the cover from opening and closing properly.
Use this guide to replace the Fuse Sift hood gas springs.
Required Supplies:
Formlabs:
Third-party:
Estimated time: 20–30 minutes
Caution:
The Fuse Sift is a heavy object. Two people are required for this procedure to prevent injury and avoid damage to the machine.
Preparing the workspace
Overview: Prepare the Fuse Sift and your workspace for replacing the gas springs.
Step 1: Remove and store printed parts
The Fuse Sift hood will be open during portions of this procedure. Remove any printed parts from the Fuse Sift workspace to prevent them from being damaged inadvertently.
Step 2: Clean the workspace
Using the vacuum attached to your Fuse Sift, clean the workspace. Vacuum any loose powder inside the workspace, under the hood, on the print bed and the surrounding port, and on the vent filter.
Warning:
Use appropriate personal protective equipment when handling loose or unsintered powder. Refer to the support article Safety with Formlabs SLS products or your powder’s safety data sheet (SDS) for more information.
Removing the gas springs
Overview: Unmount and remove the hood gas springs
Step 1: Separate the gas springs from the hood
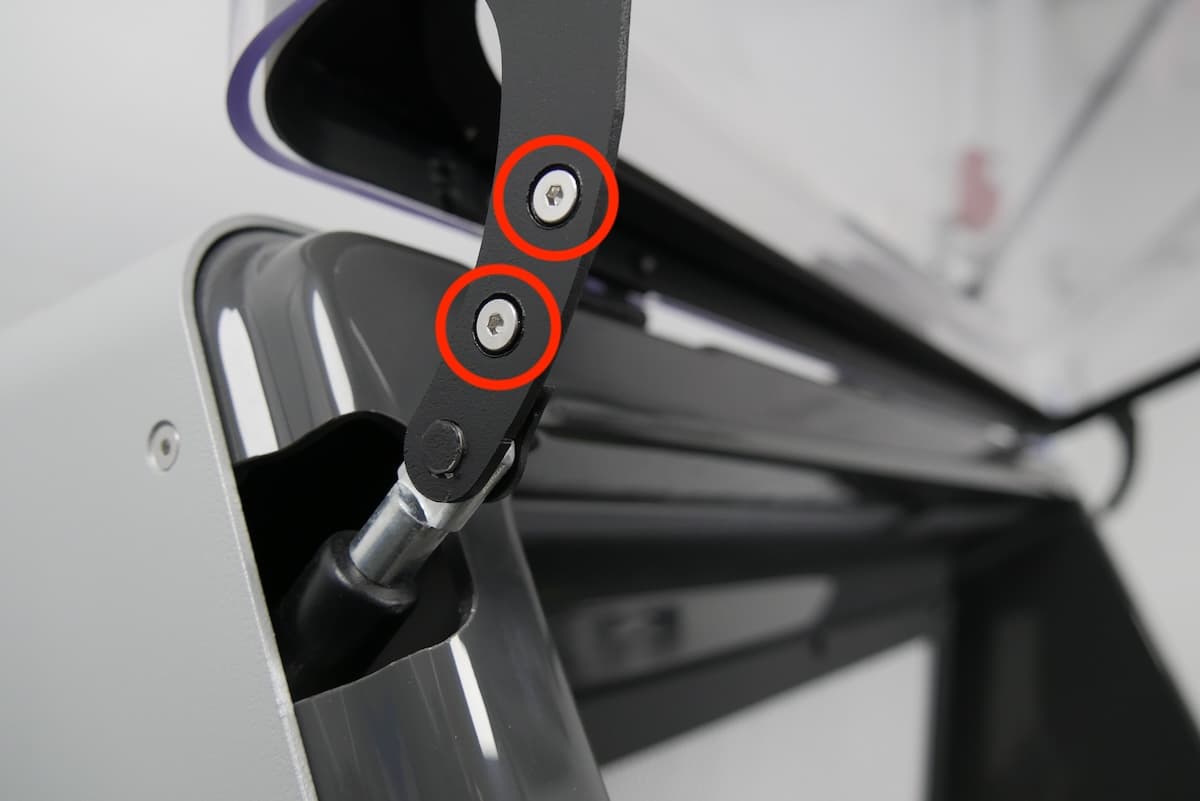
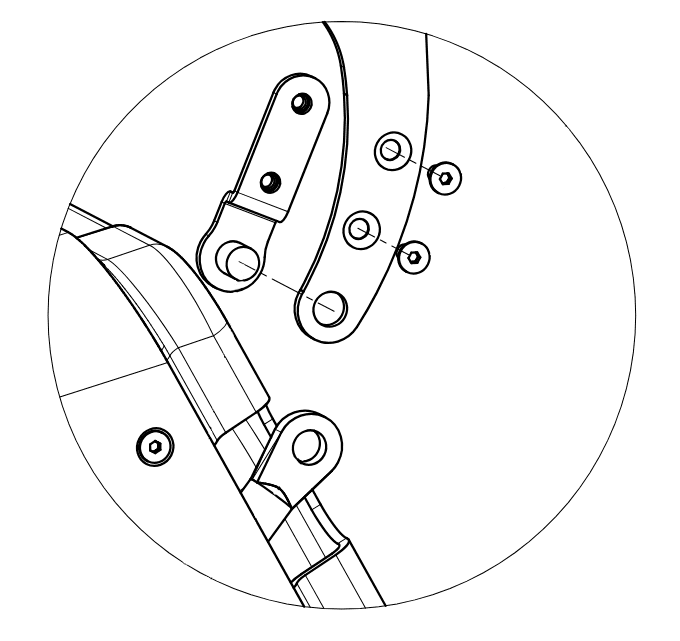
Open the Fuse Sift hood and have a second person support it. On the left side of the hood, locate the two screws securing the left gas spring and a bracket to the hood frame. Using a 2.5 mm hex driver, loosen and remove the screws. Set the screws and bracket aside. Repeat for the other side of the hood.
Notice:
Once both gas springs are disconnected from the hood, the hood is unsupported. Close the hood carefully to prevent injury or damage to the machine.
Step 2: Uninstall the left upper panel
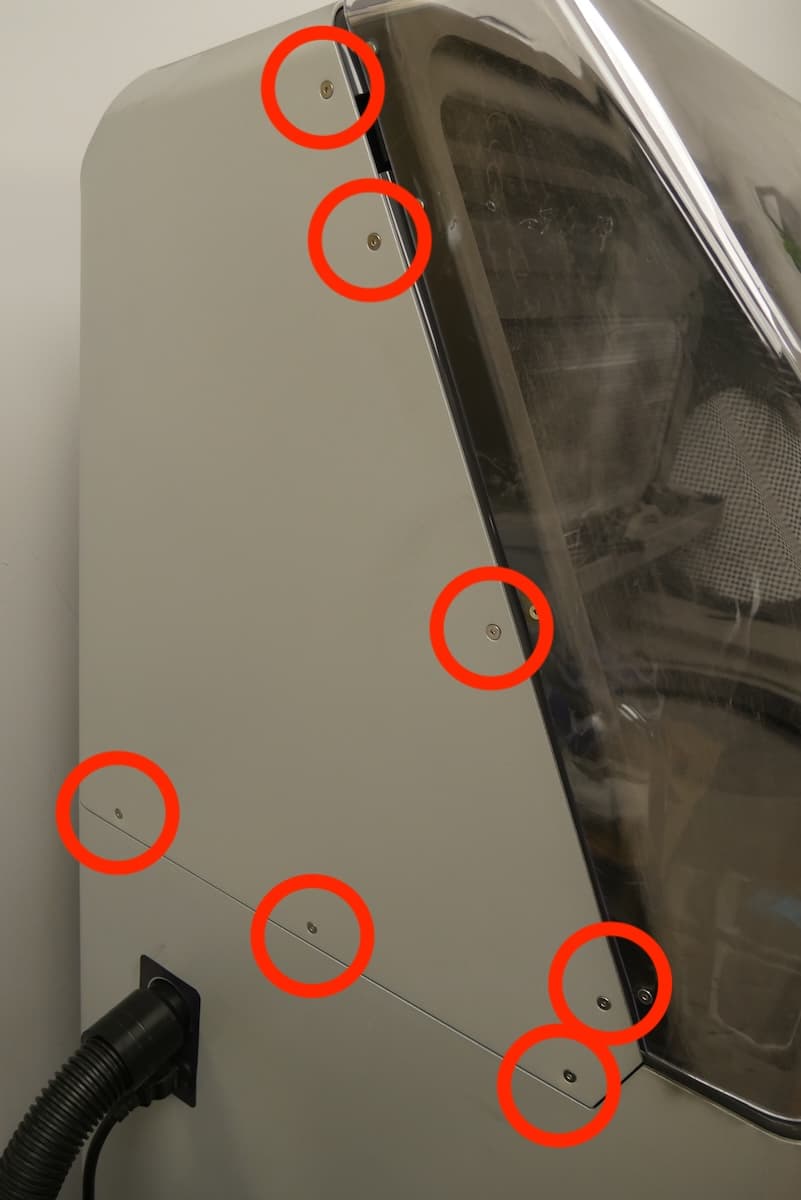
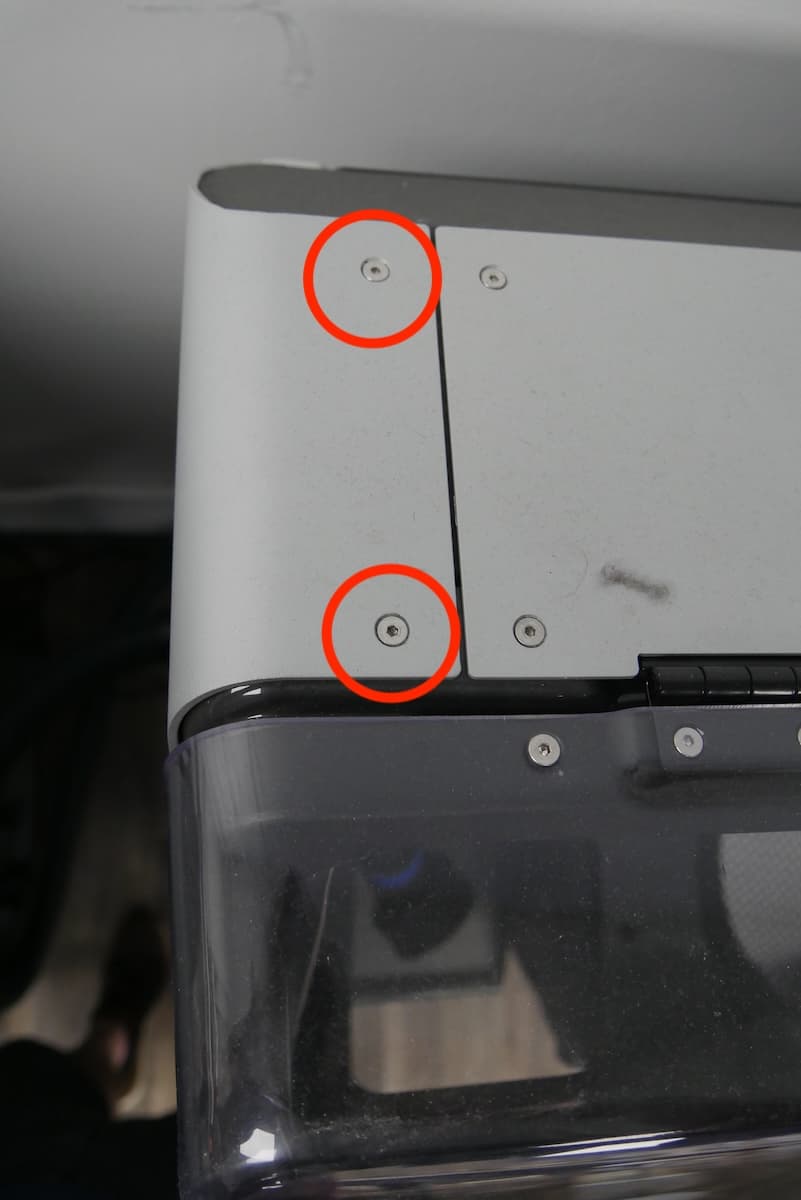
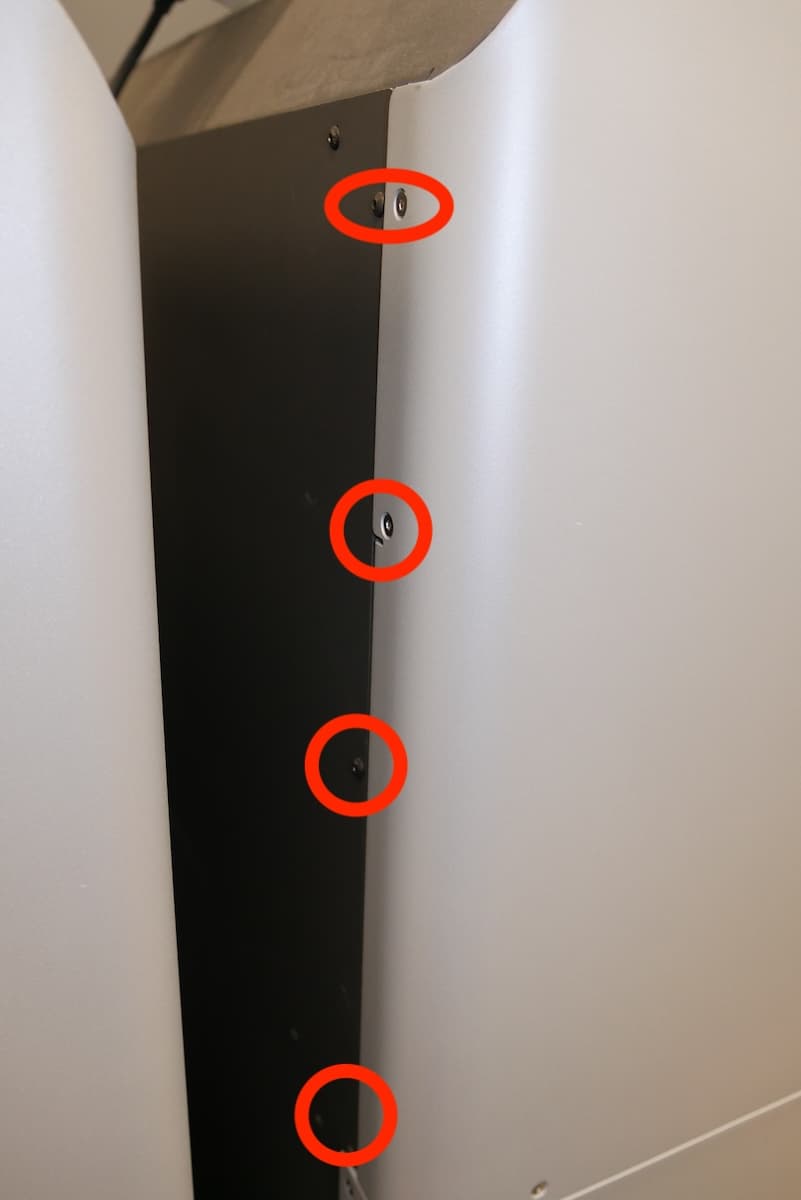
The other end of the left gas spring is secured to the left upper panel. Use a 2.5 mm hex drive to loosen and remove the 11 flathead screws and three black oxide pan head screws securing the left upper panel to the Fuse Sift frame. Remove the panel and gas spring. Repeat on the opposite side.
Step 3: Uninstall the right upper panel
Repeat step 2 for the right upper panel.
Use a 7 mm wrench or nut driver to remove the two retaining nuts from the gas spring bracket. Separate the gas spring bracket from the panel.
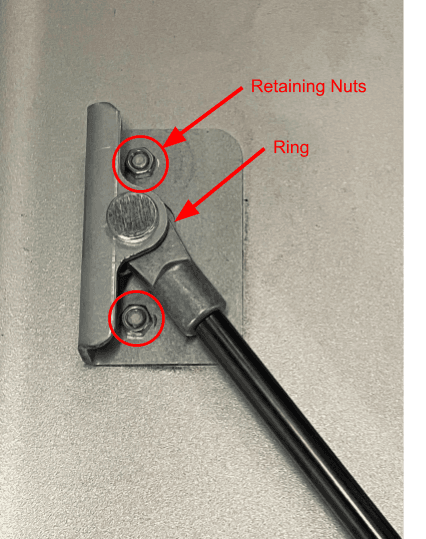
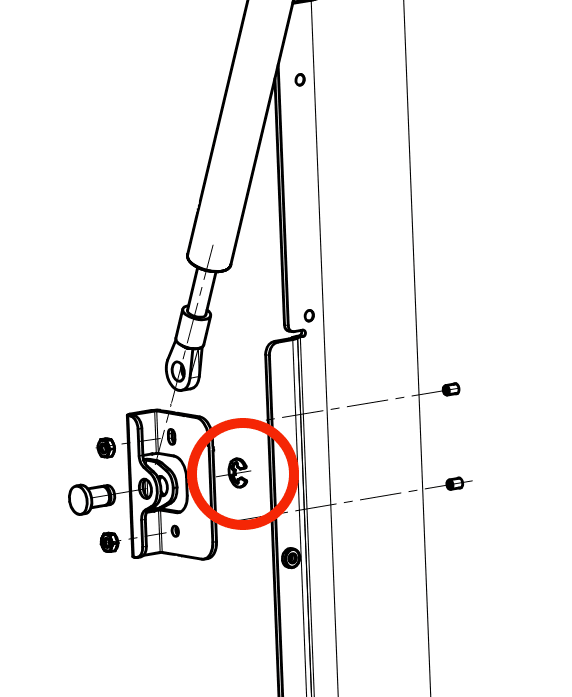
On the rear of the gas spring bracket, locate a retaining ring clipped onto the end of a pin. Use a pair of pliers to remove the retaining ring. Remove the pin and separate the gas spring from the bracket. Set the retaining ring, pin, and bracket aside. Dispose of the gas spring.
Step 6: Uninstall the right gas spring
Repeat steps 4–5 for the right gas spring.
Installing the replacement gas springs
Overview: Mount the replacement gas springs onto the side panels and secure them to the hood.
Insert the eyelet at the narrow end of the gas spring into the bracket. Align the hole in the eyelet with the holes in the bracket. Insert the pin through the bracket and eyelet. Snap the retaining ring into the groove on the end of the pin.
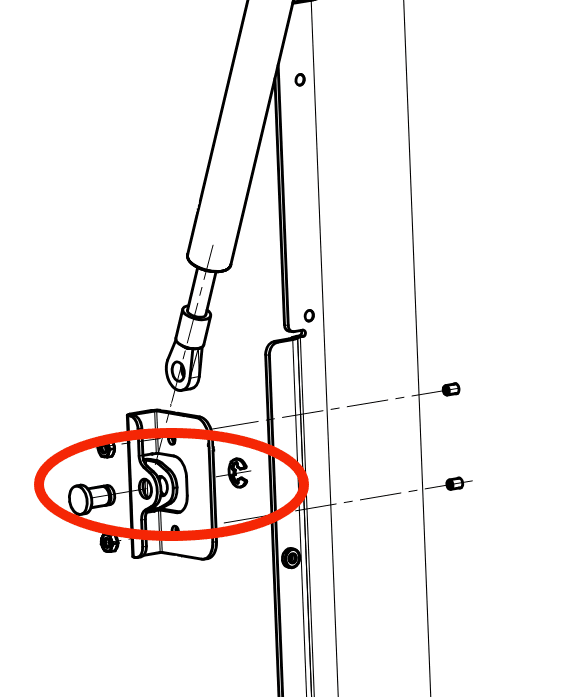
Step 2: Mount the gas spring bracket onto the left upper panel
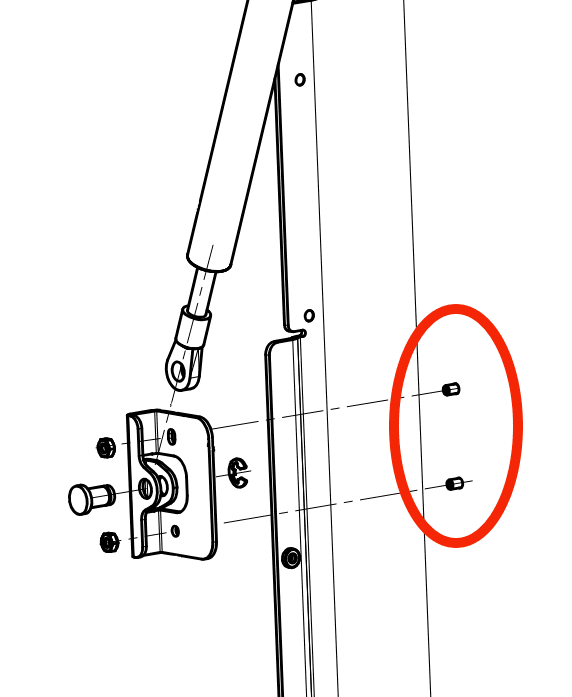
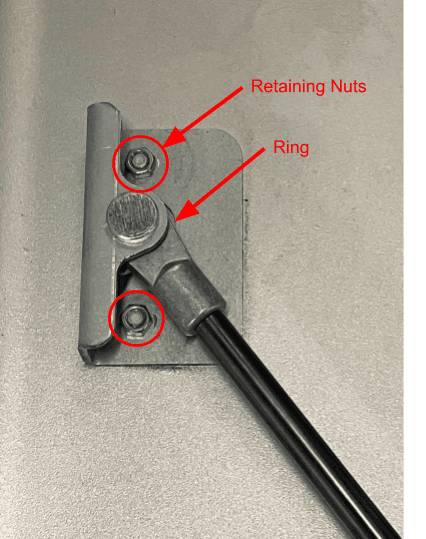
Mount the bracket on the two threaded posts on the inside of the left upper panel. Make sure the gas spring is pointed towards the angled front edge of the panel. Thread one retaining nut onto both posts. Using a 7 mm wrench or nut driver, tighten the retaining nuts until snug.
Step 3: Mount and secure the right gas spring
Repeat steps 1–2 for the right gas spring.
Have a second person lift and support the Fuse Sift hood. With the hood open, place the left upper panel and gas spring onto the machine. Angle the gas spring so it sits in the slot on the front of the Fuse Sift, allowing the panel to sit flush against the machine.
Thread the 11 flathead screws and three black oxide pan head screws securing the left upper panel to the Fuse Sift frame into their respective screw holes. Use a 2.5 mm hex driver to tighten the screws until snug.
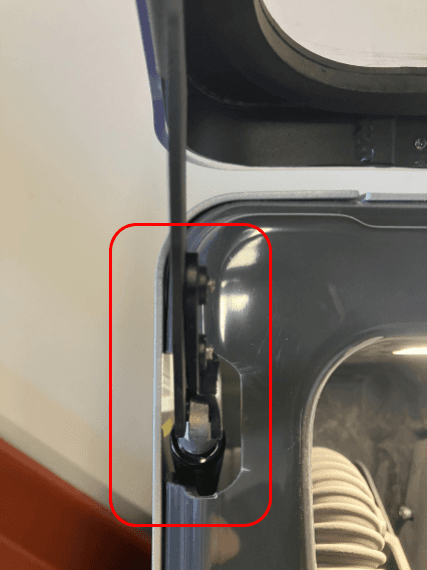
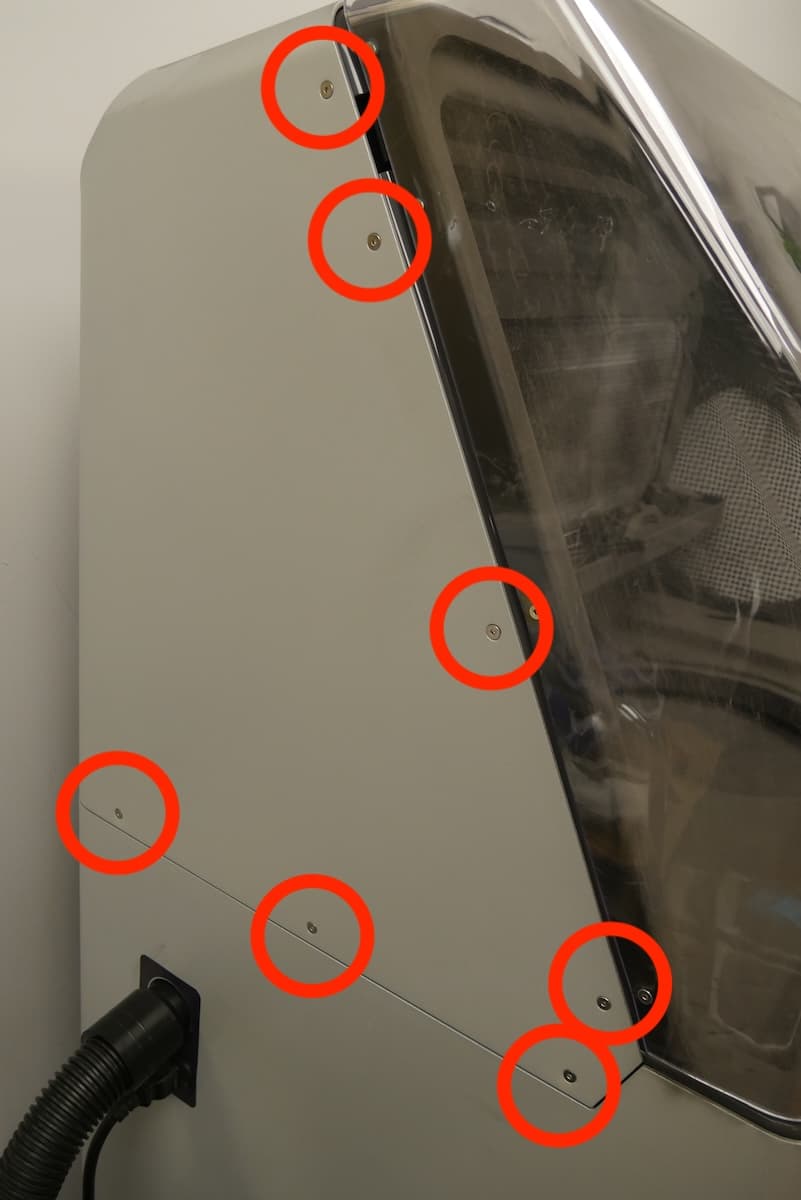
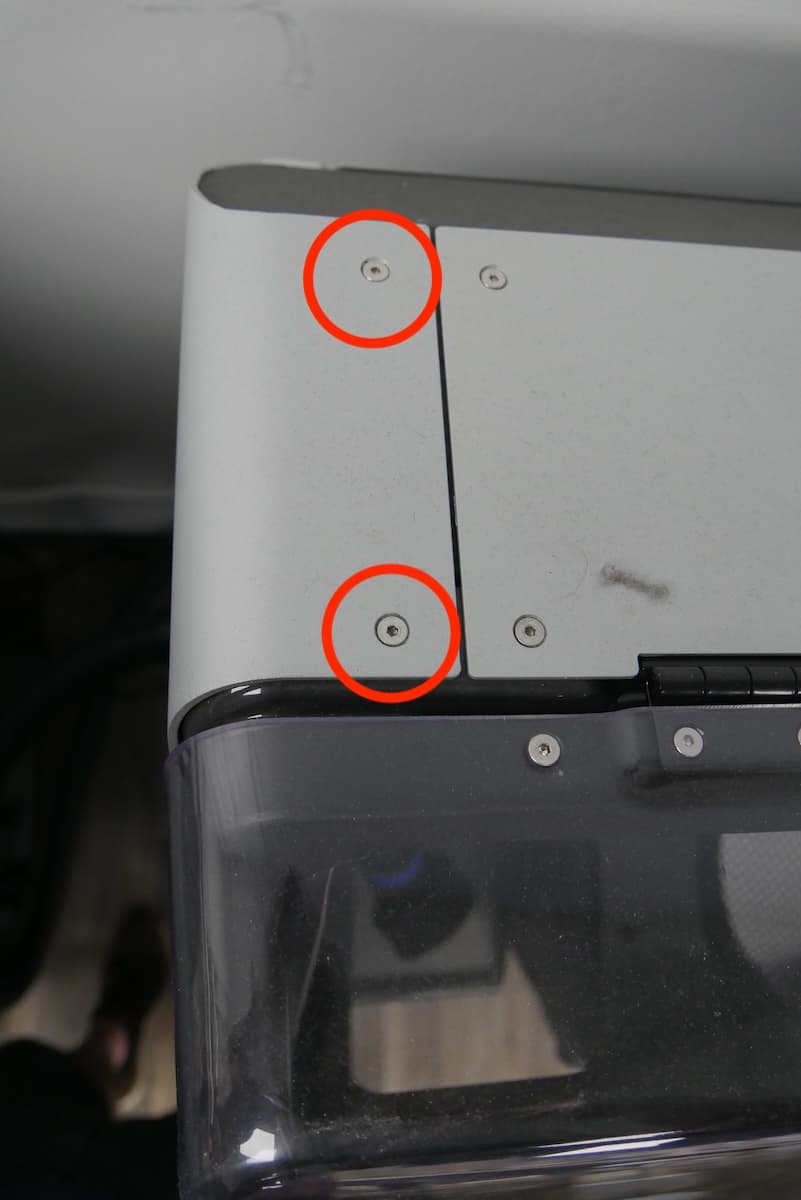
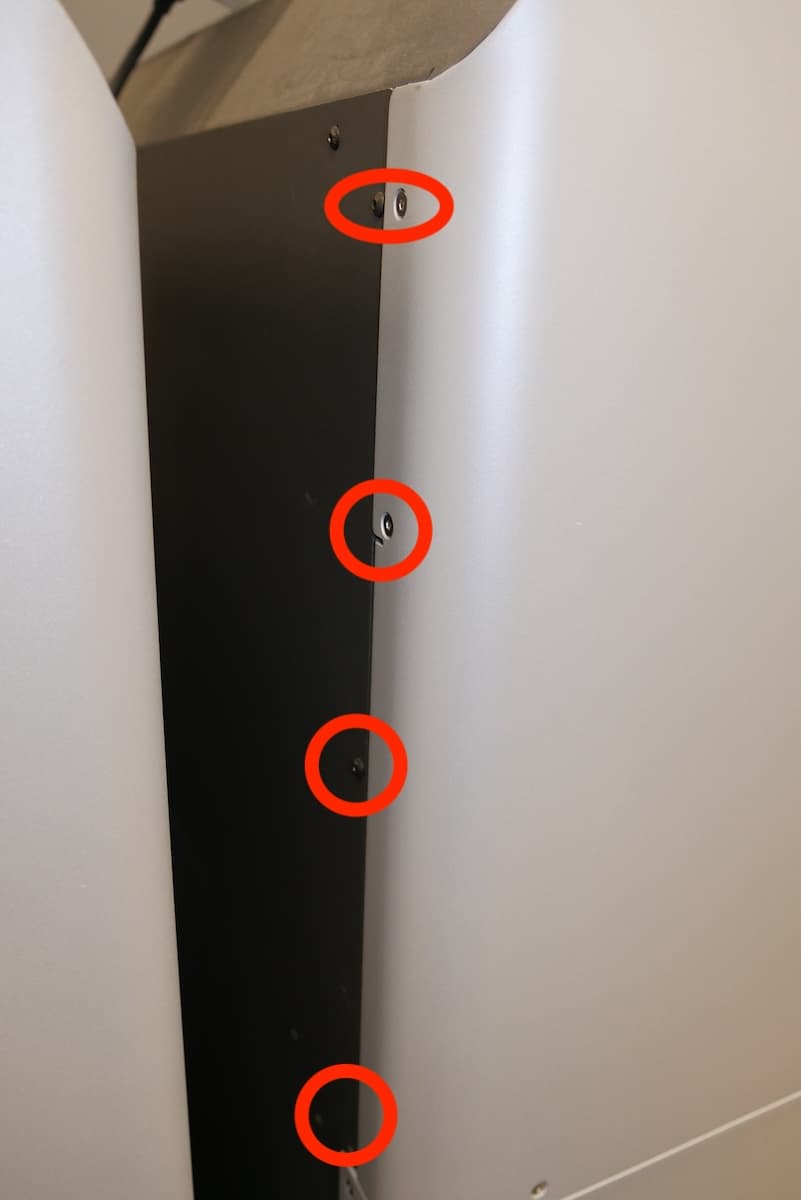
Step 5: Mount and secure the right upper panel
Repeat step 4 for the right upper panel.
Step 6: Secure the gas springs to the fuse sift hood
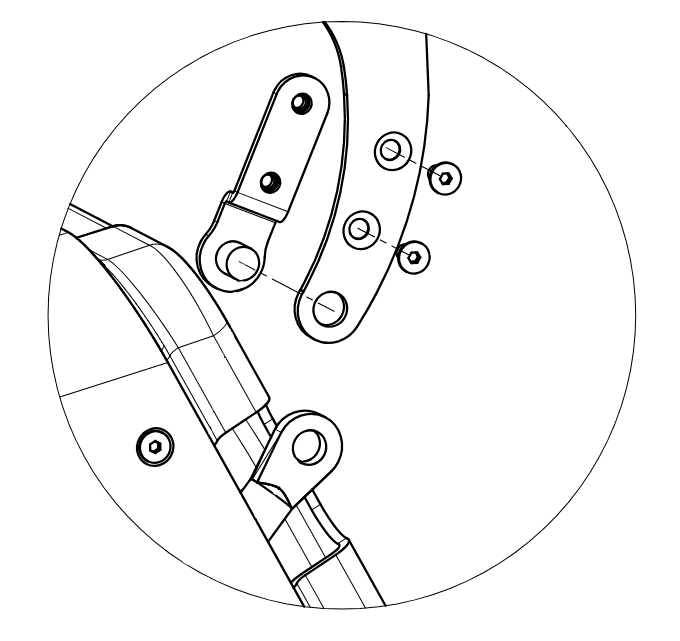
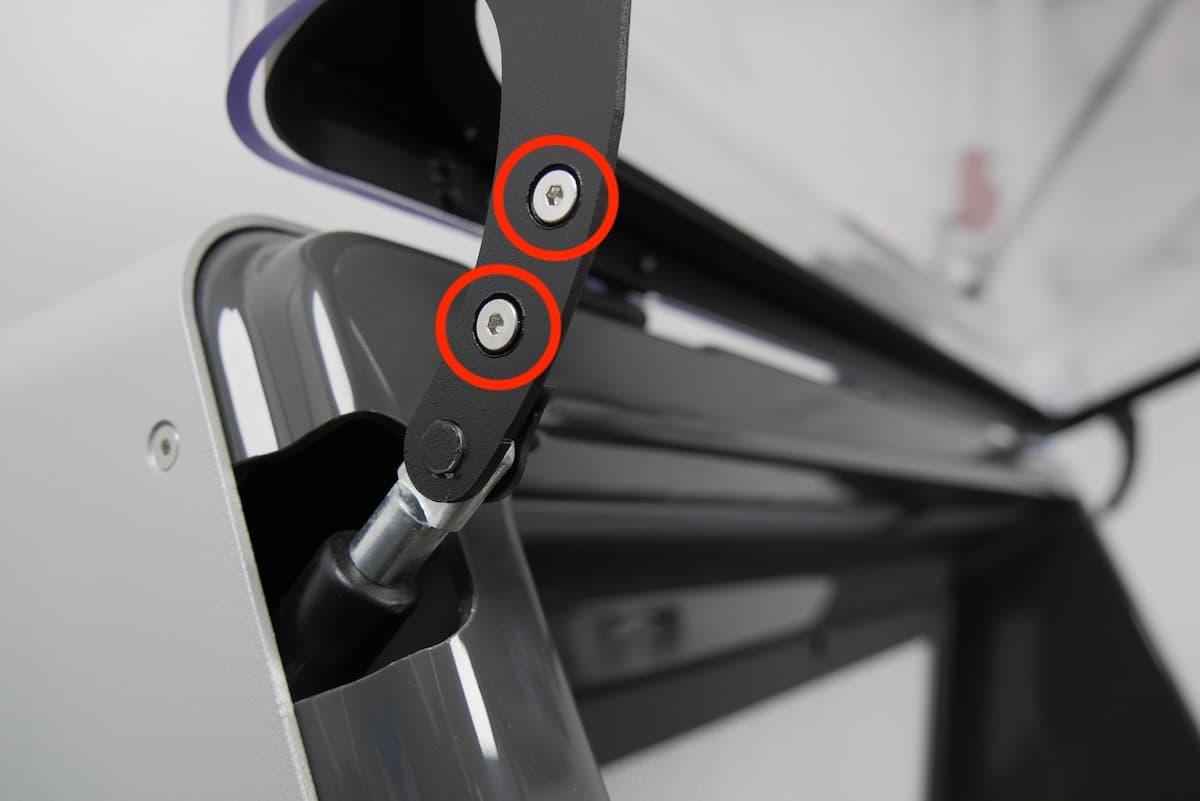
Sandwich the eyelet on the end of the left gas spring between the arm on the Fuse Sift hood and one of the hood brackets, with the pin in the bracket passing through the eyelet hole. Thread a hood bracket retention screw into both of the screw holes in the hood arm. Use a 2.5 mm hex drive to tighten until snug. Repeat for the other side of the hood.
Finalizing the repair
Overview: After installing the new gas springs, check if the hood stays open on its own.
Step 1: Test the hood
Ensure that the hood opens and closes smoothly and that the gas springs function as intended. The hood should be able to remain open without assistance.