WHITE PAPER
Formlabs Logo

Using the Fuse Depowdering Kit

Using the Fuse Depowdering Kit

After completing a print on a Fuse 1 generation printer, the resulting parts are buried in loose, unsintered powder and need to be extracted once the build chamber has cooled. Use the Fuse Depowdering Kit to remove the unsintered powder from your parts and to combine used powder and fresh powder for future printing.

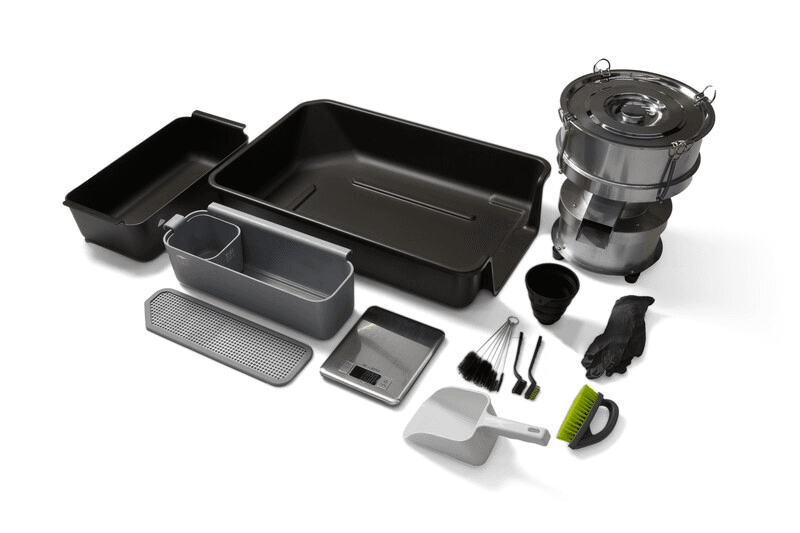
Depowdering kit components

alttext
  • Workspace: A large bin used for creating a semi-contained area to depowder printed parts with a built-in funnel to easily retrieve used powder.
  • Powder tools: A variety of brushes including large brush, nylon brush, brass brush, and pipe cleaner brushes for removing unsintered powder from parts.
  • Nitrile gloves and shoulder length gloves: Personal protective equipment (PPE) for handling powder safely.
  • Scoop: A scoop for placing sintered and fresh powder into a container for reuse.
  • Funnel: A funnel used to transfer the powder into a used powder jug.
  • Bins: An assortment of smaller bins for holding tools, cleaned parts, and the powder sifter output.
  • Grate: A grate for placing inside the part basket that separates loose powder from extracted parts.
  • Weight scale (cordless): A scale for measuring the ratio of used to fresh powder.
  • Powder sifter: A sifter used to aerate unsintered powder for future reuse. A 150 µm sieve is included in the Fuse Depowdering Kit.

Using the Fuse Depowdering Kit

Step 1: Remove parts from the build chamber

  1. Allow the build chamber to fully cool.
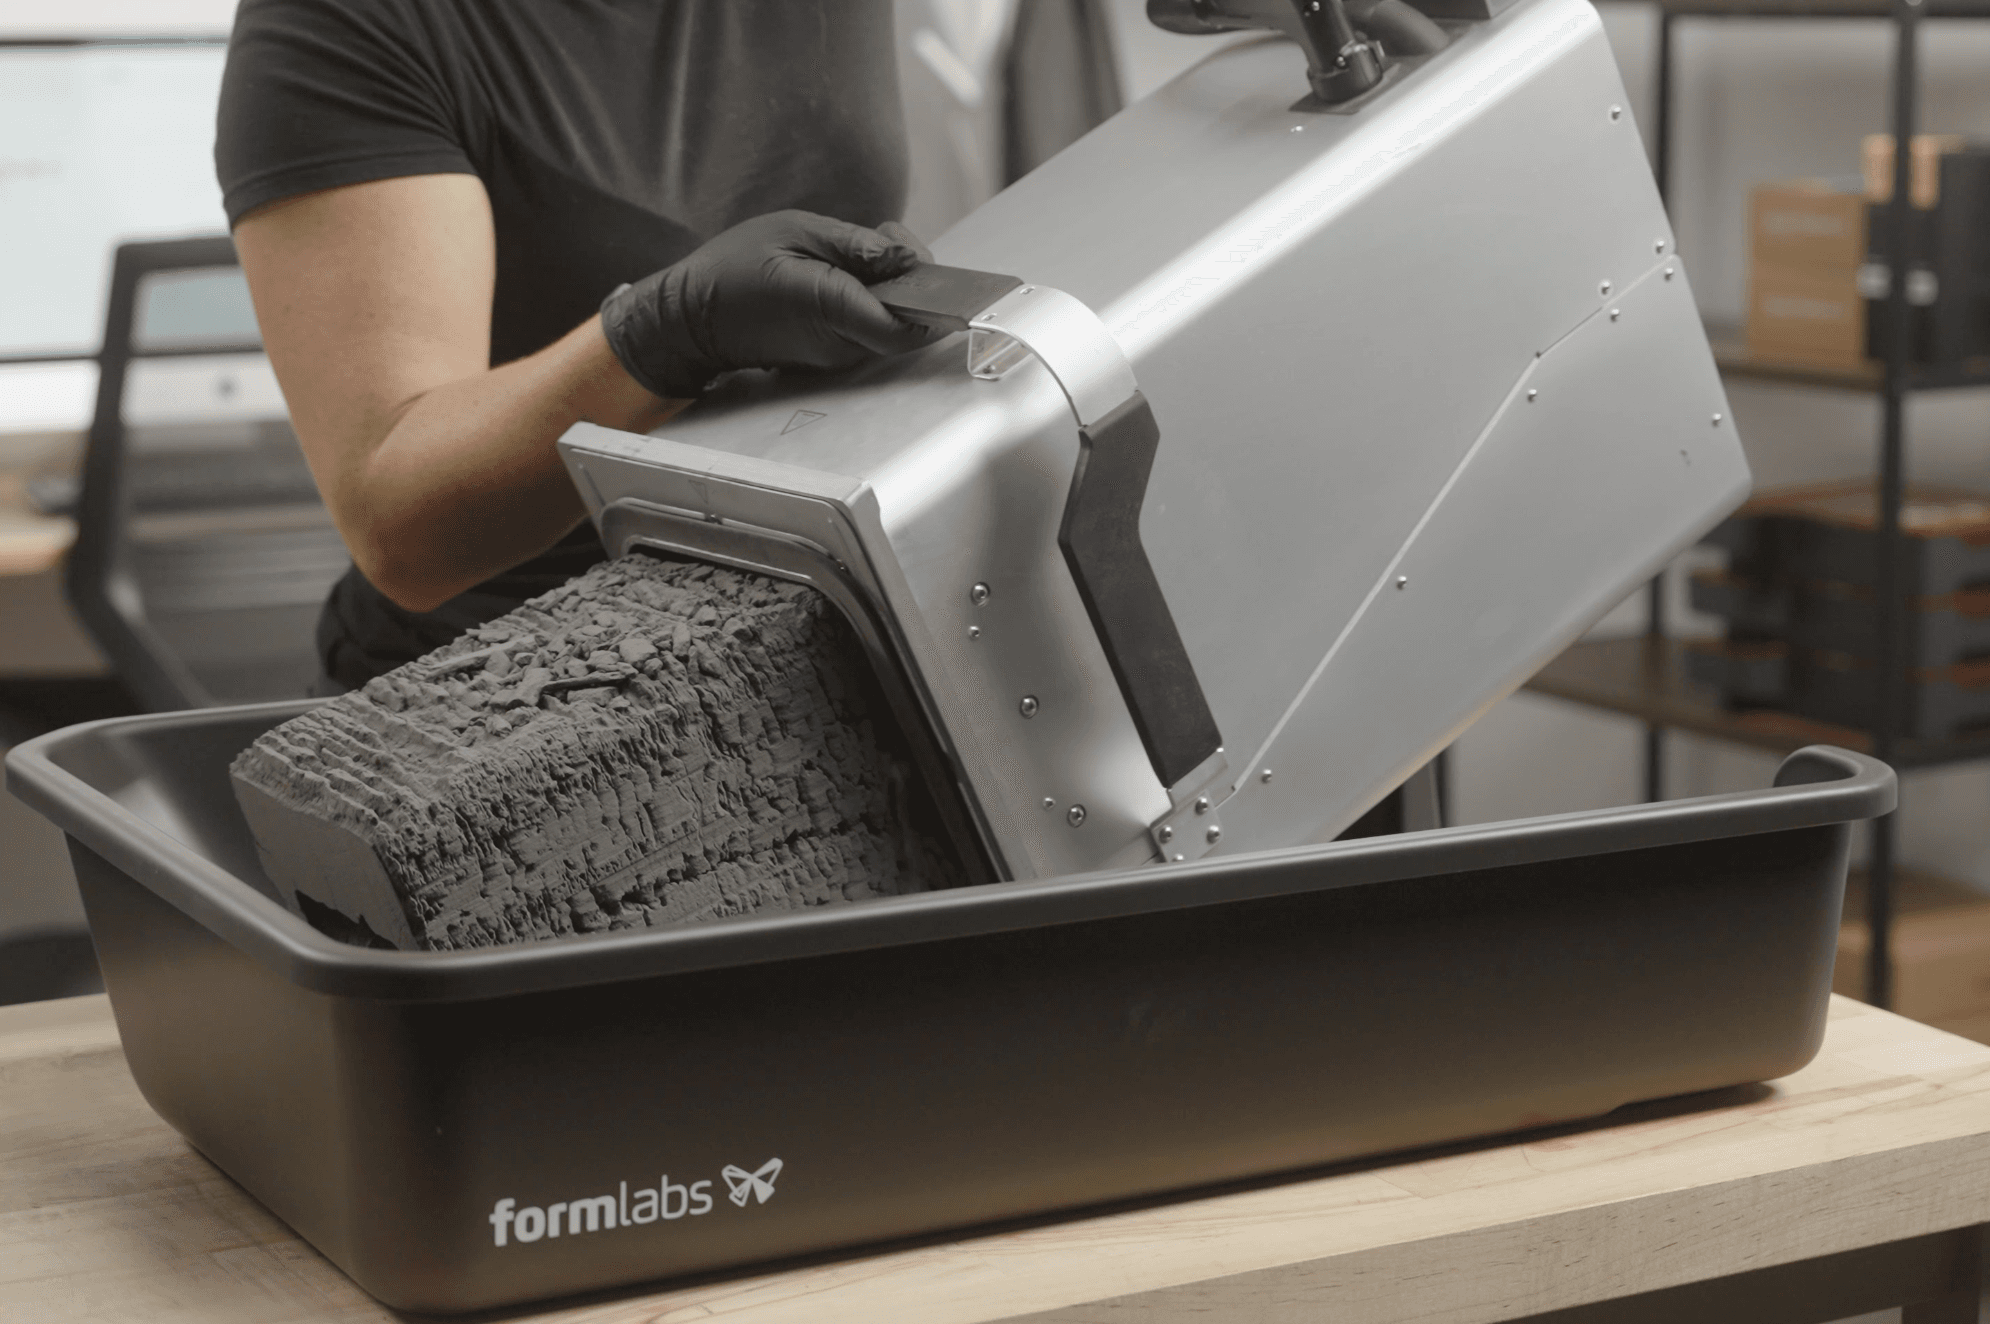
  2. Tip the build chamber onto the lip of the workspace. Some powder may come out.
  3. Lift the build chamber from the bottom. At about 45 degrees, the powder cake slides out into the bin.
alttext
  1. Place the part basket in the tray to block the lip and prevent powder from spilling onto the work table.

Notice:

Always consult the safety data sheet (SDS) as the primary source of information to understand safety and handling of Formlabs powders.

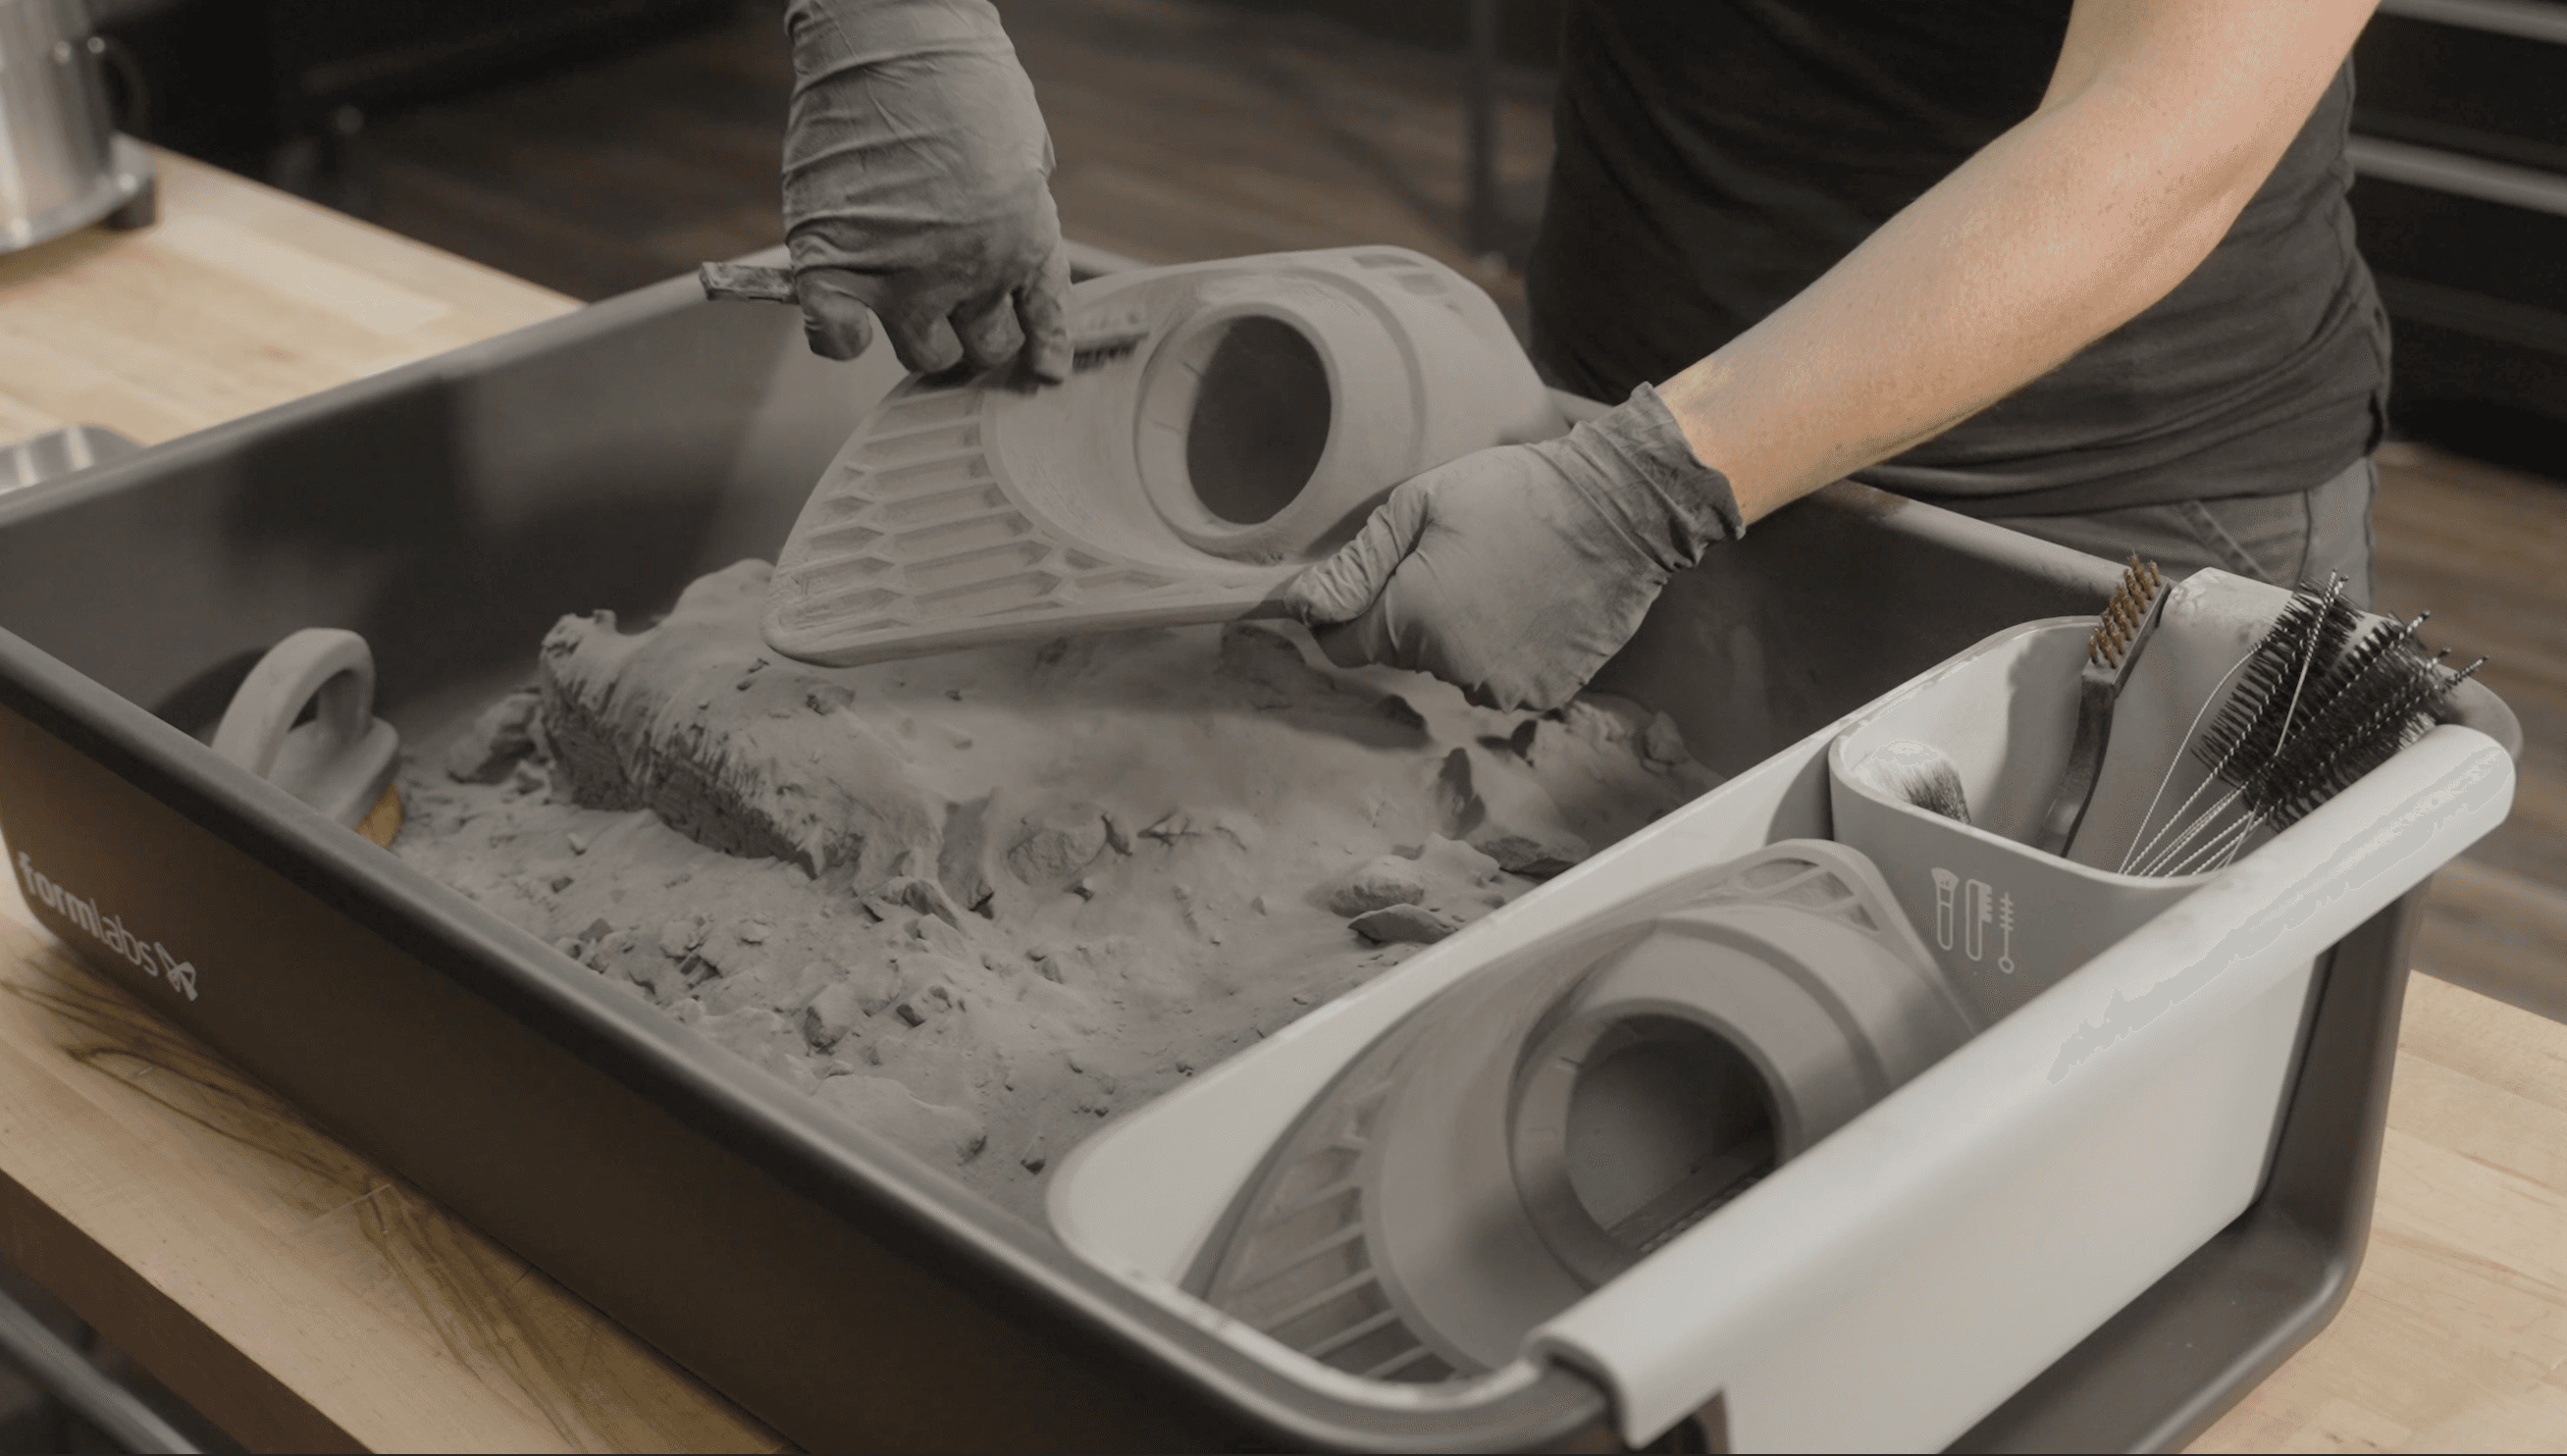
  1. Extract the printed parts from the powder cake. Leave the parts inside the workspace bin while you are processing them.
  2. Clean the parts with the included brushes. Remove any loose unsintered powder from the surfaces of your part using the large brush.
alttext
  1. If you plan to use a media blaster to finish your parts, skip to the next step. Otherwise, use the smaller brushes and picks to remove powder from any details or overhangs.
  2. Place cleaned parts into the part basket.
  3. If needed, media blast cleaned parts. Media blasting is necessary to remove Surface Armor from parts printed with Nylon 12 GF. Formlabs recommends media blasting SLS parts for the best possible finish.

Step 2: Sift the powder

  1. Place the sifter on a clean, leveled workspace. Ensure there is adequate space for the sifter and the powder sifter bin.
  2. Insert the sieve on top of the sifter, leaving weatherstripping in between.
  3. Press the turnbuckles to secure the sieve to the sifter.

Note:

Prolonged use of the sieve can cause the mesh to bind over time. Replace the sieve as needed.

  1. Place the powder sifter bin underneath the sifter spout.
  2. Lift the workspace bin over the sifter. Gently pour the powder from the workspace bin into the sifter using the workspace bin’s integrated spout.
  3. Plug in the sifter and power it on. The time it takes the sifter to sift a full build varies by material.

Step 3: Recover the powder

The refresh rate is the percentage of new, unused powder used for a print. The table below lists the recommended refresh rate for each powder to optimize print success.

Printing in airPrinting in nitrogen
Materialrecommended refresh rategrams of new powder to add to cartridgegrams of used powder to add to cartridgerecommended refresh rategrams of new powder to add to cartridgegrams of used powder to add to cartridge
Nylon 1150%1350135030%8101890
Nylon 11 CFNot recommended30%6301470
Nylon 1230%9002100Not recommended
Nylon 12 GF50–70%1275–17851275–765Not recommended
Nylon 12 Tough20%6002400Not recommended
Nylon 12 White50%1500150030%9002100
TPU 90A20%4201680Not recommended

  1. Place an empty jug on the scale and tare the scale.
  2. Using the scoop, fill the cartridge with used and fresh powder according to your powder’s recommended refresh rate.
  3. Close the cartridge.
  4. Holding the cartridge firmly, shake it horizontally and vertically for 30 seconds in each direction. Note that changing orientation is important for proper mixing. Repeat as needed to use up powder.
  5. Use the funnel to pour excess powder into another closed container such as an empty powder container for later use or disposal.

Cleaning up workspace

Using the same powder type

If you are using the same powder type, you only have to clean the sifter sieve. It is not necessary to clean the other tools in the kit.

To clean the sieve:

  1. Turn the turnbuckles to release the sieve.
  2. Without touching the sieve, use an anti-static vacuum to remove debris, clumps, loose powder, and other obstructions from the sieve.
  3. Place the sieve over a trash can or other receptacle. Use a brush to remove any small particles trapped in the sieve.

Switching powder types

If you are changing powder types, Formlabs recommends buying one Fuse Depowdering Kit per powder. Alternatively, you can clean the tools and replace the sieve.

Safety resources

Notice:

Always consult the safety data sheet (SDS) as the primary source of information to understand safety and handling of Formlabs powders.
Caution:

  • Ensure your work surface is clean, dry, and stable when using these products.
  • Long-sleeved shirts and long pants when handling the product are recommended. Routinely wash work clothing and protective equipment to remove contaminants.

Warranty and replacement parts

The Fuse Depowdering Kit includes a one-year warranty. For complete details, see the full NA warranty terms or EU warranty terms.

Replacement sieves

  • 150 µm sieve
  • 300 µm sieve