
End-Use SLS Parts in Vibrant Colors: Dyeing Nylon 12 White Powder (With Ken Pillonel)
The most successful businesses are always evolving, able to respond to changes in the market and customer demand. That’s true for massive Fortune 500 companies and small businesses just getting started. Ken Pillonel’s small business is about as small as it can get — he’s a ‘one-man plastics factory’ that nevertheless has designed, manufactured, and shipped thousands of products to customers worldwide.
Pillonel has grown an extremely successful business based on his design for an AirPods case that converts Apple’s proprietary Lightning port to the new standard USB-C port, tackling forced obsolescence and extending the lifetime of many people’s favorite technology. He’s been able to do it all himself with the Fuse Series and Nylon 12 Powder, delivering end-use, functional parts that rival injection molding for aesthetics and cost.
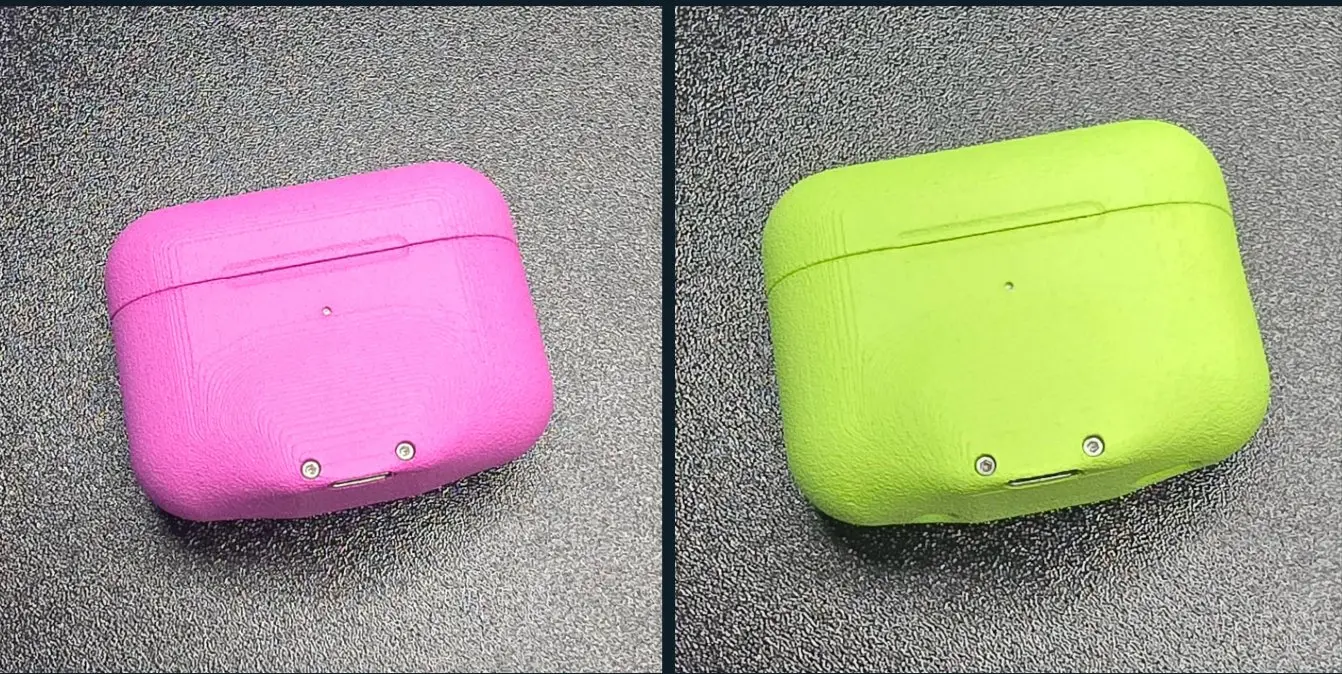
Well, for some people, the aesthetics left something to be desired. Specifically, the color. Pillonel had people commenting on his videos and product website saying that the dark grey color of the Nylon 12 Powder was ‘a bit unsightly,’ while others went even further. But start-up founders don’t become successful by listening to the minority of detractors. “I don’t really see this as criticism. Everyone’s got different tastes. When I see that, it just tells me, maybe there's a way to improve it and get even more people as potential customers from my product,” says Pillonel.
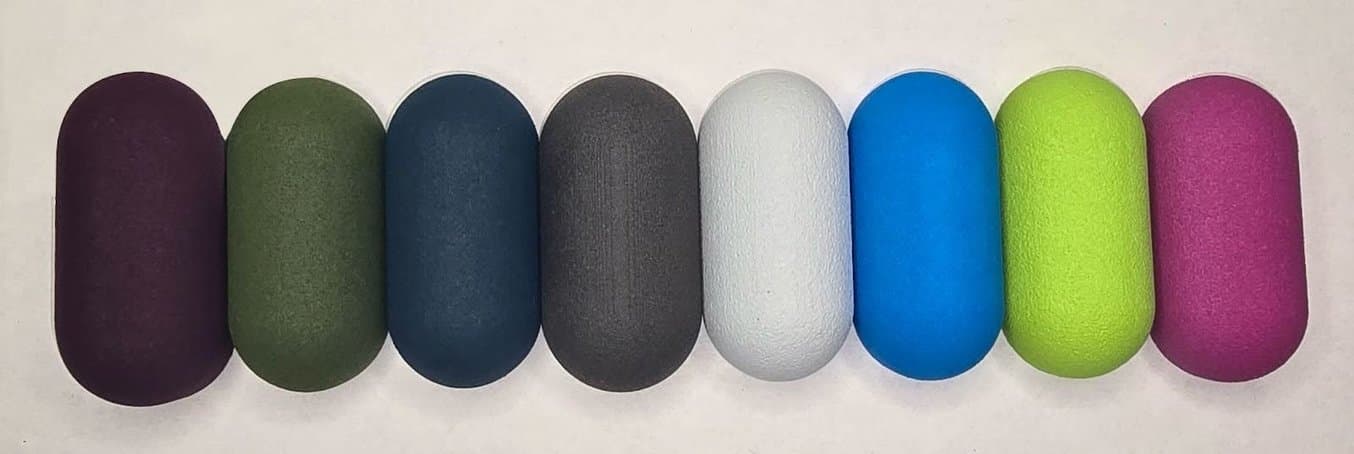
So, what was his solution? A range of vibrantly colored, dyed SLS products. Taking advantage of the Fuse Series’ scalability and the new Nylon 12 White Powder, Pillonel was able to scale up his operation and respond to customer demands.
“I’m doubling down, bought a complete second SLS set-up. The first one works so well, and I promised I will keep reinvesting everything I earn to make stuff of higher and higher quality… I did all this just to be able to print in white.”
Ken Pillonel, Engineer, Founder of Exploring the Simulation
The Benefits of Adding a Second SLS Printer
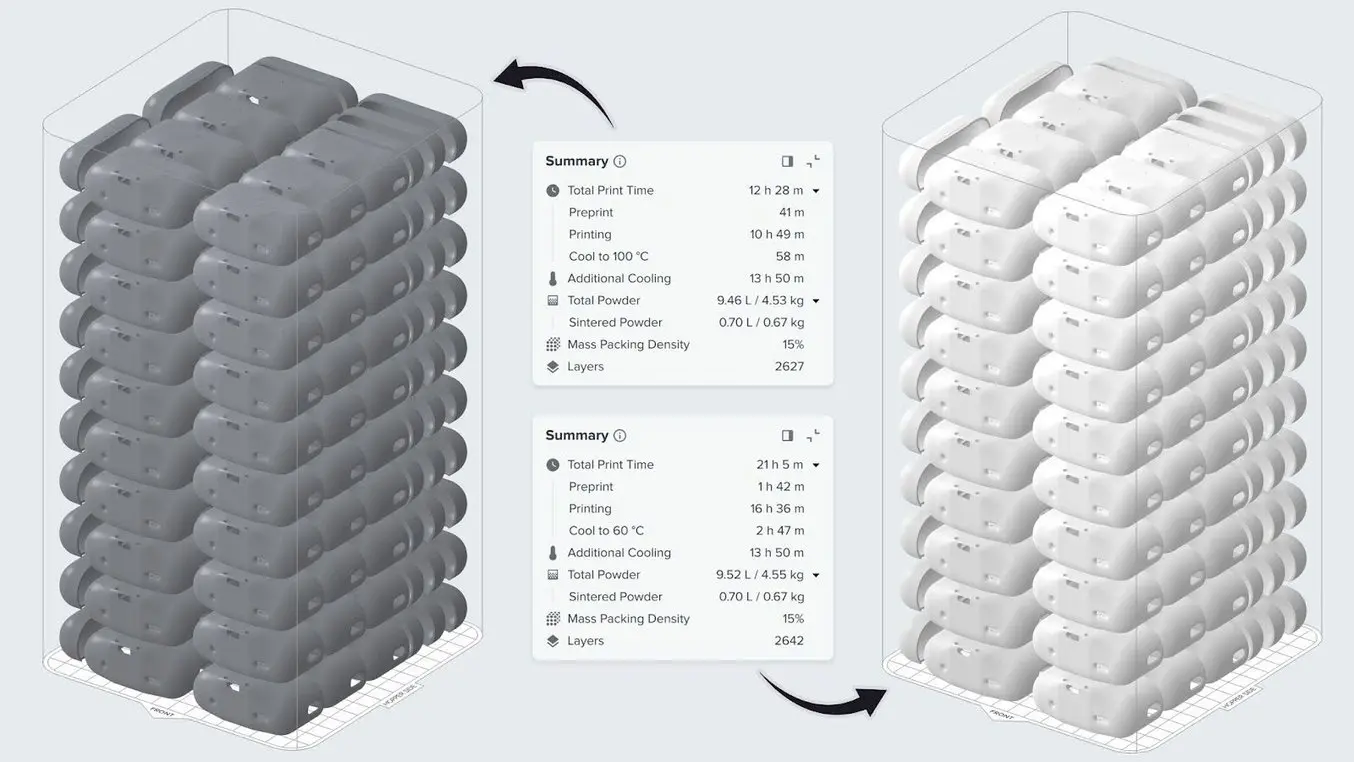
Pillonel knew that to answer the call for colored products, he needed to scale up his operation. His first Fuse 1+ 30W printer, Fuse Sift, and Fuse Blast were running 24/7, but unlike traditional with powder bed fusion technologies, duplicating a Fuse Series ecosystem is possible, even for a small shop like his. A second SLS ecosystem would provide:
-
Multiple Materials (easily): Pillonel needed white, colorable material, at the same time as keeping his dark grey main product in steady production. Though it is possible to swap materials on the Fuse Series ecosystem, the process can take several hours of deep cleaning, and when switching between a dark grey nylon and a white, there is some risk of smudging.
-
“The printer I have right now, with the dark gray powder, is my main source of income. I rely on it. It's for production. It needs to be stable. So if I add more capabilities, it needs to complement, and not replace.”
-
-
Redundancy: With one printer, any issue or production stoppage immediately has an effect on revenue. For a small business, disruptions in the supply chain can wreak havoc.
-
“How can I avoid having problems and blocking my whole chain of production? Here I call it partial redundancy because the second printer prints in another powder. But if one of them goes down (thankfully, it's never happened before), I could still funnel people to get the white powder.”
-
-
Speed: When design, manufacturing, and customer service are all one person, speed matters.
-
“Let's say that you offer parts in both colors, then maybe 600 people get the dark gray version and 400 people get the white version. And then, actually, you can spread the load on those two printers, print at the same time, and fulfill those orders faster.”
-
As Pillonel put it, ‘doubling down’ on the Fuse Series can safeguard your entire manufacturing process, while increasing agility and introducing variation into your product catalog.
The Dyeing Journey: Achieving Vibrant SLS Parts
To learn more about the dyeing process, watch Pillonel's free educational webinar about his workflow and journey to find the perfect workflow.
There isn’t a bounty of information about coloring SLS 3D printed parts out there. Stereolithography (SLA) resins and fused deposition modeling (FDM) filaments are available in every color under the sun, but the more mechanically functional, end-use SLS powders are only offered in grey and white.
SLS 3D printing for end-use production is rapidly gaining traction as founders like Pillonel, ZapWizard, S-Mute, and manufacturers like Brose and Eaton are demonstrating its numerous advantages. There are some pre-fabricated solutions for coloring these end-use parts, but they’re designed for large-scale, high-investment operations. Pillonel scoured the available resources for accessible dyeing recommendations, but wound up making his own solution.
“The goal is to have something that's low cost, repeatable, and that works for small batches. That we can repeat over time, and that's quite reliable. There are machines out there that do this on a larger scale, but they can cost just as much as the whole Fuse set-up I have, so I didn’t want to go in that direction.”
Ken Pillonel, Engineer, Founder of Exploring the Simulation
Dyeing Set-Up V.1: Perfect Color
After trying out the popular workflow with RIT fabric dyes, Pillonel wasn’t happy with his results. He turned to the French company Techniques Chimiques Nouvelles and immediately saw a difference. “As soon as I tried them, I got the perfect result….I didn’t look back,” he says.
To get that perfect result consistently, Pillonel found that he had to keep an eye on two factors: heat and agitation. Heating the solution to 80 degrees, continuously mixing the solution, and making sure the part is consistently exposed (i.e., not lying flat on a metal dipping cage) were paramount to getting a successful result.
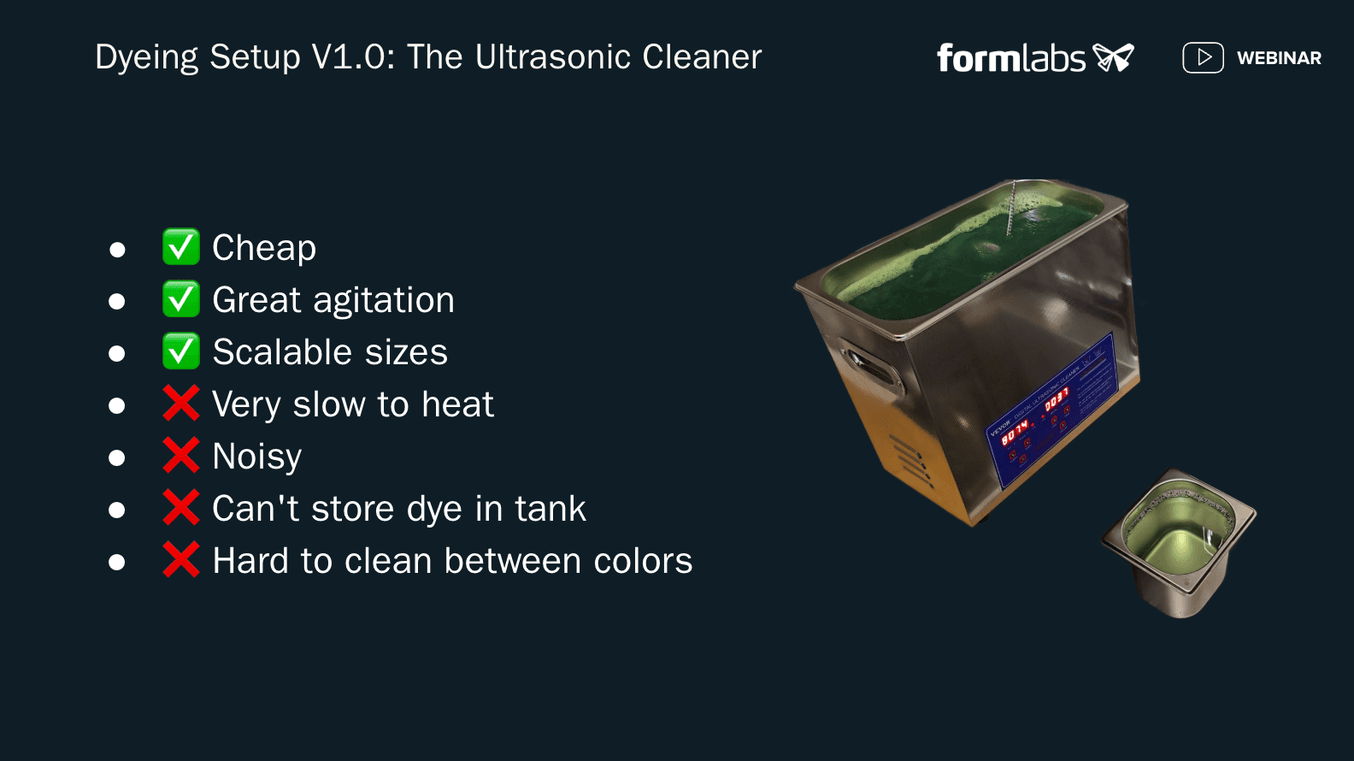
Pillonel’s first version was to purchase this ultrasonic cleaner, available on Amazon. The advantages of this are that it’s inexpensive and extremely straightforward. To use this type of dyeing solution, you mix your dye into the water in the cleaner, heat, agitate, and then dip your part in for a short time (this should be tested and determined for color depth previously).
Pillonel was able to achieve a great color solution quickly and easily. “This scales up in size really well. These cheap ultrasonic cleaners go from 1 L to 30 L, or even more. So if you’ve got big parts or you want to do big batches at once, that’s a great solution.”
The color gets darker the longer you leave the parts in the ultrasonic cleaner, so Pillonel was able to get multiple shades of colors by adjusting the soak time. “You can get great results this way. No spots or anything, it was great,” he says.
Despite the ease, Pillonel found a few drawbacks to this solution, and it led him to continue tweaking the workflow.
Dyeing Set-Up V.2: Faster, No Cleaning
Being a one-man plastics factory requires speed, and the first set-up was too slow to heat for Pillonel’s production schedule. Typically, these ultrasonic cleaners have a max temperature of 80 °C, and they can struggle to reach it. If you add the lid and turn on the ultrasonic function, it can speed up, but this can be quite noisy. Another drawback is that you cannot leave the dye solution in the cleaner, requiring you to spend extra time to remove and clean it each time with isopropyl alcohol.
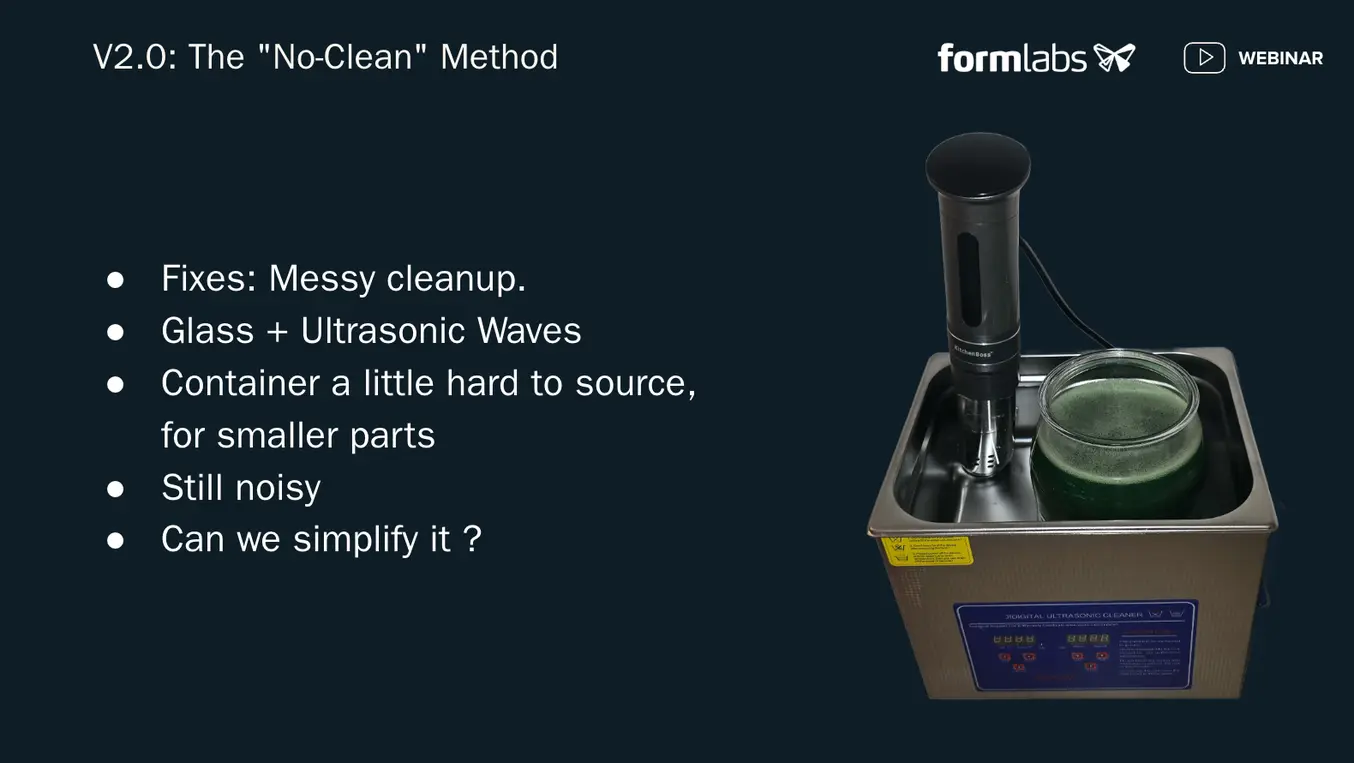
His first fix was for the heating process. He tried using a sous vide cooker to heat up the liquid quickly — they’re designed to bring up the temperature of liquid quickly and precisely, and can be left in the ultrasonic cleaner. Right away, it worked perfectly.
Next, he had to address the cleaning issue, and this time, with an ingenious hack. Ultrasonic waves can pass through water, but they can also pass through glass — they can agitate the solution inside a glass container. Pillonel filled up his ultrasonic cleaner with water, and then filled a glass container with the dyeing solution, put it in the water, and dyed the parts. When he was done with one color, he removed the glass container with one dye and replaced it with another. No mess, no cleaning, just a simple swap in and out.
Dyeing Set-Up V.3: No Noise

The glass container, no-mess solution, worked so well, Pillonel decided to stay on that thread and iterate from there. The ultrasonic cleaner was too noisy, but there were other ways of agitating the liquid inside the glass container. Pillonel called back to chemistry class to find a unique solution.
Hot plates have a magnet attached to a motor — Pillonell dropped a magnet inside the glass container, placed the container on top of the hot plate, and let the rotating magnetic forces to the agitation. “That's great because we get great heating. Usually, the hot plates are really powerful. It stirs really well. And most importantly, it's super quiet,” says Pillonel.
One note of difficulty may be sourcing the appropriate glass containers — they need wide mouths, can be resealed, and have very flat bottoms. For a popular solution from IKEA, the issue of a slightly curved bottom can be mitigated by placing the container in a metal pot for conduction on top of the hot plate. Though this solution may not work perfectly for very large parts, for small consumer goods like Pillonel’s AirPods cases, it’s been engineered to perfection.
Other Tips and Tricks for Dyeing SLS Parts
In Pillonel's guide to dyeing SLS 3D printed parts, he shared several tips and tricks to achieve the best, most saturated color for both Nylon 12 White Powder and regular dark grey Nylon 12 Powder.
-
Control contact and oil from handling the parts by always using gloves.
-
Control humidity to avoid slight water absorption by the SLS parts, which can have a slight effect on the dye penetration.
-
Rinse your parts as soon as possible once they’re taken out of the dyeing solution inside the glass container. This avoids any spots with extra dye turning a slightly darker color.
-
Dry your parts well. Pillonel uses a food dehydrator at 70 °C.
-
Stay consistent. Record your process!
-
Dye your first part with a recorded soak time. Seal this part in a plastic bag — this is your Golden Sample, from which you’ll measure your subsequent dye jobs.
-
Dye 5-10 parts at a time, and check back on your Golden Sample between rounds to ensure your dye remains the same strength.
-
Record when the dye strength starts to fade, and then lower that number a little for safety, then use that going forward as your reminder to change your dyeing solution.
-
Dyeing Your SLS 3D Printed Parts

As Pillonel demonstrates through his manufacturing process, with a manufacturing solution like the Fuse Series, you can go from idea to end-use product quickly, affordably, and completely independently. With Nylon 12 White Powder, taking those end-use products and coloring them to be even more consumer-friendly can be easy and affordable. A one-person manufacturing (and now dyeing) operation is now possible.
To learn more about the Fuse Series, contact our team. To request a sample of Nylon 12 White Powder and dye it yourself, visit our samples page.