
We built Form Wash and Form Cure to remove some of the hassle involved in traditional stereolithography (SLA), ultimately making your daily 3D printing experiences more reliable, repeatable, and enjoyable.
In this post, we’ll dig into some of your questions about using each unit, covering both the minutiae of the day-to-day operation of Form Wash and Form Cure and how to effectively integrate them into your regular 3D printing workflow. Before these products ship this fall, we’ll post extensive recommendations and information on our Help Center website as well.
Built to Integrate with the SLA Process
The Form 2, Form Wash, and Form Cure are designed to function together as a streamlined workflow. Any parts printed on the Form 2 fit in Form Wash and Form Cure. Parts can remain on the build platform with Form Wash and Form Cure emits light with the same wavelength (405 nm) as the laser used in the Form 2, providing post-curing perfectly suited for Formlabs resins.
Scroll down to the Form Cure section of this article for notes on our current post-curing recommendations.
The footprint of each machine is designed to be minimal. The external dimensions of Form Wash and Form Cure are almost identical, though the top lid on Form Wash adds several centimeters on the front and back of the machine. Both machines require 30 cm clear space directly above to allow Form Wash’s outer lid and Form Cure’s cover to fully open.
Dimensions
Form Wash
W x D x H: 10.3 in x 11.5 in x 13.4 in (26.2 cm x 29.3 cm x 34.0 cm)
Weight: 14.5 lbs (6.7 kg)
Form Cure
W x D x H: 10.3 in x 10.3 in x 13.4 in (26.2 cm x 26.2 cm x 34.0 cm)
Weight: 11.5 lbs (5.2 kg)

Though Form Wash and Form Cure automate much of post-processing, there are additional steps to consider, some of which are manual:
Adjusting Time and Temperature Settings
Time and temperature settings are user-adjustable. Finalized recommendations for both wash time and post-curing time and temperatures are under development and will be posted prior to units shipping in September 2017. While our recommendations help in most situations, we understand that users may wish to develop their own optimized settings for specific use cases. This also means that the system may be compatible with non-Formlabs resins that require post-cure or similar finishing processes.
Removing Parts from the Build Platform
Parts can be removed using the included scraper, removal tool, or flush cutters before or after using Form Wash. If removed before, parts can be washed in the wash basket during the cleaning process. Otherwise, parts can remain on the build platform in Form Wash and be removed afterwards.
The major benefit to washing parts on the build platform is a cleaner part removal experience; parts are clean before you handle them and removal tools don’t get sticky with resin.
Drying Parts
Parts should air dry after washing to let the isopropyl alcohol (IPA) evaporate before post-curing or end use. Parts can be left on the build platform or in Form Wash’s basket to dry, as parts are raised out of the IPA in the end state of the wash cycle. Form Wash has a double lid system so that while the outer lid is open as the parts are raised, the inner lid contains the IPA.
Removing Supports
Biocompatible materials must be post-cured with supports intact in order to meet biocompatibility certification. For all other resins, supports can be removed before or after post-curing.
Generally, we recommend removing supports after post-curing, as supports can be helpful for keeping parts elevated in the machine and can help counter any warping that can occur on very thin parts. However, if supports are dense enough to block light from reaching the printed parts’ surfaces, it is best to remove them. If you’re curing multiple parts, removing the supports may also help you fit more prints into the machine.
Firmware Updates
Form Wash and Form Cure are both capable of receiving firmware updates via USB. We’re excited to continue to improve the workflow and user experience for all units that ship.
Cleaning Prints with Form Wash
The basic Form 2 Finish Kit, included with the Form 2, requires users to manually agitate parts in IPA and manually move parts between a primary wash bucket and a secondary wash bucket. Parts that are forgotten or left too long in IPA can become warped. Form Wash automates this process.
The Finish Kit’s two-bucket system contains a smaller total volume of IPA than Form Wash; without Form Wash, the double wash approach is necessary since the first bucket becomes saturated and requires fresh IPA to maintain an effective wash.
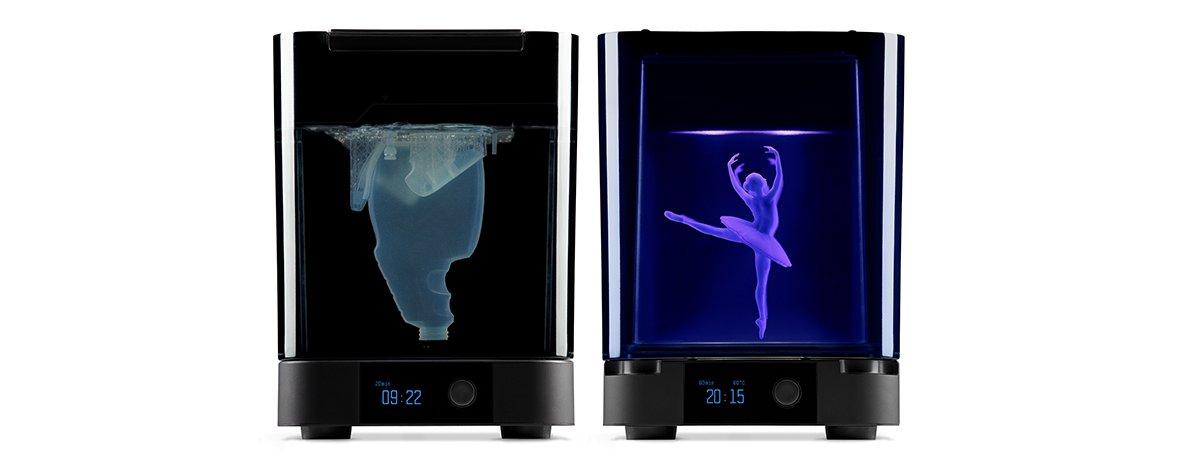
How Does Form Wash Work?
Parts can be placed directly into Form Wash while they’re still attached to the build platform, or removed and placed in the basket included with every unit. The basket and platform lower into the wash bucket, which is filled with IPA.
Removing parts is a nice option if you want to start your next print right away and only have one build platform. The basket option also helps to facilitate processing a lot of parts; while you can only wash one build platform at a time, you can wash multiple build platforms worth of parts at once using the basket.
Form Wash uses an impeller to agitate IPA to flow around parts. The impeller is magnetically coupled through the bottom of the wash bucket, so IPA never touches the electronics. Additionally, all motors are brushless to ensure that they cannot spark.
Once washing is complete, Form Wash raises the basket and platform out of the IPA where parts can be left to dry, dripping IPA directly back into the wash unit. Parts can also be removed to dry elsewhere.

IPA Considerations
IPA can be easily transferred into and out of Form Wash using the included siphon pump. While the IPA is well contained by the inner lid, IPA can deplete between uses. Keep the wash bucket topped up to the fill line with fresh IPA. After calibrating the included hydrometer, use it to check IPA saturation between cleaning cycles, and replace IPA as it becomes saturated and less effective. Based on aggregated data of typical prints, we estimate that IPA should be changed out after washing approximately 70 prints.
Form Wash’s size accounts for handling well over 1 L (one cartridge) worth of printed parts, with no risk of overflow as the parts are lowered into the IPA. You need only consider displacement if washing more than 1 L-worth of parts at one time, or in the extreme case that a large part has a large enclosed hollow volume.
Form Wash is designed to use IPA and the product will be certified by a national testing lab for safety. Learn more about buying, handling, safe storage, and disposal of IPA.
Using Multiple Wash Buckets
Similar to the basic Form 2 Finish Kit, Formlabs also recommends separate buckets to avoid cross-contamination and for conveniently washing parts with different resin types. For example, you may choose to wash White and Clear Resins separately from Black or Castable Resins to avoid discoloration of the lighter resins.
It is important to note that we recommend keeping a dedicated Form Wash unit for any biocompatible resins to ensure that there is no cross-contamination with other resins that are not biocompatible-certified. We also recommend separating Class I and Class II materials to ensure compatibility is maintained.
Additional wash buckets will be available for purchase at a later date. Each spare bucket will come with a separate inner lid and built-in impeller and can be easily swapped in and out.
Post-Curing Prints with Form Cure
Form Cure is the first post-curing solution provided by Formlabs. Form Cure was developed to provide a professional, effective, and repeatable post-curing process for our materials and is compatible with all Formlabs resins.
How Does Form Cure Work?
Form Cure combines temperature and light for optimal post-curing. A heating system precisely controls the temperature in the cure chamber up to 80 °C. Temperature is manually set according to a material’s recommended settings, which will be available online.
Form Cure’s chamber is insulated with a double wall. The outer wall will be warm in places, but remains safe and comfortable to touch, even when the inside is set to the maximum possible temperature of 80 °C.
Once the chamber has reached the set temperature, 13 LEDs emit 405 nm light, the optimal wavelength for curing Formlabs materials. The LEDs illuminate the chamber from above, from below, and from both sides. A reflective interior and rotating turntable ensure that parts get even coverage. The heater circulates air to make sure the heat reaches all parts of a print.
Learn more about the science of post-curing and alternative methods.

Setting Recommendations Before and After Form Cure
We’ve performed extensive testing to understand what conditions (light intensities, light wavelengths, temperatures, durations) are effective for post-curing parts, and designed Form Cure to provide conditions that effectively cure our entire suite of resins.
Download our post-curing guide to learn more about how post-curing affects each Formlabs resin, and visit our support site to see up-to-date settings recommendations.
Previously, we recommended nail salons for post-curing because they were affordable and readily available. A lot of these products use 365 nm light, and we developed our previous post-cure settings to produce effective results accordingly. Nail salons work fairly well because they inadvertently heat up the parts.
Through our post-curing study, we learned that 405 nm light was superior to 365 nm light. This makes sense, as 405 nm is the wavelength of the laser used in Formlabs printers. Form Cure uses a combination of active heating and 405 nm light to produce the best results.
We’ll update our specific time and temperature setting recommendations for each material later this summer.
At an appropriate post-cure temperature, desirable mechanical properties tend to plateau or somewhat negligibly continue to increase. The most common downside to additional curing is that while it may improve a desirable property like tensile strength, parts may also become more brittle, and discoloration can occur. We’ve developed our recommended settings to find the optimal upper temperature and length of time to get close to maximum desirable properties. We will provide graphs that show how properties vary over time and where our recommendation falls, so you can decide for yourself if you wish to post-cure for longer.
Available Across the Globe in Fall 2017
We’re proud to provide our customers with options for professional, streamlined post-processing, facilitating a reliable end-to-end 3D printing experience.
Stay tuned for updated data and recommendations later this summer. Form Wash and Form Cure will ship this fall, but you can pre-order both units now to be amongst the first to add automated part washing and precise post-curing to your workflow.