WHITEPAPER
Formlabs Logo

Unboxing and setting up the Fuse 1+ 30W

Unboxing and setting up the Fuse 1+ 30W

Prior to unboxing and installing the printer, prepare a suitable workspace for the Fuse 1+ and Fuse Sift, ensure you have sufficient space to store consumables, and purchase additional supplies so you are ready to process powder when your Fuse 1+ arrives.

Follow Formlabs instructions to unbox, connect cables, level the printer and turn on your Fuse 1+. Connect the machine to a network to print remotely, manage your printer, and receive notifications about print events.

Lieferung

The standard Fuse 1+ package ships on a pallet and contains the Fuse 1+ printer, stand, build chamber, and powder cartridge. Additional powder cartridges and accessory boxes ship separately from the printer's packaging.

Note:

  • Depending on the package you purchase, the accessories may ship together on a pallet. If you are in a building with palletized deliveries, ensure you have access to the loading dock.
  • As of June 2025, Fuse 1 generation printers are packaged with the build chamber installed but unplugged within the print enclosure.
 PrinterStandBuild chamber (if shipped separately)Powder cartridge
Shipping dimensions77 × 83 × 150 cm
30 × 33 × 59 in
63.5 × 66 × 22.9 cm
25 × 26 × 9 in
41 × 48 × 64 cm
16 × 19 × 25 in
41 × 21 × 27 cm
16 × 8 × 11 in
Shipping weightPrinter without build chamber:
120 kg
264.6 lb

Printer with build chamber:
131 kg
288.8 lb
24 kg
53 lb
13.5 kg
29.7 lb
2.3 kg
5 lb
Product weightPrinter without build chamber:
114 kg
251.3 lb

Printer with build chamber:
125 kg
275.6 kg
23.9 kg
52.6 lb
11 kg
24.3 lb
1.8 kg
4 lb

Auspacken

The custom packaging the printer arrives in is specially designed to protect the machine during shipping. During unboxing, inspect the product for any damage or missing items. In the case of damage or missing items, contact Formlabs Support or a certified service provider.

Vorsicht:

Um das Gerät aus seiner Verpackung zu entnehmen, benötigt man mindestens zwei Personen, die große und schwere Objekte heben können.

Schritt 1: Positionierung der Verpackung

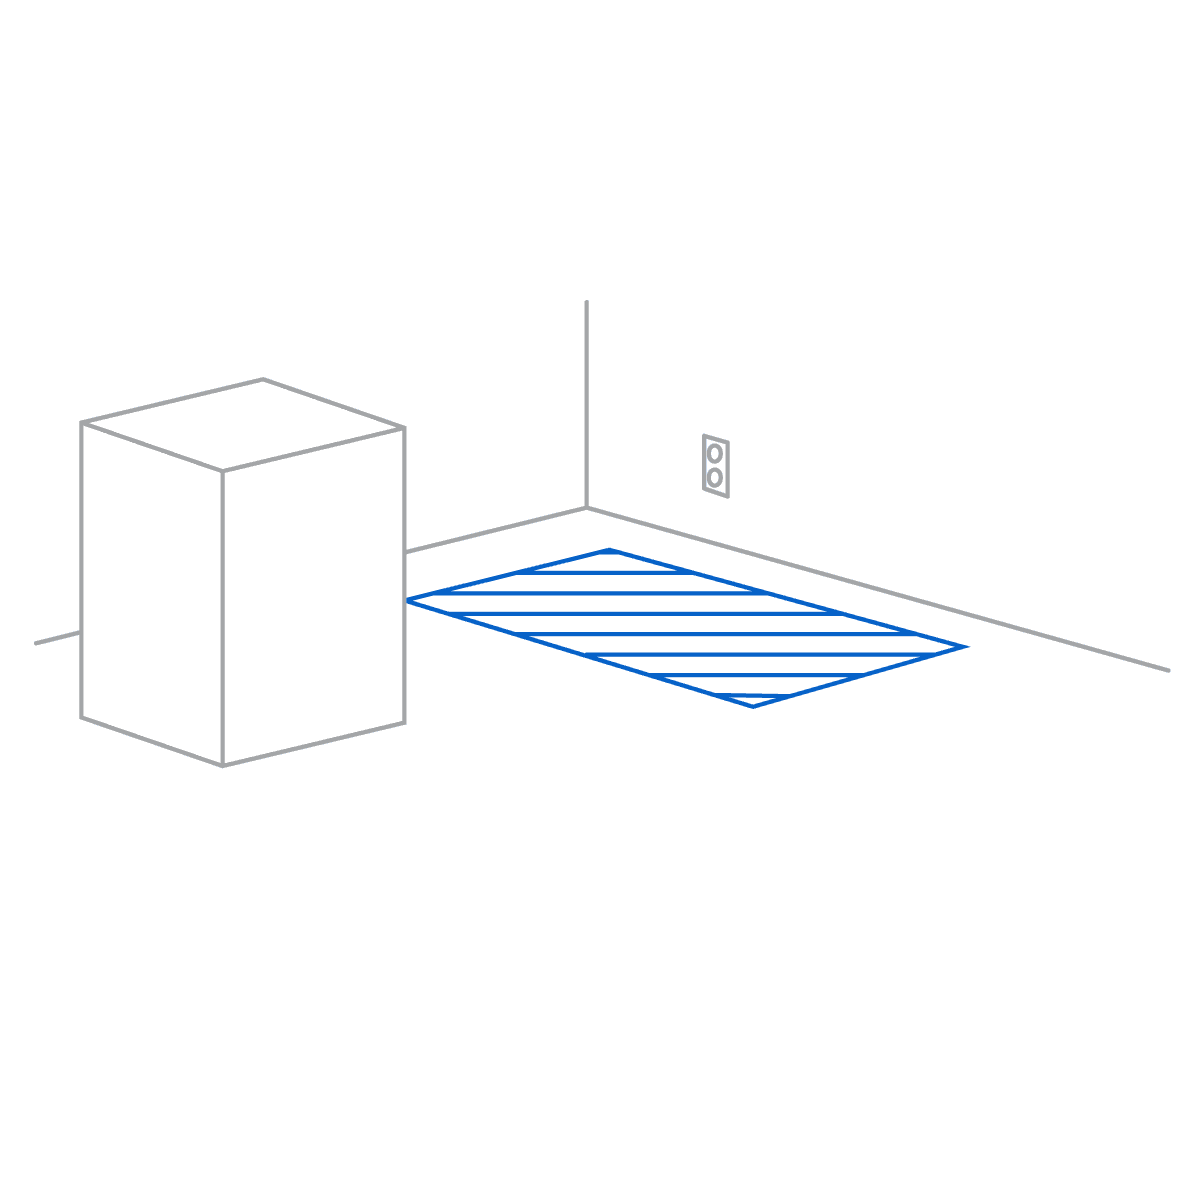
Platzieren Sie die Verpackung nahe des Bestimmungsorts mit genug Platz, damit sich zwei Personen ungehindert bewegen können. Sorgen Sie für einen aufrechten Stand der Verpackung, damit alles eben ist.

Die Verpackung des Druckers befindet sich in der Nähe des vorgesehenen Standorts.

Schritt 2: Montage und Positionierung des Ständers

Suchen Sie den Karton des Ständers und bauen Sie den Ständer gemäß der beiliegenden Anleitung auf. Stellen Sie sicher, dass der Ständer eben steht, bevor Sie den Drucker auspacken.

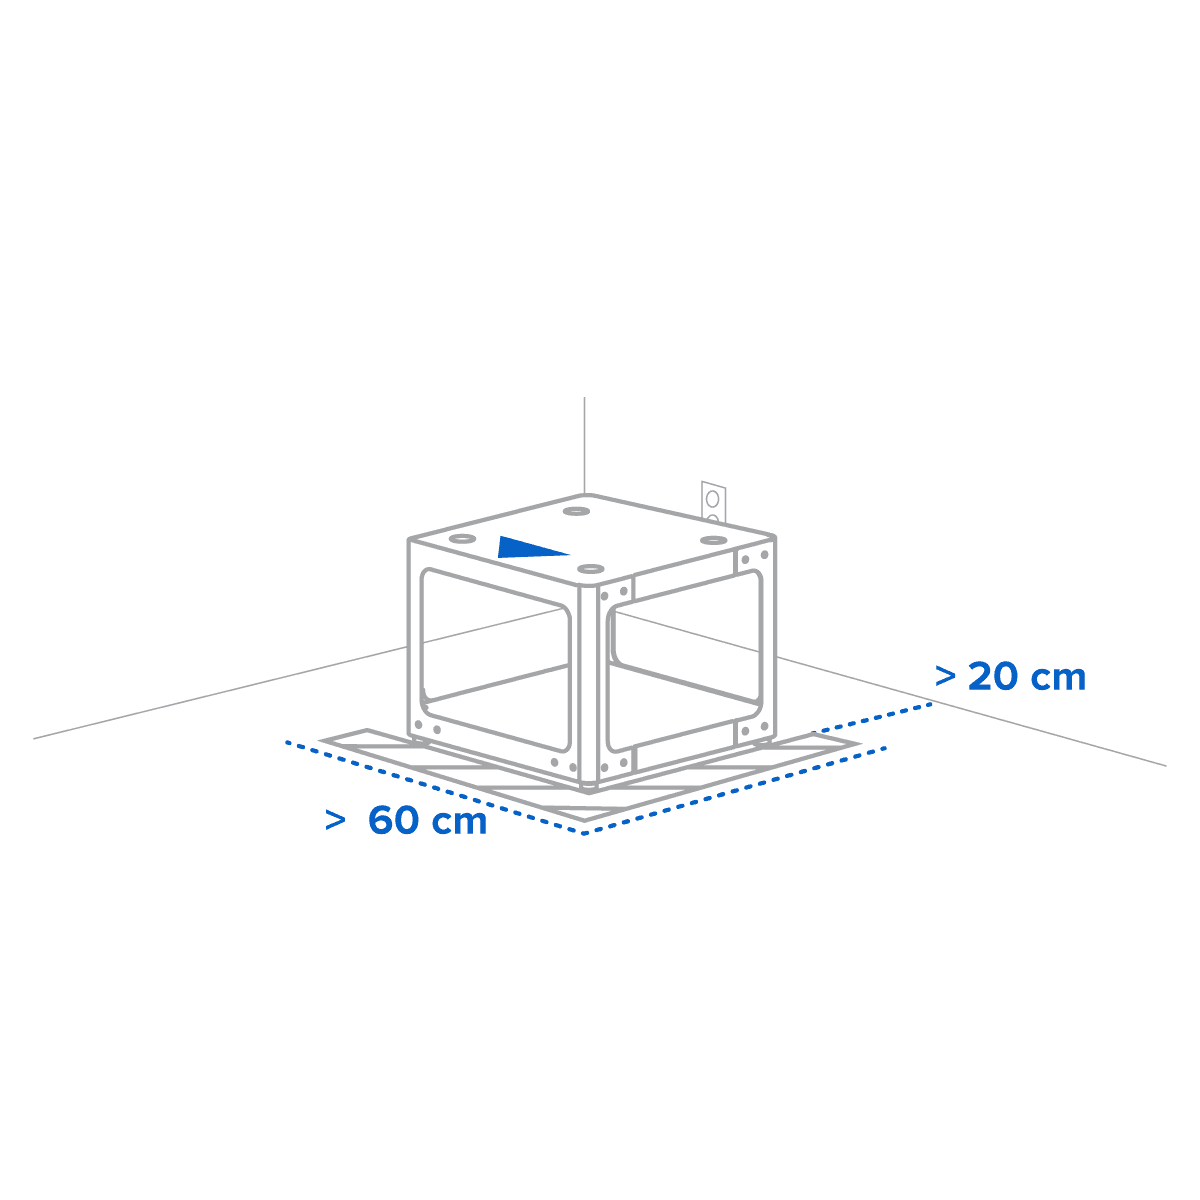
Positionieren Sie den zusammengebauten Ständer am Zielort des Druckers, sodass die Vorderseite zum Bediener zeigt. Ein Pfeil auf der Anweisung des Ständers identifiziert die Vorderseite.

Der Ständer ist im vorgesehenen Bereich positioniert, mit der Vorderseite zum Bediener.

Step 3: Open the box

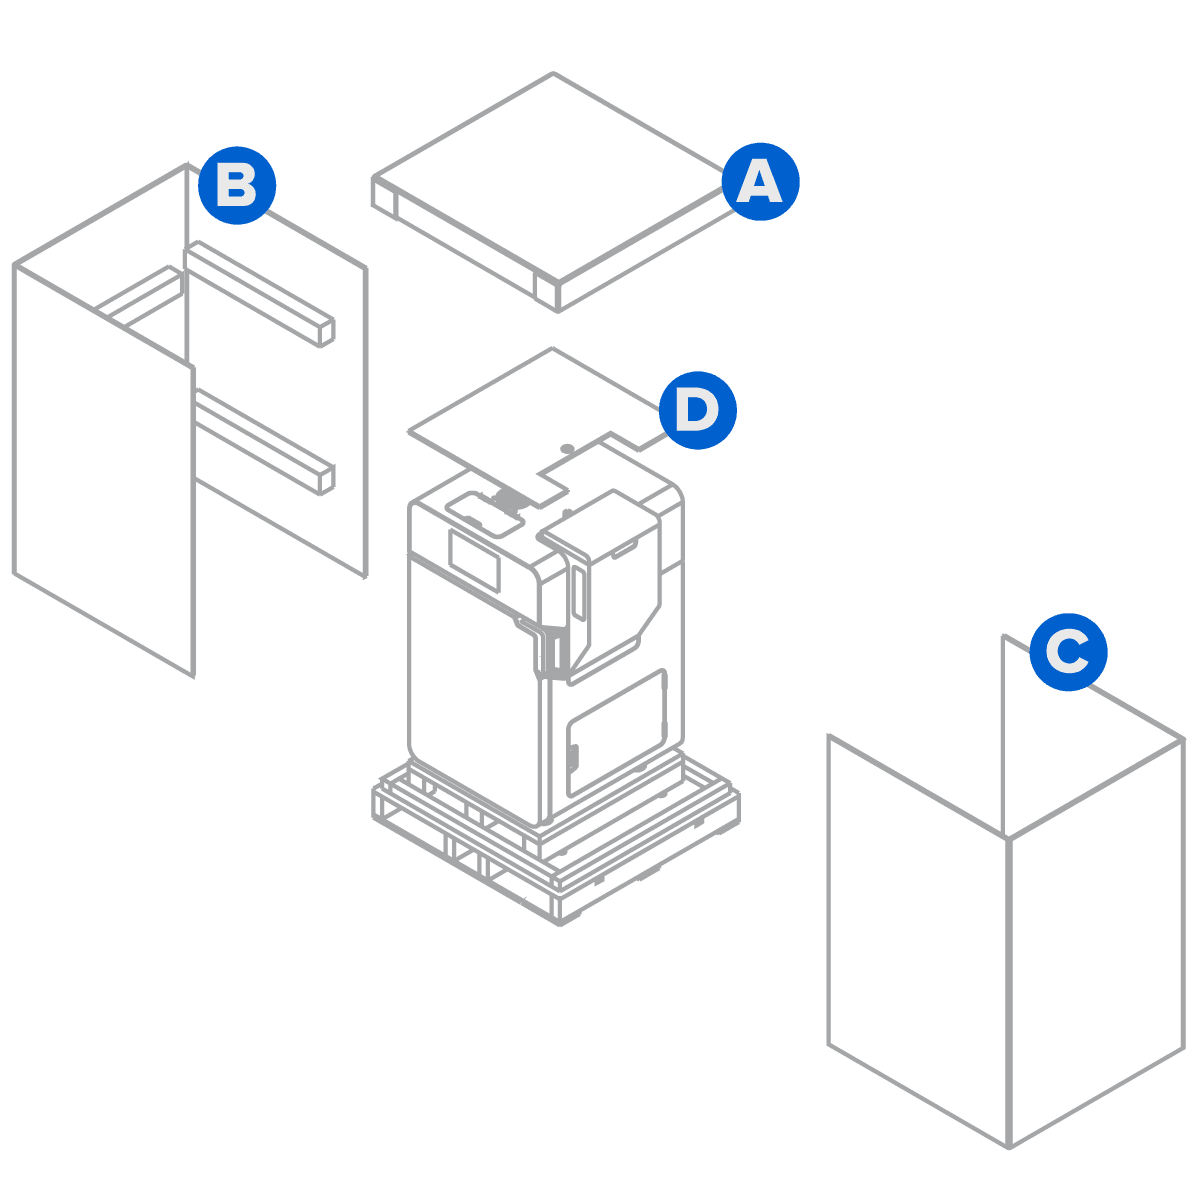
Open the printer’s box from the top by removing the lid (A), then consecutively remove the two C-shaped shells from the left (B) and right (C) sides, and then remove the protective pad (D) from the top of the printer.


Step 4: Remove accessories

Remove the accessory tray with the included accessories from the top of the printer.

Die Verpackung des Druckers sollte in folgender Reihenfolge entfernt werden: zuerst der Deckel, dann die beiden C-Wände links dann rechts und zuletzt das Schutzpolster.

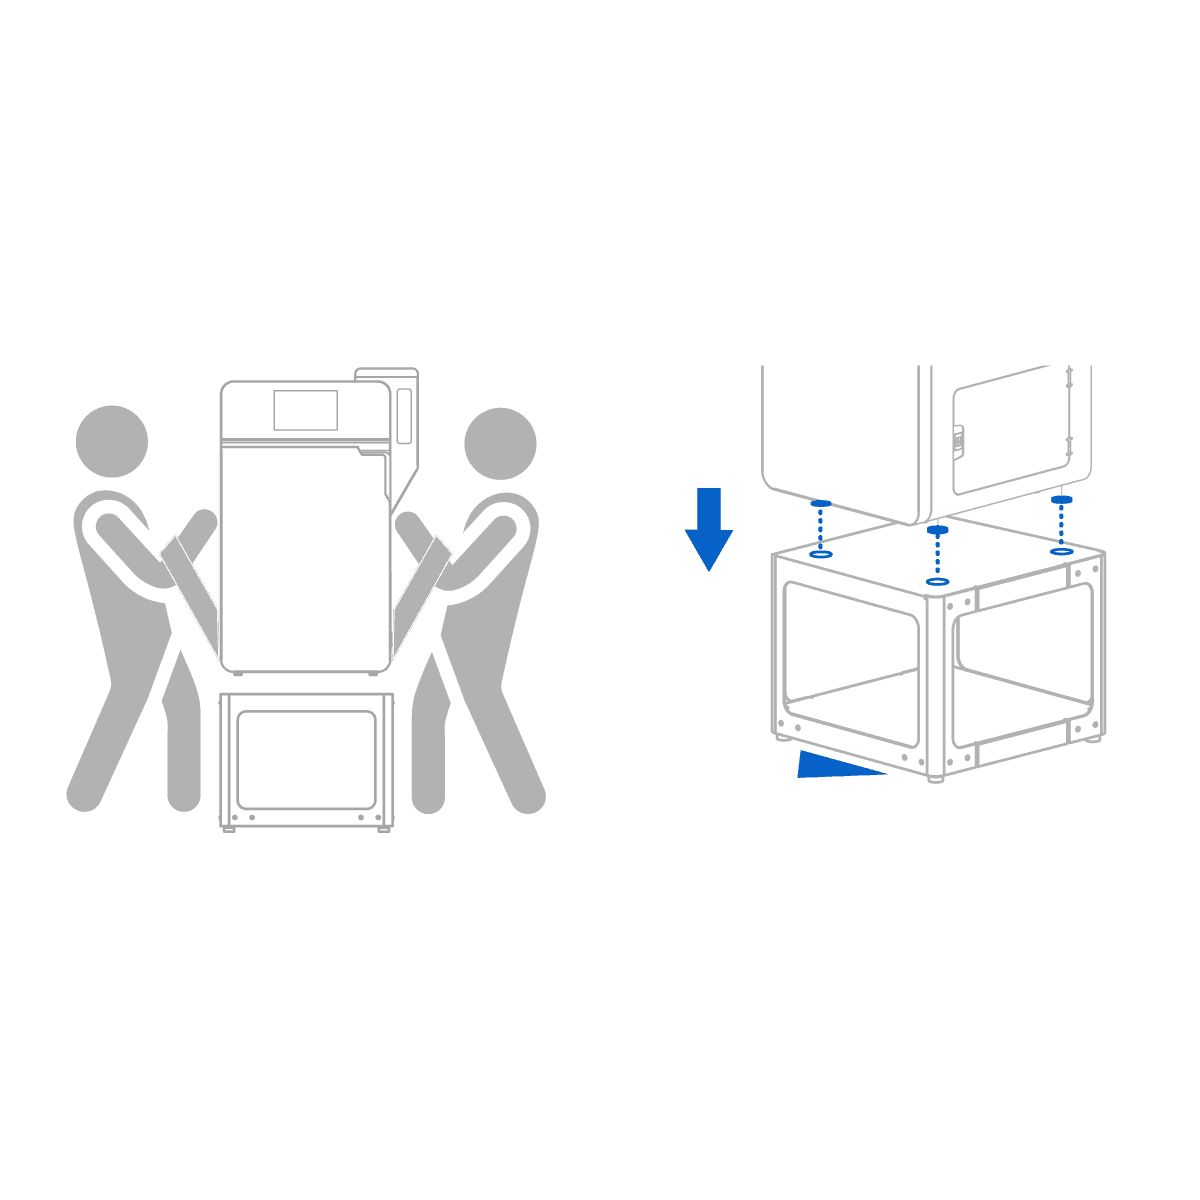
Schritt 5: Tragegurte unter dem Gerät durchführen

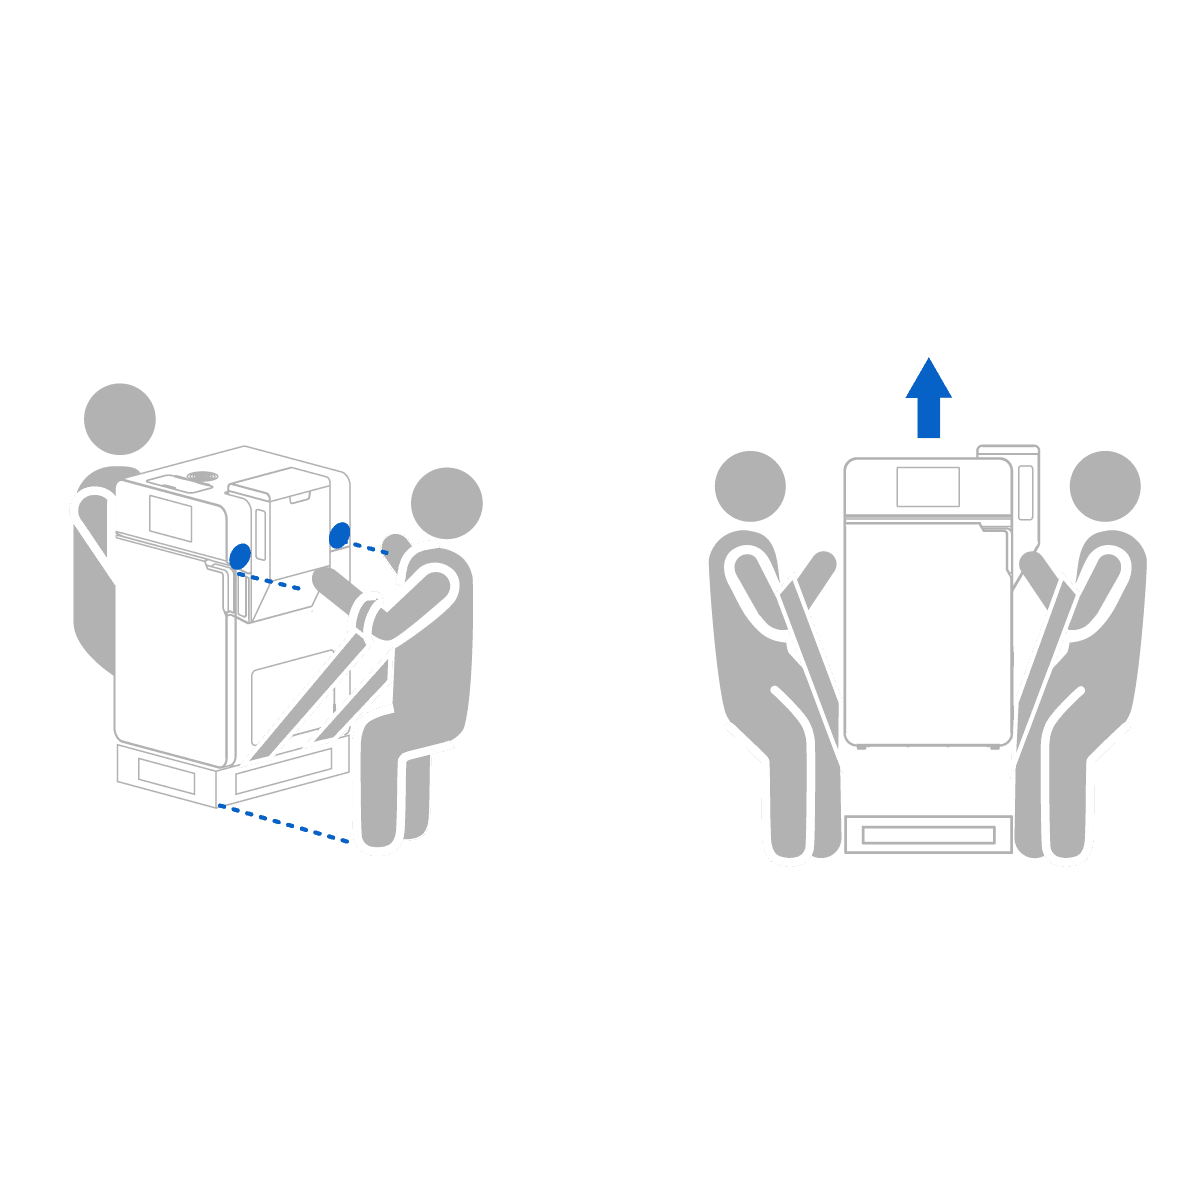
Führen Sie die beiden Tragegurte von links nach rechts unter dem Gerät durch, ohne dass sich die Gurte überkreuzen. Wenn auf jeder Seite eine Person steht, schieben Sie Ihre Unterarme in die Schlaufen, sodass diese nicht über die Ellbogen hinausgehen.

Jede Person führt ihre Unterarme durch die Schlaufen, nicht weiter als bis zum Ellbogen.

Schritt 6: Gegen das Gerät stemmen, um es aus dem Karton zu heben

Stützen Sie sich mit geradem Rücken und leicht gebeugten Knien mit den Handflächen gegen das Gerät und heben Sie gleichzeitig mit der zweiten Person das Gerät an.

Zwei Personen mit der richtigen Technik zum Anheben des Druckers.

Schritt 7: Positionierung des Geräts

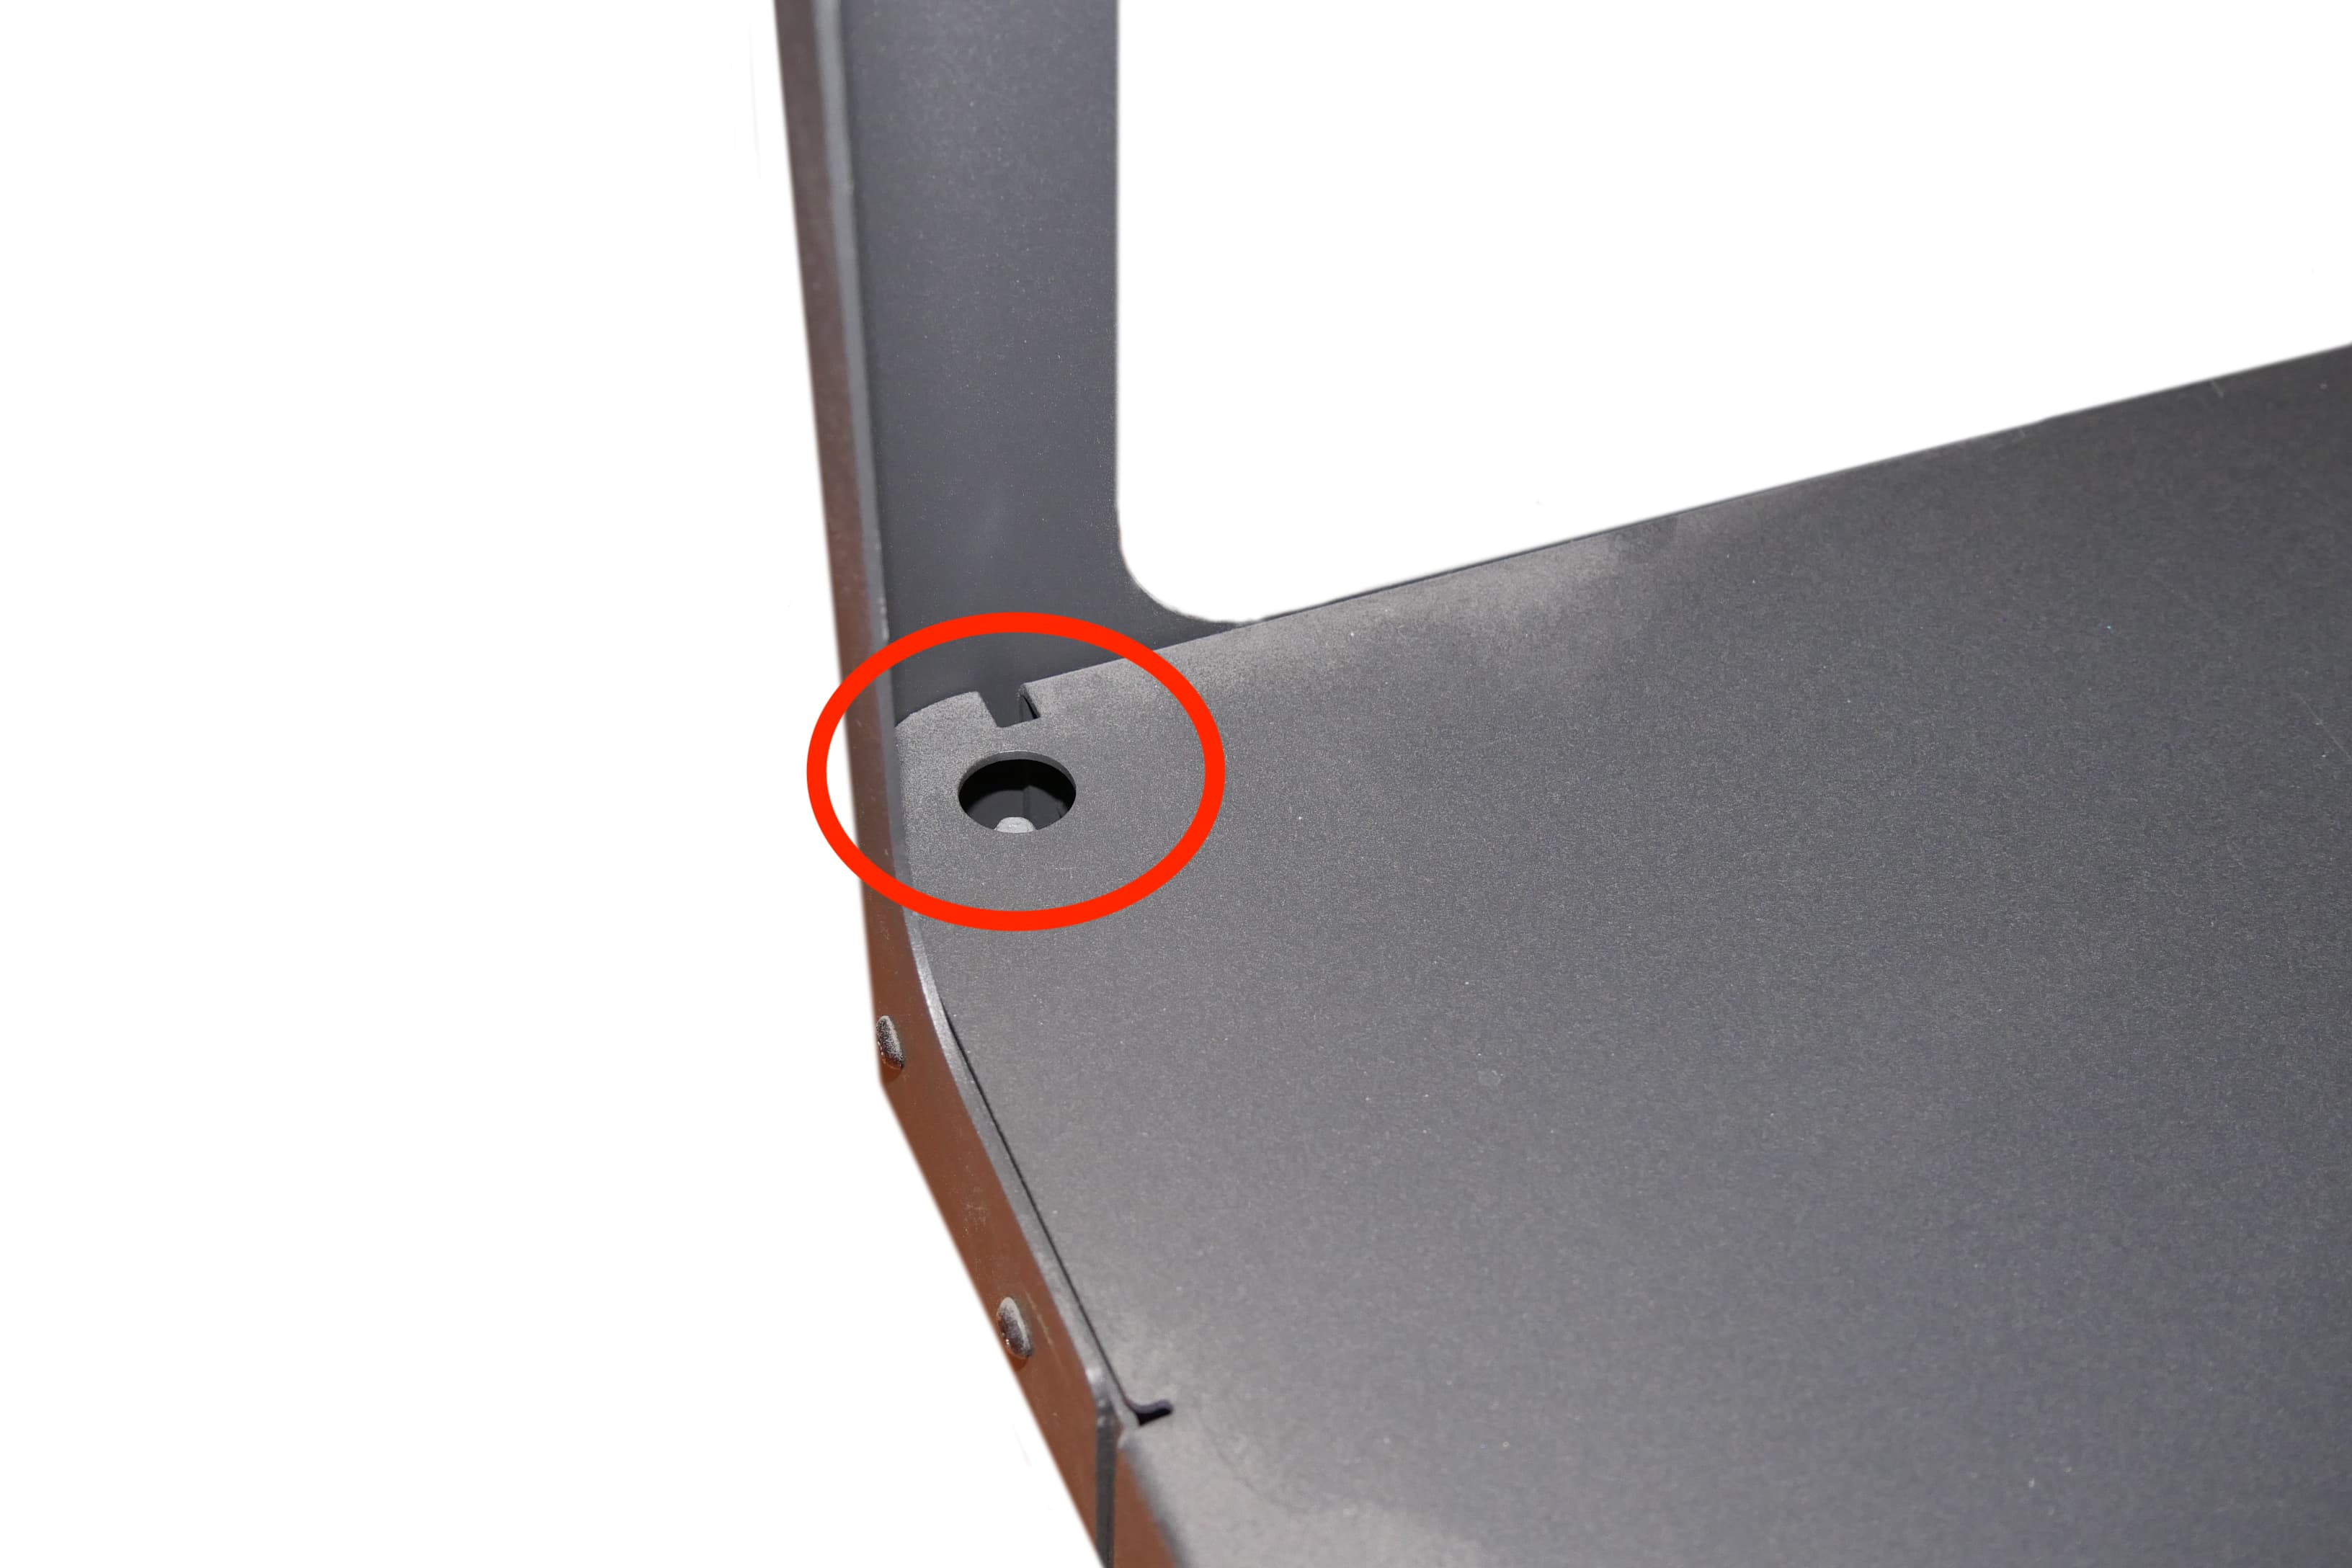
Setzen Sie den Drucker vorsichtig auf den Ständer und achten Sie darauf, dass die vier Füße auf die entsprechenden Aussparungen am Ständer ausgerichtet sind.


Schritt 8: Zusätzliches Verpackungsmaterial entfernen

Entfernen Sie etwaige weitere Verpackungsteile von der Außenseite des Druckers, bevor Sie ihn an eine Stromquelle anschließen.

Zwei Personen richten die vier Füße des Druckers auf die Aussparungen am Ständer aus.

Caution:

If you need to readjust the machine, use the lifting straps to pick it back up. Do not pick up the machine without lifting straps.

Anmerkung:

Der Originalbehälter sollte aufbewahrt und für den Transport oder den Versand – z. B. bei der Inanspruchnahme von Garantieleistungen – wiederverwendet werden. Bewahren Sie die komplette Verpackung einschließlich aller Einlagen auf.

Wird installiert

Connect the cables and install the Wi-Fi antenna, then turn on the machine. Last, connect the Fuse 1+ to a network via Wi-Fi or Ethernet.

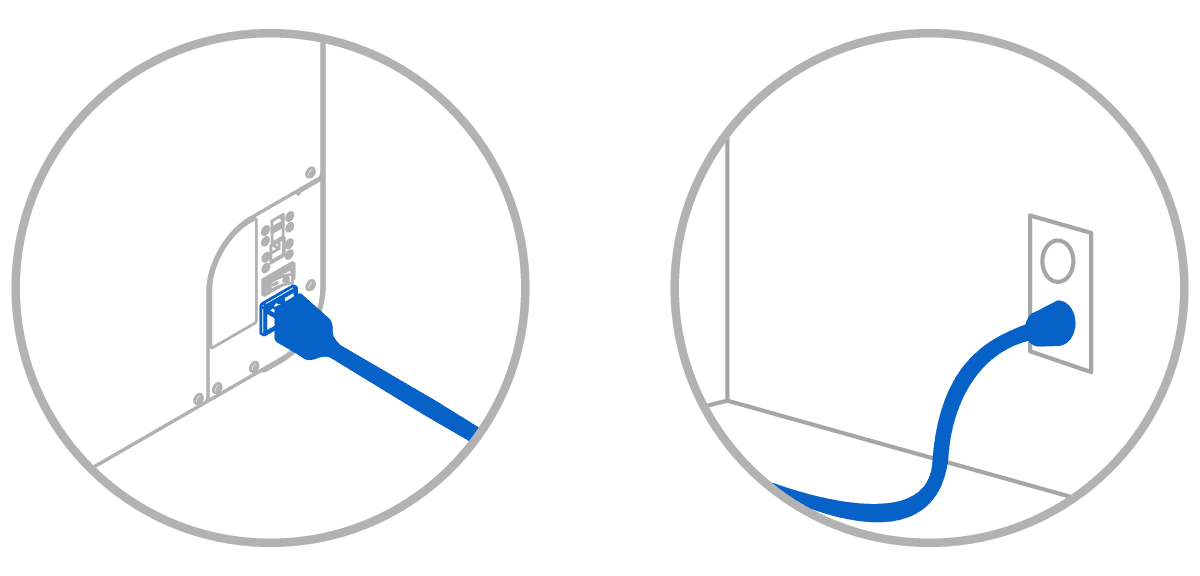
Step 1: Connect the cables

Plug the included power cable into the power port on the back of the unit and connect the power cable to a dedicated circuit.

Das Netzkabel ist verbunden mit der Stromversorgungsbuchse an der Rückseite des Geräts und mit einer Steckdose.

Notice:

The Fuse 1+ requires a dedicated AC circuit, providing at least 7.5 A at 230 VAC (EU) or 15 A at 120 VAC (US), as well as reliable grounding. This circuit must be separate from other devices, including the corresponding Fuse Sift, fans, vacuums, power tools, space heaters, or any large appliances or power tools. Power surges may disrupt prints and/or permanently damage sensitive components, jeopardizing the reliability of the product. Formlabs suggests the use of line conditioners or UPS in regions with voltage fluctuations.

Step 2: Install the Wi-Fi antenna

Screw the Wi-Fi antenna onto the jack on the back of the unit, next to the power, USB, and Ethernet ports.

Step 3: Prepare the printer for use with an inert gas atmosphere (optional)

The Fuse 1+ 30W can print with an inert gas atmosphere. The printer’s nitrogen inlet accepts a gas source with an ⅛” NPT connector or can be adapted to a ¼” quick disconnect connector. If you plan to print with an inert gas atmosphere:

  1. Locate the nitrogen inlet at the bottom-left corner of the back of the printer.
  2. Remove the plug from the inlet.

If your nitrogen source uses ¼” quick disconnect connector:

  1. Remove the hose coupling from the accessory tray.
  2. Screw the hose coupling into place.
  3. Tighten until snug.

Step 4: Connect the nitrogen source (optional)

If you previously installed the included ¼” quick disconnect adapter, use a ¼” quick disconnect connector to connect the nitrogen supply to the nitrogen interface at the rear of the Fuse 1+. Otherwise, connect the nitrogen supply to the nitrogen interface using an ⅛” NPT connector.

Step 5: Install the IR sensor O-ring

The Fuse 1+ uses an O-ring around the IR sensor shaft to improve print enclosure sealing. This prevents IR sensor contamination, helping reduce the likelihood of a print failure. Depending on the date of manufacture of your printer, this O-ring may come preinstalled or may be included with the printer packaging. If your printer came with a separately-packaged O-ring, install the O-ring:

  1. Remove the O-ring from its packaging.
  2. Open the IR sensor door at the top of the printer.
  3. Grip the IR sensor cap and pull. The IR sensor is held in place with magnets and comes out with little force.
  4. Slide the O-ring onto the IR sensor shaft until it reaches the cap.
  5. Push the IR sensor cap into the mount. The LED turns green when it is fully connected.
  6. If the LED turns orange:
    1. Push the cap into the mount until you feel the magnets click together.
    2. Rotate the cap in a clockwise direction until it comes to a halt and cannot rotate further.
  7. Close the access door.

Step 6: Turn on

To turn on the machine:

  1. Plug the included power cable into the power port on the back of the unit and connect the power cable to a dedicated circuit.
  2. Flip the breaker switch on the back of the unit to the ON position to turn on the machine.
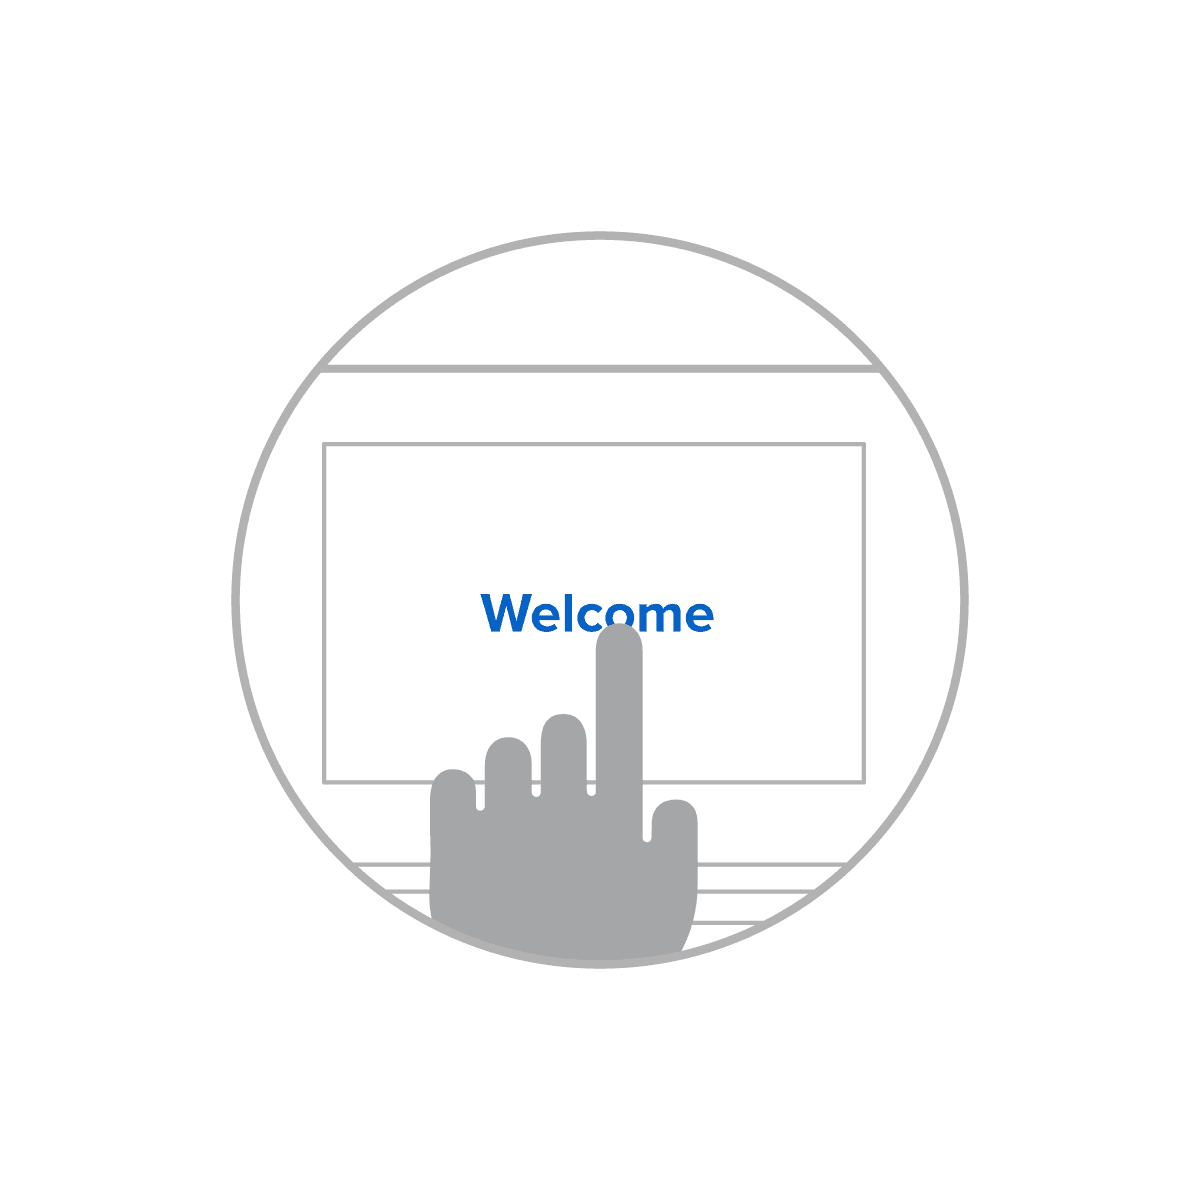
  3. As the machine initiates, the Formlabs logo with a progress bar appears on the touchscreen, followed by the onboarding process. Follow the on-screen prompts to finish setting up the machine.
Der Touchscreen zeigt den Begrüßungsbildschirm an.

Nivellierung

Der Drucker muss vollständig nivelliert sein (eben stehen), bevor der Druckvorgang beginnen kann. Wenn Sie dazu aufgefordert werden, verwenden Sie einen 7-mm-Innensechskantschlüssel, um die Füße des Ständers anzuheben oder abzusenken.

Schritt 1: Folgen Sie den Aufforderungen auf dem Bildschirm

Wenn der Drucker startet, erscheint das Formlabs-Logo mit einer Fortschrittsanzeige auf dem Touchscreen, gefolgt vom Einrichtungsprozess. Falls nötig, werden Sie auf dem Touchscreen aufgefordert, den Drucker zu nivellieren.

Schritt 2: Die Füße des Ständers einstellen (falls erforderlich)

Die Oberseite der Füße des Ständers endet jeweils in einem 7-mm-Innensechskant. Drehen Sie den Fuß mit einem 7-mm-Innensechskantschlüssel wie auf dem Touchscreen angegeben, um seine Höhe einzustellen. Passen Sie die Füße an, bis der Touchscreen anzeigt, dass der Drucker eben steht.
alttext

Verbindung

Schritt 1: Verbindung mit einem Netzwerk herstellen

Um Druckaufträge auf den Fuse 1 hochzuladen und den Drucker aus der Ferne zu überwachen, stellen Sie sicher, dass das Gerät eine ständige Verbindung zu einem gesicherten Netzwerk hat. Das Gerät kann auch über USB direkt mit einem Computer verbunden werden.

Schritt 2: Registrieren Sie Ihren Fuse 1 auf Dashboard

. Registrieren Sie das Gerät über den Touchscreen auf Dashboard. Die Verbindung mit einem lokalen Netzwerk allein ist nicht ausreichend für die Datenübertragung an Dashboard.