
Notice:
A factory reset erases all print job information, custom settings, and diagnostic logs. Upload diagnostic logs before performing a factory reset.

The printer’s touchscreen displays error messages if the printer encounters any abnormalities and displays more details about the error.
Configure Dashboard settings to receive SMS or email notifications for the errors listed in this article and for other print events.
Diagnostic logs
Formlabs printers maintain diagnostic logs to provide detailed information about the printer. Include these diagnostic logs with other relevant observations and details when contacting Formlabs Support or your authorized reseller to speed up resolution.
For printers connected to the internet over an active Wi-Fi or Ethernet connection:
For printers not connected to the Internet:
Learn more about options for network and non-network connections.
Cartridge dispense error
The printer displays a Cartridge Dispense Error if it tries to dispense resin but nothing comes out of the cartridge. Usually, this means the cartridge is empty. Each cartridge contains and can reliably dispense one liter of resin. After the full liter dispenses, dispose of the cartridge and continue printing with a new cartridge.
If a cartridge is not empty but the printer is unable to dispense resin, an issue with the cartridge may be preventing resin from dispensing.
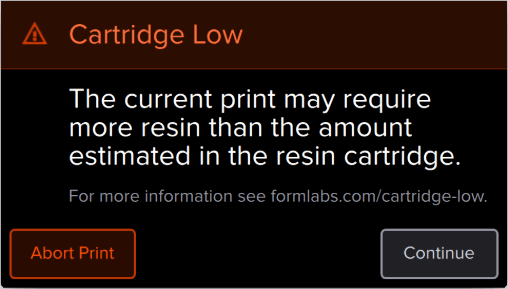
Cartridge low
The printer checks the estimated amount of resin in the cartridge before starting each print. If the estimated resin supply isn’t enough to complete the part, the printer displays Cartridge Low.
Tap Ignore on the touchscreen to continue. However, if the printer runs out of resin in the middle of a print, it pauses until a new cartridge is inserted. Long print pauses can cause a horizontal line across printed parts. Consider swapping the low cartridge for a full cartridge before starting the print, or monitor the print closely and insert a new cartridge as soon as the current cartridge runs out of resin.
Resin tank overfilled
If the resin tank is overfilled, the printer will show this error. Form 2 resin tanks are marked with minimum and maximum fill lines. The level of resin in the tank should always be between these two lines.
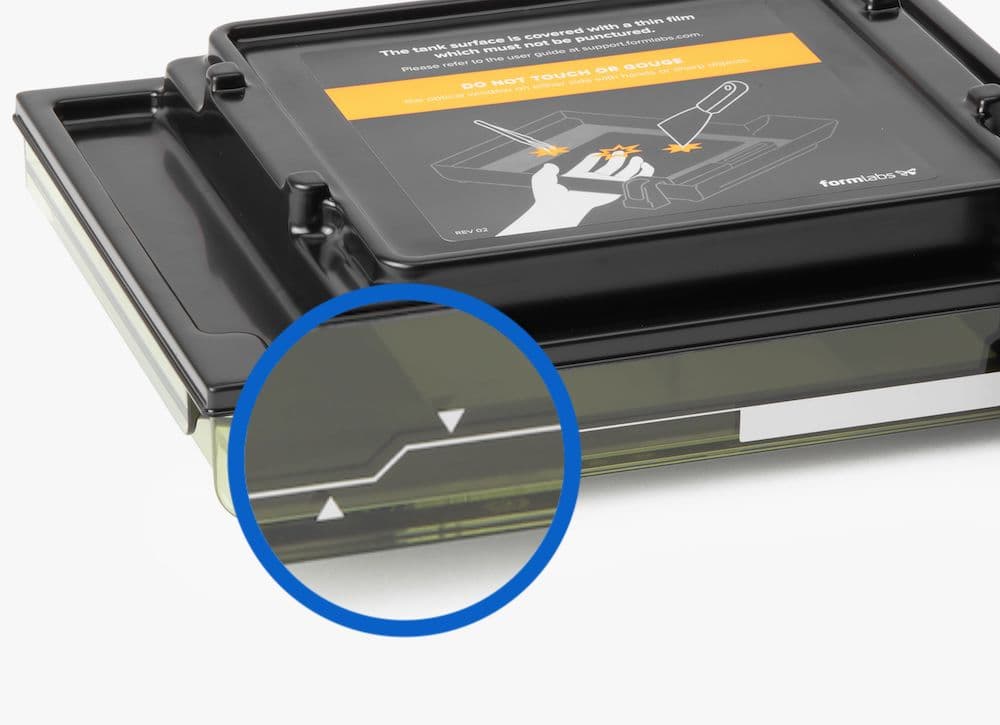
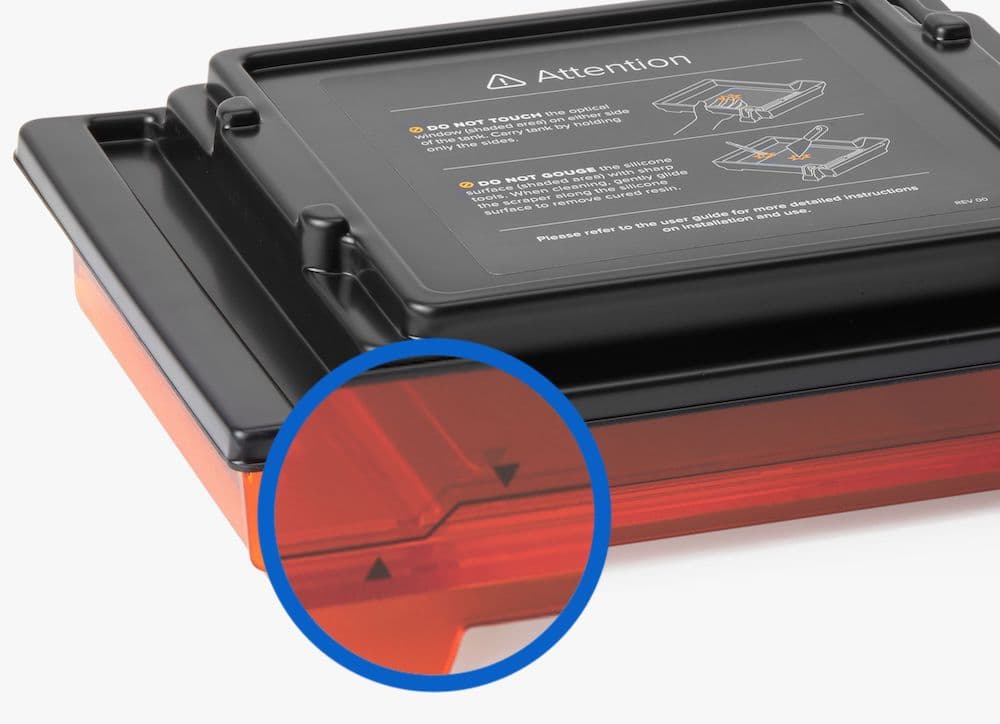
Use a syringe or small disposable cup to remove small amounts of resin, and pour it into a separate container. If the printer incorrectly warns of a resin tank overfill, check the LevelSense board for damage.
Missing resin tank and missing cartridge errors
If the printer does not detect an inserted tank or cartridge, check the ID chip on the resin tank or cartridge to ensure the chip is present and clean. A dirty or missing chip can prevent the printer from detecting the tank or cartridge.
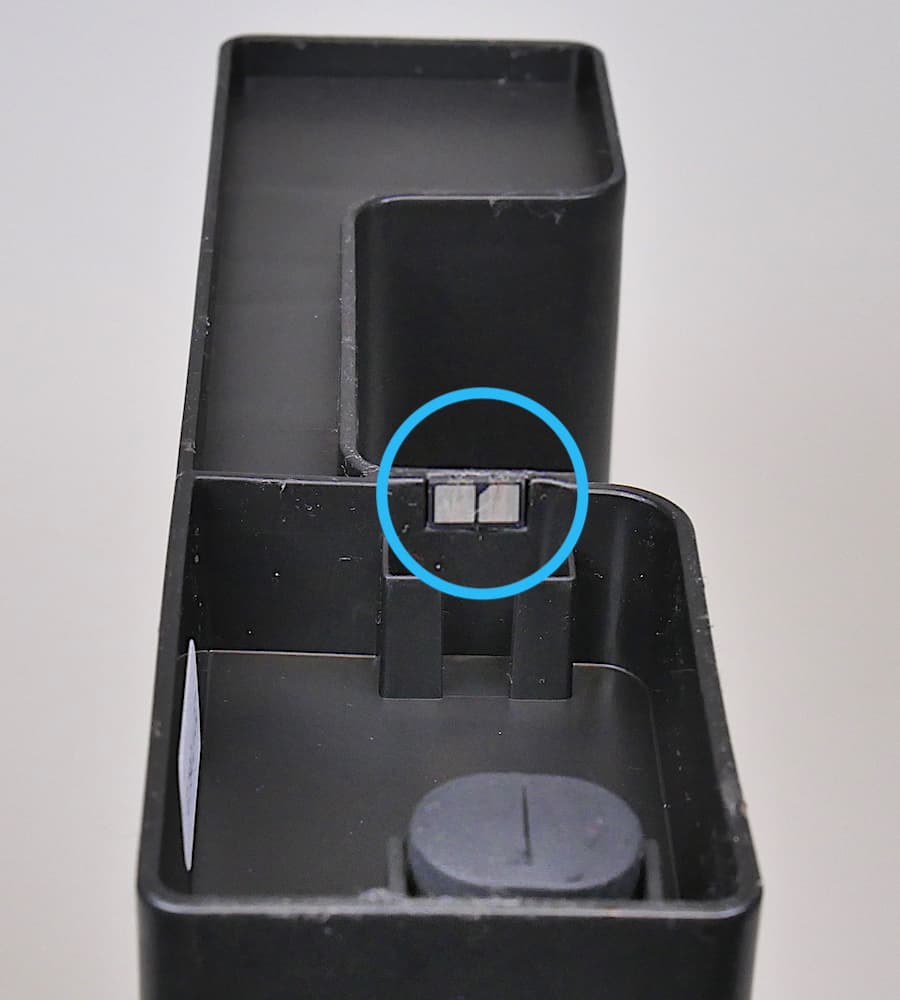
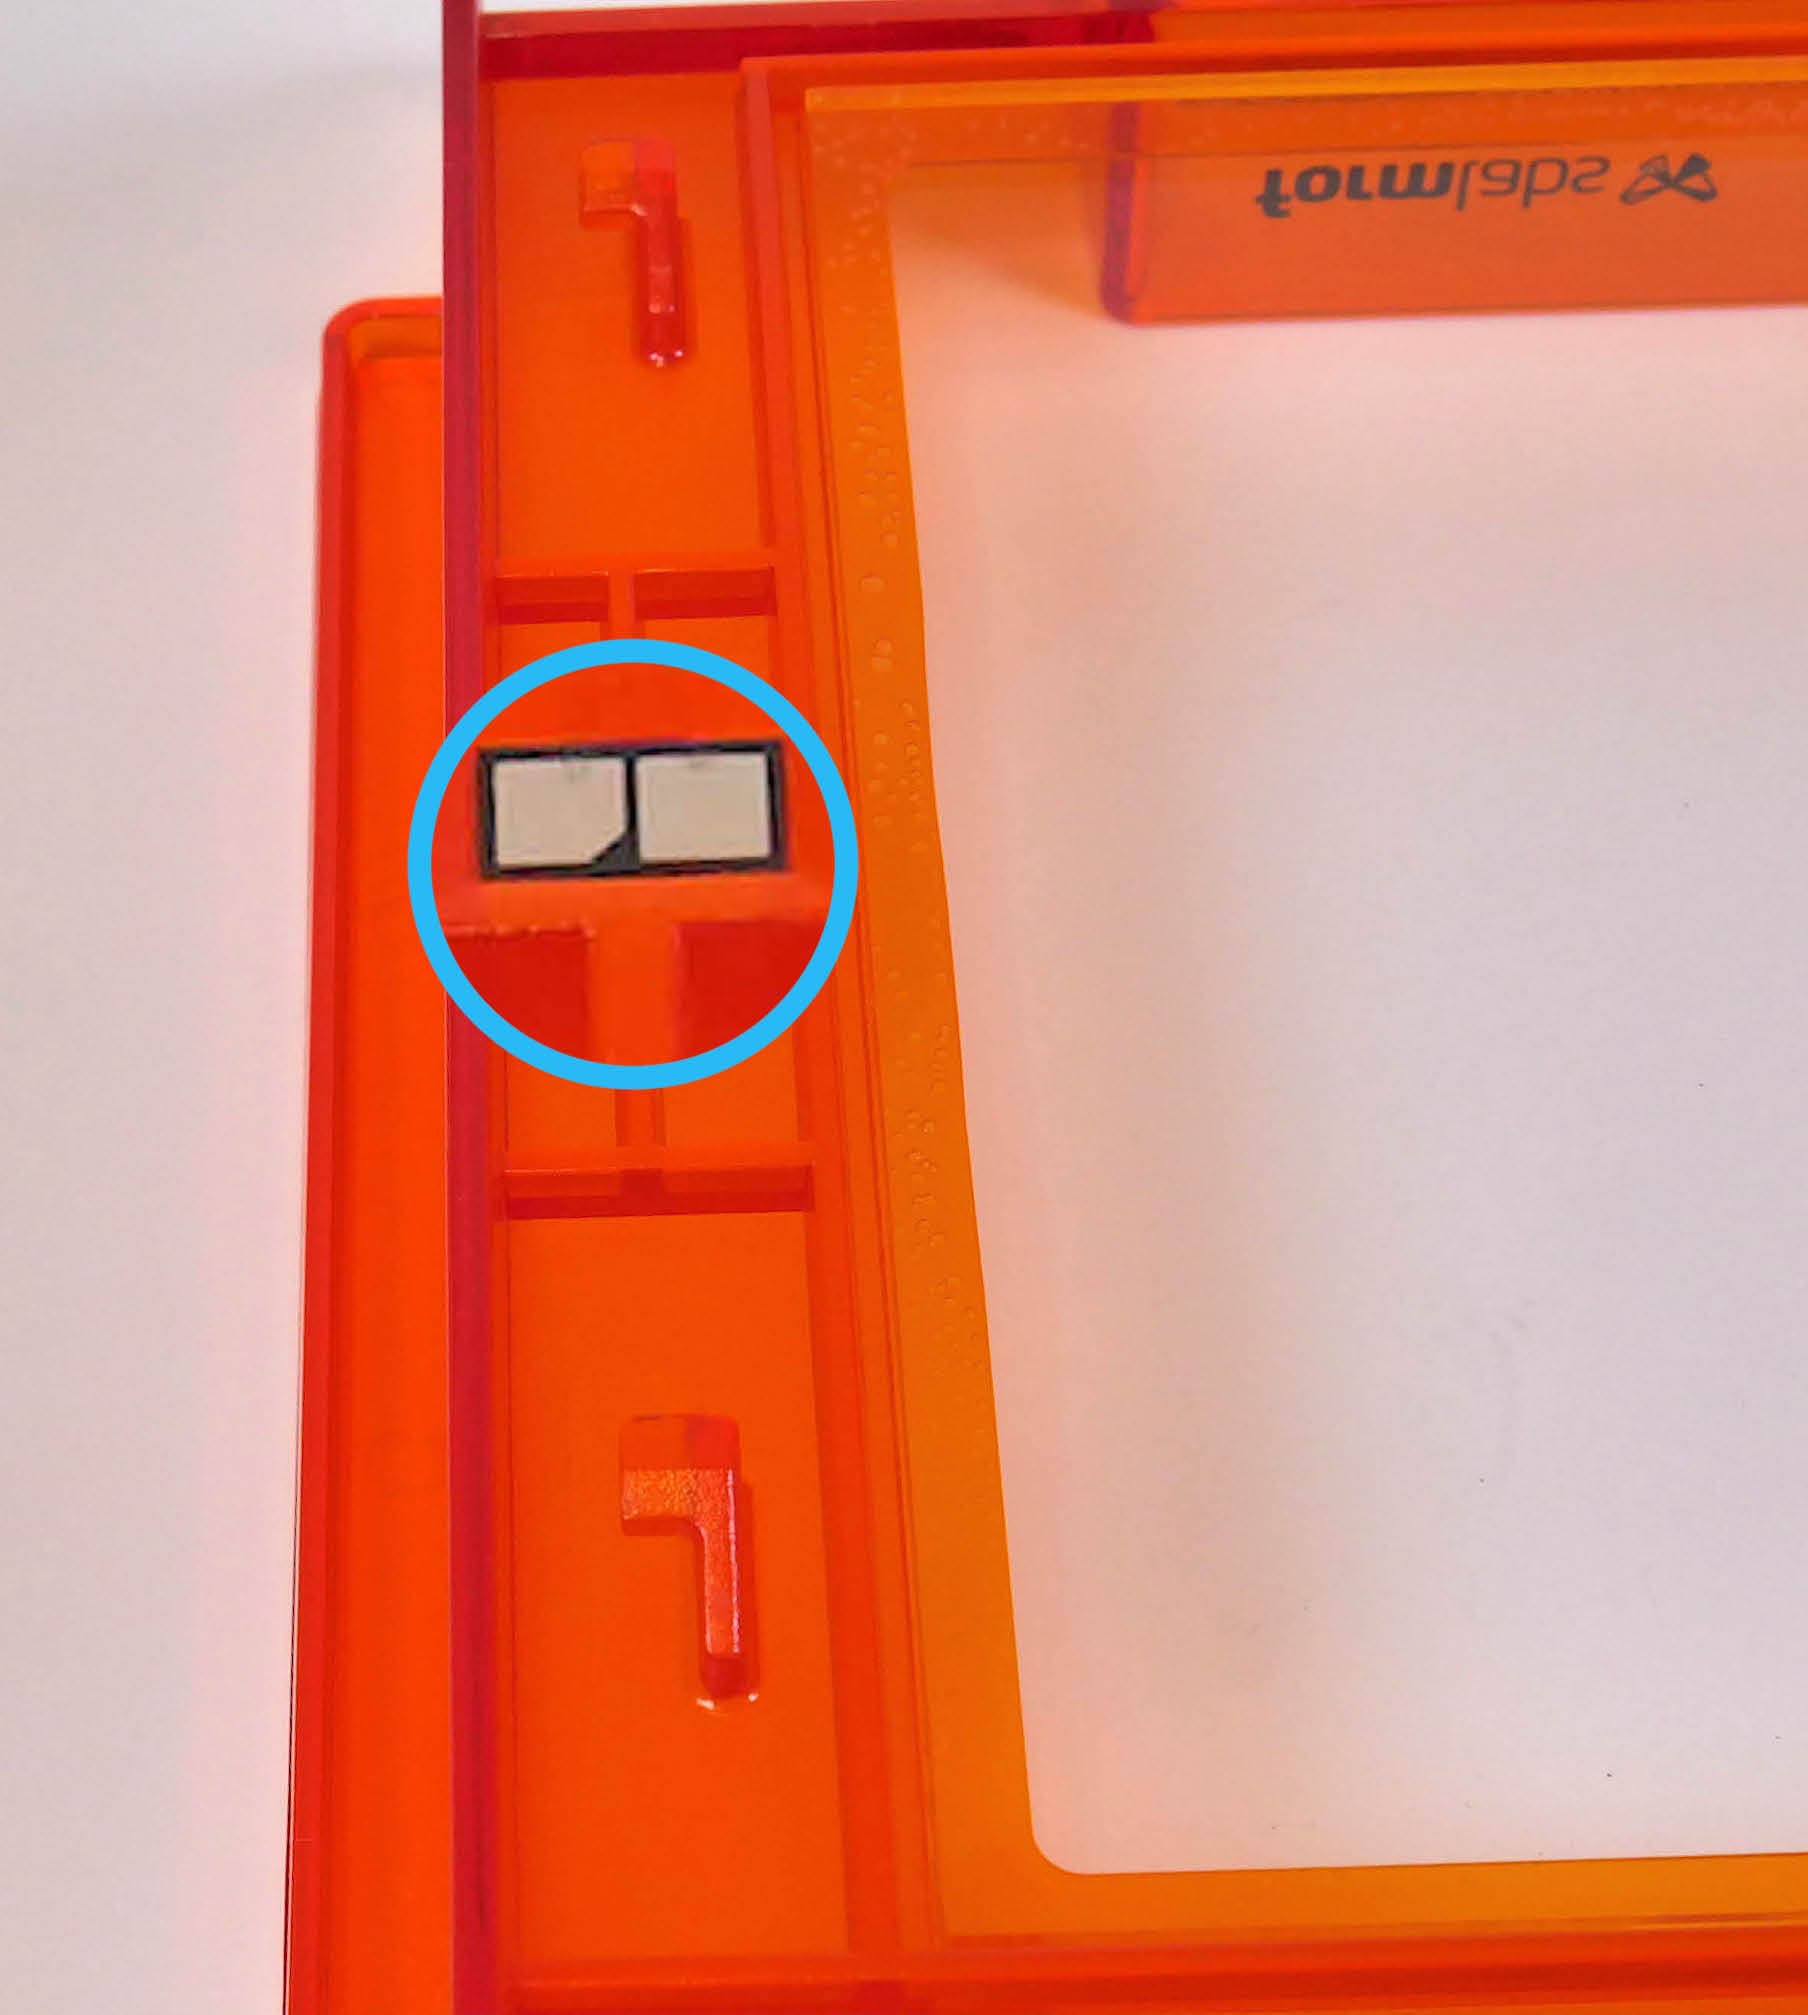
Fully remove and reinsert the resin tank or cartridge. The top of an inserted cartridge should be flush with the orange cover, and the front edge of an inserted resin tank should rest against the front edge of the tank carrier.
Resin tank and cartridge warning
The printer checks the resin type in the tank and cartridge to ensure they match the current print job. If they do not match the resin type identified in the print job, the printer displays Resin Tank and Cartridge Warning and prompts you to insert a tank and cartridge that match the print job settings.
Resin tank warning
If the resin cartridge is inserted first, the printer displays Resin Tank Warning when the type of resin in the tank does not match the cartridge. Remove the resin tank and replace it with one that matches the resin cartridge.
To use a new type of resin with a resin tank, empty and clean the tank, then tap Ignore to reprogram the tank's resin type.
Cartridge warning
If the resin tank is inserted first, the printer displays Cartridge Warning when the type of resin in the cartridge does not match the tank. Remove the cartridge and replace it with the type of resin that matches the tank.
Motors jammed
Sensors track the printer's motor movements. If a motor does not return to its original position in the right amount of time, the printer displays Motors Jammed.
Anything in the path of wiper or tank motion may prevent the motor from moving properly. Open the cover to inspect the build platform, resin tank, and wiper. Remove obstructions, then remove and reinsert the build platform, wiper, and resin tank.
Heater error
The printer stops heating if it cannot reach the target temperature of 30 °C (86 °F) after 60 minutes. In a cold operating environment, the printer may require more than one heating cycle to reach the desired temperature. Restart the print to begin heating again. For more information, refer to the support article Maintaining resin temperature.
Cartridge worn out
Each cartridge contains and can reliably dispense one liter of resin. After the full liter dispenses, dispose of the cartridge and continue printing with a new cartridge. Restart the print once the depleted cartridge has been replaced.
To manually print with non-Formlabs resins, explore the open mode on the Form 2.
Resin sensor error
The LevelSense board is located directly behind the resin tank. The printer may display Resin Sensor Error if the resin tank is too close, too far, or if the sensor or tank are contaminated.
If the printer displays a Resin Sensor Error, follow each step to see if that step resolves the error:
Printer tilted
Formlabs SLA printers operate best when perfectly level. The touchscreen prompts you to level the printer when necessary. Tap Settings > Printer Leveling on the touchscreen to view the current level status.
Follow the touchscreen prompts and use the leveling tool to level the printer.
Reset while printing
If power to the printer is interrupted during a print job, the printer will not resume the print job when it restarts. The touchscreen displays Reset While Printing. If the reset was unexpected, contact Formlabs Support or your authorized reseller.
Failed to start print
The Failed to start print error message appears if the printer is unable to determine why the print failed to start properly. In some cases, it can indicate damage to the motherboard that prevents proper connection to the laser controller or motors. To resolve this issue:
If you see this error message repeatedly, contact Formlabs Support or your authorized reseller.
Print error code: 41
The printer displays Print error code: 41 on the print job screen when it detects an unusual power draw from the galvanometers. This is a safety measure which prevents damage to the printer if the galvanometers behave unexpectedly. This behavior may be caused by a loose connection with the galvanometer cables. If you encounter this error, contact Formlabs Support or your authorized reseller.
Wi-Fi errors
The printer displays specific error messages depending on the Wi-Fi access point's response to the connection attempt. Refer to the support article Connecting to your printer to set up a connection via Wi-Fi, USB, or Ethernet. Always check with a network administrator to ensure that the wireless network is configured to allow the printer to connect. For a Windows operating system, follow Apple's instructions to ensure that Bonjour is properly installed. This step is required to connect. PreForm must be connected to the same network as the printer for wireless uploading.
Invalid network key
The password was not entered correctly. Check the network password. Check with a network administrator to ensure that the wireless network is configured to allow the printer to connect.
Connection failed
The printer failed to configure the wireless connection and could not connect to the network. Check with a network administrator to ensure that the wireless network is configured to allow the printer to connect.
Error 8
Error 8 indicates that an unexpected error occurred while the printer was reading a FORM file. To resolve this issue, delete old print jobs from the printer and attempt another print. Update PreForm and the firmware to the latest version. If the issue persists, perform a factory reset. Performing a factory reset may resolve a corrupted file system or file system bugs.
Error 23
Error 23 indicates that the printer encountered an error while trying to move its motors. To resolve this issue, delete old jobs from the printer and attempt another print. Update PreForm and the firmware to the latest version. If the issue persists, perform a factory reset. Performing a factory reset may resolve a corrupted file system or file system bugs.
Factory reset instructions
On some occasions, a factory reset may correct unusual printer behavior. Unusual behavior may include Unknown Error messages, incomplete firmware updates, an unresponsive touchscreen, or trouble connecting to PreForm. A factory reset erases custom settings, including Fine Tuning, including prints saved in the queue and network connections.
Notice:
A factory reset erases all print job information, custom settings, and diagnostic logs. Upload diagnostic logs before performing a factory reset.
To perform a factory reset:
To confirm a successful factory reset, tap queue on the touchscreen. After a successful reset, the print queue is empty. If the reset does not resolve the behavior, contact Formlabs Support or your authorized reseller.