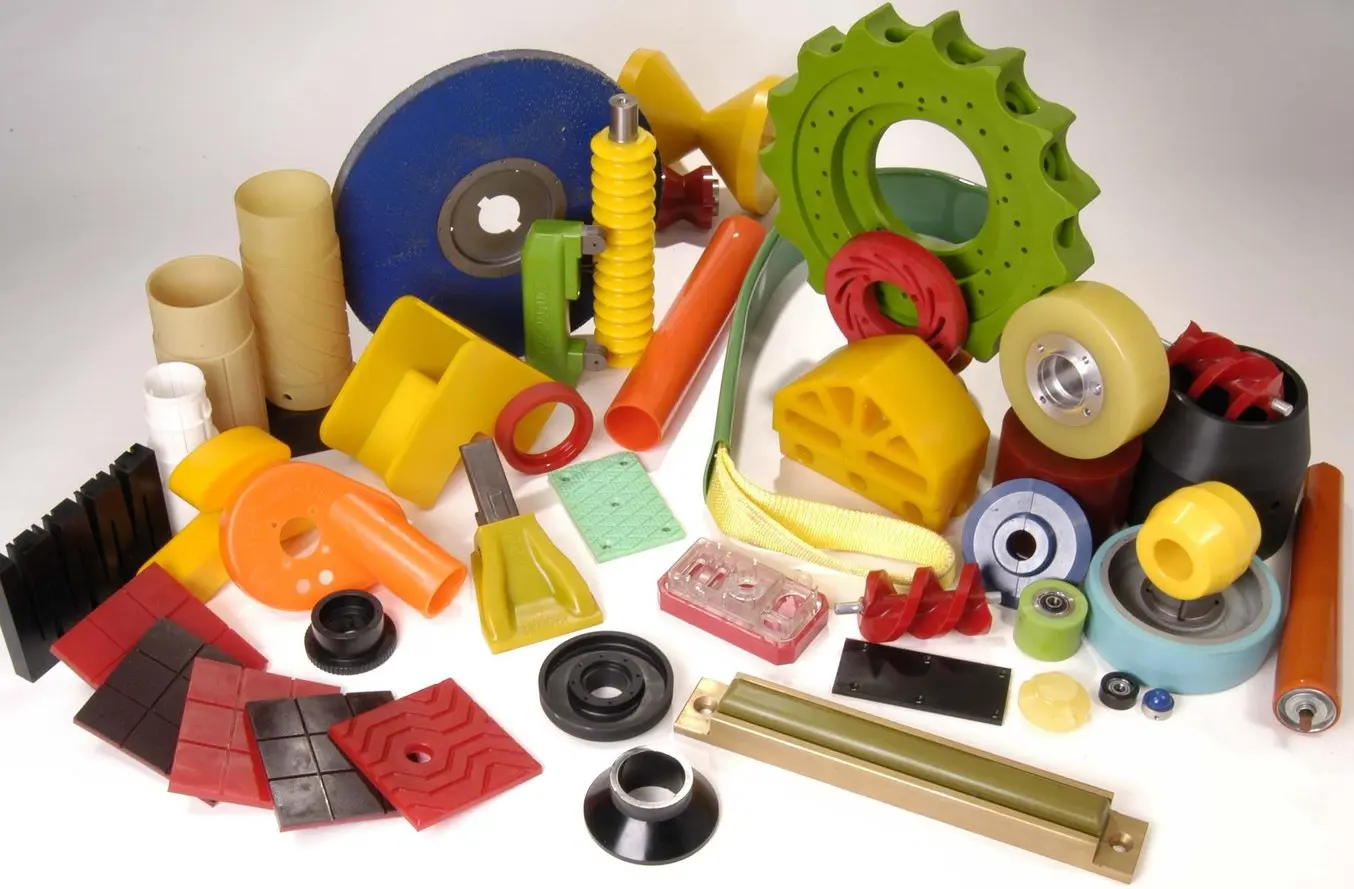
Integral, but often out of sight: conveyor rollers for assembly lines, brake pads for roller coasters, and wheel chocks that hold fighter jets in place…Polyurethane parts are essential to the operation of the overall system, though they may not be the first material we think of when we look at a product. To function smoothly as part of larger assemblies, polyurethane parts need to be designed for optimized material usage, tight tolerances, and prolonged load-bearing or deformation.
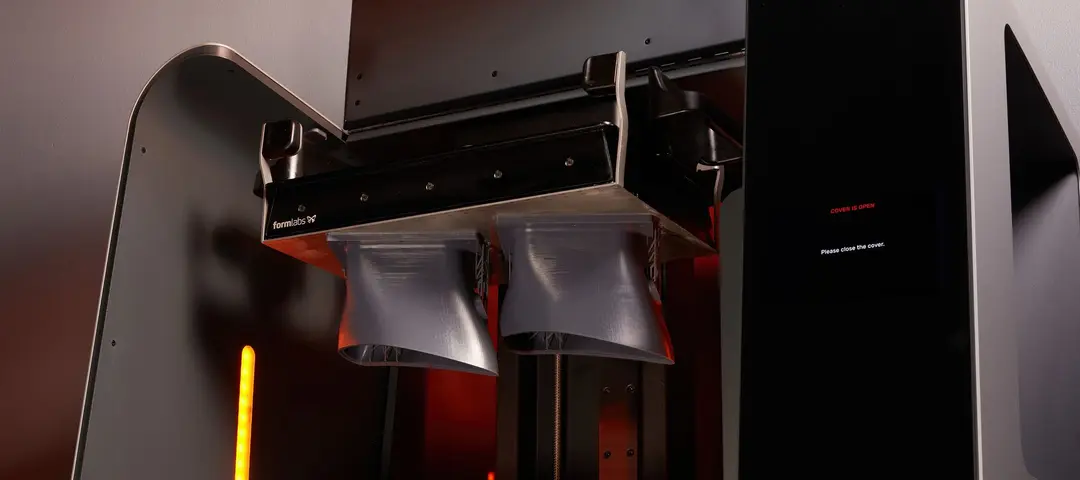
Kastalon, a polyurethane manufacturer in Illinois, has been problem-solving for decades to produce thousands of customized polyurethane parts that can satisfy this diverse range of requirements. Product Engineer Brian Baer spoke to us about how the Form 3L large-format stereolithography (SLA) printer opens up new opportunities for tooling, manufacturing aids, and new product research and development.
“Being able to 3D print a brand new mold is a very big advantage for small changes and adjustments. It’s also great for us that we can achieve the +/- .005 tolerance. We’ve done things we weren’t able to do before, and the volume is steadily increasing.”
Brian Baer, Engineer
Combining 3D Printing With Traditional Machining at Kastalon
Kastalon designs and fabricates hundreds of customized molds to produce hundreds of thousands of polyurethane parts. Traditionally, when customers submit end-use part requests, the team at Kastalon evaluates the part for molding feasibility before machining the mold out of aluminum or steel.
In the past, the expense and complexity of the machining process sometimes forced Kastalon, like many plastics manufacturers, to turn down parts that were too complicated to mold or not cost-efficient for short runs and prototyping. Molds with too many interlocking features, tiny channels, or pins were often inefficient to design, machine, and sometimes totally rework. Still, turning away business was hard, and because Baer had worked with various 3D printing technologies at school, he started researching other ways of fabricating molds.
A previous foray into 3D printing years ago had soured some of the team on the technology, so Baer had specific requirements to look for in his research. They needed a machine that could handle tolerances of +/- .005 in, materials that could withstand molding temperatures of 180-300 °F, and a system that was affordably priced.
“It wasn’t until I found Formlabs and saw the variety of materials that withstand high temps and do very specific things that I realized this printer can actually be applied to [the] types of things we do.”
Brian Baer, Engineer
In late 2022, the Form 3L arrived at the Kastalon office, but it took some testing to get everyone on board. At first, colleagues were skeptical of the materials and tolerances possible, until Baer printed a few test pieces. “I printed the machine shop a part and they did an RA surface roughness test. The shop manager was very impressed that it could match the specs that I had given him and by how smooth the part was,” Baer says.
Now, Baer says, the machine shop manager is the first to send parts to him for 3D printing rather than machining. “He’s one of the first people to suggest 3D printing when we have jobs it can be applied to. The machine shop is swamped with larger projects – if there’s anything smaller that can be printed, he wants us to take it and give him more bandwidth,” says Baer.
New Opportunities in Geometry, Testing, and Operations
3D printing opens up new possibilities for molding polyurethane parts. Kastalon’s engineering team can try new design features and geometries that metal molds just can’t complete, or make small changes to designs without worrying about wasting a machined mold. The team can confidently put forth new designs because they’ve been able to extensively test and iterate without fear of bogging down the machine shop with small changes.
Tail Puller Clamp Mold: Made Possible Through 3D Printing
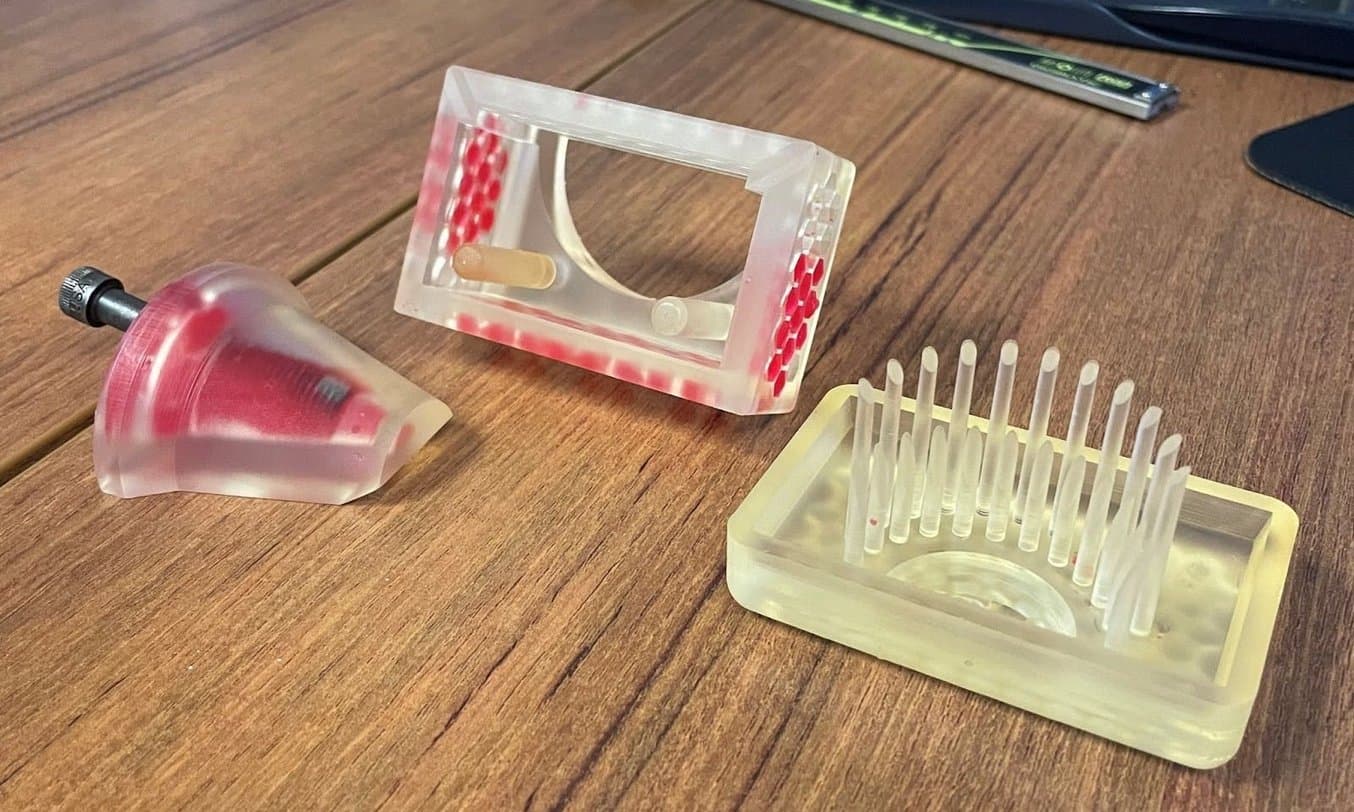
Kastalon had to turn away a customer who requested a part that had 24 blind holes offset from the top surface — the mold would simply be too difficult to machine.
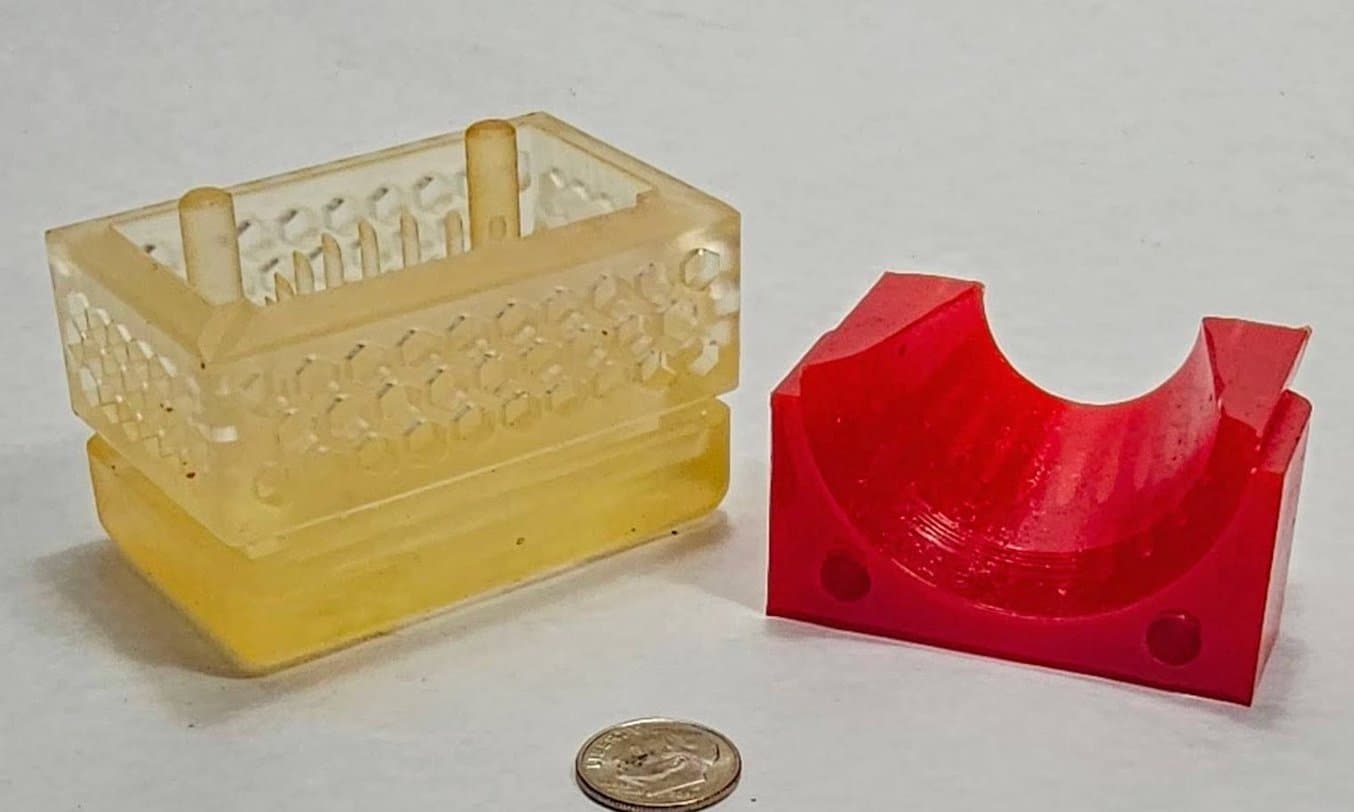
With the Form 3L and High Temp Resin, Baer was able to print and cast the finished polyurethane part (right) in under a day.
Before the Form 3L arrived, the Kastalon team had to tell a customer that they couldn’t take the order for the Tail Puller clamp mold part. Though it might have been possible after a lot of trial and error, the array of 24 tall pins doesn’t go all the way through, and the clearance between them is 0.03125 in.
The clearance and the fact that each hole is blind and ends offset from the top surface means that this part would require extremely difficult machining with very delicate, long cutters. The other option would be making each pin individually, then keying them so they align in the correct orientation — with a pin only 0.104 in in diameter, that’s not an easy thing to do.
After evaluating these different possible machining processes, the team had to refuse to accept the order. “We spent a long time discussing if it would be possible, and it was a big decision to tell the customer no,” says Baer.
Just a few weeks later, the Form 3L arrived, and Baer designed and printed the mold in half a day to demonstrate the business case for 3D printing complex geometries like this. The materials cost was just over $30, and the design took him about two hours. “Everyone immediately gained a lot of respect for 3D printing. It opened the eyes of a lot of our factory guys to say, ‘We can accept more orders, because we can do things like this now,’” says Baer.
Anti-Crush Wheel
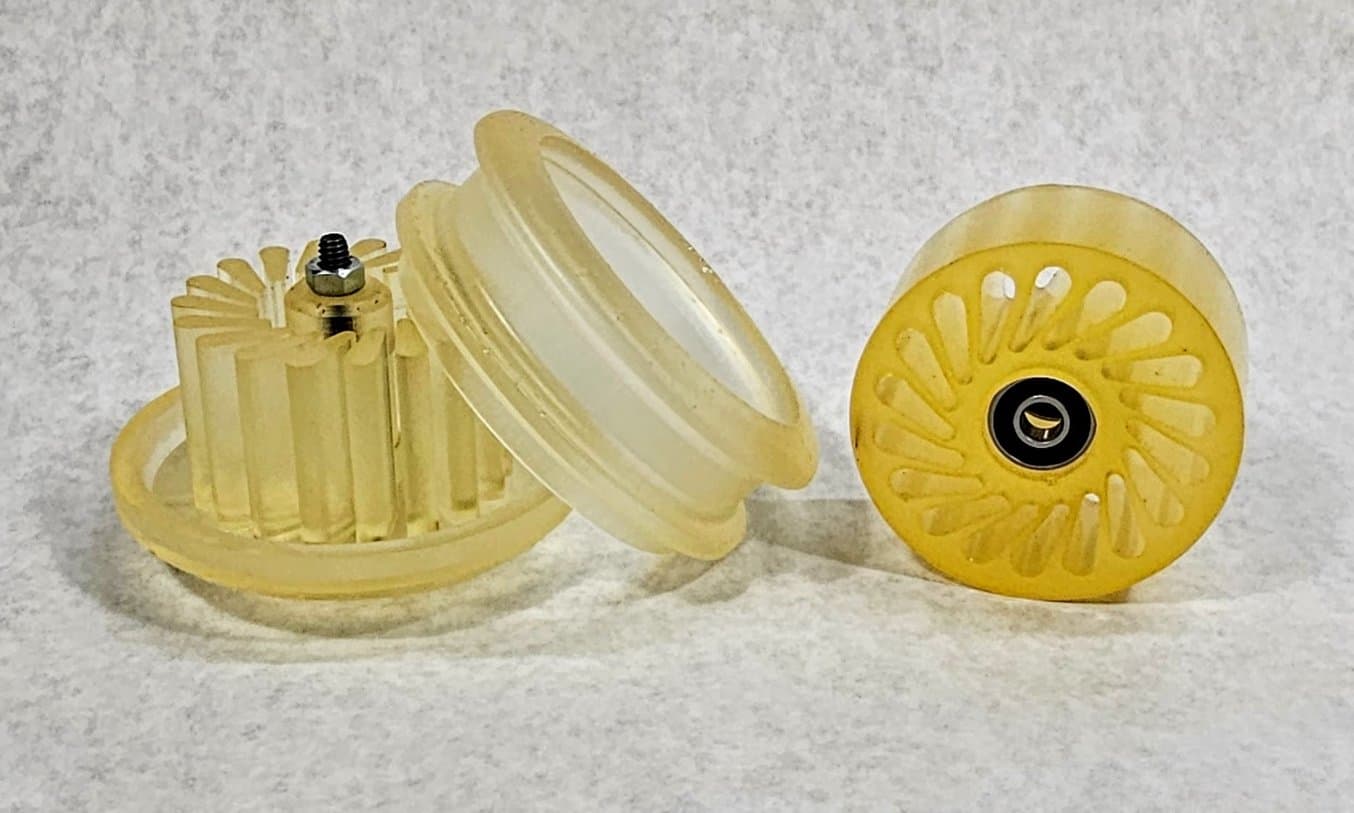
These wheel molds (left, top, and bottom) and wheels (right) are designed to deform evenly in the case of overloading — the teardrop-shaped aperture distributes weight evenly so the wheel won’t crush the product.
The Form 3L shines when tiny features make a mold too difficult to machine. These small anti-crush wheels, used for holding soft products (such as cardboard packaging) down on conveyor systems, are used in place of spring assemblies —- instead of a spring arm exerting pressure onto the cardboard, the wheel itself deforms evenly to gently hold the cardboard in place.
However, the wheel molds have an incredibly small clearance in between the ‘fins’ used to mold the teardrop-shaped apertures in the wheels, making it almost impossible to fabricate the mold.
The wheels are 2 in wide, and the wall thickness between the fins is 0.125 in. “Two inches deep with 0.125 in clearance might be possible, but there are going to be a lot of machinists angry with you if you try and send them that design,” says Baer.
On top of the difficulty level of the machining, a multi-part aluminum mold would create a more complicated assembly process. There’s a trade-off: machine the mold with the fins as one piece (as shown in the image above) and make the clearance extremely difficult for the machinists, or make all of the fins individually and assemble them as one, which would mean more setups and more assembling of small pieces, which would also add labor and irritation for the machine shop.
3D printing became the logical solution, and Baer easily designed a two-part mold with a removable bearing in Solidworks before printing in High Temp Resin and Rigid 10K Resin on the Form 3L. Using the Rigid 10K Resin, the team cast 25 wheels for the customer, at a fraction of the cost of what a machined mold would have cost them. “We’ve made many varieties and styles of wheels that are really small, which we weren’t able to do before the Form 3L because it wasn’t cost-effective for us,” says Baer.
| Machining | 3D Printing | |
|---|---|---|
| Number of Components | 21 | 3 |
| Design Time | 7 hr | 3 hr |
| Setup Time | 5 hr | - |
| Run Time | 35 hr | 12 hr |
| Total Time | 47 hr | 15 hr |
Internal Testing Models for Large-Scale Springs
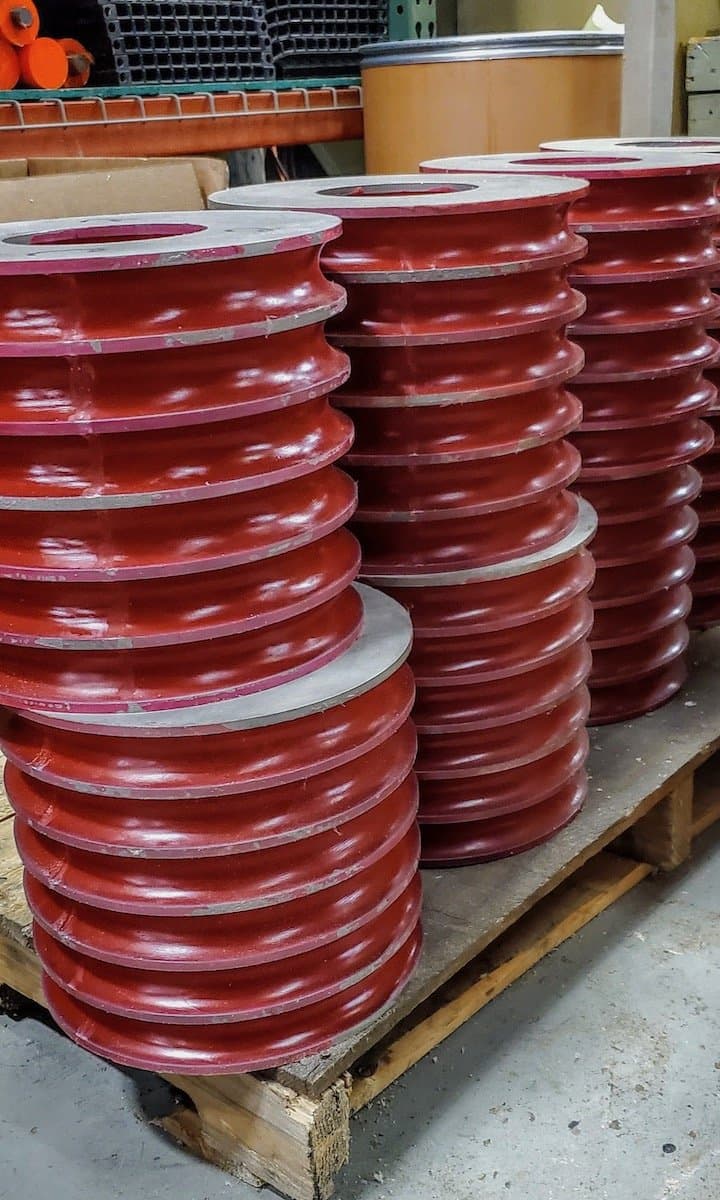
Polyurethane parts like these red springs are traditionally cast from large aluminum molds.
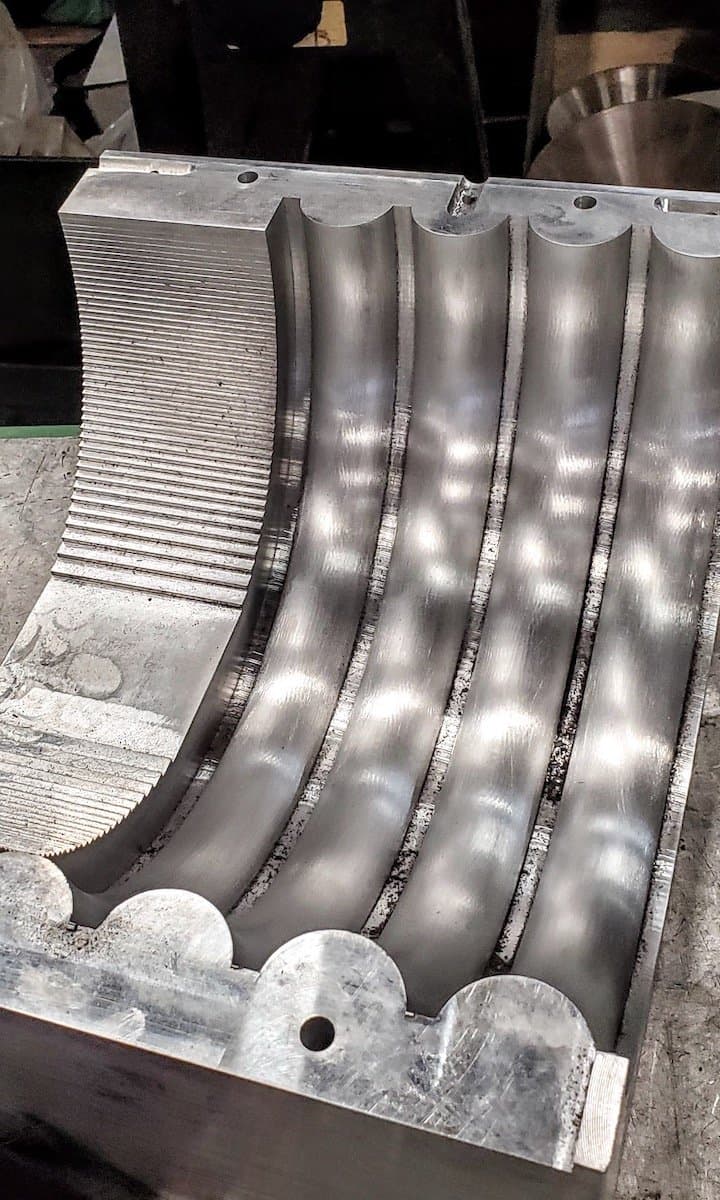
These aluminum, or in some cases steel, molds are expensive and time-consuming to machine.
The Houston Astros baseball stadium has a retractable dome for inclement weather, and Kastalon is responsible for the springs that keep the dome taut and functional, even during hurricane conditions.
Before fabricating molds like the ones needed for stadium-sized springs, the Kastalon team did extensive testing on design and material using scaled-down versions. Changing the design slightly and testing spring rate changes with different geometries and different polyurethane formulations ensured that their end product is optimized for prolonged periods of intense stress.
However, despite the change in scale, each aluminum mold was still expensive, especially if it was just used for internal testing. Now, the Form 3L allows the team to test many different spring designs at a much lower cost, and without taking up the machine shop’s bandwidth.
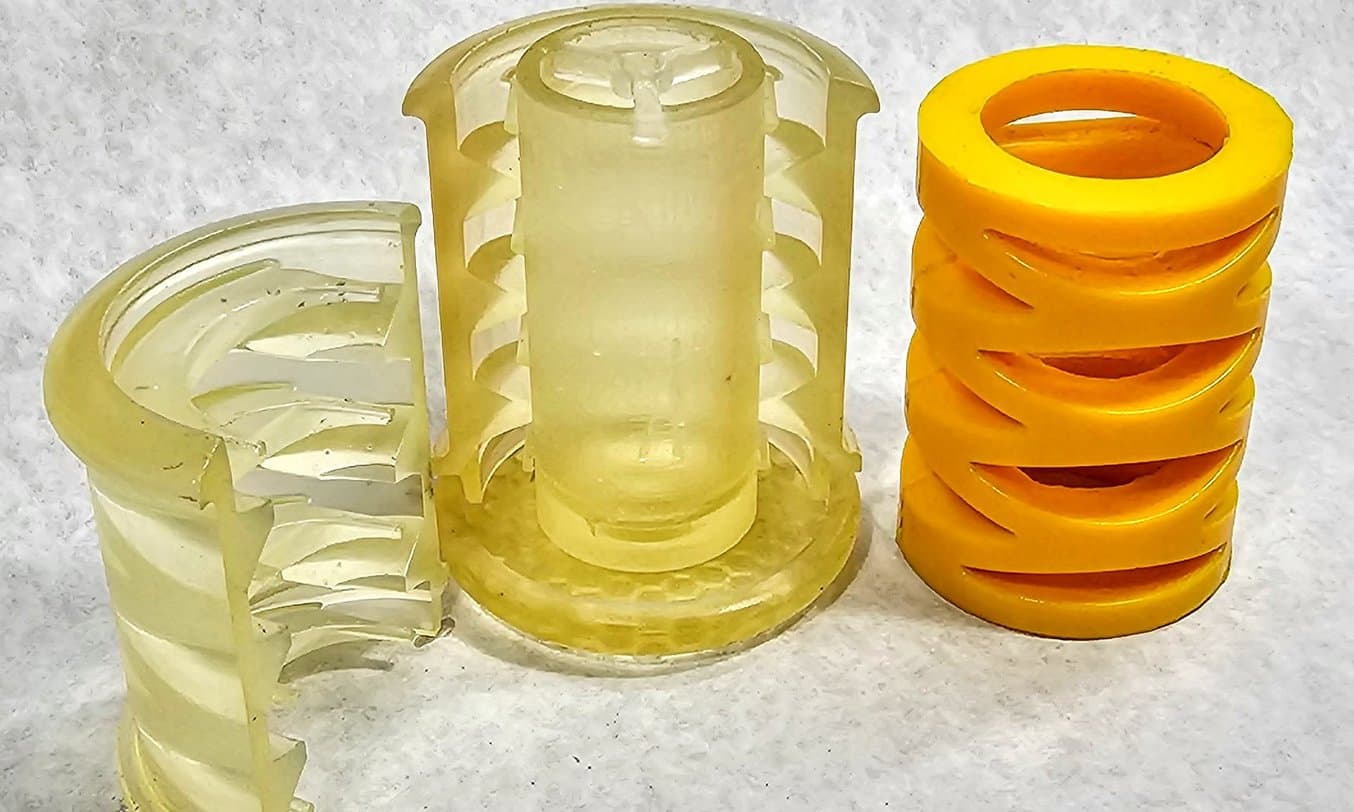
These molds (High Temp Resin, left) and cast polyurethane springs (orange, right) are prototypes with geometry made to replicate stacked disc springs.
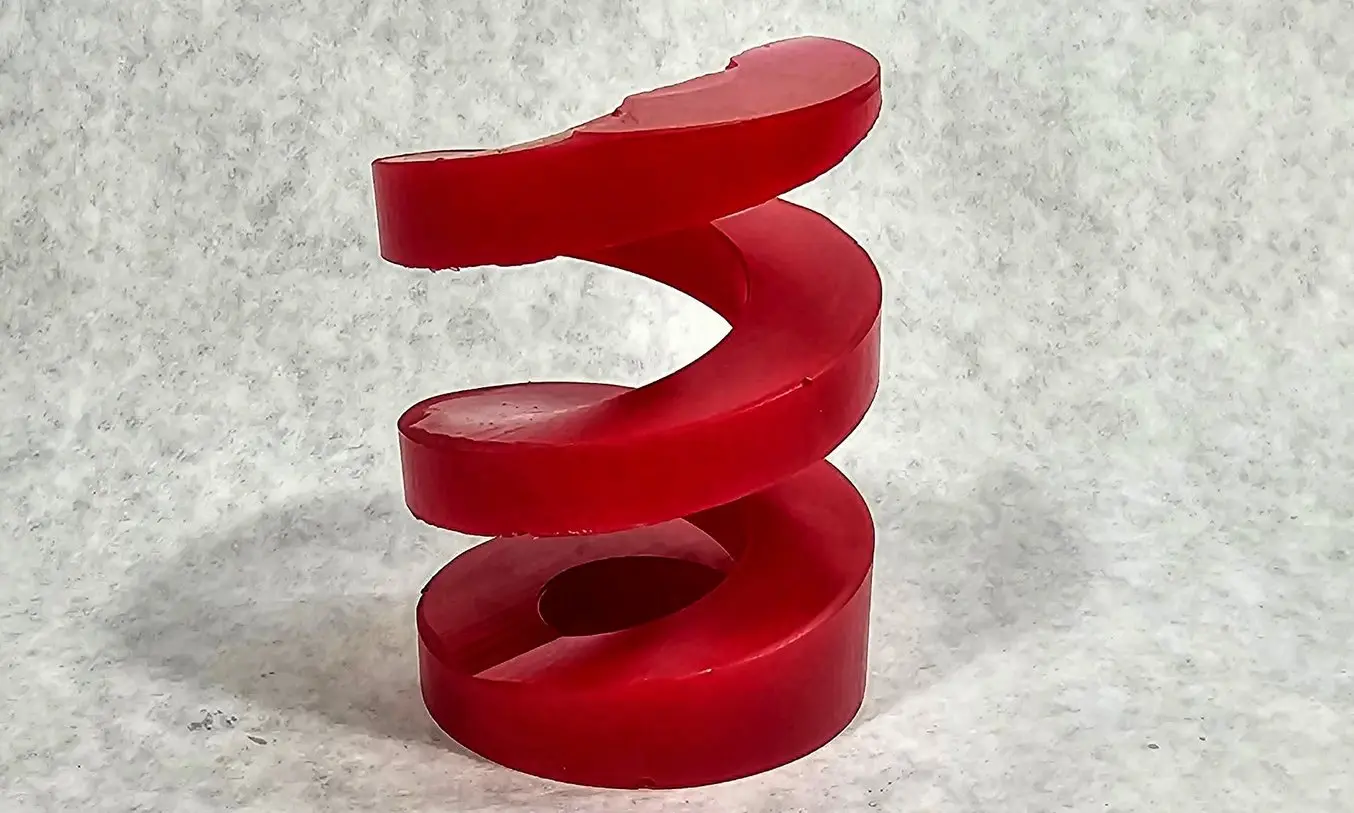
3D printing allows Baer and the team to experiment with new geometries and designs, without adding more work for the machine shop.
“We can now print and test a lot of weird shapes and geometries that before would have been an unfathomable amount of money just for testing or research and development,” says Baer. Testing out new, complicated shapes and geometries without adding high costs of machining materials and labor allows Kastalon to not only take on more business, but to make better parts for their current customers.
Roller Molds: Avoid Machining Soft Polyurethane
For coated rollers or sleeves for rollers, the traditional workflow included a cylindrical cast of polyurethane material with an additional machining step to turn down the outer diameter to the desired size and surface finish. The additional step of machining grooves can be done in a variety of styles and sizes based on the roller application. In this particular case, machining long horizontal grooves into soft polyurethane became a troublesome task. For large orders, this manual, labor-intensive machining step cut into the profit on the order and took up hours of the machine shop’s time. “Machining soft polyurethane is messy, it doesn’t always give you good results, and it doesn’t always give great finishes when cutting,” says Baer.
Machining the grooves directly would take about three hours per roller, but machining a single metal mold was too expensive and risky, especially when a mold with this geometry hadn’t been made before and it was unknown if it would work. To make a metal mold the team would require a wire tool or a shaper with an indexing head, both expensive pieces of equipment that are very specialized to certain geometries and applications.
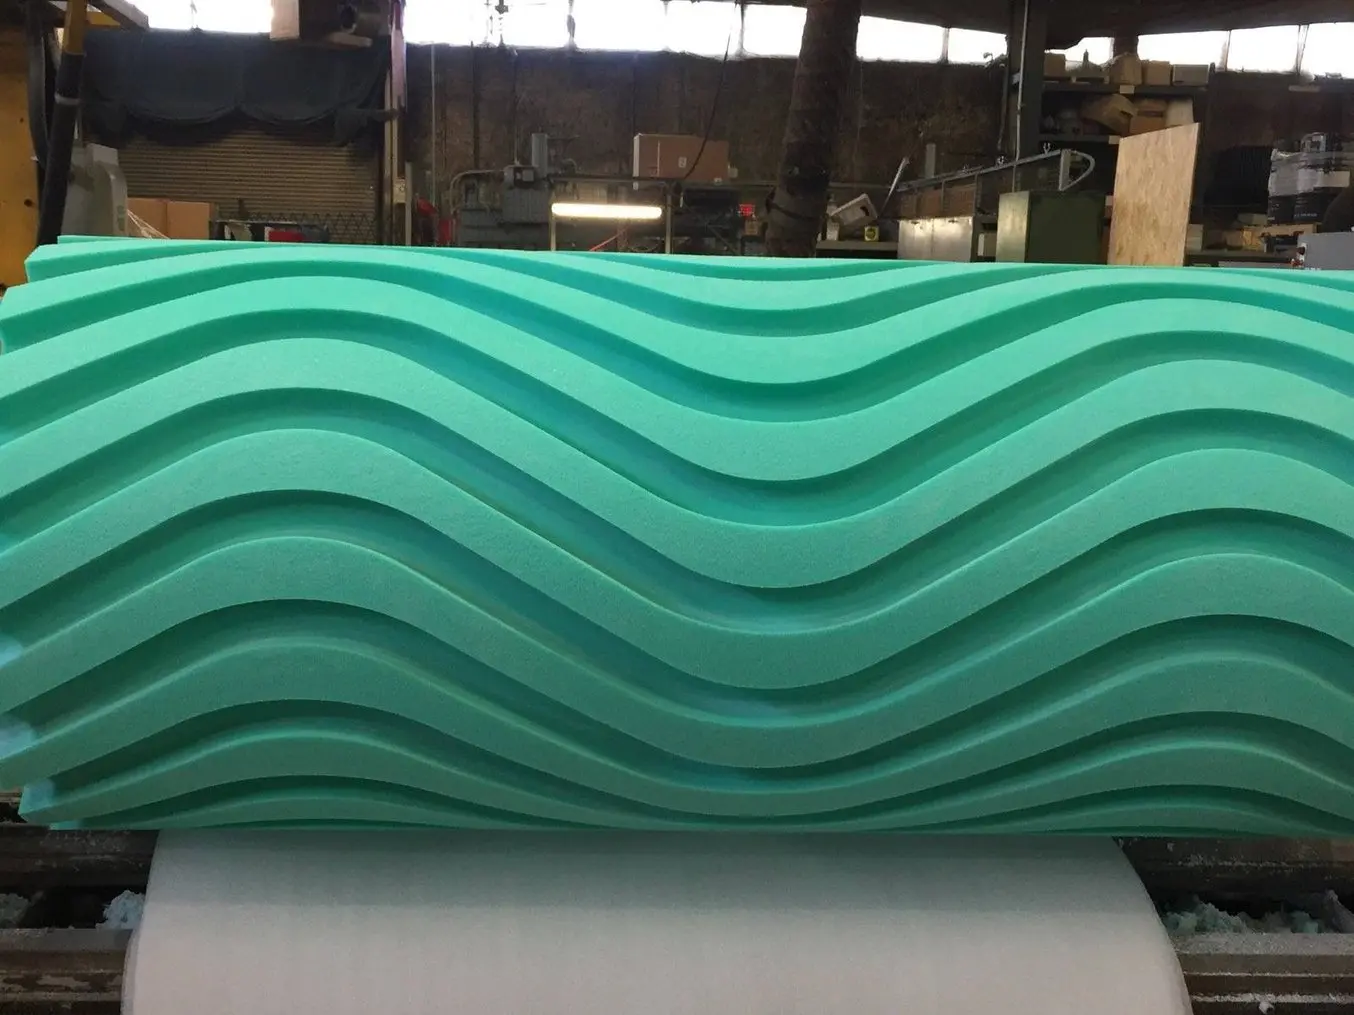
Machining soft polyurethane can be messy and time-consuming, especially on huge parts like this roller, which is cast as a cylinder and then machined to make the final shape.
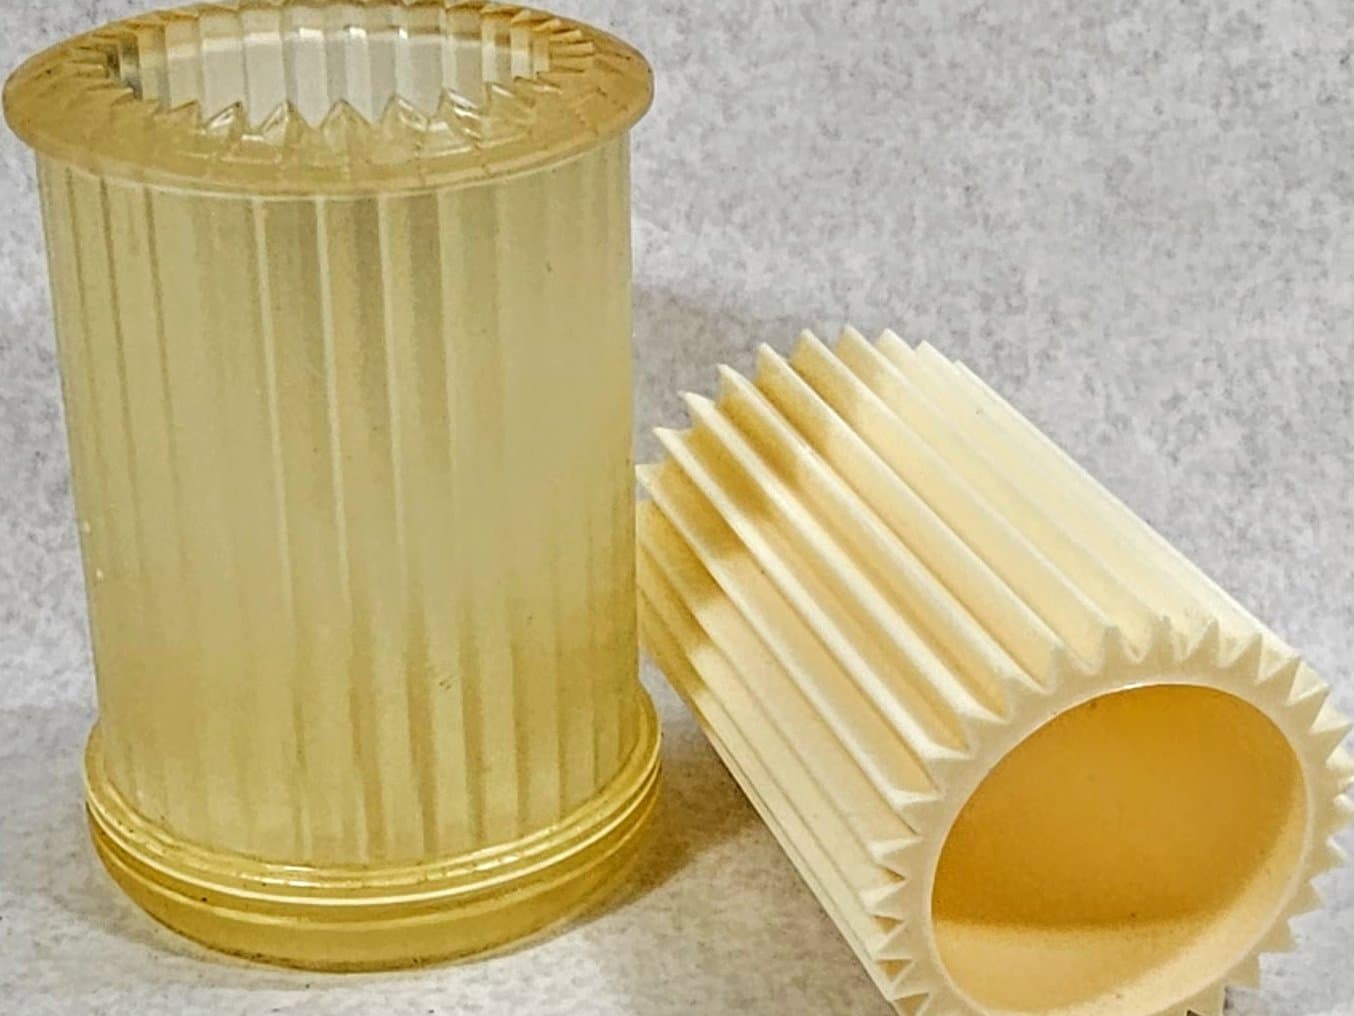
When the parts are small, machining the tiny grooves can be nearly impossible. Baer has started printing pre-grooved molds, so each cast creates a completed part with no extra machining necessary.
Baer recognized the situation and took it upon himself to try something new. He designed and printed a mold that would cast the polyurethane into the grooved shape they needed. Directly printing it on the Form 3L in High Temp Resin or Rigid 10K Resin provided a cost-effective solution that eliminated hours of hands-on manual labor.
When choosing a material, Baer considers resolution and layer height, cost per liter, strength, and color/transparency, and chooses between High Temp Resin and Rigid 10K Resin most of the time. For prototypes, one-offs, or very low-volume molding applications, High Temp Resin is used because of its lower cost and transparency — for prototypes it’s helpful to see what’s going on inside to evaluate if something needs to be changed. However, for parts that the team intends to cast in higher volumes, they’ll rely on Rigid 10K Resin’s advanced mechanical properties. “We’ve been using Rigid 10K Resin more recently mainly because it can withstand demolding better.”
| Machining | 3D Printed Mold | |
|---|---|---|
| Parts Per Year | 40 | 40 |
| Mold Setup | 1 hr | 1 hr |
| Post-Molding Hands-On Labor Per Piece | 3 hr | 0 hr |
| Total Time | 160 hr | 40 hr |
Increased Capacity and Improved Products
In less than a year, the Form 3L has transformed the decision-making process at Kastalon. No longer limited by the traditional constraints of machining, the engineering team can take on new orders they wouldn’t have attempted before, and have optimized processes that were costing them thousands of dollars in labor and materials.
“Our volume has been increasing. We’ve been gaining a lot of confidence, and the orders for the Form 3L have been steadily increasing. We’re able to try out new things and help the sales team get the customers what they want, even one or two of them, just to see that it’s possible.”
Brian Baer, Engineer
The machinists at Kastalon have built a reputation based on accuracy, consistency, and excellence. Adding 3D printed molds into the mix was a tough sell at first, but the results speak for themselves. By demonstrating the mechanical properties, tolerances, and geometric freedom possible with stereolithography, even the machine shop foreman is sending parts to the printer.
To learn more about rapid tooling, visit our applications page. To see the Form 3L, visit our product page.
