
Silicones are popular materials to fabricate soft end-use parts for a wide range of applications, including custom hearing aids, movie and TV props, prosthetics, handles and grips on consumer goods, and more.
This guide provides an overview of 3D printed tooling for silicone part production, including two-part injection molds, overmolds, compression molds, and eggshell molds. These methods can be employed for the prototyping of soft silicone products, small-batch production of customer beta units, or production of custom end-use goods.
A step-by-step guide is provided for producing a silicone keychain with an encapsulated Apple AirTag, employing mold design best practices from several Formlabs product design customers. For a detailed report, including material workflows, silicone-resin compatibility, and recommended mold releases, download our white paper.
Book a Free Consultation
Get in touch with our 3D printing experts for a 1:1 consultation to find the right solution for your business, receive ROI analyses, test prints, and more.
Casting Silicone With 3D Printed Tooling
Traditional molds for silicone part production are CNC machined from blocks of aluminum or steel. These include two-part or multi-part injection molds for liquid silicone rubbers (LSR), or single cavity compression molds used with a heat cured rubber (HCR) silicone sheet that is cured under pressure and high temperature.
Normally these types of metal molds are used in mass production, however when employed for prototyping, lead times of several weeks and hundreds to thousands of dollars in upfront tooling costs limit a designer’s ability to implement and test small changes in a mold design.
Desktop 3D printing is a powerful solution to fabricate tools rapidly and at a low cost. It requires very limited equipment, enabling skilled operators to focus attention on other high-value tasks. With in-house 3D printing, manufacturers and product designers can introduce rapid tooling into the product development process to validate design and material choices prior to transitioning to mass production. They can iterate quickly, accelerate product development, and bring better products to market.
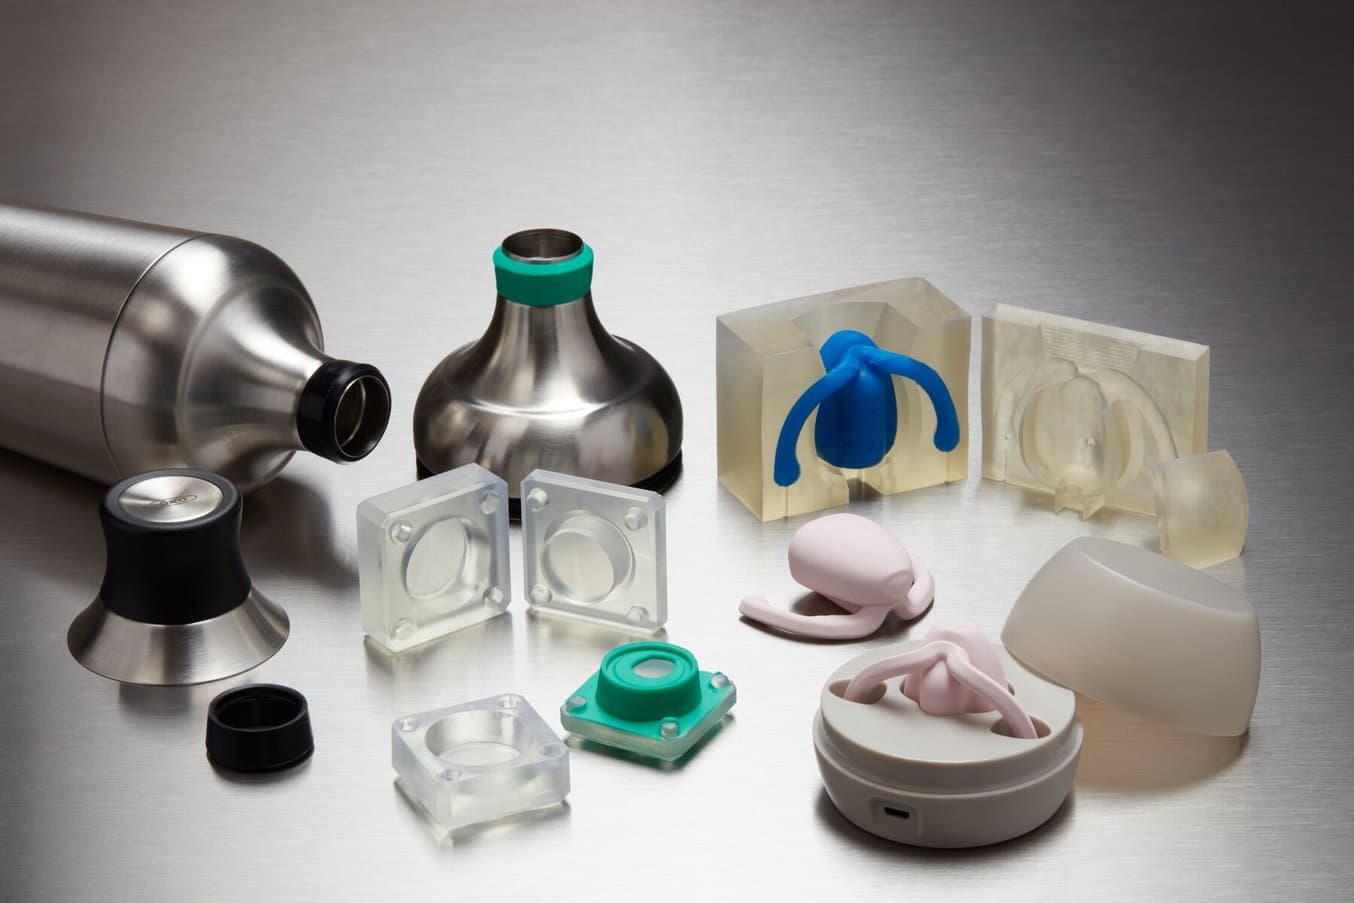
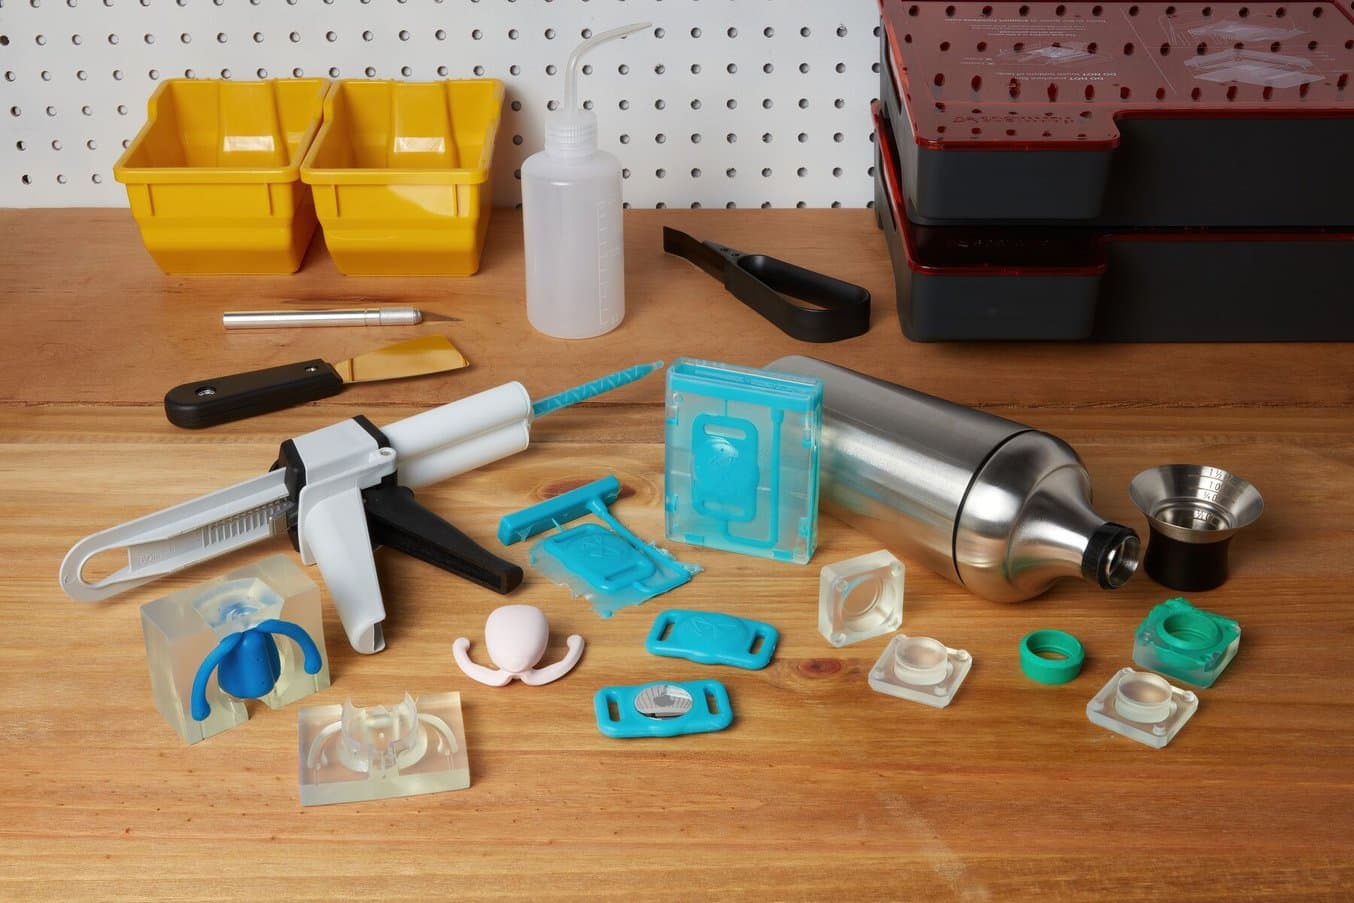
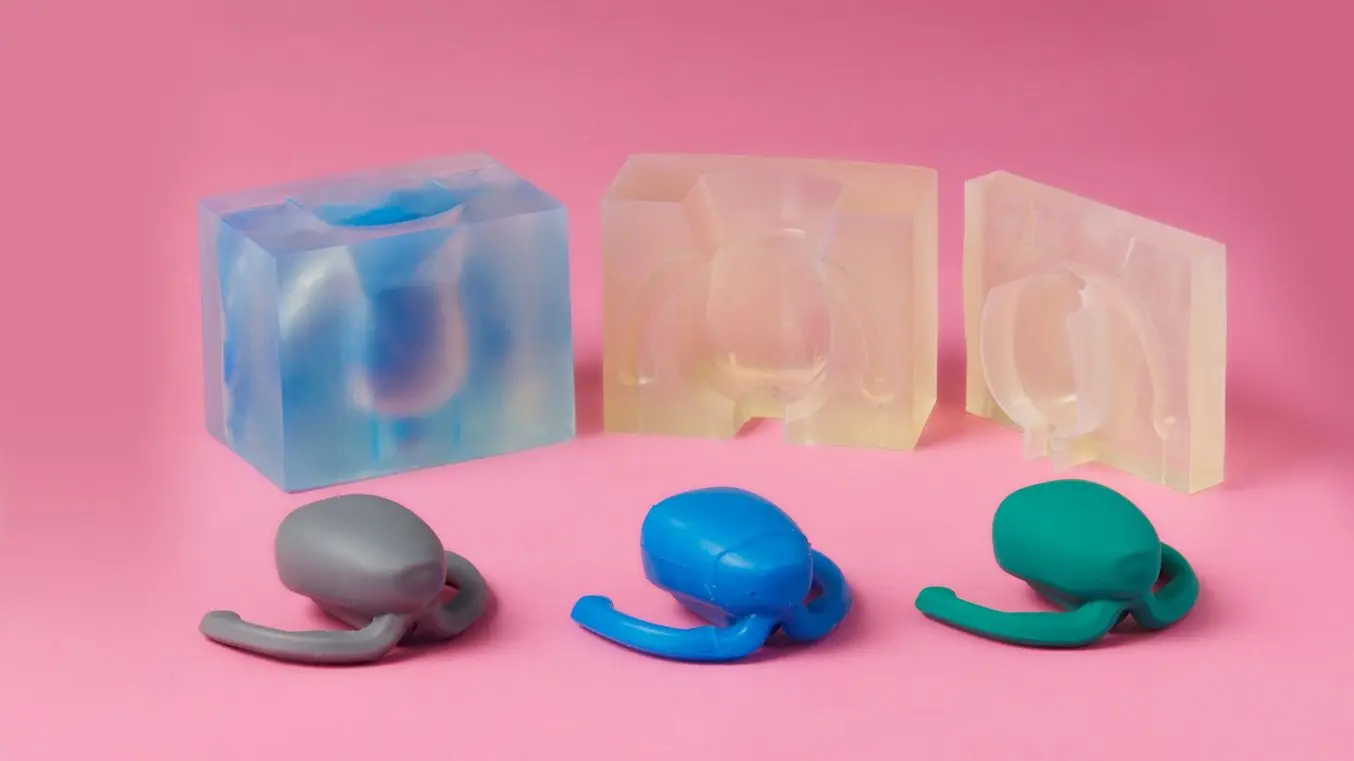
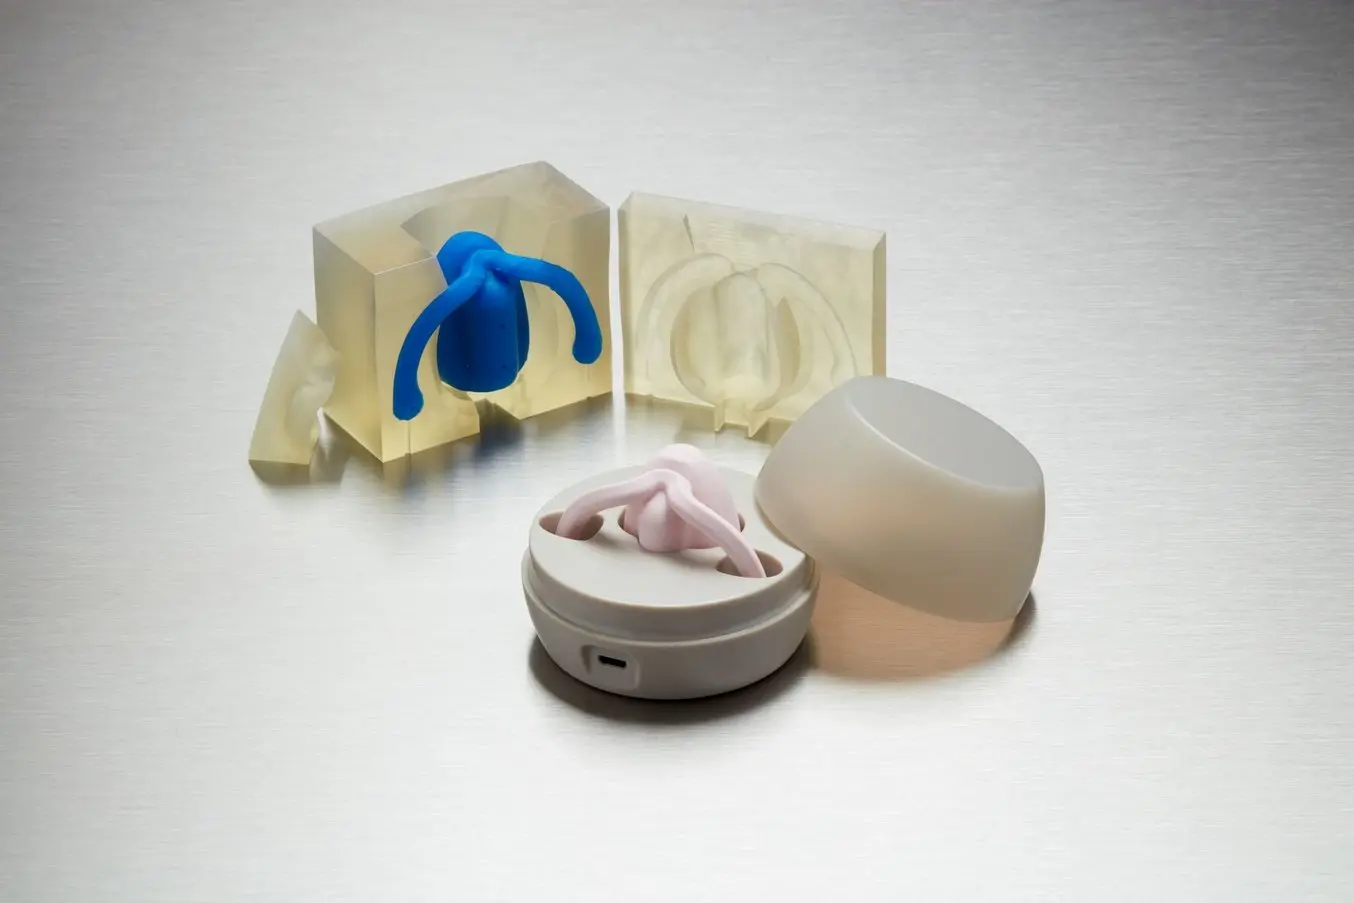
Silicone parts made with molds 3D printed on Formlabs SLA 3D printers.
Stereolithography (SLA) 3D printing technology is a great choice for silicone mold tooling. SLA parts are characterized by a smooth surface finish and high precision. RTV silicone rubbers capture fine surface details including defects, so the quality of the tool surface directly translates to the surface quality of the final part. A mold printed with fused deposition modeling (FDM) style printers, for example, would leave visible impressions of printer layer lines in the silicone part.
Formlabs Clear Resin (or other transparent resins such as Biomed Clear Resin) also allows visualization of the silicone injection process, enabling designers to assess bubble and void formation and identify areas where corner fillets or additional air vents should be added.
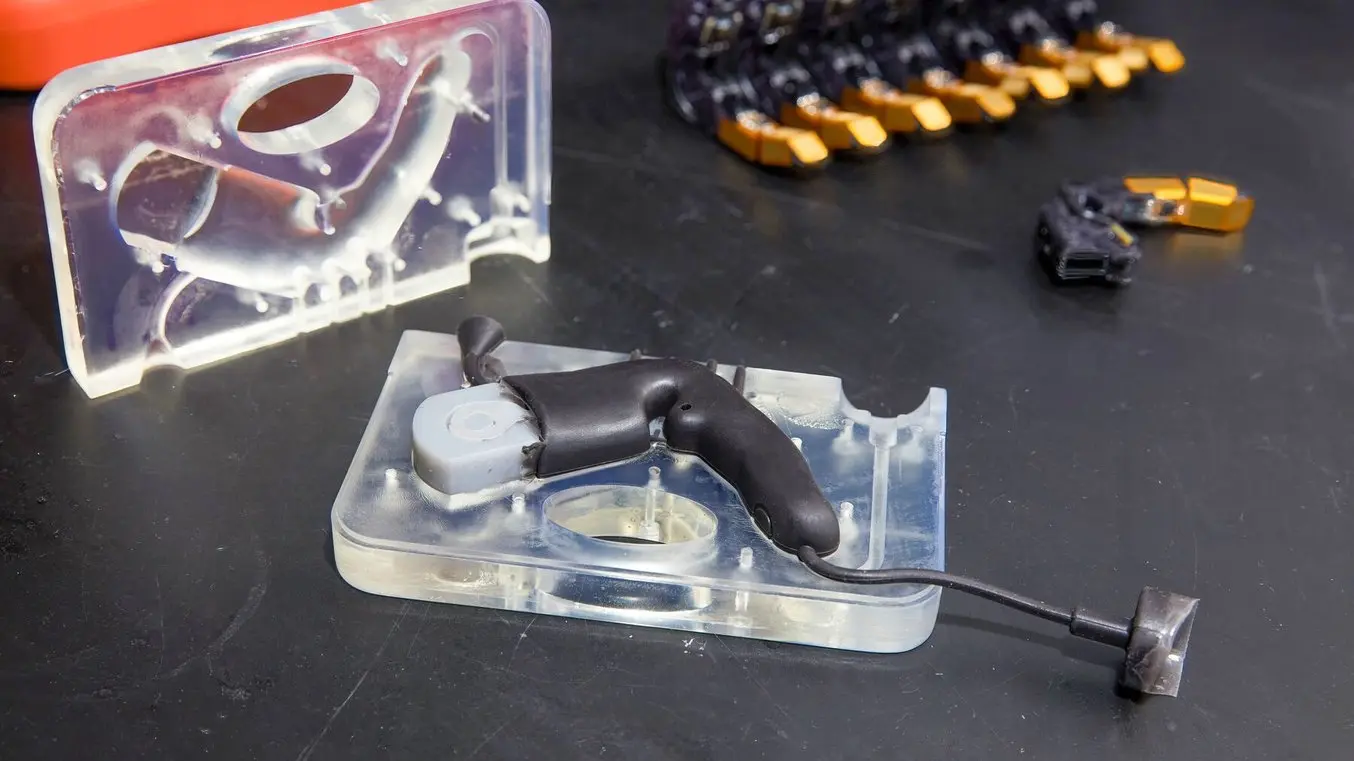
Two-part mold 3D printed in Clear Resin, to inject silicone and make advanced prosthetics, by PSYONIC.
How to Produce Silicone Parts With 3D Printed Tools
Learn from a detailed case study on SLA 3D printed mold design for silicone casting, incorporating best practices from Formlabs customers.
SLA 3D printing also offers an advantage for design complexity; a 3D printed mold allows designers to take advantage of undercuts or other complex geometries that may not be possible or would be prohibitively expensive to produce with CNC machining.
Formlabs Clear Resin is also quite versatile in its mechanical performance. The same material can be used for an extremely thin eggshell mold that cracks away easily from a custom silicone part, or for a robust compression mold that is used multiple times to produce gaskets. Finally, using affordable benchtop scale fabrication reduces lead times; a designer can print a mold geometry and start injecting silicone the next day.
When used with 3D printed molds, RTV silicone rubber captures fine surface details, including embossed text. In addition, most castable silicones are not chemically adhesive and will peel away from the mold surface after curing. Mechanical bonding can be achieved by casting onto highly porous surfaces like woven fabric, and in some cases, chemical bonding can be promoted with specialized binders.
In this video, Mack Mor, Senior Product Engineer at OXO, explains how the company uses 3D printing to make real silicone parts quickly and does a quick demonstration of silicone casting.
Anytime a castable material such as silicone comes into contact with a printed mold, we must consider the chemical interaction between the two materials. There are many, many possible combinations of silicone, resin, protective coating, and mold release that you can use. We asked customers from a variety of industries to report on their successful workflows, and their responses are summarized in our white paper.
Creating Silicone Medical Devices
This guide aims to help the user decide on the best method of silicone part production for their intended use, and provides step-by-step instructions for both printing with Silicone 40A, and molding silicone using SLA 3D printed tooling (including two-part injection molds, overmolds, and compression molds).
Silicone Casting Mold Making Techniques
Because processing RTV silicone does not require high heat or pressure, it can easily be formed with limited equipment in a prototyping lab, reducing the startup cost needed to introduce soft parts to any company's design portfolio.
There are different variations of silicone part production methods to achieve different results. These include:
OXO uses compression molding for prototyping soft components such as watertight gaskets.
Compression Molding
With compression molding, a fast-curing silicone putty is packed into two sides of a 3D printed mold, which is clamped together with a benchtop vise. This method is often used for gasket prototypes and closely mimics tooling used in mass production.
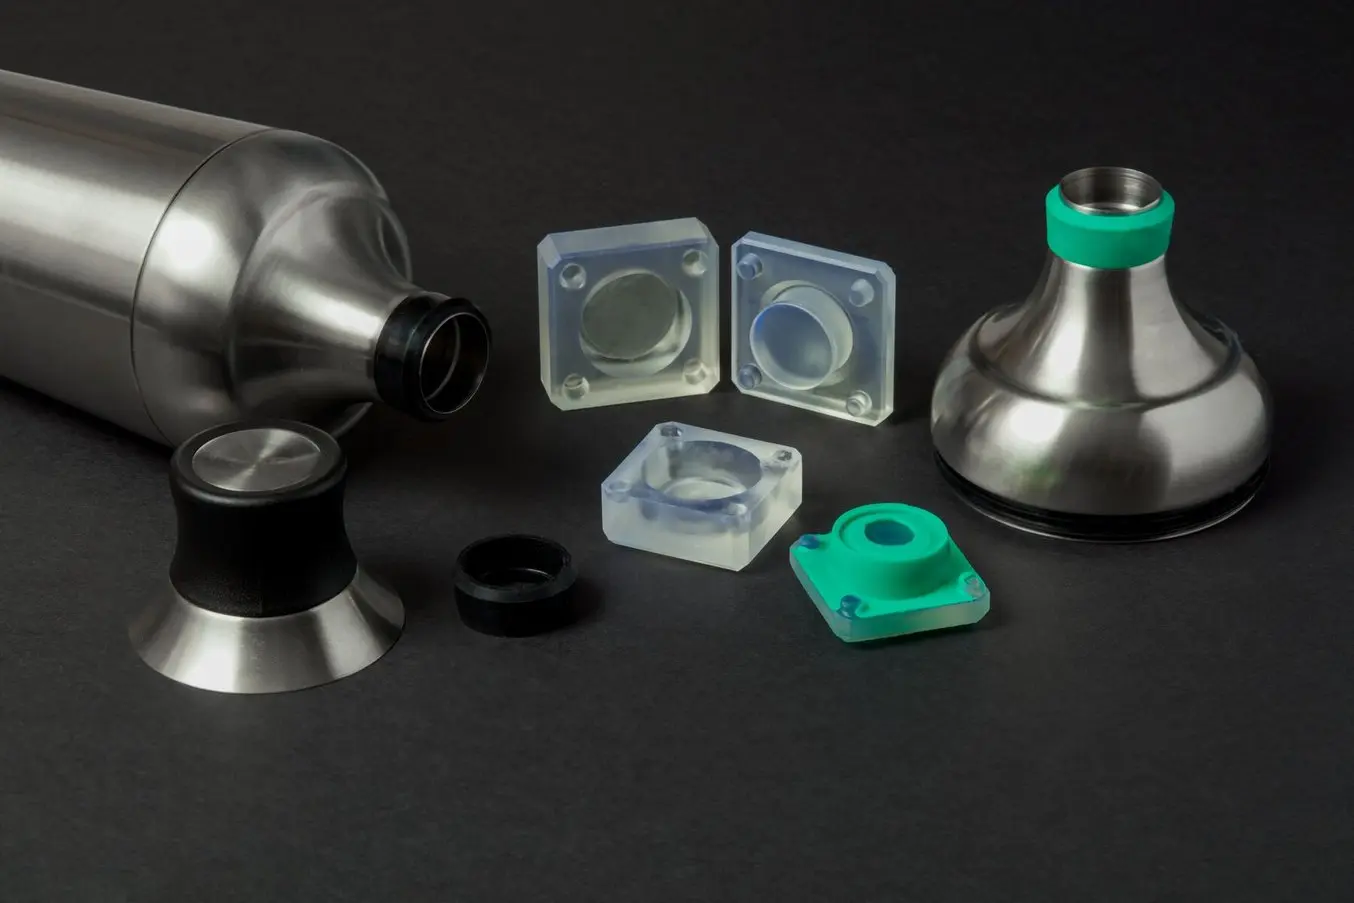
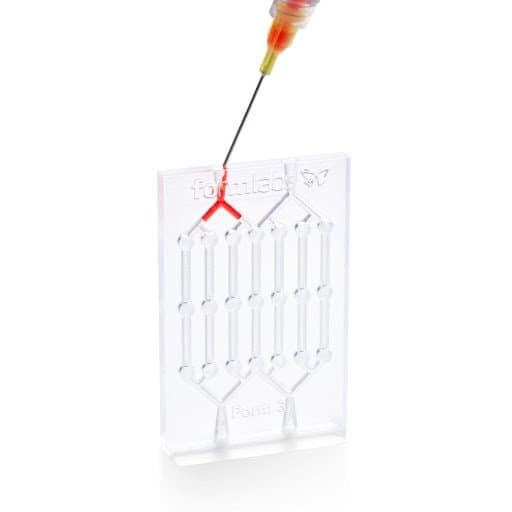
Glassboard uses silicone gravity-filled injection molds for a very wide variety of prototyping applications from silicone menstrual cups, to custom fittings, overmolds, seals, gaskets, and o-rings.
Injection Filled Molding
Injection molding is the most common method used to form a single continuous silicone prototype using a two-part or multi-part mold. In many cases, the mold is configured such that gravity aids the silicone filling process. Silicone is injected into a channel at the top of the mold, and the mold cavity gradually fills from the bottom. Liquid silicone is finally released through outlets and air channels at the top of the mold.
Dame Products employs silicone overmolding with 3D printed molds to produce customer beta prototypes.
Overmolding
Overmolding is ideal for complete or partial silicone encapsulation of hardware. The hardware component is suspended in a two-part or multi-part mold, and liquid silicone is then injected into the mold cavity, either completely or partially conforming around the hardware.
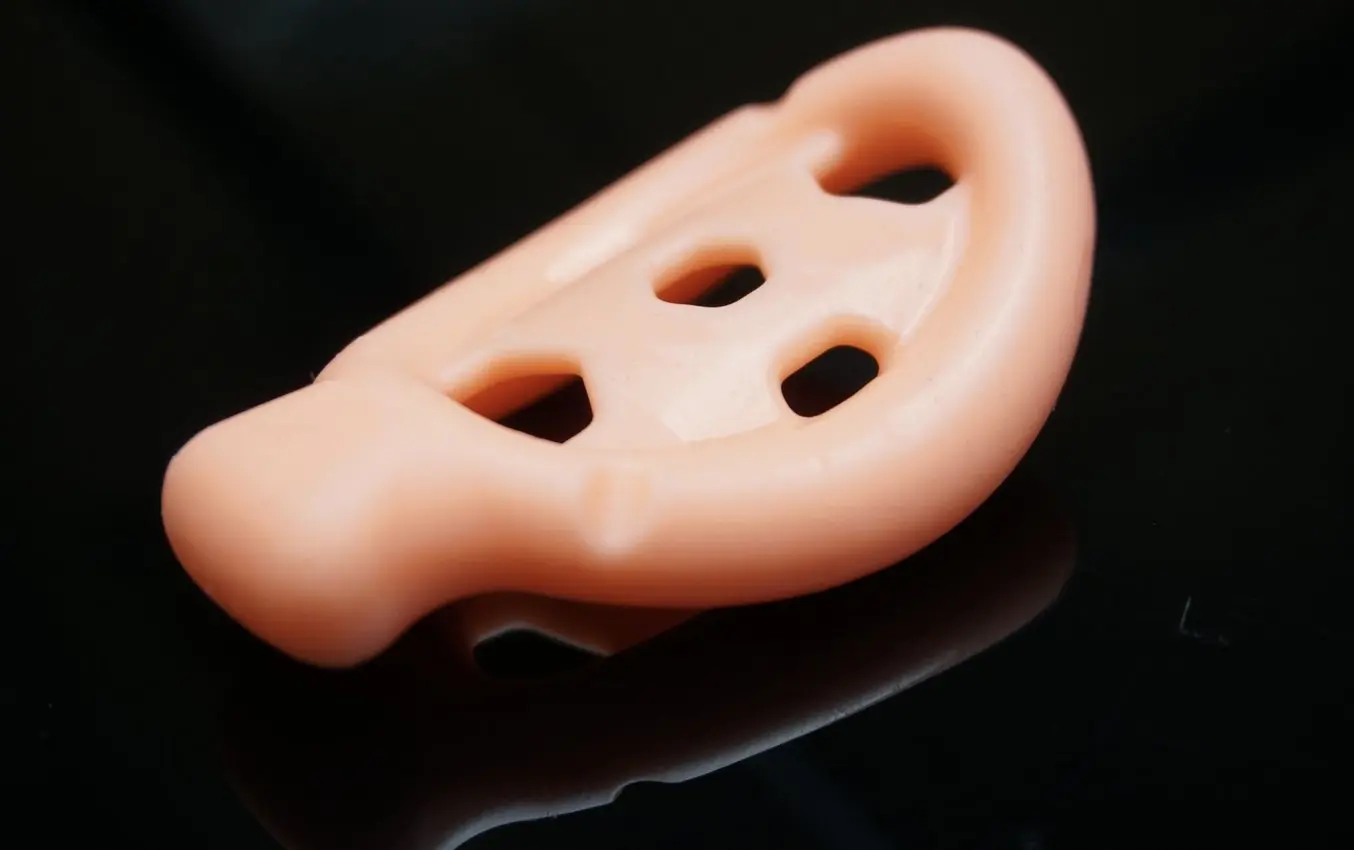
Cosm’s team turned to eggshell-style conformal molds that are filled with medical-grade silicone and then cracked away to produce patient-specific silicone implants.
Eggshell Molding
The mold is a thin (<1 mm) shell that conformally envelopes the target silicone injection cavity. After the silicone is cured, the 3D printed shell-like mold is cracked away to reveal a silicone part. Since this is a sacrificial mold that cannot be reused, this technique is used to create one single custom part.
For more information about eggshell molds, the Formlabs audiology white paper 3D Printing Custom Silicone Ear Molds provides a step-by-step guide.
While the outcome of each molding process may look similar, there are a few criteria that we recommend for selecting a mold type. These include target part geometry and the ability to accommodate undercuts and holes in the design, your scale of production, and the materials that you intend to cast. We name a few guidelines in the table below.
| Mold Type | Part Geometry | Materials | Production Scale |
|---|---|---|---|
| Compression Mold | No undercuts | High-durometer, silicone putty | Dozens of casts |
| Injection Filled Mold | Minor undercuts | 2-part liquid silicones | Dozens of casts |
| Overmold | Encapsulate internal hardware, minor undercuts | 2-part liquid silicones | Dozens of casts |
| Eggshell Mold | Can accommodate large undercuts and holes | 2-part liquid silicones | Single use |

Silicone Part Production With 3D Printed Tools
This report provides a step-by-step guide on 3D printed tooling for silicone part production, with best practices and customer case studies.
Silicone Casting Mold Making: Step-by-Step Process
To produce low-volume silicone parts in-house, quickly, and affordably with 3D printing, read the following step-by-step process to make a silicone casting mold.
In this example, we will create a mold to produce a keychain with an embedded Apple AirTag device.
Materials and Equipment Required
Materials
-
Dragon Skin 20 (Pt-cure) by Smooth-On
-
Silc-Pig colored pigment
-
Krylon high gloss acrylic spray
-
Ease Release 200
-
An encapsulated hardware, in this case, an Apple Airtag
Equipment
-
Epoxy cartridge (50:50)
-
Epoxy gun
-
Mixing nozzle
-
Spring clamp
-
Vacuum chamber and pump*
-
Pressure pot*
*Optional
1. CAD Model Design
First, you will need a CAD model of the final part. This can be achieved by designing the model using CAD software or even reverse engineering an existing physical part, with a 3D scan.
In this example, we created a mold to produce a keychain with an embedded Apple AirTag device, so we used a digital replica of an Apple AirTag device.
2. Silicone Casting Mold Design
Our white paper provides a step-by-step guide for designing 3D printed tooling for this project. These basic design steps and best practices apply to any injection-filled mold or overmold, with gravity-aided fill:
-
Design your base volume, including any encapsulated hardware
-
Define a parting line and split the mold
-
Remove the base volume from the mold stock
-
Design the silicone fill gate
-
Define the air vents
-
Add alignment features to secure encapsulated hardware
-
Add registration features to mate the two mold blocks
-
Design a silicone trough
-
Modify the fill gate to accommodate a syringe
-
Create pry points on the mold exterior
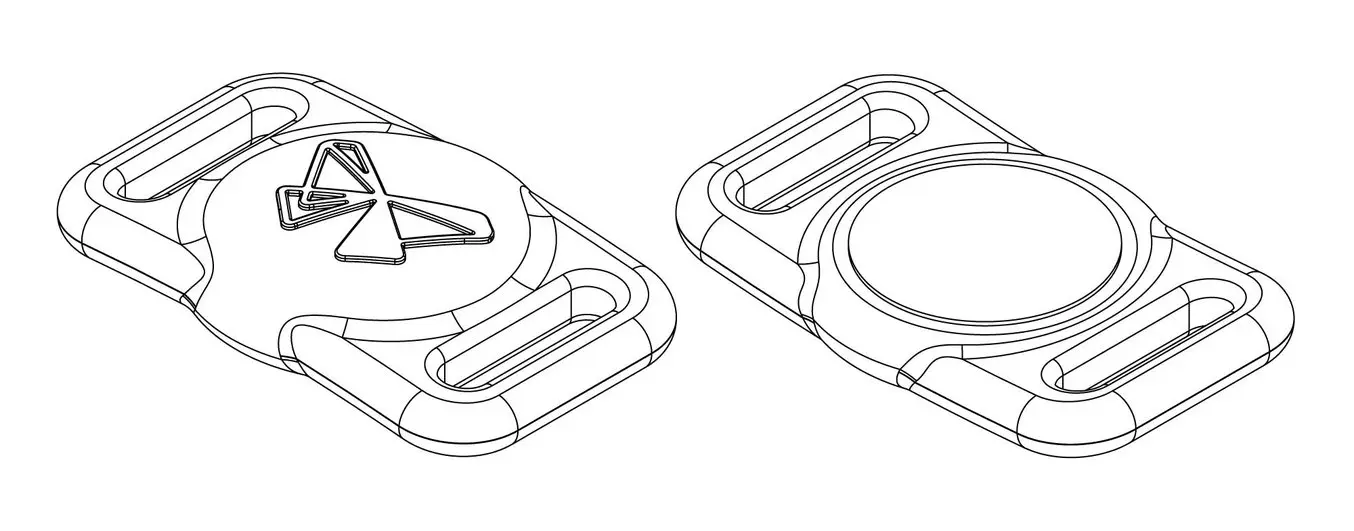
Base 3D model with encapsulated hardware.
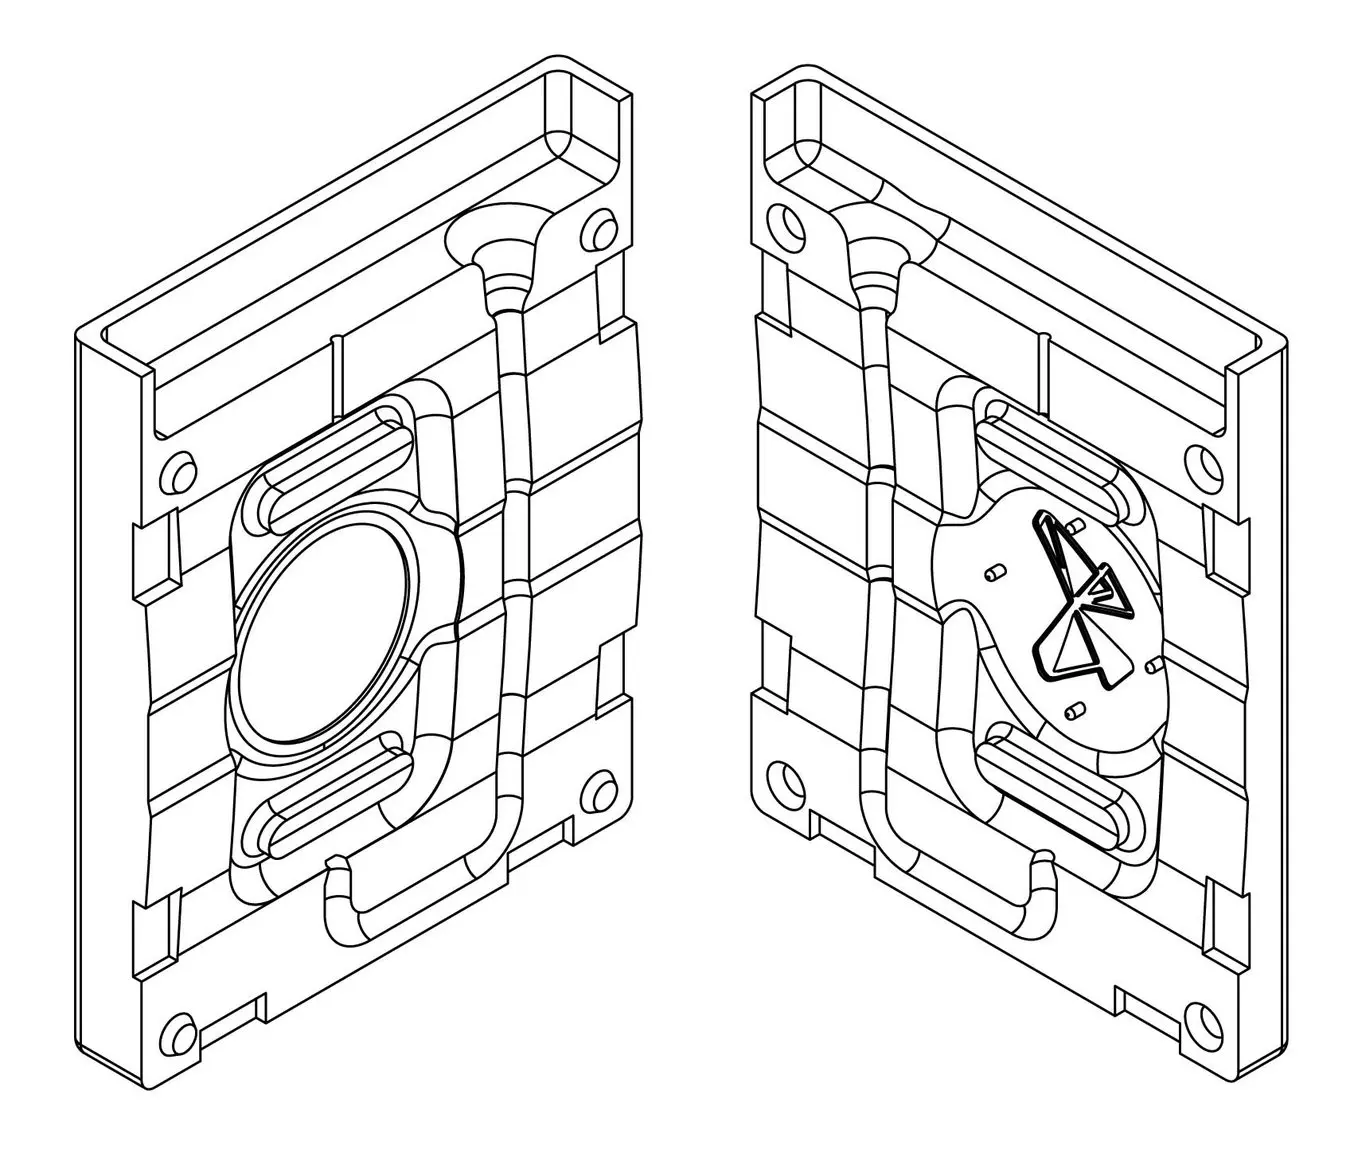
Final mold designed in CAD.
For detailed mold design step-by-step instructions, read our Silicone Part Production With 3D Printed Tools white paper.
3. 3D Print the Mold
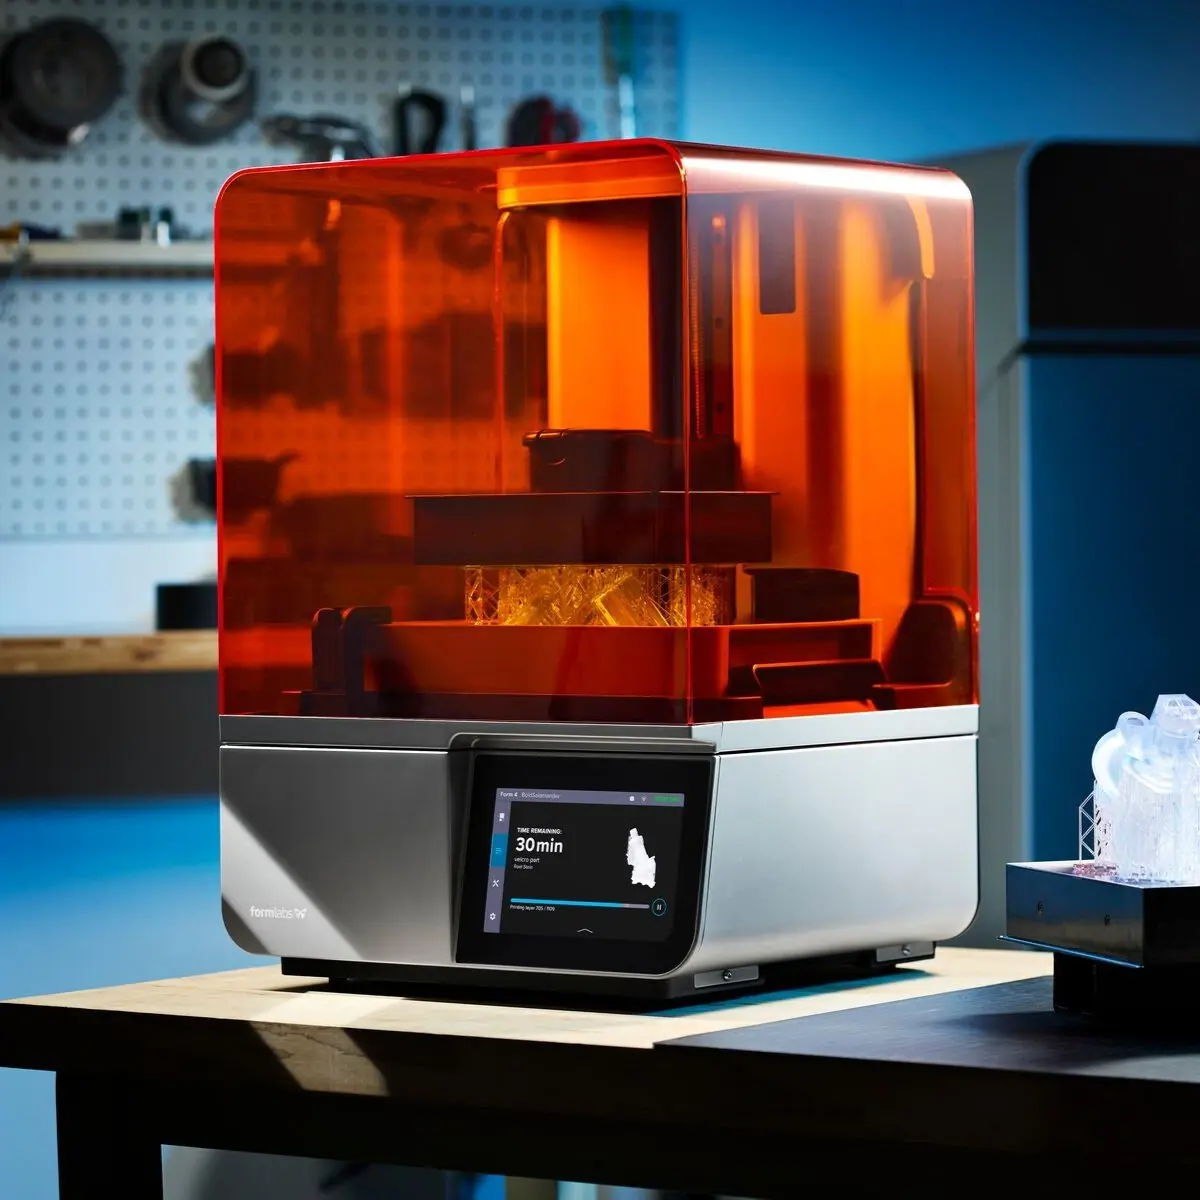
Depending on the size needed, you can use one of Formlabs’ resin 3D printers, the Form 3+, for smaller molds, or the Form 3L for large format prints.
In terms of resin selection, many available resins work, however Clear Resin or Biomed Clear Resin are great options for visualizing the flow of silicone while casting your part.
Request a Free Sample Part
See and feel Formlabs quality firsthand. We’ll ship a free sample part to your office.
Using Formlabs print preparation software, PreForm, you can automatically prepare your model to print and send the model to your printer. We recommend printing with a 50 microns layer height for a good balance between smooth surface texture and fast printing time.
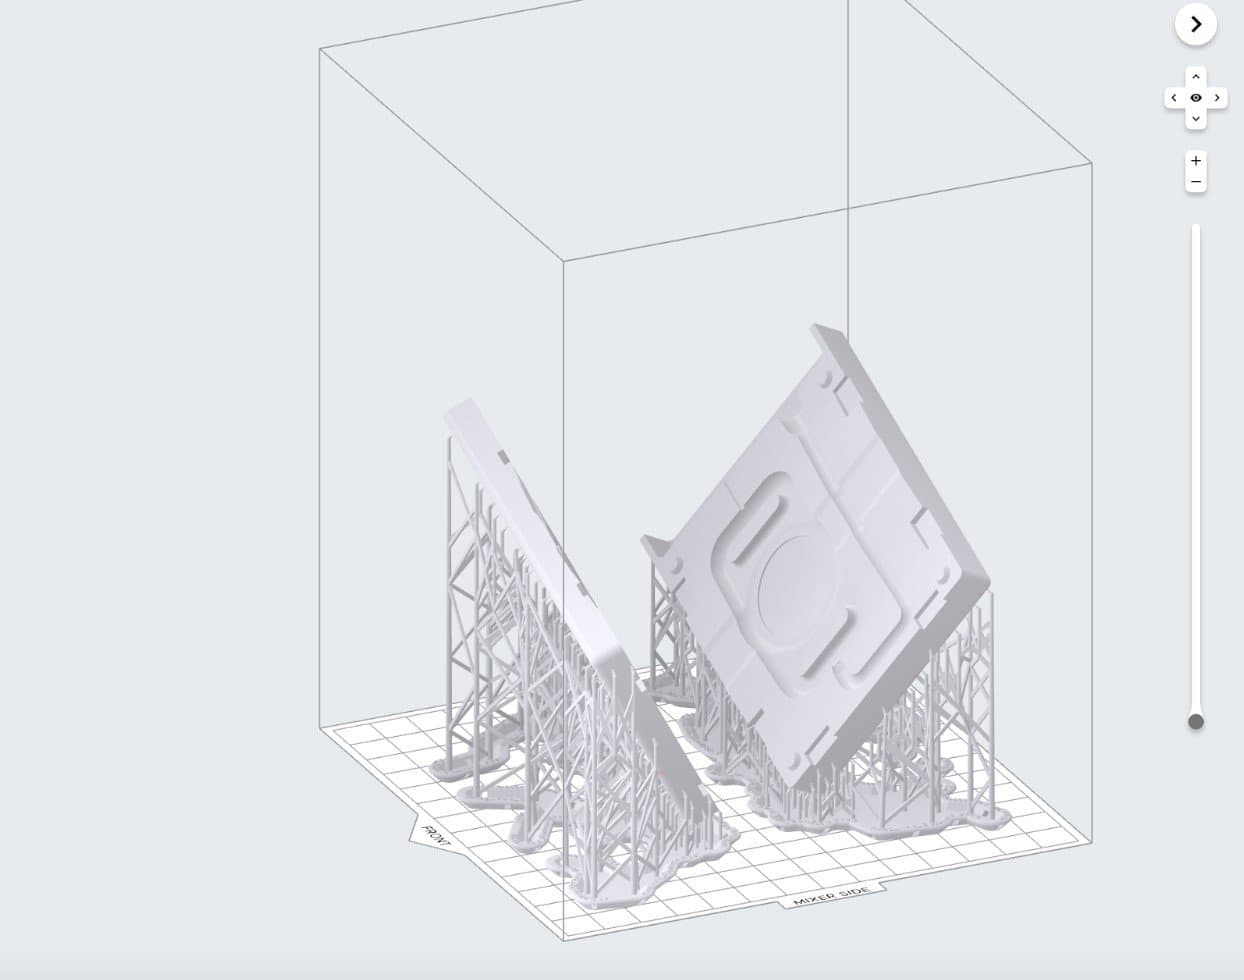
Silicone casting mold preparation for 3D printing with automatic support generation on PreForm.
Since silicone picks up fine details in the surface, including layer lines, 25 microns layer height might be needed for some aesthetic applications. Orient your parts on the build plate so that critical interior surfaces are free of support marks. Placing the mold stock flat on the build platform can work in some cases.
Once the mold is printed, wash and cure the printed parts and remove supports.
4. Assemble and Fill Mold
Prepare your mold for casting by applying protective coatings and mold release. Consider using mold release anytime two different materials come into contact with each other. This includes embedded hardware that you plan to insert and remove from an overmolded silicone sheath. Consult our customer workflow table in our white paper for recommendations.
Follow the guidelines on your material packaging, and wait for the coatings to fully cure or dry before moving on to the next step.
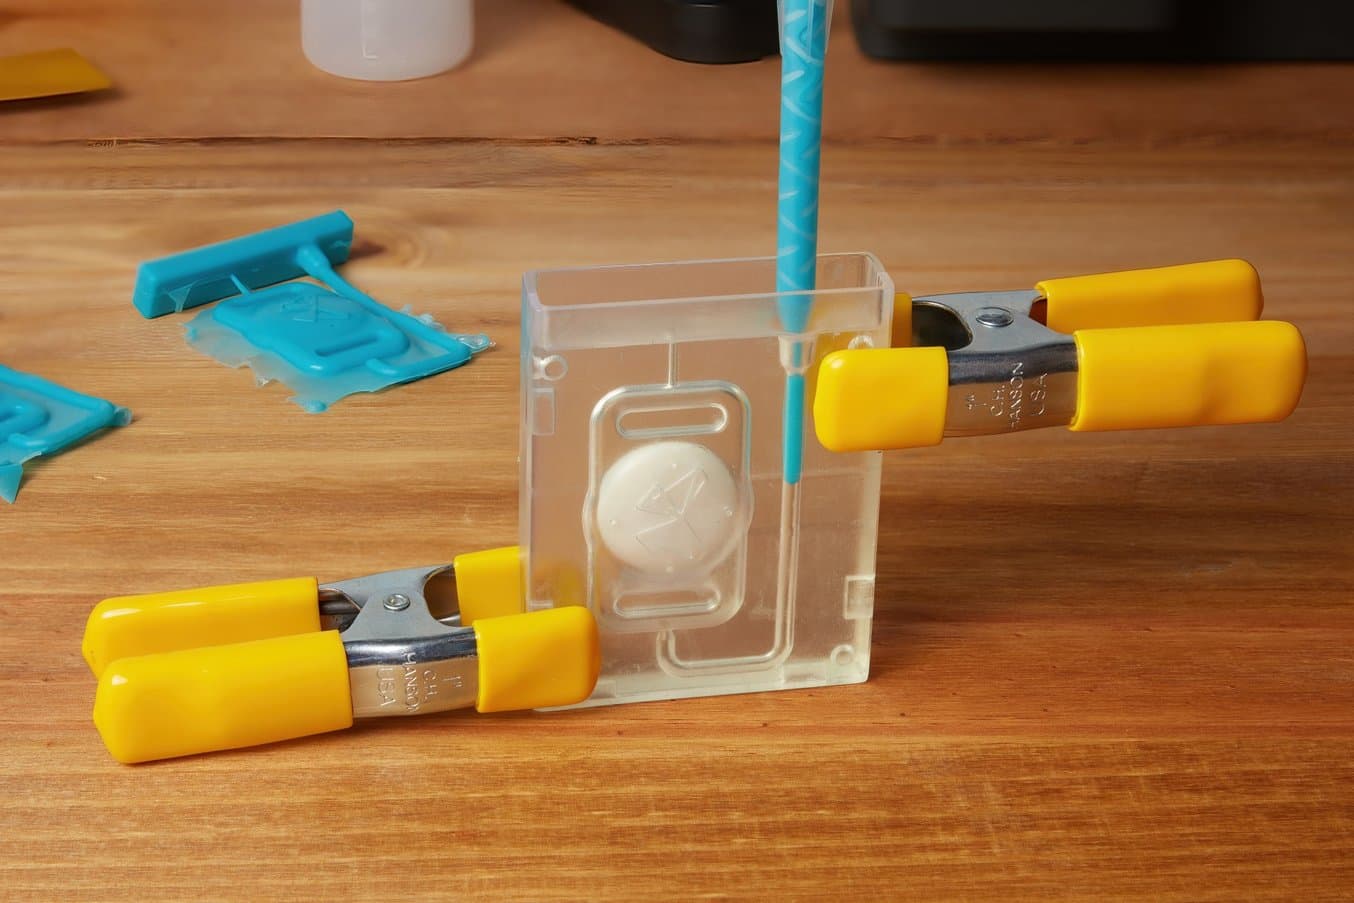
Carefully clamp the mold starting in the direction of the draw, making sure that the mold stock and any encapsulated objects remain in alignment.
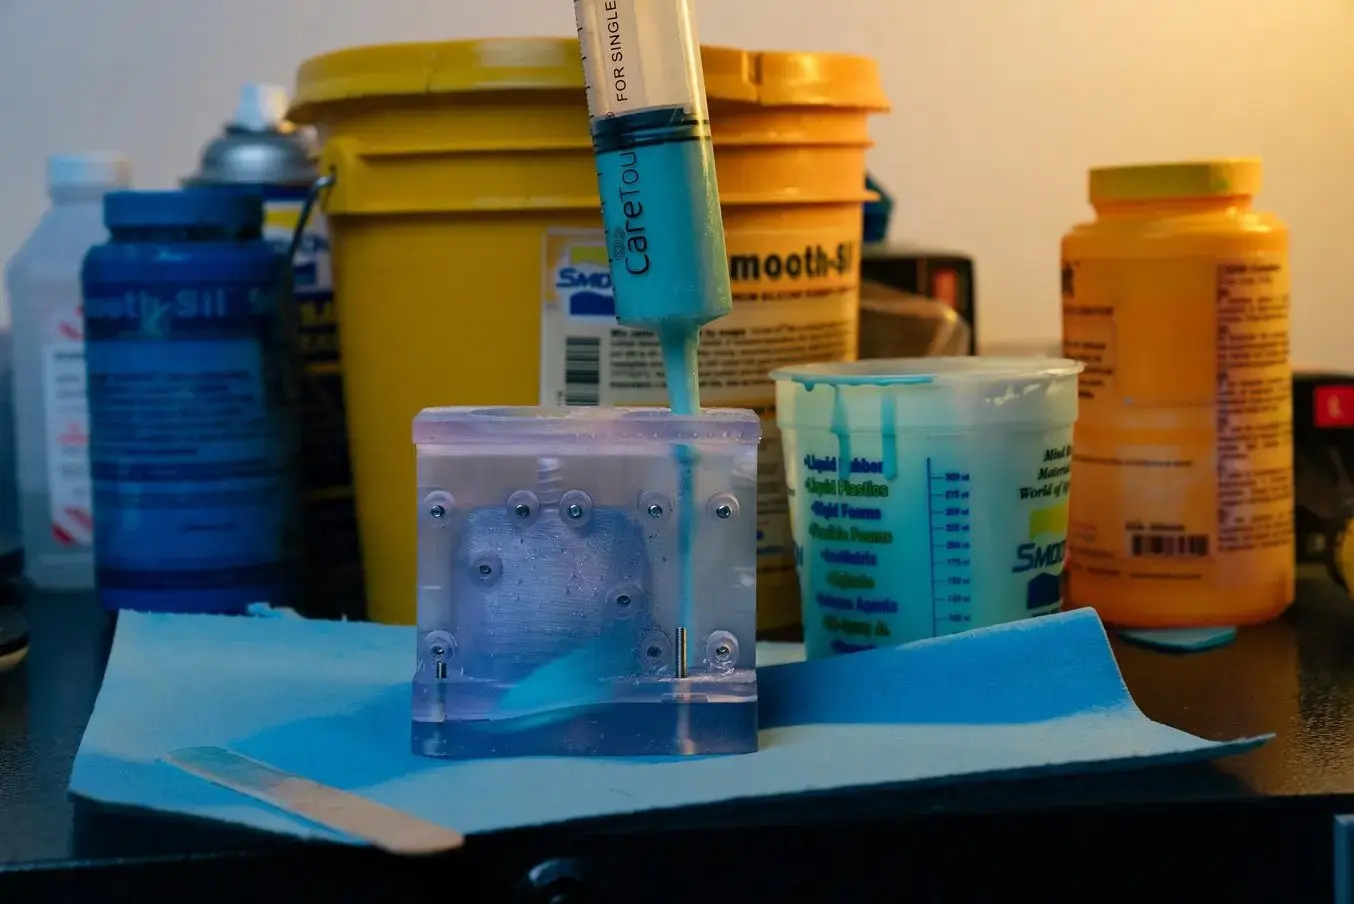
Clamping and filling the silicone casting mold.
Prepare the silicone material of your choice and fill the mold. To learn more about what type of silicone material to choose, read our white paper.
5. De-Mold and Finish
Next, de-mold and trim the silicone part. It is normal to develop some flash within and around the parting line. Remove excess silicone from the exterior of the mold first. Pry open the mold by inserting a flathead screwdriver or another flat tool into the pry point and gently twisting it to break the seal. Remove the silicone part, being mindful that some silicone may need to be gently trimmed away from any air vents.
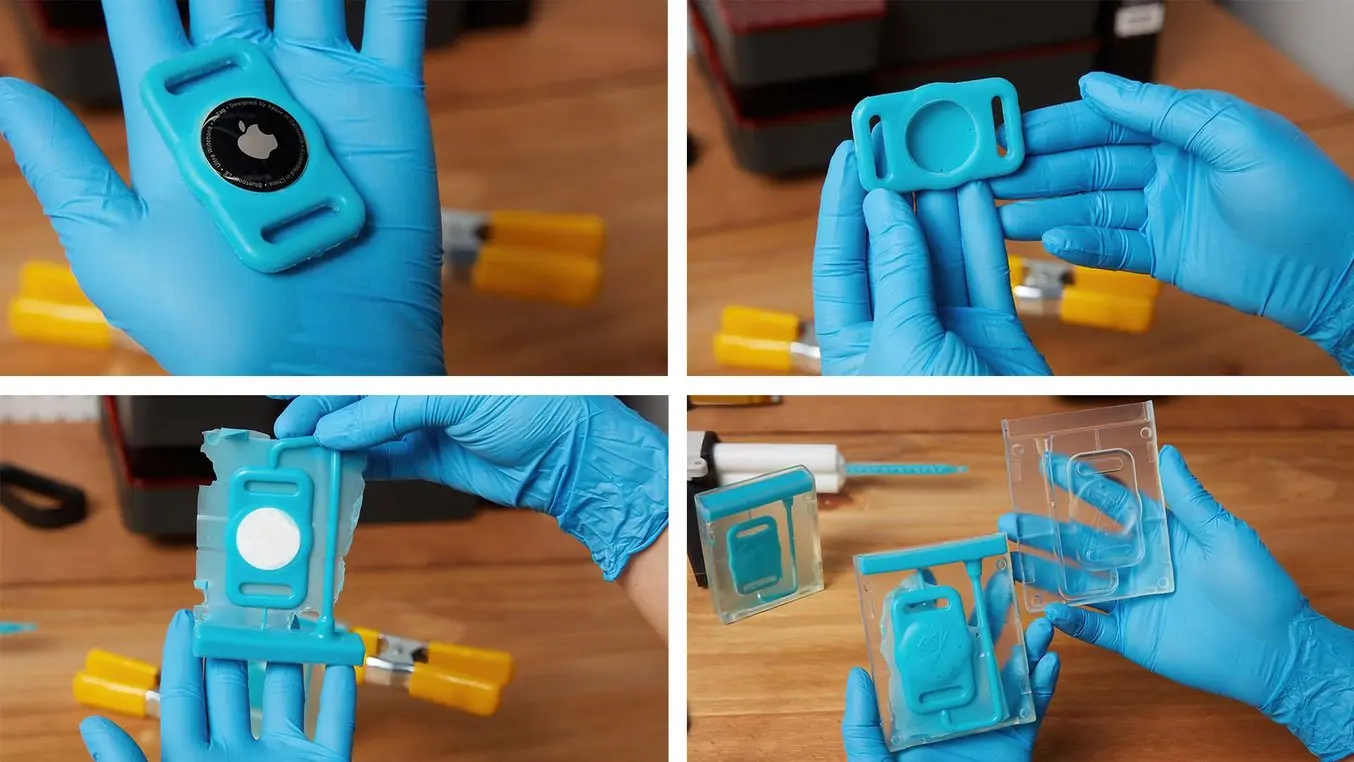
Demolding and trimming the excess silicone casting, and the final keychain with an embedded Apple AirTag device, made with 3D printing and silicone casting.
After removing the silicone part from the mold, use a sharp razor or flush cutters to trim the vent and gate features from the part. Residual bumps can be removed gently with wet fine grit sandpaper. Finally, you can wash the part with soap and water to remove sandpaper and mold release residues.
Depending on your mold type, you can reuse the mold multiple times. You may need to clean out vents with a sharp tool and/or reapply mold release before filling with silicone again.
It is normal to go through a couple of mold design iterations after trying the full end-to-end workflow. A few design changes you might need to consider include increasing the offset distance between mating features, moving alignment pins to ensure that encapsulated objects are fully constrained, or adding air vents in areas that tend to trap air bubbles during filling.
Get Started With Making Silicone Parts With 3D Printing
Whether you are making silicone parts with 3D printed molds, making silicone molds for casting other materials, or directly 3D printing silicone-like soft materials such as Formlabs’ Flexible and Elastic family of resins, 3D printing can help in the process.
Formlabs' complete, easy-to-use ecosystem makes it simple to get started with 3D printing molds for silicone part production and adding soft rubbery components to your product or project portfolio.
Request a free sample part to see Formlabs 3D printed materials firsthand.
Not sure which 3D printing solution fits your business best? Book a 1:1 consultation to compare options, evaluate ROI, try out test prints, and more.