Off-the-shelf drones by big manufacturers like Skydio or DJI are inexpensive and easy to purchase, but what you order is what you get — it can become hard to customize your drone for your own application.
Even pre-made drone kits can limit your power to make design choices to optimize for speed, or take advantage of materials you may already have, saving on cost. Building your own DIY drone can make it easy to customize your drone for your unique application. In this guide, we’ll detail a step-by-step drone build, provide an easily accessible (and customizable) bill of materials, and talk about the advantages of different methods, materials, and components.
Book a Free Consultation
Get in touch with our 3D printing experts for a 1:1 consultation to find the right solution for your business, receive ROI analyses, test prints, and more.
Understanding Drone Physics
Before building your own DIY drone — we’ll later walk through a quadcopter design process — you should understand the basics of drone design and performance.
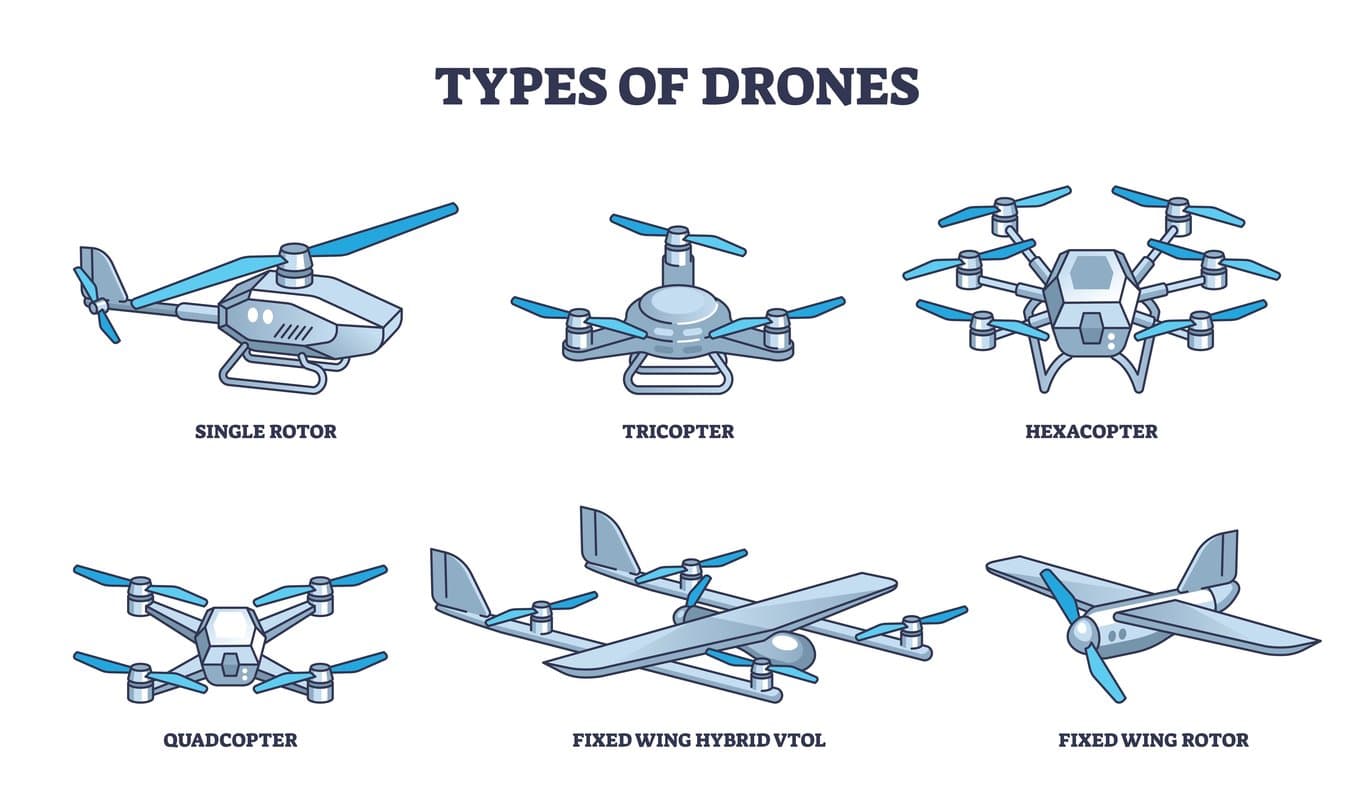
First of all, why quadcopter drones? Quadcopter drones are used for drone racing, surveillance, research, construction site monitoring, and more. Their primary strength is their maneuverability and their ability to hover, which makes them well-suited for monitoring applications like crime-scene surveillance or agricultural mapping. The plane-like drones, called ‘fixed-wing’ drones that are used by the defense industry, by contrast, are geared towards long flight times and heavy payloads.
Though you can absolutely build a DIY fixed-wing drone, the landing and takeoff processes are more complicated, and if it’s your first build and design, a quadcopter design will be more straightforward.
Quadcopter drones lift off the ground by their motors pushing air down, creating ‘lift.’ Two of the quadcopter’s motors rotate clockwise, and the other two counterclockwise. These opposing forces keep the quadcopter balanced; think about a helicopter creating lift with its main propeller — it has to be balanced by the small rotor on the tail in order to stay level; it balances in the air by modulating the force of the two distinct ‘lifts.’
Drone Frame Size, Shape, and Material
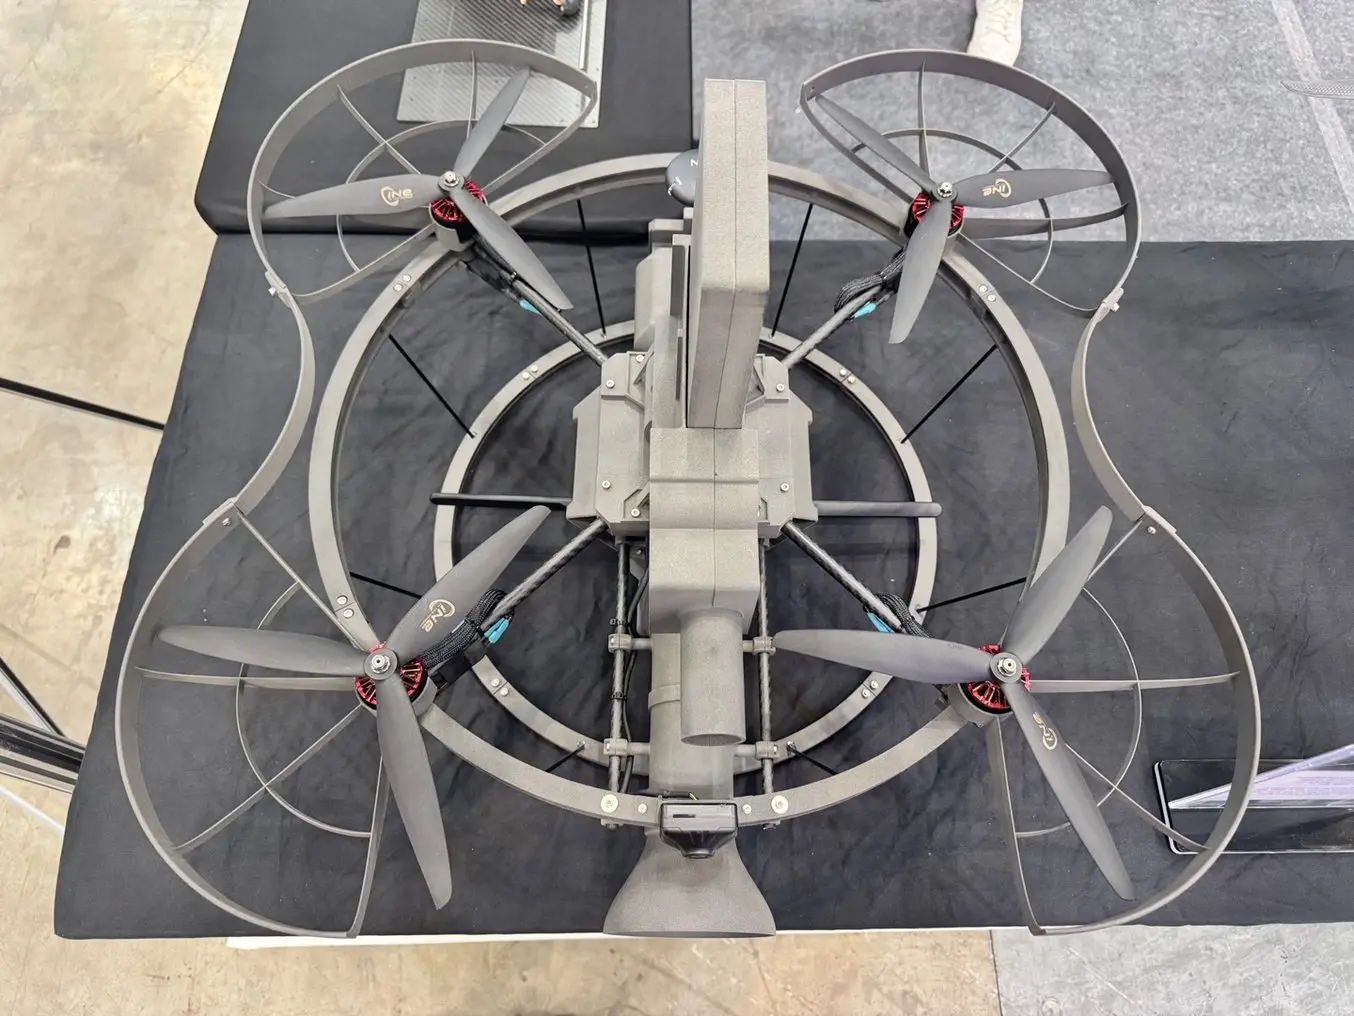
This drone by ION Mobility has SLS 3D printed components in its main tech stack — the center portion that houses the battery, GPS, and VTX — as well as the thin parts encircling the off-the-shelf motors and propellers. With 3D printing, the ION team was able to optimize this drone for stability and durability — the frame protects the props in case of collision or rough landing.
Your DIY drone frame is important — frames account for the vast majority of your drone’s size and need to be durable, lightweight, and strong. The drone frame’s job is to serve as a base for your electronics, and a central connection point for your motor arms. The distance from one propeller blade to the other is how drones’ sizes are measured, so a ‘550 drone’ is 550 mm from one tip of a propeller to the other. Most FPV drones, like the most popular DJI models, are around 200 to 300 mm in diameter, making them fast and agile. What these drone frames gain in agility, however, they often lose in flight time — their small frames cannot carry big batteries, limiting them to typically less than an hour of flight time.
Most mass-produced drone frames are made using injection molded plastics like ABS. For your DIY drone, you can purchase the ABS components for frames and rotor arms, or you could purchase carbon fiber frames, which are easy to machine and assemble. Or, you could use 3D printing to design a unique frame that can be purpose-built for your application, bringing together motors, wiring, batteries, and navigation components that otherwise wouldn’t typically fit together. The bottom line — DIY drones are up to you, and 3D printing takes that to the next level by eliminating the limitations of pre-set DIY drone ‘kits.’
SLA 3D printers enable drone frames in materials like Formlabs’ Tough 1500 V2 Resin, which can handle the same impacts as injection molded polypropylene. Or, an SLS powder like Nylon 12 Tough Powder, which can be built with no supports, enabling organic geometries optimized for a great strength-to-weight ratio.
3D printed materials have come a long way, and can withstand repeated stress and impact while still remaining functional. Formlabs SLA resins like Tough 1500 V2 Resin (left) and SLS powders like Nylon 12 Tough Powder (right) have been engineered for functional strength and impact-resistance, making them perfect for drone applications.
Identify Your DIY Drone Design Parameters
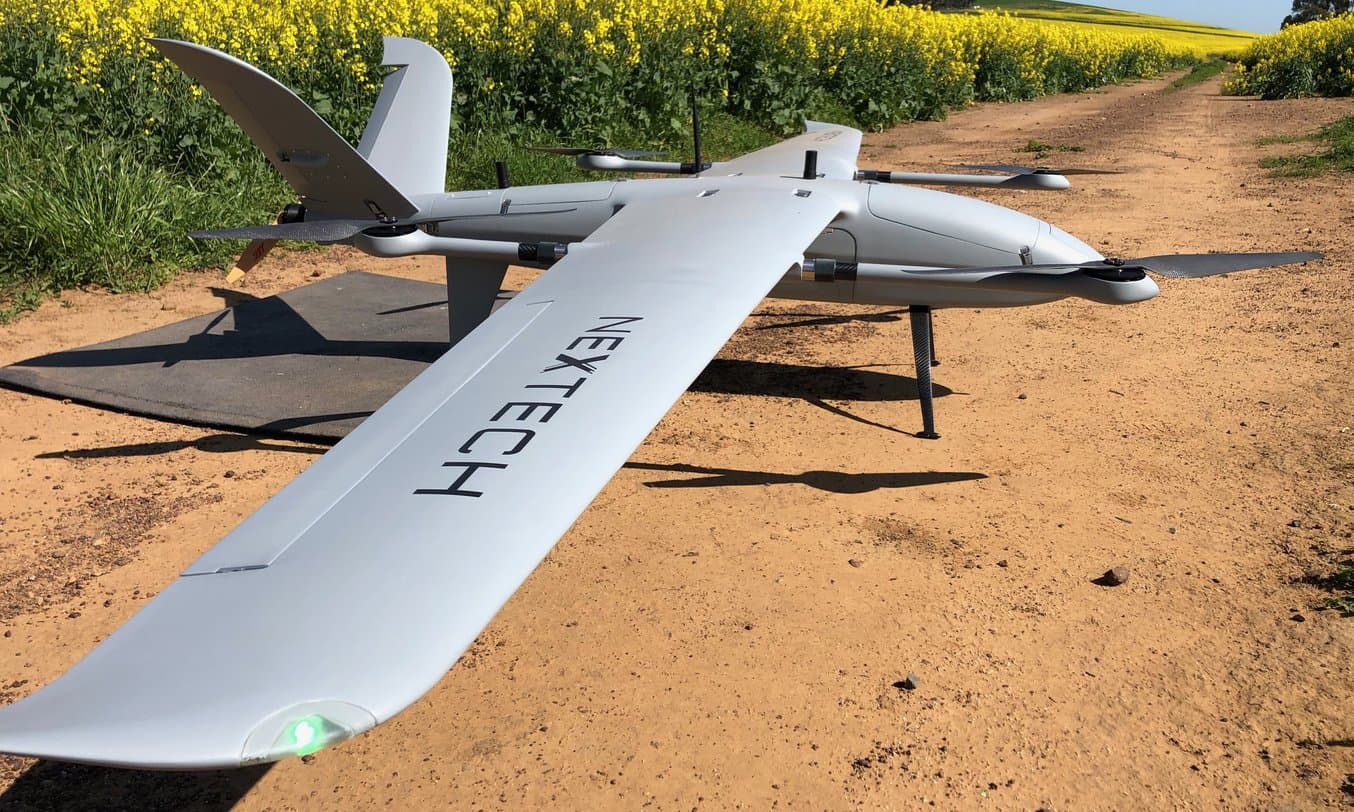
This agricultural mapping drone is a fixed-wing design, and can fly fast and far — it doesn’t need to prioritize maneuverability or the ability to hover. (photo courtesy of Nextech)
Before choosing components, the first step in getting your own customized drone designed and fabricated is setting some initial parameters by answering the following questions:
-
Application: How can I optimize the design for the intended application?
-
All drones need to balance structural integrity with weight so that they can support their payload without draining their power source too quickly.
-
Delivery drones need to be large and have a big power source to carry heavy objects. Racing drones need to be lightweight and highly maneuverable, and surveillance drones need to optimize their design to allow for a high-quality camera system.
-
-
Regulations: What regulations do I need to pay attention to?
-
Regulations vary by country. For example, in the US, drones under 250 grams in weight can be flown (recreationally) without the operator having an FAA license, while those 250 grams or heavier need to be flown by an operator with an FAA license and need to apply for local permission to fly in certain areas. To obtain a license, you’ll need to take a written test and pay a fee.
-
All drones need to be flown under 400 feet, and drones cannot be flown within 5 miles of an airport.
-
-
Cost: How much should I spend on components?
-
Mix and match off-the-shelf components to fit your budget. That’s the beauty of using 3D printing for your drone frame and arms — you can build your frame around a varied set of less expensive components that otherwise wouldn’t fit together onto a standard frame.
-
Pick a Fabrication Method for Your Drone
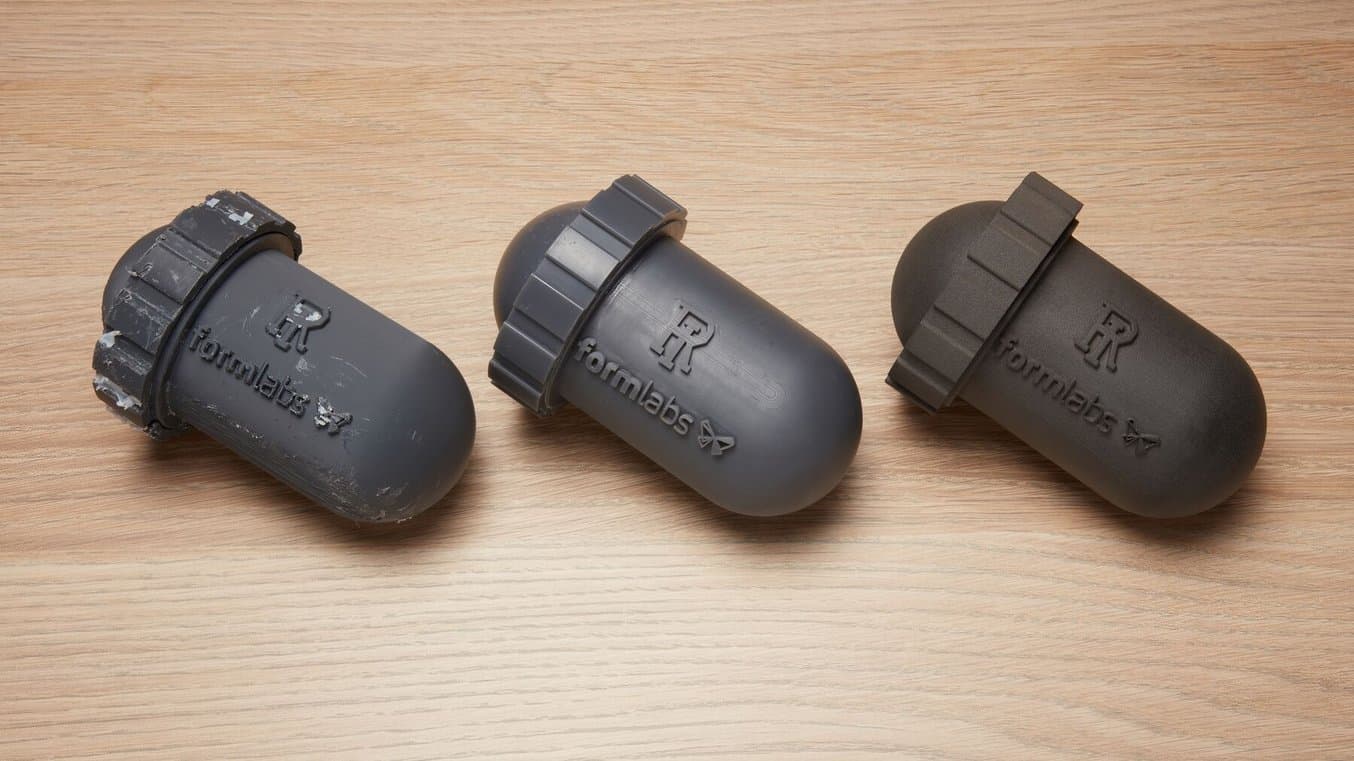
For underwater drones, or UUVs, 3D printing can be a good choice, though FDM 3D printed parts (like the capsule on the left) are not watertight. SLA (middle capsule) and SLS (right capsule) have been tested underwater at high pressures, and can keep delicate electronics safe.
Choose between completely off-the-shelf drone components, a pre-set drone kit, or a completely original design (and how to get those parts made). Most drone kits come with directions for building, so for this guide, we’ll focus on building a DIY drone with a completely original design, and using 3D printing for the non-electrical components. However, for drone kits and off-the-shelf builds, 3D printing can provide a good replacement part fabrication method or for parts that enhance, secure, or otherwise adapt a pre-built drone.
3D Printing for DIY Drones
Though most drone enthusiasts may be familiar with fused deposition modeling (FDM) technology, where a nozzle extrudes one layer of filament at a time like a hot glue-gun, this 3D printing technology is not ideal for functional drones. The anisotropic material properties of FDM 3D printed parts mean that upon impact or load-bearing strain, the components may peel apart along the layer lines. Though affordable, fast FDM 3D printing is still applicable for prototyping drone parts, end-use drone manufacturing should rely on a more functional 3D printing technology.
SLA 3D printers can both prototype drone parts and produce end-use quality components. The material properties of SLA 3D printed drone parts are isotropic, so impact and load bearing will not cause a delamination effect along layer lines as with FDM 3D printed parts. Additionally, SLA 3D printing offers a range of materials that can be chosen for specific applications to best suit the demands of the job. For example, underwater drones, or UUVs, need watertight enclosures for their electronics. SLA 3D printing UUV components is an ideal choice, especially when using flexible materials like Formlabs’ Silicone 40A Resin for gaskets and seals.
Impact-resistant materials like Tough 1500 Resin V2 are good choices for printing thin-walled enclosures, brackets, and covers. The smooth surface finish of SLA parts can also add to the professional look of a part and improve a drone’s overall aesthetics. High-speed SLA 3D printers like Form 4 and Form 4L can turn out prototypes multiple times a day, and can be useful for the iterative stages of drone design.
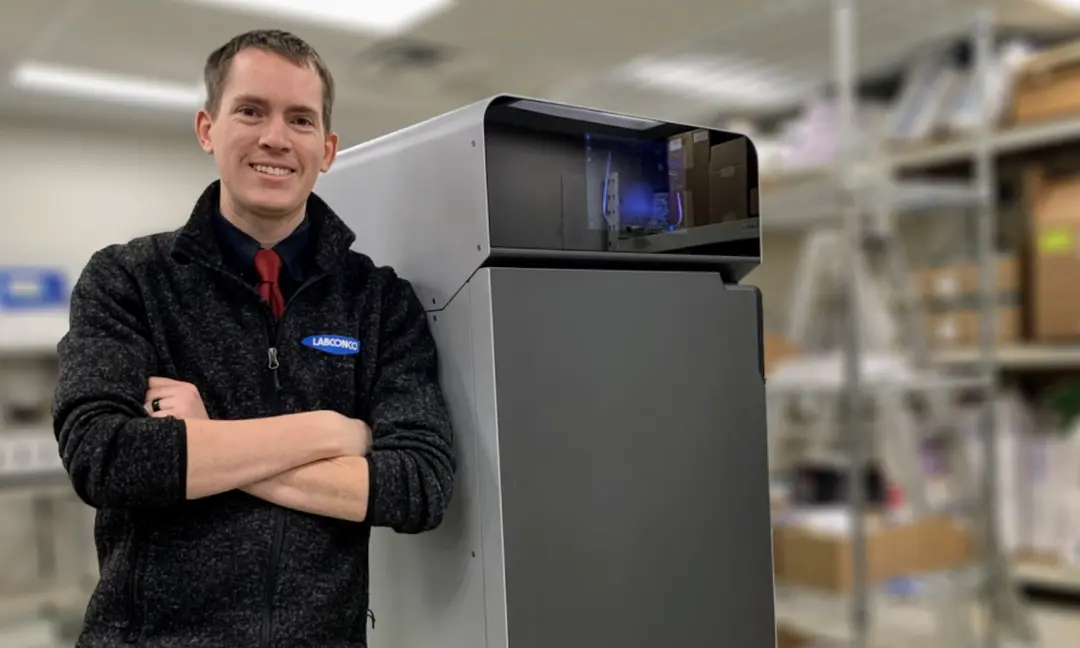
SLS 3D printing offers several unique advantages to 3D printing for drone design. The powder bed fusion technology supports the part as it prints, ensuring there are no support marks and enabling complex, organic geometries, which can help optimize for lightweight strength without added bulk. The SLS powders available, like Formlabs Nylon 12 Tough Powder, are highly durable and proven in industrial, load-bearing applications. For 3D printed DIY drones, ordering SLS parts from a service bureau is the best way to get a functional, durable, strong drone frame for the lowest possible cost. If you’re looking to design and fabricate one to five drones for your business (i.e. drones as a service), outsourced 3D printing is the most affordable option, and SLS drone components combine the best geometric freedom with functional strength.
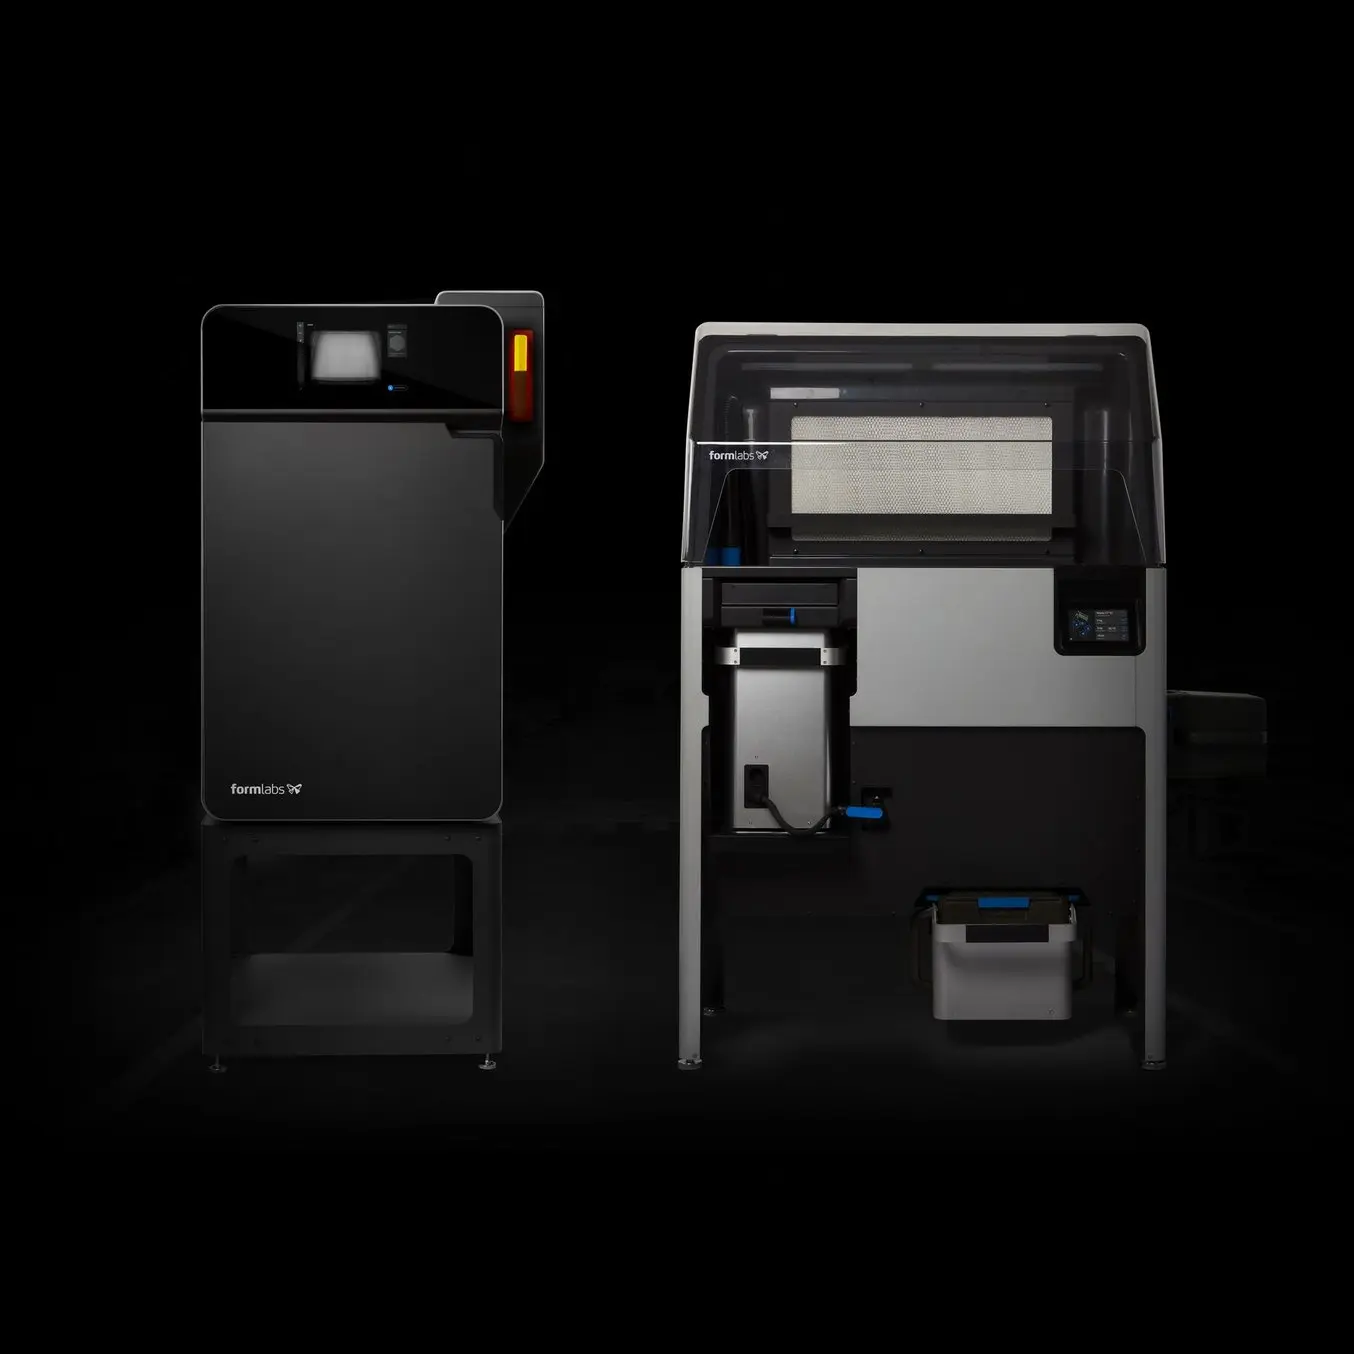
For those looking to start manufacturing higher volumes of 3D printed drones, bringing SLS in-house with the Fuse 1+ 30W SLS 3D printer keeps upfront costs low, while enabling a production workflow.
Using 3D Printed Tooling for DIY Drones
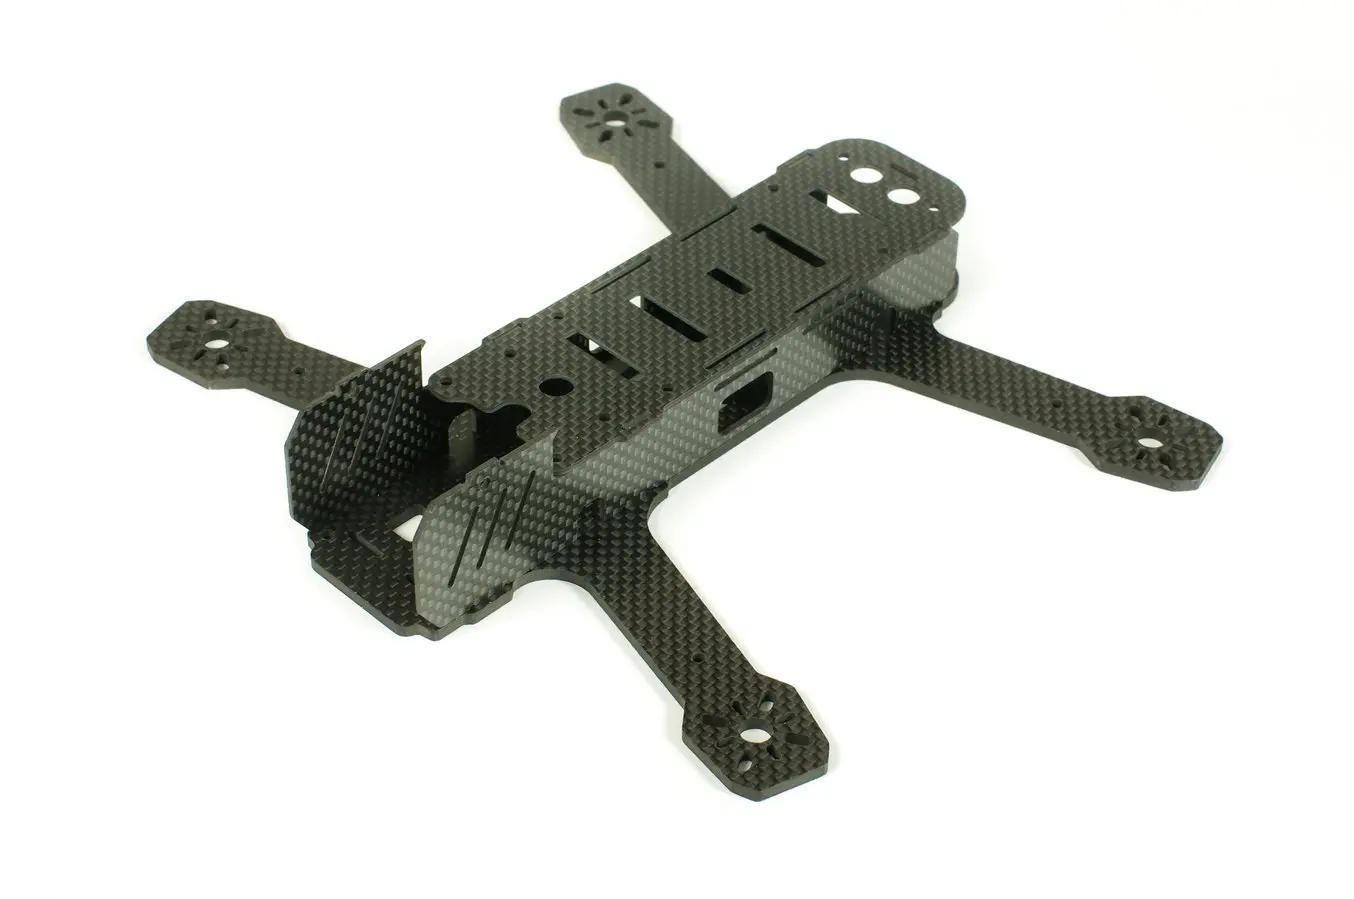
This frame for a racing drone is made of separate parts cut from sheets of carbon fiber. It’s incredibly lightweight and can withstand impact, but would be difficult to customize for a unique tech stack or payload.
Many consumer-focused drones use carbon fiber body frames, for their extreme lightweight and strength. These carbon fiber pieces are typically cut from sheets of mass-produced carbon fiber. While these frames are a good solution for an at-home DIY drone kit, they are made to fit specific technology stacks, and aren’t truly customizable.
However, 3D printing can also provide an affordable way to create a DIY drone, even when 3D printed parts are not used for the frame itself. 3D printed rapid tooling is an easy way to get custom carbon fiber parts made in-house.
Molds for carbon fiber part production can be made with a variety of techniques, but the smooth surface finish and extensive materials library of stereolithography (SLA) resin 3D printers make them a common choice for in-house mold production. SLA parts have virtually no layer lines or porosity, so the carbon fiber sheets can be pressed firmly into the mold without fear of creating a textured surface.
Another way of using 3D printing for DIY drone components is for the typically mass-manufactured propellers. Propeller design is highly reliant on the physics of air and water movement — a small change in design can have an outsize effect on the force and direction of the ‘lift’ forces acting on your drone. Off the shelf, injection-molded propellers will have the most consistent dimensions and best strength, but you can 3D print your own. Before designing them, take advantage of the numerous tutorials offered by CAD program experts like this one with Fusion 360.
Designing a DIY Drone With SLS
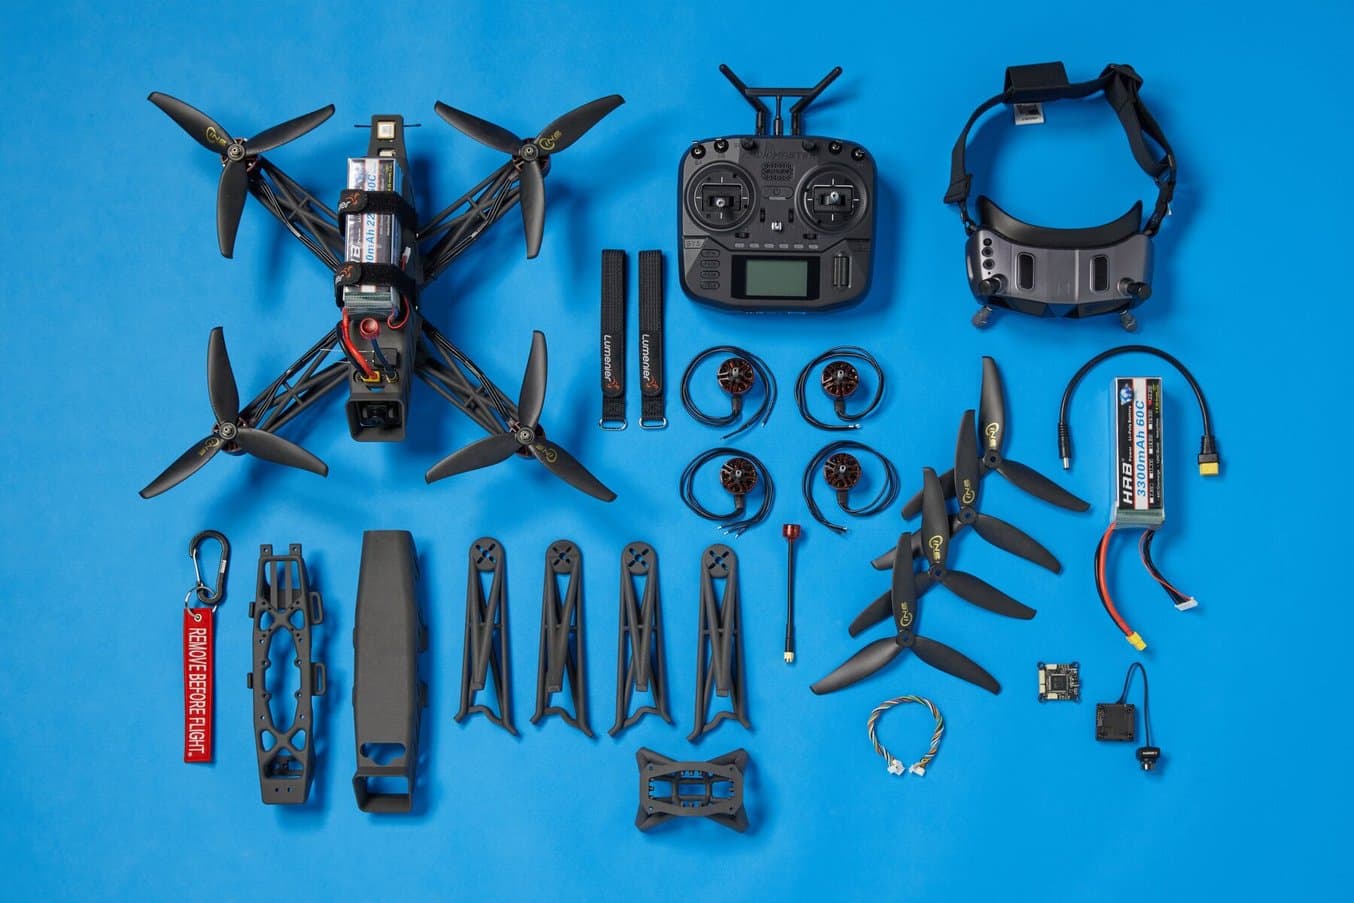
As an example, let’s walk step by step through the assembly process to design and build a DIY first-person view (FPV) drone made to satisfy FAA and NDAA regulations.
-
Identify Parameters:
-
Can be over 250 grams
-
Has Remote ID
-
Has GPS
-
Has camera and visual transmission technology
-
Uses a standard small unmanned aerial system (SUAS) battery: HRB 2pcs 6S Lipo Battery XT60
-
Quad-copter motor style
-
-
Choose your off-the-shelf components. See Appendix for full Bill of Materials.
-
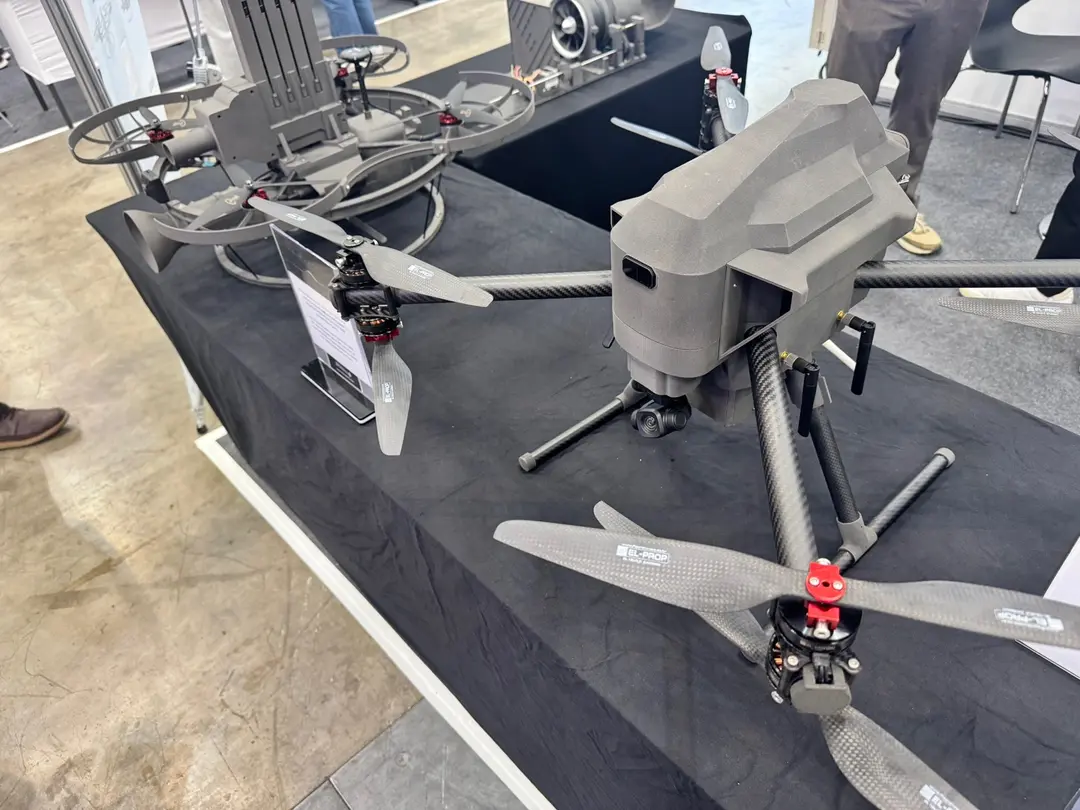
Choose your drone design: fixed wing, quad-copter with spaced arms, copter-style with duct propeller frames
-
Optimize for lightweight features like latticing
-
Run your design through a generative design program to find the best possible combination of weight and strength, removing unnecessary bulk
-
-
Choose a 3D printing process:
-
For this drone, we need a strong material that can carry the weight of the LiPo battery, without being too big or bulky. We also need the drone frame to withstand some impact, and stand up to UV exposure.
-
The best way to optimize strength and weight while allowing for our specific off-the-shelf components is to build the DIY drone using SLS 3D printing. Using the Formlabs’ Fuse 1+ 30W, we can pack all the drone parts in a single build chamber, print them easily without supports, and deliver a fully printed drone with minimal post-processing in less than 24 hours.
-
-
Choose a 3D printing material:
-
To maximize the strength and durability of our drone frame, we’re going to choose Formlabs Nylon 12 Tough Powder for the arms, component plate, and cover, and TPU 90A Powder for the small spacers, the camera mount, and the GPS mount.
-
Nylon 12 Tough Powder parts are highly ductile and extremely dimensionally accurate. This material, with a refresh rate of just 20% is also extremely cost-effective to print with.
-
TPU 90A Powder is perfect for mounts that need to absorb impact and keep delicate instruments like the camera and GPS module safe and secure. In this drone frame, we’re going to be cutting the GPS mount to thread a wire through, which is possible with TPU 90A Powder, but not with other SLS powders.
-
-
Print and Post-Process:
-
Follow instructions for printing and post-processing
-
The spacers are quite small, and can get lost in the excess powder. Either create a part cage to easily locate them or print them as part of a grid that you can cut away later.
-
-
For our SLS 3D printed drone, you’ll need to print in Nylon 12 Tough Powder on one printer and TPU 90A Powder on the other.
-
Remove unsintered powder. This can be done in the Fuse Sift for SLS parts.
-
For media blasting, do not media blast the TPU 90A Powder parts (mounts and spacers)
-
-
-
Assemble your 3D printed DIY drone:
-
To follow along with our drone build, follow along with Building Momentum's Chief Product Office, Henry Sullivan.
-
To learn more about the Fuse Series, visit our page. To explore testing SLS 3D printed drone components for your project, contact our sales team.
Appendix: Bill of Materials
| Item | Description | Qty Per Drone | Cost Per SKU |
|---|---|---|---|
| Battery Mounting Straps | Battery Strap | 2 | $7.99 |
| Hardware | M3 Square Nut [Frame General] | 12 | $8.00 |
| Hardware | M3 x 16mm Flanged Button Head Screws [Frame General] | 12 | $12.93 |
| Hardware | M3 Washers [] | 6 | $5.50 |
| Hardware | M3 x 10mm Screws [Motors] | 16 | $9.37 |
| Hardware | M2 x 16mm Flat Head Screws [VTX] | 4 | $9.00 |
| Hardware | M2 Washers [VTX] | 4 | $9.75 |
| Hardware | M3 x 30mm F;lat Head screws [FC Stack] | 4 | $6.93 |
| Battery Connector | XT60 E-M | 1 | $8.59 |
| sUAS Battery | Dronetag BS V2 Remote ID Module | 1 | $89.00 |
| sUAS Battery | HRB 2pcs 6S Lipo Battery XT60 22.2V 4000mAh 60C | 1 | $90.99 |
| Battery Adapter | 3pcs XT90 Male to XT60 Female Connector Converter Adaptor for LiPo Electric Quad/ESC | 1 | $9.60 |
| Antenna Connector | SMA to U.FL Cable 30cm | 1 | $5.49 |
| VTX Antenna | LHCP SMA 125mm Red Antenna | 1 | $14.99 |
| VRX | Walksnail Avatar HD Goggles | 1 | $458.99 |
| RC RX | HGLRC Gemini ELRS 2.4GHz RX Dual Receiver | 1 | $22.99 |
| RC TX | RadioMaster Boxer Radio Transmitter - 4-in-1 | 1 | $139.99 |
| ESC | Hobbywing XRotor Micro 65A 6S BLHeli_32 4-in-1 ESC - 30x30 | 1 | $89.99 |
| Flight Controller | RADIX 2 HD Flight Controller, H7 based flight controller for HD (digital) FPV systems | 1 | $112.99 |
| GPS | Lumenier SAM-M10Q GPS Module - NDAA | 1 | $79.99 |
| HD VTX | Walksnail Avatar HD Kit V2 - 8GB - w/ Gyro | 1 | $139.00 |
| FPV Coxial Cable | Walksnail Avatar Coaxial Cable 20cm | 1 | $11.90 |
| Motor | T-Motor CINE Series Cine66 2812 Motor - 925KV | 4 | $45.99 |
| Props | HQProp 7.5X3.7X3 Polycarbonate Propeller | 4 | $4.99 |
| Battery Charger | iSDT 608AC Smart Battery Charger AC 50W DC 200W 8A w/ Detachable Power Supply | 1 | $64.99 |
| Libo Bag | LiPo Storage Bag | 1 | $12.99 |
Not sure which 3D printing solution fits your business best? Book a 1:1 consultation to compare options, evaluate ROI, try out test prints, and more.