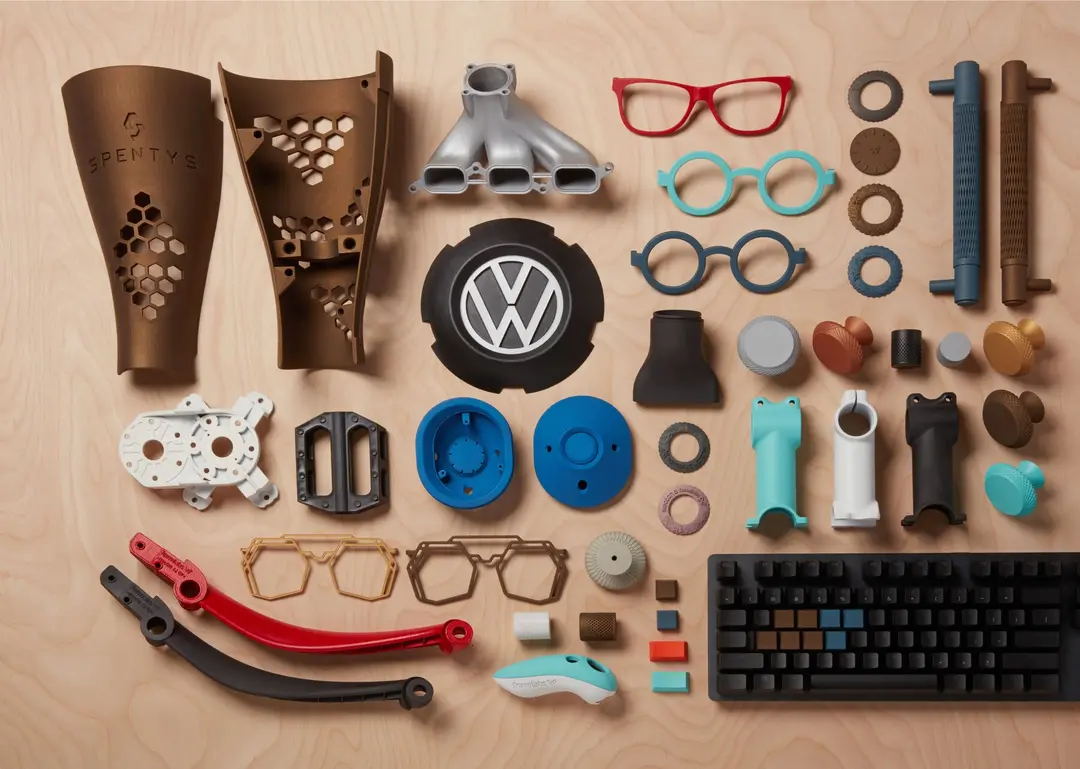
Selective laser sintering (SLS) 3D printed parts are increasingly relied upon in industries as diverse as aerospace and eyewear design for their superior mechanical properties and cost-efficient production methods. To further improve their aesthetic and mechanical properties, SLS 3D printing users often employ post-processing techniques like dyeing, coating, plating, or painting.
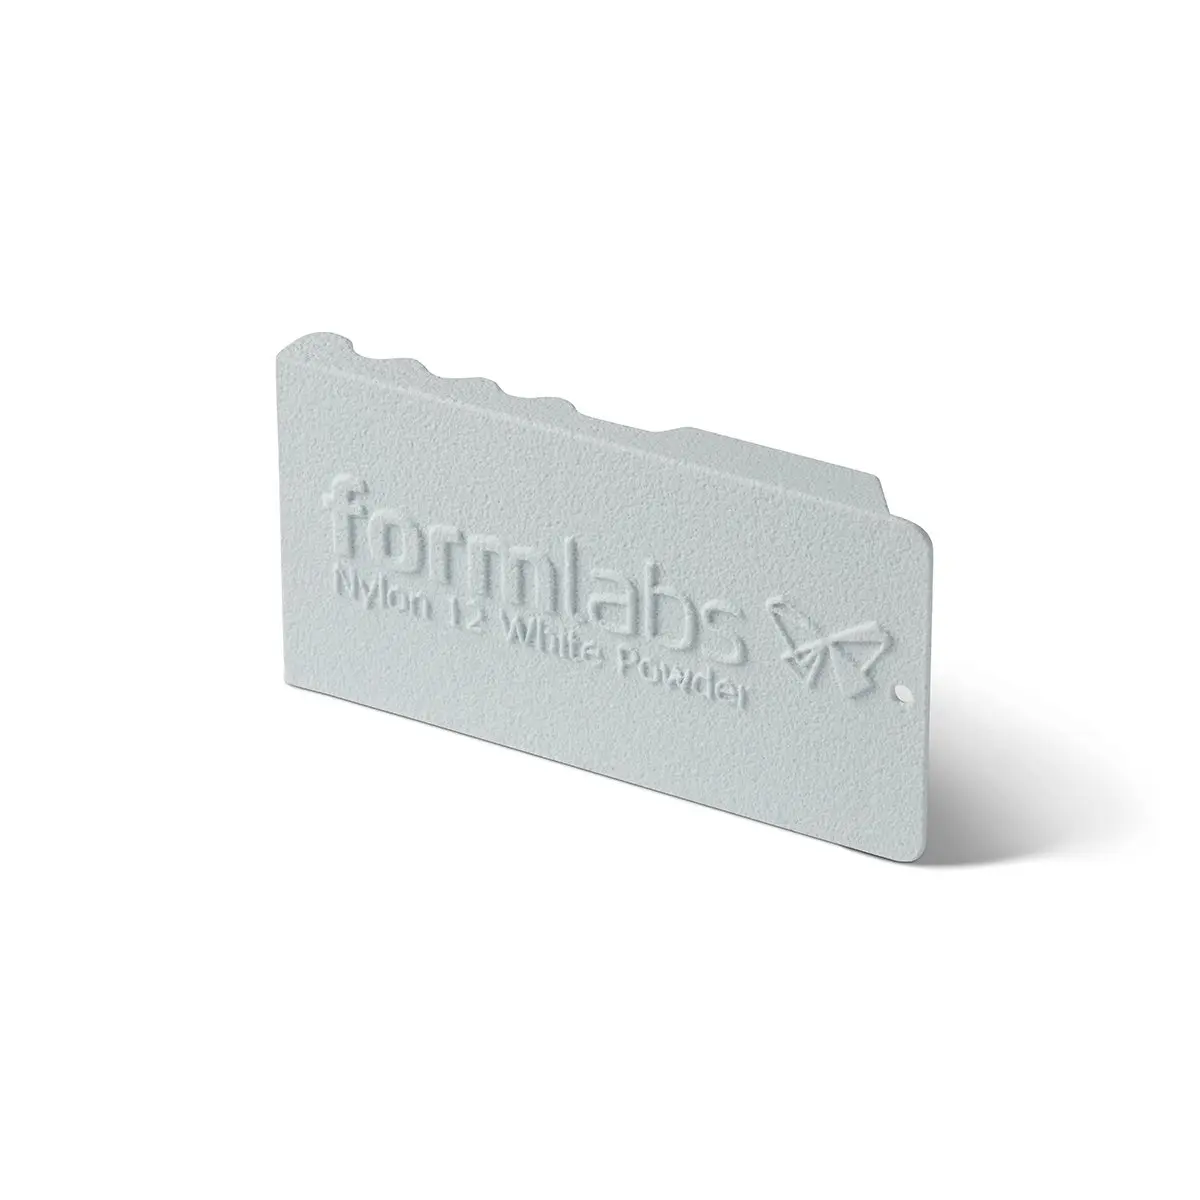
Dyeing parts 3D printed in Nylon 12 White Powder on Fuse Series SLS 3D printers unlocks a huge range of opportunities for customers to build compelling prototypes and create production-ready parts in an array of colors.
In this guide, we’ll outline the process for dyeing SLS 3D printed parts and review the many benefits this process provides.
Why Should You Dye SLS 3D Printed Parts?
SLS 3D printed parts are becoming more common in every phase of the design to manufacturing process. Due to the slightly grainy surface of SLS 3D printed parts, post-processing solutions such as smoothing, coating, and dyeing are growing in popularity as well.
Dyeing is a low-cost method to color SLS parts that enhances their aesthetics while maintaining mechanical properties. Whether one is looking to do a small batch of colored parts or Pantone-match high-throughput production, dyeing methods exist to fit every workflow. With Nylon 12 White Powder, users of Fuse 1+ 30W can reliably achieve a range of colors, from oranges to pinks, blues, and almost everything in between. Whether color is required for product differentiation, to meet a specific aesthetic standard, or for safety-critical visibility purposes, dyeing is a viable solution.
Our team tested four popular dyeing methods and reported on the results. This guide will report on those methods, as well as share a dyeing workflow from a customer who designs and manufactures end-use products with this Fuse Series ecosystem and Nylon 12 White Powder.
Dyeing is ideal for both functional prototyping and end-use production of parts with custom colors to match brand aesthetics.
Request a Free SLS Sample Part
See and feel Formlabs quality firsthand. We’ll ship a free Nylon 12 White Powder sample part printed on the Fuse 1+ 30W to your office.
Dyeing Equipment
We tested dyeing equipment to assemble the optimal setup for dyeing Nylon 12 White Powder. Below, we outline the hardware, dye mixture, and dye bath parameters that achieved the best results in our testing.
Dyeing Station
When choosing a dyeing system, one should consider the part size, quantities, price, and levels of color consistency required. Dyeing systems range from a few hundred dollars to tens of thousands of dollars, and the price is often commensurate with the level of quality and consistency achievable. The four most common methods for dyeing 3D printed parts each have distinct advantages, and it’s important to set expectations regarding color quality and budget before choosing a method.
Pot dyeing is the most accessible method because it requires only a high-temperature-safe pot and the dye solution, but it provides less consistent results than all other methods, is the most labor-intensive, and sometimes results in damaged parts from heat and stirring.
Ultrasonic dyeing provides an improvement over pot dyeing in terms of consistency and maintaining part integrity. This method is less labor intensive than pot dyeing, as the user only needs to set a desired temperature on an ultrasonic cleaner, add the parts, and set a timer. Using ultrasonic vibrations to agitate the solution reduces any chance of part damage during dyeing and provides consistent results.
Pressure dyeing is conducted using a pressure cooker, similar to culinary appliances like the Instant Pot. This method can reach higher temperatures than pot or ultrasonic dyeing. After parts are added to a solution within the pressure cooker, it is sealed and can reach up to 120 ℃. The combination of heat and pressure is conducive to intense color saturating the parts, but a drawback is that the high temperature can also potentially damage the parts — 120 ℃ is above the Vicat softening point of Formlabs TPU 90A Powder.
Industrial systems like the DyeMansion DM60 are cost-effective for high volumes of parts and when extremely consistent results are necessary. These larger format solutions take much of the manual labor out of the dyeing process and include programmed settings for different types of parts and colors. With a more ‘set it and forget it’ type of system like the DM60, SLS 3D printing customers can spend more time on higher priority tasks, like part design and print optimization.
| Method | Size | Quantity | Color | UV Stable | Cost |
|---|---|---|---|---|---|
| Pot Dyeing | ★★ | ★★ | ★★ | No | Under $50 |
| Ultrasonic Dye | ★★★ | ★★★ | ★★★ | No | $100 to $1000 |
| Pressure Dye | ★★ | ★★ | ★★★★ | No | $100 to $500 |
| DyeMansion DM60 | ★★★★★ | ★★★★★ | ★★★★★ | Yes | $50,000+ |
The hardware that we recommend for dyeing is the ESVC-28 - Spectrum Thermal Circulator from Winco. This machine is affordable, available from multiple sources, and is easy to set up and use.
US Source: $699.99
EMEA Source: €659.99
APAC Source: $299
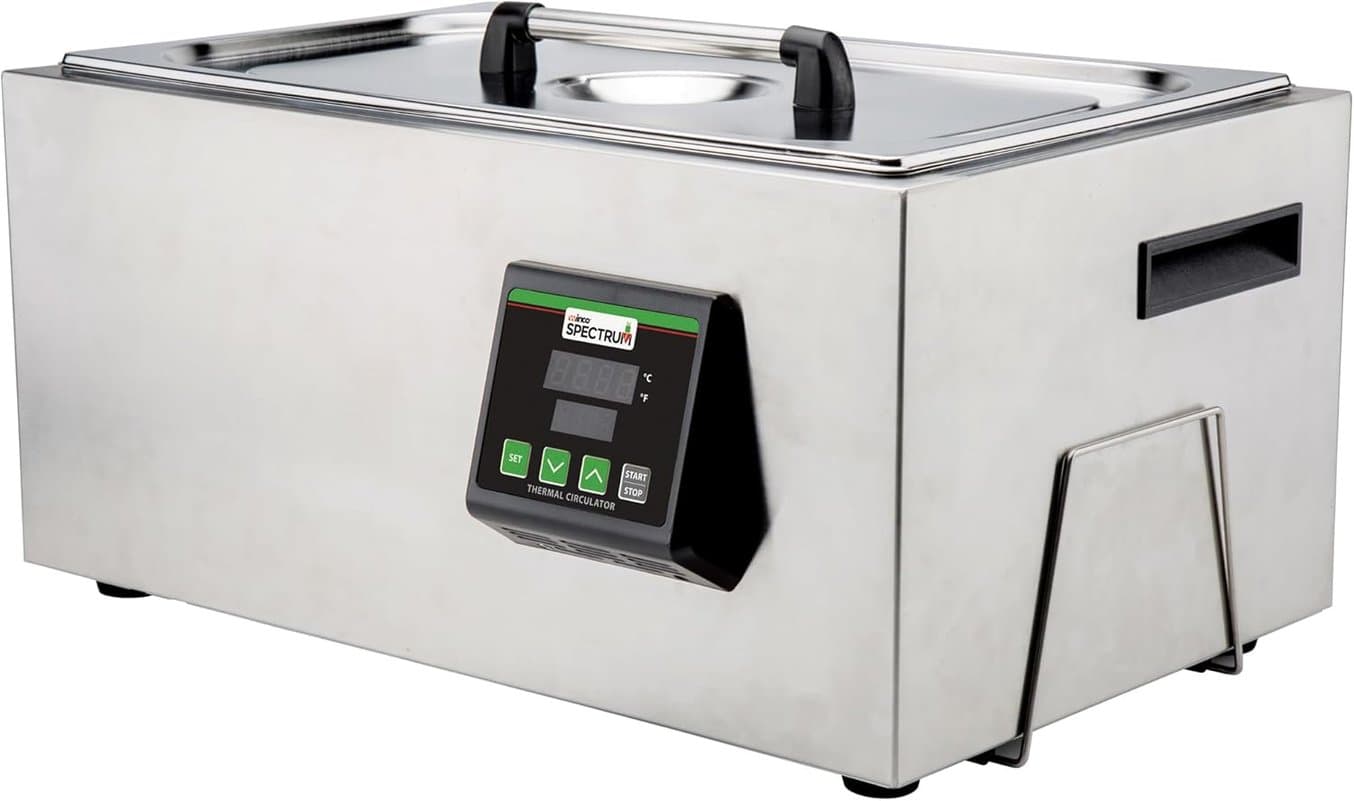
The Winco ESVC-28 Spectrum Thermal Circulator is an ideal solution for ultrasonic dyeing.
Any system that is able to reach the necessary temperatures of 80 °C to 90 °C as well as circulate the solution should be adequate for dyeing. We also recommend having stainless steel tongs nearby to assist in removing parts from the dye bath.
There are also industrial solutions available on the market for dyeing SLS parts, like the Dyemansion DM60, that are cost-effective for high volumes of parts and when extremely consistent results are necessary. This product is capable of holding up to 60 L of components per dyeing batch and will automatically inject the dye as well as rinse the parts post-dye.
The DM60 confers a much higher degree of consistency when compared to pot dyeing as well as improved UV stability of the dyes. An additional service offered by Dyemansion is tailored color development. For users with a strict color requirement or who are looking to dye a very high volume of parts (end-use parts, production runs of 1000+ units), using an industrial machine such as the DM60 may be a good choice.
These larger format solutions take much of the manual labor out of the dyeing process and include programmed settings for different types of parts and colors. However, higher upfront costs mean the return on investment will be faster for those printing very high volumes of parts.
Anti-Corrosion Equipment
A circulating and heated water bath can corrode the steel liner of the bath. Some of the dyes suggested in this white paper can gradually corrode steel under repeated heating. This is very similar to corrosion noted in water heaters used in homes. The easiest solution to address potential corrosion is to add a magnesium anode into the bath, ensuring that it makes electrical contact with the steel liner, e.g. via a conductive clamp or tight junction. Formlabs’ internal testing has shown that the inclusion of a magnesium anode will extend the lifetime of the dye bath by more than 8x the lifetime of a dye bath without a magnesium anode. Magnesium anodes can be sourced through many readily available channels, including Amazon and local hardware stores. Formlabs used this magnesium anode in our dye baths during testing.
Other options to extend the lifetime of the dye bath include using milder dye solutions, such as Jacquard acid dyes, or operating the dye bath at a lower temperature.
Dye Solution
For dyes, we recommend RIT ProLine dye for users who are simply looking for quick easy results. While this does not allow for color matching or dyeing beyond the options currently offered by RIT, it does provide a streamlined solution. Various shades of the colors offered can be achieved by varying the time and temperature in the dye bath. More information on the effects of temperature and time is included in the Dyeing Workflow section of this white paper. RIT ProLine can be sourced through Amazon or through RIT’s website.
During testing, Jacquard Acid Dyes were also tested and found to be an effective solution. There was no discernible improvement to the color saturation achieved by a Jacquard acid dye over RIT, but it expands the number of colors available.
If using RIT ProLine dye, our suggested concentration is 100 g of dye and 100 g of citric acid per 1 kg of water. Additional dye and/or citric acid may increase the part's dye uptake. Increasing dye uptake leads to more saturation and a more intense color on the final product. Start with the suggested concentration and, use some test parts to evaluate color and time impact on the final part appearance, then add more dye, or dye of another color, to adjust to the desired appearance.
Deionized water and tap water were tested with no measurable difference between the two being identified. The tap water that was used was sourced in Somerville, Massachusetts, and has an average water hardness of 16 mg/L. It is possible that users in locations with a higher water hardness may see different results with tap water vs. deionized water.
As detailed later in this guide, Formlabs customer and end-use parts manufacturer Ken Pillonel found that dye from the French company Techniques Chimiques Nouvelles delivered a more vibrant color. In internal testing, this dye did produce vibrancy, but came with a noticeable odor. If you don't have proper ventilation in your workspace, RIT Dye is most likely the better option.
How to Dye SLS 3D Printed Parts
Formlabs has conducted extensive testing to determine what colors can be achieved with SLS printed parts using accessible, low-cost dyeing techniques. The dye used was RIT ProLine dye, a low-cost, easily accessible powder that contains a mixture of direct, acid, and disperse dyes, and is effective on nylon fibers. Further variables tested include temperature, acidity, saturation of dye, duration of dye time, and detergent additive in the dye solution. Both Nylon 12 Powder and Nylon 12 White Powder parts were tested and the effect of each variable is covered below.
1. Part Preparation
It is essential to ensure that parts are properly cleaned prior to dyeing. Loose powder remaining on the surface of the part may absorb dye differently from sintered powder, leading to a less controlled, nonuniform dye finish, and making the part less wash-safe. We recommend cleaning parts with the Fuse Blast automated cleaning and polishing solution. This will ensure that all loose powder is removed from the part without adding additional labor time to the workflow. Alternatively, a manual media blaster can be used to ensure the parts are clean.
When cleaning parts printed with Nylon 12 White Powder, a blasting cabinet that was previously used for gray powders is not recommended as the residual powder can give the white parts a grey sheen.
2. Dyeing
Heat the bath to 90 °C to start to maximize color saturation. The heating of the bath can take several hours, depending on the dye bath being used. Once the bath has reached peak temperature, test a part for one minute in the bath. This is enough time to gauge the color and decide if further adjustments are needed to either the dye or the time needed in the bath.
Temperature and Time
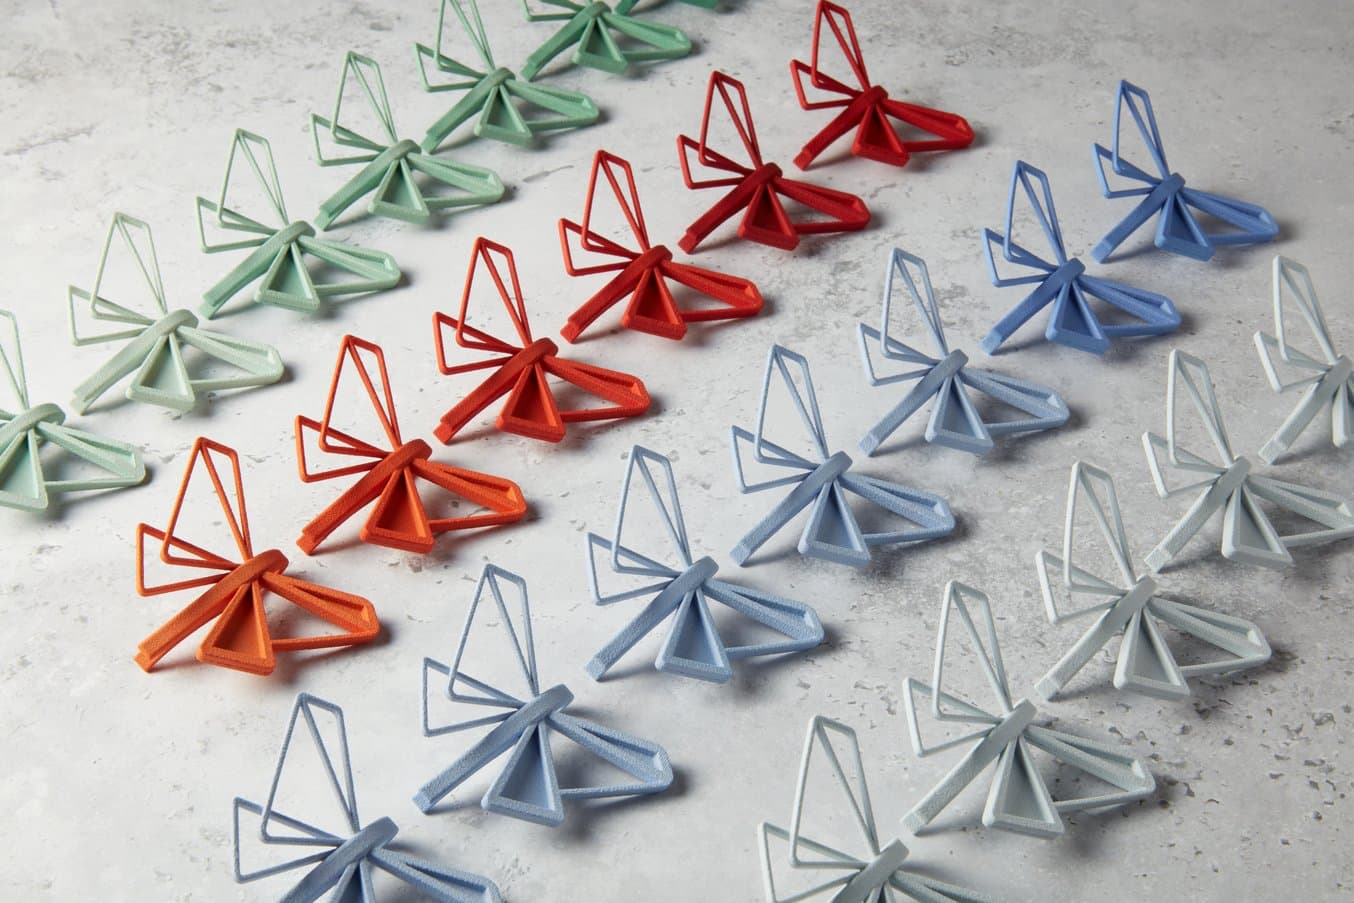
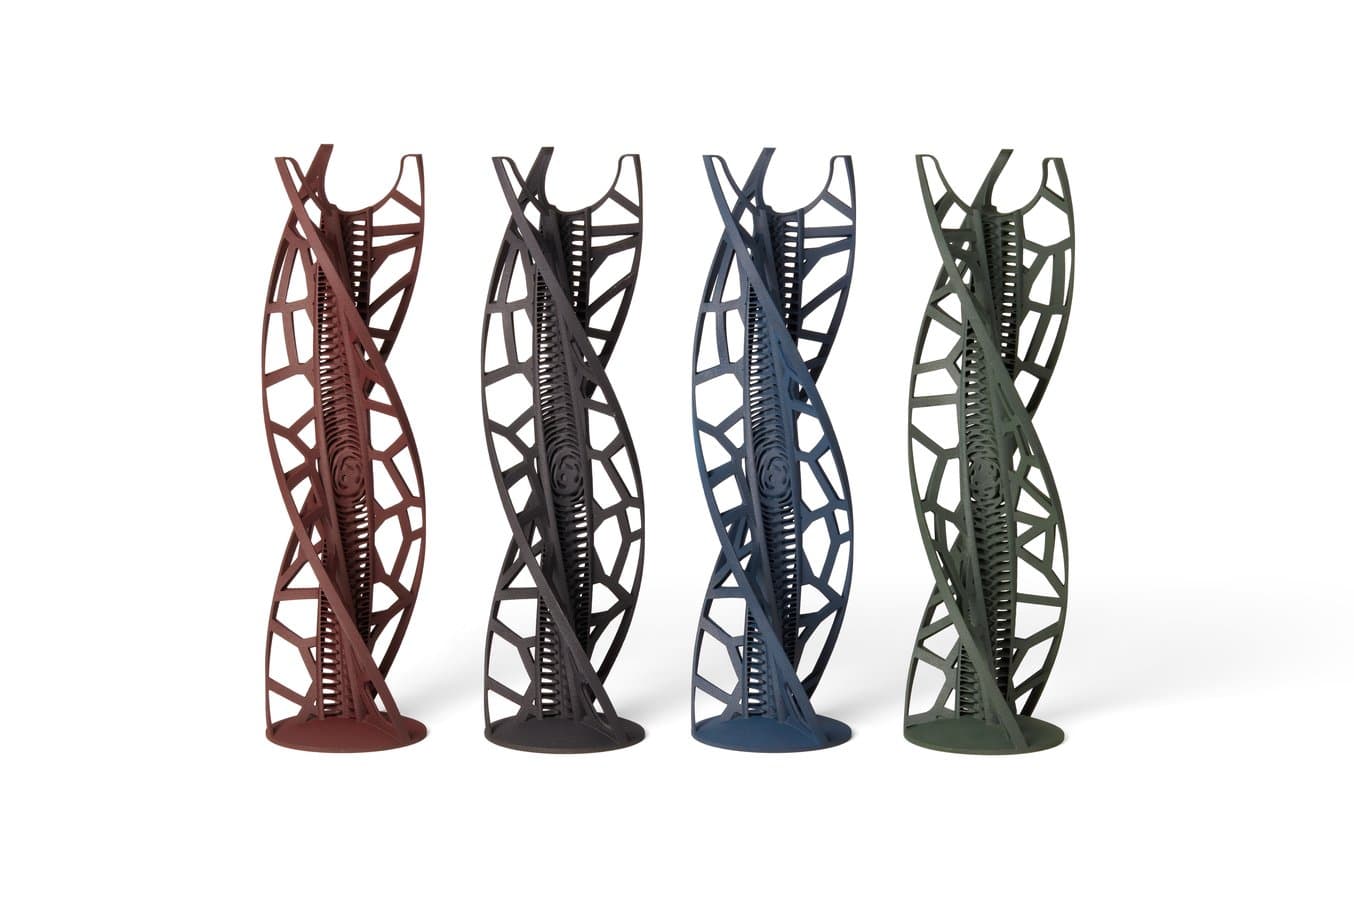
Temperature and time have a huge impact on the final part color. Based on our tests, higher temperatures lead to a more saturated color in a shorter amount of time.

The parts in this image were dyed in the same dye bath, at 90 °C, with parts removed at 3-minute intervals from right to left.
If a lighter shade is desired, consider reducing the dye solution temperature to 70 °C or lower. At higher temperatures, saturation can occur extremely quickly, leaving very little margin for deviation and potentially resulting in variance of finished parts. There is an increase in part uptake of dye over time but this trend plateaus at 20-25 minutes as the part reaches a saturation point where no more dye can penetrate the surface.
Additives
Certain additives can change the dyeing process and improve the uniformity or dye uptake. For RIT ProLine and Jacquard Acid Dyes, citric acid or acetic acid is typically used as a necessary component to acidify the dye bath.
Ammonium sulfate can also be used as a 1:1 replacement for most or all of the citric or acetic acid. Ammonium sulfate is a milder acid source and a leveling agent, meaning it slows the rate of dye uptake into the part. This is helpful for achieving uniformity with lighter shades, or for dyeing workflows where more precise control over shade is desired. Other leveling agents that may be used in addition to an acid source include sodium sulfate, sodium acetate, and cationic or nonionic surfactants.
Surfactants can be helpful to use in the dye bath as well as in the post-dye washing procedure. The addition of surfactants to the dye bath can help with infiltration into small pores or channels of parts, as well as with dye leveling. Nonionic household detergents may be used, such as Alcojet Low-Foaming Detergent, at a recommended 10 g per 1 kg of dye bath. Ionic surfactants such as dish soap are not recommended as they may cause foaming or bubbling.
To minimize dye leaching from parts, parts can be washed with a mild surfactant after dyeing to remove any excess or unbound dye. Caution should be used, as strong surfactants and/or hot water can cause the dye shade to fade. We recommend using specially designed detergents such as Synthrapol, following the manufacturers’ instructions.
After washing, dye leaching can also be prevented by using a dye fixative. These products are used on the washed and dried dyed part, and many options are available online. Be sure to select a fixative that is advertised for use with acid dyes, nylon, silk, or wool. In addition, or as an alternative to using a fixative, dyed parts can be coated for optimal wash and light fastness. Polyurethane coatings are often used for dyed fabrics, but can be more challenging to work with. For smaller scale or easier workflows, fabric coatings and protectants can be used as surface coatings on dyed parts. Be sure to select a coating compatible with nylon fabric.
Changing Dye Bath Colors
When changing the colors of a dye bath, first drain the entirety of the current solution and dispose of it according to local regulations and the dye’s safety data sheet (SDS). Alternatively, the dye bath can also be stored in liquid form to be used at a later date, according to local safety regulations.
As a dye solution is heated and cycled, some settling can occur. Due to this, the walls and base of the tank should be wiped down after draining to ensure no cross-contamination of colors occurs. Once these two steps are completed, a rinse with clean water is recommended to make sure any remaining dye in the circulation system is removed.
Only after the machine is cleaned should a new dye solution be prepared. If multiple colors are going to be used frequently, getting multiple circulators to prevent frequent swapping is an option.
Ken Pillonel designed an easy workaround for this step, using large flasks filled with dye solution within the tank, and a rotating magnet on the bottom of them to agitate the liquid. This way, he can use different flasks for each dye color, without waiting for cooling and cleaning. To learn more about his method and this workaround, watch his video, shared at the end of the article.
Dye Bath Degradation
As consecutive batches of parts are cycled through the dye bath, the dye pigment will be absorbed by the surface of the parts, depleting the concentration of the dye in the dye bath. To account for this, adding additional dye to the solution may be necessary. For the most consistent color results, a fresh dye bath for each cycle is best.
3. Post-Dye
Washing
After dyeing, the parts should be washed with water. This post-dye wash removes any excess dye solution that is on the surface of the parts. This excess dye can unevenly color the parts as they dry and may leach out if exposed to moisture. To wash the parts off, simply rinse them in warm water for one to five minutes or until the water runs clean. If taking many parts out of a bath at once, immediately place them into cold water as they are removed. Excess dye that dries onto the parts without rinsing can cause uneven coloring.
Drying
Drying the parts after washing helps prevent staining. This is an optional step but is particularly recommended for parts with internal cavities that can trap liquid inside. These parts may dry unevenly leading to a water mark stain line on some surfaces of the component. To reduce this, make sure to thoroughly wash the excess dye off after the dye cycle has been completed, and if possible, use compressed air to remove as much excess moisture as possible to assist the drying process. For consistency, we found food dehydrator to be a low-cost method to achieve repeatable results.
Polishing
Using the Fuse Blast Polishing System after dyeing is an effective method to increase the reflectivity of the dyed parts, resulting in a higher gloss appearance on dyed parts. Parts can also be dyed after being vapor smoothed for a glossy finish.
Color and Material Combinations
Color Dyeing White Parts
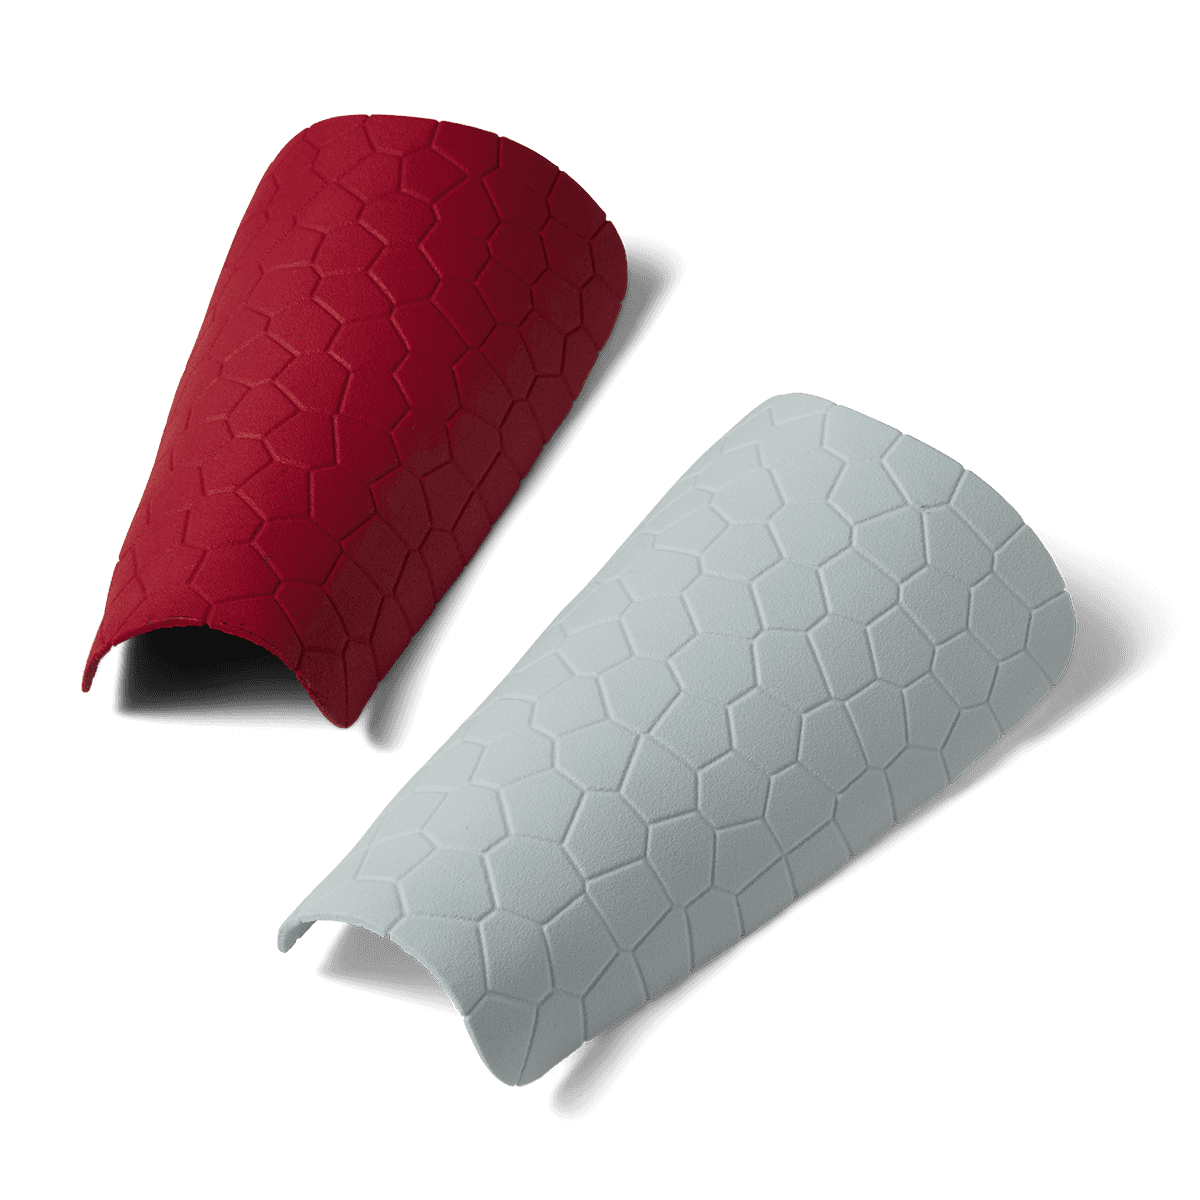
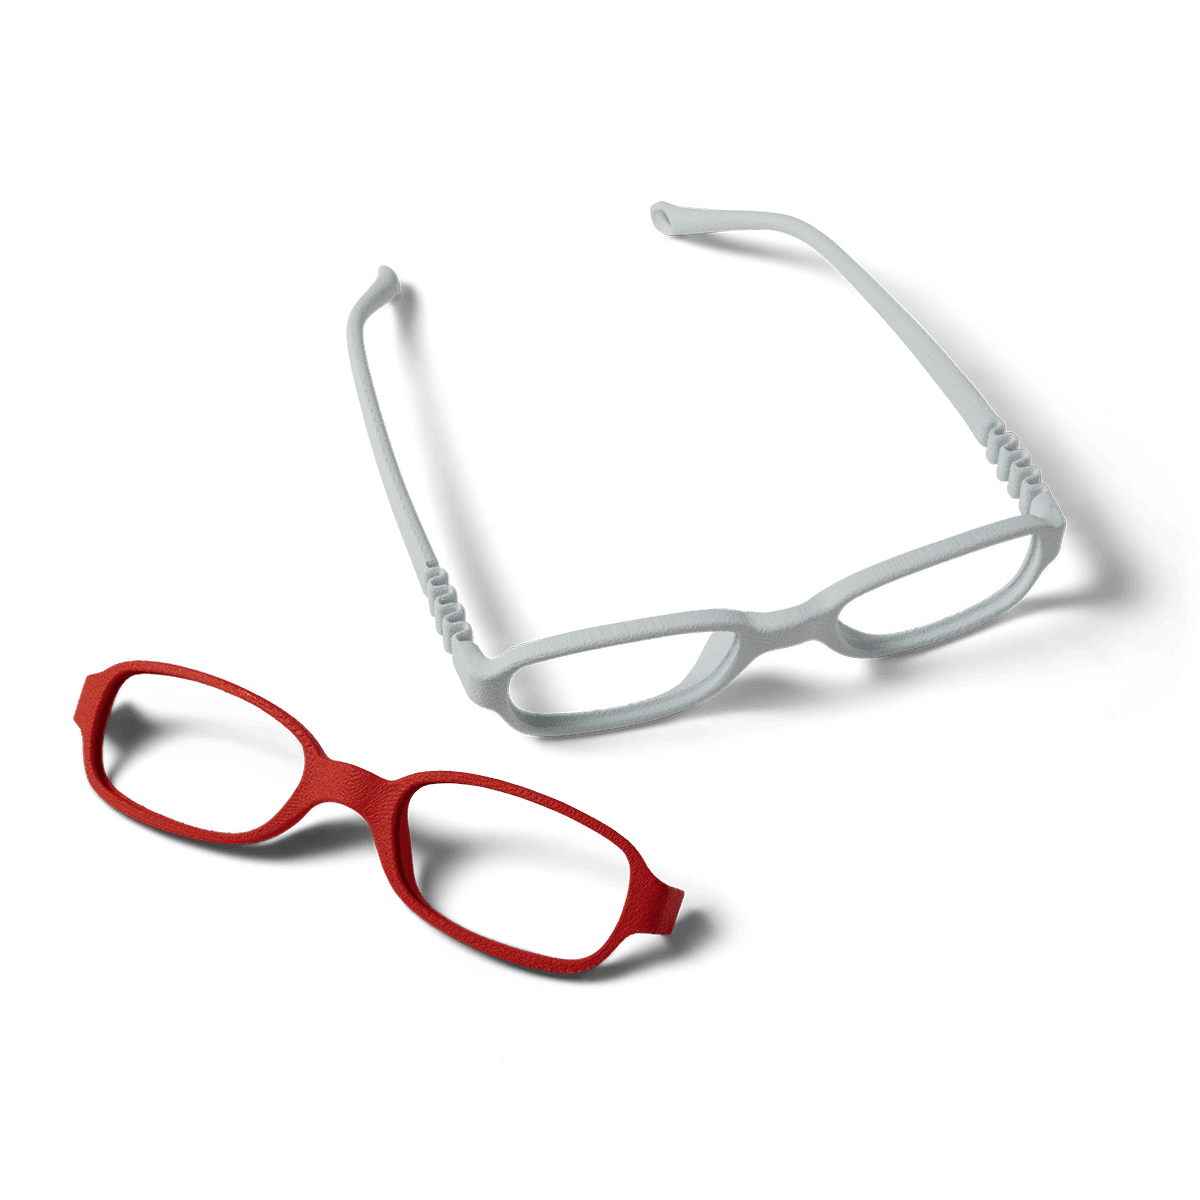
Dyeing Nylon 12 White Powder is the best option to attain the widest range of colors. Nylon 12 White Powder should be used to dye all light colors, including pastels, and vibrant colors.
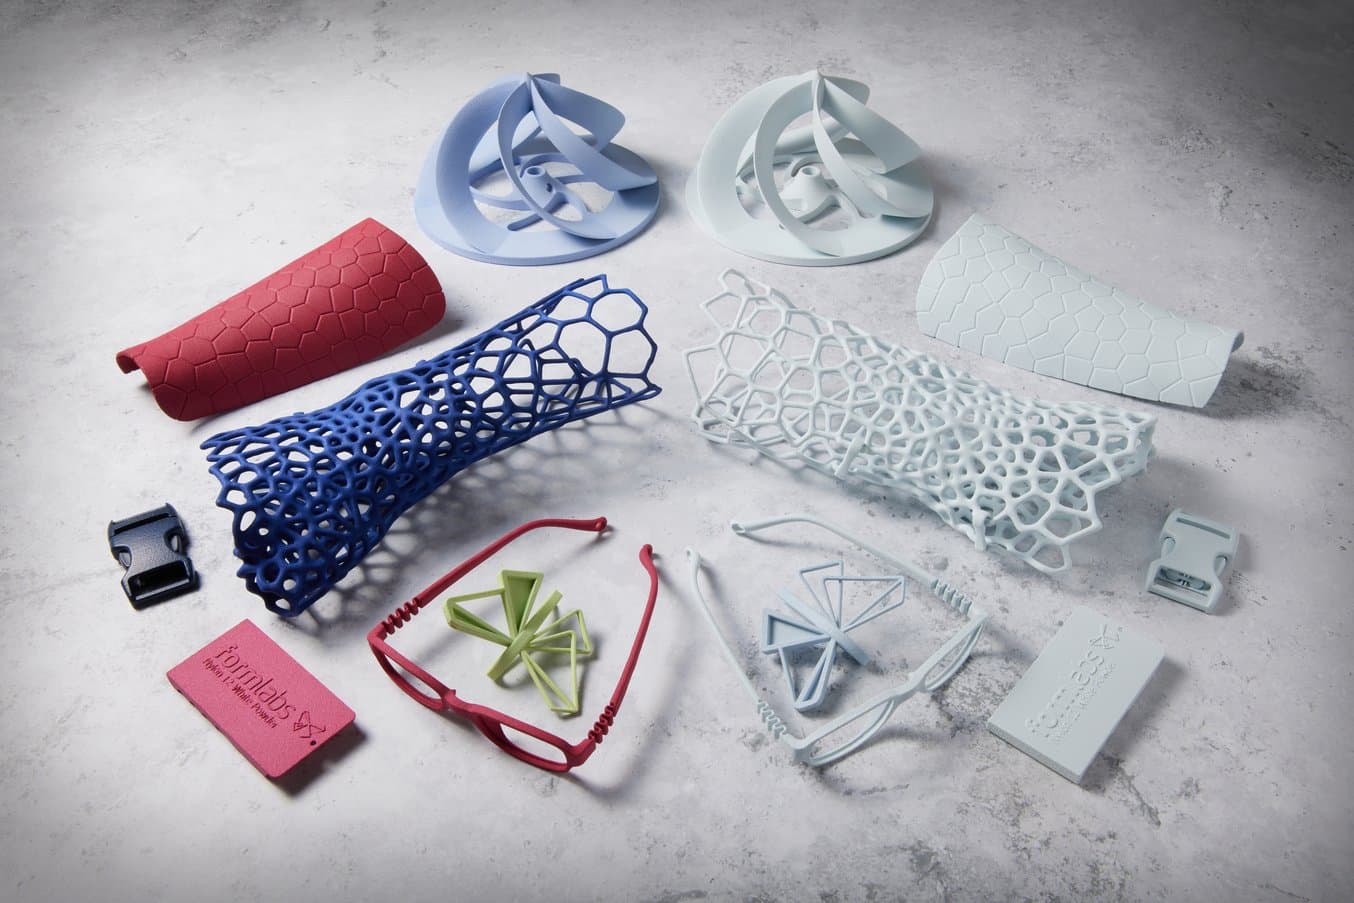
Parts 3D printed in Nylon 12 White Powder that were dyed in an ultrasonic dye station.
Color Dyeing Grey Parts
The same process can be used to successfully dye Nylon 12 Powder parts. However, because parts printed with Nylon 12 Powder are a dark grey color, only darker shades of color are possible, and these are often more muted in their vibrancy.
Dark grey Nylon 12 Powder parts dyed to darker shades of color.
Dyeing Parts Black
If black is the desired final color, we recommend using Formlabs’ standard Nylon 12 Powder with Rit ProLine Black. This material has a darker substrate, making the transition to black more consistent.
Dyeing Nylon 12 White Powder parts to black, while doable, is not recommended. The lighter substrate makes darker colors more challenging compared to dyeing the initial dark state of Nylon 12 Powder.
Advantages of Dyeing
Dyeing is typically implemented as an alternative to coatings. The advantages of dyeing over conventional paints and coatings are lower cost and labor needs, and the possibility to color complex geometries.
Cost
The equipment required to bring dyeing in-house is highly accessible. Once the equipment has been sourced, the cost of running dye trials is incredibly low. Due to this, dyeing is more cost-effective than paints and coatings in the majority of situations.
Labor
The dyeing process is largely automated; once the dye solution is prepared the equipment will regulate the dye bath temperature. The only labor that is required is to add the parts to be dyed into the bath while it is circulating, and then remove and rinse the parts once the desired time has been reached. This low requirement of labor is another strong advantage of using dyeing to color SLS 3D printed parts.
Part Geometry
Fuse Series SLS 3D printers are capable of printing highly complex geometries. This can lead to features that are difficult or impossible to cover with traditional coatings that rely on a line-of-sight style spray. Since dyeing uses a water solution to impart the color, complex internal geometries are dyed just as effectively as external features.
Dyeing Constraints
When dyeing parts, there are a few constraints that should be considered in order to get repeatable results.
Geometry
When dyeing parts that have a cup geometry, ensure that they are fully submerged. Parts that contain internal cavities have a tendency to trap air and float. This prevents the dye from penetrating the surface area floating above the solution as well as the internal faces that contain the trapped air bubbles. Forcibly submerging the part and agitating to remove the trapped air should effectively resolve this.
Color Constraints
When dyeing lighter shades, the time spent in the dye bath and the temperature of the dye bath will dramatically change the final color of the parts. If a specific shade is desired, or all parts need to be a consistent color over multiple dye baths, ensure that the parts are being removed after the same amount of time in the solution, and that the parts are dyed at the same temperature.
Workspace Constraints
The dyeing process can be quite messy. When adding or removing parts from the dye solution, splashes and drips may occur. Any splashes that get on skin or clothes will dye, so proper PPE covering should be used. We also recommend placing your dyeing equipment away from any surfaces that you do not want to get stained, such as white walls. Dye disposal can also be challenging depending on the dye that is being used. Make sure to check your local water requirements and follow the SDS to ensure that your dye solutions are properly disposed of. A final workspace constraint to consider is fumes. Since the dyeing process requires that the solution be heated, fumes can emerge depending on what the dye bath contains. In our testing, some brands result in far more noticeable scents than others, but in all cases, proper ventilation is strongly recommended. RIT ProLine had fewer noticeable odors than other brands.
Light Fastness and Wash Fastness
The color of dyed parts can degrade over time when parts are exposed to light or water. These properties are known as light fastness and wash fastness respectively. Dye leaching in wet environments may occur if the parts are not adequately washed after dyeing. See Post-Dye Washing for more information. Even if parts are properly washed and dried after dyeing, fading may still occur. Under high temperatures or frequent washing, this fading will be accelerated. Fading is also expected under extended sunlight or UV exposure.
Any form of UV protection, such as a UV-resistant clear coat, can help improve light fastness. Brands such as Krylon and Rustoleum are widely available and cost-effective. In testing, Nylon 12 White Powder dyed with RIT ProLine black dye was observed to maintain a consistent shade after the equivalent of one week in sunlight. Similarly, dyed parts faded by ~3% (just about at the limit of typical human perception) after soaking in 60 ˚C water for six hours. A noticeable amount of dye was observed to leach from these parts, staining the water in which they were soaked, as well as skin or fabric that came into contact.
Dyeing is ideal for both functional prototyping and end-use production of parts with custom colors to match brand aesthetics.
Customer Case Study: Dyeing SLS Nylon Parts With Ken Pillonel
Ken Pillonel, engineer and founder of the popular YouTube channel Exploring the Simulation, has created a "one-man plastics factory," with the Fuse Series SLS ecosystem. After expanding his capabilities and adding a second Fuse 1+ 30W printer, Fuse Sift, and Fuse Blast, Pillonel has been able to manufacture his end-use Airpods charging cases in dyed Nylon 12 White Powder. For an in-depth discussion of SLS 3D printing for end-use parts, setting up a nitrogen workflow, and figuring out how to acheive a precise, repeatable, and high-quality dyeing workflow, watch Pillonel's video below.
Getting Started With Dyeing SLS 3D Printed Parts

With affordable workflows such as ultrasonic dyeing available, dyeing SLS parts is an easy and accessible way to elevate your parts' aesthetics.
Dyeing Nylon 12 White Powder and Nylon 12 Powder parts using readily accessible hardware and dye consumables is a cost-effective and efficient method for imparting color onto finished parts, regardless of the desired shade. This process offers a viable alternative to traditional coatings, requiring minimal labor and effectively coloring complex geometries.
By following the recommended guidelines outlined in this whitepaper, users can achieve consistent and desirable results, expanding the potential applications for SLS 3D printed nylon parts. Whether for aesthetic, functional, or safety purposes, dyeing provides a valuable solution for incorporating color into 3D printed components.
If you are exploring an application that requires color SLS printed nylon parts, contact a representative to learn more about the Fuse Ecosystem and dyeing nylon parts.