

A lithophane is a three-dimensional image that changes according to the intensity and quality of the light striking it. The light areas are very thin, allowing more light to pass through, while the thicker parts appear darker.
Lithophanes date back to the 1800s, when they were traditionally carved from wax, molded in plaster, then cast and fired in porcelain. In the meantime, photography was invented as a simpler way to capture an instant, but now, 3D printing enables you to experience the best of both worlds.
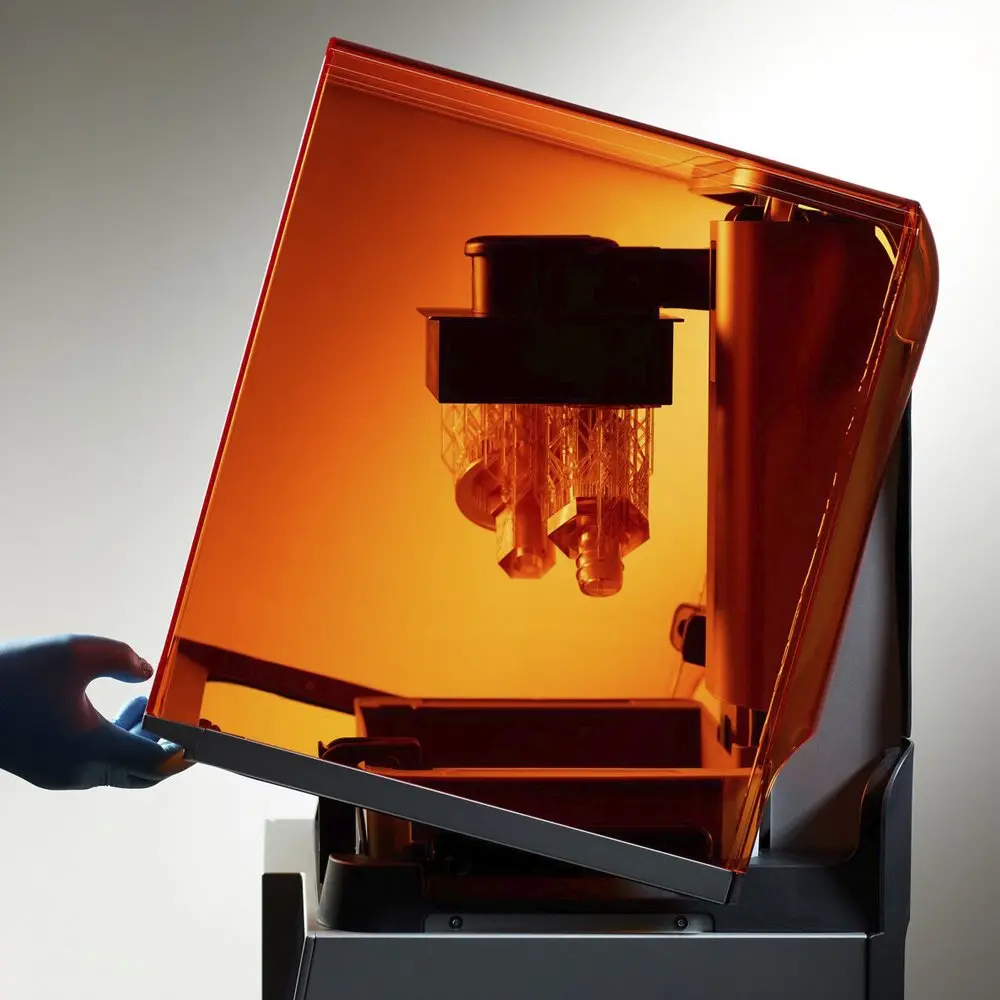
Finely detailed and delicate, lithophanes are best suited for 3D printing on a high-resolution stereolithography (SLA) printer. Plastic extrusion fused deposition modeling (FDM) printers will produce thicker layers and unsightly buildup that diminish the appearance of the image.
In this tutorial, we’ll walk you through the process of creating 3D printed lithophanes on a Formlabs SLA 3D printer in three simple steps.
What You’ll Need:
- Formlabs SLA 3D printer
- Formlabs White Resin
- Form Wash or Finish Kit
- Form Cure or alternative post-curing chamber
Introduction to 3D Printing With Desktop Stereolithography (SLA)
Looking for a 3D printer to realize your 3D models in high resolution? Download our white paper to learn how SLA printing works and why it's the most popular 3D printing process for creating models wth increadible details.
Request a Free Sample Part
See and feel Formlabs quality firsthand. We’ll ship a free sample part to your office.
Design the Lithophane
First, pick a photograph. Lithophanes rely on the difference in contrast between parts of the image. Thanks to the high resolution of SLA 3D printing, any picture with a moderate level of contrast will result in a clear image with stunning details. If the image has low contrast, try converting it to black and white, turning up the contrast, or erasing the background using a photo editing tool.
Option A: Use a Free Lithophane Generator
For 3D printing, convert the 2D image into a three-dimensional lithophane model. There are multiple online lithophane generator tools available, the easiest being a free online lithophane generator, like ItsLitho or the image-to-lithophane converter.
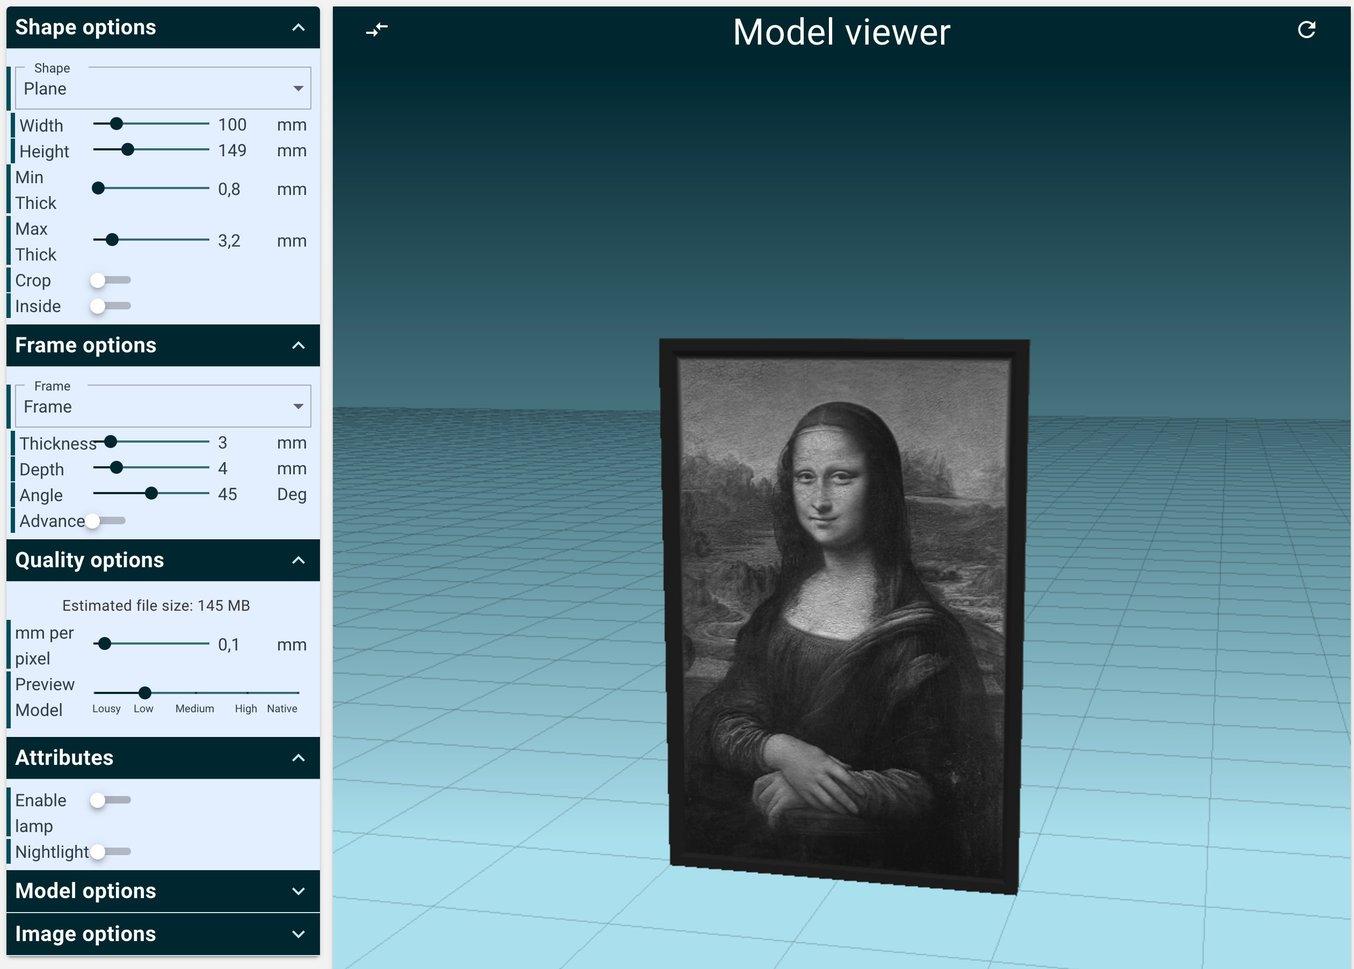
Creating 3D printable lithopanes only takes a few seconds with a drag and drop lithophane generator.
Option B: Take Full Control With Advanced Tools
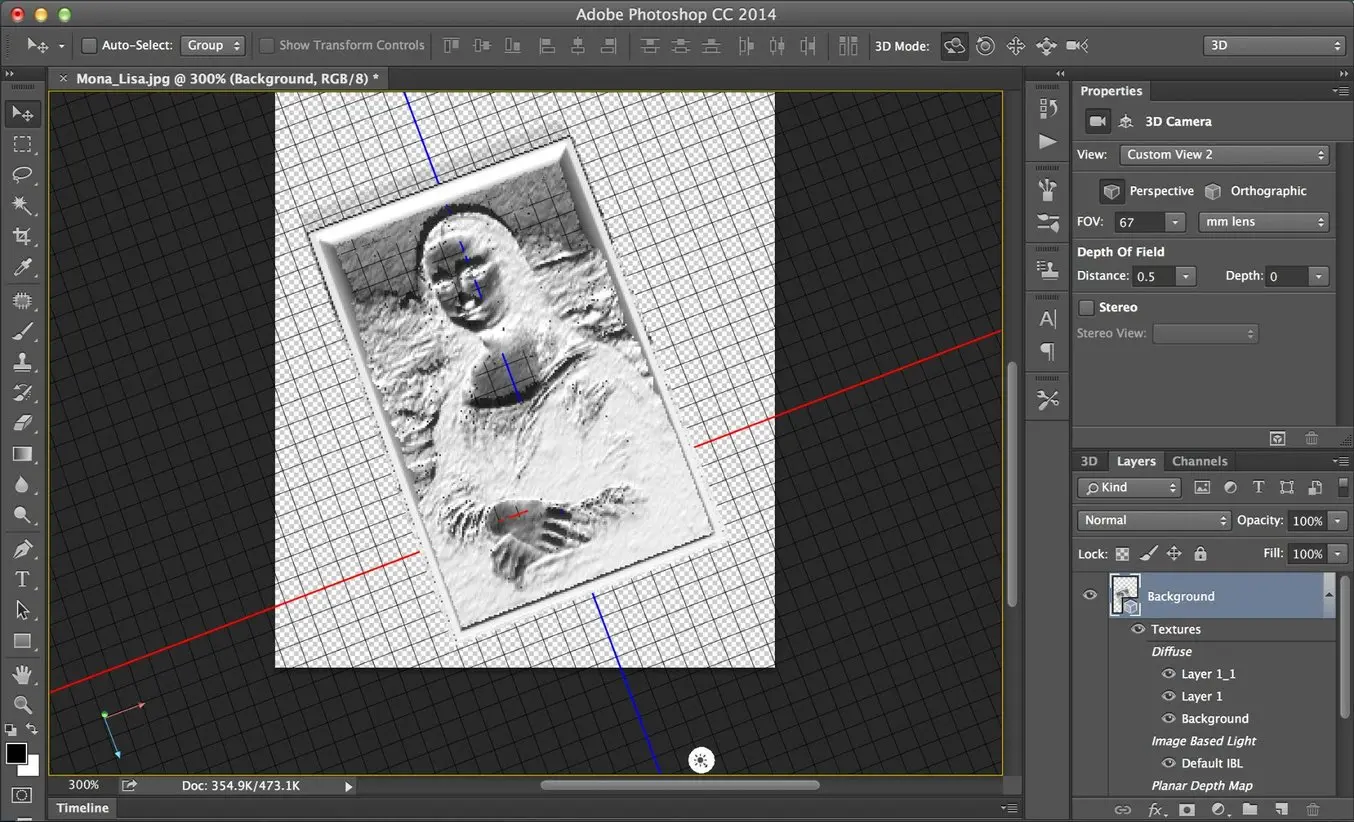
Advanced tools like Adobe Photoshop (download a free trial here) or Blender provide more room for adjustments. The steps for Photoshop are the following:
- Install the “Make Lithophane” action for Photoshop from the Adobe website. Unzip the file to reveal “Make Lithophane.atn.”
- To install the action, open Photoshop and open the Actions window by opening Window > Actions.
- Open the actions menu by clicking on the top right corner of the window, highlighted in red below:

- Click on Load Actions and navigate to the file, “Make Lithophane.atn.”
- You should now see “Make Lithophane” in your actions list.
- Open the image that you’d like to turn into a lithophane.
- Run the “Make Lithophane” action. Photoshop automatically goes through a series of steps to convert the image to grayscale, invert the colors, and make a 3D depth map. It also creates a raised border and a flat surface on the back.
- To export as an STL file to your Form 3 printer, open the print settings in the Properties window by clicking on the red box. (You can also access this by going to 3D > 3D Print Settings). Export by clicking on the 3D print button, as indicated by the blue box.
- Set “Print To:” value to Local.
- Set “Printer” value to Export STL.
- Set “Printer Volume” to Millimeters.
- Set “Detail Level” to High.
- Set “Scene Volume” to your desired size, as long as the X is below 125, and Z below 175.

3D Print Lithophanes in High Detail on the Form 3+
Next, 3D print the lithophane on the Form 3+. For the quickest results, print the file with the flat side directly on the build platform with no supports.
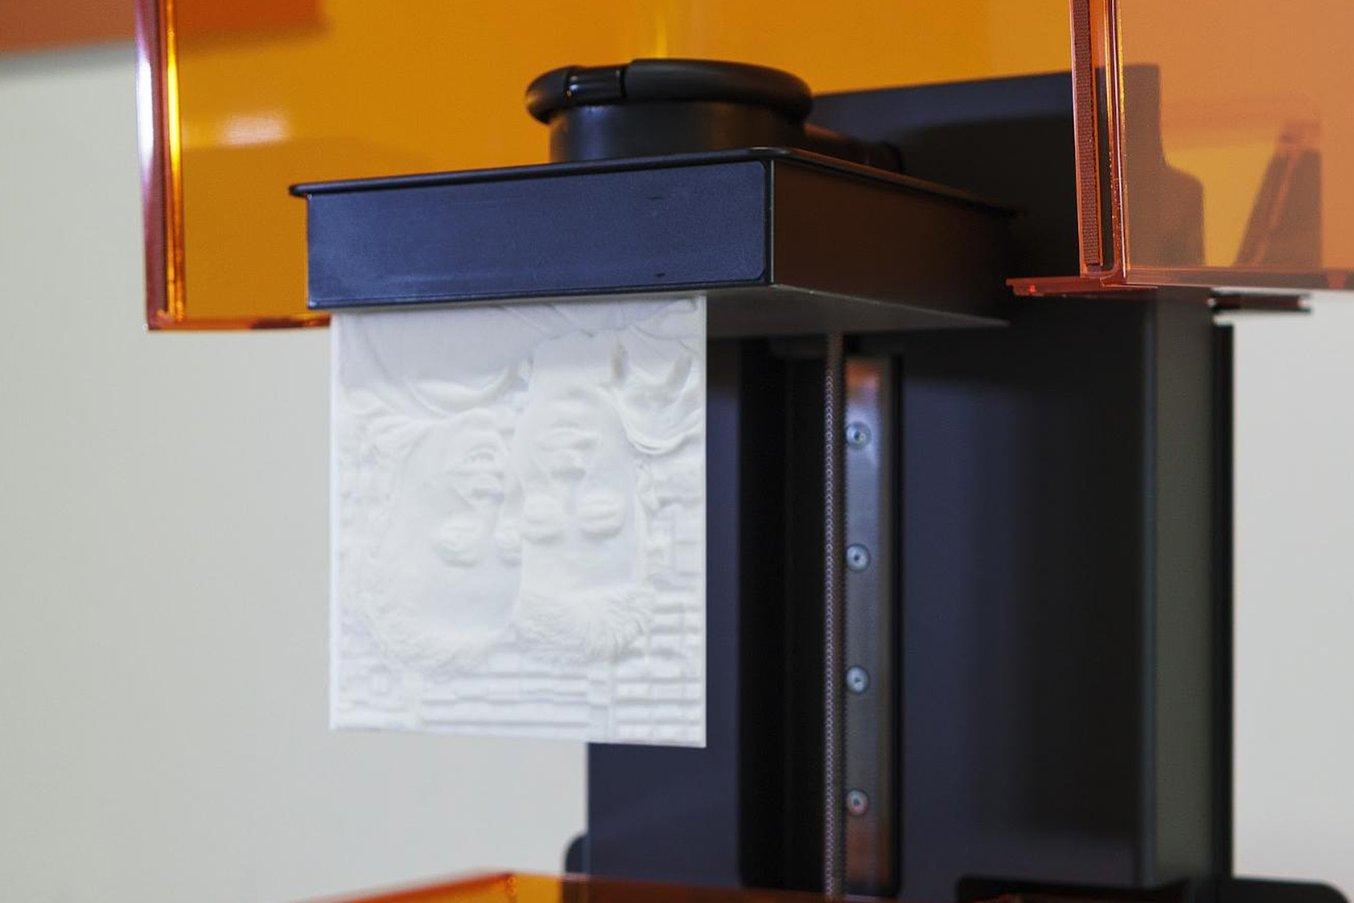
Alternatively, printing vertically will enable you to print large lithophanes, up to 185 mm by 145 mm. This will also simplify removing parts from the build platform and allow you to 3D print up to 19 lithophanes in one build, significantly increasing the efficiency of the process.
- Open the STL file in PreForm, Formlabs' slicing software. PreForm will automatically detect any integrity issues and repair your model.
- Orient the file on the Build Platform using the Select Base feature.
- Print the file in White Resin at 50 microns for the best results. If you’re rushed for time, 100 microns will still give you great results.
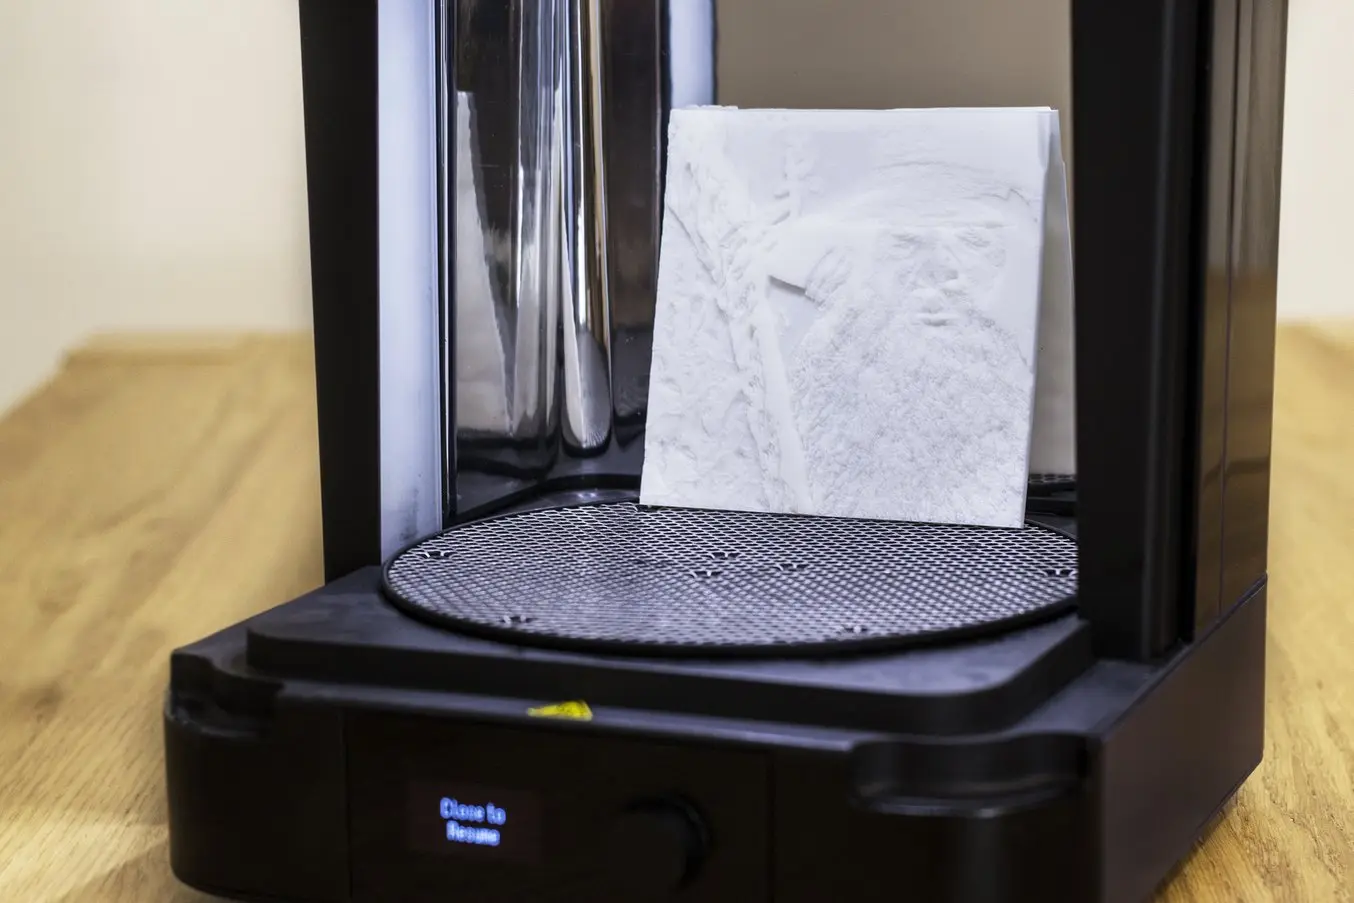
Automate Post-Processing with Form Wash and Form Cure
Post-processing 3D printed parts is essential for a perfect finish, and due to the delicacy and extreme thinness of the parts, lithophanes require extra care.
For the best results, use the Form Wash and Form Cure automated post-processing solutions from Formlabs that simplify the production of small batches customized products.
- Pull the build platform out of the Form 3+ and place it into the Form Wash, without removing the lithophanes from the build. Form Wash will agitate the IPA to clean even the most inaccessible areas.
- Once the parts are completely dry, gently remove the 3D printed lithophanes from the build platform and put them into the Form Cure. Lithophanes require less time to cure due to their thinness, so select 5 minutes at 40 °C on the device.
Your 3D printed lithophane is now ready. Thanks to the high precision and level of detail, lithophanes created on desktop SLA 3D printers will yield beautiful results.
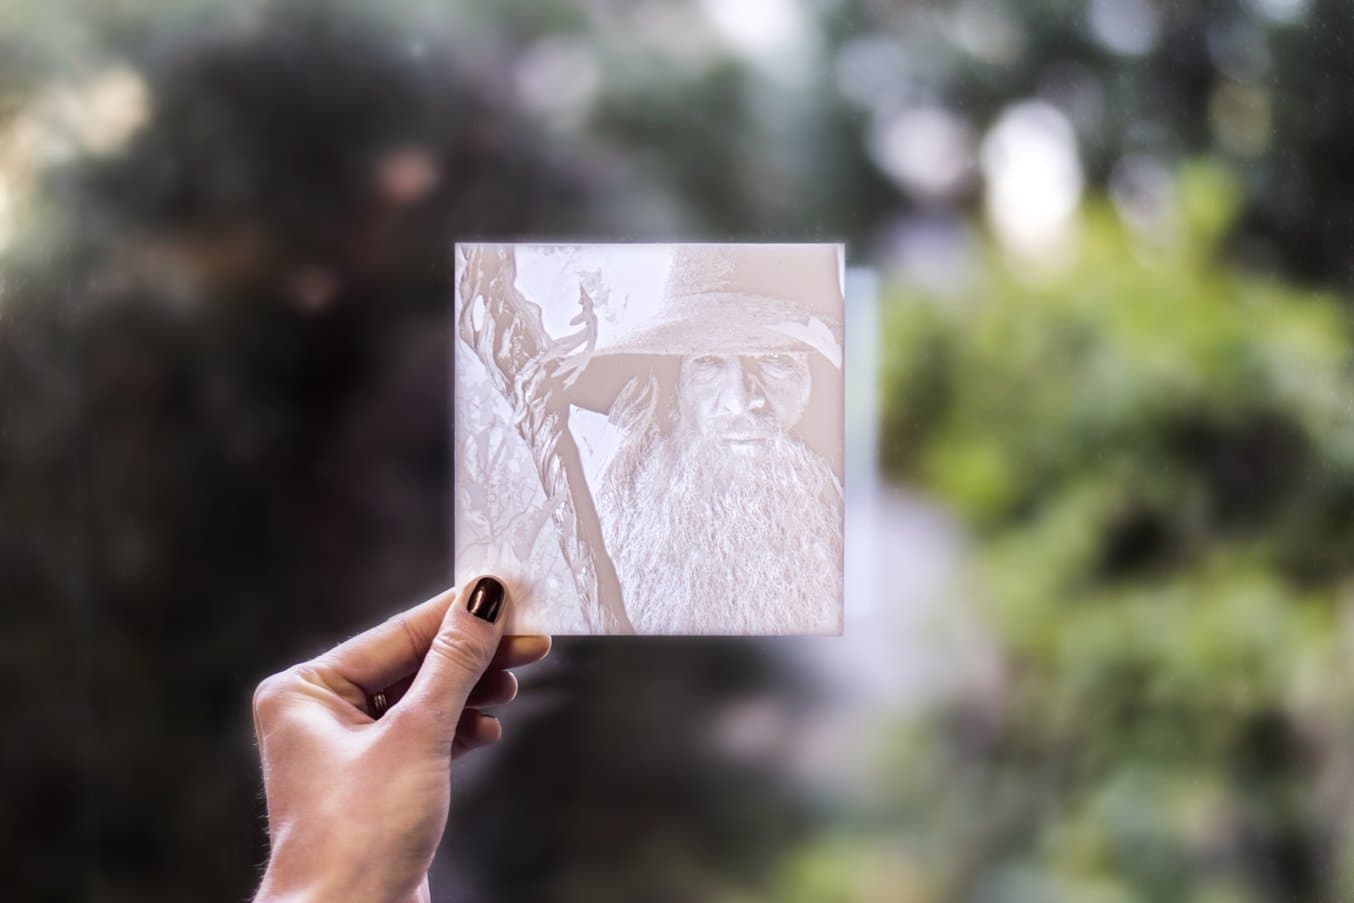
Mount it on a window to let the light shine through it or create a LED back light to create a lithophane lamp and enjoy at night. Happy LithoForming!
We’d like to thank Italian Formlabs partner Manufat for their guidance throughout the process.