
#Agile Manufacturing and 3D Printing at Formlabs
This post was written by Formlabs engineer Adrian Tanner.
Manufacturing has come a long way in the last decade. Until recently, traditional methods meant that any tweaks in products and processes required costly redesign, refabrication, and shipping.
With the increasing prevalence of technologies like 3D printing and the availability of accessible contract machine shops, it’s become much easier to design for manufacturability. Whether by responding rapidly to issues on traditional manufacturing lines with 3D printed jigs and fixtures or directly printing production-ready parts, 3D printing is helping make agile manufacturing a reality. Companies taking advantage of these new technologies are reinventing the process of bringing a product to production.
Formlabs uses our own desktop 3D printers to ensure that our parts work well for manufacturing, and to improve the manufacturing process itself. We use the Form 2 throughout the entire process of developing future technologies, from idea generation all the way to execution.
The 24-Hour Design Cycle
We prototype parts for our printers in-house, often following a 24-hour design cycle.
We design during work on the first day, print overnight, clean and test the next day, tweak the design, and repeat. Once we’re confident in our design, we send a small sample run to a shop with quick turnaround. When we receive the final parts, we’re fully confident that they’ll work, individually and as part of our entire printer ecosystem.

We don’t stop prototyping once a part is in production. We tweak and reassess in real time; again, employing agile manufacturing. Interested in learning more? Register below for our webinar to find out how we used 3D printing in our design process.
3D Printed Parts on the Manufacturing Line
Some companies design a jig or fixture, put it to production, and never redesign it because the time and engineering cost using standard prototyping methods wouldn’t be worth a potential yield increase. However, many modern companies have found that their jigs become outdated over time, or that they could be improved later to reduce cycle time or increase yield.
Our use of our own printers doesn’t stop at prototyping. We use 3D printed parts as end-use, custom jigs for manufacturing. This allows us to easily, cost-efficiently make adjustments if issues arise in manufacturing. We’ve 3D printed quick-turn, low-volume custom parts for manufacturing quickly, easily, and affordably.
For example, sometimes we order a piece, it comes back within spec, but it isn’t usable. This happened with a glass panel case we ordered: it wouldn’t fit with the jigs we were using, but we were able to easily print something so that our jigs worked with the new versions of the glass, saving time waiting for a new order and, of course, material costs. When you need a part right away, you can CAD something up in 10 minutes that’s ready to use the next day.
We can easily upgrade 3D printed parts as our manufacturing processes evolve. For example, we had to upgrade some of our jigs so that our contract manufacturer (CM) operators could make the yield we have now (as compared to a much lower yield before).
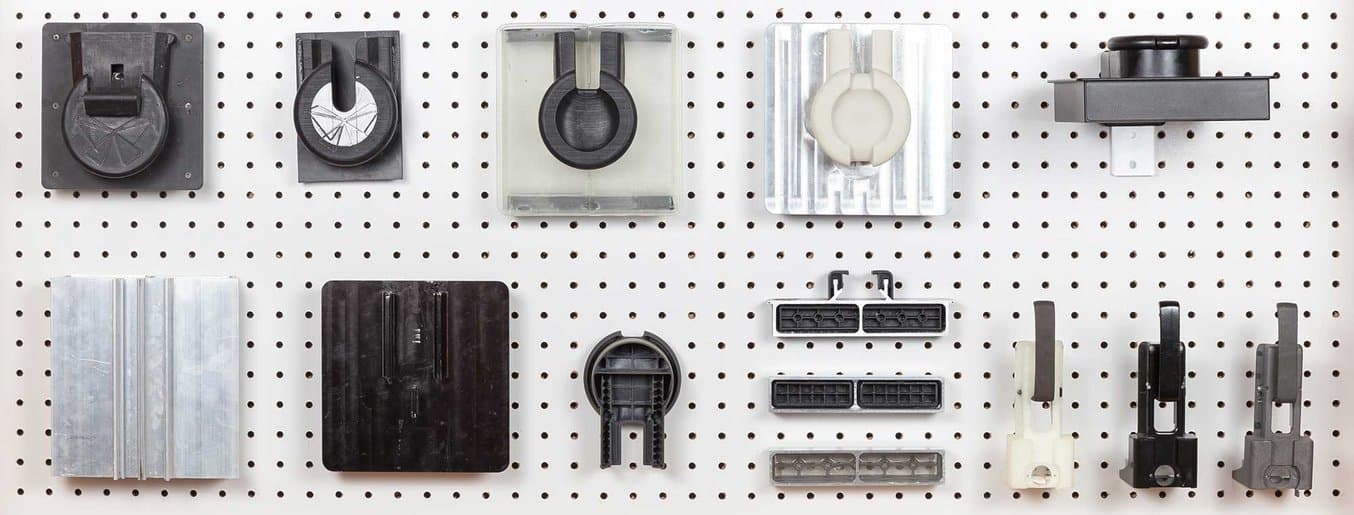
Pictured below is an early prototype of a jig that we currently use on our manufacturing line. We designed it from the start to print directly on the build platform (rather than requiring support structures) to reduce post-processing time, then quickly assembled and tested it. After several rapid iterations, we sent the jig out for machining, tested for reliability and product quality, and then implemented it at our factory.

The version on our manufacturing line now is machined from aluminum, but the initial printed part was dimensionally accurate enough that it performed as we expected, better than the last version, and helped us decide that it was worth machining this part.
Nothing beats machined metal for longevity. Printed parts experience wear after thousands of cycles, but the ability to quickly, easily print parts that we can test, fix, and re-print within 24 hours has saved us a great deal of time, money, and agony.
Improving Operator Quality-Of-Life With 3D Printed Jigs
On a manufacturing line with humans making precision equipment, quality of life is extremely important. Operators are repeating the same actions many times, so it’s important that they aren’t terrible and annoying. There’s a difference between a complex step that requires attention and a difficult, irritating task. Good jigs make difficult tasks easier.

For example, the printed jig pictured above holds the display screen that sits in the Form 2. This part doesn’t directly save us material costs, but it does save time and make life easier for the people on our manufacturing lines. It holds the display up in a sturdy manner during testing and allows operators to interface easily with the printer before the shell is put on. The jig includes a built-in interlock system that allows operators to simulate opening and closing the printer cover, a step that would otherwise require taping magnets to the display.

Another part we use for testing is a simple quick-release galvanometer holding system that allows us to evaluate galvanometer quality before putting these parts into a printer. Although the final part is designed from aluminum and plastic, we prototyped this part using 3D printing to test the fit before ordering a large quantity from a manufacturer. While we weren’t too worried about the fit of this part, we were concerned about spring tension: if the spring were too loose, it wouldn’t hold the part in place; if it were too tight, it would be irritating to use for the operator.
Prototyping these parts with our 3D printers helped ensure that the jigs didn’t just work right; they also felt right.
The Future of Production
We hope this behind-the-scenes look at how we use our own machines for manufacturing sparked some ideas for how 3D printed parts might help you bring agile manufacturing to your own production line.
Ultimately, 3D printing jigs, fixtures, and prototypes have helped save us time and money, and resulted in better end products. 3D printing helps engineers and designers prototype for manufacturability, increase agility during the production process, and cost-effectively produce custom end-use parts.
Build and Manage a Multi-Printer Facility
Interesting in building your own cell of six or more printers for prototyping or low volume production? Download our white paper to learn how to build and manage a multi-printer facility.
