Formlabs developed our own print preparation software, PreForm, to make the pre-print process for our desktop stereolithography (SLA) 3D printer, the Form 2, as automatic and simple as possible, and to bring 3D printing ever closer to the dream of “plug and print.”
In our latest software update, PreForm 2.13, we’re excited to introduce a completely rewritten Auto Layout algorithm that significantly improves One-Click Print. In addition to the new Auto Layout, we’ve also introduced faster print time estimates and support for 3Dconnexion SpaceMouse and SpaceNavigator 3D mouse devices to make the pre-print experience even smoother.
Read on to learn more about the latest features, and download the new version to try the new tools.
Automatic, Fully Optimized Part Packing
Seasoned Form 2 users often make tweaks to the way parts are arranged on the build platform to save time. Whether it’s squeezing in as many models as possible, arranging parts closer to the wiper to reduce print time over thousands of layers, or batching similar parts for simplified post-processing, small tweaks can make a big difference over many prints and many layers.
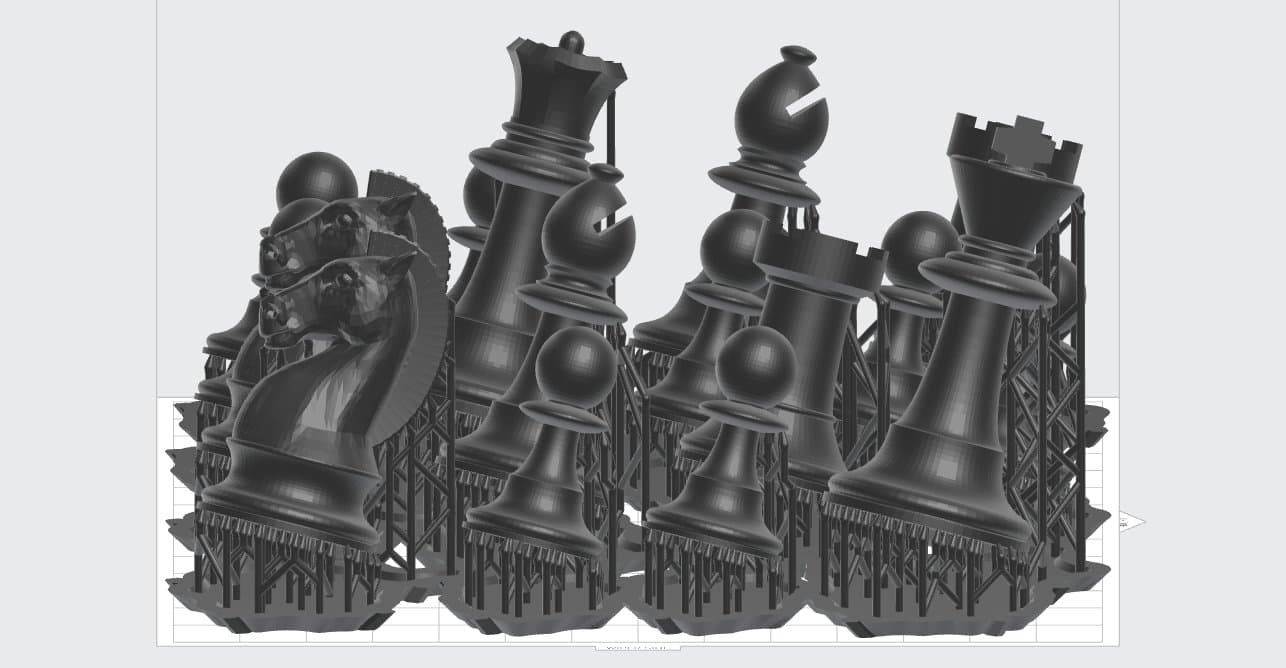
We’ve rewritten PreForm’s Auto Layout algorithm so anyone can now 3D print with an optimal layout, and introduced new tools for those who prefer to lay out parts manually.

Now, you can tuck parts under each other where there aren’t supports to optimize use of space. We’ve also added manual control of spacing between models (the default is 5 mm minimum between parts).

To increase the packing density dramatically, you can now allow the support rafts to overlap. This may make part removal a little trickier, but significantly increases the number of parts that can fit in a single build volume.

Lock rotation of parts or let the algorithm decide. Locking rotation can matter if you are particular about the way a certain geometry might print—for example, for a long rectangle, you may want the long axis to be parallel with the peeling motion.

Parts will highlight in red when models collide so you know when parts are overlapping.

Try the new Auto Layout tools by clicking the “Layout” icon on the left menu bar, then click the “Layout All” button. Auto Layout is also applied automatically when you select One-Click Print.
Learn more tips and tricks for successfully setting up 3D prints in PreForm.
Faster Print Time Estimates with Machine Learning
In earlier versions of PreForm, you needed to press a button to calculate print time and manually refresh every time you made a change. Then, the software would generate all of the data for a given print behind the scenes to pull an estimate. This number could take minutes to calculate, and involved processing a lot of unnecessary data that was then thrown away.
In PreForm 2.13, we’ve implemented a formula based on data from thousands of prints to calculate print time much more quickly. The formula accounts for volume, surface area, number of layers, type of resin, and other factors and then uses machine learning to directly compute an accurate print time estimate. For newer materials for which we have not collected sufficient data, the system will calculate print time using the old method to analyze each individual print job.

To try out the new print time formula, simply load a model into PreForm and the print time will update automatically.
3D Mouse Support for Smoother Workflows
We’ve added support for the 3Dconnexion 3D mouse, so that many engineers and other CAD users can work even more smoothly, using tools already embedded in their 3D modeling workflows to manipulate the view in PreForm.
The 3Dconnexion SpaceMouse is an input device that allows users to intuitively manipulate their view of 3D scenes. Many PreForm users already use a SpaceMouse when they’re designing parts in a CAD package.
If there is a SpaceMouse connected to your system when you start PreForm, you’ll immediately be able to use it to rotate the view, zoom in and out, or move around. This can be extremely helpful when placing support locations manually. Simply use the SpaceMouse to zoom into the place where you want to add supports, then use your regular 2D mouse to add and remove support locations. In addition, the first button on the SpaceMouse now calls a “View Home” command which returns you to a view that displays all of your models.
Try PreForm 2.13 for Yourself
Visit the PreForm web page to read the release notes and give the newest tools a try. Even if you’re not already using the Form 2, PreForm is free for anyone to download and experiment with your 3D models.